Search the Community
Showing results for tags 'l28e'.
Found 9 results
-
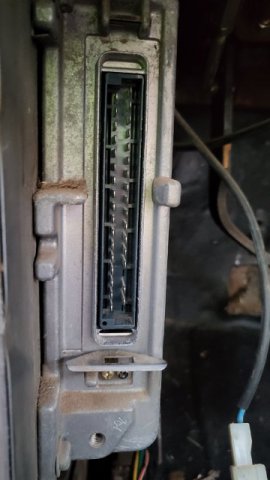
I have a question about switching the ECU. I have a 83 280zx with an L28E that I may have accidentally fried the ECU in. I have found an 82 Maxima with an L24e that I could buy to source some parts from. My question is from the phitos ive seen, the plug on the ECU for the L24e matches the plug on the L28E ECU in my 280zx. Is it possible the ECUs could be swapped without major issues? I could see it possibly working, working but not great, or not working at all. Has anyone tried this or know anything about these ECUs? The first photo is from an 82 ECU from a maxima and the second photo is the ECU from my 280zx. Thanks!

-
Hey guys, I’m working on a blow through set up on my L3.0 flat top engine. I’ll be running a P90 head all stock with light blending and port clean up. Stock turbo exhaust manifold, t3/to4e .50 trim Garrett turbo. Haven’t picked the FMIC yet or piping. I know I need the oil pan and oil lines. my question is this, I’ll be using Atomic EFI (2) and a Clifford manifold. I’d like to use MSD 6al along with it. The TBI atomic has a timing control feature id like to use. I was wondering if I could use my NA dizzy and just lock the timing. Also if I can do this, how do I set it up to control timing? I’ve searched all over and can’t find to much on it and I’m in WV. There aren’t any Z guys around me. (From Florida originally) the reason I really want to control the timing is because I have a flat top engine. I don’t want to blow the dang thing up if I decide to run 15+ psi. any help on running this kind of set up would be awesome. Parts list etc? 😁🇺🇸 Thanks guys!
-
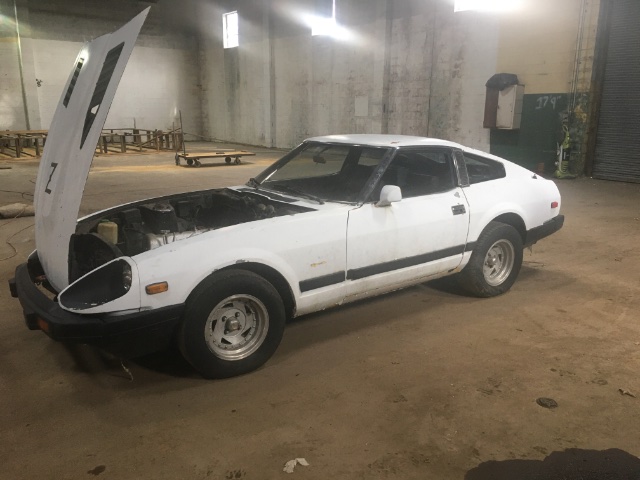
So I found an '82 280zx in beautiful condition for having sat out in snow, rain, sleet, hail, sun, etc. for almost 12 years. I contacted the owner and he told me he had no plans of restoring it and will give it to me for $1500. There's almost no surface rust and the engine still runs after all this time. I am planning on completely restoring it then in the future modding it as I make it through college and stuff. There is a slight misfiring issue whenever it starts, but the owner says he thinks it's spark plugs, but to be safe i'm replacing the spark plugs, ignition coil, fuel filter, oil filter, and ignition distributor rotor to get it running smoother. The driver side seat cover is torn, so I will also be getting new seat covers and also probably a dash cap since the old one has cracks all over it. I will then use that to learn manual (I know I'm a disappointment, I've wanted to learn for so long, just never had the chance to). I will post some pics of the car so you all can see the current condition and give updates as I find out more. The plan is to have the car in 2 months, then get it back running within that month, then drive it for a week or so to learn stick then I will set it in the garage and start the internal restoration. If anyone has any recommendations or if you find anything in the images, feedback would be very appreciated.
-
Ok, so I am new to this forum, but about a year ago I bought a 280zx with what is so far only rust issues (which have mostly been worked on). The gearbox seems very good, then engine runs perfectly from what I can tell, and the interior is in pretty great shape for its age. But the guy who owned it before me autocrossed the car, and in the ad he mentioned some of (if not all) the aftermarket or generally modified parts on the engine. The list of the parts are as follows: -Schneider Racing Camshaft (274 duration .48 lift) -Shaved L28 engine - Approximately 11:1 compression (fuel injected for the record) -Monza Headers -K&N air filter on high flow cold air intake So I am not the best when it comes to cars, and I do not exactly have easy access to a dyno, so I was wondering what you guys think this could could be making? I'm not really chasing any goal, its just something I've been wondering since I've gotten the thing, hell it could be making stock horsepower and I would still be happy. Also here is the original ad since he never took it off this site for some reason https://www.usedregina.com/classified-ad/1982-Datsun--Nissan-280ZX-_32069386.lite?
-
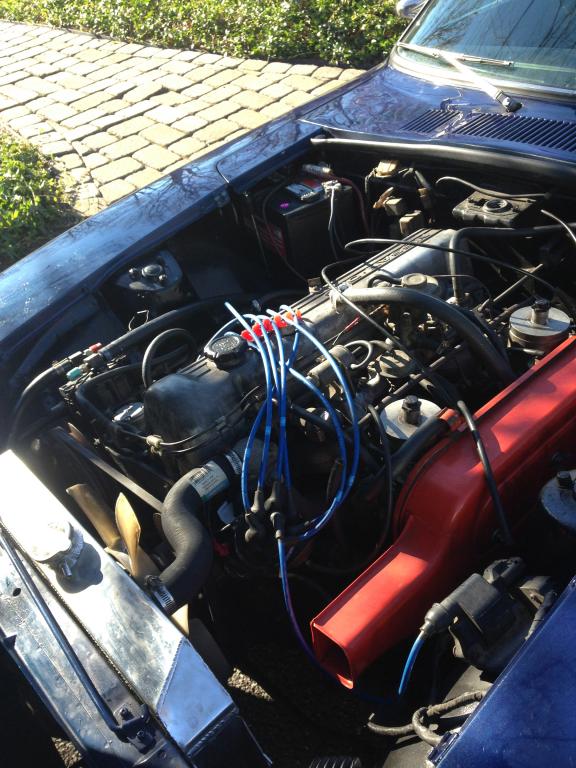
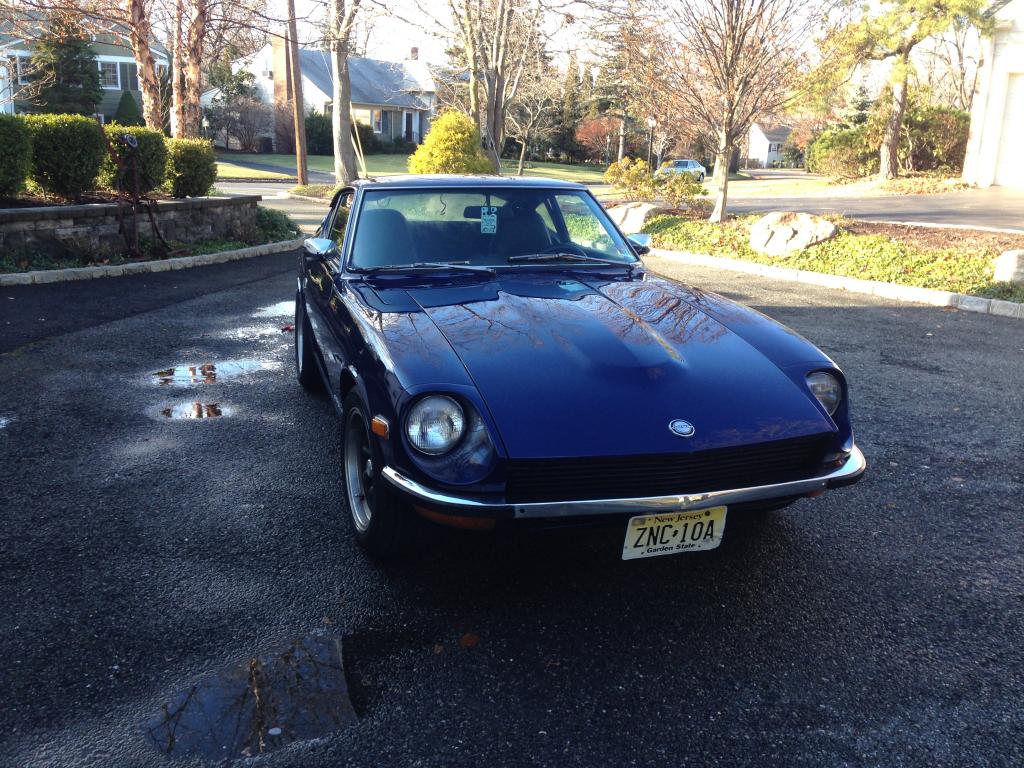
So I've recently bought a 1977 Dark Blue L28E 280Z. Car has been sitting for about 10 years; I was told the car was stopped in working conditions, but it seems some work might be needed. Where do you recommend to start work on it before trying to ignite the engine? Oil and filter change? Spark plugs? Spark plugs wires? What would be the first thing to look for before running the engine, and the first thing to look after running the engine? I'm trying to bring back to life this grandpa by this time. I'll love to build it something near this: If anyone has info about this build ^ please be kind to share! Thanks for your comments
-
Hi im new to this forum but just the other day I got my first 280z. When I bought the car I knew it would be a project but I thought mechanically there was nothing wrong the previous owner swapped a new l28e and a new 5speed with 50k on both. With that being said I was doing a speed run the other day and after taking my z to 100 the power curve seemed shaky like after 80mph I would get bursts of highter power and then a lull of power. Now the problem hasgotten much worse, when I get upto 4000rpm it feels like the car is fuel cutting and randomly while I drive I just get what feels like complete fuel starvation. I think it might be either the afm or the tps but I was wonderin if anybody else has had this problem. There are new wires and plugs, new fuel filter, and injectors, and from what I can tell decent fuel pressure. I also started the car and it seemed like one of the cylenders want firing... maybe somethin to do with ignition timing? -thanks
-
 I'm pretty new to this forum but I wanted to start a build log for my car so i can document my progress and hopefully get some tips along the way so i can truly get the most out of my car. A little backstory on the car and the swap is that there are few people in New Jersey who really know how to take care of these cars and tune the Su's properly and webers also proved to be quite rare and i wanted something a bit more reliable. My car had been breaking down going lean, going rich, backfiring, all sorts of engine problems that i just didnt want to deal with so i thought id upgrade to fuel injection...being 18 and having this as my only car i need something that i can get around in and wont die on me. So im starting with my 240, taking the l24 out along with the terrible wiring the previous owner did, and putting all new wiring in along with an l28e thats going to be spruced up a bit in the coming weeks, once everything is running and well, im going to ditch the ecu, put in megasquirt dial it in, then turbo the engine, i already have a turbo manifold, im working on getting a turbo dizzy, and oil pan. Today is day 1, the car is covered in snow, and the l28 just arrived itll probably be a few weeks before any work can be done because the swap will be done in my mechanics backyard My goal is to have the engine bay look clean maybe not a show stopped but something i can be proud of, horsepower goal is 275 at the wheels Thats what im hoping to get the car to look like any advice before i start? ( ive read the forums hundreds of times and will probably still read them a hundred more) - nzarano
-
Hi Guys, I'm still pretty new to the forum but I wanted to start contributing right away! I just bought a 1975 280z that had been sitting for over 10 years and was the victim of seized fuel injectors. There are a couple of options on how to handle the situation, one would be to replace the old injectors with new ones. Thats a solid choice but oem injectors will set you back $350+. Another option would be to buy refurbished injectors. Again, that's a fine option, but since fuel injectors are sealed units that cannot be opened, all you are really buying are old injectors that have been cleaned. Your next choice is to send the injectors off to a fuel injector cleaning service that specializes in cleaning electronic fuel injectors. If you choose that route I'd suggest www.witchhunter.com as they are a well known and good company. A full service cleaning is going to set you back about $180 but has the added benefit of having the injectors flow tested. Lastly, you have the option to clean them yourself. The process I came up with worked great for me and only cost about $20 and as such I will be discussing my method for the remainder of this article. Before we start, a disclaimer: *** The procedure Outlined below was developed by myself to clean my bosch L-jetronic fuel injectors. I am not a professional, nor do I claim to be. By performing any of the actions described in this article you risk damage to your fuel injectors that could render them inoperable. This process may be used on any injector however take special note of the correct voltage used to drive your specific fuel injectors.***** The Injector: How & Why Let's take a brief look at how the injector works and why it may end up seized shut. First things first, take a look at this cutaway view of an injector: (photo credit Gordon from witchhunter.com) The points we are most concerned with from this photo are numbered 4, 5, and 6. Number 4 is the coil. It is a coil of wire that wraps around the inside of the injector body. When current is sent through this coil, it creates and electromagnetic field, basically, it's an electromagnet. Number 5 is the pintle. Think of it as the rubber stopper that plugs the drain in your bathtub. It is a tiny piece of metal that for al intensive purposes "stops up" the fuel injector and keeps fuel from flowing through it. Numer 6 is the pintle seat. Think of this as the drain in your tub. It is the piece of metal with a hole in it that the pintle stops up. When the coil is energized, it becomes magnetized. This magnetic force pulls the pintle up away from the pintle seat allowing fuel to pass through the injector. When a car sits for a long time, the fuel in the injector degrades and separates releasing gums and varnish. As time passes and the fuel evaporates and degrades, whats's left is the gummy mess that clogs up the injector. When dry, it effectively "glues" the pintle the the pintle seat. Cleaning: Now that we know the basics of how an injector works and why they get clogged or seized, lets look at what we need to do to clean them. The basic strategy is the same whether clogged or seized but the approach is going to be a little bit different. The first thing we have to do is devise a way to pulse the injector out of the car. The next thing we will need to do will be to get the injector operable meaning we need to make sure the pintle is moving up off of its seat. This step won't be necessary if the injector is just clogged. Then we will want to do the actual cleaning, and finally we will replace the feed hoses and O-rings before reassembling the unit. Supplies Here is what you are going to need. 2 bottles of 91% isopropyl alcohol 1 small eye dropper 3 tupperware containers - 2 must be able to hold all 6 injectors and the cold start valve fully submersed in alcohol. The third needs to be slightly longer so that you can have good access to the injector while submerged. 2 lead wires with alligator clips electrical tape 6 to 8 D batteries Paper Towel (preferably shop towels) or a cloth Piece of cardboard or other suitable work surface Procedure: ​Now that you have all of your supplies it's time to get to work. Obviously the first thing you will need to do is remove the injectors from the motor. if you do not know how to do this I highly recommend you get yourself a factory service manual. There are also numerous how-to's online. Once you have everything together, find a comfortable place to work, I laid a piece of cardboard over the kitchen table and worked there but anywhere reasonable clean will do. Place all 7 injectors in one of the containers and fully submerse them in alcohol. Let them soak for about an hour, longer being better. Now take your other container and fill it with enough alcohol to submerse all 7 injectors (Don't forget your cold start valve!) and the other longer container with about 2 inches of alcohol. Place these to the side. the long one will be our working bath and the other one will be our clean bath for the injectors to continue to soak after we've worked on them. In order to clean the injectors, we must cycle them open and closed. To do this we will need to come up with a way to run a current through the injector. In our cars, the 12 volt current from the battery is routed through a dropping resistor that drops the voltage from 12v to 3.5v before it is passed through the fuel injector. So, ideally what we want is a 3.5v current that we can turn on and off to pass through the injectors. You could come with a whole bunch of different ways to do this depending on how fancy you wanted to get but my method is simple and easy and ver effective. If you did not know, a standard D battery output is 1.5v (actually AA, AAA, C, and D batteries all output 1.5v). By combining 2 D batteries in series ( + to -), the output voltage is bumped to 3v. This 3v current is very close to the 3.5v used in the vehicle so it will be perfect for replicating the pulse the injectors get in the car. So, what you will want to do is take two of your D batteries and tape them together so that the + side of one battery is touching the - side of the other. Now, grab your wires with the alligator clips and tape on end of one of the wires to the + one of your battery pack you just made. At this point you are ready to grab one of your injectors out of the alcohol bath and start disassembling and cleaning the exterior. Remove the bottom O-ring as well as the aluminum spacer on the main body. once the spacer is off you can remove the thin metal piece that sits right on top of it. Now you can work the thicker rubber O-ring off the main body of the injector and go to town cleaning. I used a toothbrush and some paper towel to get the outside decently clean. This isn't crucial but it will help to keep your cleaning bath free of contaminates. After you are happy with the cleanliness of the injector go ahead and attach the other end of the wire to one of the pins coming out of the injector plug. It doesn't matter which one since the magnetic field will be the same regardless of which direction the current is flowing. Go ahead and wrap the exposed metal of the alligator clip (if there is any) with some electrical tape to minimize the chances of the negative clip contacting it when she attach it. Speaking of the negative clip, go ahead and grab your other wire and attach one one to the other pin coming from the injector plug. What you should have now is as follows, -[ ]+-[ ]+ ----------Injector--------- in case mtg diagram doesn't make sense, you will have your two batteries taped together with one end of a wire taped to the positive side and the other end of that wire attached to one of the pins on the injector. From the other pin on the injector you should have another wire which is not currently attached to anything. Now if your car has been sitting for years, it is not uncommon for the injectors to be seized shut. If this is the case they will not open and will not spray any fuel. After all, that is the reason for this article. It is important that you remember that the injector is an electromagnet pulling the pintle off the seat with magnetic force. If the injector is seized then what that means, is that the magnetic force pulling up on the pintle is not great enough to overcome the force of the gunk holding the pintle down. So how can we free it up? First we need to see if that long soak in alcohol was enough to free it up. So go ahead and touch the free end of the cable coming off the injector to the negative end of your battery pack. It is good practice not to keep the current flowing throughout the injector for too long. If you hold it too long you can actually burn up the coil inside the injector and then you will have to replace it. Since we are only using 3V that isn't likely but better safe than sorry. If you are lucky, you will hear a click come from the injector meaning that the injector did actually open up. However, if you are like me, the injector will still be stuck. So what to do? Well, if you have ever taken physics then you may know what to do, but for those who haven't or are a bit rusty, heres a little physics lesson. Voltage is the potential difference across two points. Current is the rate at which the electric current flows. Resistance is the resistance to the flow of electricity. Voltage, current, and resistance are all directly related by the formula V = IR. V is voltage measured in volts, I is current measured in amps, and R is resistance measured in ohms. How does this apply to an injector? Well, the resistance of your injector is constant and does not change (unless you have a faulty injector that should be replaced) the variable that we can control here is the voltage that we send through the injector. By increasing the voltage, we are also increasing the current that the injector draws. That same formula above can be rewritten as I = V/R which mean that the current is equal to the voltage divided by the resistance. The resistance of an injector varies based on the application but lets assume here that our injectors resistance is 10 ohms. We just attempted to actuate the injector with a 3v pulse so let's calculate how much current that was. 3 volts divided by 10 ohms comes to 0.3 amps of current. Now, we know that 0.3 amps of current is not enough to break our injector free so how do we increase that? well, as we've learned we need to increase the voltage. to do this you need to simply tape one more battery in line with the other two making sure to put the + end of the battery to the - end of the other. this will increase the voltage by 1.5v for a total of 4.5v. This will bump our current to 0.45 amps. now try tapping the negative lead to the negative end of the battery and listen for a click. Tap it 5 or 10 times and if you still don't hear a click add another battery to the line and try again. Keep adding batteries one at the time until you get the injector to unstick. You can add up to 8 batteries in a row without risk of damaging the injector. The faster but less optimal way to do this would be to use a 12v car battery right from the get go to unstick the injector. this would be fine as long as you use short pulses of energy and do not hold leads on the battery for too long. At this point you should have gotten the injector to unstick and are ready to start cleaning it. If not, you will have to seek out another option for fixing your stuck injectors. The actual process of cleaning the injector is easier if you have a buddy to pulse the injector for you while you do the cleaning. So, assuming you do, have them start pulsing the injector while you force alcohol throughout he top with the eye dropper. do this for a few minutes and then do the same thing but this time forcing the alcohol though the nozzle end of the injector. During the process you should see dirty gunky fluid come out of the injector. repeat this until the fluid that comes out is clean and clear. Do note that it will only drip out and won't be any sort of stream of flowing. After you are done cleaning, place the injector in the clean alcohol bath until you are done with the remaining injectors. Repeat the above process for all 6 injectors including the cold start valve. The cold start valve was designed to run off of 7 to 12 volts so it may take a few batteries taped together before it will click open. Congratulations! You have successfully cleaned your injectors! Now we need to get the old hoses off and replace them as well as the O-rings. If your injectors are like mine, then you have hoses held on by small metal cups. I tried cutting the hose with a blade and pulling it off, but I could not for the life of me get the hoses off so I decided I would have to cut the metal cups. For this you'll ned a dremel and a razor blade along with a pair of pliers. This is the bit we will be grinding off. Before trying this, be sure to try and just pull off the hoses after you make a slit down the side with a blade. It may work for you and will save a big hassle! Hold the injector with the pliers and carefully start grinding away the metal cup. when you think you've ground off enough try and peel it away as best you can to expose the hose underneath. Now cut down the side of the hose to the base with the razor blade. Get your pliers and start pulling the hose off the injector. It will be really difficult but just keep twisting and pulling until you get it off. Once the hose is off, the cup will just slide right off. Replace the hoses with new fuel injection hose and clamps. Please be sure to use fuel injection hose and not normal fuel line. Now we can replace the O- rings and slide the thin metal piece and aluminum spacer back on. It helps to lube up the o-rings with a dab of motor oil! Now you are ready to reassemble everything and fire it up! If the motor has been sitting it would probably be a good idea to replace all the rubber fuel hose and clamps as well as the fuel filter and spark plugs! Thank you for checking out my writeup! I hope it helps you out!! -Blake
-
So i'm in the process of building my z and when I took the head off I was an idiot and didn't check to make sure the bottom end was timed and now that i'm timing the car I ran across a problem. The head and cam sprocket both have marks so that is in the correct timing position but the bottom end has no markings. The sprocket for the crank has a punch hole but there is nothing on the block to line it up with so now i'm kind of stuck. Any help would be appreciated. Thanks guys