Derek
-
Posts
1343 -
Joined
-
Last visited
-
Days Won
53
Content Type
Profiles
Forums
Blogs
Events
Gallery
Downloads
Store
Everything posted by Derek
-
Looks like a nice setup. It's pretty small too. Considering all you need to add is a lift pump the price is pretty decent. Probably not enough volume for a road race car.
-
Glad it's working out. Biggest problem for me is retraining my muscle memory as to what gear I should be in. The CD009 gear spread really works well in my opinion.
-

Does someone know this kit from AutoACSolutions?
Derek replied to munters's topic in S30 Series - 240z, 260z, 280z
It's pretty much hidden. There have been a few install posts on ClassicZcar including the one I did. I suggest you give this a look. -
I manufacture a CD009 conversion bell housing for the L6. I sell them through Godzilla Raceworks. https://www.godzillaraceworks.com/drivetrain/cd00a-swap-bellhousing-kit-for-l-series-engines It uses your existing clutch pressure plate and flywheel which is nice.
-
Does someone know this kit from AutoACSolutions?
Derek replied to munters's topic in S30 Series - 240z, 260z, 280z
I run the Vintage Air Gen 2 Mini. I had all the other stuff already so I didn't need a kit just the evap/heater unit. It fits under the dash really well. -
curious to know what are the best L Series Transmission options now?
Derek replied to primaz's topic in Drivetrain
This is it exactly. The more lopey the idle the more I notice it. My aluminum flywheel isn't helping either. A steel one would have a more damping effect. It's subjective and a camera phone is not going to pick up a true recording. The next time I pull the transmission I'm going to put some DEI Floor and Tunnel Shield in. I think that would help a bunch. I hated the noise when I did the install but as AydinZ71 said it's a known thing and after a while it's not a big deal. I love having the 6 speed though so it's a worthwhile conversion to me. Back in the day they called the Muncie M22 "Rock Crusher". The CD009 sounds like it actually is crushing rocks:). And yes the TL70 is still moving along. I'm relying on Godzilla to do the test fit and their moving to a new facility during a pandemic has not helped things. They are close to verifying the tilt angle is correct and the shifter is in the right location. I'm leaving crossmember development up to them since my car no longer has the mounting ears. -
Twin cam head for the L6 from Derek at Datsunworks
Derek replied to Derek's topic in Nissan L6 Forum
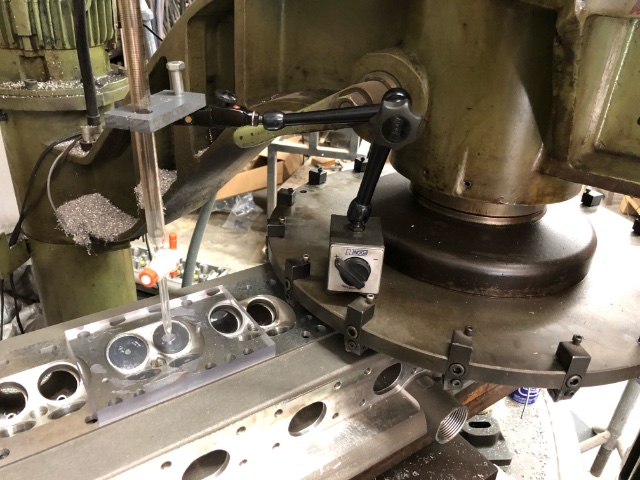
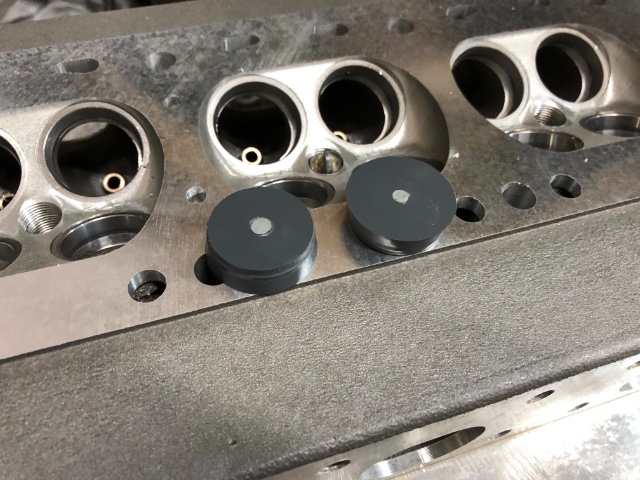
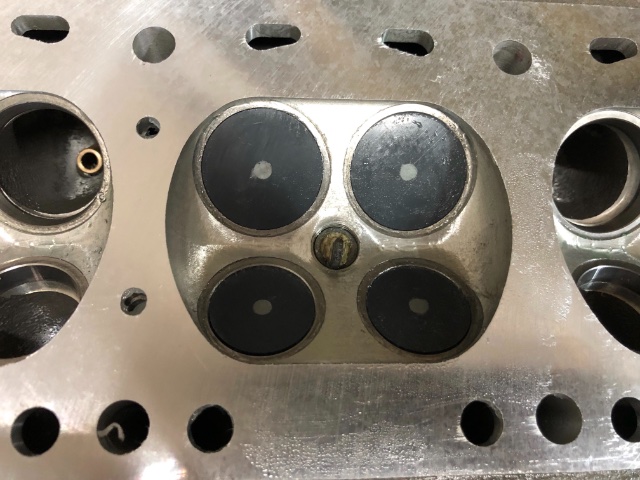
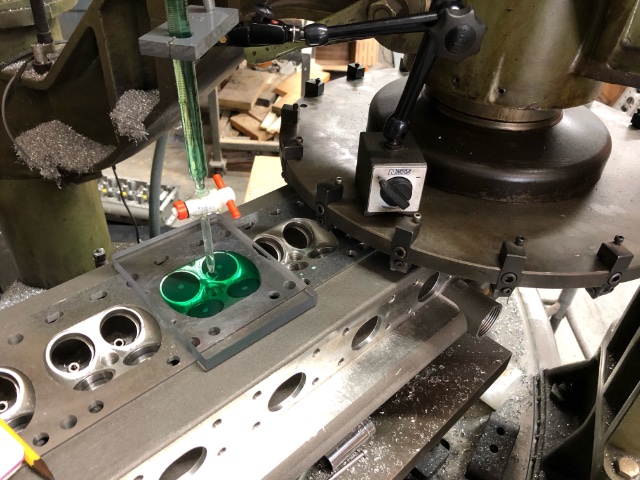
I’m sure OSHA would have no complaints with anything in this picture:) Now that I have a surfacer I’ve decided to play around with CC’ing chambers after I make my final pass. When I originally modeled the chamber in 3D I left a 1mm straight wall plus machine allowance for the builder. The reason for that was to create a known steady surface area if you wanted to really dial in the chamber volume. A .010” surface cut will remove approximately 1.3 CC’s. The problem is Even though there are seats in the head you can’t put valves in since the guides are not sized and even if you could they would sit proud of the seat since they are not angle cut. So I machined out some plastic plugs to sit as close as I could to flush with the seat face. Not perfect but it's as close as I'm going to get. I almost look like I know what I'm doing Actually this isn't part of my normal operations so I'm still in the "get fluid everywhere but where you want it" mode. Right now the math is following pretty closely to the actual measured chamber size. Not sure what my ultimate goal is since I have no plans on hitting a target CC when it leaves the shop. Ideally in my thinking you would do the valves and make your final surface cut and CC the chambers. Then you would order pistons designed to meet your CR goals. The problem is that can add months to a build. I’m basically grabbing data to see how much variance there is from head to head. I think that ordering pistons based on a certain CC chamber and then have the builder surface and CC to dial it in will be the safest approach.
-
Twin cam head for the L6 from Derek at Datsunworks
Derek replied to Derek's topic in Nissan L6 Forum
You beat me to it It was a lot better than I was expecting and mostly accurate. I'm glad they kept the HybridZ origins in there and a link to the page also. -
Is that built out of GPO3?
-
Twin cam head for the L6 from Derek at Datsunworks
Derek replied to Derek's topic in Nissan L6 Forum
Ok well we know it will go to 3.4. Still a lot of questions though. Also the lack of actual pictures of the MRZ 3.4 DOHC makes me wonder. I will say that knowing MRZ's price points even if they offered a head like mine it would be pricey. -
Twin cam head for the L6 from Derek at Datsunworks
Derek replied to Derek's topic in Nissan L6 Forum
Nope. I saw that awhile ago and assumed that they were either developing their own head or had made a deal with OSG to buy complete motors. It also say's Nissan 3400 straight 6. Neither the OSG nor mine is a Nissan product so I'm not sure what is going on. I suppose they could be doing some sort of RB thing. Can you get an RB out to 3.4? I don't think the head will flow enough to feed it though in a NA application. -
Twin cam head for the L6 from Derek at Datsunworks
Derek replied to Derek's topic in Nissan L6 Forum
I am but as soon as I put bungs there I guarantee you someone will want them somewhere else. Also the majority of the builds are running Jenvey stuff and for the most part they come with bungs. And last but not least the casting works for both tilts depending on how I machine it. The bungs would over complicate that. -
Twin cam head for the L6 from Derek at Datsunworks
Derek replied to Derek's topic in Nissan L6 Forum
I think Derek's injectors are at the head I purposely have left that stuff up to others since A: I know very little about making power and B I know even less than that I do know how to make a casting though so that's more important in my mind. I did a search on production vehicles that make over 100 HP per liter NA and it's a pretty impressive list. Rob sent me a link to an article that came out. https://www.thedrive.com/news/41805/nissan-240z-roars-with-honda-style-dohc-head Links to and mentions this build thread which was nice. -
Twin cam head for the L6 from Derek at Datsunworks
Derek replied to Derek's topic in Nissan L6 Forum
Thanks Ben I'm glad some numbers on a 3.2L (3.18) are finally out. 100hp per liter is pretty decent from what I hear. Rob feels like there is still some more to be had via tuning but it's a street car so there is always a balance to strike. I'm just glad that for Zcar Garage it's now an itch they need to scratch. -
Twin cam head for the L6 from Derek at Datsunworks
Derek replied to Derek's topic in Nissan L6 Forum
I own one and the videos even got my blood pumping. That car is really amazing. Hopefully after this round of heads I'll be able to finally finish my 3.1 ish build. I will say that the sound is pretty much the same with mine. It's really great that now there are some real HP numbers on the head. It's an expensive head for sure but getting 350HP at the wheel out of a regular ported head wouldn't be cheap. The best part is that is the SEMA car that HAD the OSG head. Had..... Bwahaha -
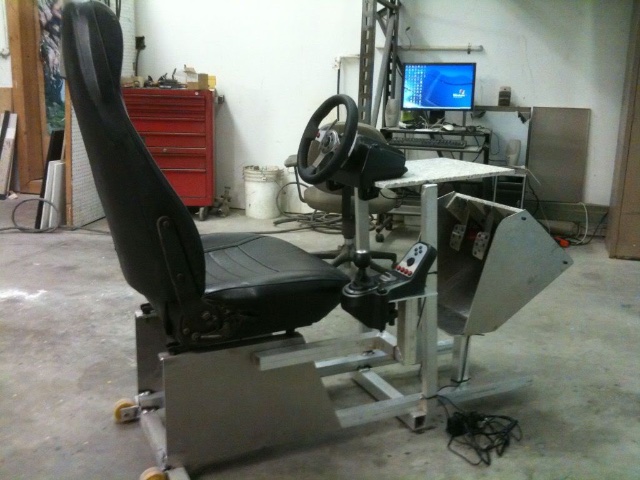
Looks great. I think you drove mine at Bill's if I remember correctly. That was with Rfactor. It's up in a pallet rack since I seem to have ZERO free time these days. How do you like the VR vs monitor?
-
Twin cam head for the L6 from Derek at Datsunworks
Derek replied to Derek's topic in Nissan L6 Forum
Just had a long talk with Rob. He has some valid points but mostly they are just so busy that it kind of has been pushed aside from a social media standpoint. He was hesitant to post numbers because he knows he can get more out of it with a better tune. The owner of the car loves the head and has zero complaints about it. The problem is Rebello is just so busy all the time that they take forever on a regular build. Add the complexity of the KN20 and waiting a year for a motor is a real buzz kill. Other avenues are being explored to speed it up and at the request of Rebello I'm now selling the heads with guides and seats installed. This has been a major time vampire for them and has caused a ton of delays. I built a custom head oven and purchased a nitrogen dewar. Made custom installation drifts for the guides and seats. I've done 2 heads so far and it has gone really well. I'm big on the science and realistically, heat soaking a new head and nitrogen chilling the seats and guides is the way to go. If you are using brute force then you are broaching. I think it's especially critical on a new casting. Now for the good news. Rob is putting the car back on the dyno for a new tune and they will be doing a complete writeup including pictures of the install and will be posting them soon. We can put away the pitchforks now:) -
Twin cam head for the L6 from Derek at Datsunworks
Derek replied to Derek's topic in Nissan L6 Forum
As it stands I have been paid for 10 cylinder heads. The only ones that are actually running and drivable is SN001 which is mine and I have over 7K miles on it, SN005 has over 10 K I think and SN010 which is in a Zcar Garage/Rebello build. Probably not to many miles on it but the word I got on that one was the owner was very happy. That car is a 3.15L I think. They haven't released the Dyno numbers at this point for whatever reason but I was told it was very impressive. Here is a link to an instagram video they posted of it on the dyno and then a short blast on the street. https://www.instagram.com/p/CMKqD5BHwrr/?utm_source=ig_web_copy_link Rebello currently has 3 heads they are doing builds with. At the moment I'm in production on 5 more heads and three of those are spoken for. So that will put the sold units up to 13. The lack of available HP data is troublesome but that isn't stopping sales. I think people who have the means to get one of these can see the potential based on published CFM numbers as well as the fact that it's Honda valve train. -
Twin cam head for the L6 from Derek at Datsunworks
Derek replied to Derek's topic in Nissan L6 Forum
It's not a good platform. And it won't matter how many caveats I put out there on how tired the motor is or the lack of compression ratio etc etc the internet truth will be "that Datsunworks head only made XX hp". My butt dyno says it is faster than a SOHC but not by much since the CR is way way low. Probably in the 9:1 range. If I needed the data I would do it in a heart beat but I don't. -
Twin cam head for the L6 from Derek at Datsunworks
Derek replied to Derek's topic in Nissan L6 Forum
Well If I ever get my 3.15L built I'll have some numbers but the the motor that is currently in it there is no reason to dyno it. -
When I did the KN20 prototype I used a lot of JB weld on the water outlet without issue. I would have done it after assembly though to give it a little more to hang onto.
-
Twin cam head for the L6 from Derek at Datsunworks
Derek replied to Derek's topic in Nissan L6 Forum
Is there a class it could even run in at all? If so how much horse power would it need to put out to be competitive? I'm not into road racing so I have no clue. -
Twin cam head for the L6 from Derek at Datsunworks
Derek replied to Derek's topic in Nissan L6 Forum
I told you guys before don't blame me blame Tony D. I think that has a nice ring to it. Like an orange juice commercial. Not yet. It's a pretty pricy head to blowup. -
Twin cam head for the L6 from Derek at Datsunworks
Derek replied to Derek's topic in Nissan L6 Forum
He sure does. Thanks Duffy. Now I'm trying to figure out if I can make it work on my VVT setup. -
Twin cam head for the L6 from Derek at Datsunworks
Derek replied to Derek's topic in Nissan L6 Forum
No Actually my specialty is pattern making and casting design sprinkled with a little machining and a lot of dreaming. I leave the rest of that stuff to people who are far more knowledgable than me. Yea that combo has more than one person, me included, to rethink their builds. My thinking at this point is basically a Rebello style 3.2 build with offset ground LD crank, rods, and pistons. Bore the block to a safe number based on sonic testing and call it a day. For years people have been saying that the majority of the L6 power comes from the head and this is really proving it to be true. The DOHC configuration moves a ton of air without a ton of lift compared to the stock single cam heads.