-
Member Statistics
33175
Total Members5167
Most Online
All Activity
- Past hour
-
If it's the T5 and it's like my Ford truck transmission you can remove the shifter and align the shifting rod ends with a screwdriver. It needs to be in neutral before you install the shifter. I locked mine by removing the shifter while in 5th gear then reinstalling it. Locked it up solid. Took some sweaty minutes to figure out. Not sure a T5 is the same though. Mine is an M5OD (M5R2).
-
Is it a 71B or the T5?
-

Ls1 swapped 280zx exhaust issues
nismoluv replied to bajajoas's topic in Gen III & IV Chevy V8Z Tech Board
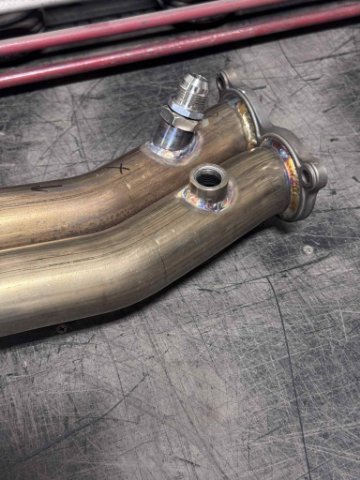
Today I made more progress. To improve the angle I had to chop off more than I wanted too, and remove the rag joint to get that extra inch. Here is a photo of the unfinished angles.
- Today
-
Hello everyone, As the title states, my transmission is “locked up” after I rebuilt my short block. I pulled the block with the transmission in first gear forgetting to put it in neutral. on reinstall, the transmission is now stuck in the first gear gate. It goes into gear when pushing up, and when pulled towards neutral, it neutrals, but I cannot shake neutral back and forth or get it out of the first gear gate. Will rolling the car or spinning the engine with a starter free things up? Or do I need to pull transmission and set neutral detached from block? Thanks!
- Yesterday
-
-
-
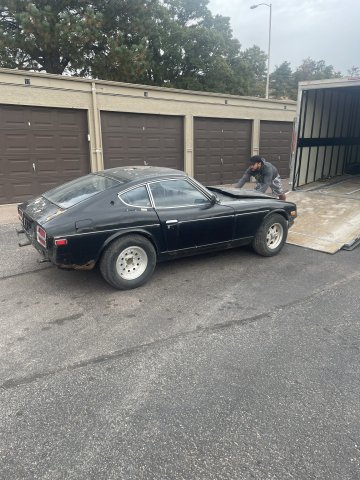
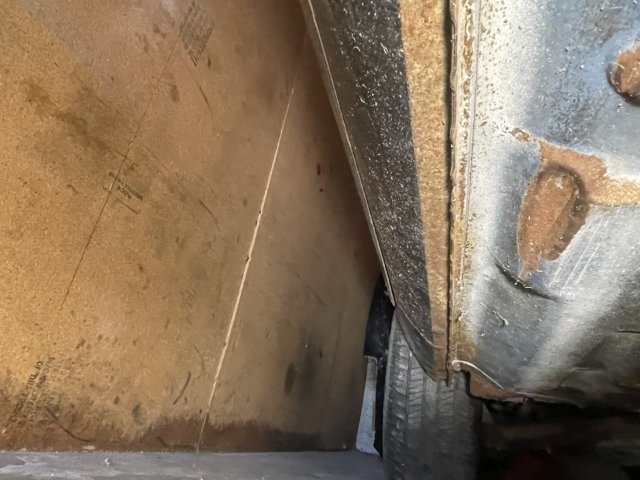
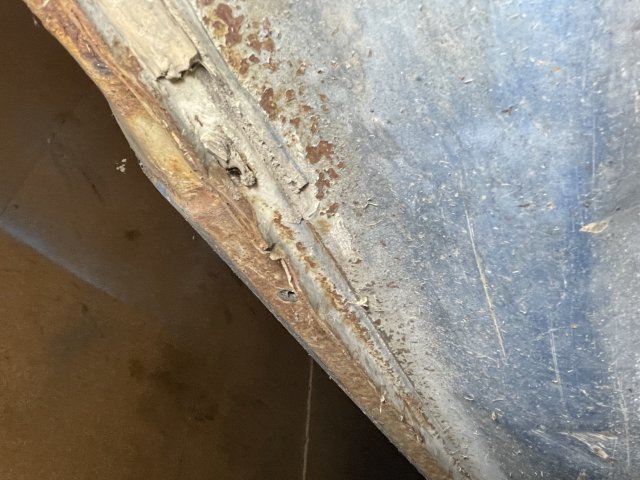
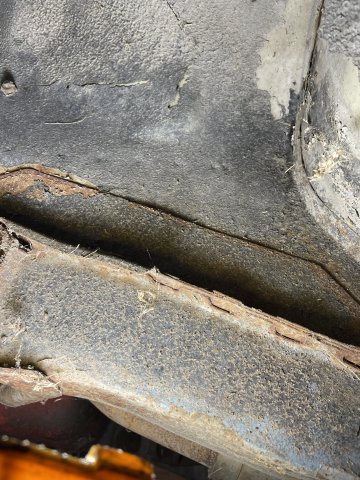
I have been building my ATLAS 4.2 for a little while now, and I have an AR5 transmission from a 2WD Chevy Colorado truck for it. I found a good deal on this Z car online. 1974.5 260Z. The "Big Bumper" 260Z car. Build date of 10/74.....so it's really a 280Z to me as the drivetrain is going away pronto. I love that it has the thicker sheet metal in the subframe and all those extra bends in the floor, that is more rigidity, and it already has the R200 rear end with the 3:54 gears I wanted to offset my transmission gears and work better with my engines power band. Yesterday I took the front panels off of it, looked the whole car over and I am amazed. No rust in rails, no rust in doors, no rust in fenders, no rust in rear hatch panel. 5 rust locations and somehow the hatch itself on one side is completely missing from rust. I ordered the patch panels needed from KF Vintage JDM except the under battery tray rounded piece, which I got form Z Car Depot. Also ordered a new hatch from Resurrected Classics. So soon, the shell will be completely done. This is a long term project, but at least I have a home for the ATLAS, and finding this Z so rust free has made it an absolute keeper. I am thinking about the Rocket Bunny knockoff kit. 1400 bucks delivered is a good deal. Opinions on that? here are a few pics:
-
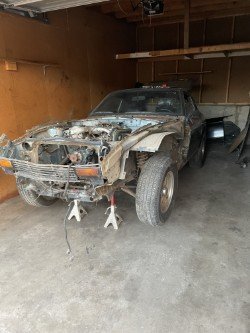
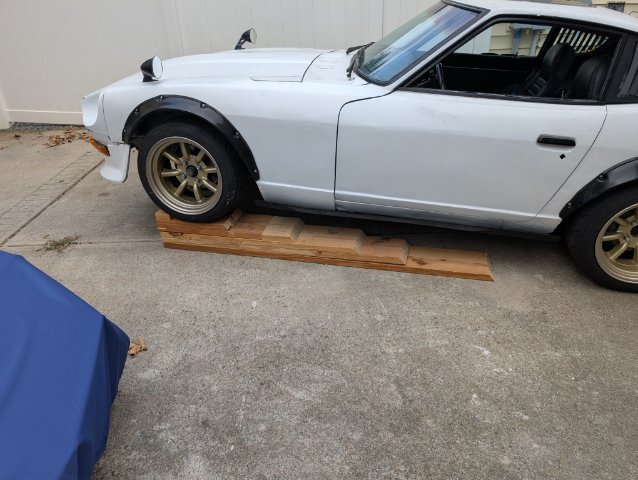
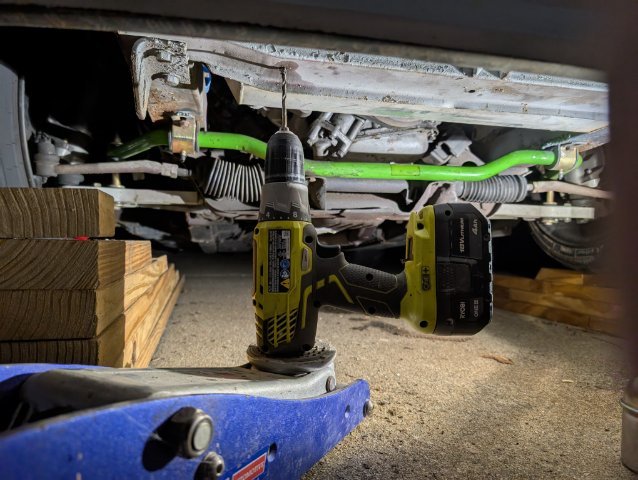
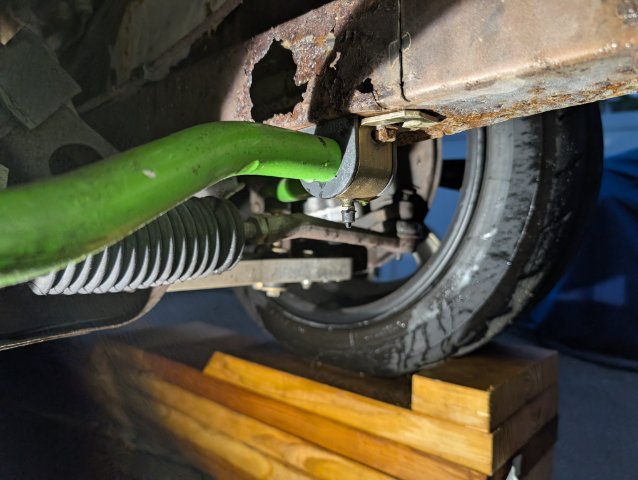
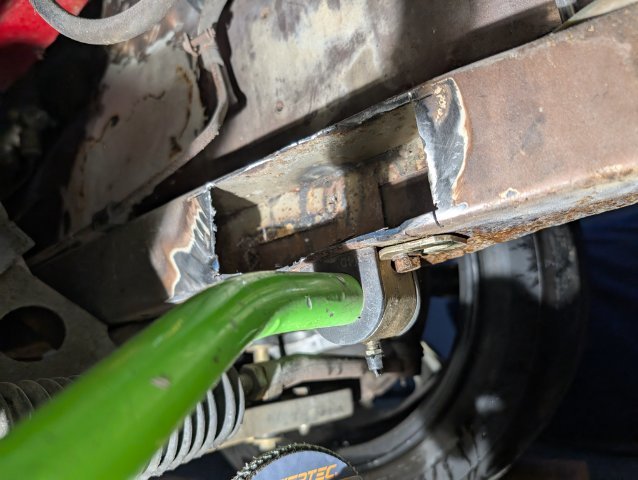
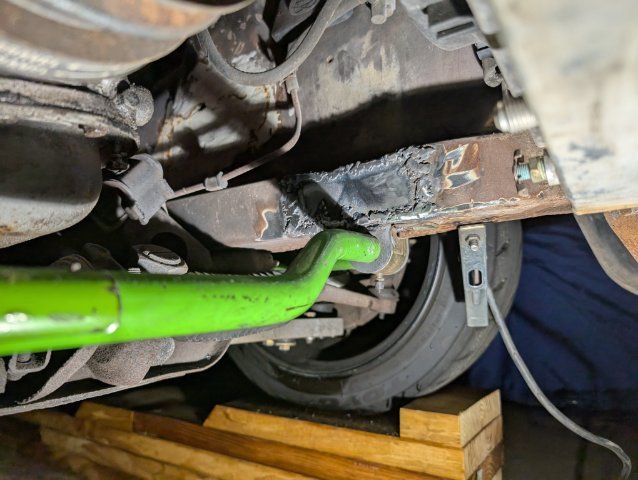
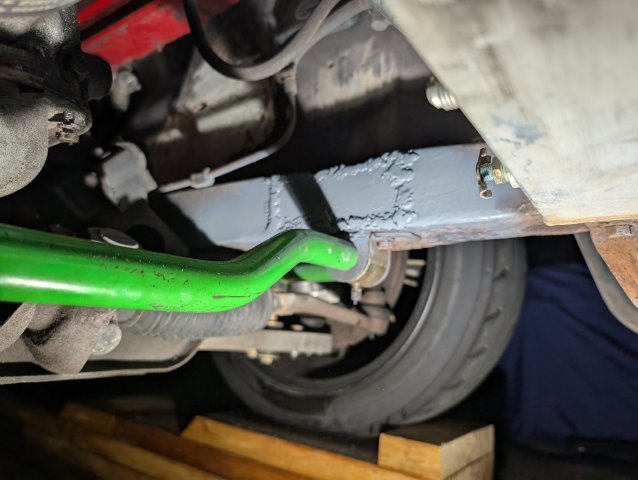
 This week, I feel like I didn't get nearly as much done is I wanted. I went to a local shop and got an alignment done. I built some low profile ramps to make jacking up the car easier, and it is 100% better. I also gave the car a wash because it was filthy from sitting in the garage for so long. I also drilled out the rusted bolts from the skid plate. I removed the skid plate a couple years ago to fix an oil leak. All the bolts were rusted, so I cut the heads off the bolts just to get the skid plate off. I regret that now, because it was a pain in the butt to drill out all the bolts. Now, I need to go back and tap the holes for some new hardware. I also found some more rust. Both sides of the frame rails where the sway bar attach are pretty bad. I don't remember them being this bad when I first did rust repair. I upgraded to a beefier sway bar about 1,000 miles ago. I also have driven the car pretty hard through corners and turn since upgrading the suspension. I wonder if the new bar and hard driving could have brought some rust I missed to the fore front. I'm not an amazing welder, but I'm also not awful. If I was doing this correctly, I should have removed the sway bar to get more access, but I feel like it's good enough for my standards. I also started soaking the exhaust bolts/nuts in PB blaster because that has to come off next so I can fix the leak. The goal this week is to: finish the exhaust, install the skid plate, more rust repair, and adjust the front suspension to sit better (it is a little high for me right now.)
- Last week
-

IMSA GTU vintage racer build
clarkspeed replied to clarkspeed's topic in S30 Series - 240z, 260z, 280z
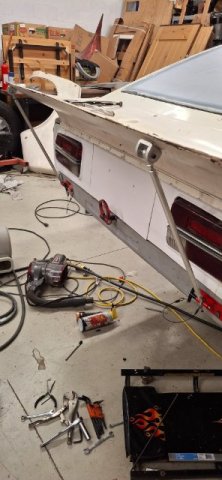
It is just insane how many hours I have put into mounting the hatch. The simple things always take the longest. And I already had brackets fasteners from previous install. Had to fab up my own support strut setup. And I am still fine adjusting the entire thing so someone can remove and install quickly.
-

Anyone running a Schneider 270-60F-14? Questions about idle
juggernautjoee replied to juggernautjoee's topic in MegaSquirt
They never gave me an answer to exactly what idle vacuum I should be getting. Just a suggestion to open the lash a bit. I do not have any EGR remnants. I've sealed off the EGR plate and the bottom is plugged. I've bumped up my advance to 25 degrees in the idle range and can get a steady 16in of vacuum now at the same RPM. But obviously that doesn't leave a lot of room for me to advance the ignition through the load ranges. I've got a set of home-made detcans that I've been using to detect pinging/detonation. I advanced the ignition at idle up from 25 and didn't notice any difference of vacuum, but did notice some stumbling around 30 degrees. I can live with the 16in of vacuum at idle if -

Tach is struggling below 2,000rpm
BoostLee replied to Luzifer's topic in S30 Series - 240z, 260z, 280z
I had a lazy tach, and taking it out and disassembling it and cleaning it helped. -

Fast Floridian's 240Z Track Build
FastFloridian replied to FastFloridian's topic in S30 Series - 240z, 260z, 280z
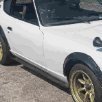
Will do. I’m going to go with some wide wheels and tires up front, somewhere between 305s up to 325s. With all that rubber the power steering will be a huge help. -
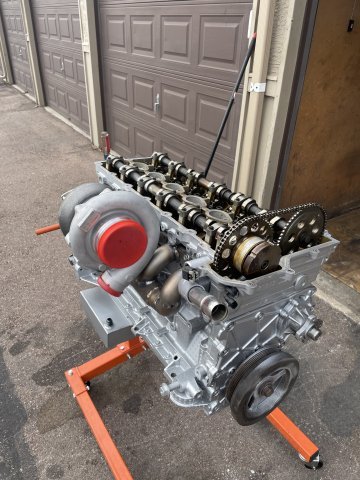
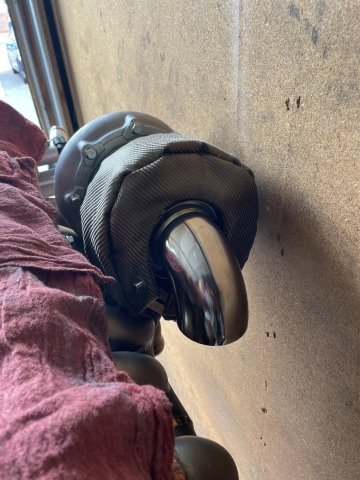
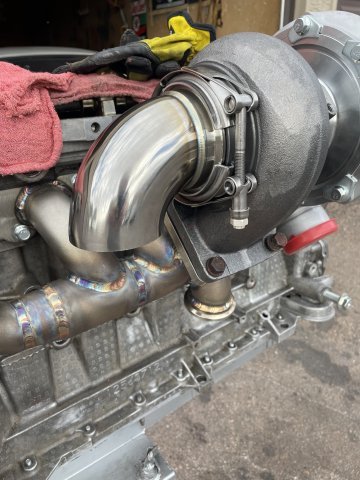
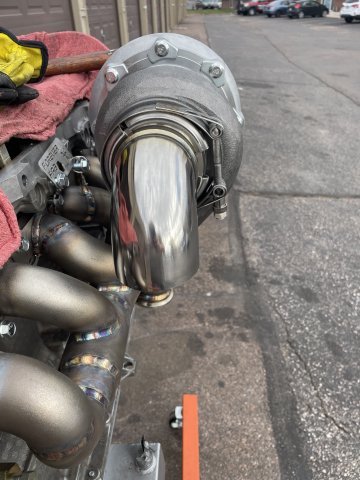
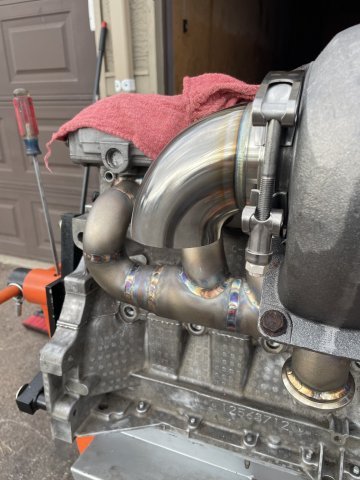
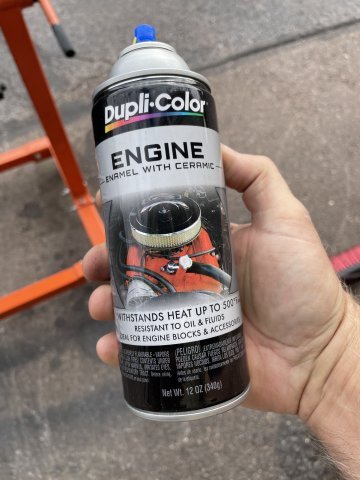
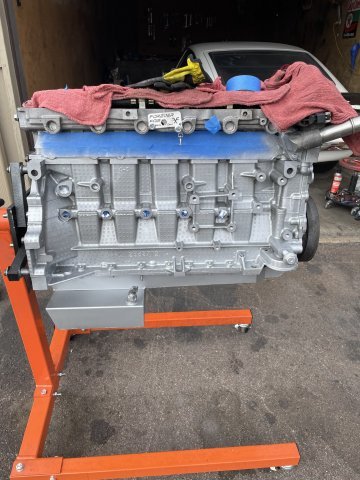
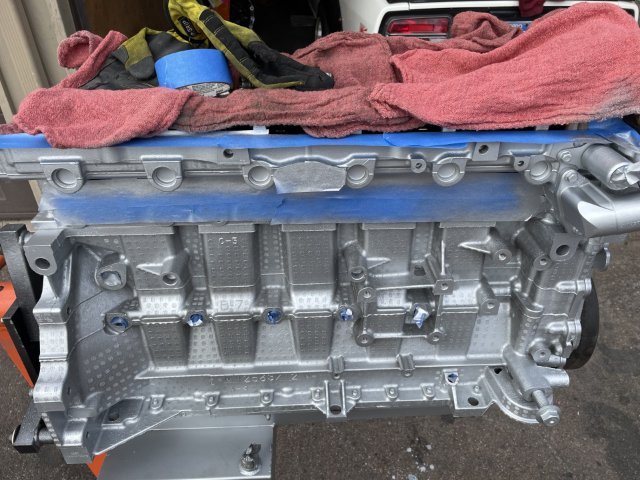
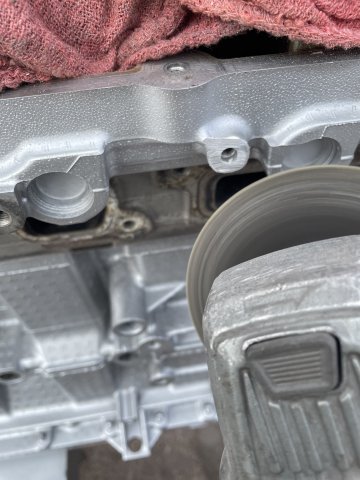
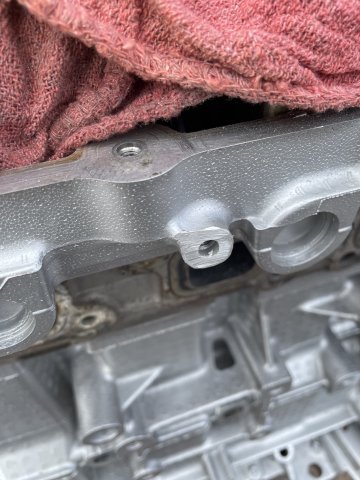
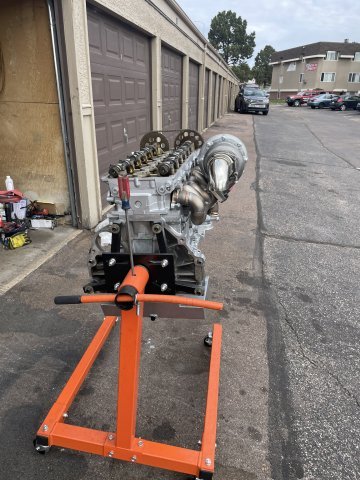
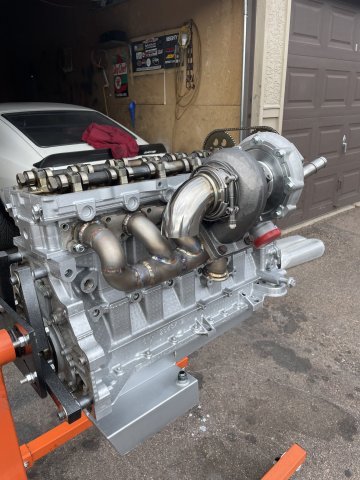
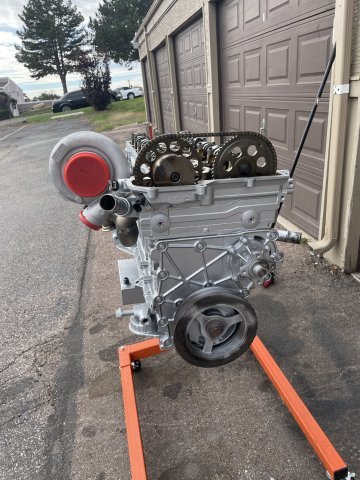
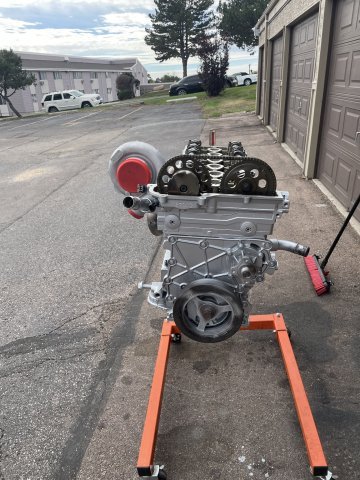
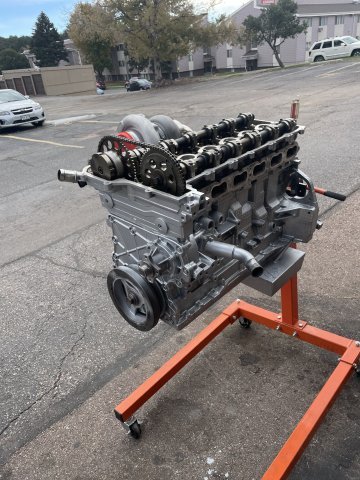
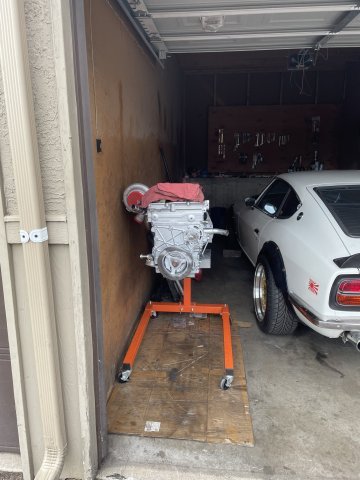
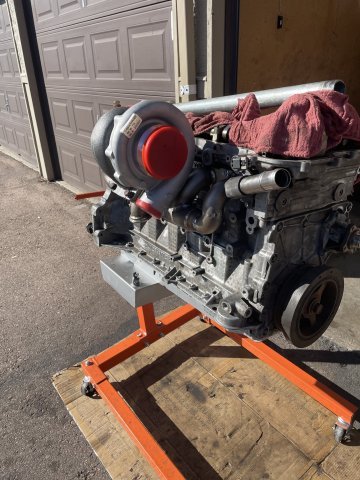
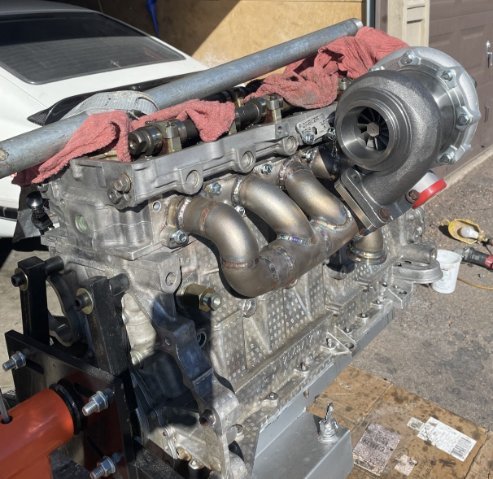
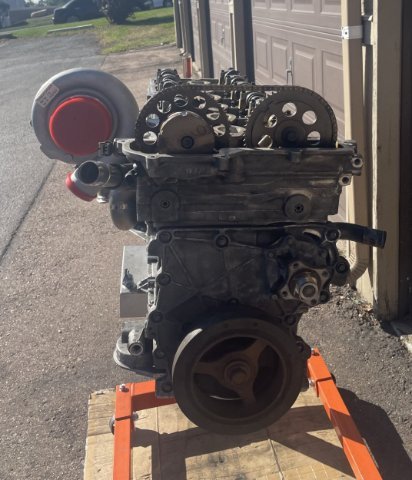
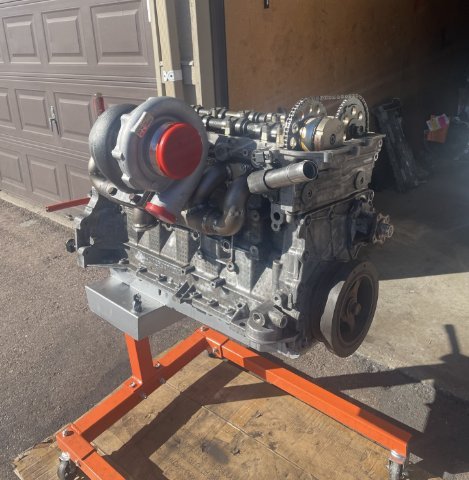
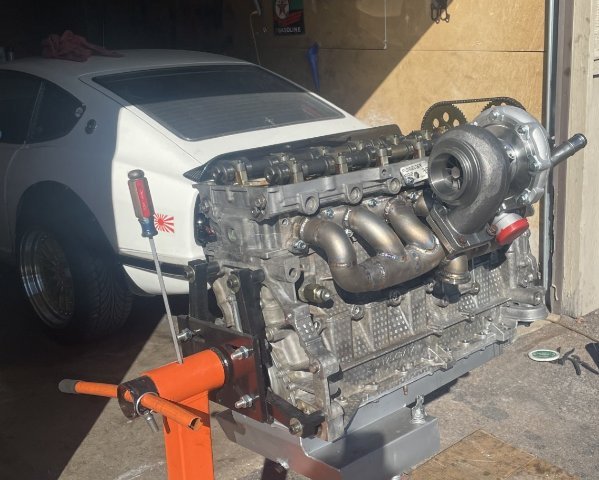
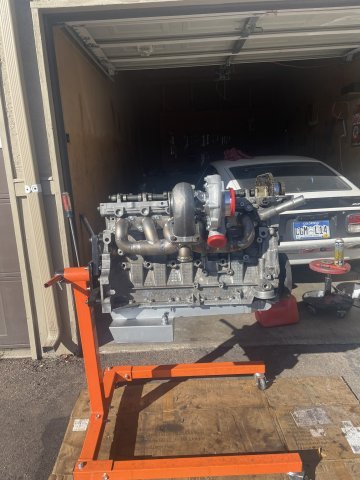
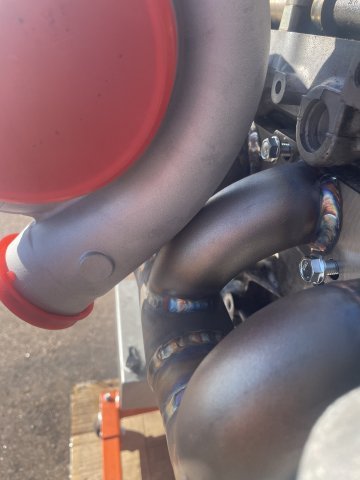
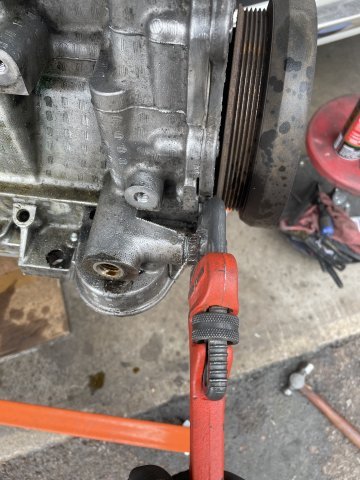
10-09-2025, This morning I trial fitted the tight 90 turndown on the turbo, clearanced the boss on the head that was touching the turbo compressor housing, and then masked and painted the engine. Once dry I can then mask and paint the crank pulley. See pics:
-
-
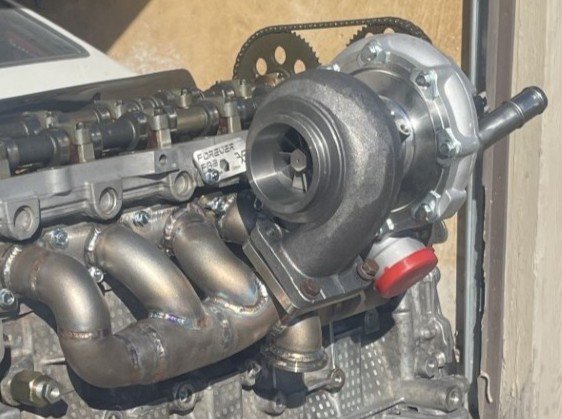
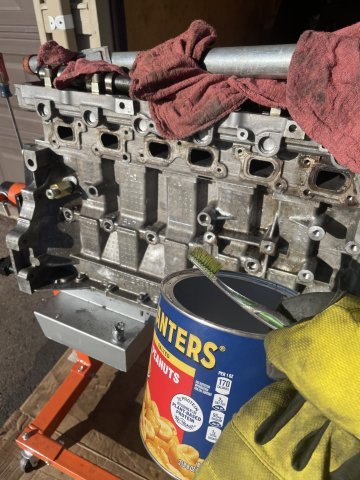
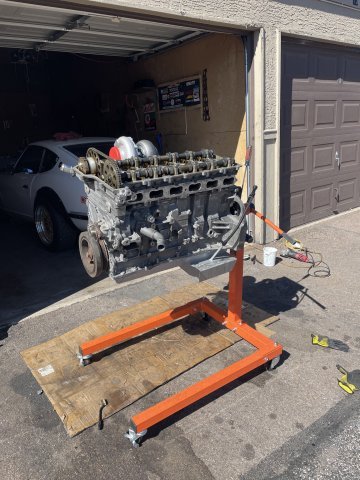
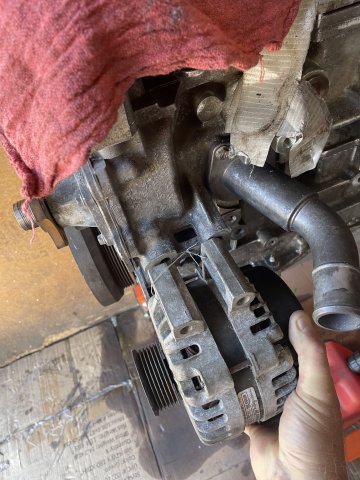
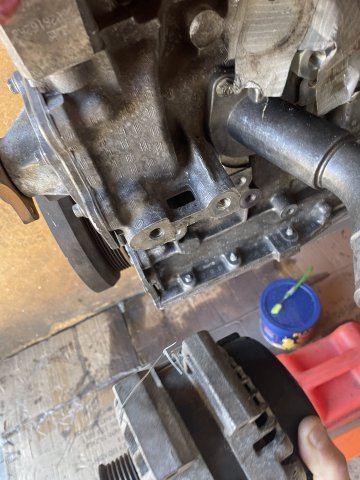
4200 Progress, 10-08-2025: Finished the cleaning of the engine today, using a can of gas (not recommended) and an old toothbrush and a shop cloth to wipe it up, razor blade on gasketing surfaces and other spots as needed.......then I mocked up the turbo header and turbo.....yep, my turbo is a bit bigger than what was expected I guess. I can get some space with another flange stacked up with the aluminum plate gasket for the second one, will probably need to put a wrap of header tape just in that spot as well. Also have a small boss sticking out on the head touching the compressor housing. I can just carefully grind it down a tad for clearance. Big T-76 turbo sticks up there huh? Good thing I will run an intercooler huh?
-
Working on PCV again, I am going to try for the exhaust. My basic plan is, valve cover to stock pcv valve, to a catch can, then block to the catch can, catch can to the exhaust.
-
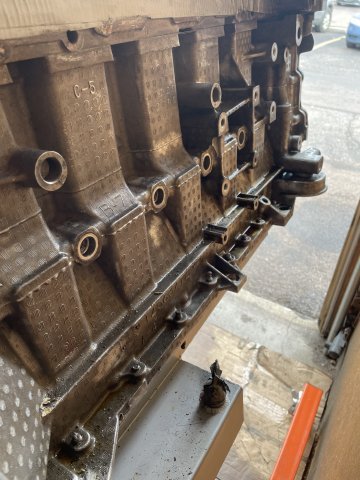
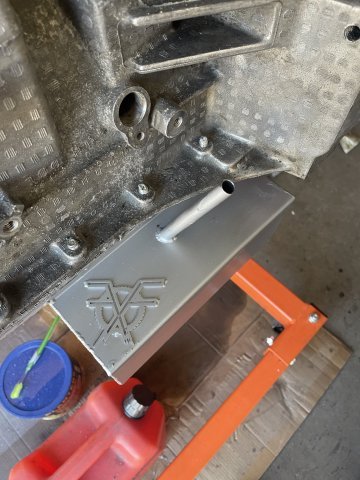
Im building a l28et and im converting it to front sump. I've already drilled everything and I know what im doing there. Wanted to run how im sealing the oil galley off. I the picture you can see my new pickup hole and dipstick hole. I have already put a Welch plug to the left of the small hole and plugged the old pickup. Next im going to put the aluminum plug i made that has a npt plug inside of it between the new pickup and dipstick hole. When I tighten down the npt plug it will spread the outer wall of the aluminum plug and seal it off. I will theb back that up with another Welch plug. Im almost sure it will work but I wanted to get some more eyes on it to make aure. Because if it doesnt work. Ill suck air and take out the bearings. Any recommendations on a sealer I should use if any?
-
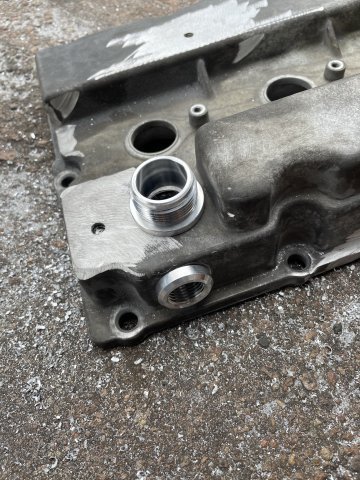
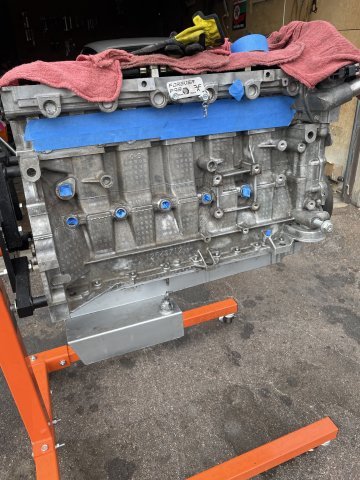
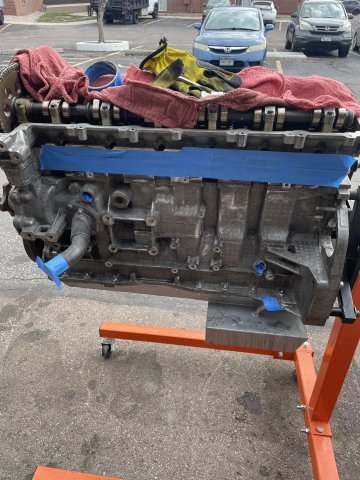
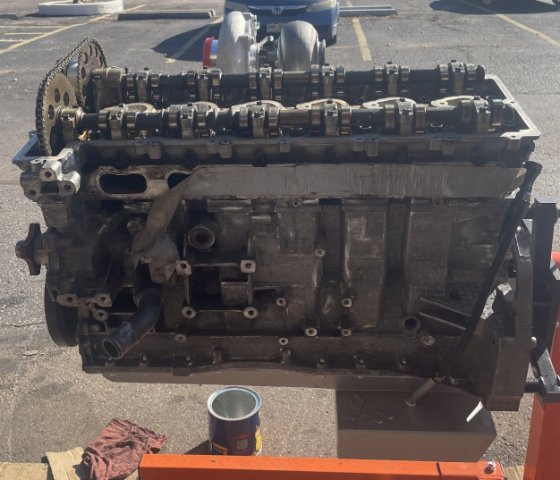
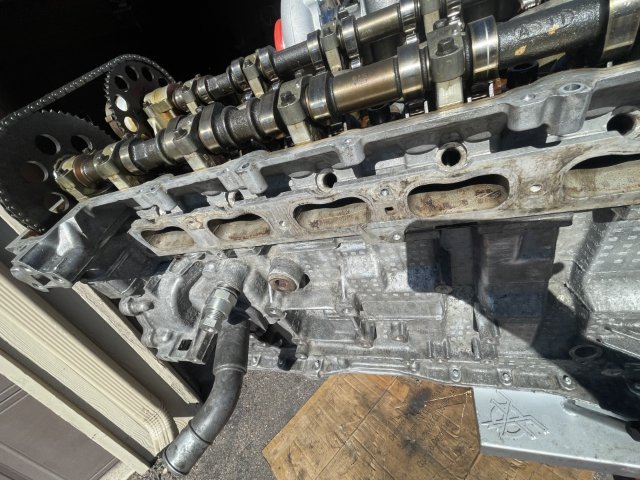
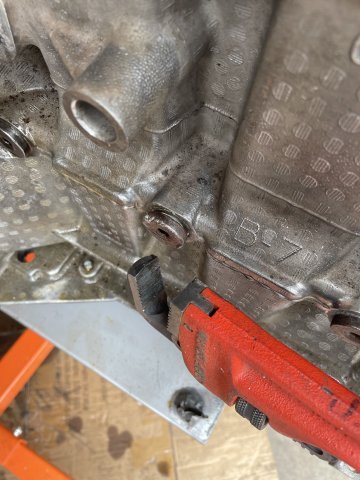
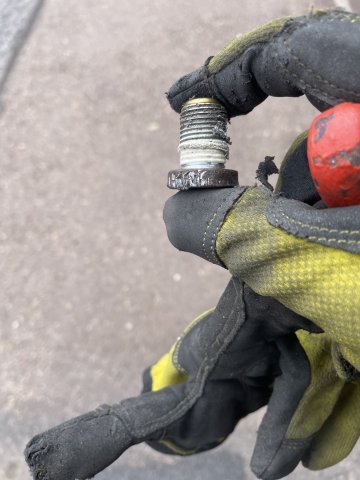
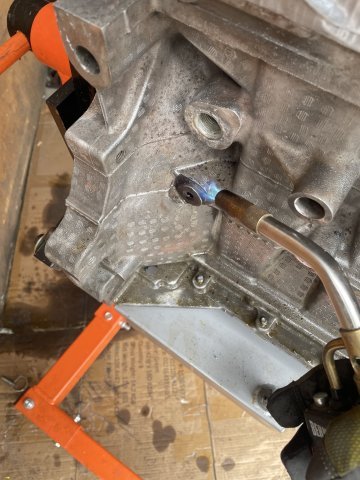
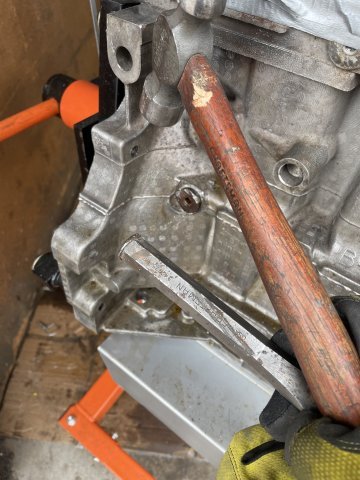
Today was a cold snap, but I managed to get a job done I have not been enthusiastic about doing..... removing the oil screw in plugs from the block. Metal plugs in an aluminum block and have been in there for 19 years. I had to use a pipe wrench, hammer, hex wrench, PB Blaster, a MAPP gas torch, and a cold chisel. I found that the cold chisel is the most effective at getting them loose and off, but it will take several cycles of PB blaster , spraying it where the bolt face touches the block and letting it seep in, and then MAPP gas (2000 degree F or close to it, maybe more) held around the bolt to heat up the aluminum and get it to expand, then hitting the head of the bolt a few times hard with the hammer, and then putting the chisel on an angle and beating on it with a hammer to shock it loose and turn it. These bolts are M16X1.5 thread, with the exception of the bolt facing the side at the oil filter. The bolt facing straight ahead is the same size, M16X1.5 but the one to the side where the sensor normally is..... is a coarse thread bolt, M16X2.0 thread. I have ordered brass plugs from Auto Meter to install into each port that are drilled and tapped with a 1/8 NPT center. I will put brass plugs in #1-3, #4 is for the oiling system re-route from the front facing port at the oil filter, number #5, the last port on the block at the very end is for Turbo oiling feed. The side port at the oil filter, the bolt will be drilled out in the center and tapped to 1/8 NPT so I can use it for an oil psi gauge. Sure feels good to have this done. In the pics you can see how the factory really gooped up the threads when they installed them. Pics follow. Cheers!
-

Fast Floridian's 240Z Track Build
Mitchel0407 replied to FastFloridian's topic in S30 Series - 240z, 260z, 280z
I’m curious as to how the electric steering kit will hold up and what you think of it. No power steering isn’t that bad but it might be a nice upgrade down the line. Please keep us up to date once you have the car driving. - Earlier
-
Fast Floridian's 240Z Track Build
FastFloridian replied to FastFloridian's topic in S30 Series - 240z, 260z, 280z
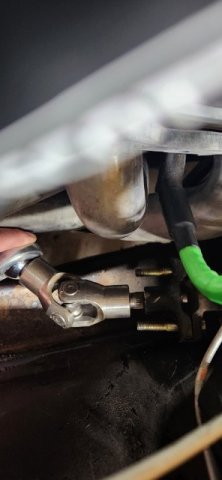
You are 100% correct, thanks for pointing that out. You don’t know what you don’t know. The new steering kit lets you attach the u-joint in any configuration, I wasn’t even thinking there was a right and wrong way to install them. Quick google search and see what you mean and how to align them properly. Glad to be able to fix now, rather than find out later, love everyone’s help on this forum. -

Fast Floridian's 240Z Track Build
74_5.0L_Z replied to FastFloridian's topic in S30 Series - 240z, 260z, 280z
Just looking at the picture that you posted of your steering shaft, it looks like the u-joints aren't phased correctly. It may be an optical illusion from the angle of the picture. -
I removed the cylinder head, N47, didn't find any torn pieces of the gasket. After ordering a new set of valve springs and valve seals from zcardepot, I took the head to the machine shop.
-
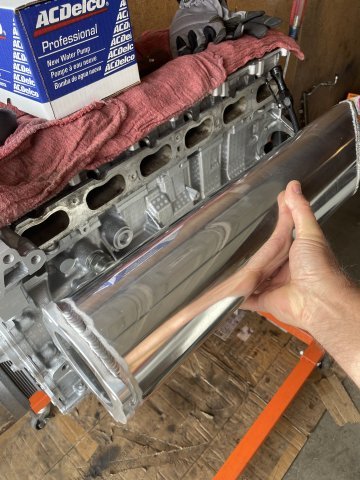
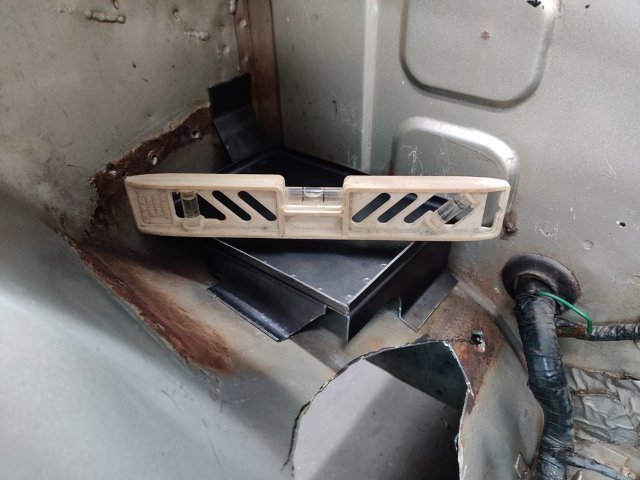
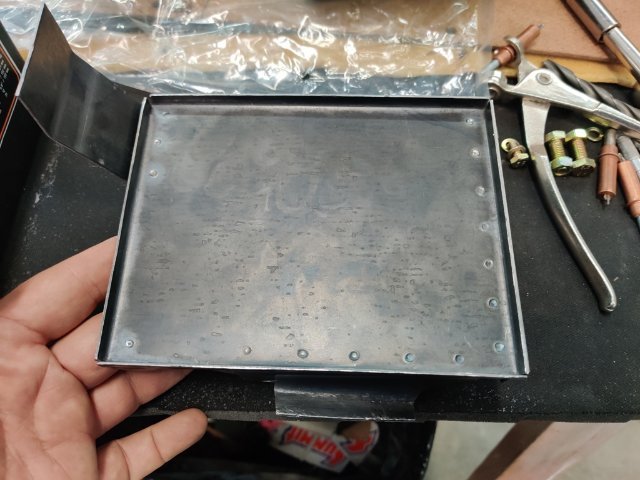
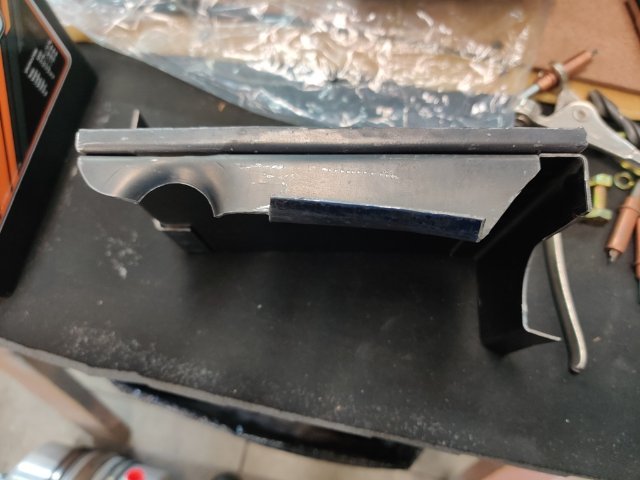
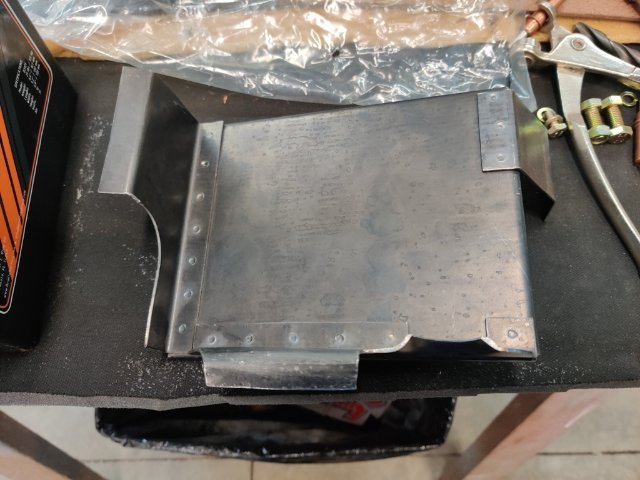
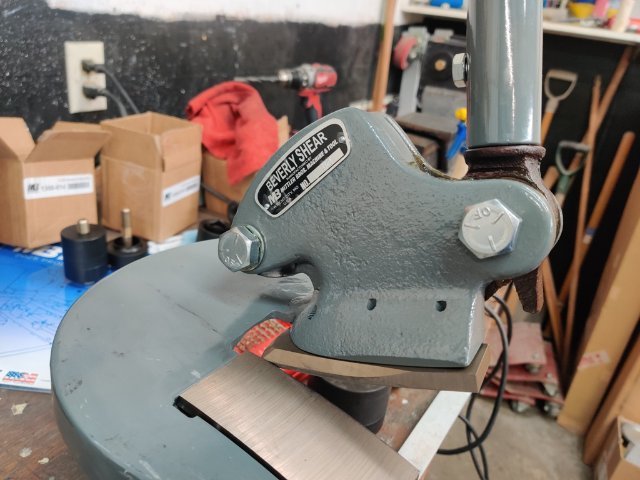
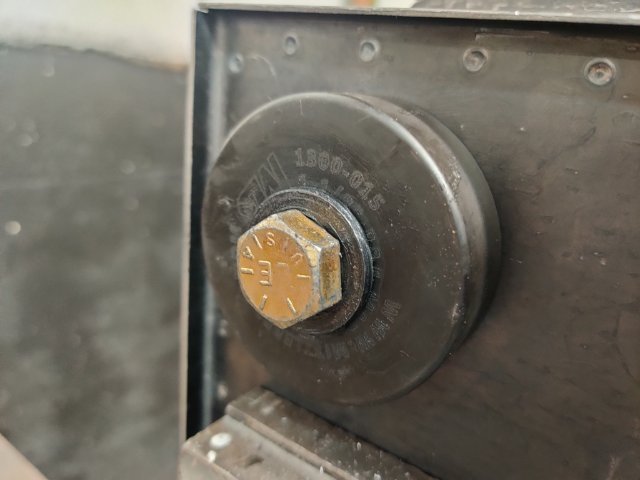
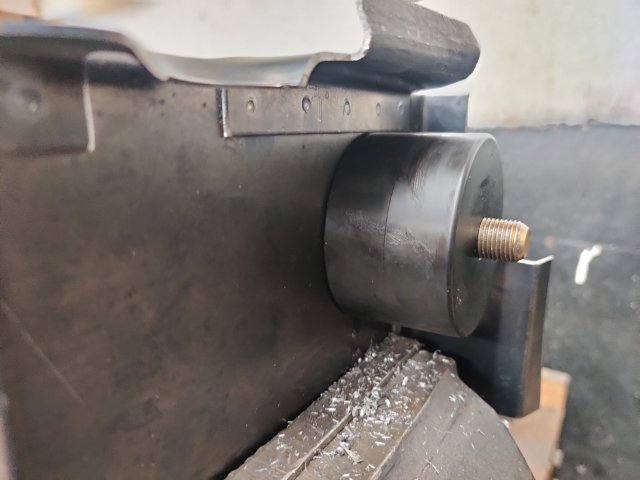
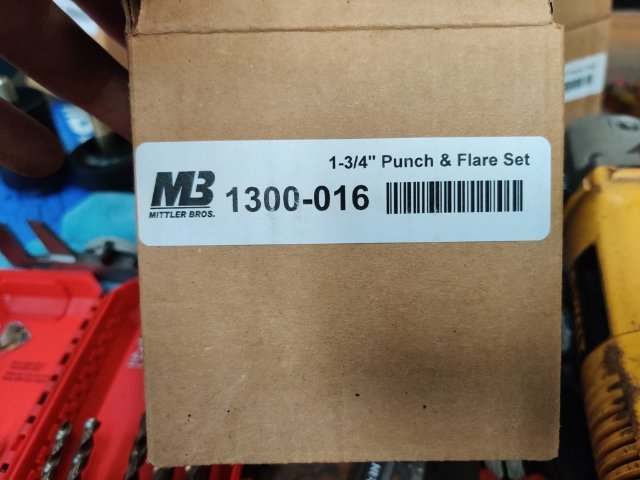
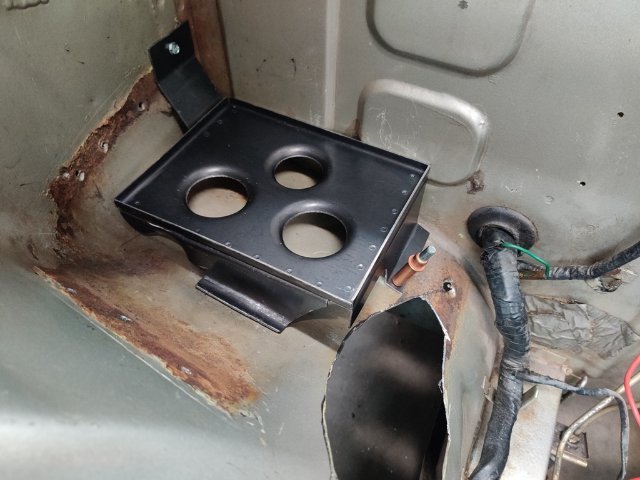
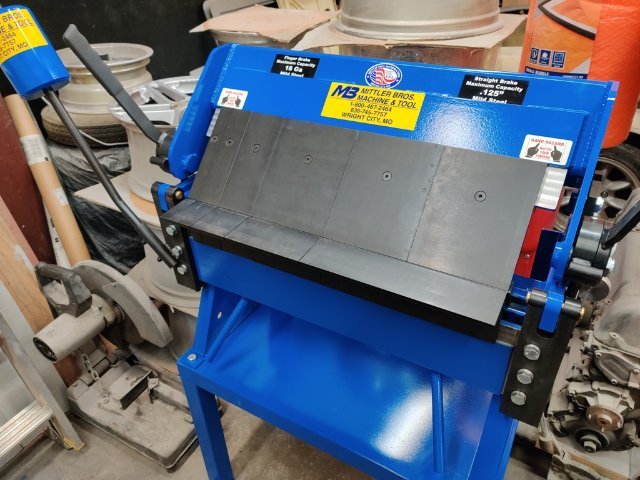
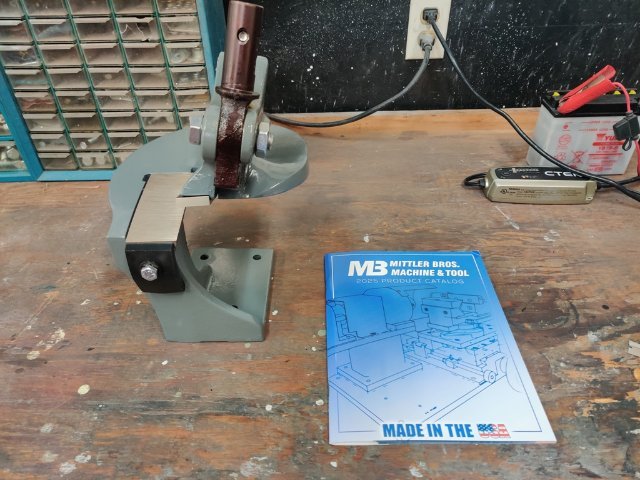
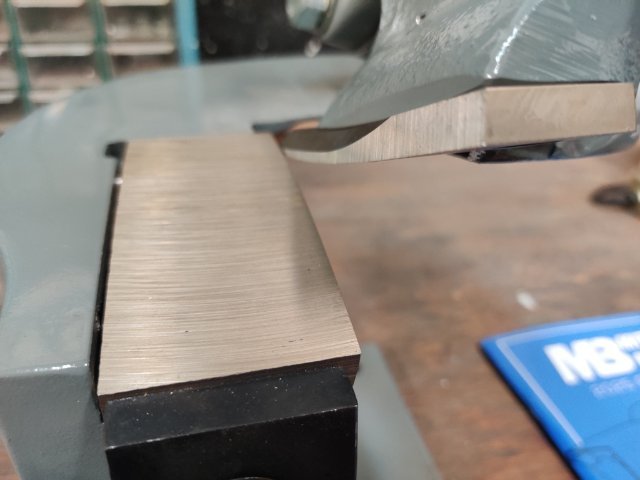
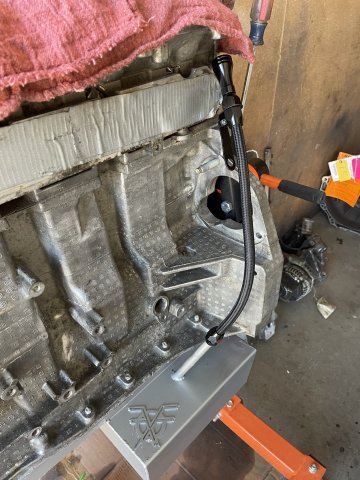
After several weeks of various distractions, I was able to commit a bunch of hours to working on the "track car" this weekend. I recently purchased some nice tools to make fabrication projects easier. Here are some pics of tools: And with those on hand, I was able to make a nice battery tray for the new Braille battery. The spot welder I bought several years ago was awesome to use as well. I, am very happy with how this part came out, even if it did take me about 9 hours to make it (!) I still have to design a battery clamp down mechanism to hold the battery to this new tray, so I will work on that soon. With the battery tray temporarily in place, I again mounted the dry sump tank, and started figuring out all the fittings I will need for the lines for the dry sump system. I plan to order those soon and then mock up some hoses.
-
Toiletduck34 joined the community
-
Second that
-
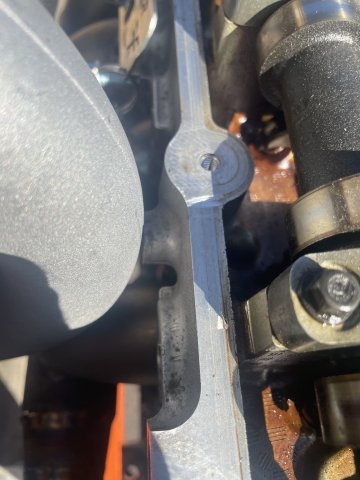
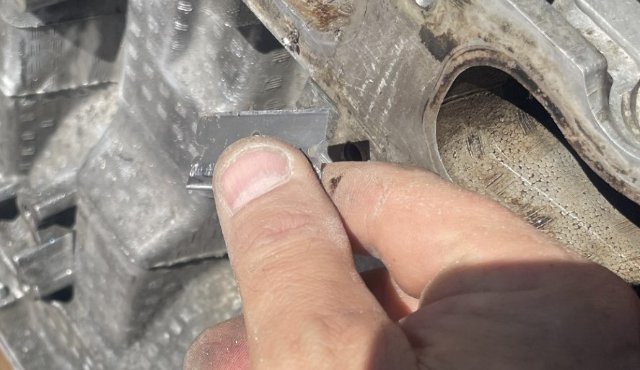
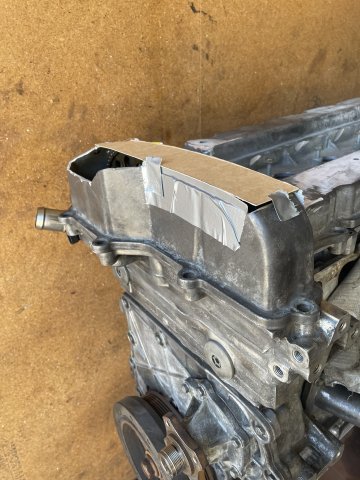
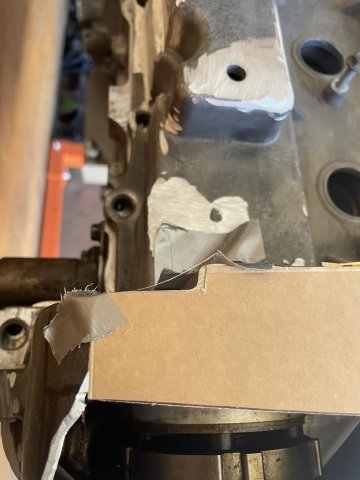
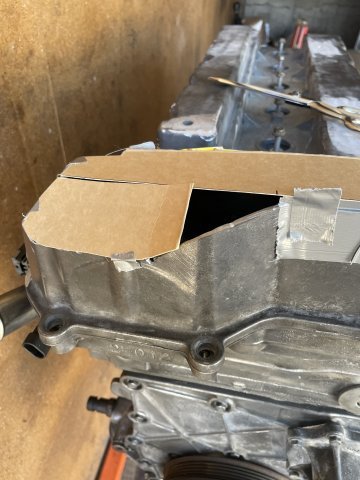
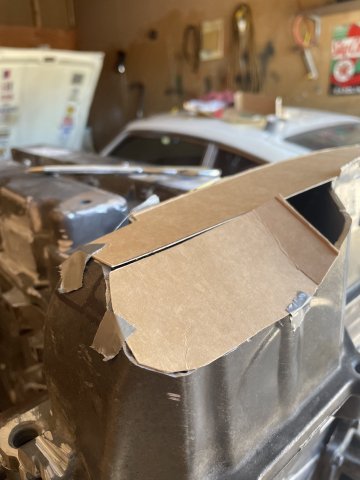
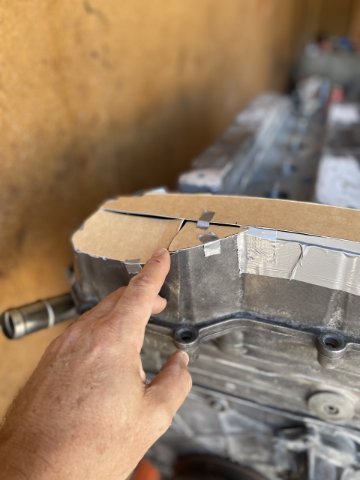
I worked on making the forms for the valve cover today. I can now use them as templates to cut them out of some 1/8" thick aluminum plate I got off of Amazon, and it should be here tomorrow. Also stuck the dip stick in a little bit to get an idea. It also comes with the oil pan and pickup. Lastly, I am getting ideas on alternator fitment.....pics.


-
Who's Online 1 Member, 0 Anonymous, 596 Guests (See full list)