Leaderboard


Popular Content
Showing content with the highest reputation since 10/07/25 in all areas
-
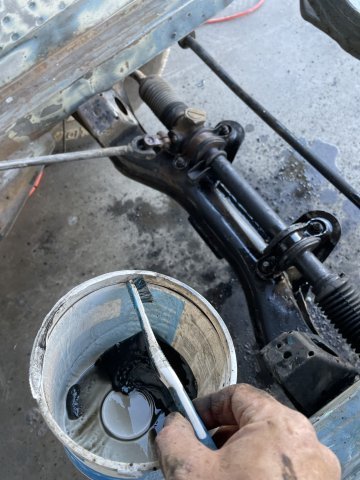
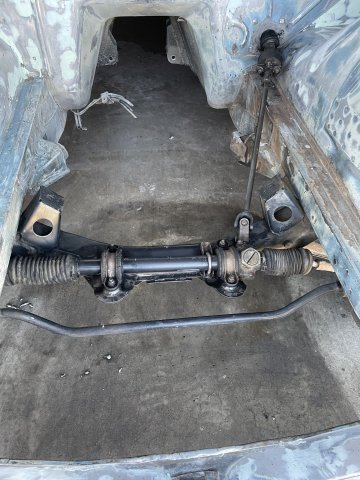
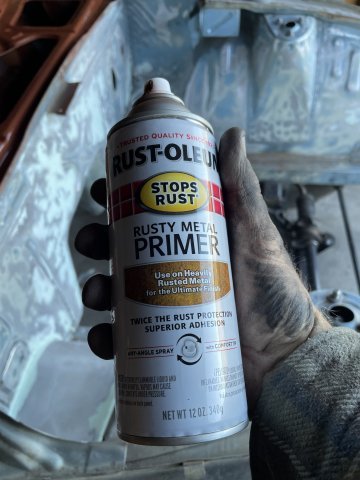
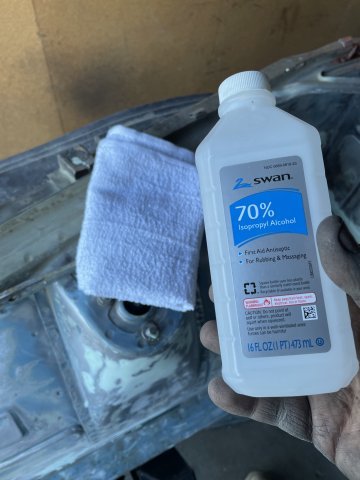
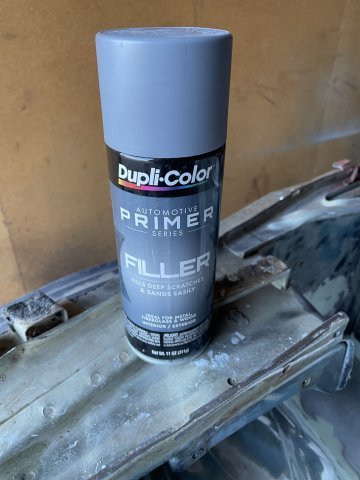
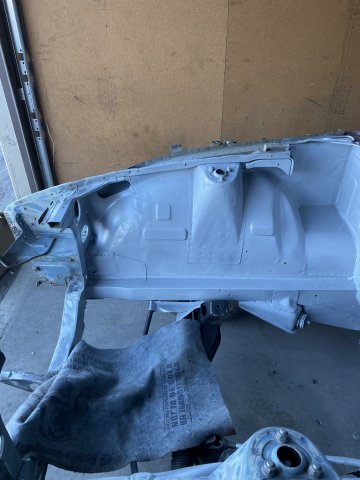
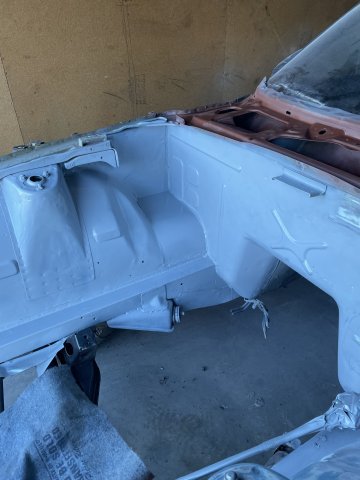
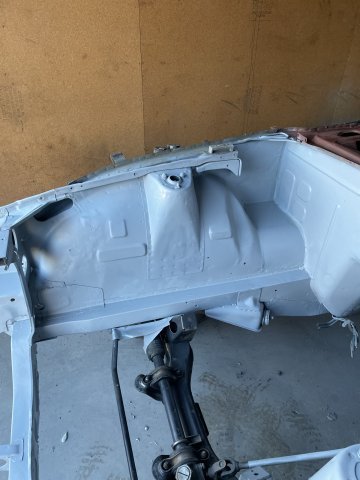
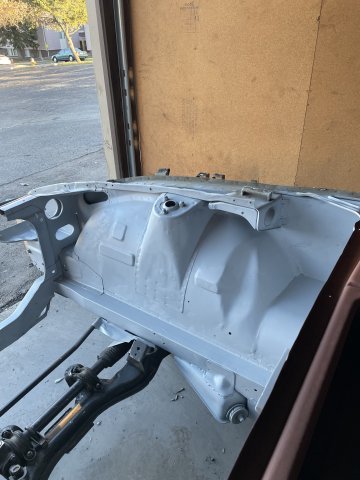
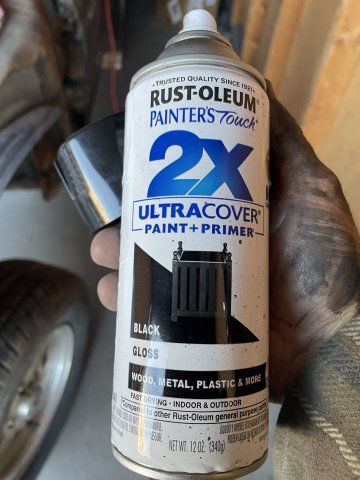
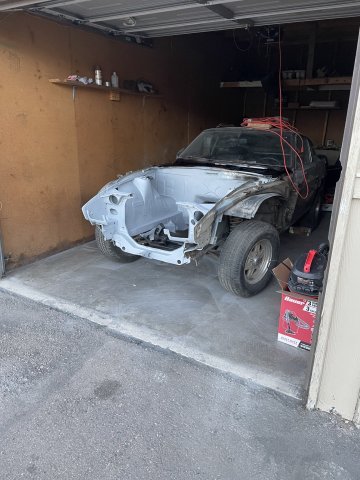
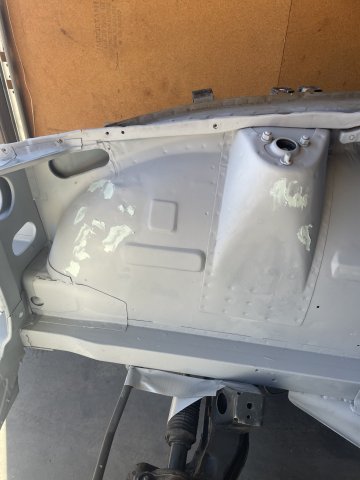
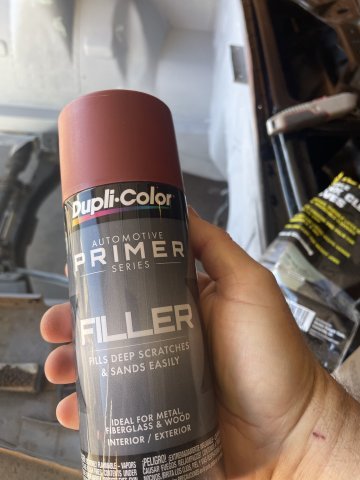
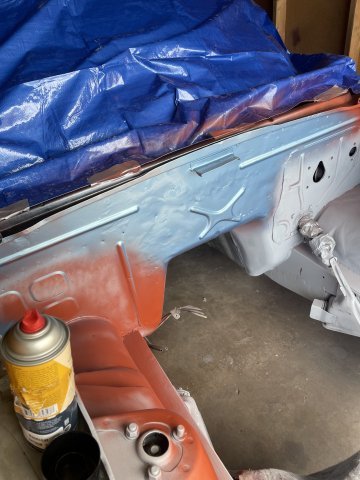
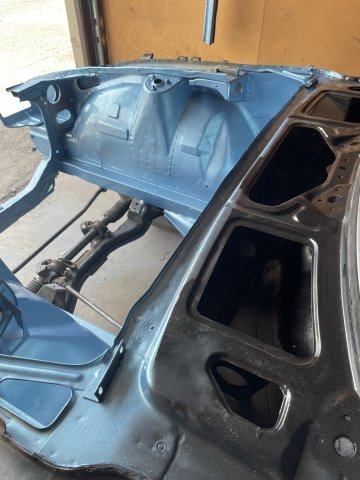
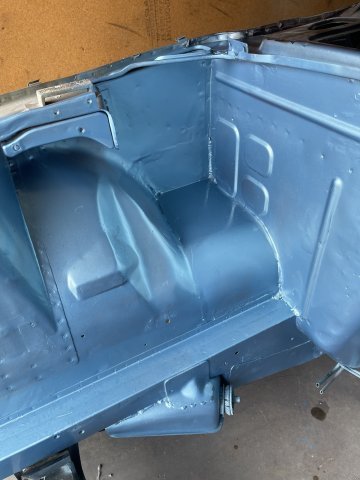
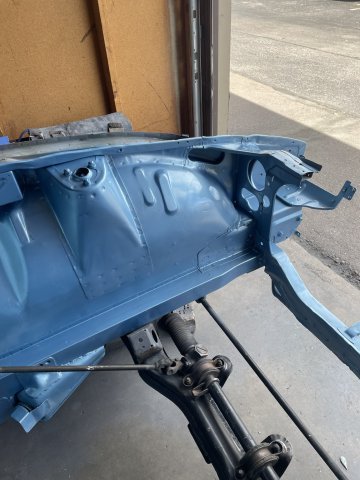
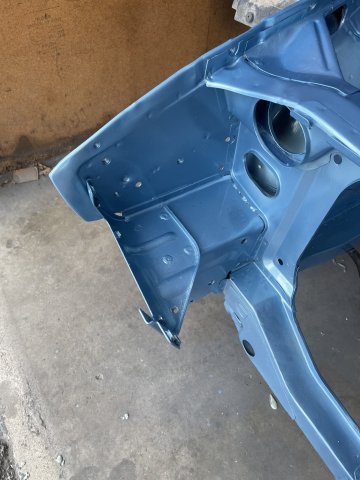
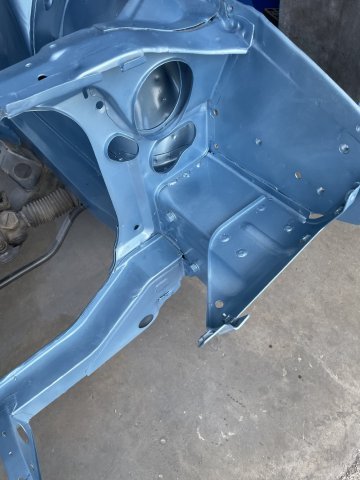
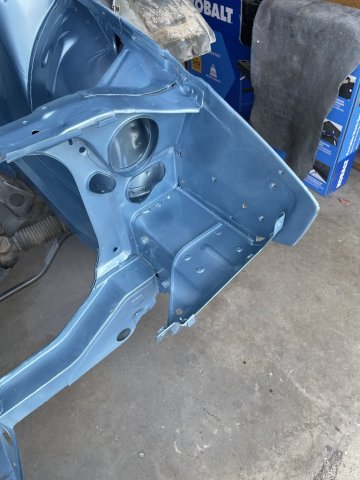
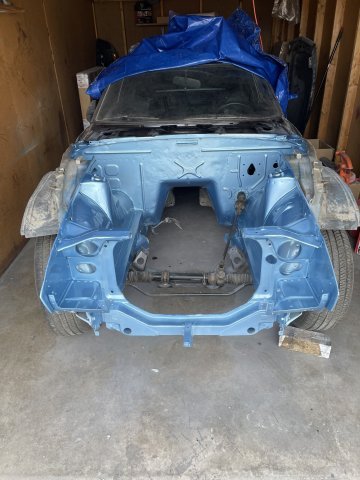
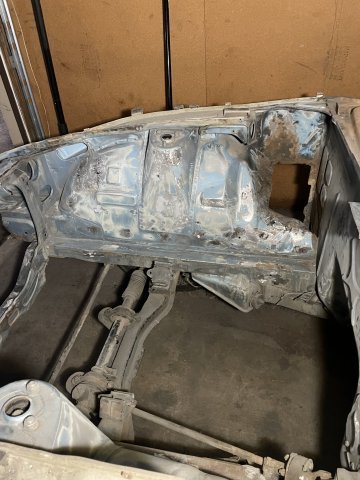
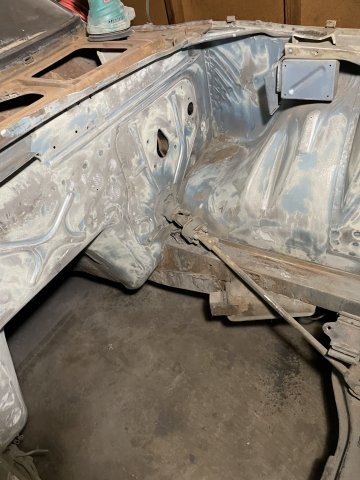
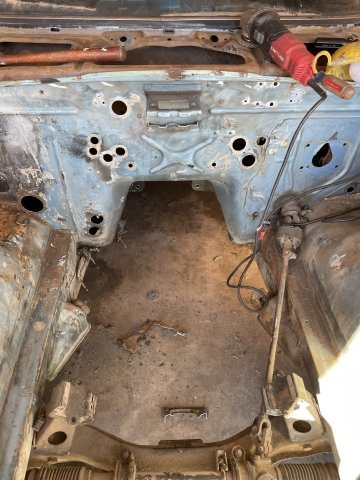
11-01-2025. 260Z work. I got the engine compartment sanded down after the glaze and then cleaned up the crossmember and rack with cleaning solution "g@s" and a toothbrush, and then steel wool, etc. Then I vacuumed out the cowl and primed it with rustoleum rust primerand top coated it with gloss black paint, then painted the engine bay with filler primer. Once dry I will use some spot putty I picked up on the areas that need it, hand sand it smooth and filler primer over that. Once it is good, then I will progress to color and then clear. Busy day! Pics:
 3 points
 -
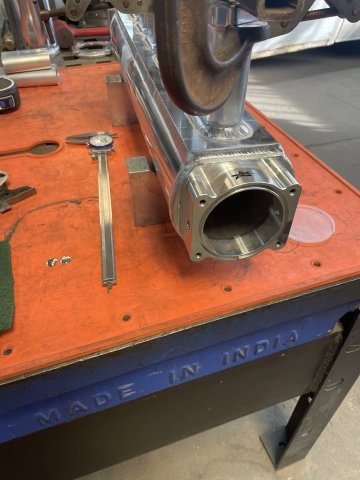
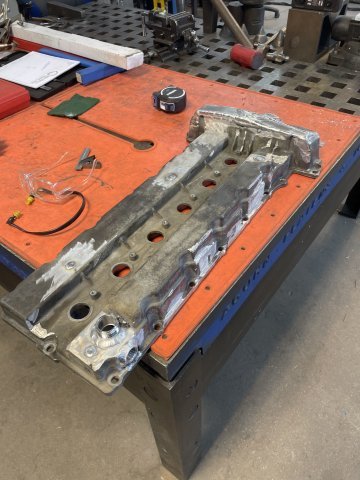
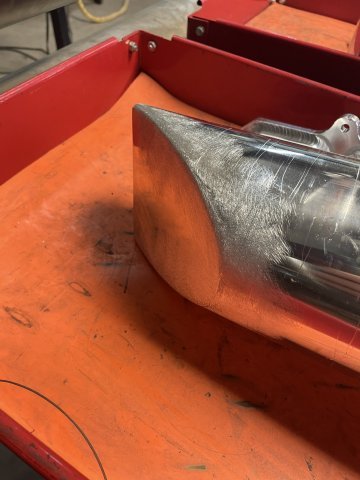
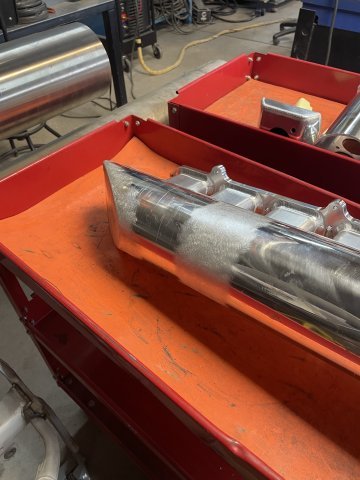
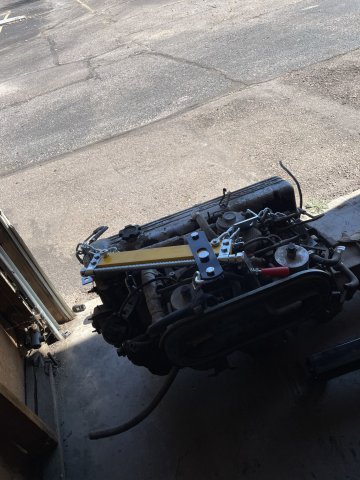
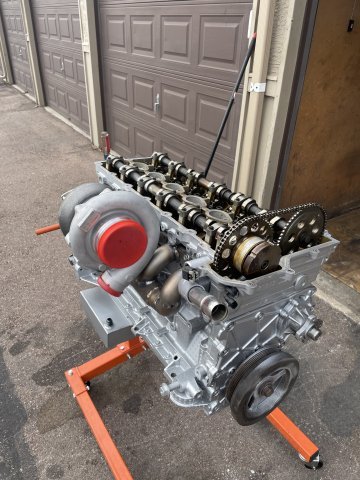
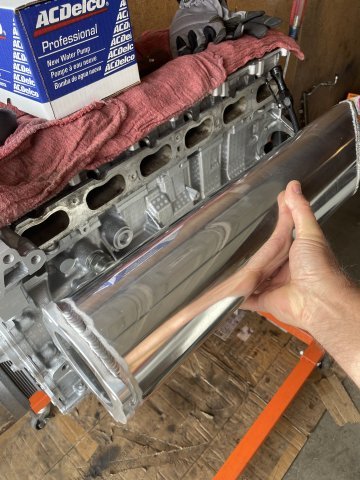
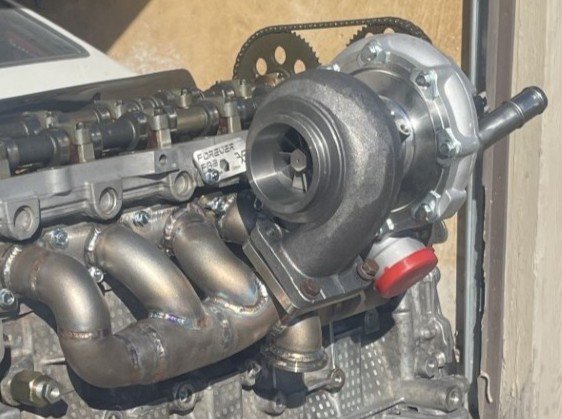
4200 engine update. Progress pics of my intake. almost ready to go to the polisher!
2 points
-
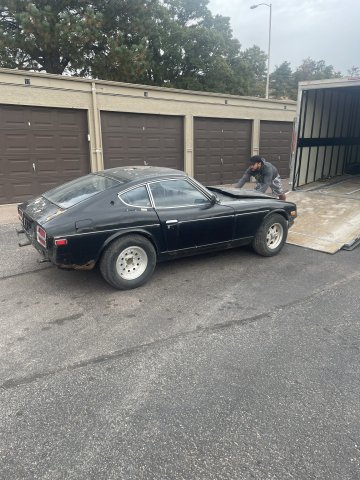
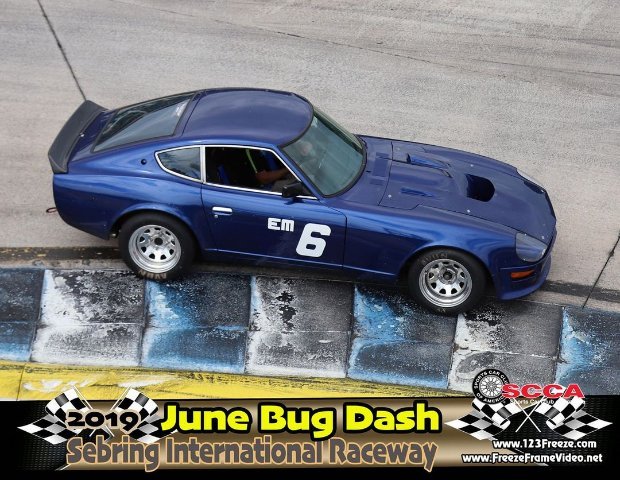
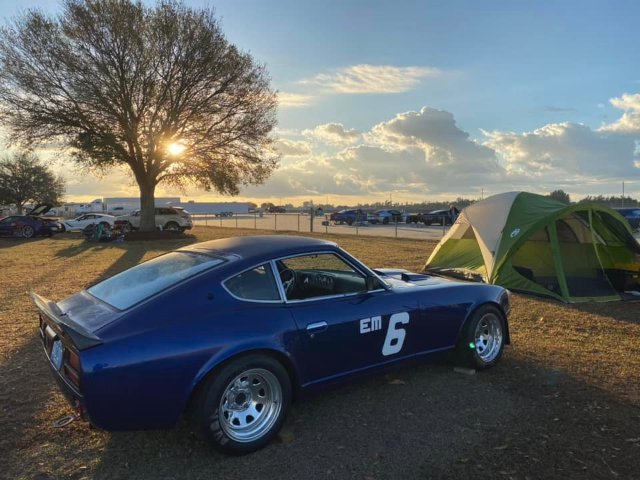
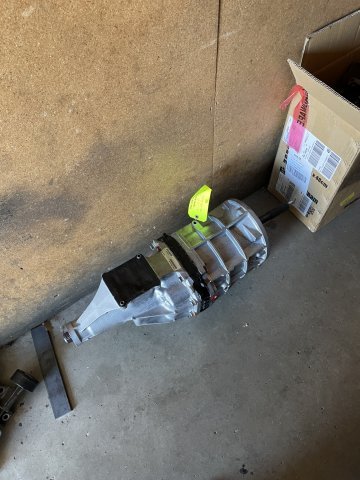
I have been building my ATLAS 4.2 for a little while now, and I have an AR5 transmission from a 2WD Chevy Colorado truck for it. I found a good deal on this Z car online. 1974.5 260Z. The "Big Bumper" 260Z car. Build date of 10/74.....so it's really a 280Z to me as the drivetrain is going away pronto. I love that it has the thicker sheet metal in the subframe and all those extra bends in the floor, that is more rigidity, and it already has the R200 rear end with the 3:54 gears I wanted to offset my transmission gears and work better with my engines power band. Yesterday I took the front panels off of it, looked the whole car over and I am amazed. No rust in rails, no rust in doors, no rust in fenders, no rust in rear hatch panel. 5 rust locations and somehow the hatch itself on one side is completely missing from rust. I ordered the patch panels needed from KF Vintage JDM except the under battery tray rounded piece, which I got form Z Car Depot. Also ordered a new hatch from Resurrected Classics. So soon, the shell will be completely done. This is a long term project, but at least I have a home for the ATLAS, and finding this Z so rust free has made it an absolute keeper. I am thinking about the Rocket Bunny knockoff kit. 1400 bucks delivered is a good deal. Opinions on that? here are a few pics:
1 point
-
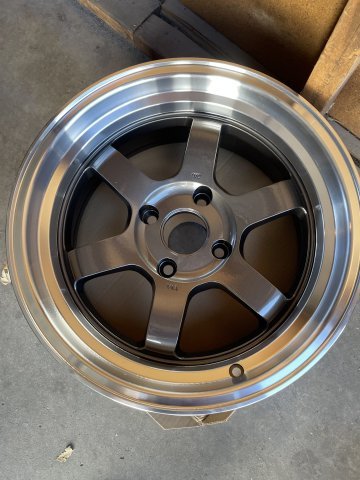
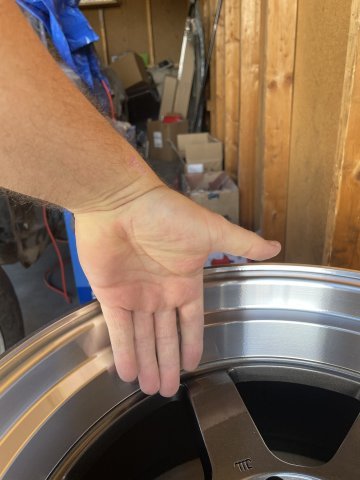
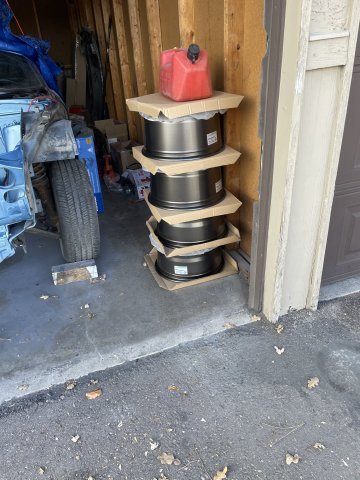
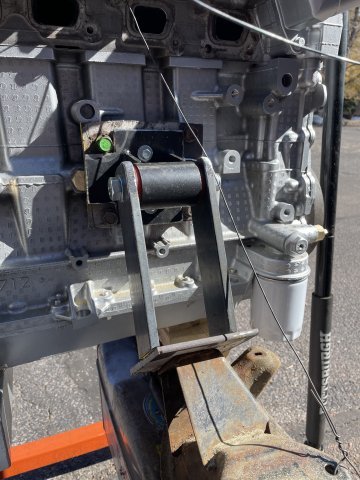
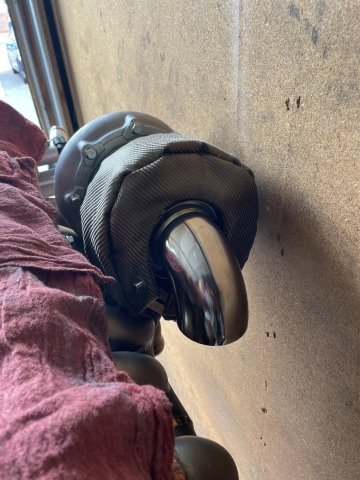
Today I cleaned up the motor mounts and alternator bracket and gave them a coat of paint. I also drilled out the holes in the motor mount pads on the crossmember and painted the visible spots. Lastly the wheels came in....16x8 in the front, 16X9 -15 in the rear. Tires are 205/55R16 and 225/50R16. have to slot a couple holes ont he alternator bracket still and a couple holes on the motor mounts needs some time with a burr bit but almost ready to drop the engine into the Z.
1 point
-
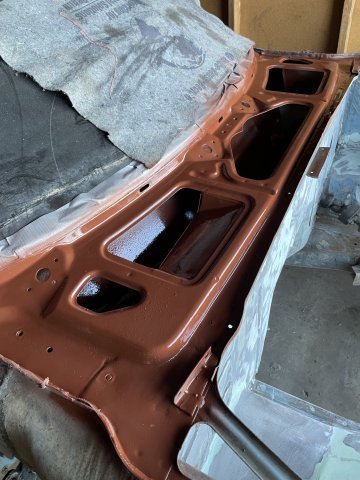
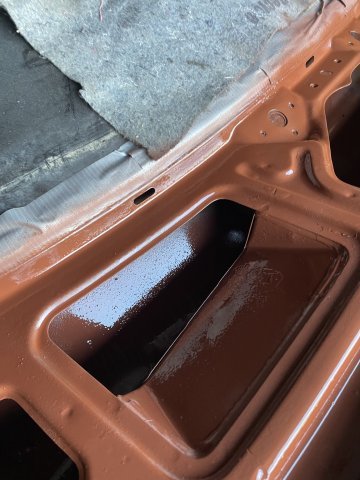
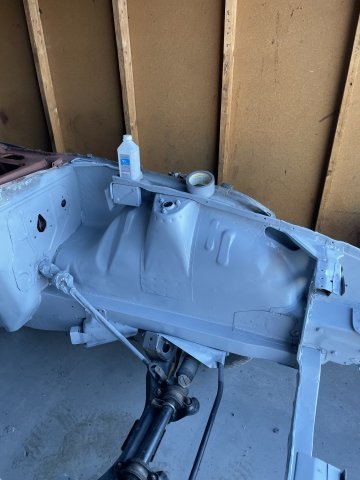
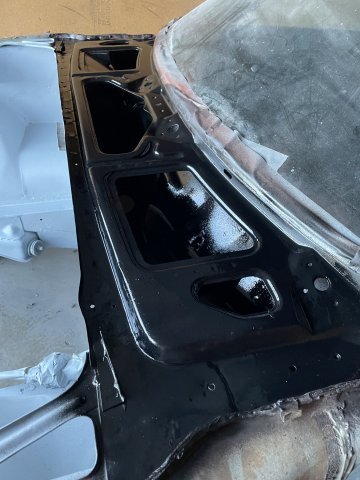
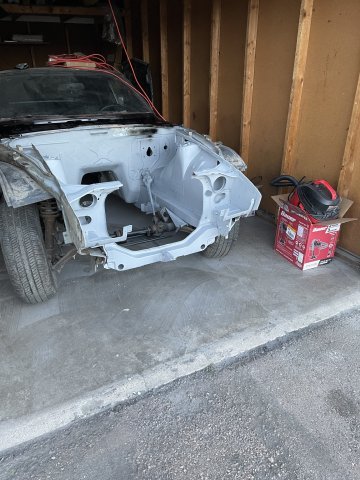
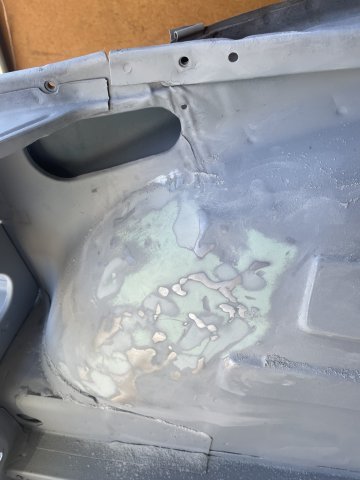
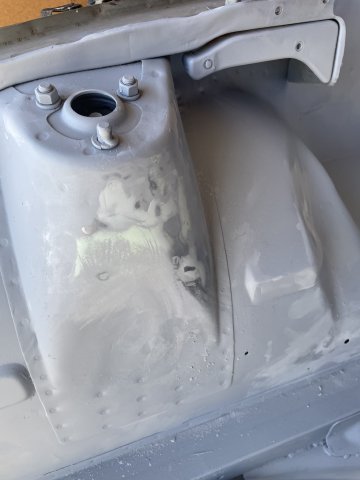
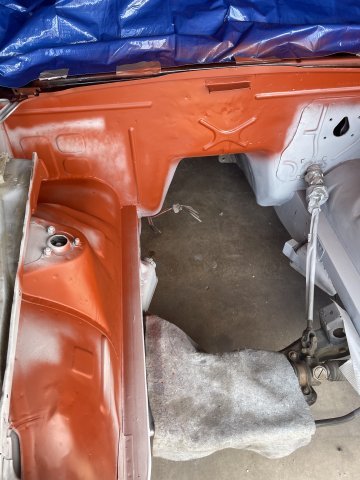
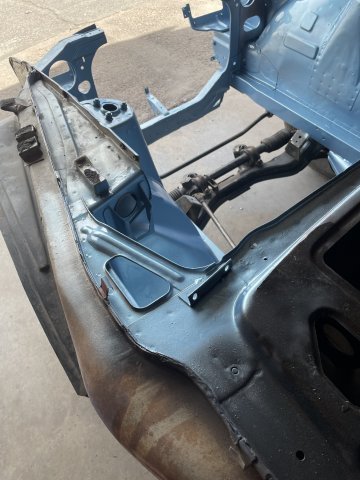
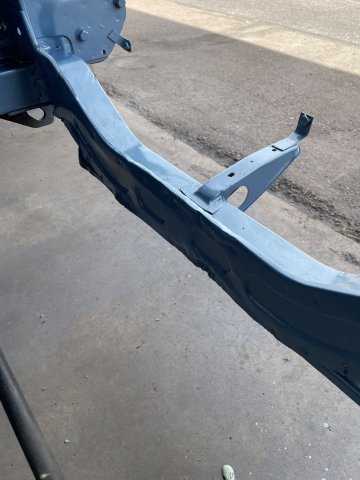
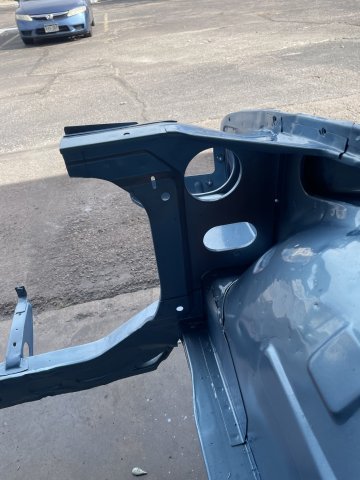
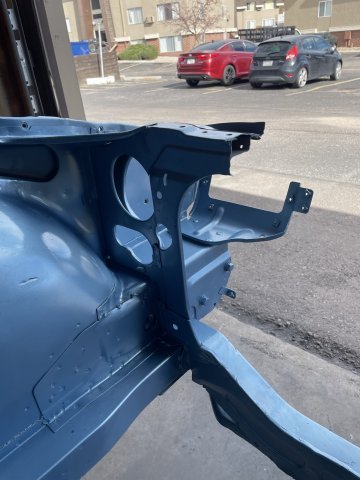
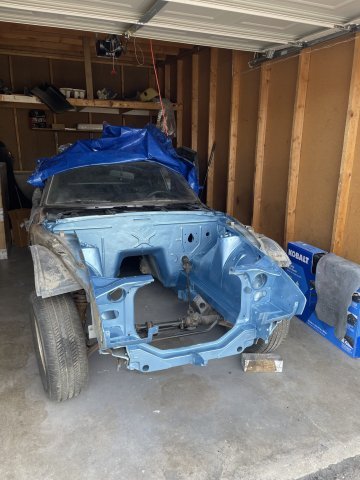
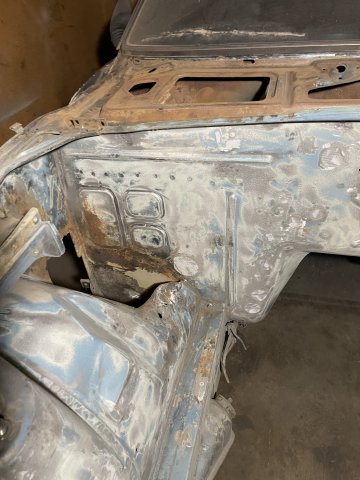
11-04-2025. I did a little bit of spot putty work this morning, have a few spots a couple thick coats of filler primer then went ahead and painted the engine compartment and cleared it. Yep, the work isn't very good.......I did what I could. PICS.
1 point
-
Unfortunately I live in the Netherlands so I will probably never be able to attend SEMA and there aren’t a lot of S30 Z’s running around here let alone modified with Apex Engineered hardware. I do plan to change that over time as the suspension kits look really good not to mention the perfect timing of new Retro Mod line which retains the original differential setup. The wife isn’t happy with me spending money on the car but I really want my 280z back on the road this spring. I’ll wait till black Friday to see if there are any good deals and then contact for an order for at least the frame rails and rear suspension.1 point
-
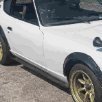
I'm currently running 15x10 wheels with a 5.25" backspace on all four corners. I use 23.0x10.5-15 Avon Slicks or Hoosier 275/35-15 tires on all four corners. I run a 1/4" spacer on the front and it just barely clears my coilovers. No spacer on rear, and I have at least a 1/2 clearance to the strut. I have a modified version of the SubtleZ body on my car which provides an extra 1.5 of clearance at all four corners. Below are some pictures with the 15x10s and SubtleZ kit.
1 point
-
thanks. God willing I will continue to. I got very lucky, buying a car looked over due to the rough paint, but clean....rails, doors everything clean no rust. 2 spots int he floors and a couple other spots, that's it. Still love my 240Z best, but this is a nice home for my ATLAS engine.1 point
-
Yes. That's the set up I have now. But as I'm hearing from different folks in my Datsun world since I posted this, replacing the inlet/ring to something else is extremely pricey.1 point
-
Well... its been almost a decade... better get restarted... Started messing with a new front turn signal. Cutting up airdam brake ducts and integrating a turn signal from a late 90's integra. I flipped the turn signal to better match the contours at the bottom of the airdam. What else is done or in the works... New interior - dash, center console, door panels, seat, carpet, gauges, sound deadening Vintage air HVAC control panel upgrade Coolant and heater hose upgrades Hydrualic hood hinge setup Silvermine Power steering Apex rear strut bar Subframe connectors Passenger seat - corbeau fx1 pro Vinyl wrapped hood Sanded/polished exterior light lens Exhaust work.... again and still Mfactory lsd T3 front sturt bar T3 harness bar Honda wiper upgrade LED headlights Skillard front lip More posts to come soon.
1 point
-
After reading the Arrington CCV Bible it looks like I actually want a dual catch can setup, with both the crank and valve cover returning through a filters catch can to the intake plenum, or somewhere before the throttle plate. This eliminates foul air modes at WOT and in either direction will still function. The PCV valve itself can be a choke point specifically at WOT due to increased blow by. The difficult part is that I have dual SU carbs that have no "plenum" and are essentially open to atmospheric.
1 point
-
I had not been on in a few years and just signed in for the first time today and saw this. I don’t know if you’re still in the group. Unfortunately not, I’m active duty military and shortly after I started I got sent overseas. I just recently got back stateside and will be starting again soon. I don’t have this Z anymore so I’ll be using my 260z.1 point
-
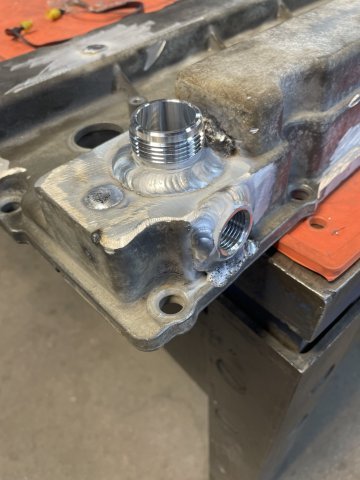
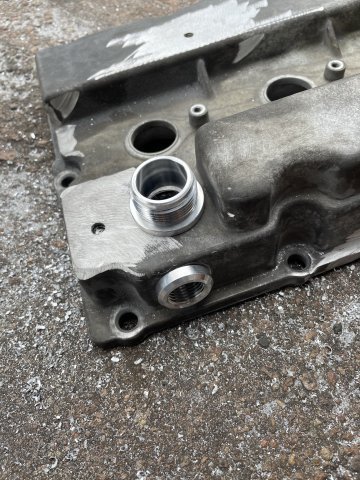
Progress pics on the valve cover and 2 pics of the intake. getting ready to go to the polisher! all the welds on the valvecover will be sanded smooth.
1 point
-
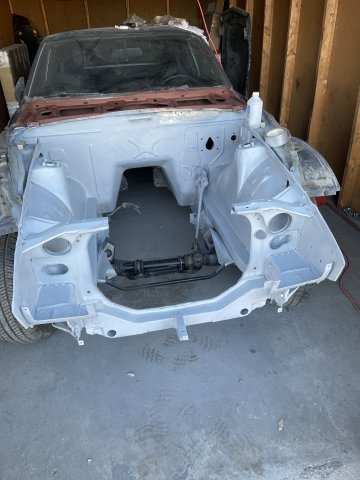
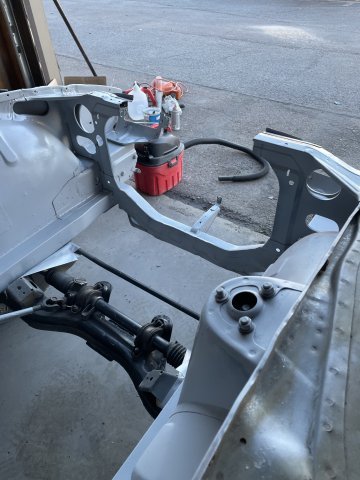
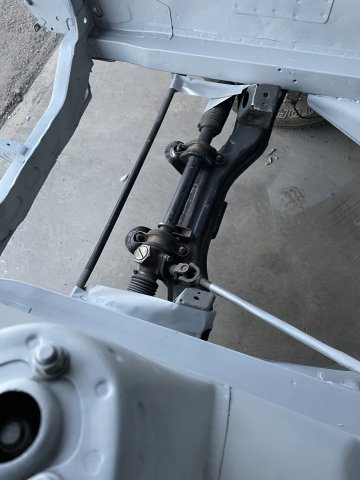
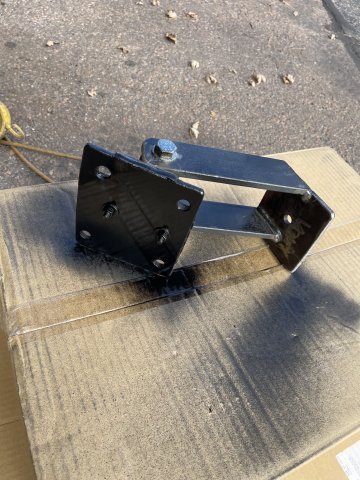
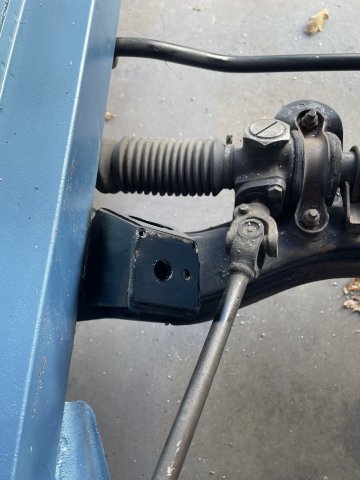
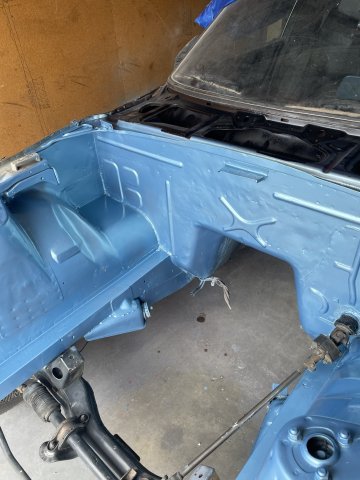
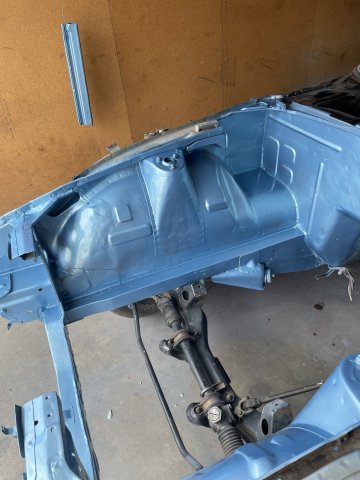
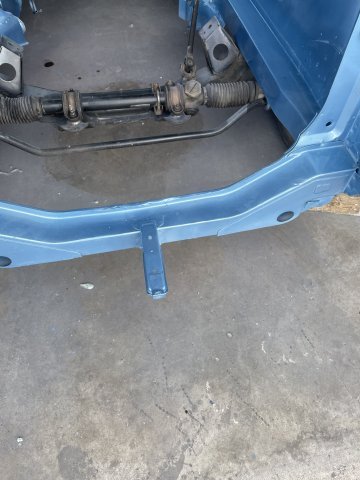
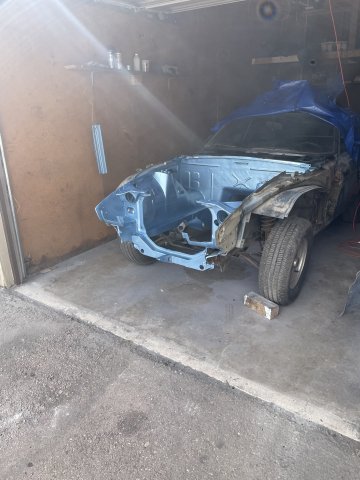
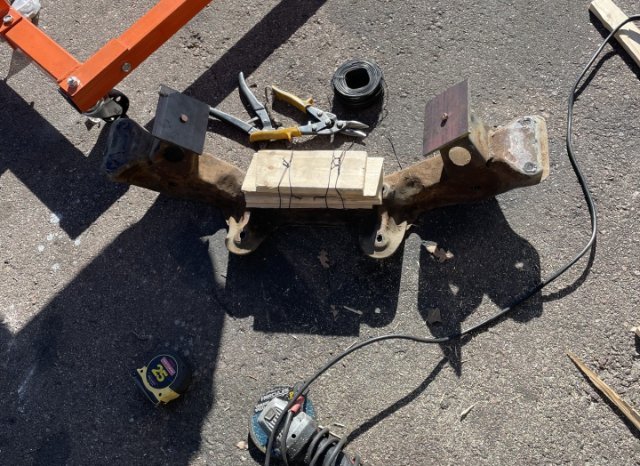
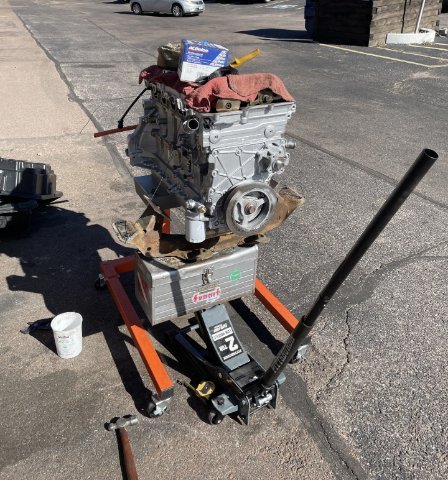
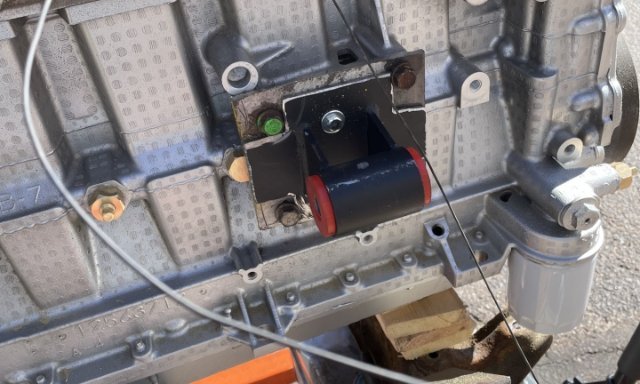
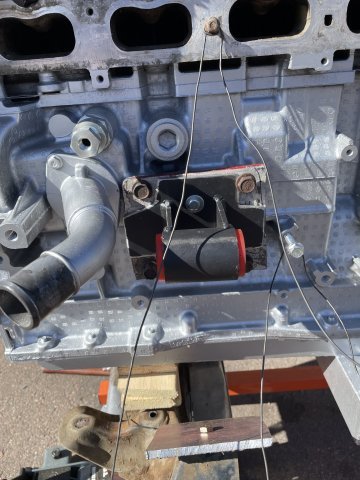
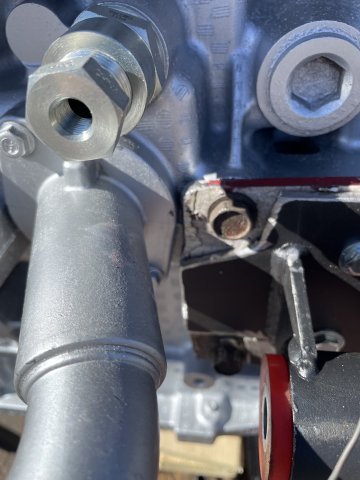
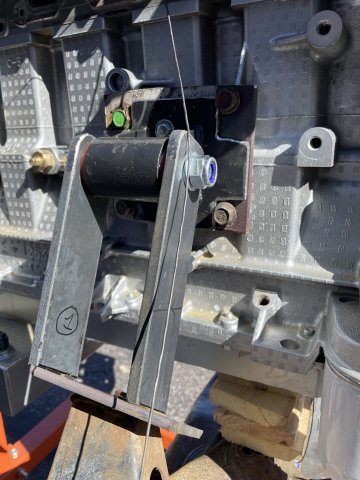
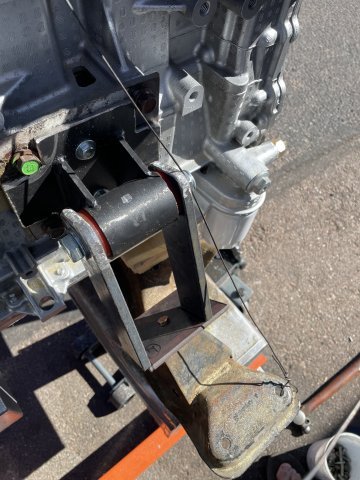
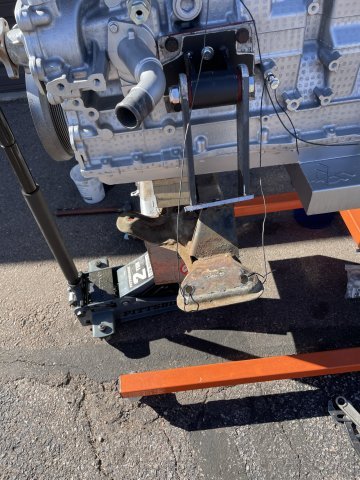
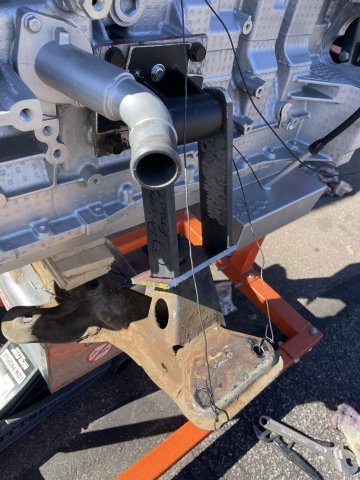
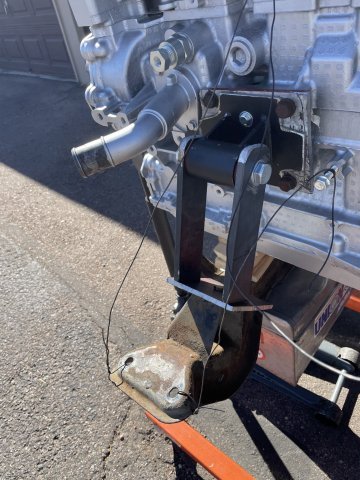
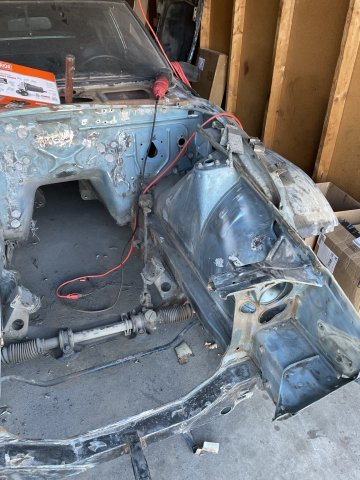
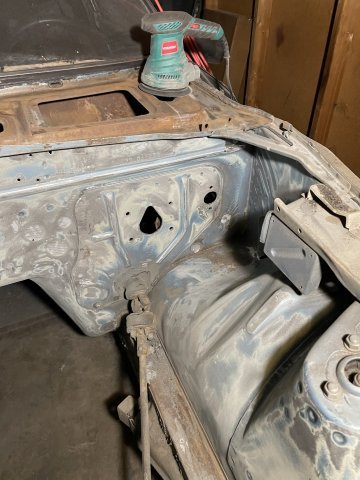
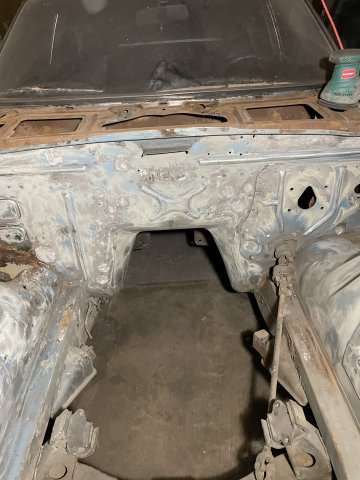
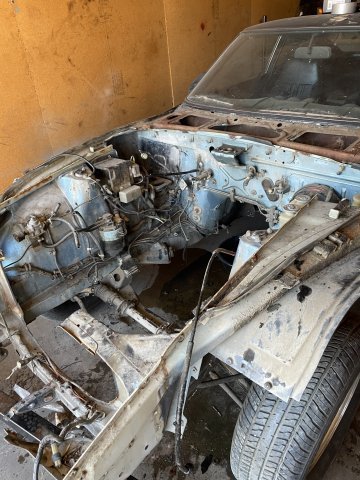
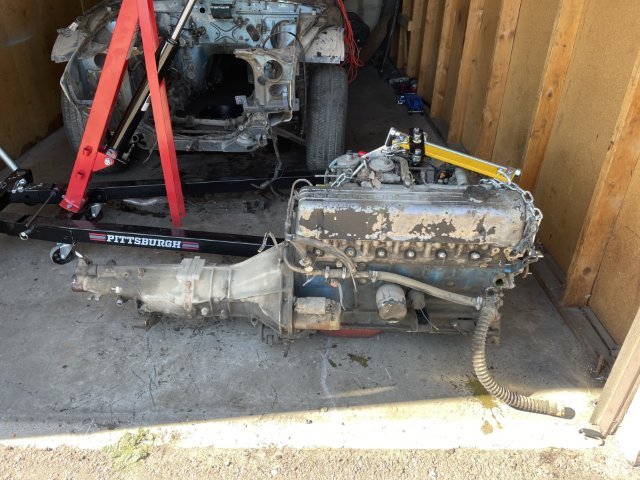
Today I got the motor mounts all done. I used my idea of holding a spare crossmember with spacers under the engine to make the mounts. 3 inches clears the steering rack with a hair of space. I used LS mounts I found on ebay for 32 bucks, and had to chop them up a bit to make them so they would weld over 1.4" steel plate that was cut and drilled to fit the 4200 block. The metal spans that it came with were too short, so I used a length of 3/16 steel bar and cut and drilled them. Then using the bolt, one at a time I pushed them up to the plate and used a sharpie to draw the angle then removed them and cut them down. You have to remember to mark everything so when apart, you don't get pieces mixed up, as the sides are not identical. After that, I boxed up my core transmission and then cleaned up a bit and headed to the other garage for 260 work. I ground off remaining brackets and other pieces that still needed to be removed in the engine compartment, then used a DA sander to get it all sanded down. The old paint etc....well 80 grit wouldn't even phase it, so I had to use 60 grit. I was able to get everything sanded down except for the corners and tight spaces. I have an elliptical sander I bought that I will use next to get all the corners sanded out with 150 grit, then go over what I finished today to let that 150 grit smooth out any sanding marks. After that, I will then slick all the panels with Dolphin glaze, and sand the entire deal in 220 grit. Then 3-4 coats of sandable filler primer to fill in any imperfections, then color, then 2-3 coats of clear. A lot of work, very dirty, but progress was made. Pics:
1 point
-
As I’ve documented on this forum before I got kind of stift by the auction company and the previous owner of my 77 280z. The frame rails are rusted and need replacement to pass inspection and something is wrong with the rear suspension. I’m trying to not spend too much money at the moment but still want good parts that will stay on the car trough out the build as doing thing twice costs more in the long run. I will have to take the car to a body shop to get the frame rails welded so I’ll be looking to get pre made frame rails to save on labor cost. That gives me two choices, 1,5mm thick reproduction rails from KF vintage or the 3mm thick rails from Apex. The KF rails are send trough a warehouse in Spain so that saves a lot on import cost for me but the Apex rails are twice as thick which may give the almost 50 year old car some much needed strength and rigidity. Does anybody have the Apex rails on there car and how are they holding up? As for the rear suspension the question is if it is the chassis itself that’s crooked or something in the suspension. As I can’t find many stories of bend chassis online I’ll take the bet that it’s the rear suspension. That means I’ll have to look for adjustable rear control arms. That way even if the chassis itself is a little bit crooked I can tune it out for now till the car will be fully restored. Again that search let me back to Apex, there was also Silver Project from Europe which was a lot cheaper but I don’t hear much good from them. Has anybody installed the rear (or front) control arms from Apex with mostly stock suspension? I currently have a list of products form Apex which interests me and I’ll probably wait till Black Friday to see if they got any good deals. I don’t know if I’ll order everything but the frame rails and rear control arms I’ll probably order. This is what I’m interested in at the moment: - Frame rails - Rear control arms - Fender brace (If the car gets welded anyway, why not) - Rear strut brace - Front control arms - Low profile outer tie rods (I run 15” atm) - Inner tie rods (because of the threat difference) - Steering knuckles All combined should give the chassis and suspension a nice upgrade and the adjustability I need to get the car on the road. I do plan on keeping the four lug setup and the coilovers that are currently on the car. I do like there coilovers but That may be too much money for now. Yesterday I contacted Apex Engineered with some questions and they claim that the suspension components I’m looking at do work with the stock components. Are there people on here running Apex components (except the track attack kits) and what is your opinion on them.1 point
-
The frame rails are nothing special except folded metal. You could make a pattern from heavy card stock and have them created locally and save a lot of money. Those would fit your car exactly. That will save you the tarrifs and the shipping. 1,5 mm thick rails should be more than enough. The other option is to split structural square tube and if you can't find a sheet metal shop. That will probably be more expensive, but is an option. The fender brace is a very simple item you could save money having made locally too. I helped a friend with a street car project and rather than weld items to the unibody and increase the potential for rust we opted to use some of the structural adhesives that new cars get built with. It's been on the car for 15 years and seems to be holding up well. Hope this helps, Cary1 point
-
I am planning to do it the right way but finding a body shop that can straighten the car is a bit difficult. I was always planning to fully strip, repair, straighten and repaint the car at some point but if it’s possible I would like to at least be able to drive the car on the road. Seeing as I don’t have a car trailer and “officially” my daily driver isn’t allowed to tow more then 1400kg it would be a lot easier to transport the car to body shops under its own power. And for that I need an valid inspection…. Instead of diving head first into an full restauration, which will take years and tens of thousands of euro’s in one go, I’m just trying to spread out the costs and take it on piece by piece. I would like to at least enjoy the car for a bit and attend some meetings in my 280z instead of my Opel Astra diesel estate. Seeing as most parts come from the US it’s a big hurdle to buy. Shipping is very expensive, there is a 4,5% import cost and then a 21% tax on the total amount. In all I pay 50% more than someone from the US for parts. This also gives me time to calm down the misses a bit as she only sees the dollar signs flying away. I have seen this spiral before and I don’t want to end up with a stranded project. I want to keep my Z for life and I will take care of her.1 point
-
Whatever frame rails you choose, have them put on by a body shop that can straighten your unibody first. You shouldn't have to use non stock parts to correct a tweaked unibody car - that's poor economics.1 point
-
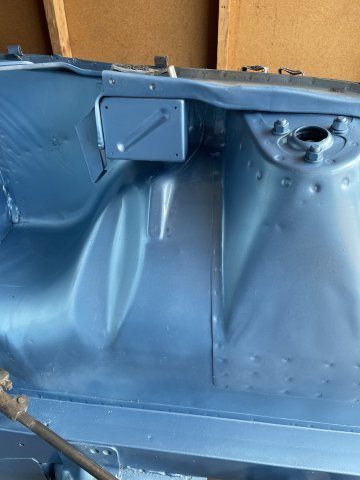
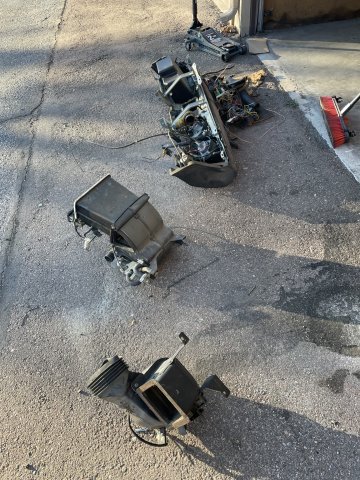
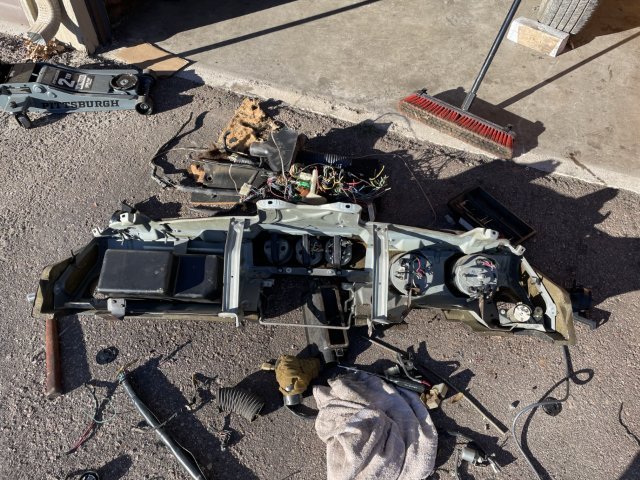
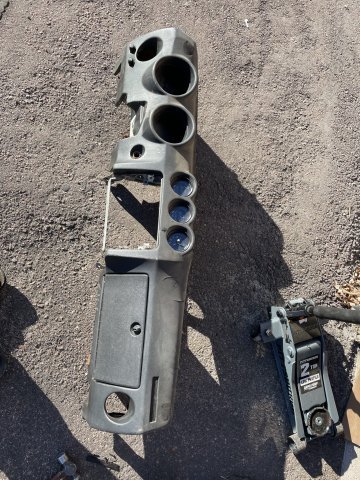
I started at dark this morning, and got the seats, center console and dash out of the 260Z. prepped the holes in dash and they are now plugged and curing. then I took some time and just gutted the whole area, to include the dash. Finished at 1:40 this afternoon.
1 point
-
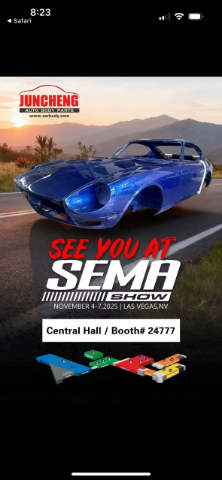
A Chinese Metal Fabrication Company is planning to unveil a Brand New complete Early Model 240Z body at the 2025 SEMA SHOW in Las Vegas on Nov 4-7. They are looking for Distributors in North America. Just consider, even if you do not need the whole body assembly, they have to created every sheet metal body stamping of the 240Z. So almost any 240Z, no matter how corroded or damaged could be bought back to life. https://www.instagram.com/reel/DOxdQynjijn/?igsh=MWk4N280Nm1zOXI= I will be attending the SEMA SHOW and will post pictures and more information when I return from the show. Please watch for my post show postings- Tool Man
1 point
-
There's a shop near me that has been advertising pre-buys for these bodies(and others). I get the impression that they're working with the manufacturer.1 point
-
Feels like the options for smaller wheels are just becoming impossible to find, at least in the US. Europe and Japan still have lots of small new cars, so I think they have a couple more options. Even the more popular size Miatas use in 225/45/15 I can only find in 200tw, but they're so much shorter than stock, I think they always look terrible and out of proportion on the Z Potenza sport looks okay. I think the 052 is out of the question as a 200tw, but moreso because of the cost. I'm trying to keep it under $200 per tire so I can spare some change for the wheels. Right now I'm thinking of the Continental Extreme Contact Sport 02. They're 340tw, but supposedly slightly better on the comfort than most other options, which I have started to care more about now that the car is much nicer haha. Know the Toyo Proxes R1R are popular for some guys running 16s, but they're only in a 225/45 profile. I appreciate the support! I know many posts have nothing people can really respond to, so sometimes it feels like you're just typing into the wind, so I appreciate that people have been enjoying the build all these years.1 point
-
Update - The Kumho tires I was using as a street option are no longer available. It looks like the only tire options in 225/50 are all 200 treadwear or under, so basically track only. I'd be interested in a couple of the 200tw options, but it seems like a lot of wear and expensive for a cruiser, so it looks like moving up to 16" wheels is the only option now1 point
-
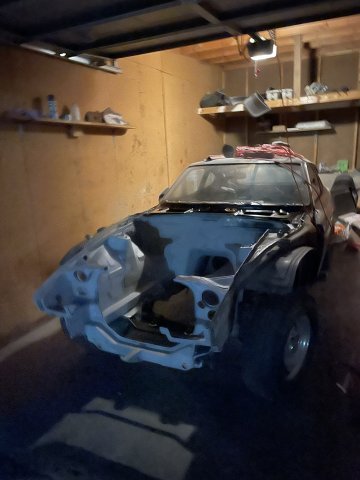
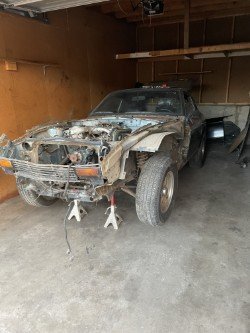
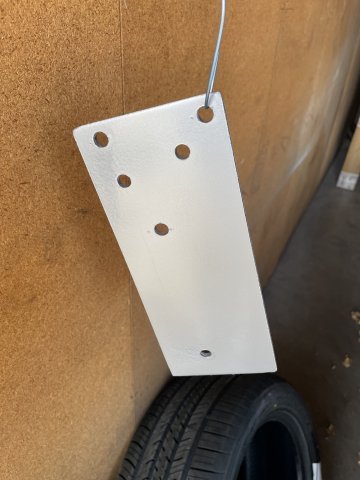
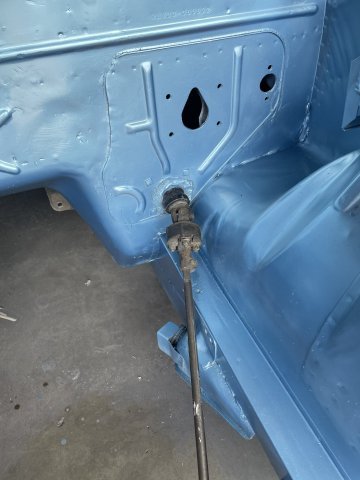
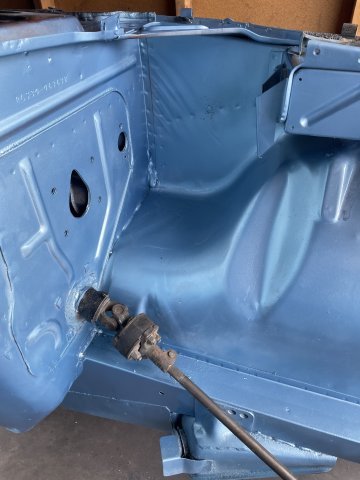
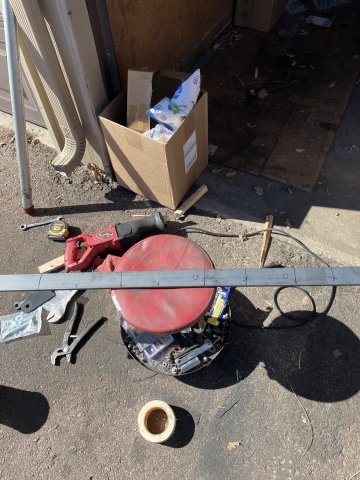
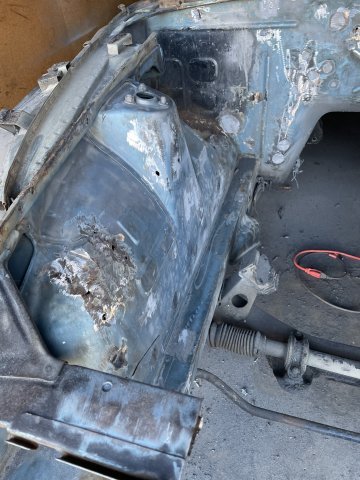
10-15-2025. Busy morning in the garage. My 260Z gave up its engine and trans to make way for a future ATLAS install. And yes, it fought me A LOT. My new Harbor Freight hoist gave out midway through, but I got it to limp along with 2 floor jacks and a neighbor guy to basically wrestle it out. From now on, engine only....no more transmission attached for me. Yep....I cut the firewall bracing. It was my plan to do so anyway, and to reinforce and make it removable. I measured before cutting it and sure enough it widened 1/4 inch after cut. After I have made the brackets for re-installing the piece, I will simply use a ratchet strap to pull it back to the correct distance and bolt it in with grade 8 bolts. All nice and pretty. reinforced with thick plate steel. Inside the tubing I will put a spacer for the bolt to go through so when tightened it will keep the tubing from buckling. We move forward!
1 point
-
Thanks jhm. Probably get a lot of mean looks taking such a clean shell and making a hot rod out of it.1 point
-
1 point
-
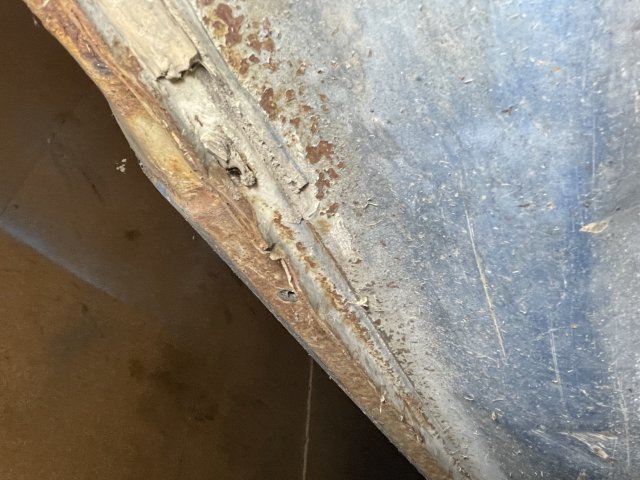
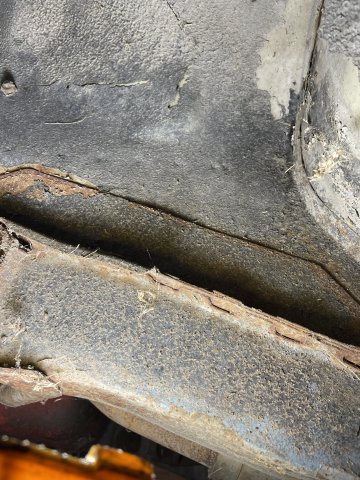
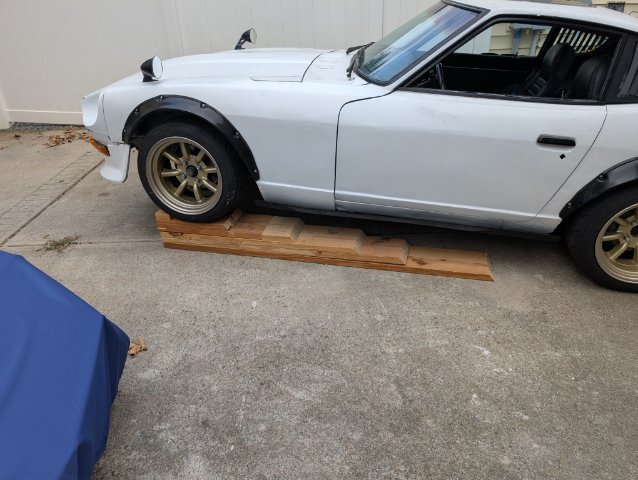
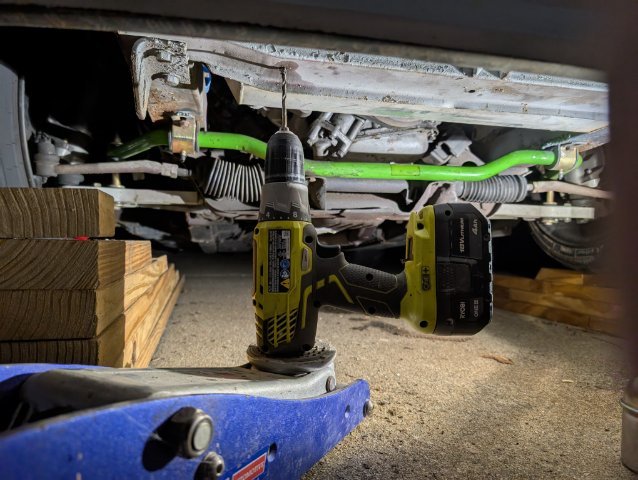
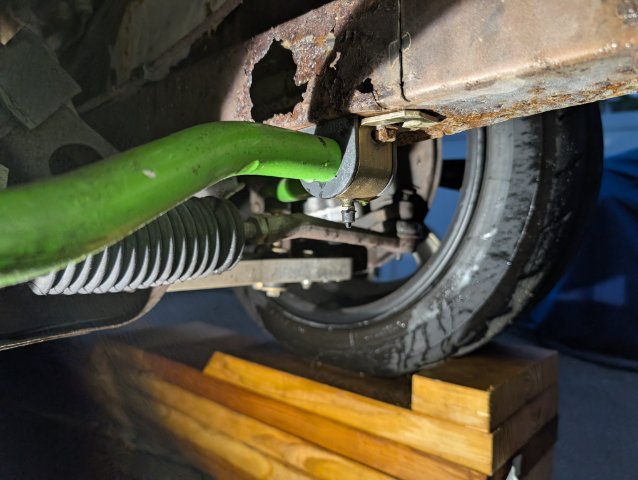
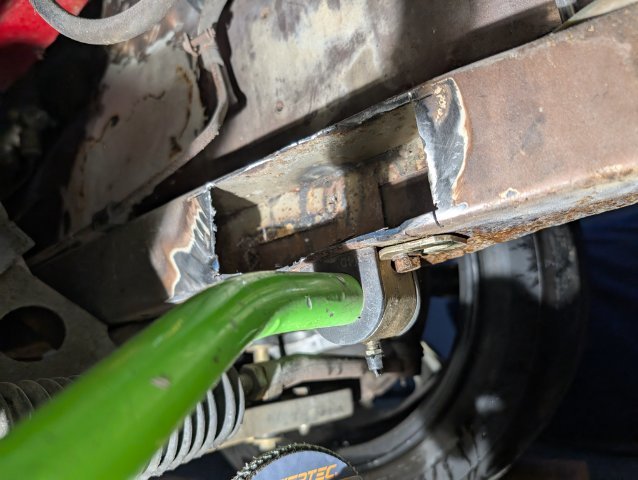
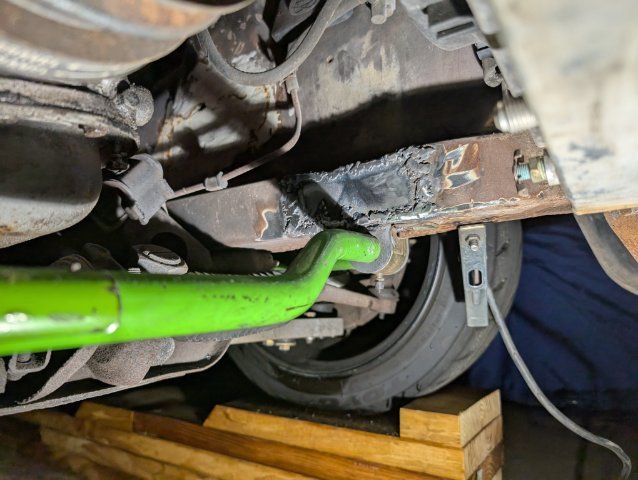
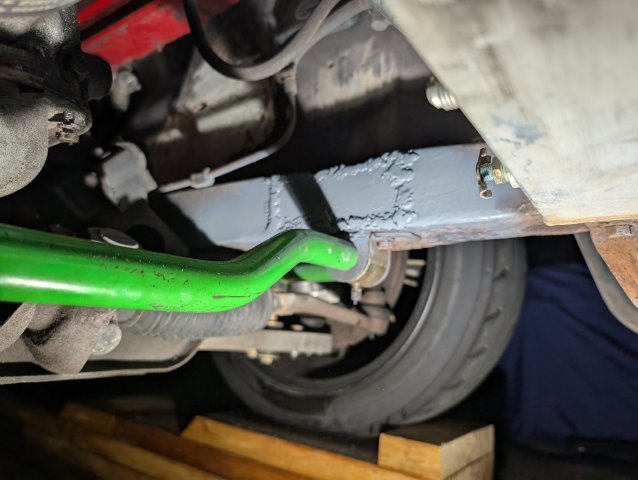
This week, I feel like I didn't get nearly as much done is I wanted. I went to a local shop and got an alignment done. I built some low profile ramps to make jacking up the car easier, and it is 100% better. I also gave the car a wash because it was filthy from sitting in the garage for so long. I also drilled out the rusted bolts from the skid plate. I removed the skid plate a couple years ago to fix an oil leak. All the bolts were rusted, so I cut the heads off the bolts just to get the skid plate off. I regret that now, because it was a pain in the butt to drill out all the bolts. Now, I need to go back and tap the holes for some new hardware. I also found some more rust. Both sides of the frame rails where the sway bar attach are pretty bad. I don't remember them being this bad when I first did rust repair. I upgraded to a beefier sway bar about 1,000 miles ago. I also have driven the car pretty hard through corners and turn since upgrading the suspension. I wonder if the new bar and hard driving could have brought some rust I missed to the fore front. I'm not an amazing welder, but I'm also not awful. If I was doing this correctly, I should have removed the sway bar to get more access, but I feel like it's good enough for my standards. I also started soaking the exhaust bolts/nuts in PB blaster because that has to come off next so I can fix the leak. The goal this week is to: finish the exhaust, install the skid plate, more rust repair, and adjust the front suspension to sit better (it is a little high for me right now.)
1 point
-
Will do. I’m going to go with some wide wheels and tires up front, somewhere between 305s up to 325s. With all that rubber the power steering will be a huge help.1 point
-
Yes, still working on then, just have not posted anything. Bought some expensive components that take time to recover from. A blank PAMS head, that I then designed and has DelWest make me titanium intake valves, Inconel mnemonic stainless steel exhaust valves, also MoldStar 90 seats and guides. Had it assembled, and ports cleaned up for some nice flow numbers. Also purchased a Nismo 6 Speed Trans that was also strengthened and modified by HPI in Japan. I take some progress pics soon.1 point
-
I have 205/55/15 7.5" in front and 225/50/15 8.75" in rear.1 point