madkaw
-
Posts
2366 -
Joined
-
Last visited
-
Days Won
27
Content Type
Profiles
Forums
Blogs
Events
Gallery
Downloads
Store
Everything posted by madkaw
-
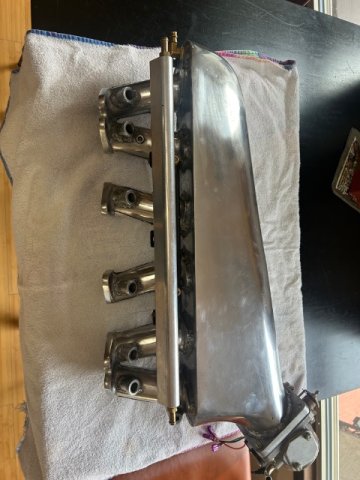
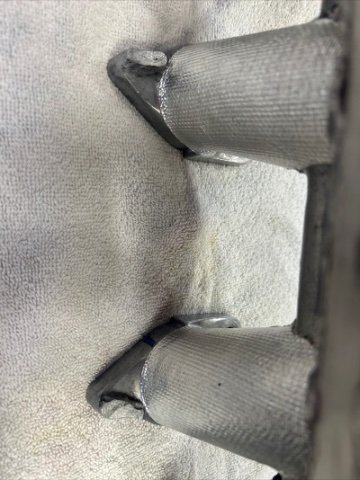
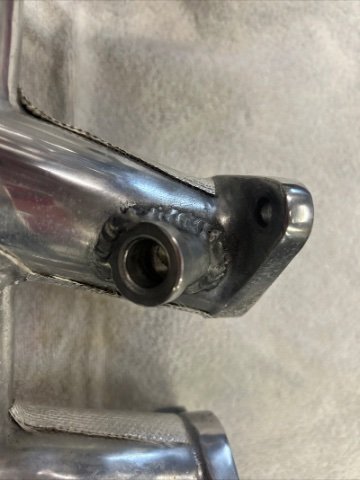
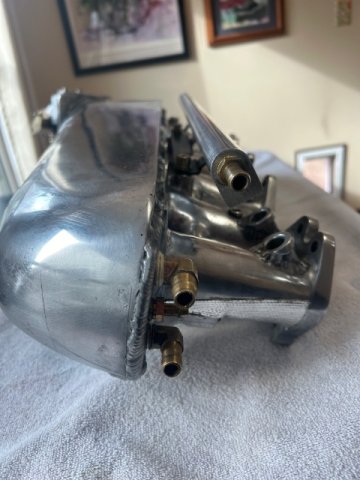
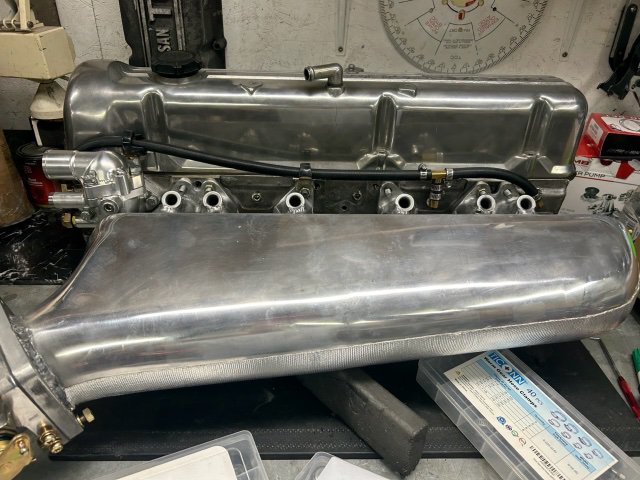
Custom Datsun/Nissan L6 intake manifold with fuel rail and and BBK throttle body with TPS. Built on a Cannon intake manifold this custom intake manifold should bolt to any L6 cylinder head . I ran this manifold on a N47 head with injector cut outs on the head with no issues - just need to use proper gasket . Mates up with early heads with no injector cut outs also . Runners are 37mm at the head surface tapering up to 44mm at the manifold plenum . BBK throttle body is 75mm . I used cable linkage mounted to black stand off bracket in the pic . Injector bungs are for 14mm injectors . Custom fuel rail fitted with this manifold has 1/4 NPT threads at the ends with 5/16” nipples currently . Manifold has 3 vacuum ports at the end and also PCV on the bottom of the plenum . Cannon mounting flanges at head are standard thickness and do not require step washers . My project is moving a different direction and selling off parts that I will no longer be using . No defects with this manifold . I smoothed welds and polished the top surfaces only since that’s all that’s visible . There is heat wrap on runner on bottom sides to protect against heat . I had no issues and this manifold performed great. asking 500$ plus shipping PM or sfinnerty1018@gmail.com

-
Been rocking these seats for years on my Z . It makes riding in my Z so much better for this old mans body . Nice work!
-
No luck boss . I must sold it or gave it away
-
I’ll have to look but I doubt it . I’ll reply on here if I do
-
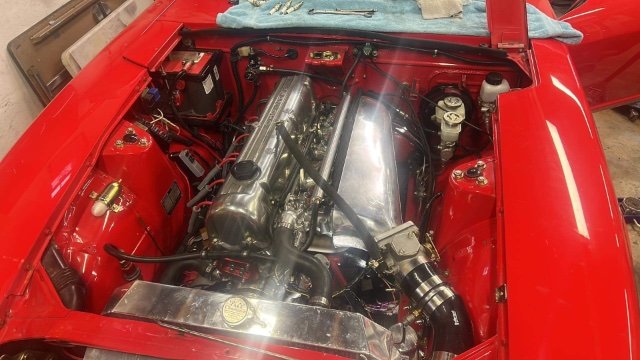
Can’t believe it’s been so long since I updated this thread . Current pics of the intake I made .
-
That looks about right . It allows a lot of movement which I’m not sure that is all that great for anything over stock
-

SU carb question....SM needles, 5.5 turns down.....wow
madkaw replied to A to Z's topic in Fuel Delivery
I went thru this recently on a customers car . Similar L28 with a Maxima head but with a Bonk cam -520 lift . This car was an automatic which really made it a challenge . After playing with float levels I ended up about 4.5 turns with SM needles . Maybe you are pulling air from somewhere else ? I ran an electric pump if that makes a difference . -
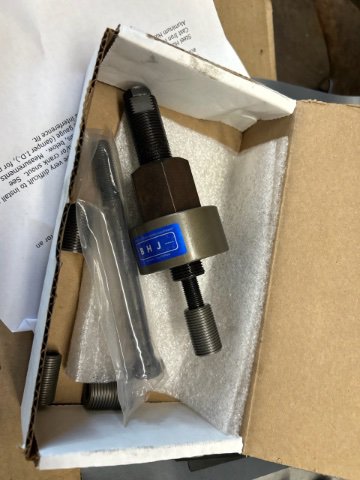
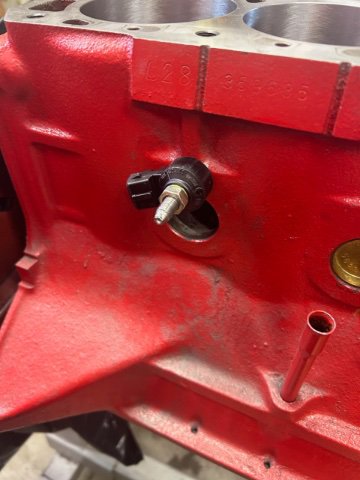
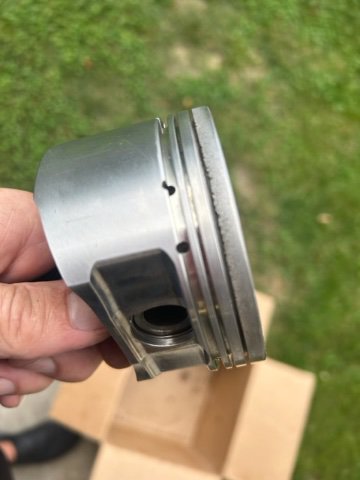
Some good news ! Rebello will be able to come up with one piston for me ! BHJ Dynamics replaced my damper for free ! Their own investigation of the damper showed too tight of a tolerance for the press fit . That caused the initial galling and it got worse over time . I went ahead and purchased their installer to help make sure I get it installed properly . Really happy with Chris at BHJ - he stood by his product . Maybe should have done this earlier but I will be using the head cooling mod on 5&6 cylinders . Also going to be more conservative with my timing . Also installing a knock sensor - but this is a N42 block and had to come up with a location for it . This will take some serious calibration to make it work - if it will work in this location . I had the module already installed on my MS3 . This is a Bosch sensor
-
I’m sorry but I didn’t say anything about loose main bolts - only the crank bolt
-
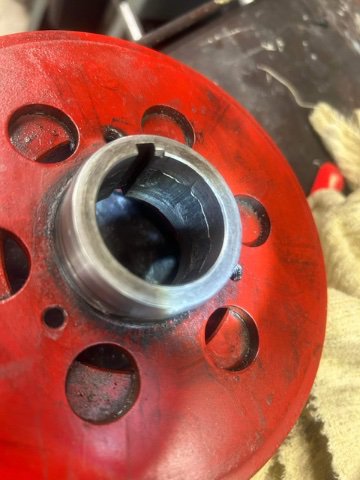
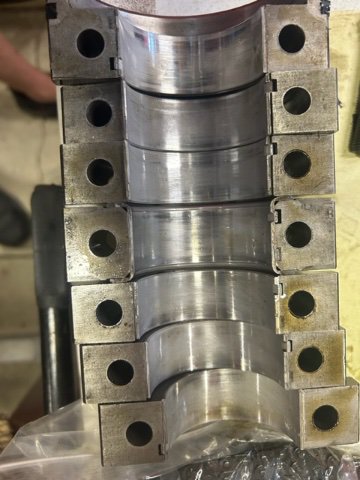
The latest . There was no signs of trouble before I found this . I was changing out cams and doing more port work when someone noticed in a pic that I had 1&3 pistons swapped - dumb ass . Look liked my front seal was leaking so I went to change that and it took my a half day to get the damper off . Decided to put some fresh rings in and found a broken ring in #6 . So here we go with a complete rebuild . The bearings had some wear and it might be from dirty air being sucked in the chambers . 4500 miles total on this I had done lots of timing changes with as much as 37 degrees total at WOT - probably too much . I drive this engine hard . Rebello told me I should have left the slinger off . Also to make sure I get 150lbs on the damper . Hope I can order 1 pistons - though mine are custom- ugh. Not sure this change the way I drive it but I will be better about the areas I messed up
-
I run 17x8.5 +4 offset . Not sure the offsets are a clear indicator of dish size . I’m going to run 235/45/17’s . I think it’s more about wheel design
-
SOLD
-
That’s not right . You are doing the right tests. Nissan clearances should be tight . I’d take it somewhere else . Most guides come sized that the intake will be .0015 and the exhaust will be .00025 . They might tighten up during install . I just went through this . The machine shop honed out the guides to .002 - so they said . It’s a bit tricky to measure guides . I doubt after install the guides needed anything after install . Nissan says the clearance is .0008- .0015 for the intake .
-
When I finally got the head on a work bench and measured the intake ports I realized that I left these smaller than other heads . It was necked down to 32mm in most ports . So I opened them up to 35mm - which is the absolute limit based on a head I cut up . I do have Bonks- stage 2 cam on hand which is probably better suited for my intake - but I might try both . I think the Bonk -1 cam would give better numbers based on increasing my port size . I know bigger is not always better - but compared to all out porting on the N42 , my porting is conservative at 35mm. The intake has been welded on once again . Flange is in the right spot and I decided to weld steps on the flange to eliminate the step washers . Of course after all this welding I was skeptical this flange was flat anymore . I took to my friend/machinist/ welder/ CFD modeler/ and put it on his surface plate . It was bad . Because of its odd shape he couldn’t use his milk and had to hand scrap it flat . Andy is true expert at this . It took it little bit of time but he got it flat . It’s almost an art form . I also had him flatten out my flanges in my exhaust . I couldn’t get it to seal right and my attempts were sad - lol.
-
Very cool. Super impressed with your fab skills and like your art/function approach . Looks like a header that Kameari would make. Need a NA version !!
-
Can you tell me or did you do a CFD work with your plenum using on a NA engine? Does this style plenum only work well for turbo engines ?
-
What about your turbo plenum ! That’s what I want to see !!
-
Why the title NA vs Turbo? Also glad you are back . Anxious to see more work done on your turbo plenum . Most of your pics are gone off the site so looking forward to seeing some of those again .
-
Need Help Retrieving my user name and password
madkaw replied to aka monZter's topic in Site Support
Back on the grid !! Welcome ! -
NA 3.1L=>head & camshaft questions. No shortcuts, max
madkaw replied to zredbaron's topic in Nissan L6 Forum
Sounds good brother . I still remember your videos on the back roads breaking the back tire loose . Helped to motivate me ! Good luck and I wishing you the best -
Help - Drivable Base Tune 83 280zx upgrade with MS3
madkaw replied to taijirich's topic in MegaSquirt
Maybe chickenman #richard Boyk will read this and help you out . Might try Facebook on the church of L page . Many people there can help too . I run NA so not sure that would be a good tune for you . Hopefully Chris will respond also . So it starts and idle but what’s the issue with driving ? -
They are all the same height . 108.1 is the dimension I believe
-
Looking for this trans . Just a core will do or even just the bell housing . sfinnerty1018@gmail.com
-
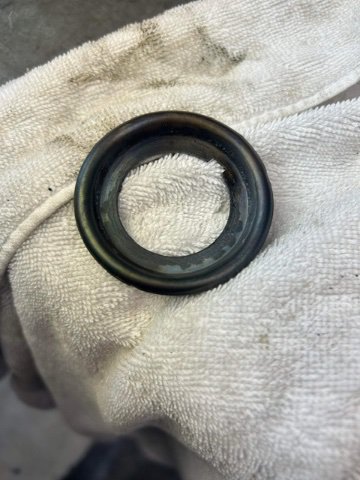
The ones that I got with Vintage rubber( aftermarket) fit like ass . I had to make cuts to allow the seal to sit correctly in the hole . So I will have to use some seam sealer to supplement the sealing of the seal . I’ll take a pic .
-
I believe the RTV was meant to applied at the same time as you install the seal so it dries around the seal . It’s not a factory pump . A factory pump should have a cast impeller that is much more efficient moving the water .