madkaw
-
Posts
2366 -
Joined
-
Last visited
-
Days Won
27
Content Type
Profiles
Forums
Blogs
Events
Gallery
Downloads
Store
Everything posted by madkaw
-
bump
-
Any feedback on TEP-Top End performance. I was considering flywheel lighteneing service from them, but haven't found much info about them from the Z sites. Any references or warnings would be appreciated.
-
Man I can't wait to get my little 2.4 going and i hope it sounds nearly that good. It would be interesting to see you put that car on the drag strip just to see if all those numbers equate to a decent time on the 1/4 mile. Sorry if its been asked already, but what flywheel are you running?
-
My glass packs were 12$ a side. I cannot comment on the noise level since i am not running yet, but I think running straight pipes to save a buck doesn't make sense. I would try and fit some small glasspacks at least. I am going to run a crossover from my 6-to 2 setup to help eliminate the drone I read about. I want a healthy tone from my inline, I think it sounds good, but I don't want overbearing .

-

Show Off Your Engine Bay! Pics Wanted, L-series
madkaw replied to philipl's topic in Nissan L6 Forum
Well actually he posted OR JUST THERE ENGINES -
Show Off Your Engine Bay! Pics Wanted, L-series
madkaw replied to philipl's topic in Nissan L6 Forum
l24 , ain't it pretty
-
I bought this guy. It takes a little work to get it to spray right. You are spraying glue you know I bought a gallon of glue figuring I would go thru a lot of it. I tries using spray can glue, but this works much better at being more precise with the spray.
-
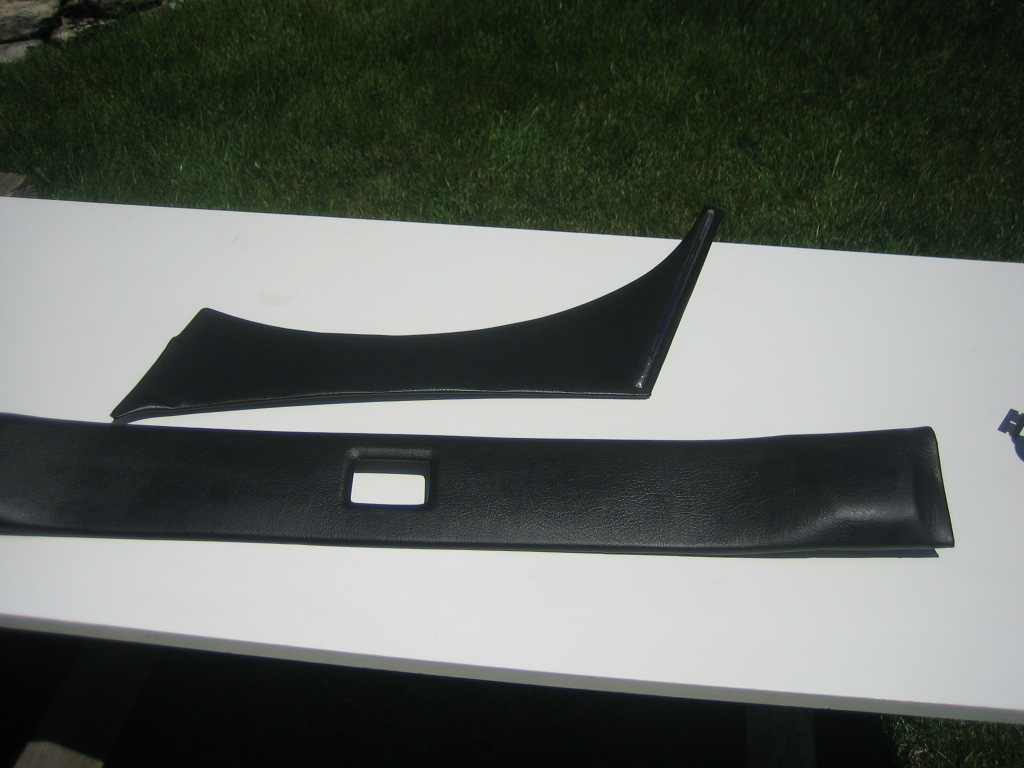
My goal was to cover all the plastic pieces also, but it is harder then you think. The rear quarter window pieces are a complex with the window set "in" effect. I couldn't get the Joanne stuff to stretch good enough without tearing. Look at the "allsport vinyl" on that website. It's not an exact match but it would stretch much better. I need to order a sample to see how it matches up. I tore up a lot of the Joannes stuff trying to make it stretch far enough, so I need to try something else. Those books are helpful, but it's trial and error my man. That overhead piece I covered didn't have any foam under it, even though I do have some foam available. I left that step out to see if I could even do this endevour. Also, I fiberglasses the back of all my panels first so they would hold together during this process. I just layed one layer of cloth over them and called it good. It should keep them from cracking anymore. You could use later model panels that are thicker to eliminate this stage, but the early panels need the strength IMHO.
-
Here's a linky to the place I have dealt with. better prices then Joanne fabrics, but if your not sure what you want you will have to get samples from them. Joanne has a perfect match for the vinyl pattern in the Z car, I am quite sure your "Auto Trim Store" has it too, for less. they also have some great looking carbon fiber looking vinyl which I have considered. I would also suggest their glue gun and glue(by the gallon) if your going to do it right. I started mine last summer , but ran out of warm days. This is strictly and outside job for me with the fumes. The pic is of the overhead panel I did with the Joanne vinyl. You will find that joannes stuff will not stretch as good as some of the better 4 way stuff, but this simple shape it worked well. http://www.yourautotrim.com/
-
I had RK back in 1990 I guess when my employer still paid for it. I had terrible vision-like 20-400 or something like that. Well the RK got me to 20-150 which is really a major improvement. I didn't feel so dependent on glasses. My doc said that in a feww years the laser will be perfected and I would be able to touch the RK up to get to 20-20. Well 18 years later I went back to the same doc who had his own laser center and we did the prk. I actually had no options but PRK because I had my flap sliced up by the original rk and he said it would just fall apart. He says the PRK is superior anyway, just much more pain and aggravation-and it was. I now have 20-15 in both eyes-amazing. Once again though-Tony is right. There were conditions that I thought were caused by my contacts , but are actually because of dry eye.
-
TABCO body parts (more to be offered???)
madkaw replied to Horatio's topic in S30 Series - 240z, 260z, 280z
John, you make agood point, that is why I added about the porsche panels. Though the porsche panels were not exterior body, they still were a crappy fit. If you can buy anything from the original manufacturer , that is the way to go. It might be way more expensive, but it will fit right. -
TABCO body parts (more to be offered???)
madkaw replied to Horatio's topic in S30 Series - 240z, 260z, 280z
Dog legs are the only panels I used from them. They weren't pressed evenly or squarely. In all fairness I guess after market usually is not that great when it comes to body panels. I repaired a 911 earlier this year and expected to get decent panels for that car, but I had to do a lot of adjustments on the "universal type" panel. -
TABCO body parts (more to be offered???)
madkaw replied to Horatio's topic in S30 Series - 240z, 260z, 280z
I wasn't happy with the tabco stuff I used. It did not fit well. Maybe they should work on perfecting the stuff they sell now! -
For the hobbyist the cheap old chop saw was good for me. Yes it makes a little mess, but I prepare for that. Spend less on the saw and buy your self a decent 12" dics sander/belt sander combo and you can sand any angle you need. I found that the with the one and only mandrel exhaust system that I put together(I am making the point that I am only a hobbyist), that the disc sander was invaluable for making the finally fitment.IMHO
-
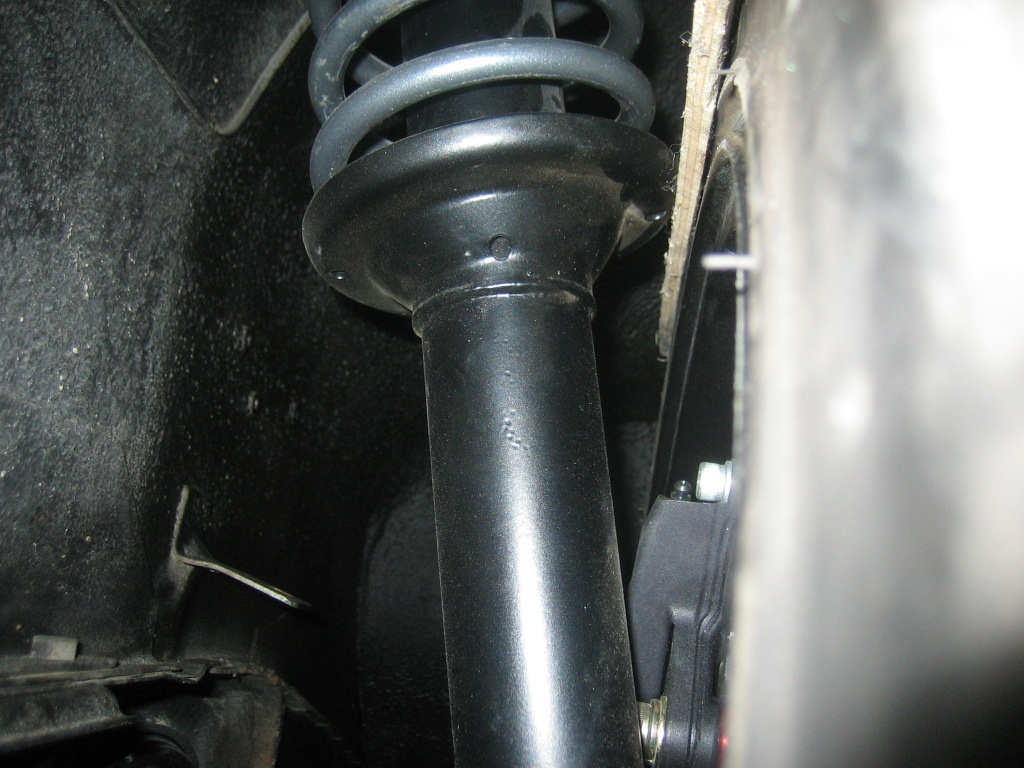
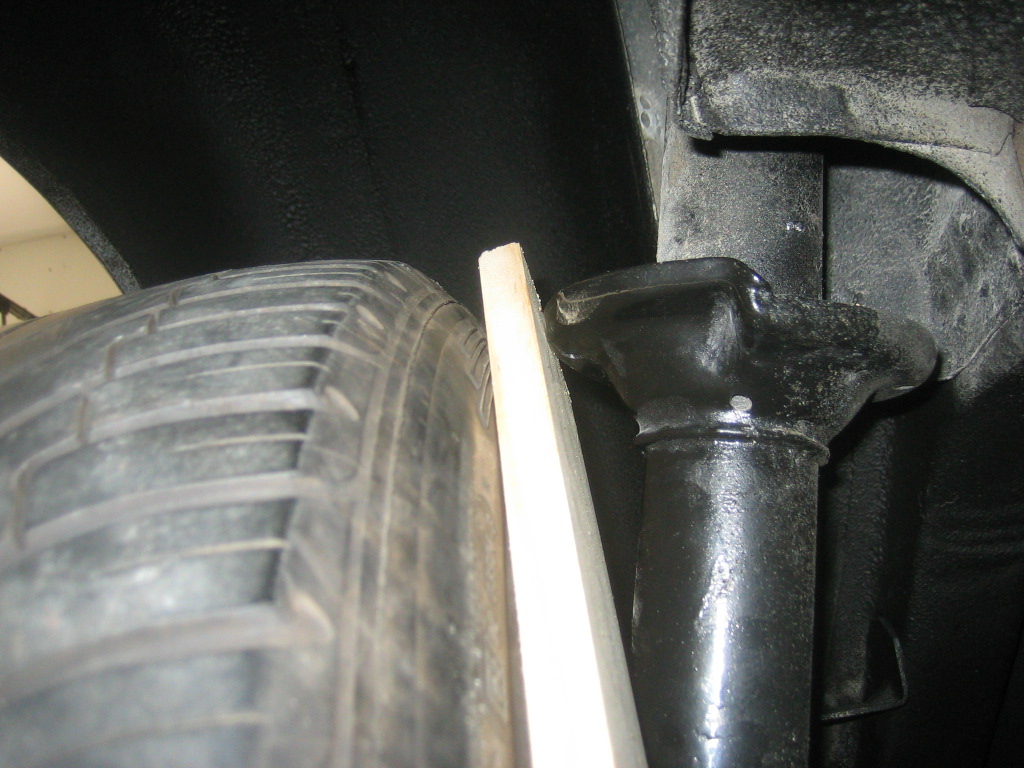
I thought I would post pics of these 8.5's since there has been many questions regarding fitment of various sizes. Chris, I hope you don't mind since they aren't the group buy size, but I maybe it will help answer some of the questions. If you notice the lip is about the same size if not exactly the same size, but the spokes are curved. Kim calls these a rbr on the site, but they are definitely the curved spoke like the rb. These wheels will fit without any fender cutting or rolling as long as you stay under a 235 tire. I am running the 245 and I had to trim a lot off the rear lip and the front is very tight on the strut with a little modification needed. The pics are showing the fit with 235 tires, so it actually got a little tighter with my 245's. The front strut perch was hammered flat on the tire side to gain a 1/4", so the spacing actually remained the same for the tire sizes. I hope this helps answer some questions.
-
Wheel Show! Post your pics of you wheels
madkaw replied to k3werra's topic in Brakes, Wheels, Suspension and Chassis
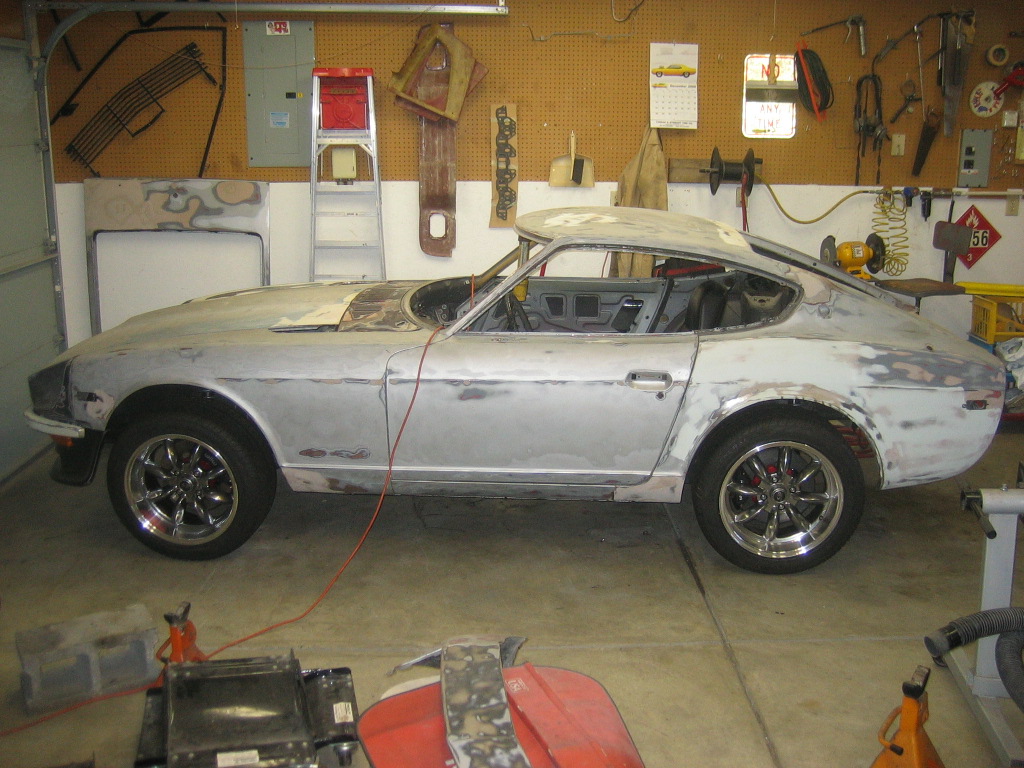
I finally took the car off the jacks today after it seems years. Actually it has been up there for the a while to install my wildwoods all the way around and rerun brake lines-PITA. This is the first day I have seen the car with the Rotas and the tires sitting on the ground. By the way the tires are 245/45/17's.
-
Yes I have dealt with this, just weld fill the hole and redrill. Should last for another 30 years. Just try and get the hole close to where it originally was-no rocket science!
-
If you don't want to cut your fenders you will HAVE TO use the 8.5's with the +04 offset-period. I have the 8.5's on my car and it very, very tight with 245 tires and I had to trim the fender lips on the rear to make it work. The 8.5's have the same lip size-3", but they are look more like the rbs because of the curved spokes. Hope this helps
-
OEM metric brake line fittings
madkaw replied to Savage42's topic in Brakes, Wheels, Suspension and Chassis
Look for a local vendor of these guys! http://www.brakequip.com/mfthread.html -
OEM metric brake line fittings
madkaw replied to Savage42's topic in Brakes, Wheels, Suspension and Chassis
Napa! -
Metric Brake Adaptor
madkaw replied to Scottie-GNZ's topic in Brakes, Wheels, Suspension and Chassis
http://www.brakequip.com/mfthread.html -
Probably too much info in the title, but I tried to cover it all:-D I have recently done my complete 4 wheel wildwood brake set up and can't be happier. I was doing a lot searching the other day about pedal travel and adjustments and stumbled on a possible screw up by me. I noticed after the fact that I was suppose to switch around lines to the master since the ZX master is different as far as front and rear reservoir. My stupid question is that can you just swap out the reserviors on the top of the master and put the larger tank for the fronts? maybe I am not understanding the internals of the master completely, but is there a difference internally? Is it just the reserviors? . Now the ZX 15/16 MC was made for 4 wheel disc or not? What would be the effect of just swapping the reserviors and not the lines? Is not the pressure the same at all corners just regulated by the proportioning valve? Any help in understanding this would be great.
-
Differential mounted E-brake
madkaw replied to rudypoochris's topic in Brakes, Wheels, Suspension and Chassis
Chris, I forgot you had this project going on besides the rota wheels, your a busy man. Now that I have installed my wildwoods all around I will be interested in this project. I set my line lock/hydraulic brake the other day for the first time, after bleeding my new brakes for the first time, and the rears held for an hour or so. I don't know what to expect from a line lock, but I wouldn't think AZC would sell it if it would cause damage to the seals over time. Since my car will rarely be parked on a hill(indianapolis), the parking brake was not that important to me, but I would still like to have something other then the line lock. I am envious of your fabrication skills and look forward to seeing updates -
Flaring brake lines-need advice
madkaw replied to madkaw's topic in Brakes, Wheels, Suspension and Chassis
I found a business that would make up custom line lengths with the different line ends already installed. They also sent an adapter to go from metric to standard for my other fitting. I believe I was using an inferior tool, but I will take part of the blame also I guess. I will look at the sight though, I would like to see what I was messing up on. I watched the video and I basically did everything that was on that video, but my flares did not hold up. Sometimes you just need to stop wasting so much time on one aspect of your project and move on to the next. I spent 2 days practicing making flares and I couldn't get 2 of them to look the same. Brakes are one area I don't want to second guess anything. Thanks -
You will be VERY happy with the brakes. This kit is very well thought out and the parts are all top quality-down to the hardware. The biggest hassle with this installation(for me) has been the proportioing valve. You are going from metric to a SAE , which has taken some work and research.