madkaw
-
Posts
2366 -
Joined
-
Last visited
-
Days Won
27
Content Type
Profiles
Forums
Blogs
Events
Gallery
Downloads
Store
Everything posted by madkaw
-
Once again searching has left my little brain hurting more then anything.:ugg: I have a 2.4 that i am mating to a 82 turbo BWt-5. When I had the engine assemblies balanced I gave the machinist the 225mm flywheel instead of the 240mm flywheel. From what i read from the archives the 225mm will be fine for my hot street motor. I want to use the 225mm because it has been balanced but i want to make sure i put this together correctly. I have read that for my set-up, I can use the 225mm with the BWt-5 as long as I use the 225mm throw out collar along with the 225mm clutch kit. Do I also need to use a fork from a 225mm flywheel? I would be glad to hear any good deals anyone has gotten on a performance clutch for their car. Please correct me if i have this wrong so I can get this clutch ordered.
-

Wheel Show! Post your pics of you wheels
madkaw replied to k3werra's topic in Brakes, Wheels, Suspension and Chassis
One more ? Dtaylor! I noticed the caps are on the front wheels. I have heard of problems with the bearing caps not allowing the wheel caps to sit correct-any problems with yours??? Thanks Steve -
GARY!!! Isn't that the murder capital of the world:eek2: Isn't there a chicago Z club, maybe someone is close from that club.
-
Well captain furious I am curious myself about the crossover effect myself and what's killing me is that it is sitting in my garage attic ready to be tried. Damn I gotta get moving on this car Great sound austin!

-
Jon, Hope this goes with the flow of this thread but I wanted to know is whether the yokes for all these r160,r180,r200 are interchangable?
-
I have been educating myself thanks to the helpful links from you guys-thanks! The "how to modify" book shows 9mm rods were in 2.4s after 5/71 but I have read on the sites that they were in later years-like exclusively in the 73 model. The zhome site says that the 9mm are also lighter then the 8mm that is why they are prefered. Is there a way to tell just by looking at the rods or do you just need to measure rod bolt? Any testaments to what month/year you got your 9mm rods from?
-
Thanks for the helpful links. The Zcar home page is very helpful and maybe I can come up with some more intelligent questions this time.
-
I am gathering parts for a cheap stroker. I have a diesel crank lined up and I have 240z rods from a 9/71. I am working on getting a 280 block. I have been reading my "how to modify your Datsun" and I need a little help deciphering some info . I know the 9mm rods are prefered and the real early 240 rods are only 8mm. I read threads where some use the 260 rods in their stokers and others just say 240 rods. So if I was going to just make a 2.9 stroker, no over bore, would I need the shorter rods from a 260z? I realize that pin height is a factor but I couldn't find info on the KA 24 pistons mentioned on the threads to compare to stock pistons pin height. It seems that the longer 240 rods would put the stock piston to high in the block. Am I even close to making sense or do I need to back and study. I really have searched but that only complicates my dislexia issues. I also have a line on a 260 block so I want to figure this out before it disappears.
-
That's what i want to hear. I will buy it and part it out if I can break even or atleast get the diff cheap. Is the turbo engine worth anything, he says it has only 98k on it? I didn't see much happening on e-bay for 300zx parts.
-
I am looking at a cheap 300zxt for the the diff. I was wondering if I can get any of my money back on the rest of the car in parts sales. I don't know if the turbo is worth anything or not. Any input would be great.
-
Nick, I just went thru this same scenerio with a 71 that hadn't been started since 88. I was doing this for a customer and I didn't promise anything. Fortunately, the prior owner to this guy thought enough to shoot some oil in the cylinders and turned it over every once in a while(so he said). The guy did drain the fuel out if the tank whih was great! I sprayed the cylinders as suggested and turned it over by hand first, then by starter, then eventually put fuel and fire to it. When I first started it I had 2 dead cylinders-valves stuck open slightly which causes the lash pads to turn sideways and not allow the valve to close all the way. Do a compression check when using starter to turn it over. If you have 0 on a cylinder that is probably what happened. Compression levels after starting were all over the place 90psi to 150 psi. Now that I have 30 minutes on the engine the compression levels are all up around 175, not bad for a old engine that sat around for 20 years. It smoked and still smokes a little, but seems to get better all the time, I need to get some highway miles on her. The original fuel pump still was good but the rubber diaphram was starting to dry rot. Have several fuel filters handy to replace after running the first couple of times. You will have to pull fuel tank and clean it or you will have a lot of problems. I had to replace filters AFTER cleaning the tank because the lines produce crap too! You might want to try some Marvel Mystery oil in the oil with your oil change to help break in the old motor. By the way, the little 2.4 still has it, lot's of power, she still wants to go after all these years:razz:
-
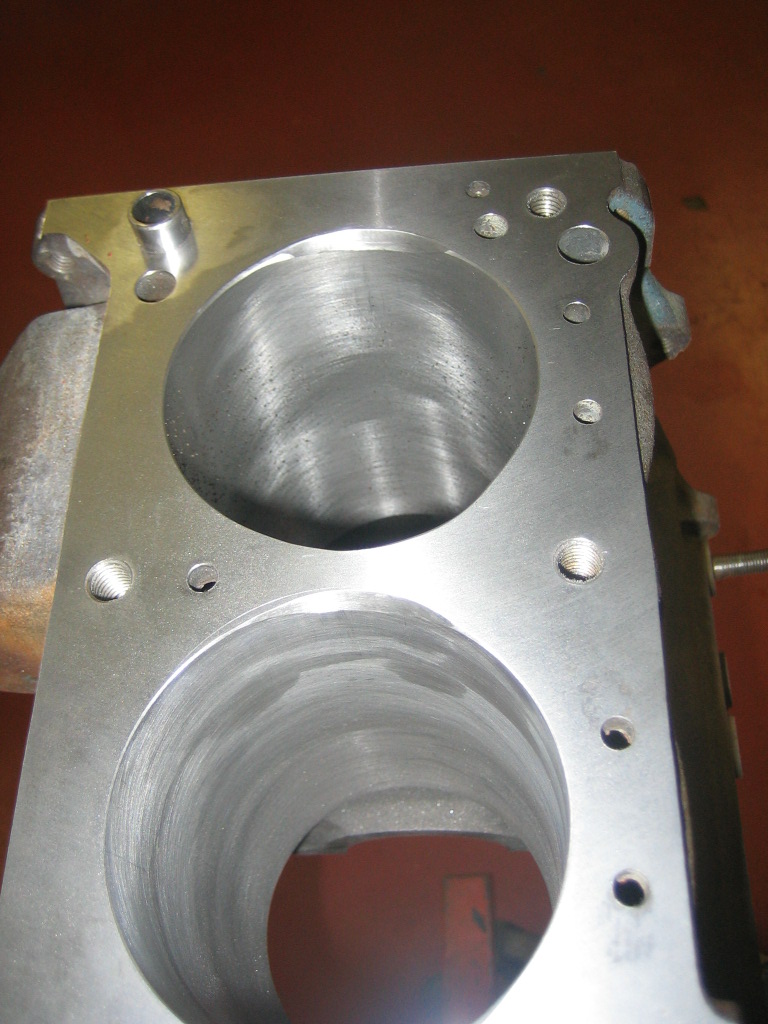
I didn't want to take a chance and I believe it compliments the unshrouding effect done on the combustion chamber. There isn't much room for flow after installing the bigger valves.sure like to hear this baby run!!!!
-
I'm glad to see others in the same dilemma. My car is almost 100% rust free with minor body work which has held ne back from doing the flares. I love the look and I hope to put big enough meat under there to fill them, but yet I hesitate. I have already shaved off the rear bumper, but I stop to think about the ZG flares. If I get the 17X9.5 Rotas I won't have a choice. It will still will be tough to start cutting. I know in the end I will like them and it's really about what your perspective on how it looks!
-
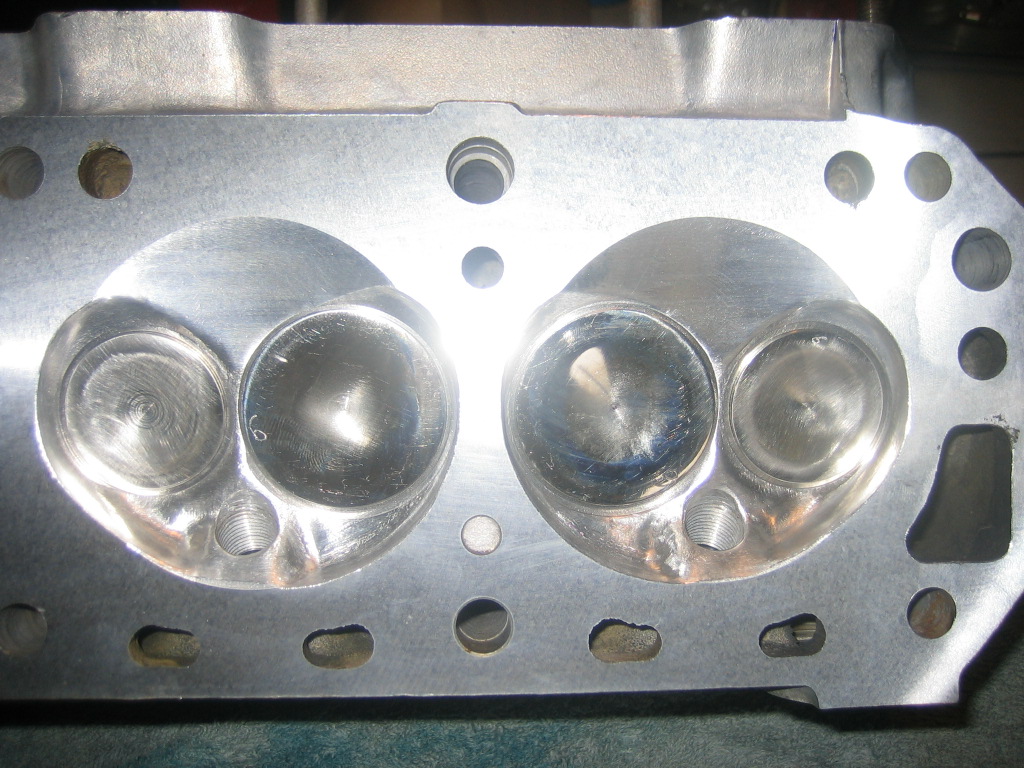
I thought I would include this photo of my head. It seems different then the E-88 in the first post that was found on a 260. Please correct me if I am wrong but the chamber is shaped just slightly different and is not as open,granted this head was shaved .010. My car is a 9/71 production so i guess this would be the middle series e-88. Oh, I forgot, I did put the bigger valves in this head which brought my chamber size down to 39.5 I believe.
-
All i can say is that I drive something different! Actually I am very happy with the truck/ car compromise and with the turbo it goes like stink. I needed 4 seats(kids) and wanted a truck bed but didn't want a truck,this is the only car that fit that niche. I really do like it-the looks are definetly subjective
-
I still would like to see a dyno day similiar to wind tunnel testing. I would think a dyno would rent much cheaper then a Nascar wind tunnel. Surely we could come up with enough combinations to test to make this worth while. More folks on this web site are concerned with HP then I believe areo efficiency. I realize this means a lot of wrenching and you would want to use the same platform(base engine) to get accurate results, but it could be done -couldn't it. It would be a Hybrid Myth Busters . I would think there would be more vendors that would get involved then was in the Tunnel testing. Things that could be busted 1) 4bbl vs. Su 2) Fuel Injection vs. both 3) n-36 manifold 4) header performance 5) electronic ign vs. points 6) mechanical fuel pump vs. electric 7) clutch fan vs. electric fan 8) triple webbers vs. all Just a thought- could it be done or would anyone else like to see this!
-
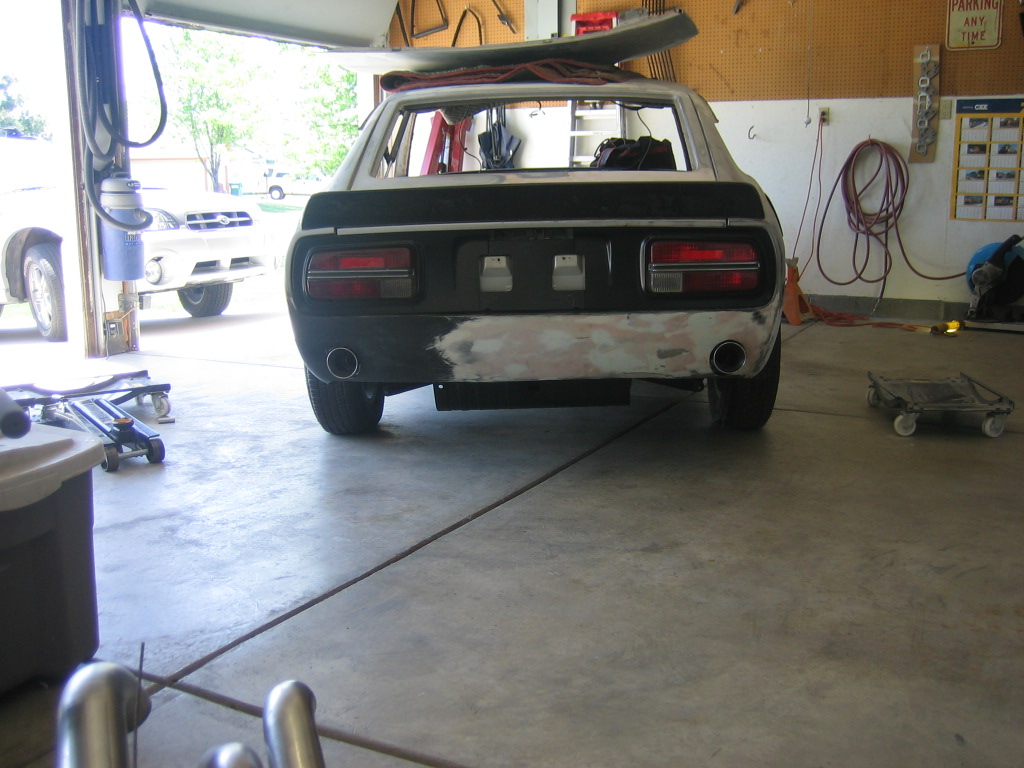
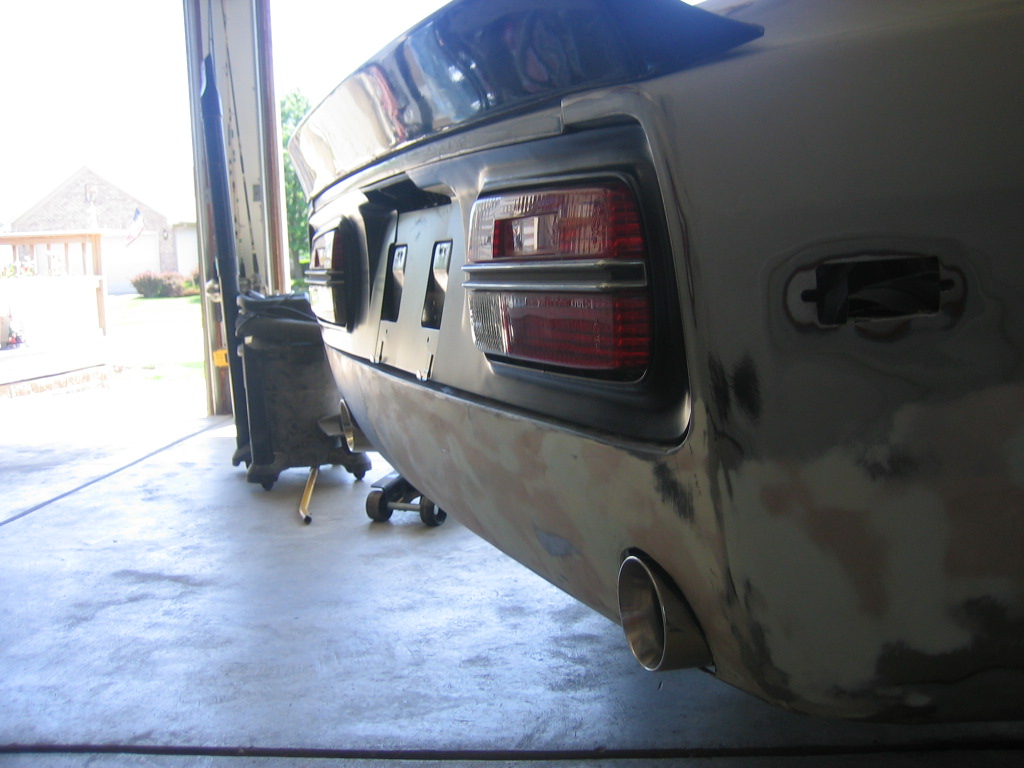
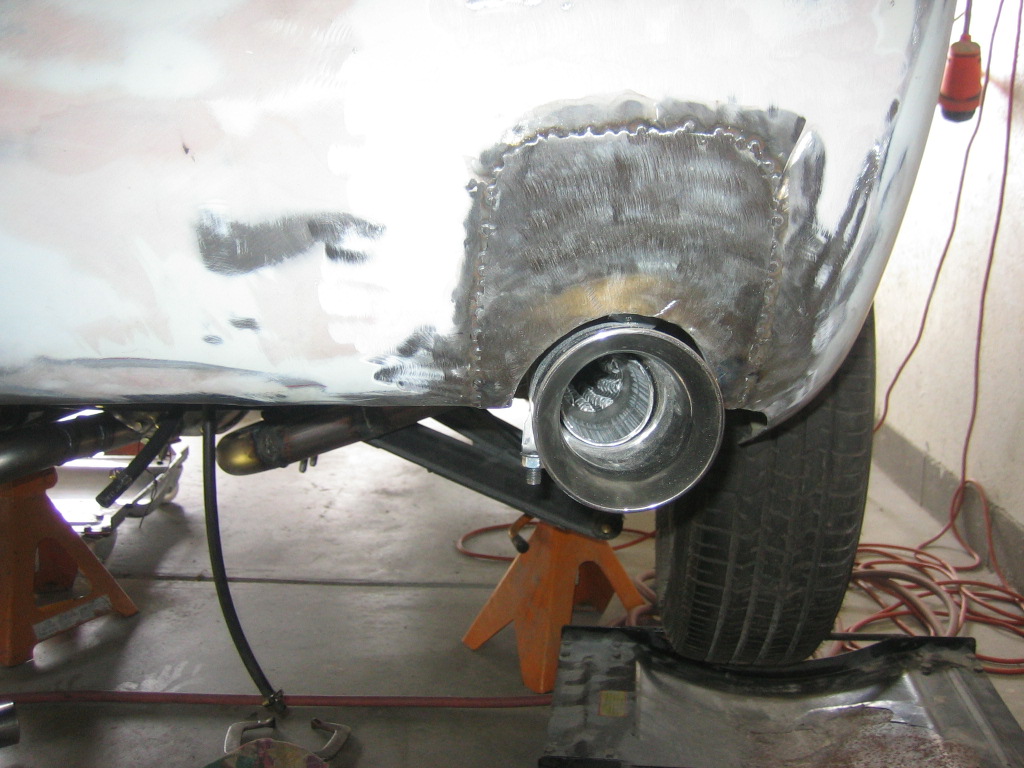
I tried the exhaust through the valence but changed my mind and just did the cut outs on the bottom edge. There isn't much room under there for mufflers and putting the exhaust that high even limits more what you can put in. Plus i had a fuel tank filler neck to work around.
-
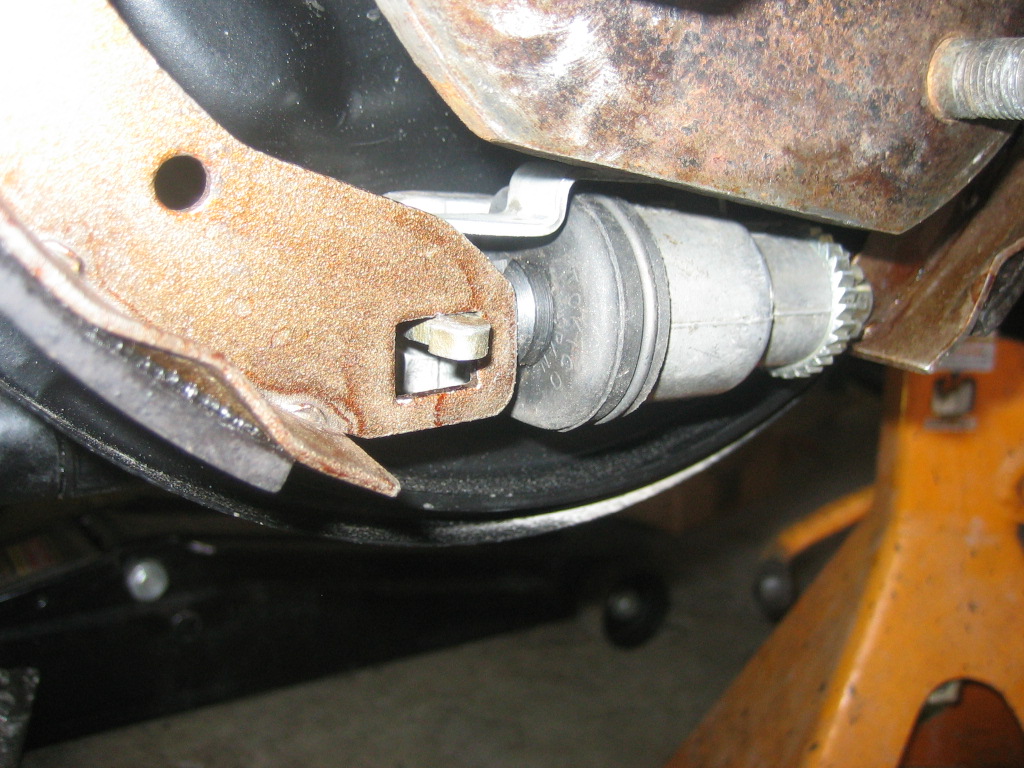
From the AZC web site - Front Brake Installation Note: the outboard edge of the lower control arm may need to be trimmed or ground down so it will not rub the inside face of the rotor (see red arrow), you must check for adequate clearance BEFORE DRIVING! and with the car on the ground with the suspension under full load!
-
What are you guys doing with the rota cap on the front? I see the caps missing on a lot of pics. I assume that they will not fit over the bearing cap.
-
Whats one thing thats makes your Z different from the rest....
madkaw replied to a topic in Miscellaneous Tech
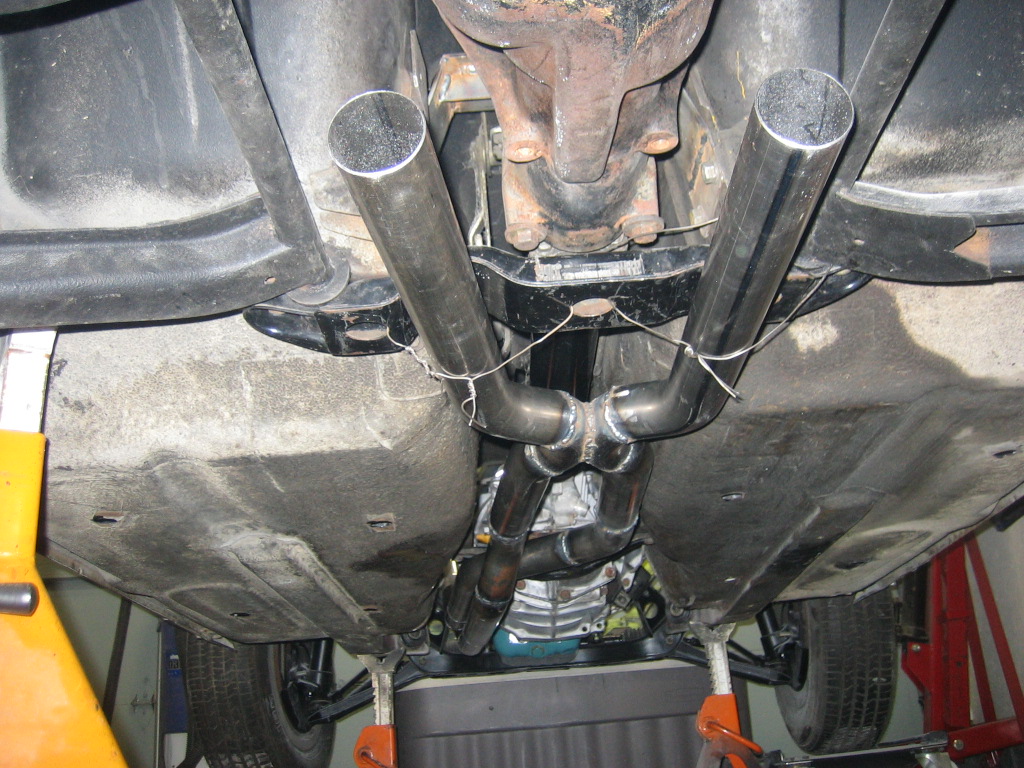
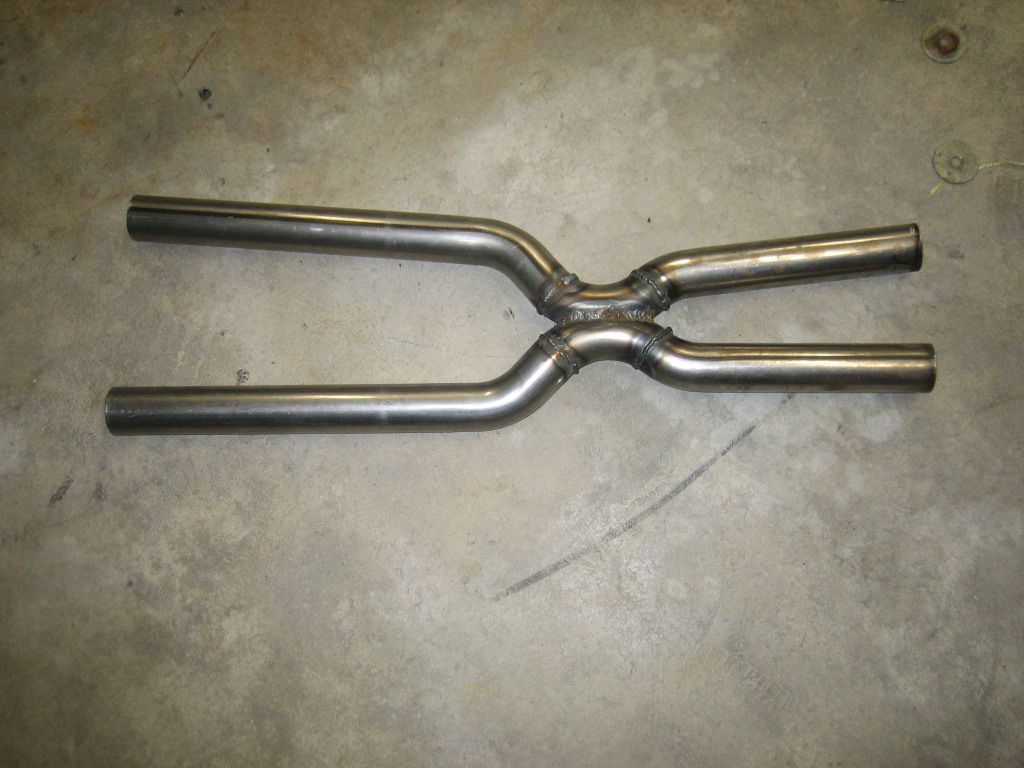
I haven't read of anyone making a true dual exhaust for the L6 with a x -pipe so I guess that makes mine different. Sorry i can't brag about how it performs since my motor isn't back in the car yet.
-
I also purchasedc the AZC rear brakes ,but I did ponder the idea of the parking brake. I will also go with AZC up front and planned on questioning Dave on the actual usefulness of the line lock as a parking brake. And I don't think brakes can be overkill, or if I was going overkill ,that is one area I would do it. I just didn't like the kit options out there except for MM ,and the price difference was not that much considering your getting a (imho) a much better brake system. Good luck with the car and keep the thread going.
-
I have used the por-15 ,a lot, and it is for real. In your case if it is new metal you will want to spray it down with metal prep first before you use por-15(as recommended) to etch the metal. The por-15 loves texture to grab on to . Epoxy paint would also be great but I think the por-15 would be a heavier and tougher coat then anything if you follow the instructions. You should buy their package to get the marine clean and the metal prep with the paint. You will be impressed with the marine clean-the best degreaser I have used--period
-
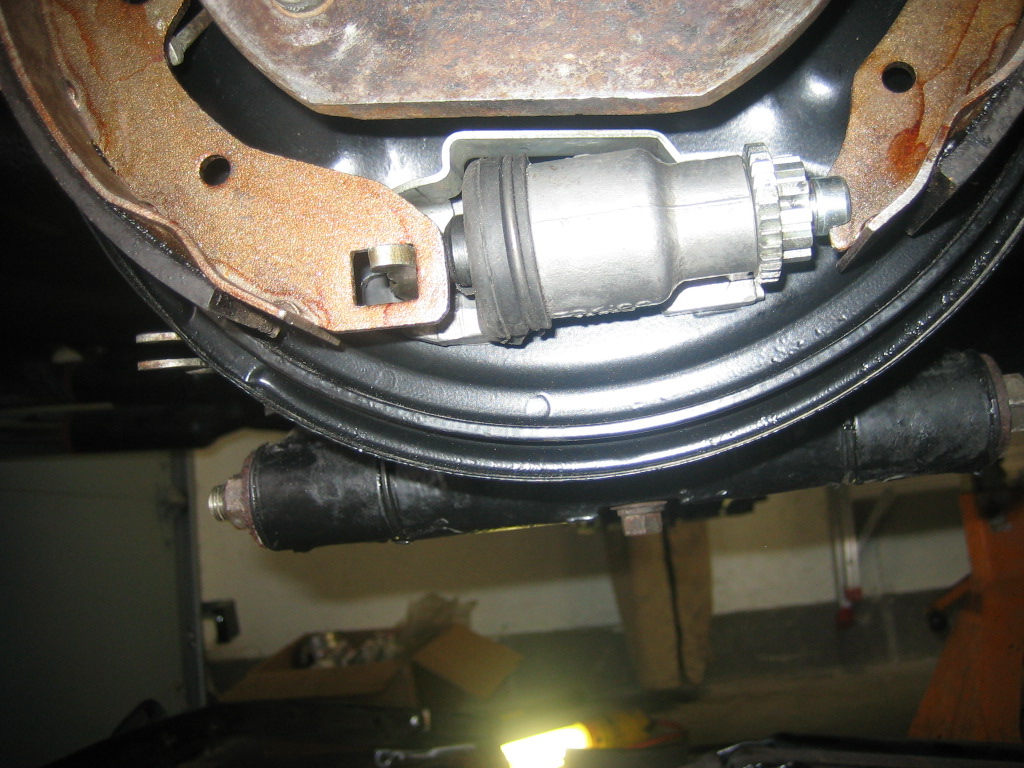
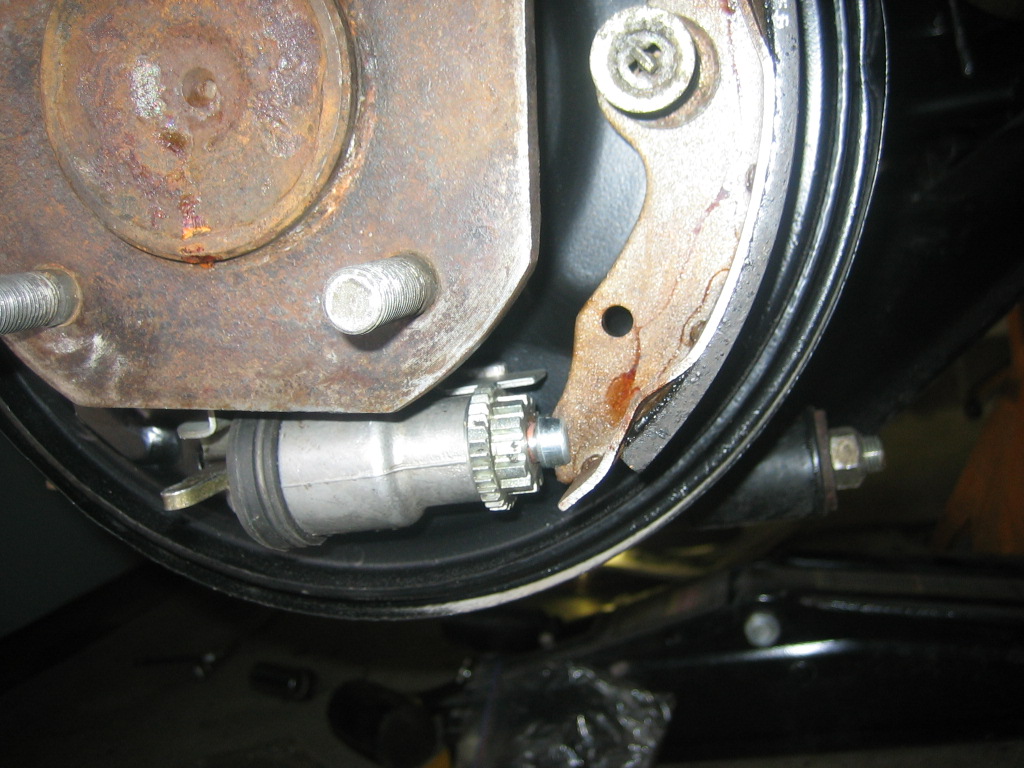
I guess I've had these apart to long, tell me what I am doing wrong! The pics are the passenger side of a 71. I thought the rear shoe slid between the cylinder and the emergency brake lever???? The shoe hits the adjuster lever, what am I doing wrong here??
-
It would have to be MULLs. It encompases all the advantages of internet web sites as far as entertainment and knowledge at the same time. Granted it is more fun than a learning thread, this kind of thread makes this sites great to be part of.
-
Kaminari air dam install and rattle can rally stripe
madkaw replied to ktm's topic in Body Kits & Paint
Bo, where did you get that great looking air dam:biggrin: How did the holes line up?