-
Posts
1201 -
Joined
-
Last visited
-
Days Won
7
Content Type
Profiles
Forums
Blogs
Events
Gallery
Downloads
Store
Everything posted by duragg
-

Wheel Show! Post your pics of you wheels
duragg replied to k3werra's topic in Brakes, Wheels, Suspension and Chassis
Tire sizes? Nice. -
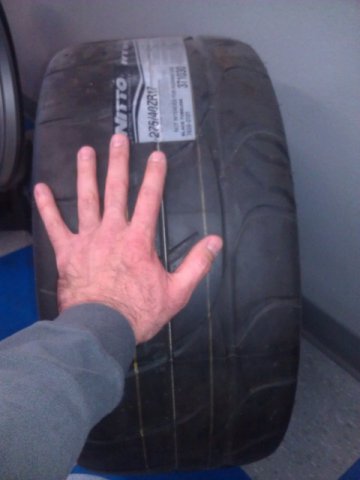
Agree on those tires. A 275 is pretty darn wide. I've been walking around taking pictures of tires and widths.. Kim told me there was one set in HyperBlack and 5 people trying to buy it. I don't want my money sitting there for months waiting on stock. I need a 25" or 26" tire for my 4.375 R200 being installed. Don't even have my speedo hooked up...
-
What are you doing for tires?
-
It is fun. Can't wait to ditch the open 3.345 for my 4.375LSD over the holidays. New difffy going to require 17" wheels and better springs too.
-
PDF with dyno charts and AFR is just above one post (3 pages). I keep hearing about cast pistons (ITM +1MM for me) and 7000rpm. What begins to happen to them above 7000. This is one area I am now wishing I hadn't gone the cheap route in afterthought. Tj
-
$800 if paid by cashiers check or money order according to Kim today. Probably still a ganga.
-
Can't feel it, but you can taste it... Working on that next.
-
And yes... it did really happen:
-
191.8 wheels with some work to do left. 2011 Dyno N240ZZ.pdf
-
Raw data is attached. I didn't have interest or the jets with me to play around with it. Ran it twice and called it good. With some tweaking I could probably hit 200 mark. Not bad for a hack.. The dyno guys seemed very happy with the cam which surprised me. How they can tell I don't know. Sorry for the file size. I need to work on the lower end jetting, fix the mid-range, maybe fatten the top a bit with a smaller air corrector. Get some 36mm chokes and start all over... 2011 Dyno N240ZZ.pdf
-
191.8 wheels. Charts to follow. Benz in front of me made 900. Had 17 inch front Brakes! Tj
-
Spending a couple grand on one of these cranks?
-
Agree on setup. That is what I was trying to do with my signature line. Some company sells an offset ground stroker crank, but I don't recall who it was.
-
Have not put the green car on a dyno. It feels like twice the power of the L24 which had the triples, mild cam and headers. I do plan on doing this. Heck I suppose I could run it over there this week. I'd love to see it make 200 at the wheels, but in reality probably less and if it is less I really don't want to know... I wish I had gone with a much wilder cam, for a gnarly idle is all. In this configuration the car pulls strong to 7000 and by 7200 is ready for a shift. Sometimes I push till 7500 for fun. When I finish the installation of the 4.375 R200 I will need that headroom. With the 3.345 in there now ... not so fun. You know, triples are a pain in the ass. You have to be ready to submit to them in all respects. I have mine running as well as they can. No flat spots, no bogging, no barking or spitting (usually). But setup for max power they blow through fuel like mad. If money weren't an object I'd do the http://imagineinjection.com/ Just called the dyno guys down the way, they are getting me in at 4:30 tomorrow. See the things I do for Hybridz brothers!
-
Looks like I am "In" for the group buy wheels and will contact Kim. Tire availability is the driving factor here and the choice to use a 17" rim is pretty obvious. Spent the weekend reading this entire thread. Lots of hard work here. Thanks to all who put this together. TJ
-
My idea of using plain steel wheels like the Diamond Racing Wheel on my Z is dashed after a nice conversation with DRW this morning. 17" DRWs are No Go. They don't make them. Too heavy and too thin material. 16x10 is the biggest they make and they are 25 pounds. I can live with the weight, but. Tires are the problem. 15" and 16" tires suitable for a 9" or 10" wide RIM are just slim pickings. And finding a suitable matching brand for a stagger is worse. So, maybe the 17" RB-R group buy wheels are in my future aftereall. Tj
-
I built the top motor that Z-Ya referenced above and it is a blast (but I used N42 head). Cheap and easy. Stroker was my intention too, but at that particular time I didn't dig up any V07 cranks, and with the headgasket cost the price delta really went beyond the Fun meter. By scrounging, DIY and some donations from friendly vendors I spent less than a grand building a strong L28. Biggest cost were the larger pistons and the cam. If a V07 crosses my path I might redo it. But I don't think I would ever do it if I were stuck with $300 head gaskets..
-
I installed this same part about a month ago and it was probably a thou interference fit, maybe more. Once installed I pulled the rocker cover and plugs, got a good TDC indication and used a paint pen to make a new TDC mark. TJ
-

Wheel Show! Post your pics of you wheels
duragg replied to k3werra's topic in Brakes, Wheels, Suspension and Chassis
What tires? Sourcing wide plain steel wheels now, but at least just by reference to "tirerack.com" it is tough finding good price and selection in 15 or 16 tires. 17 has lots of choices. Future won't be any better? Better source than Tirerack? -
I have to do this same job on my new R200 but was afraid to ask.... thanks!
-
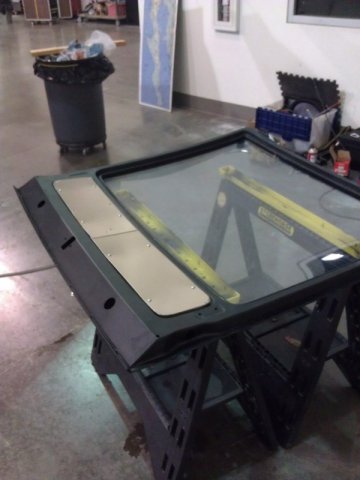
Major improvement in my exhaust consumption. The new glass to hatch weatherstrip doesn't have cracks letting eshaust in. More importantly that cover just below the glass was missing so I was open to the world. Made a new cover and sealed with more weatherstrip. I have a new hatch to body seal coming next week which will make it even better since mine has some cracks. Almost drivable now.
-
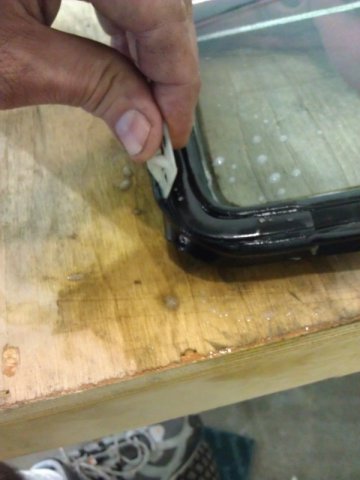
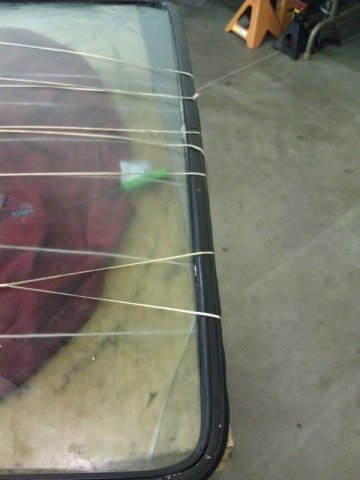
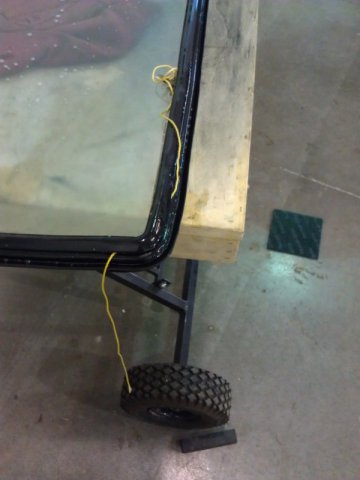
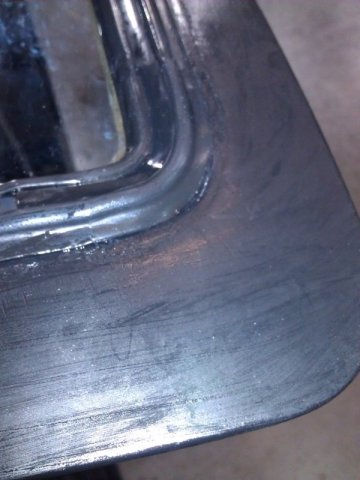
Done. Its a bunch of work. I needed to do it alone for sanity. Trim painted and was pretty easy to work into position with the seal on the glass. Trim has some outward spring to it so a string around the seal kept it where I wanted it prior to install. Juiced everything up and got my string loaded in the groove. I actually used 2 strings in opposite directions and left the ends in various places. Glass supported on a table and set the hatch on top of it. then its like... ok now what? Find a corner and start. Just keep working around and moving to different places to the the glass in nice and square. I dont think I was perfectly square and the last edge / corner were rougher. I was told not to use sharp objects but I couldn't resist. Once the bleeding stopped from putting a bent sharpened awl through my finger I went back to plastic which works best. In fact I took apart a set of Safety Goggles becuase the arms had a nice hook shape. one for going left and one for going right. Worked pretty good. Once done I flipped it over and (horror) the seal wasn't sitting like I hoped. Some rubber mallet time and LOTS more soapy water helped a little. But one corner doesn't sit too well. Fixable? Tomorrow finish fabricating the cover and reinstall all the parts and stick it back on the car.
-

Weber jets??All who live for their triples please read this
duragg replied to datfreak's topic in Nissan L6 Forum
I found more value knowing where progression ends than where mains begin. End of progression is a constant: x% of throttle position and the butterflies are past the last progression hole and their fuel contribution is gone instantly. Begin of mains is variable depending on rpm, throttle position, instantaneous float level, setup and 238 other things. Off idle was an easy fix. The transition to mains a little trickier but for me the solution will be the same. Get the idle and main jets setup properly and modify the progression holes to suit the car. -
I tested slipping the (blacked out) chrome in, with the seal on the glass and it went right in. Its not like that crazy trim in some cars that reaches deep into the seal.

