

jpndave
-
Posts
314 -
Joined
-
Last visited
-
Days Won
4
Content Type
Profiles
Forums
Blogs
Events
Gallery
Downloads
Store
Everything posted by jpndave
-
Ford Super 8.8 irs swap thread. Rear brakes too
jpndave replied to Invincibleextremes's topic in Drivetrain
The Super 8.8 certainly shows the most promise of any of the differentials I've seen. Better/stronger/easier mounting points. Stronger all around, easy to pick up a takeout reasonably priced. Good aftermarket support (it's a mustang). All of this is just going to be better as time marches on since every new mustang uses it. @1969hondaand I are working on a version using these diffs for our cars. We have iron and aluminum cases as well as limited slip and torsion centers. We're going all out on suspension/hubs/brakes with A-arm suspension rather than struts but mounting up the center will be a commonality no matter what is done outside that. We also have a complete Mustang sub-frame (he does) for reference and have toyed with using as many of the parts possible. I'm using aluminum center, Torsen T2, 3.73 as it matches up to my T56 Magnum ratios and Voodoo power range. @1969honda Is iron center, limited slip and 3.15 or 3.31 to better match his setup, more bottom power, less stratosphere RPM, different T56 ratios. One additional positive not mentioned is that with mustang parts even if you want upgraded Wilwood or whatever performance brakes they are readily available. The new stock stuff is no slouch in the performance department. And that's on a mustang, take off 1000-1500 lbs and it just gets better. Once we fixture up, we can share designs or parts as interest dictates. Seems like you are headed in a good direction here. The thing is here on this site we have everything from R180 upgrade to supercar builds. Your universal take should go a long way no matter the direction a particular build is headed and allows upgrades to the outers later as necessary. I agree that welding shafts is a really bad idea. Resplined as a budget starting point up to 930 CV/300M shafts at the top end. Keep up the good work, Dave -
I don't have time to give a super detailed reply. The 6L80E is an exceptional unit but I'm not sure how well it would fit/function in the Z. I absolutely LOVE the trans in my Jeep. Super low first gear and double overdrive. "Learning/adaptive" shifts, very responsive. I'm in the process of putting the later Corvette version which will be upgraded a little in my JK behind a stroker LS3 based (with VVT) 6.8L. It is a very large and heavy transmission. Tall and large girth. I suspect the transmission tunnel would require substantial modifications. It communicates via the CAN bus and doesn't base shifts on conventional inputs which is what allows clutch to clutch shifting and the adaptive learning that makes it work so well. Simple it's not but that seems to be the way things are going. MUCH more efficient than a 4L80 based unit. I have quite a bit of experience with those and the upgrades/alternate gearsets, etc. The 6L80E standalone I am familiar with and they claim to be all that. I don't have personal experience with it and am not sure if the claims are backed. I am only aware of one company making the unit and would suspect others are "re-branded" boxes which happens a lot in that world. I have toyed with the idea of going to Gen 5 and the 8L90 but I'm not sure how much there it to be had with the increased gear splits given the broad power delivery I have and don't really find gaps with my current setup. The 2 points of overdrive would be nice but I don't think it would be worth the cost and complexity. First is already killer low and with the new billet converter it will be even more torque multiplication. I'll try ad review your tread and offer a more succinct and to the point reply rather than the above ramblings but saw @1969honda reference and thought I would throw out a few thoughts.
-
I agree with Derek on what it seems you are after finish wise. Unless you coat the parts a vibratory polish/burnish is going to be the way to do. I would be careful with soda. I haven't used it but I have a good friend that is in high end paint for custom cars and he is adamant against it. Definitely more delicate at removal of rust and paint while not damaging the surface it can leave residue. Have you considered a really high quality clear coat? The bead blasted parts won't stay that clean color and texture. Aluminum will corrode over the years unless it is somehow coated or anodized. You could also clear anodize which might be a good choice. I'm not sure how much corrosion resistance if any the vibratory media would provide and how much residue is left preventing an anodize or paint. With as much work as you have put into this project I would certainly want it to stay that way. I am chemically stripping my car then blasting what that misses. Aluminum will be bead blasted for texture then probably clear coated or anodized to prevent corrosion. If I had access (meaning reasonably priced without having to send it out at full shop rate) to the Vibratory finish Derek is showing I would really consider that option. I have two blasters in my shop both a cabinet and pressure pot and a compressor large enough to run either all day long. I just can't justify paying for something I can do here. I don't mind the dull finish as long as it is clean and even and protected from corrosion. The rifle project I mentioned is going to get a nickel boron plate after engraving trying to get as close to the stainless barrel as possible. That finish is outstanding at corrosion resistance and lubricity but is really expensive to have done. OK on small parts but would be obscene overkill for car part castings, at least for covers and housings.
-
Outstanding! Thanks for posting it up. My 11yr. old has even been enjoying watching these with me.
-
I'd be a little careful with the silicone parts. I have one purchased for an intake and is really flexible, evan collapsible still sitting on a shelf. I ended up sourcing a nice rubber type material that holds its shape much better. On a pressure/boosted side of a system they would be great but not so much with a vacuum on a normal aspirated. Some may be reinforced which would help.
-
Glass beads are really just a different shape being round rather than rough like silica sand, less abrasive. It isn't the same as say "shot peening". In my experience, the dull appearance is normal. The beads do remove less material and are less abrasive, giving more of a matte finish almost a dull sheen. The actual sand depending on grit is similar in appearance but much more aggressive and rough in finish texture. Sand will remove more material and leave a rougher finish. Keep in mind as well that the "glass" beads break as they are used in the cabinet and are no longer round as does the sand which depending on the material of choice may become less aggressive or more as they break into smaller pieces. Silica sand loses its sharp edges and bite. Garnet, and other materials behave differently. All of this is assuming it was blasted in a cabinet where the material was used over and over. If done outside with one hit, things will behave more consistent as you only get the original material hitting your part. Usually the cabinet is used as media gets expensive if it's a one shot deal and also messy. Your photos do look consistent with glass beads. You could roll that media in your fingers to see if some are round or if all of it is rough and jagged. As a an example, I am building a custom lever action rifle and will use the glass beads in a cabinet to just texture an already clean aluminum receiver. Low air pressure and fine beads to get a light even matte finish without removing material is the goal. On parts like yours if they have to focus on removing dirt, grease or paint you could end up with material removal in certain areas if part is raw and part painted, the raw part will lose some material while they are trying to get the painted part to let go. Beads are less abrasive but also slower and less aggressive at removing the junk while tending to leave a less rough matte finish. Beads will also tend to close up the surface a little like shot peening rather than open it up to better accept paint. Shot peening is more a of a hardness treatment rather than to clean. I don't know of any media except for maybe shot peening that would leave a part shiny from blasting. Shot peening is like thousands of tiny hammer hits. I hope that helps and anyone with more extensive experience is more than welcome to clarify anything that I may be missing here. Sorry I got a little wordy there. Your project is coming along and it's nice to see the progress and quality of work. Dave
-
Also, my son and daughter work for a shop that does these shirts/hoodies/hats/etc. My son has done design work and has his own little side business selling logo products. Might be able to get a deal on them there if that helps to increase the donation potential or drop the purchase pricing while holding the donations the same maybe picking up more volume. Food for thought. I think long term, having a constant "store" for the shirts and other paraphernalia along with everyone doing consistent "membership" donations might be better than SuperDan getting frustrated at lack of support and the burst to make it up. I have been super busy with building a new house/shop and totally missed all the potential shut down. Read up last night and was really impressed by all the rallying support. I have personally just donated the recommended amount every year. from shortly after I got back into my 240Z project and found this site. I don't financially support many of these forums but this site is really a great place to be with great people and information so I felt it was important to support. Let me know if I can help out. Dave
-
Very nice. Always enjoy seeing your updates.
-
I missed this the first time around. If you do another run I'd be in for a hoodie and shirt.
-
Too late on the transmission but that was a deal I couldn't pass up. It was a trade deal at like half price. I'll agree on getting parts more as needed, especially this particular engine as prices will only come down. I'd love to see a direct inject version of it too. Sadly I've had too much experience with cutting edge parts that ultimately ended up on eBay because something better came out or I changed directions. I have a whole pro-street Harley/Ducati project I need to sell along with a bunch of other project's cool parts. There is a huge amount of work to do before the engine holds progress up. It will probably get a Coyote initially for mock up and the fact I can actually make money selling that engine if truck based when I find the right Voodoo. I need to focus on the shell, structure, suspension and body first. Most of that I have parts for or won't require substantial investment. Don't get me wrong I would LOVE to just see a Voodoo sitting in that engine bay but you are all too right about "cart before the horse". Thanks for the comment and following along.
-
Progress on my insane VQ35HR 240Z project
jpndave replied to markrolston@mac.com's topic in Nissan V6 Forum
Sounds like you are headed in the right direction. All the hidden carbon wouldn't be anywhere near as affected by UV light on the resins. Painted with all the WOW still seen when you open her up sounds super cool to me! -
Thanks for the input Ryan but that would kind of defeat the point of the build. It may get a Coyote temporarily. I have a set of rods for one already so I could use a truck based engine even earlier years and might even make a bit of $ when it comes out to go towards the Voodoo. Long term, I'd just do an LS if that were the goal. I'm intimately familiar with the platform, have lots of parts, etc. But, I want the sound, high RPM revs and the way the power delivers from that flat plane crank. 500hp to the wheels will be great and the car might actually start out without completely being out of control. Will it cost quite a bit more? Pretty sure that will be the case. This isn't a budget build. Sadly not a very fast one either. Hopefully some updates will come in the near future. We're working on the 8.8 from the new mustangs and are getting closer on that project. Just moved it over to my new shop/garage for storage while I finish up the house and get everything else moved over. Thought I had a rotisserie all sorted but 1969honda came up with a better idea so I may go that route instead. Collecting a few pieces here and there. Just no time to dive in until the house is done.

-
-
-
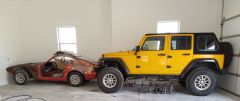
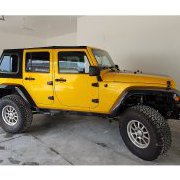
From the album: 240 project
Z and JK at the new shop -
Looks like it's working out. Next time come use my TIG
-
I have a scraper that sandwiches on the main stud nuts for my LS. I'll have to show you. Maybe something similar could be rigged up. As I recall, the bottom ends looked similar.
-
Either is doable. I think the scraper is more important and that tray should work.
-
Windage is second from right in your post. Can't get my tablet to upload it.
-
I wouldn't weld if there is enough material to just tap. I like the hinged baffle pickup idea.
-
This one shows the windage tray:
-
If capacity is a little low you can always use an accusump. I have one here for my Jeep if you want to see it. They have the benefit of pre-lubing your engine (and turbo bearings in your case) if set up right along with 1.5 to 3 or more extra quarts and pressure buffer in high G manuevers. Food for thought...
-
Does it have a crank scraper? The windage is there. What about directly threading and tapping that kickoff for the pickup? Maybe add a baffle and screen the re-route to the main galley?
-
The clutch/flywheel/adapter are going to take some more thought, math, planning but we'll get there. Front transmission pattern isn't going to make life easy but we'll sort it out. Between your bell, my bell and the two transmissions we'll have most of what we need for a billet adapter plate I need to get an engine here to mock stuff up. Might just need to find a Coyote for now as I've already got parts for it and the Voodoo will drop right in later. Should be able to sell the Coyote for a profit later anyway. That would give us the last of the reference data. We have plenty of rear end stuff to occupy all the time we have at this point. Still need two rotisseries. Hopefully those books have all kinds of suspension and chassis ideas swimming in your head. The oil pickup is interesting. As long as you have enough capacity and a good place to draw from it should work well. Should be a bit cheaper than the low profile steel pan I've got to buy and you get to keep the structural aluminum part.
-
Exceptional as usual. I always enjoy and am inspired by your updates.
-
So machined plate between the bell and trans? If so that will need to be factored in. Pilot bushing/bearing is usually pretty simple to adapt. Often you can mix and match pressure plate and disc to get the correct bolt pattern and splines. Slave will probably be T56 internal and an adjustable height would be nice or we can add spacers if necessary. All doable. We just need to make sure that transmission is exactly concentric with the engine.

