

jpndave
-
Posts
314 -
Joined
-
Last visited
-
Days Won
4
Content Type
Profiles
Forums
Blogs
Events
Gallery
Downloads
Store
Everything posted by jpndave
-
From a post I made years ago on this thread http://www.fullthrottlev6.com/forums/showthread.php?50690-LLT-swap-into-a-4th-gen-f-body/page7 "Ok, these are rough numbers taken with a tape measure.Overall height from bottom of pan to top of the bump on the intake manifold: 30"Width at heads: 23" Width at stock exhaust manifolds: 25"Length from transmission mating flange to front of balancer: 20.5"These are at the widest points."
-
I'll move my posts over here. Wouldn't work so much about "top heavy" even though it is. All DOHC engines will be like that as you can't put 4 cams and the associated phasers for VVT, direct inject pump, etc up there and not have the associated weight. The gains far outweigh the drawback in this case. My Voodoo (Coyote) will be the same way. The "high feature" V6 will have an advantage if set as far back as you can in being so short you in essence have a front mid engine car. Again, I'm doing the same with my setup but the engine is longer. Calculations put #1 cylinder about centered on the strut (will be coilovers with SLA on my car) towers. That V6 should by fully behind.
-
Front Suspension Swap? Anybody done one
jpndave replied to rabrooks's topic in Brakes, Wheels, Suspension and Chassis
That engine deadheads the high pressure. The primary is regulated at standard GM pressure (58). -
Front Suspension Swap? Anybody done one
jpndave replied to rabrooks's topic in Brakes, Wheels, Suspension and Chassis
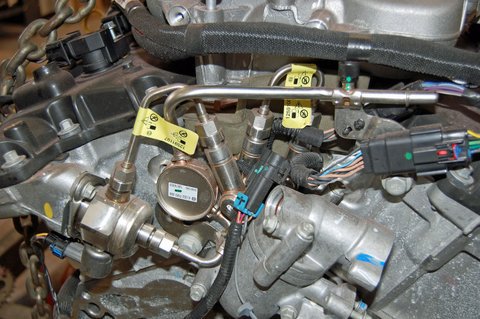
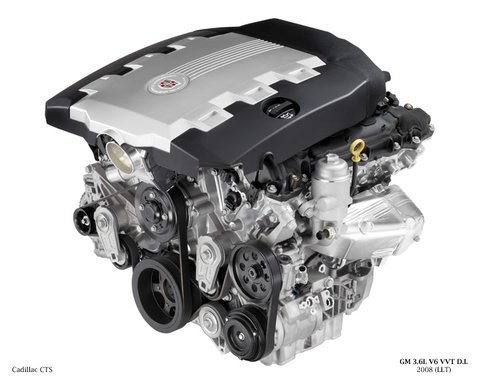
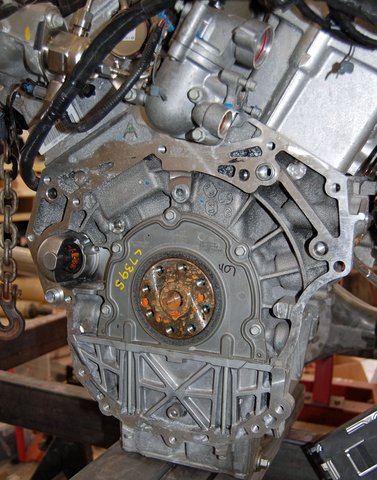
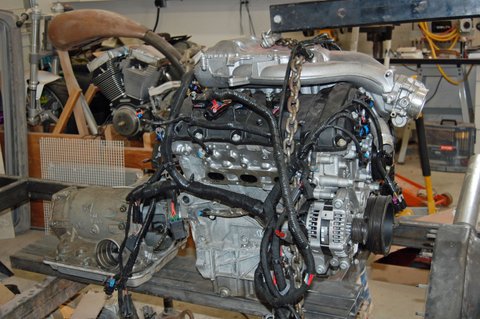
HTH some on the engine. First photo is the factory GM and the rest are of the engine I had. -
Front Suspension Swap? Anybody done one
jpndave replied to rabrooks's topic in Brakes, Wheels, Suspension and Chassis
So improved power integral exhaust manifold version that's a little lighter (basically the weight of the exhaust). Downsides - REALLY tall. I'll find my measurements. The Voodoo (Coyote) I'm using is bad but a low profile race pan is available making it possible . Not so here and it's structural. I don't think it will even be close to fitting in a Z. It is extremely short but the all up weight is not much less than an aluminium LS. The accessories are in the way of the steering. Electronic support should be there on later models. That early one used an oddball Bosch ECU that at the time I couldn't find support for. Wiring is doable and I had the harness really cleaned up nice ready for wrapping. The direct inject pump is right rear cam driven so shouldn't be a problem. Normal FI pump feeding it from the tank at normal pressures. Goofy bellhousing pattern (that's why I posted that rear photo) so you'll want a manual transmission donor full pull.
-
Dual Ball Joint Strut Modification
jpndave replied to JMortensen's topic in Brakes, Wheels, Suspension and Chassis
If those are the official terms I will try and get that right from now on. As far as "virtual pivot point" you would want that located a bit inboard of center so that the line like you drew here would go through upper pivot then "virtual pivot point" and land ideally at the center of the tire contact patch for zero scrub. With the strut it might just act more like a SLA with shorter upper arm/longer lower rather than a horrendous kingpin.
-
Dual Ball Joint Strut Modification
jpndave replied to JMortensen's topic in Brakes, Wheels, Suspension and Chassis
So hypothetically you put two new joints/your fabbed knuckle/arms in that suspension - spread to intersect and give the zero scrub. What will that do to the kingpin angle? Does the wheel/tire end up flopping back and forth because it's steep? Does having the two joints add to a steering load especially the further they are spread or just act like a single longer arm pivoting out at the "imaginary" intersection? Looking at that photo your car has a serious scrub radius. Is the steering super heavy at low speeds? Sorry if I'm missing some technical terms here just trying to grasp how all this relates together. -
Dual Ball Joint Strut Modification
jpndave replied to JMortensen's topic in Brakes, Wheels, Suspension and Chassis
The late Mustang uses it in the rear also. Not sure why. -
Front Suspension Swap? Anybody done one
jpndave replied to rabrooks's topic in Brakes, Wheels, Suspension and Chassis
Is this the LLT (and subsequent versions) direct inject you're referring to? Do you have the engine? I ask because I had one for a different project and sold it due to logistics and abandoned the project in favor of building my 240Z. I still have photos, dimensions somewhere along with an imported Australian 4L60E bellhousing and either a flexplate or the flywheel. On paper sounds great, in reality not a good choice for a ton of reasons. I'd be happy to share but if you want suspension here maybe a different engine thread to not derail this further.
-
Front Suspension Swap? Anybody done one
jpndave replied to rabrooks's topic in Brakes, Wheels, Suspension and Chassis
Agreed, I started reading this and particularly JMortensen's posts including the one on the double joint front had me intrigued. So I'm thinking cool, a healthy discussion on SLA front suspension! Then suddenly I'm wading through muck. At that point I'm m not sure I even want to chime in, not cool. Generally this forum is great to have healthy discussion on topics that often can translate to my car being a better design. I would appreciate going down the road this started to head. Or if the OP wants to continue a different direction we could take it somewhere else. Is a SLA suspension required for good handling? Not necessarily. Can the Z be made to handle with the stock design? Sure. Is a strut superior to a double arm if both are executed correctly? No way. The reason they run struts is cost or packaging and I suspect the Z was done that way for both reasons, fairly light, cheap, easy to package. If your car is in decent shape and you're not doing an intensive build with tools and skill set to get it right the struts are probably best left there. I've got to rebuild the entire front subframe along with the new engine, brakes, etc. and for me going to the better designed SLA makes sense. I'm intrigued by that double joint lower and want to explore if it may solve some scrub. I'm looking at a relatively clean sheet but would like to use readily available stock pieces wherever possible. Anyone up for a Healthy discussion? -
Cages - Experiences wanted
jpndave replied to EF Ian's topic in Brakes, Wheels, Suspension and Chassis
I'm late to the party on this thread. Here's a quick suggestion on your latest drawing. I'll read the whole tread and give a more in depth reply later. Nice car BTW EF Ian you have some pretty details in there. Pardon the crude tablet finger drawing. Yellow delete/move to blue. Green and additional (not shown) diagonals on the main hoop ideal but probably a no-go because of the seats. Lower diagonal blue will help a lot instead. Join all the tubes at the circles as high as you can -same point all tubes. Only one triangle per opening is needed, 2nd the input that "x" braces generally just add weight don't add much strength. I'm going to tie the lower front subframe all the way back into where the main hoop is attached at the floor and spread the box out to catch the hoop tie in if that makes sense. The idea is to try and have all the tubes in tension/compression and every plane braced for sheer (triangles are your friend). All junctions should be at the ends not out in the middle of a tube unless you tie it in with another tube.
-
Ford Super 8.8 irs swap thread. Rear brakes too
jpndave replied to Invincibleextremes's topic in Drivetrain
Exactly, well said. -
Ford Super 8.8 irs swap thread. Rear brakes too
jpndave replied to Invincibleextremes's topic in Drivetrain
I just posted up what was on the referenced site. The common 1018 you are referring to would be lower. I did find my copy of "Engineer to Win" so I'll grab some info from that. Most of what is on the links is pretty much plaigerised from Smith. In high performance applications he's pretty blunt and brutal on mild steel. What you are posting here is basically the points I was trying to make. Your perspective here clarifies that a bit more. Without proper treatment annealed 4130 has minimal strength gains and major cost. With care and some minimal pre and post treatment it can easy go double the strength which allows thinner sections and lighter weight. However cost is higher, harder to get and care must be taken to avoid areas that would be prone to cracks/stress fractures. Filler metal either needs to be such that when blended with the parent metal is more malleable and thus reduces brittle tendencies or maybe takes a mild treatment. Thicker sections at the weld make up for lost tensile strength. 4130 filler should NEVER be used unless the full completed part goes through a full heat treat. I've debated between ER70 and ER80 and have seen both recommended, leaning towards the 80. Most of that is out of bounds for a shade tree guy with budget mig. I'm sure you have the skills and equipment to get it right. To pull back on topic a bit, the targeted sales for most of these kits would be better served in mild steel with a bit thinner sections for weight and weld penetration. Using 4130 instead as an option in thinner sections would be ok with serious warnings and maybe liability waiver for advanced users but probably not worth the effort using these designs as if you are going to go to that much trouble, you're likely full on replacing everything not piecing stuff together to get a great "bang for the buck" universal solution like is set up here. It's fun to have advanced conversations about more exotic materials (yes I know 4130 is pretty mainstream in performance circles) but we are probably derailing this thread from its intended audience. Your stress analysis would likely lead to a major redesign, half the weight in mild steel and a stronger part with less material and cost before even touching 4130. I'll reference back to my post on Jun 5th #3 item on ways to gain strength. #1 mass, #2 stronger materials (4130) # 3 better design. Sorry if I'm posting too much on your thread Invincibleextremes. Don't mean to step on toes. HTH -
Ford Super 8.8 irs swap thread. Rear brakes too
jpndave replied to Invincibleextremes's topic in Drivetrain
So patience is not one of my best strengths. However my favorite reference Carroll Smith's "Engineer to Win" I loaned to JD (69Honda here) to read while he was gone to Green Beret training so these numbers are best I could come up with quickly and seem to fit with what I generally remember. Mild Steel ~ 40-50K Yield and just under 60-70K ultimate unless quenched but it will get brittle 4130 Annealed ~ 50+K Yield and 80+K ultimate 4130 Normalized (cold drawn) 87K Yield and 98K Ultimate 4130 Mild heat treat ~130K yield and 145K Ultimate I highly recommend Smith's full series but especially "Engineer to Win", "Tune to Win" is great for suspension and chassis dynamics. For Reference, 4340 annealed is 108K and a maximum usable of close to 220K. 300M can go to 300K and not lose toughness. Those are different types of loads more suited to the axles and hubs not chassis parts in thin sections. Look at this post here, most of which is pulled from Smith's book: http://www.pirate4x4.com/tech/billavista/PR-BV60/index1a.html Most of the cautions, proceedure, advice etc. are from Smith. Those books should be required reading when we get into this stuff IMO. And another racing type post with good perspective again quoting Carroll Smith https://grassrootsmotorsports.com/forum/grm/chrome-moly-or-mild-steel/88293/page1/ HTH Dave -
Ford Super 8.8 irs swap thread. Rear brakes too
jpndave replied to Invincibleextremes's topic in Drivetrain
Here are pics of that 3" .095 tubing after being rolled and why I needed it in the annealed condition. I don't think the rollers would have handled "normalized" and likely would have at least partially crushed the tube. Pardon the messy shop, should have the new one more orderly in a bit.
-
Ford Super 8.8 irs swap thread. Rear brakes too
jpndave replied to Invincibleextremes's topic in Drivetrain
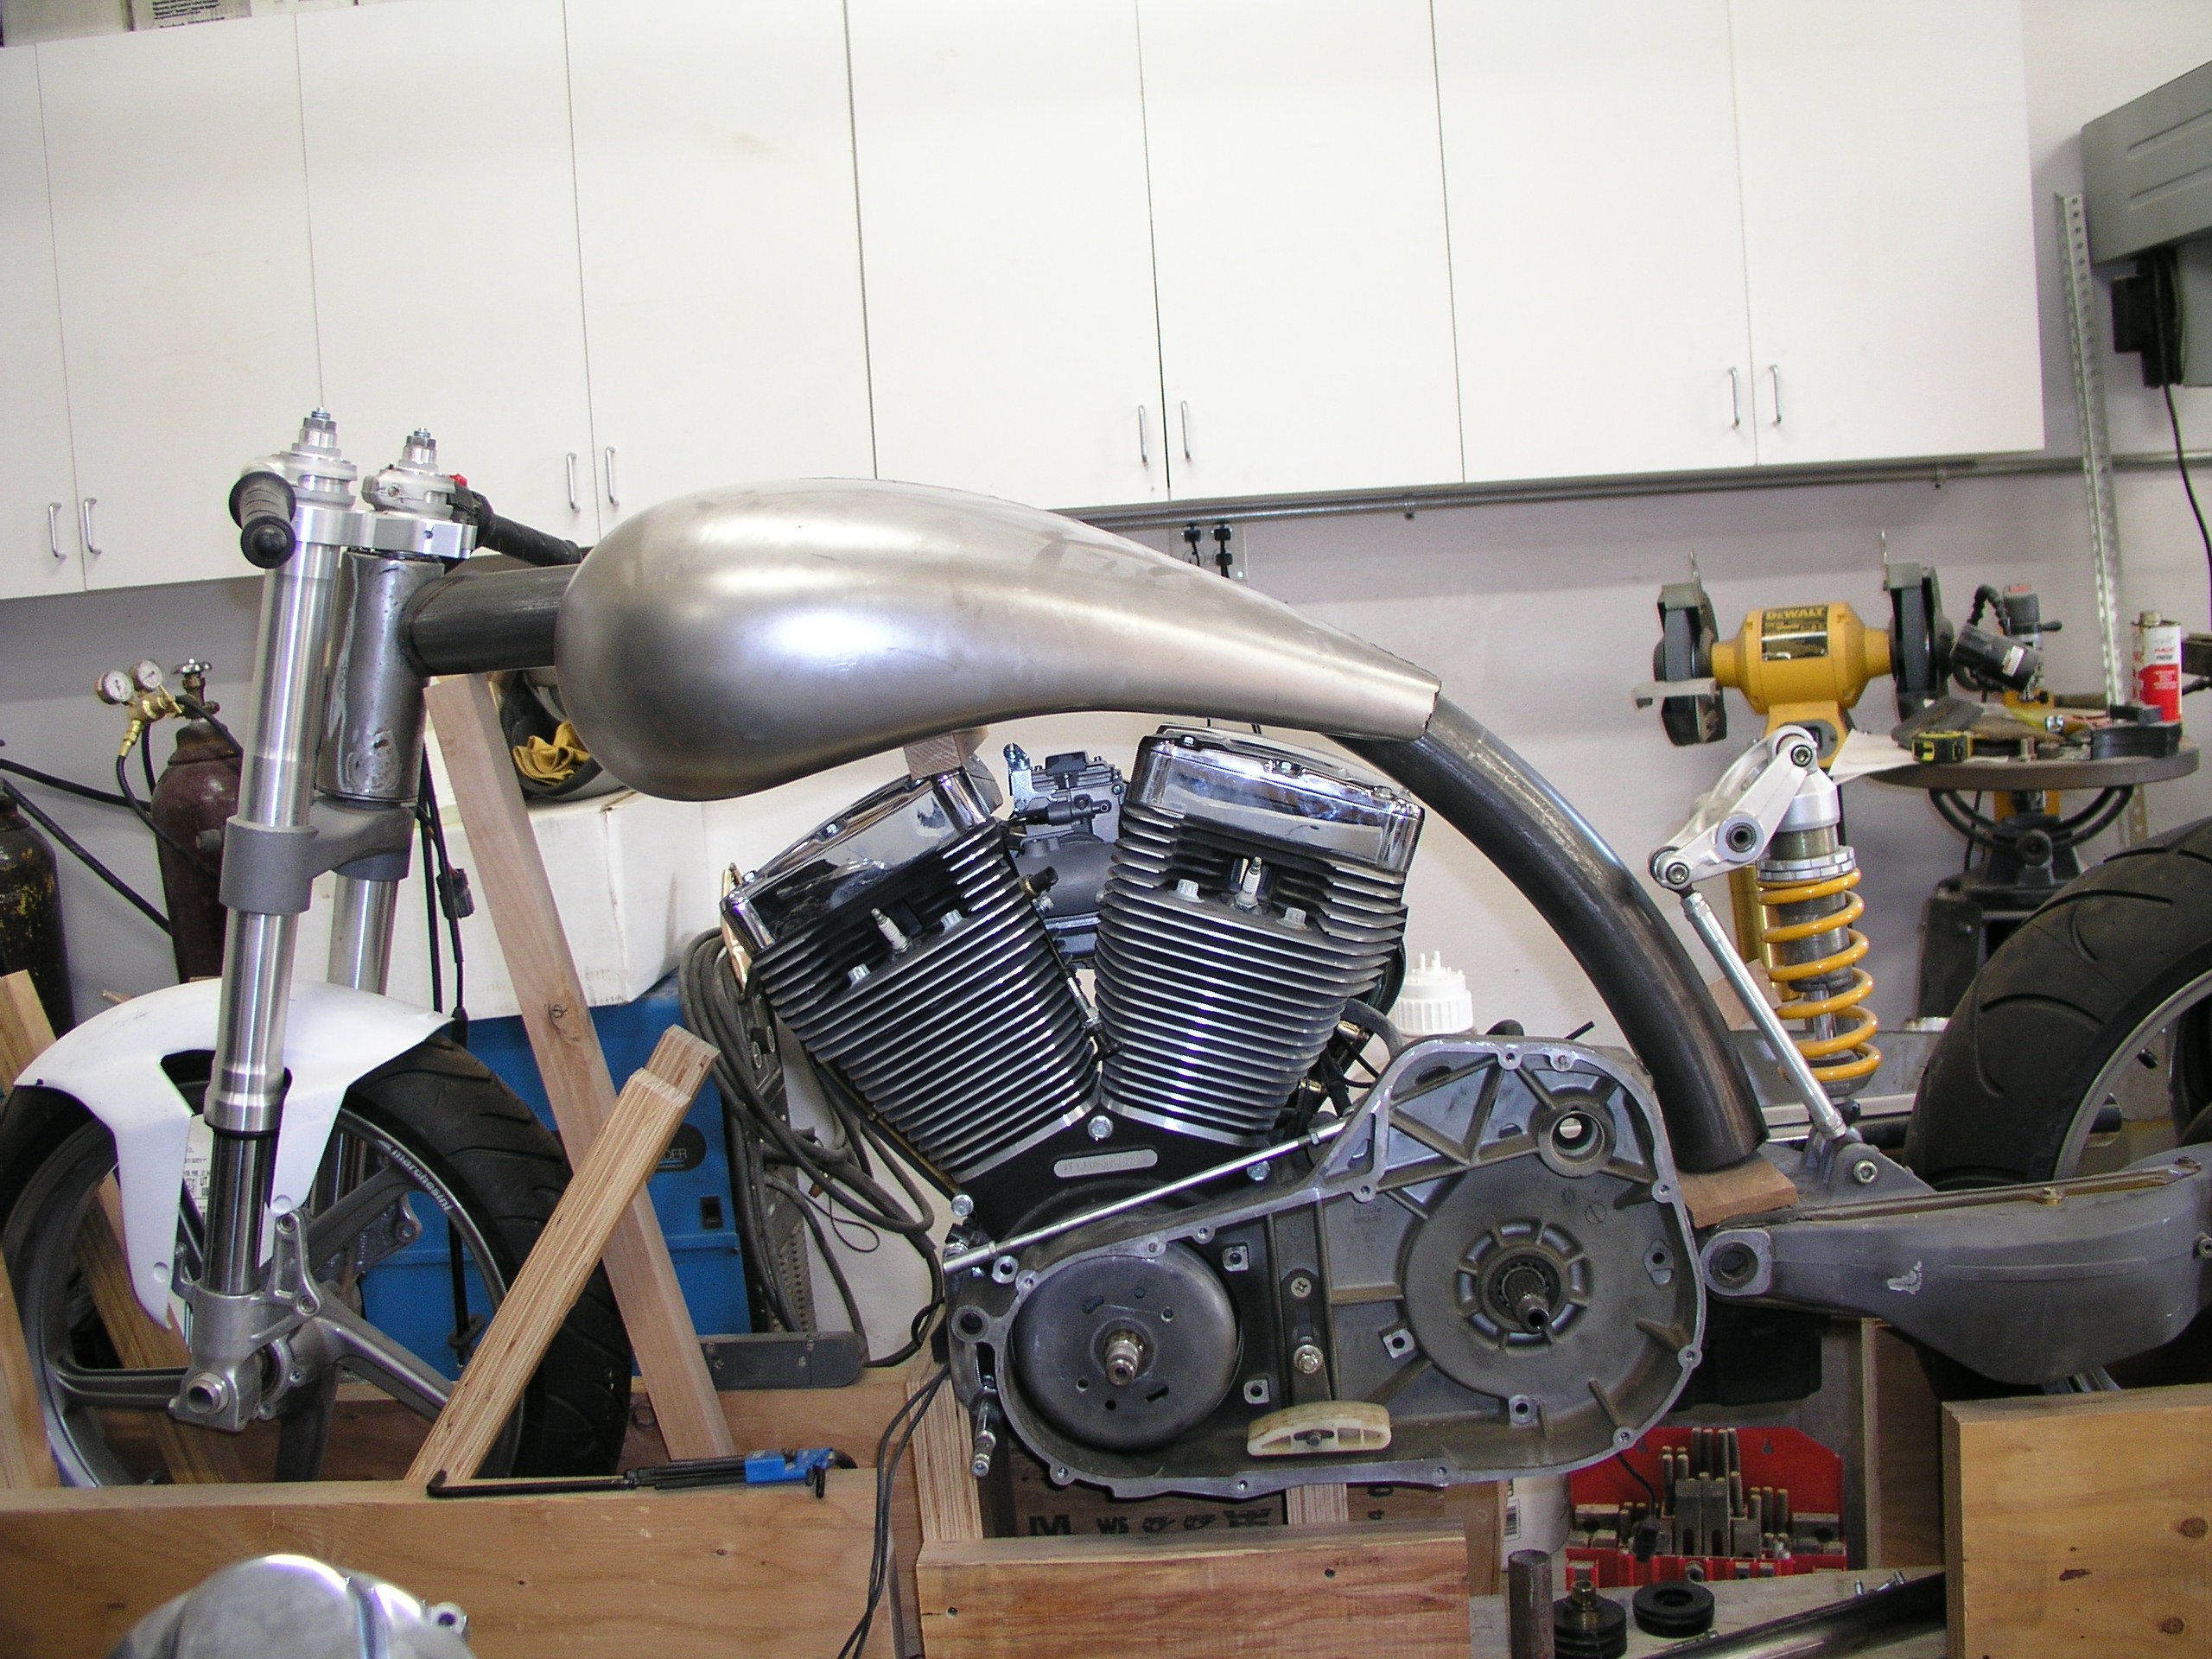
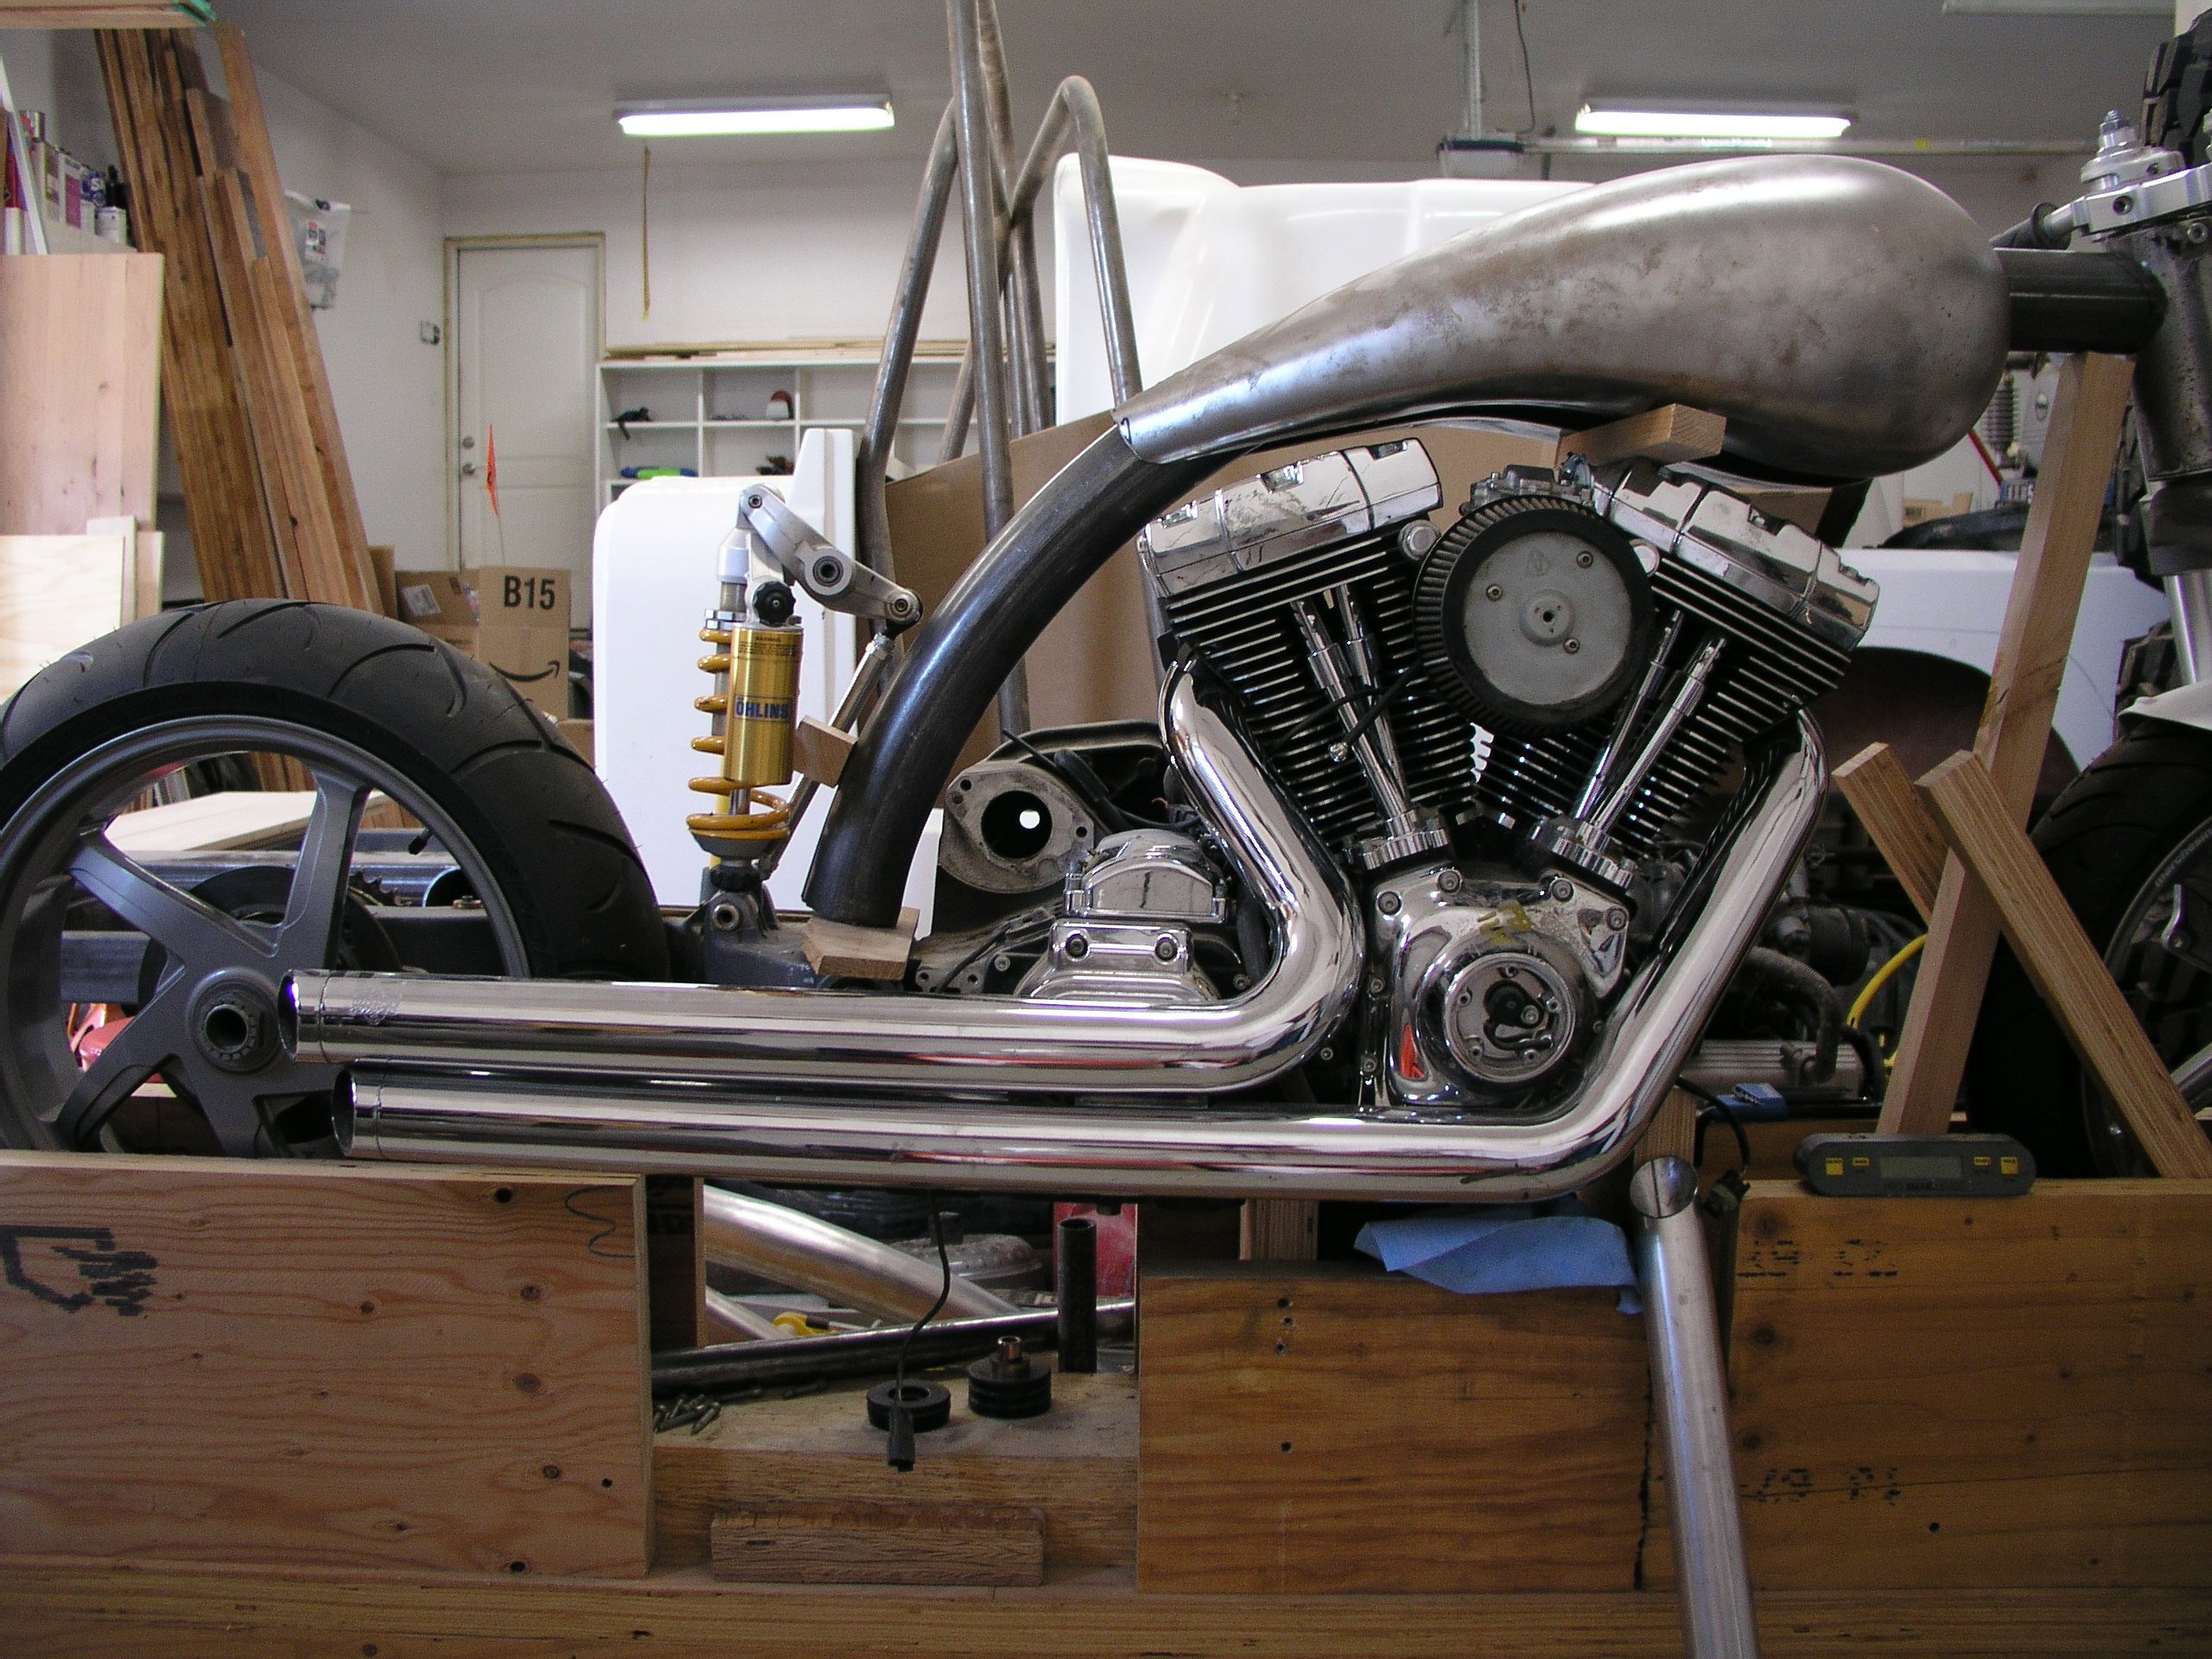
Going to sell the bike project. I decided I need to limit my projects and the Z won. -
Ford Super 8.8 irs swap thread. Rear brakes too
jpndave replied to Invincibleextremes's topic in Drivetrain
Glad you are enjoying it! 😉 I appreciate the members on this forum. There are some really knowledgeable people on here. If we can keep discussions civil discussions and share knowledge we're all better for it. -
Ford Super 8.8 irs swap thread. Rear brakes too
jpndave replied to Invincibleextremes's topic in Drivetrain
I really had to look fairly hard to get annealed tubing in 3" od for a motorcycle project. Most everything is in a "normalized" condition. Not really heat treated to full potential and not annealed. That is what is typically used in race cars and aircraft. I'll dig up some specific numbers when I get a chance. If you can work the material annealed then heat treat the assembly fixtured to avoid distortion that would be ideal but in reality is simply not practical. 4130 is much more likely to stress crack (maybe not in the annealed state) than mild steel but definitely isn't really an exotic material. In the annealed condition is loses much of it's advantage over mild steel as the tensile strength just isn't up where it should be. There are racing organizations that require 4130 be left unpainted to allow it to be inspected for stress fractures. I'll find the numbers which will be much more telling than bantering on about things. Facts speak more clearly I my experience. I agree thinner sections would be better for either material both from a weight saving and like you mentioned on being able to get full penetration welds. Most home shops don't have MIGs capably of punching through that heavy material and it shouldn't be necessary. The only place I would use those plate thicknesses is on my Backhoe and yes the 350P will penetrate it but that is a lot to punch through. -
Ford Super 8.8 irs swap thread. Rear brakes too
jpndave replied to Invincibleextremes's topic in Drivetrain
I'll likely MIG my 4130 with preheat as much as possible, back purge or flux the off side and post treat to minimize heat effected zones. The old traditional aircraft 4130 is welded with a torch which just by the way it works is a much gentler heat and pretty much gives you that post treat if let to cool slowly. I have a 350P MIG and a 200DX TIG so can go either way, yes I have a torch too but I'll reserve that for pre-heat. Most are not going to want to go to that trouble and expense and will be better off with a well designed mild steel part. Cold rolled is cleaner and more consistent in plate/sheet. -
Ford Super 8.8 irs swap thread. Rear brakes too
jpndave replied to Invincibleextremes's topic in Drivetrain
4130 easier to machine than mild steel? Maybe close to the same if annealed which it typically is not. Usually comes normalized which is going to be harder than mild steel, not terrible but definitely harder. If you go to a thinner section it would likely be easier than the large thickness parts. Welding is certainly doable but you need to be more careful with heat zone, ideally post treat to normalize. Choose filler carefully, fit properly, etc. I plan on using pretty much all 4130 on my car on what I add in the cage, floors, etc. It is stronger if treated correctly and can be lighter at the same strength if you go thinner wall. For example I'll use 1-1/2" .095 tubing in the cage where you would normally use .120 wall to get a similar or maybe a little better strength and a lighter part ~20%. But you have to be careful not to make it brittle or soften things up to the point of mild steel strength with the thinner section which is then weaker. And it is MUCH more expensive. Not insane but substantially more for material. 4130 is good for high performance thin walled structure type applications. Any of the energy transfer parts like hubs/axles look at 4340 or even 300M is best unless you get into some of the new "wonder alloys" and proper heat treat. 300M isn't stronger than 4340 natively, it just allows you to heat treat to a higher level without getting brittle which is how you get a much stronger part. 4130 might be a good option but cold rolled would likely be fine for most applications. The thicknesses you are showing here are plenty IMO. I'd look at bracing and structure a bit rather than throwing mass at the parts. I'll bet that it could be done thinner and still keep plenty of strength even in mild steel. That saves money and weight. 4130 would be much thinner. Generally you can get more strength three ways: mass stronger materials better design/engineering The second two are much better for performance. Design is free other than the time to do it which in the business world means money. But only costs on the initial setup, free on everything after that, maybe even cheaper if done right. Materials - cost is higher raw cost and often higher fabrication/heat treat/procedures. You just have to weigh out what it's worth to you or whoever is going to be buying it. Not trying to offend here, some of that is my opinion but based on facts and how things are done in higher performance applications. Every build on here is done differently and one of the things I really appreciate and enjoy on this forum is the tact that is generally afforded. Everyone's vision and budget is different and there is room for all of that here.- 283 replies
-
- 1
-

-
- disc brakes
- suspension
- (and 7 more)
-
Ford Super 8.8 irs swap thread. Rear brakes too
jpndave replied to Invincibleextremes's topic in Drivetrain
All these rods and points might not be the same length or location but have to move in the same arc and planes as the suspension. If not, then the effective lengths change as things move and bump steer happens. Again, it's all in a 3 dimensional world and the steering has to stay constant in relation to the wheel/knuckle as all of this moves or you toe in or out depending on what each wheel is doing. The double wishbone is easier to control more exactly but a strut is easier to package and cheaper with acceptable changes. There are a couple of really good books on the subject of suspension and some threads out there that are helpful. I'll have to go look at my library and post a few up. Properly designing the rear is one thing but throw steering in the mix and it gets all sorts of complicated. -
Ford Super 8.8 irs swap thread. Rear brakes too
jpndave replied to Invincibleextremes's topic in Drivetrain
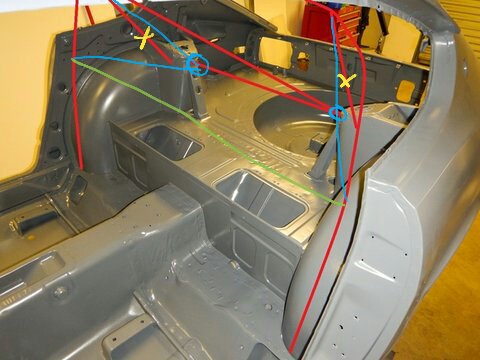
That's a good hand drawn summary "perfect Ackerman" on top and both extremes in two dimensions. With the ackerman aligned with the center of the rear "axle" or centered between the rear wheels, inner and outer tires turn with zero scrub ie they turn in the radius that each travels inner tighter than outer. That's the theory a line through the pivot point for the wheel and the tie rod end pivot center. Things can also change as all this gets dynamic rather than static or theoretical and the struts don't hold everything perfect as suspension cycles. These old cars flex a bit too. I haven't run the numbers on stock or even started design for my car but it definitely will be in the considerations. You've got scrub radius, as well as the caster and camber to deal with too. Lots going on up there. -
Progress on my insane VQ35HR 240Z project
jpndave replied to markrolston@mac.com's topic in Nissan V6 Forum
Beautiful car Mark! Yours has been an inspiration for my build. Love the red. Just noticed the LED front turn signals. Nice touch there. I've always hated the side markers on my car. Planned on eliminating them front and rear using the stock lower early lights for some side coverage up front and a Ferrari tail light that sticks slightly out in the rear. Yours mounted flush look nice. There are so many details that I notice another every time I look at your photos. Thanks for sharing. -
Ford Super 8.8 irs swap thread. Rear brakes too
jpndave replied to Invincibleextremes's topic in Drivetrain
Here are two views of the nodular diff from my build thread here even though I'm using the aluminum case, they look the same. Need to update the photos. I have opened up the case to look at the Torsen and Limited slip. I'll try and get photos of both versions. Does this help to see why Invincibleextremes is so stoked about the prospect? Look at the strength of the pickup points and the just the ease of mounting the thing in there. Plus it's stronger case and internals, across the board. Factory and aftermarket support is great as every new body style Mustang gets it in one form or another. Aluminum behind the automatic smaller engine cars, Nodular in the upper models, Torsen in the race package and limited slip as far as I know it across the board unless it gets the Torsen T2.
-
Ford Super 8.8 irs swap thread. Rear brakes too
jpndave replied to Invincibleextremes's topic in Drivetrain
We have this if you need any reference dimensions. Complete subframe drop. Probably won't be using much of it but it wasn't really any more $ and we can reference the complete assembly for mockup. We're considering the hubs and brakes, tried to get the carriers to work too but I think it will compromise geometry too much for those parts. If we can get the hubs/calipers/rotors to work, ABS might be doable as well. I'm just concerned a bit with the stagger I was planning as it might throw off the ABS computer. We'll see, need to get the house/shop done and get some time to test fit up parts. JD is further along on his rotisserie and that will certainly make it a lot easier. This assembly is his other than the aluminum case as he's using the nodular one for strength. I'm chancing it to save weight and my power will hit differently, not as hard down low, more on top. Fingers crossed I don't regret it. Just need it to hold 500 at the tires. We're planning to tie all the structure together front to back including a mild cage so integrating pickup points for the mounts will be in that plan. Doesn't make for stock bolt in compatibility like your design. If we can retain that we will but I really doubt it. This one doesn't have the upgraded calipers but it does have the vented rotors. The stock A-Arm setup is a little goofy with the extra linkage on it. I think we'll be fabbing that to fit. Center for sure but anything else that's usable is a plus as it is there and paid for. Let me know if I'm hijacking too much here.

.jpg.ca221b829b0cb37892e96aa1feca4d90.jpg)
.jpg.088946fd8ef6e760aaff0b1459bfc421.jpg)
.jpg.0e66ece4d3e858db148b31a36e0c2562.jpg)
.jpg.114d4bd01eabd940ddd8b0def7fde18d.jpg)