-
Member Statistics
33316
Total Members5167
Most Online
All Activity
- Today
-
Interesting. How quiet (at least subjectively speaking) are these? I am looking for a mellow, unobtrusive sound... actually I don't much care what it sounds like, so long as it is quiet, doesn't disturb anyone, doesn't draw attention, and approximates (more or less) a 1990s V8 taxicab, like a Caprice or a Crown Vic. In my application, space is not a premium, so huge mufflers (or even two in series, for each pipe --> 4 total) are OK... if that actually helps.
- Yesterday
-

Flowmaster "50-series big block" mufflers for quiet exhaust?
Brad-ManQ45 replied to Michael's topic in Exhaust
This is what I put on mine.... https://www.dynomax.com/mufflers/ultra-flo-welded-mufflers/ultra-flotm-welded-centered-centered-598.html -
 I have been having a flowmaster hushpower pro 3" in and out 13012100 for the last 10 years, and it is loud and has so much drone on the hwy. I am looking for something quiet (er) and no drone. What are yall using on your swaps that is quiet and fits in the stock location on a 280Z?
 -
Hello hybrid z, its been so many years since this thread. Im now 46 years old. After reading through my build thread it brought back so many memories. I still have the car (I'm never selling it) it has seen some upgrades through the years gtx3582r turbo, injectors, standalone..etc. the car is still running like a champ and I have never been inside the engine all stock factory toyota. What's most amazing is how reliable the car has been...I think the only major problem i had is when the stock ecu went out.. Things I would like to do in the future are, totally new wiring throughout the whole car, all new fuel system and lines, stainless exhaust system, new dash and seats, new rear suspension setup.( i did the front a few years ago). Reflecting on this build also brings to light how expensive everything is now...in 2008 I paid $2000 for a 1jzgte and r154 trans...today that would cost 6k or more...my z was only $600 running and driving..now, that is about 4k or 2k for a z with trees growing through it... any kind of build like this now us easily 10-15k from the jump.. and thats not counting what you have to upgrade and replace because the car is 50 years old..lol It was and still is a awesome journey! Currently projects (nothing ever changes😊) 84 chevy c10 super charged 4.8 ls engine swap....should be done soon... 84 rx7, s5 roatry engine, ida weber, wide body, 10x17 all four corners😉...

-
I put a 3" in and out hushpower on my LS Z thinking it would be quiet. Its the only thing I dont like about the car, its loud and very droney on the hwy. Im trying to find what would be the quietest muffler that will fit in the stock location, I dont care if it takes a slight performance hit at this point to make the car more enjoyable.
- Last week
-
L6 3.0 Rebello build with MilkFab Crankfire on the required 280ZX front pulley. The ZX pulley has a "B" size (5/8"width) for the AC and the normal "A" (1/2") width for the alternator and water pump. The car is street only and in Houston, TX. I have the complete AC system that I have used for close to 30 yrs and all I really want is a Sanden clutch for my compressor. I will spring for a compressor if it has the right width belt and can fab my own brackets if needed. Sanden won't answer e-mails and most of the parts sellers don't have the answers. Looking for anyone that has solved this issue.
-
I have a bunch of them from diesel maximas and some did not have the wings. Now they could have been replaced with Gas engine pans sometime since 1984. For drag racing you may need to add at least one baffle because the combination of front lifting upon launch and the acceleration of the car can actually nearly empty the pan and submerge the rear half of the crankshaft in oil. I didn't feel good about what was there from the factory.
-
Today is the first day in over a month with no problem. No slowdowns on other sites. Just left and came back with same problem - took over 1 minute to load, 15 seconds to go to particular forum.
-
it didn't occur to me that it could be something specific to this page but mine has been painfully slow for at least a month. Just assumed it was something to do with my internet.
-
Seems fine to me. Must have just been an intermittent issue.
-

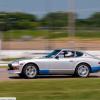
A 2026 SEMA SHOW 260Z Build all the way from Great Britain
toolman replied to toolman's topic in Body Kits & Paint
Part 11- trial Fit of the 370 Rear Drive Sewction into the 260Z. In this episode, the Car is finally on the ground for Rear Suspension construction. Since they are using a Fiberglass Hatch Delete section, there will be very little space for anything else but a Fuel Tank Cell. the major problem is time to finish the car as they are not even at the half way point of the build. The craftmanship truly amazing as they solve problems with building a one of kind vehicle. . -
uniquesnd joined the community
-

280z 1jz track build from a pile of parts
flatout replied to flatout's topic in S30 Series - 240z, 260z, 280z
Been a long week but got everything completely stripped and got some epoxy primer layed down on all the metal surfaces. have plenty of body work to do but atleast its sealed and protected now. Hopefully in the next week or two i can get the bodywork done and get some color on it. I did talk to john and his comment is "I don’t claim to be an expert on bonding. But in my experience cracking at a bond line is often due to inadequate surface prep both the underside of the fiberglass and the underlying metal), poor bonding agent, not enough bonding agent, cheap body filler, and/or excessive flexing of the unibody. On the other hand, I know a lot of guys who do the bolt-on installation. For performance applications, it can be an advantage for working inside the wheel well". With that said I think I will spend the time to make the fitment as good as possible and make a last minute decision based on how well it fits/looks.
-
What is wrong with the server setup on the hosting site that causes such slow response times?
- Earlier
-

A musician's therapist (The $300 Z)
Zetsaz replied to Zetsaz's topic in S30 Series - 240z, 260z, 280z
Front end got tidied up quite nicely and I made new brackets for my intercooler. The drier clears, but I'll have to place the trinary switch on the #6 line instead of the drier. No big deal, but I wasn't able to make the rest of the hoses while I was here. Used on the threaded holes for the original airbox for one of the top brackets, and an existing hole made by the previous owner. The brackets on top aren't supporting weight, just preventing it from tipping forward or back so it doesn't torque on the lower brackets and bend them. Only downside is the brackets look slightly lopsided but the intercooler is centered! Took the car to get aligned and they told me there was play in the steering shaft from a cross threaded bolt. Looks like the end wasn't all the way in and the bolt had never crossed to the threaded side. I loosened everything, chased the threads, and got everything tightened up. Also added one of the missing trim pieces. Looks much nicer. The car as a hole is feeling pretty good, and nearly everything is great. I'm just at a loss with the rear end. I know it'll probably help slightly when I go to the 3.54 rear and everything is rebuilt but there's just this persistent vibration. Flipping the driveshaft 180 somehow solved most of it, but I still get the occasional buzzing and it's driving me crazy. I'm about ready to go back to the stock control arms, oem spindle pin, stock mustache bar, and a kameari mount on the original front diff crossmember. Everything on the car just feels so great except for the rear end buzzing or squeaking. So much of the car is damn near perfect that the small issues like that are a distraction from enjoying it as much as I could. Alignment rescheduled for today, so we'll see what they find or if it solves my problems.
-
 Turbodelta joined the community
 -
To wrap this all up, it made 308hp 358lb/ft at 4510RPM 17PSI. Power was climbing the whole time, but it ran out of injector at 4500RPM so I limited all runs to this. More power than expected. Plenty of power for the street, but to be safe I will step up to bigger injectors.
-

Fast Floridian's 240Z Track Build
FastFloridian replied to FastFloridian's topic in S30 Series - 240z, 260z, 280z
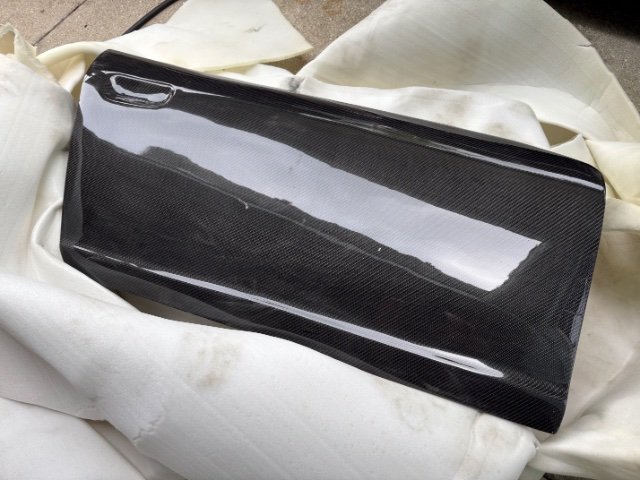
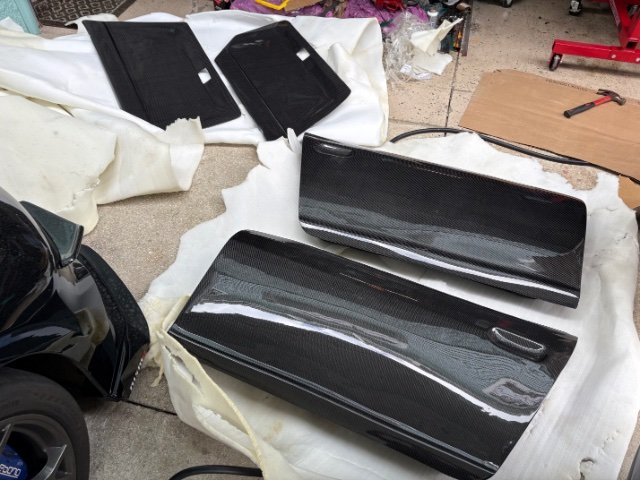
They are super light, I’ll get a weight on the shell this week and share, and in a few months when I get around to installing them I’ll get a full weight with windows/hardware. -
Fast Floridian's 240Z Track Build
flatout replied to FastFloridian's topic in S30 Series - 240z, 260z, 280z
Those are incredible. I'm with Mitchel on needing to know the weight difference. You gotta put them on a scale for us. Very interested in fitment and your thoughts along the way. They look like they allow for roll up windows and factory door handles too. very nice. -

Fast Floridian's 240Z Track Build
Mitchel0407 replied to FastFloridian's topic in S30 Series - 240z, 260z, 280z
I would love to see a full weight comparison between the original and carbon fiber door. I know from lugging my 280z doors around that the factory doors are quit heavy. -
Fast Floridian's 240Z Track Build
FastFloridian replied to FastFloridian's topic in S30 Series - 240z, 260z, 280z
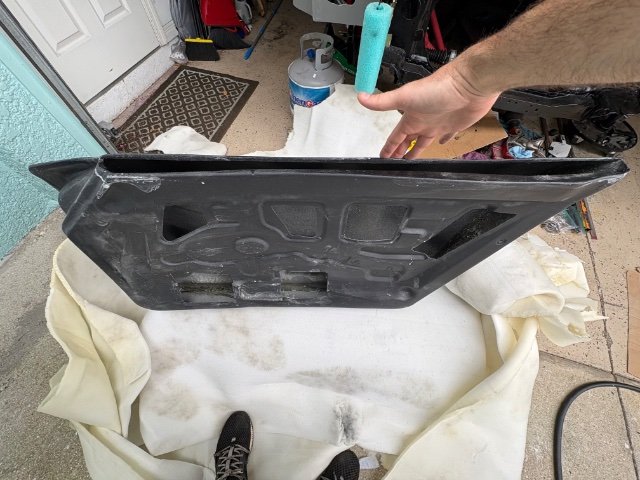
Carbon fiber door and door cards came in, these things are super sexy 🥰
-
 Martathord joined the community
 -
 dylus121 joined the community
 -

Fast Floridian's 240Z Track Build
74_5.0L_Z replied to FastFloridian's topic in S30 Series - 240z, 260z, 280z
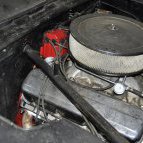
Without the oil cooler, my water temps were never an issue. Never over 200 on track. When I put the Aviaid Mangusta pan on the car it had a provision for an oil temperature sender. Even though my water temps never got too hot on track, once I installed an oil temp gauge, I discovered that my oil temps were getting near 300F. I added the Setrab 34 row cooler, and my oil temps stay below 250F. -
Fast Floridian's 240Z Track Build
FastFloridian replied to FastFloridian's topic in S30 Series - 240z, 260z, 280z
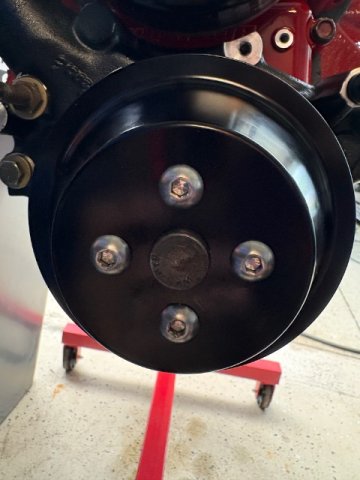
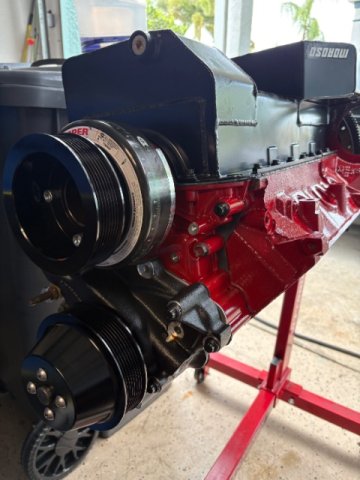
Used a Dremel and the water pump pulley on.
-
Fast Floridian's 240Z Track Build
FastFloridian replied to FastFloridian's topic in S30 Series - 240z, 260z, 280z
Thanks sharing the pics. How do your oil temps do? I’m thinking of going with 2 smaller coolers so I can mount them right behind bumper on the sides to get direct air. My 370Z over heats at the track with oil cooler, intercooler and radiator all stacked. -
Fast Floridian's 240Z Track Build
FastFloridian replied to FastFloridian's topic in S30 Series - 240z, 260z, 280z
I threaded bolts up, looks like they’ll fit, I’ll find out soon. -
Fast Floridian's 240Z Track Build
74_5.0L_Z replied to FastFloridian's topic in S30 Series - 240z, 260z, 280z
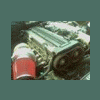
On my car, I am using the SN95 timing chain cover, water pump, and pulleys. By doing so. I have a couple of extra inches of space at the front of the engine.
-
Fast Floridian's 240Z Track Build
flatout replied to FastFloridian's topic in S30 Series - 240z, 260z, 280z
bolt pattern looks too small to. maybe just the photo?


-
Who's Online 0 Members, 0 Anonymous, 968 Guests (See full list)
- There are no registered users currently online