-
Member Statistics
32473
Total Members2093
Most Online
All Activity
- Today
-
I wasn't expecting that.
-
ZX rack is mounted behind the crossmember.
-
I have been looking at the options to add power steering. I haven't seen anyone use a 280zx hydraulic rack and pinion. I don't know the dimensions of the rack, but it seems like it would be closest to the proper size as opposed to other options. Any one have any thought on the 280zx rack? Are folks using Miata or Subi racks because the 280 rack is not as good? I think the 280 rack is slower. Something I will need to consider.
-
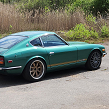
Yet another LS 260z swap :)
christianmoller replied to christianmoller's topic in Gen III & IV Chevy V8Z Tech Board
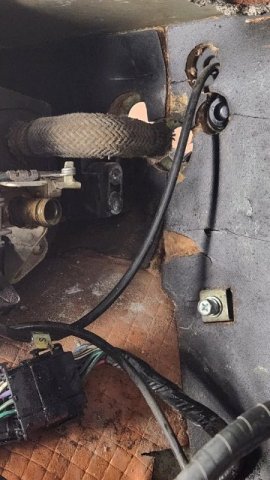
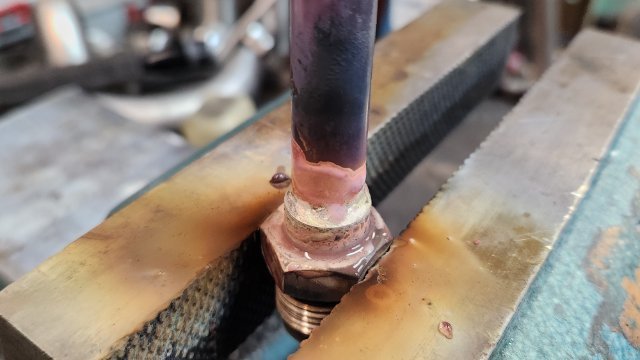
Today i created a milestone, i mounted the throttle pedal😱😁😎. I also welded some old bolt holes and took some not wanted brackets away from the engine bay. There were also time for some thinking of the water lines, i think i have a solution, move the vacuum/water thing closer to the heater valve and i have deleted the short pipe that goes thru the fire wall. What is the actual purpose of the vacuum/water valve? i'm well aware that it shut the water of but the heater valve does the same?!?!? When i look in the FSM for Air condition i see that is open in every mode of operation (AC/Heater) or am i missing something? 🍻 Edit: been reading some more......it seems like the vacuum valve blocks hot water in AC and Vent positions and the HOT/COLD lever don't do anything in these positions,...................i think so if i keep the heater valve closed in these positions i might be able to delete the vacuum valve, or? I will help a lot when plumbing.
-
Did you finshed the wiring? I'm in the process of rewiring my 240z. Do you have any guidance you can give me. I can be reached at 661-910-5467, I'm in Yuba City.
- Yesterday
-
Yet another LS 260z swap :)
christianmoller replied to christianmoller's topic in Gen III & IV Chevy V8Z Tech Board
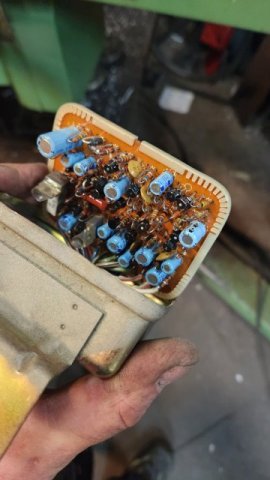
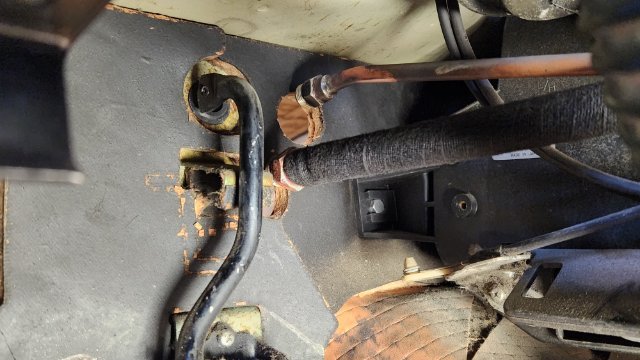
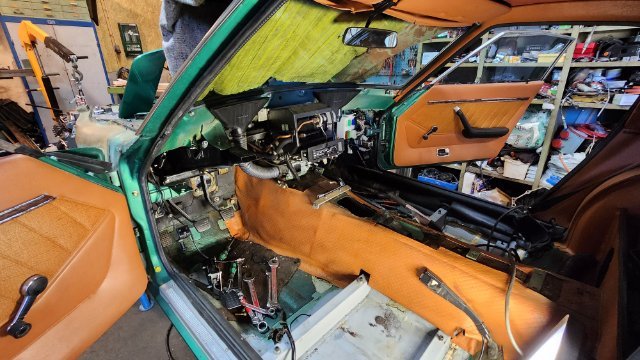
Good evening , Today's work was finishing engine room harness, take the dash board iut and start with the heater and Ac lines. I cut my record of taking the dash out by 15 minutes so i'm down to 30 minutes🤣🤣 AC lines were easy, just shortens 2.5 inches so the joint went inside the car, heater lines need some more work. I need to have the joint inside the car as the pipes hit the cylinder head so a 90° bend is needed at inlet/outlet in the firewall. Shorten the vacuum ting and move the water valve will probably do the trick(we will see tomorrow🤣). I also open up the "Interlock" unit, lot of ancient komponents. All of it's funktions are deleted as they are not needed anymore. /🍻Saturday Christian
-
 Received mine too! Thank you!
 -
Michael8018 joined the community
-

HybridZ Apparel Order Thread - 100% of Profits Will Be Donated, round 5
Leon replied to cockerstar's topic in Vendor's Forum
Got mine a few days ago--looks great! Thanks very much for your efforts Ryan! - Last week
-
Yet another LS 260z swap :)
christianmoller replied to christianmoller's topic in Gen III & IV Chevy V8Z Tech Board
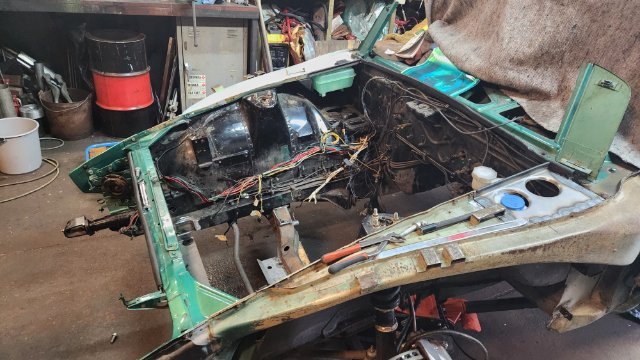
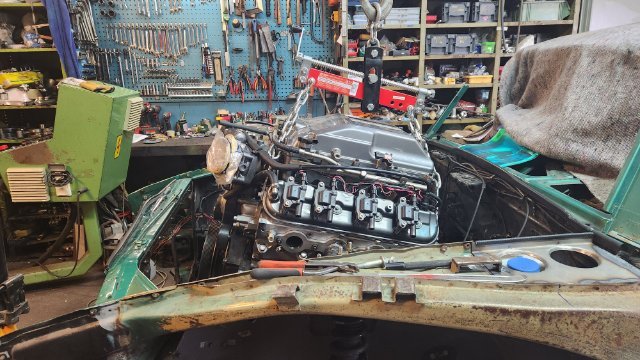
Hello, Engine went out today, time for the engine bay, old brackets has to go and some new goes in. Welding some holes that not going to be used, routing AC and heater lines,
-

A musician's therapist (The $300 Z)
Zetsaz replied to Zetsaz's topic in S30 Series - 240z, 260z, 280z
I honestly haven't done too much. Most of what I've printed so far have been things others have made and made freely available. Usually my cousin or a friend have printed things for me. T3 parts ARE nice. Fitment has occasionally been JUUUUST a bit off but it's almost always when I have to chase some threads or because I have mismatched parts from such a broad range of dates on my stuff. That rear brace on the driver side is unfortunately gonna hit my exhaust so I have a guy that does stainless work checking out the car at some point soon and hopefully redoing some of it to correct things and get better clearances everywhere. I think we're about at the point with 3D printers, in terms of reliability, as home inkjet printers were when I was a kid. Still not quite as mainstream but getting there. I remember inkjet printers being good for getting my homework done when I was still using floppy disks to take my work between home and school, but they were pretty slow, and the ink ran out pretty fast. I think within the next 10 years we'll be approaching where laser jet printers are now and we'll have reliability and speed in a mainstream consumer level printer. -
Team 24oz at the Australian Tarmac Rally Snowy River Sprint. To show your support, please like our Facebook and YouTube pages if you would like to see more footage and keep tarmac rally alive in Australia. https://www.facebook.com/share/p/2WxXKW5pzi9yNBqs/?mibextid=WC7FNe
-
Yet another LS 260z swap :)
christianmoller replied to christianmoller's topic in Gen III & IV Chevy V8Z Tech Board
Ahh, thanks👍 -
The latest generation of printers has made it pretty dang easy. They're basically as easy to use as paper printers at this point. Learn some basic modeling skills from YouTube and you're off to the races.
-

A musician's therapist (The $300 Z)
Jboogsthethug replied to Zetsaz's topic in S30 Series - 240z, 260z, 280z
Man I would love to learn 3D printing, that would be awesome! Those T3 Parts are so sweet man! -
Hello. I want to add a locking fuel door to my 1972 Z, which did not come from the factory with one and does not have the catch inside the opening (see circle in attached photo). Were these catches welded to the body from the factory or attached with hardware? Does anyone reproduce them?
-
Not a 12v supply. I mainly followed DIYAuto’s how to mega squirt post which said to use the same power source. Megasquirt’s db37 supplies the ground and signal wire for the dizzy
-
A musician's therapist (The $300 Z)
Zetsaz replied to Zetsaz's topic in S30 Series - 240z, 260z, 280z
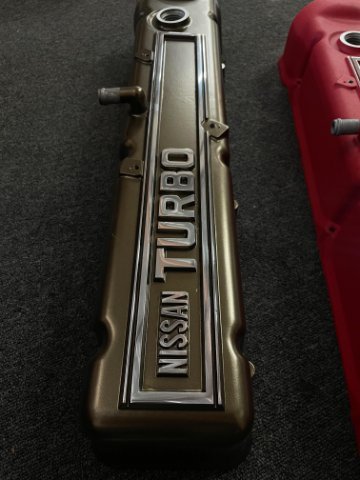
Couple of small things coming up as I prep the car for summer -Still super unhappy with the fitment on the exhaust, especially after the rear bracing was added. Have gotten in touch with some folks that do stainless about some adjustments. -New vinyl trim for the rear arrived. Won't be tearing anymore and won't have the holes on top of the strut towers. Should finally be able to start buttoning up the interior. -Purchased a new valve cover. This one came up and seller accepted my offer. Red might have been better, but it was sold. The bronze will sort of match the interior and right now I think it's a good homage to the original brown paint on the first shell I had that was unfortunately beyond saving. I think I'll eventually modify mine to relocate the breather, and shave some of the bits with threaded holes are for the old spark plug cable holders and make it red with polished lettering like the one on the right. - Also had a friend help with a better design on the distributor cover. The original was just a very plain 3d printed cover. Friend has a nicer printer that can do much smoother work with carbon and started making a better design when I sent him the old one and he didn't like it haha. Should be a fun change. The plan is to print it in black and maybe fill the Z logo with enamel
-
Why would dizzy power be spliced into power for the MS unit ? Isn’t there an output for the dizzy?
-

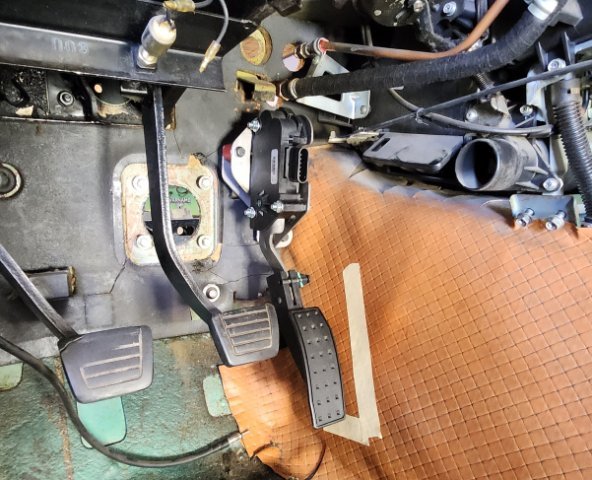
Yet another LS 260z swap :)
calZ replied to christianmoller's topic in Gen III & IV Chevy V8Z Tech Board
We usually call it a balance bar in English -
Spoke too soon, the fuel pump issue is NOT fixed. It still cuts out randomly. Throwing a multimeter on the power wire, when it cuts, the voltage drops from 14 to 12, not sure if that drop is enough to cause the issue, or if that is a side effect of the issue. I redid my main megasquirt ground on the block, and also made sure my relay grounds were clean. Wiggling the distributor wires had no effect and did not cause the cut. Neither did wiggling where the dizzy is spliced into the megasquirt power wire. I'm going to monitor the main relay's voltage to see if that's cutting. In other news, I copied the ve table and afr table from the map pin with similar specs and the car runs and revs well, except when the car shuts down for a second.
-
Yet another LS 260z swap :)
christianmoller replied to christianmoller's topic in Gen III & IV Chevy V8Z Tech Board
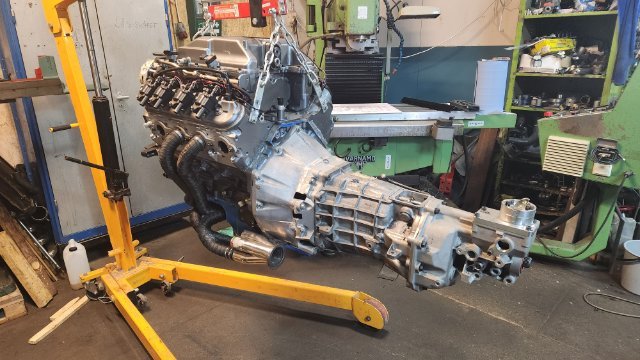
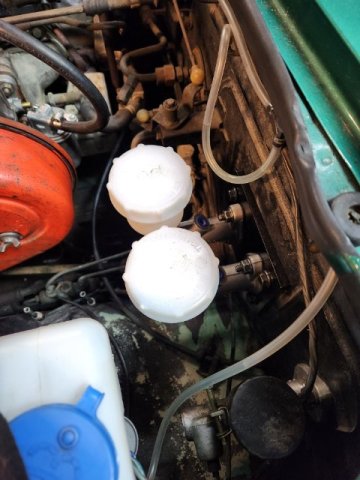
Hello, Yes it will be serviceable. I dont have any brake booster as i have two master cylinders, one front and one rear so they sit flush to the fire wall. on the inside there are a pivot rod between the cylinders were the pedal connects, it is possible to alter the point were the pedal press on the pivot rod(front/rear). I'm sure there is a English word for this but ......i dont know. Did not take the engine out today, maybe tomorrow. There was a lot of cables though that went to cable heaven🤣.
-

Jim Cook racing California z widebody flares
Mayolives replied to BurnoutZ's topic in Body Kits & Paint
Jim Cook Racing has a face book group. -

Yet another LS 260z swap :)
idiot280 replied to christianmoller's topic in Gen III & IV Chevy V8Z Tech Board
Clean work. I like the plate over the wiper fluid. Will the brake booster and reservoir be serviceable after this is welded down? -
Delete please


-
Who's Online 6 Members, 0 Anonymous, 330 Guests (See full list)