-
Member Statistics
33087
Total Members2821
Most Online
All Activity
- Today
-
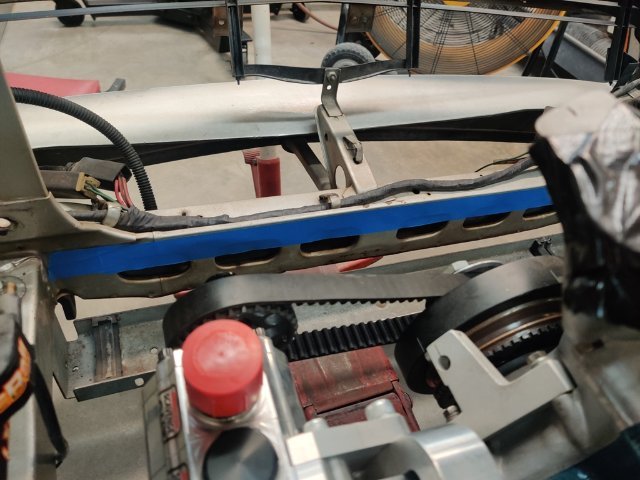
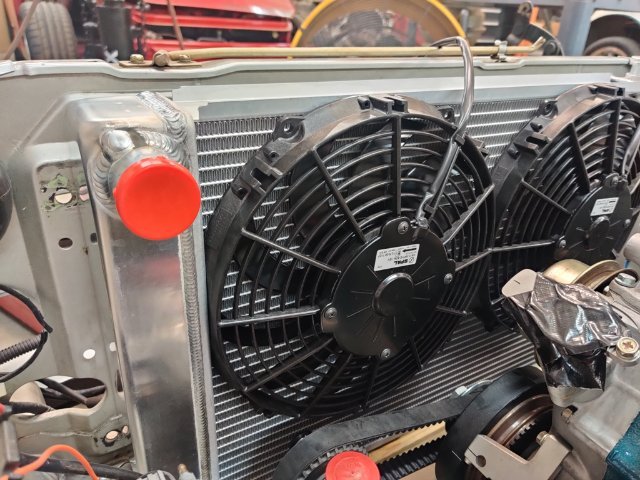
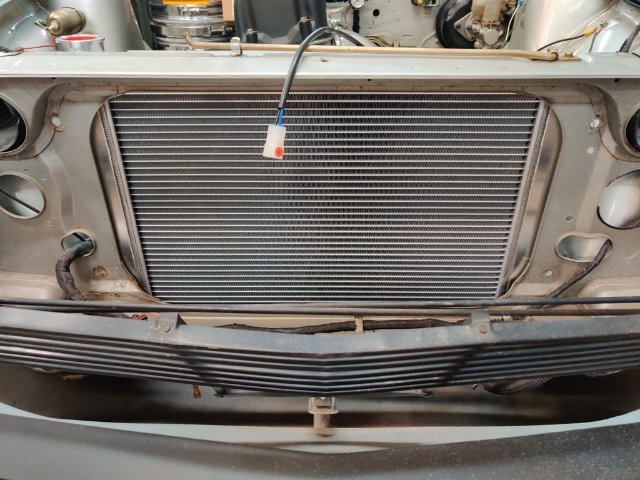
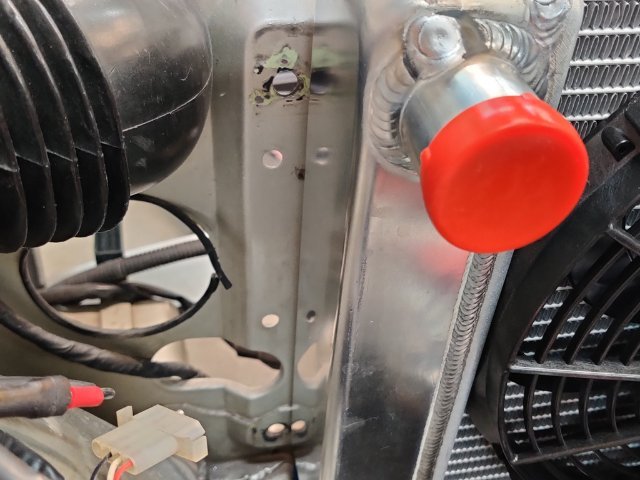
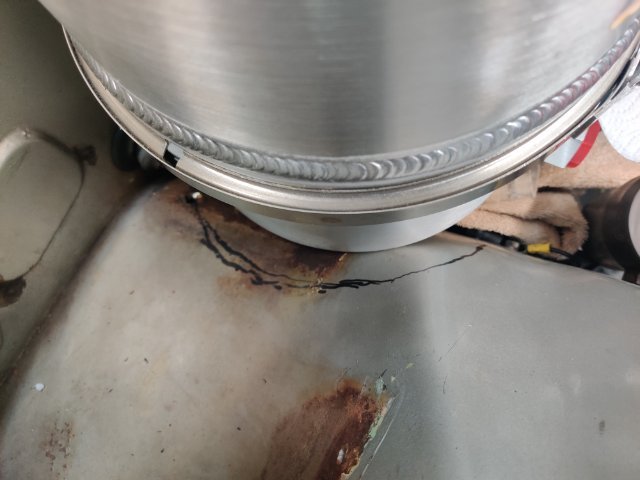
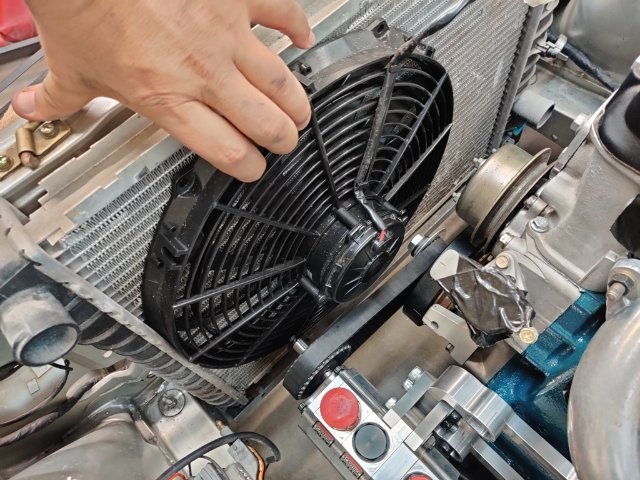
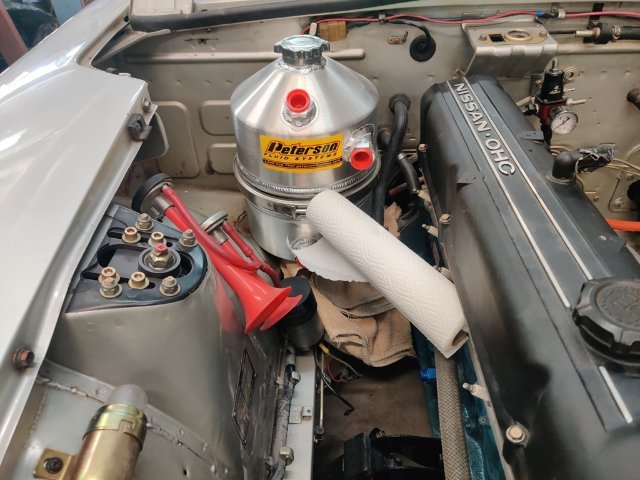
After lots of measuring and thinking, I ordered another Griffin radiator and two 10" Spal fans. This radiator is a bit wider and the same height as the other Griffin I bought years ago. However, the core has two 1" wide tubes instead of the two 1.25" wide tubes. Thus, the core is a bit thinner and that helps provide a bit more room for the fans. Being a bit wider, the two 10" fans fit better as well. Here are some pics: I will mount the fans at the top as shown. This will put the fans above the oil pump shaft and crankshaft dampener bolt. I will probably shorten the oil pump shaft, as the extra length is not needed for this application. The bottom edge of the radiator aligns with the bottom edge of this blue painter's tape. The side tanks fit just inside the stock radiator mount bolt locations: I am very pleased with this combination from a fit standpoint. Each fan is rated at 802 CFM. I repeatedly came across information where the CFM was higher when they were used in pairs in combination with shrouding. So, I plan to add some shrouding as well as some directing panels on the front to improve total CFM. I won't be able to measure it, but I think bumping the total up to 2000, an amount that should be good for a 6 cylinder engine, should be possible. Next, I will figure out how to mount the radiator, and wire up the fans.

- Yesterday
-
Thanks for Repairing my PassWord Problem. Is there anything that I need to do prevent this problem from occurring again? Toolman
-
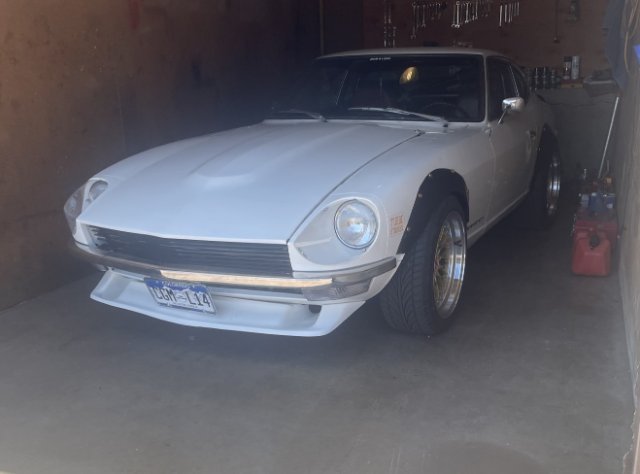
Love it Ben, great to see the car back on the road and being used as it should be!
-
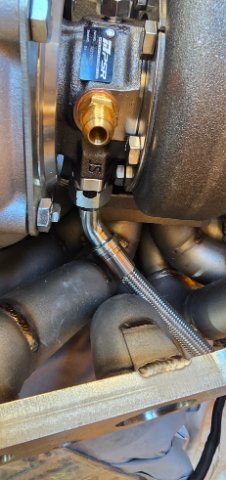
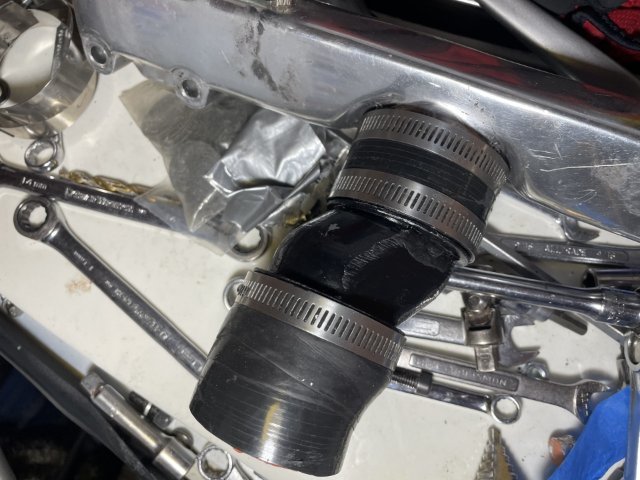
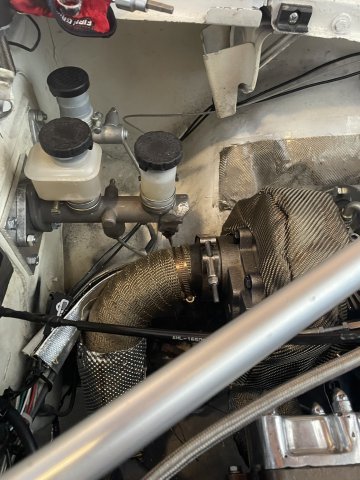
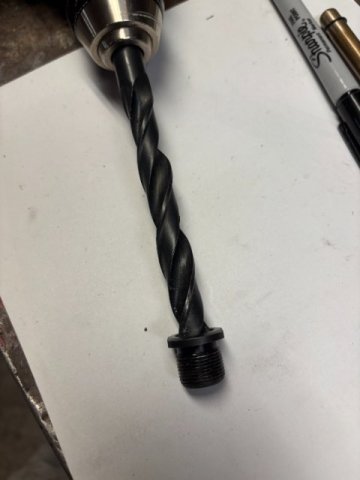
Its an ebay header so Im guessing the builder didn't spend much time confirming clearances, so no help from them... I know the drain should be as straight as possible out of the turbo, but would a 90 off the bottom fitting be acceptable?
-
I have searched and have not seen where anyone has stated that they have utilized all of the fuel pump relays and efi relay for their MS install on a factory turbo car. Wondering if this is overkill or not needed.
-
Close is one thing, but resting directly on the header isn't good. What's the line routing look like from factory? Does the header manufacturer have any pictures of it installed on an engine that you could use to figure out where they intended the drain to go?
- Last week
-
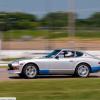
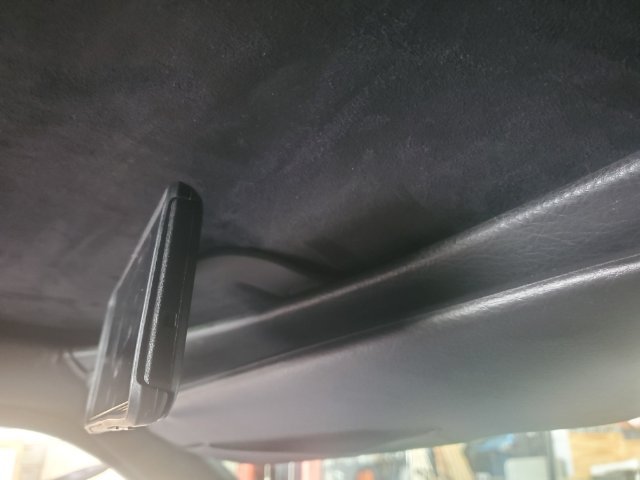
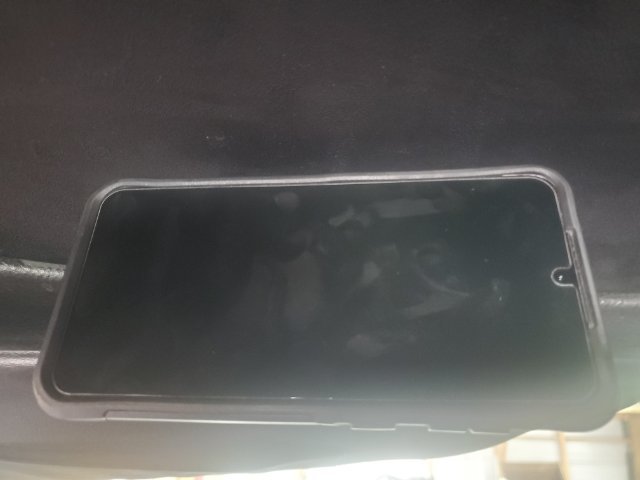
https://a.co/d/9XKdee7 Just got this one. Haven't driven with it yet to see the stability, but you can put it up high and out of the way, and bend it into all kinds of positions. You have to stick a metal ring onto the back of your phone for the magnet to hold it.
-

My Z car log....small jobs done and fun things
A to Z replied to A to Z's topic in S30 Series - 240z, 260z, 280z
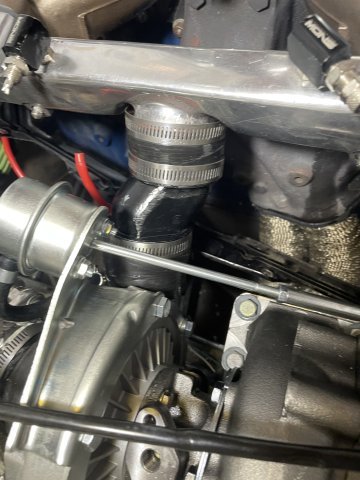
07-01-2025. I had a crack in the fuel line, so I took the time to change it up and use a bit of 1/8" pipe and fittings to make it so it is supported versus kind of floppy before. I deleted the cheap fuel psi gauge I got from Amazon which was spotty at best. Click on "V1MOV" below for a short video V1.MOV
-
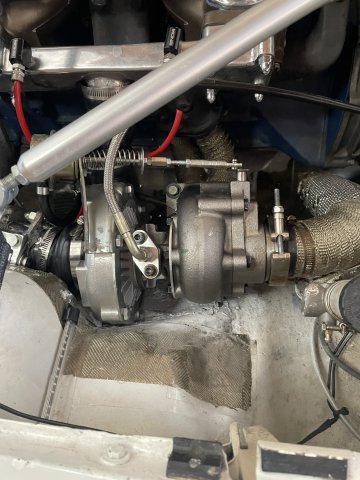
Turbo guys, this is my first time working around a turbo and I have a question on the oil drain. The manifold, turbo, drain fitting are all really tight and the drain line ends up laying on the header, is that going to be a problem? It's all so compact and close that it all looks problematic to me, but I'm pretty ignorant on what might be an issue or not... Any suggestions are welcome! A couple pics of the current layout
-
Went out for some Auto-x this weekend, and had a proper blast. Highly recommended for anyone here who still hasn't gone to try it. Enjoy a slow lap, some V8 noises and straight cut gearbox whine. I have a handful of things to think about and address moving forward, but overall I'm very happy with where this sits. Next up is OnGrid at the Ridge in late July for more testing, and maybe, just maaaaybe a little redemption.
-

A musician's therapist (The $300 Z)
Zetsaz replied to Zetsaz's topic in S30 Series - 240z, 260z, 280z
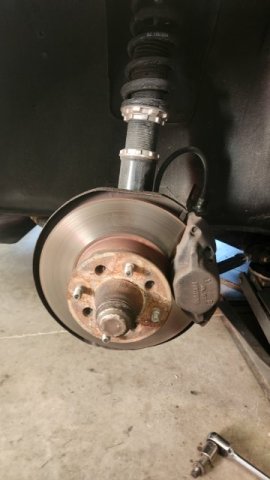
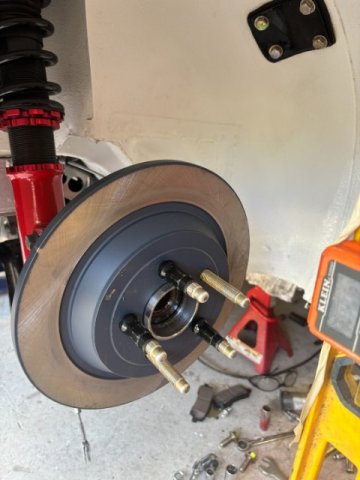
Got the front wildwood brakes installed today! A couple small quirks along the way on my install: First side I installed the rotor on the adapter ring to the hub wrong and the caliper didn't line up. It has two separate mating surfaces, one for a 240z and one for the later 280z hubs. Since I've replaced my 280z hubs with the T3 hubs, I failed to realize they're essentially a universal hub for early and late models which is why they had an extra shim ring of about 10mm to account for where the 280z mounting surface is. I took the ring off, so technically I had to install them where the 240z ones are, unless I wanted to run my rotor ring AND the hub spacer shim that they came with. Avoiding too many unnecessary pieces so I redid that side to mount on the 240z mating surface of the adapter and we were fine. Problem 2 - because I ordered the 280z brake kit, the included hardware also assumes you're still using stock 280z hubs. It's on and worked on my short drive, but I noticed in the picture where they're installed that the bolts don't go all the way out to the mating surface for the wheels. Quite a few threads left unengaged. It's probably safe for the time being, since I thought about the forces on those specific bolts and it's not really in or out since they're perpendicular to the rotational force applied by the brakes. I also didn't feel like I had particularly few threads engaged as I was bolting the rotor to the hub. Probably safe for casual driving, but it's a high priority fix right now to get the correct length bolts from T3 or locally. Better safe than sorry! Other than that I'm really happy. Bled the system with my new Motul brake fluid, which should cope much better with the heat off the turbo vs the cheap generic O'Reilly fluid I had before.
-

Heavy Duty frame rails and connectors
armorer replied to toolman's topic in Gen III & IV Chevy V8Z Tech Board
Appreciate your detailed installation thread on this kit Will be starting mine shortly, nice to see it done -
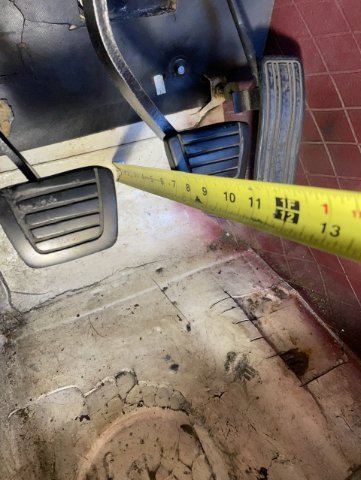
Update: replaced the mustache bar bushings, re-torqued the strut lock nuts. I don't hear any more banging noises now. Still not sure what fixed it though. When I was checking my rear Bilsteins with springs compressed, I didn't feel any extra movements to give me that noise. I also swapped my master, slave clutch cylinders and clutch hydraulic hose. The old ones had some 'brake fluid sludge' inside from the internal leakage. I adjusted the clutch pedal at 8 inches (i have a carpet/sound insulation), the master cylinder rod of the replacement unit was the same length, no need for an extra nut. I could put the pedal at the max height (over 9.5 in) and the rod was still good. The free pedal travel is within specs, 15 mm. I was observing the operation of the slave with my $20 endoscope, 15 mm of the clutch pedal before the slave starts its movement. The clutch fork throw is half an inch (12.5 mm). I could push the slave's rod back towards the front, the rod gets back to its self-adjusting position. I did some searching - it sounds like 15 mm is a better number. My reverse and 5th get engaged without grinding noise and without any difficulty. The clutch operation is smooth. I used Rockauto's Luk's: LMC245 and LSC199 parts. Appreciate your guys' help. After fiddling with my closed-loop idle, I am still chasing my tail. I posted a thread on the msextra.com forum at: https://www.msextra.com/forums/viewtopic.php?t=82151 The RPMs get dropped very low, the ECU is not commanding enough steps for my IAC (or it is telling to give, for ex., 60 steps with not much difference). The car is driveable, but with rpms sometimes hitting low 300-400s, which is not good (CLI is not even running when it happens). Here is my updated tune and drive logs if anyone wants to take a peek. Thanks, Den 2025-06-29-v102.msq 2025-06-29-cold-start.mlg
-
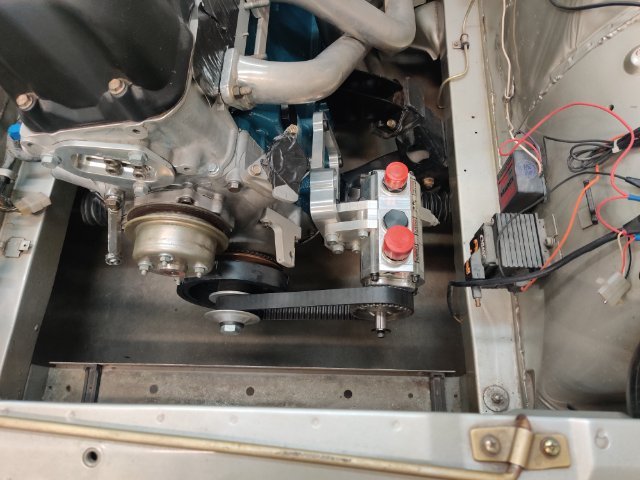
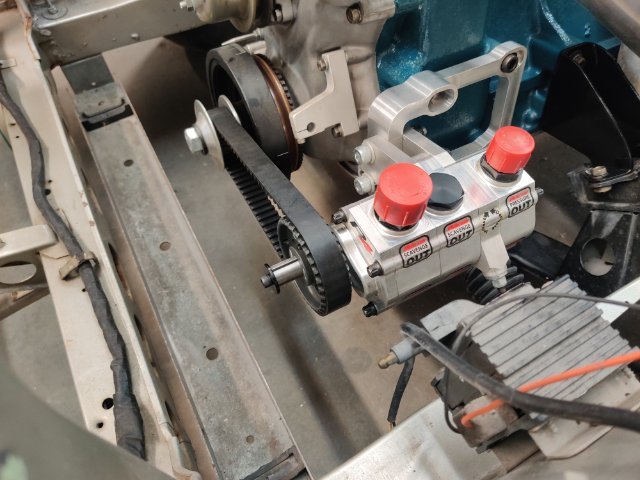
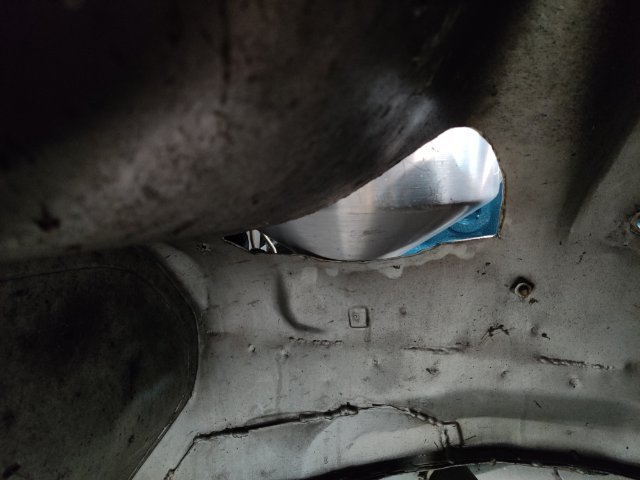
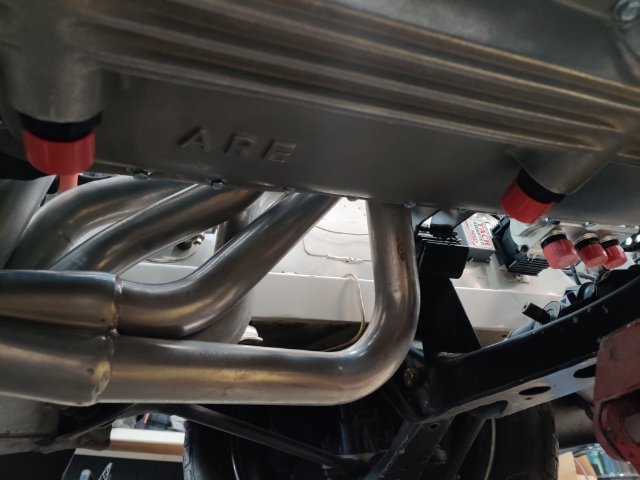
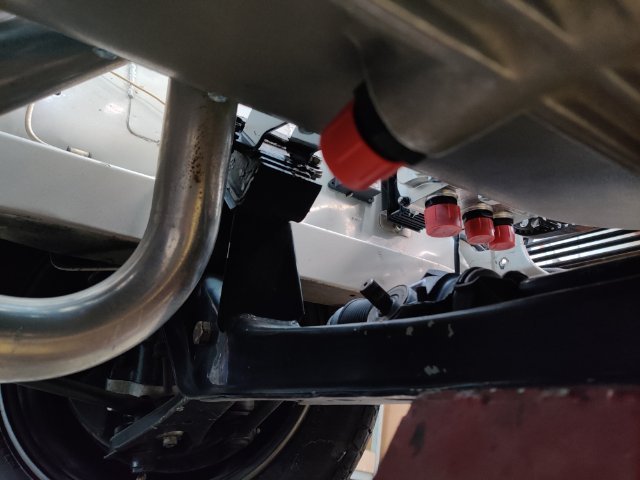
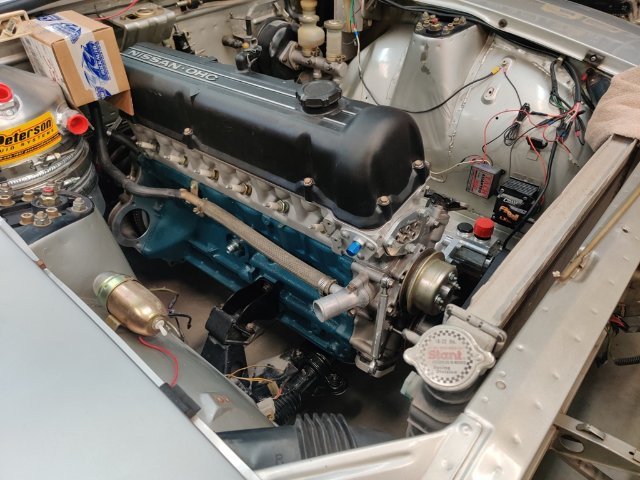
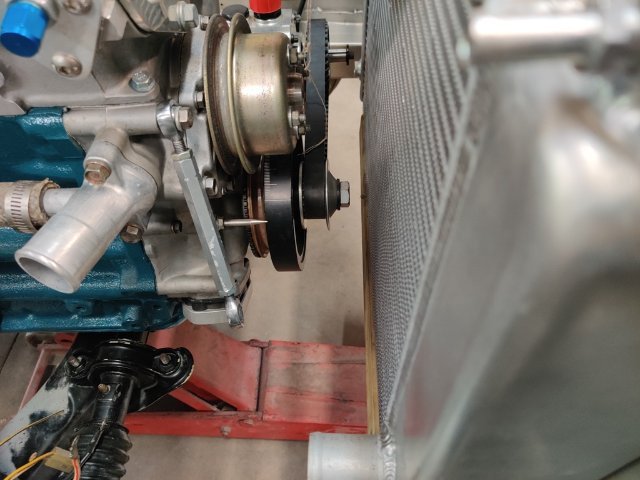
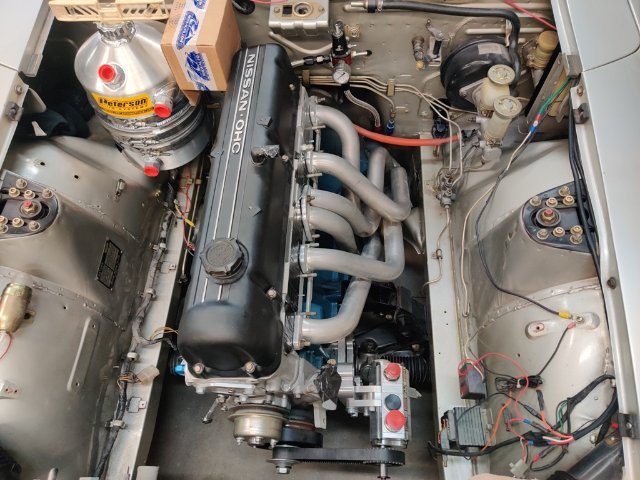
I put the engine in the car last weekend. This weekend I am doing a lot of staring at it and thinking. I need to figure out how and where to route all of the oiling lines. And I need to figure out what to do for a radiator and cooling fan as the Griffin I bought is 3" thick and is awfully close to the crank dampener bolt. Those are the immediate concerns. I still have to wire up and install a set of Speedhut gauges, drain and flush the gas tank and lines, and a bunch of other stuff before I can attempt to start the new engine. Going to put the tank about here: Have to cut sheet metal here to get the tank low enough to fit under the hood: Pump and custom mount: There is a good amount of space under the pan. I will route the two pan scavenge lines under here to the bottom two fitting on the pump. I can clock the bottom of the tank about 90 degrees to get the bottom fitting pointed towards the left side, and then I might be able to run a line from there, across the top of the transmission bell housing to the left side of the engine compartment, and run it along the frame rail to the front of the pump. Radiator situation - Griffin set in place in first pic is very close to the crank and oil pump shaft. The Stealth Conversions radiator is much thinner, but even some the 14" Spal would be a tight fit. And when I was last at the track with this radiator, the temp gauge indicated slightly elevated temperatures from normal. So, I'd prefer not to put that radiator back in this car for that reason. It was fine though for all use except track sessions in the August heat in Atlanta. I had no shrouding and a stock clutch fan (plastic) when it was last installed.
-
My Z car log....small jobs done and fun things
A to Z replied to A to Z's topic in S30 Series - 240z, 260z, 280z
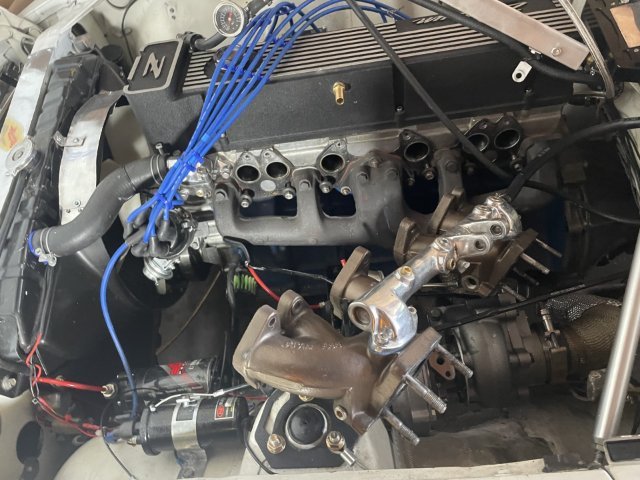
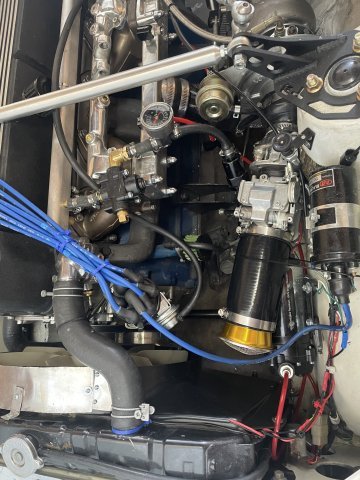
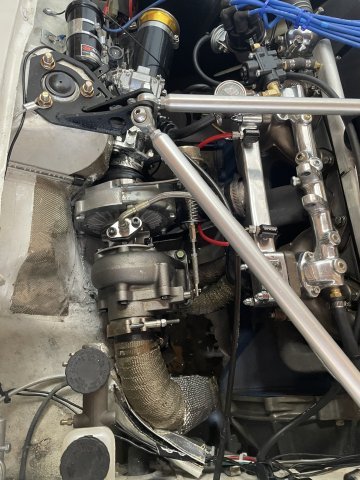
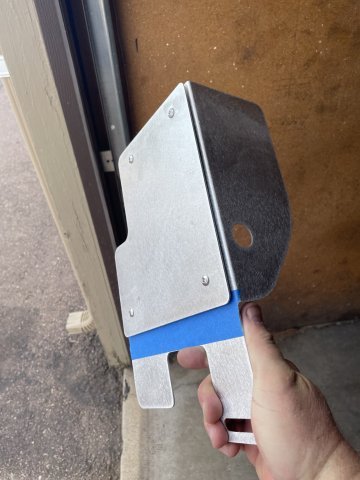
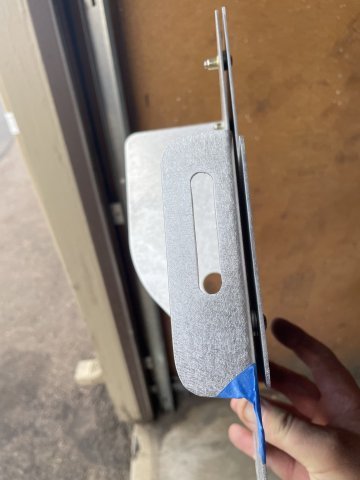
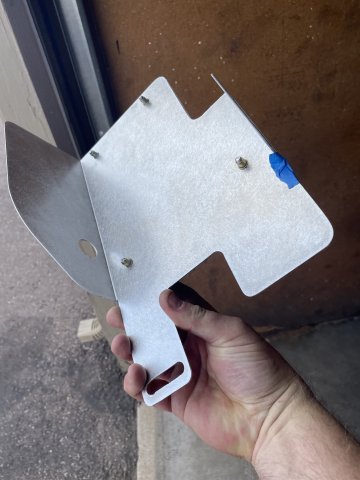
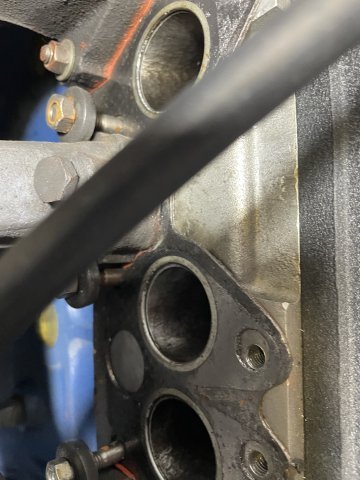
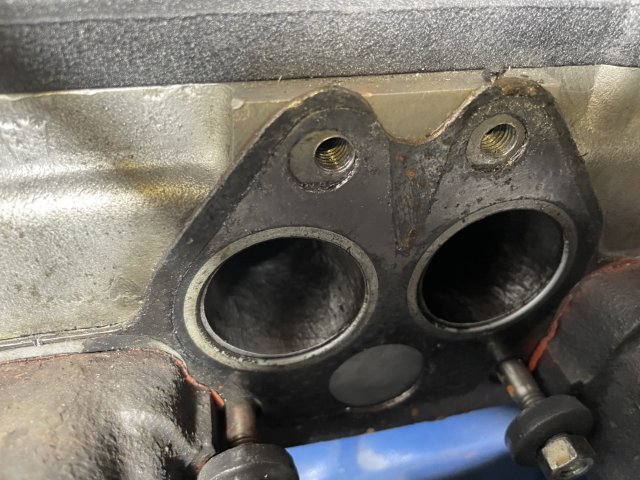
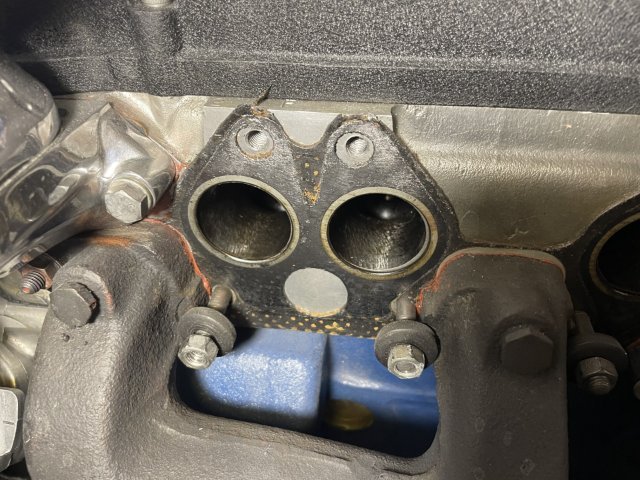
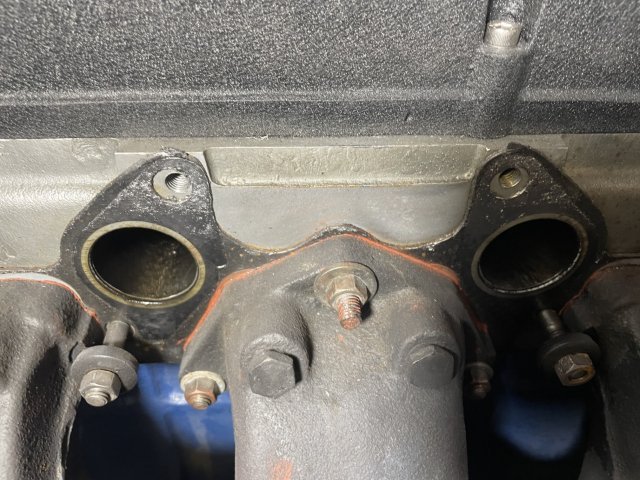
06-28-2025. Putting the new turbo on. With the new turbo to manifold piece, I had to actually remove the intake manifold, put it all together, and then slide the manifold back on. It WORKED! Look at those HUGE ports! I haven't seen them in awhile! That's my Russ Racing prepped and shaved E31 head! I have it almost all assembled, I had to "slip" the top hose clamp up a bit to get a really good seal clamped down. Looks "different" but it is SNUG. I vacuum tested the new wastegate actuator......WAY too high (boost crack at 15 psi !!!) , so I put the older one on, and it boost cracks at only 2.5 psi.,....but I didn't port the turbine housing this time, so keeping that in mind, I think very little boost will be bleed off....enough to protect the engine, but it's going to pump quite a bit of air and fuel! (boost creep expected). The Skillard brake master cylinder heat shield I ordered came in, and is waiting me to custom mod as needed and install. Also went ahead and started clamping down the vacuum hoses to avoid any more hoses blowing off under boost. I have also added on a few pics of my intake ports if interested. Almost done! It is now HOT, have to keep stopping and wiping my face off. I think it was over 86! cheers! pics attached.
-
Fast Floridian's 240Z Track Build
A to Z replied to FastFloridian's topic in S30 Series - 240z, 260z, 280z
GREAT! I haven't seen those....I got mine from Z car depot. -

Fast Floridian's 240Z Track Build
FastFloridian replied to FastFloridian's topic in S30 Series - 240z, 260z, 280z
Thanks, just ordered sway bar plates from bad dog -
My Z car log....small jobs done and fun things
A to Z replied to A to Z's topic in S30 Series - 240z, 260z, 280z
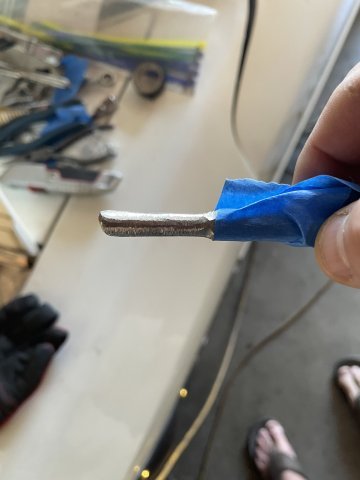
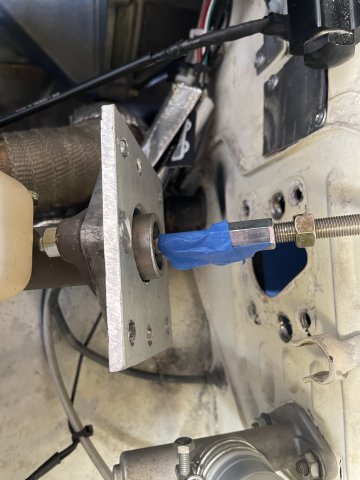
06-26-2025. I finished the manual brake conversion. I had to remove the master again, from the firewall screw in the rod all the way and then take measurements....how far the rod goes into the master cylinder, and then figure out how much rod needed to stick out of the firewall to be just right....and then because it was screwed all the way in, take a bit more off from that and it should be good......but when you change pedal hole height, sometimes you have to shave down the rod to fit in the master without binding from being on a slight angle, etc. So, using the die grinder I got it smaller and decent looking and then re-assembled. Works, pretty good. when I push on the brakes, I can feel it come on within 1-2 inches and by 3 inches the floor it stops, and if I push HARD it completely stops 1.5 to 2 inches from the floor. I set it with about 1/4" of play at the pedal when released. So, we will see how it works on the road. Here are some pics:
-

Heavy Duty frame rails and connectors
toolman replied to toolman's topic in Gen III & IV Chevy V8Z Tech Board
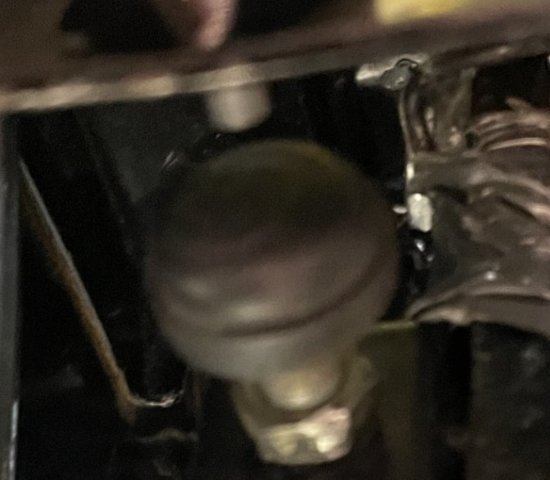
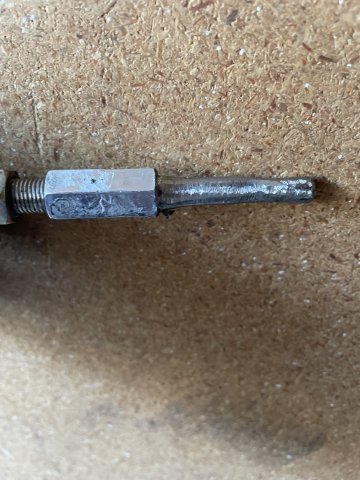
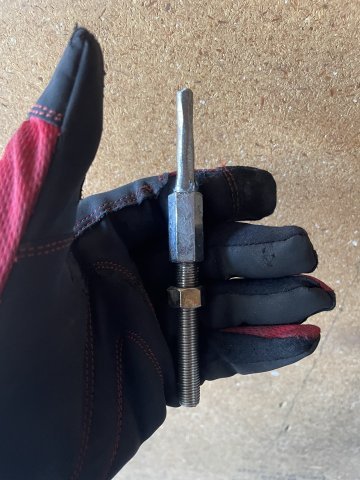
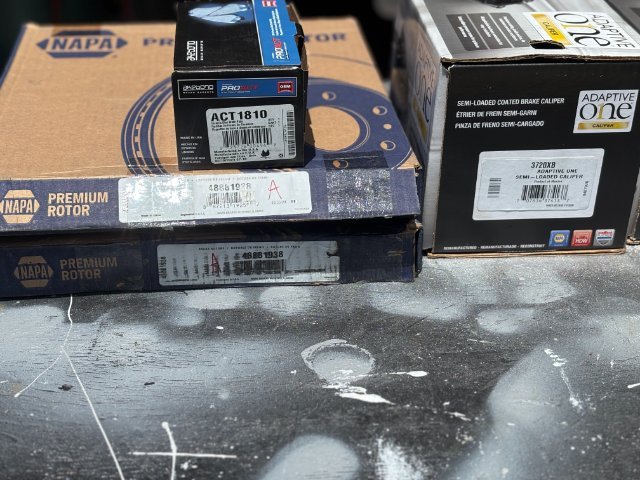
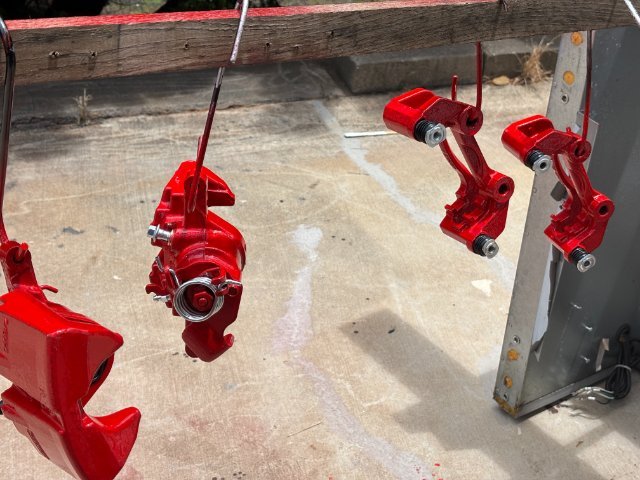
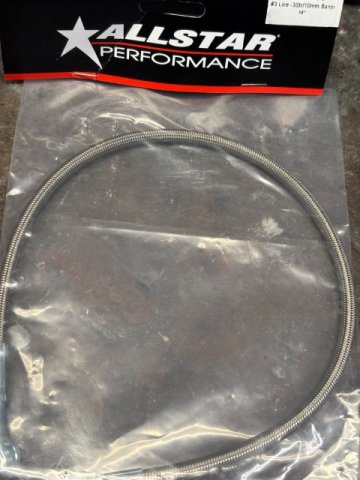
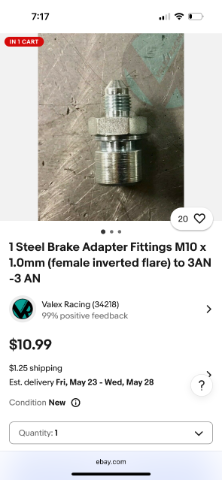
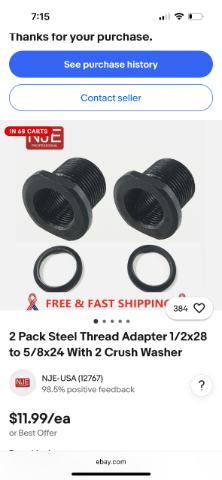
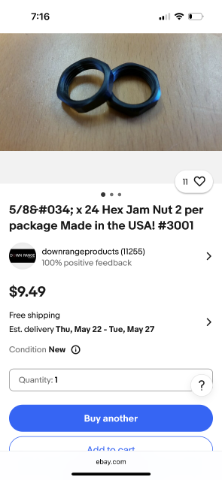
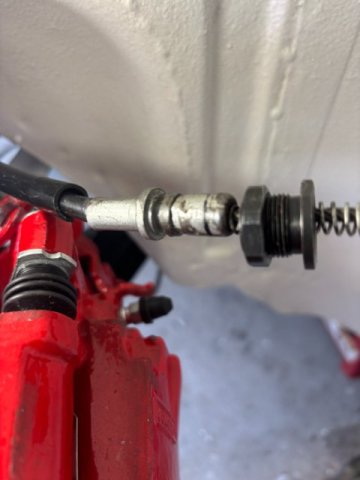
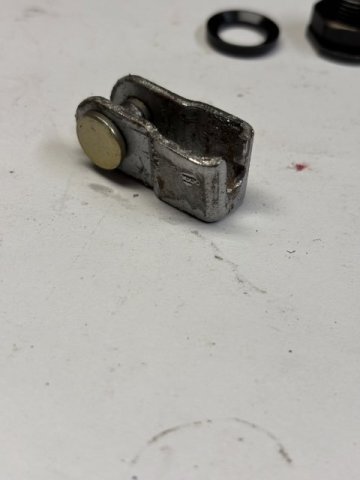
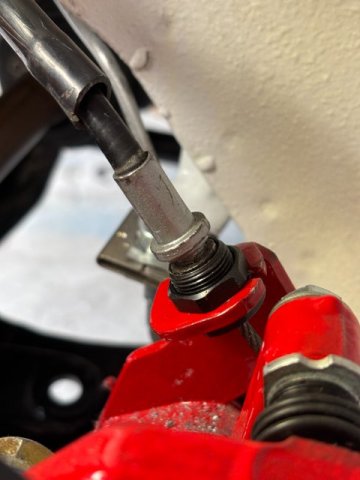
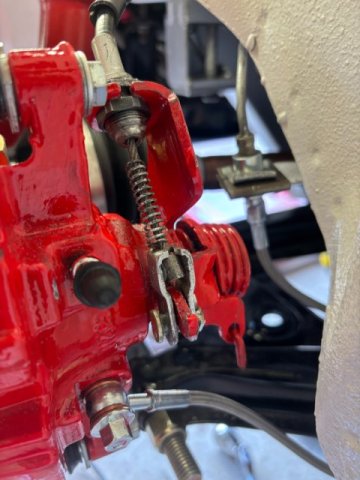
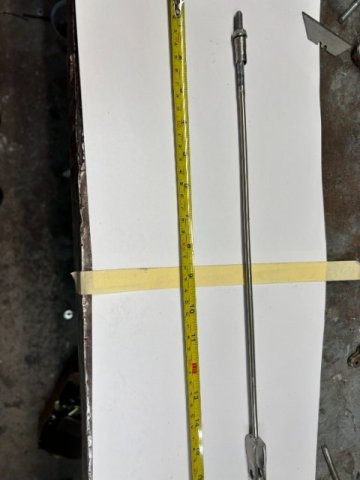
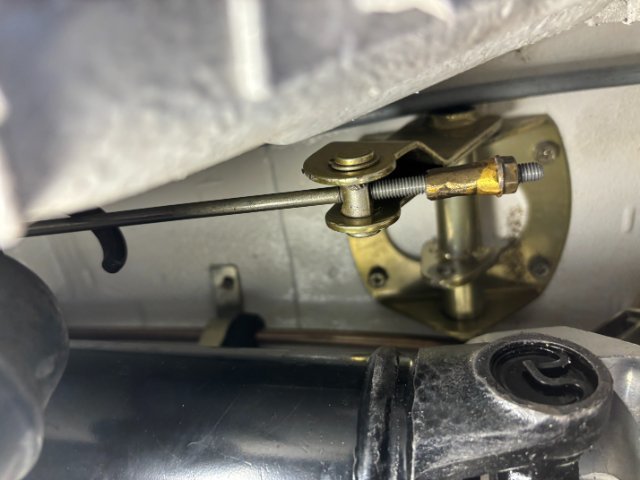
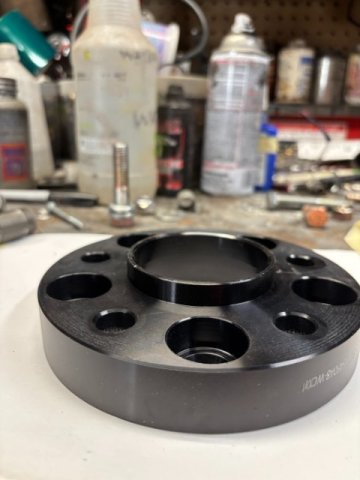
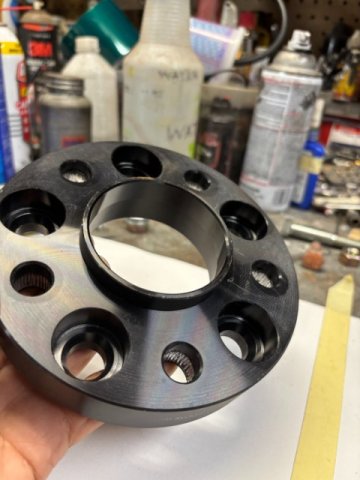
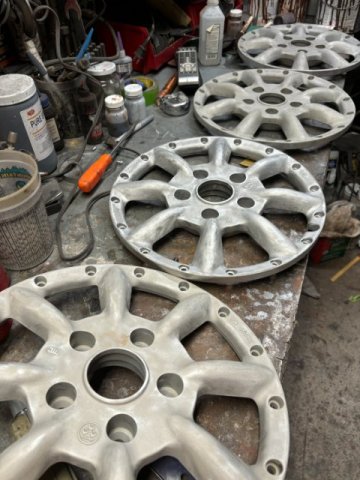
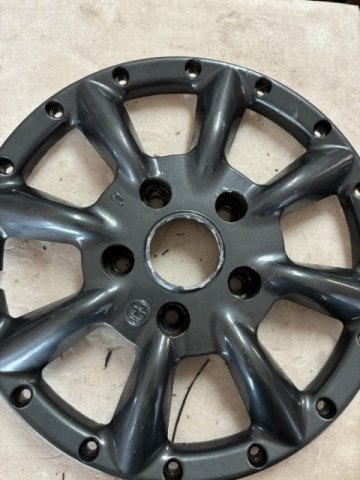
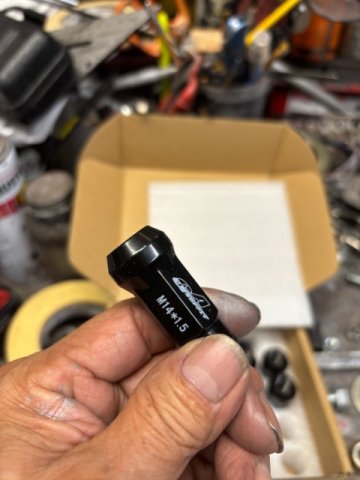
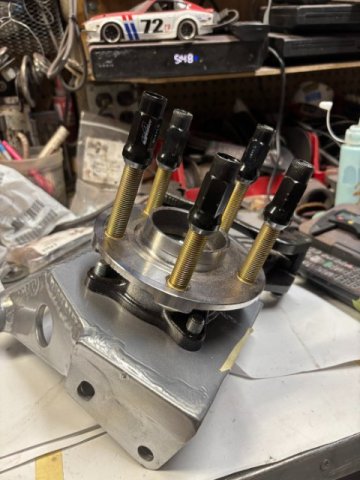
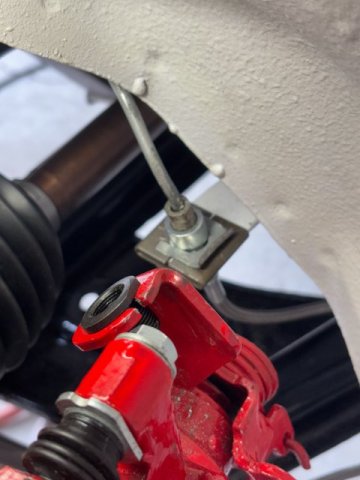
Sorry for the delayed reply. Was having difficulty with my Password and trouble posting. Thanks Administration for correcting problem. Disc brake and Hand Brake Installation- First, Important Notice-The Invinclble Extreme 8.8 Differential Conversion Kit requires the use of 2015 to 2024 Mustang GT Rear Disc Brake system. All related Suspension Parts were created to work with these parts. Check carefully if any alternate brake parts are used for fit and function. Otherwise, Different Parts may require Modification at some level. I utilized NAPA Replacements Brake Parts (Calipers, Rotors and Upgraded Pads) for 2019 Mustang GT I painted the Calipers and Mounts with Polyurethane Bright Red to improve their appearance, Stainless Steel Brake Lines(from Amazon) were used. Brake Line Adaptors from EBAY connected the Male OEM fittings to the Stainless Lines. Brake Line Adaptor installed with OEM Clip to Stainless Steel Brake Line Hand Brake Modifications- The Hand Brake required a little more fabrication to function properly. I found these adaptors on Ebay although they were not designed for this particular job. The Above Two Parts were used together to adapt the OEM Hand Brake cable to the Mustang Caliper Hand Brake Cable Mount. The Cable Bracket with roll pin must be Slit to allow the cable to fit into the Threaded Cable Mount. After being inserted into the Cable Mount, the Bracket with Roll Pin is reassembled on the Cable. The Slot can hammered closed afterwards(or even tack welded) The Caliper Hand Brake Cable Mount had to be enlarged to 5/8" from 9/16"(use Unibit) to fit the Hand Brake Cable Adaptor. Insert Cable into the Nut assembly with JB Weld Epoxy to fasten cable to prevent movement. Allow 24 hours for the JB WELD to harden. Drill out Adaptor to 5/8" to provide Cable fit. /inserting Cable into Adaptor with JB Weld to hold it. I Assembled all together With the Hand Brake completely Loose, Slide Cable Roll Pin with Cotter Pin over the Caliper Lever Arm while pulling cable. Note-Stainless Brake attached to Caliper with Bolt(with copper washers-above and below. 0 The Hand Brake Adjustment Threaded Rod must be shortened by 2 1/2". Just use a Hack Saw to shorten a non- threaded portion of the Adjustment Rod. Pic of the Hand Brake Adjustment Rod in Trans Tunnel. The Shorten Adjustment Rod will move the Hand Brake Arm forward and make it easier to access. Final Hand Brake Adjustment was made when all Four Wheels were on the ground to the point the vehicle could not be pushed be hand. Wheel Spacers- With my 17" x 11 1/2" Wide Wheels and Deep Offset, the Inner Wheel Bolts would contact the Ca[iper Outer Face. US Wheel Adaptors provided 1" thick wheel spacers which get about 3/4" Caliper Clearance. I can probably shaved the Inner Side of the Spacer about 1/2" to bring the clearance down to 1/4" Clearance if necessary. Bigger Brakes with Larger Calibers and Vented Rotors would probably fit now(trial fit to be sure) if you go to LARGER Calipers and Rotors. US Wheel Adaptors can make spacers to whatever spacing that you might need. Also, the spacers can convert to different wheel mounting patterns. Wheel Inserts with 5 Lug and 4x 4 1/2" Pattern Matt Cochan at LOVE20BEE IN California found Watanabe Wheel Inserts for me. I sandblasted and took them to a local PowderCoater to powder coat. Extended Lug Nuts- Because the Narrow Wheel Lug Pockets, I went to Ebay to purchased Extra Long and Narrower Lugs. Almost all of these 14mm x1.25 lug nuts had to been retapped with Exlarge Long 14mm x 1.25 Taps because of bad threading. Extra Long Wheel Lug Nuts on Extended Wheel Studs. Next-Struts and Exhaust Pipes
- Earlier
-
Latest updates are more tuning . I’ve now figured out have to get 2 x16 tables for VE and timing . I’ve also converted AFR so now I’m total Alpha male - lol. I haven’t driven since converting timing to Alpha N so that will take some time and knock ears . Weather has been so hot I haven’t driven the car in days . I also still have an issue with one bank O2 sensor . I must have a small leak somewhere that hard to find - maybe underside the header flange . I’ll have to try a smoke test to try and find it . Spark plugs all looked the same though my reading is wacky on 4-6 cylinders . So far mpg has been decent though that isn’t much of a consideration right now .
-
 Just use a 1979 280xz MC as it bolts on and it has the correct metric threads in the output ports. The downside of going to a larger bore MC is that the pedal will be stiffer and requires more foot pressure to stop. This can be corrected on the 240z that uses a 7in. dia. booster by going to a larger 81/2 in. dia. 280z booster. If you do this booster swap you will need to swap the 240z booster push rod into the 280z booster so the booster push rod connects to the brake pedal like stock. My brake set up: Brakes are excellent. · Front:1979 Toyota 4x4 pickup S12+8 calipers with 240z stock solid rotors. · Rear: 1989 240SX calipers with 1984 non-turbo 300ZX solid rotors. Modern Motor Sports adapter bracket (NLA) · Master Cylinder: 1979 280ZX 15/16. sourced from Arizona Z Cars · Booster: 1977 280Z. Barely fits between throttle bracket and clutch MC (Wilwood Compact). Brake feel is excellent. · Brake Pads: Carbotech AX6. Excellent cold bite and does not fade when hot. Perfect daily driver pad.
 -
Matt90Gt joined the community
-
has anyone tried to use a 1.00" bore master cylinder from a 96-98 Mustang v6? Looks like you would remove the studs. If that bolt pattern is compatible, it could be an easy swap
-
I have this one mounted to the side of my console. Not really in the best place for naviguessing but I love the spring loaded mechanism. The unit is cocked and when you push your phone into it the arms snap into the phone. https://www.amazon.com/dp/B0875RKTQF?ref_=ppx_hzsearch_conn_dt_b_fed_asin_title_15&th=1
-
https://www.amazon.com/eSamcore-Detachable-Bendable-Aluminum-Accessories/dp/B0CS5Y75DS?crid=2EMDXE1QAZW0N&dib=eyJ2IjoiMSJ9.LJ63zaP-fwTEX81KyOmXcZWnqbwEQyxTGnYN4p01FB2fhawGloi1TEnplAbQqG1s08LwQ0VUVQ9sIHJ1Q1VqlQWCpQz2obhbEqjg7ajdZBoatYvrrp68EPTlJ81LOX_3Hux-0tund0aLqEvXyZVc_m7E7WEdAyUtGlShbRi363a8pCVkXxXIixUmDGj4BPuOcJCe8S9vQ_IS8omWPC5AEqb482m0CYjmt4OvCmvG980.amYLxmZUEVryWcFKNUFLOhzkAMhJwYrTNoVwKcI10TA&dib_tag=se&keywords=baseus+co2+magnetic+phone+holder&qid=1750781730&sprefix=baseus+co2%2Caps%2C177&sr=8-5 I was looking at this, wondering if it could hook over the top of the frame above the window. I have a suction cup one that sticks to the windshield, but no matter where I put it, it seems to be in the way.
-
One of these. There's a bunch of different styles and shapes to suit your specific needs/application. https://www.kohls.com/product/prd-6332796/connect-extendable-grip-mount.jsp?skuid=62689230&CID=shopping30&utm_campaign=IMPULSE&utm_medium=CSE&utm_source=google&utm_product=62689230&utm_campaignid=20502647405&CID=shopping30&utm_campaign=SSC&utm_medium=CSE&utm_source=google&utm_campaignid=20502647405&gclsrc=aw.ds&gad_source=1&gad_campaignid=20151170307&gclid=CjwKCAjwmenCBhA4EiwAtVjzmmGsgHEr2FxdndBlsr7nvJ-AyaHRjwm2Psbg3FGAyHRbKSoYI6ckFRoCuIEQAvD_BwE


-
Who's Online 3 Members, 0 Anonymous, 144 Guests (See full list)