deja
-
Posts
2075 -
Joined
-
Last visited
-
Days Won
4
Content Type
Profiles
Forums
Blogs
Events
Gallery
Downloads
Store
Everything posted by deja
-
Congrats, there's nothing like that first run.
-
How do you turn off the outer cv. in a 300zxtt halfshaft?
deja replied to f-jenssen@c2i.net's topic in Drivetrain
My mistake, I have 280zx CV's not 300zx. -
How do you turn off the outer cv. in a 300zxtt halfshaft?
deja replied to f-jenssen@c2i.net's topic in Drivetrain
Mine did NOT have a c-clip. I had to use a gear puller to get the bearing off and a press to get them back on. Then I smashed 3 areas on the spline end to assure they stayed put. All that is according to the Datsun shop manual. -
1977 280z suspension upgrade
deja replied to Duran_rs's topic in Brakes, Wheels, Suspension and Chassis
Not really aggresisve. I'm running 215x50x17 tires. The side skirts make it look lower but its probably down where a stock 240Z sits. -
Congrats, there is nothing like that first start...well maybe the first drive. Looks like the drive isn't far off.
-
You're not sick at all, you just might be an engineer but not sick! I have several spreadsheets for cost and project schedules. Plus I have a notebook with electrical schematics and instructions for unusual equipment I have installed and another notebook with receipts for everything I bought. On top of all that I have kept a website documenting the build as I accomplish or fail each project, this has gotten quite lengthy. I also have several word docs about special things like my custom dash, Camaro fuel tank install and my tail light modification.
-
I was driving in the Z up I-85 in Atlanta comfortably cruising at 75 mph, yeah I was speeding but its Atlanta...speed or get run over, . Anyway I look in the mirror and see a car I have never seen coming up on my right. I had no clue what it was other than it looked badass. As it got closer I saw the Audi rings on the front but still had no clue. When he passed me, totally ignoring me BTW, I saw the R8 logo on the rear. Unfortunately I got stuck in traffic, imagine that happening in Atlanta, and he got too far ahead of me to really follow. This is a beautiful car and after looking up the specs I was even more impressed. A longitudinally mounted 420 hp V8 mid engine using Audi's 'trademark' Quattro permanent four wheel drive system. Of course any car costing north of $115K is going to be impressive.
-
LOL, I was fortunate that my Z28 was wrecked. The windshield was trashed so we cut out the cowl and pulled it out the top. The wiring wasn't really an issue, but I have a LT1 so it could be totally different. But I too had a few choice words for the GM engineers on how the F-body cars come apart. Certainly designed for manufacturability, not for servicing.
-
Here's a pict of all the stand-off you'll need. Check with some of the guys parting out thier cars, someone must still have the boards.
-
1977 280z suspension upgrade
deja replied to Duran_rs's topic in Brakes, Wheels, Suspension and Chassis
From everyone I talked to you need the spacers. -
1977 280z suspension upgrade
deja replied to Duran_rs's topic in Brakes, Wheels, Suspension and Chassis
My choice was TOKICO HZ3012 185 lb/in and HZ3013 200 lb/in springs and shocks, bump stops 88-715 from Black Dragon and spacers 23-4186 from zcarparts.com. After reading the threads about Tokico kits dropping the car to the ground I was more than a little worried about this swap. But it all worked out perfectly. Make sure you get 280Z setup and get the spacers and bump stops. -
That might work if I hadn't already pressed the bearings back on and stacked them. So the boots are already in position. Standing them up on end and setting the stubs on top it looks like the long goes with the long. It makes the long one about 1/2"-1" longer. If I switch the stubs the long one is now only about 1/4" longer. I also might add these are spare axels, the leaking ones (temp fixed) are still one the car.
-
I can't believe nobody knows the answer to this. I would really hate to put these together just to find I messed it up. Please respond if you have ever done this rebuild.
-
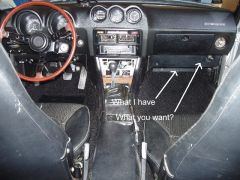
Looks great. I don't know if you've looked that the window cranks in relation to the dash but you might want to check. When I finished my dash and installed it I was shocked to see my window crank only misses the dash by only 1/4". I can still use it but its close. I extended that section of the dash to mount my fuse panel in the driver's side dash end. BTW I like your idea of fabricating this using wood as a template. I highly modified the stock dash and then covered it with fiberglass. It ended up weighing a lot.
-
One thing to warn you about. Remove the oil pressure sensor from the back of the block before you start your install. These thing have a tendency to break rather easily, trust me on that. Depending on where you put the lift chains it can get hit by those. Plus its very close to the firewall and can just get hit during install. Its plastic and doen't take any abuse.
-
Sounds like you're on the right track so far. I am running the stock dampener on mine. Its close to the rack but there is clearance, just watch when you install the engine, Slot the Datsun mount so you can move the engine forward and backward a little. I don't know about running the steam pipe to the overflow, mine is plumbed into the heater hose. Although I did just discover there is a Camaro radiator hose the has a fitting built into the upper hose you could use, its expensive though. I think your son is right about the driveshaft. It could get expensive if the dimension is wrong. One thing I found after I got it all installed is the JTR driveshaft adapter hit on my rear sway bar when I backed up. I just removed the bar. Just something to look for. I had no more than 1/16" clearance for the sway bar.
-
WOW, nice recovery, Glad you weren't hurt. That looked mighty scary heading toward the guradrail.
-
Clear up the mystery on LT1 cooling
deja replied to lgoodson@pacbell.net's topic in Gen I & II Chevy V8 Tech Board
The steam pipe runs along the intake. In fact it has a bracket that bolts to the 3rd intake stud and holds it against the valve cover. I just looked at mine, if you're careful it looks like you should be able to get the intake off. -
Clear up the mystery on LT1 cooling
deja replied to lgoodson@pacbell.net's topic in Gen I & II Chevy V8 Tech Board
That's a good point. -
Clear up the mystery on LT1 cooling
deja replied to lgoodson@pacbell.net's topic in Gen I & II Chevy V8 Tech Board
From http://www.indipalass.com/ARCHIVE/TechCorner/ARTICLES/LT1ReverseFlowCoolingSystem.htm Dry Intake Manifold: The LT1 has absolutely NO water running through the intake manifold! Conventional cooling systems have passages in the intake manifold which allow coolant to crossover from one side of the engine to the other. In the LT1, coolant crossover occurs in the water pump, which is also where the thermostat is located. Since there are no coolant passages in the intake manifold, a major source of leaks has been eliminated. Overall engine reliability is improved since an intake manifold leak allows coolant to enter the top of the engine which can quickly wipe out the camshaft, lifters, and other major engine components. -
CV sanity check. I am replacing the boots on my 280zxt CV axels. My question is about the stub axels. I took both axles apart at the same time and am pretty sure I kept the axels and stub axels together. Yeah, I should have marked them. But before I install the inner boots I want to be positive I have the right stubs with the right axles. Am I correct that the longer stub goes with the longer axle?
-
Rover aluminum V8's with carbs - old school!!!
deja replied to notheredave's topic in Other V8Z Tech Board
From a cool factor I think it would be awesome. I think that engine was used in old Buicks from the 60's before it was sold to Rover. -
LOL! There is no such thing as a cheap rebuild. Getting it running is the easy part, getting it running right takes time and money. It took me exactly a year to do my LT1 swap. As I said to one of my buddy's "I am now in my 8th month of my 2 month project"! Much of that time was those while I'm at it stuff. Brakes, lowered suspension, baddog frames, custom dash, custom fuel tank. Am I done...hell no. I doubt this car will ever be really done. Stick with it, the rush of that first ride will make all these hassles worth while. And when you're done and people ask where you got it you can truly say "I built it".
-
I wouldn't trust tire that old no matter what they looked like. Assuming you're running 3:54 rear gear and your final tranny gear is 1:1 the 70 series will tach 3365 at 70 MPH. The 60 series will tach 3588 at 70 MPH. http://www.corral.net/tech/gearcalc.html
-