-
Posts
540 -
Joined
-
Last visited
-
Days Won
2
Content Type
Profiles
Forums
Blogs
Events
Gallery
Downloads
Store
Everything posted by MONGO510
-

S30 independent rear suspension
MONGO510 replied to MONGO510's topic in S30 Series - 240z, 260z, 280z
I can't say that there is an advantage. It's just something I wanted to try. The camber curves are pretty much fully adjustable, so I don't think it will be a total waste of time. The change is also completely reversable. I dance to the beat of a different Drummer! Mongo -

S30 independent rear suspension
MONGO510 replied to MONGO510's topic in S30 Series - 240z, 260z, 280z
The lower suspension uses a stock lower suspension with a gutted and shortened strut. What you see in the pics mounts on the floor in the hatch area. Mongo -
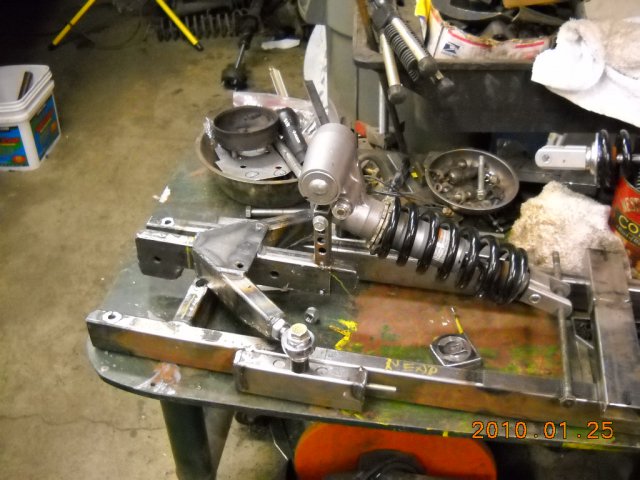
Here are some pics of the suspension I am building. Feedback would be welcome as I intend to drive this thing pretty fast and I don't want it to fall out at speed. Pics are at reply # 10 Mongo http://forums.hybridz.org/showthread.php?p=1118178#post1118178
-
Here are a couple of pics of the rear suspension I am fabricating. This is just in the preliminary build stage and will probably not look anything like this when completed. It has adjustable a-arm length, adjustable a-arm pivot point, and pivot height is adjustable. Shocks are double adjustable Hayabusa shocks. Shock mount is adjustable to vary the spring rate. Stock hayabusa rate is about 800#'s/in. I will shoot for a wheel rate of about 275#'s/in. Here are the pics. The subframe ties into the mustache bar mount and also bolts to the floorpan in six other places
-
I want a few myself! Mongo
-
Thanks Ron, will do! John
-
When I removed my fenders there were several foam pads on the top of the fenderwells that supported/cushioned the fenders. there was also a vertical foam seal towards the rear . What are you using to replace these pads and the seal? Thanks, Mongo
-
Looks like an R200. R180 cover is rectangular.
-

Anybody know anything about the U20 motor from a Datsun 2000?
MONGO510 replied to josh817's topic in Nissan L6 Forum
We had clearance problems with R-16 domed pistons, pistons hit the valves, had to flycut the pistons. Make sure and check clearance!!! Mongo -

Anybody know anything about the U20 motor from a Datsun 2000?
MONGO510 replied to josh817's topic in Nissan L6 Forum
It sounds like you have stiff springs. The fact that it willclose the valve by itself says the cam is not bound up. .010-.012 hot sounds ok. You might want to check piston to valve clearance with a piece of clay to make sure of clearance. the U-20 tends to have head gskt leaks at the rt. rr. of the head. Otherwise it is a pretty good engine. By the way, You may be able to get parts for it at a Nissan forklift dealer. The used that engine in some of the older forklifts. Mongo -

GC Camber Plate Install
MONGO510 replied to MONGO510's topic in Brakes, Wheels, Suspension and Chassis
Dan, you are correct on the washers. They came with the plates. 1/4" plate with true studs is a good alternative to what I did. My method required a few less steps, but was not better than your method in any way. Different paths to the same result! Thanks J., I was hoping to help clarify the install process, and cut down on the amount of searching required. Mongo -
Here is a link to my Camber Plate install. I hope this will help with your project. http://forums.hybridz.org/showthread.php?t=152093 Mongo:p
-
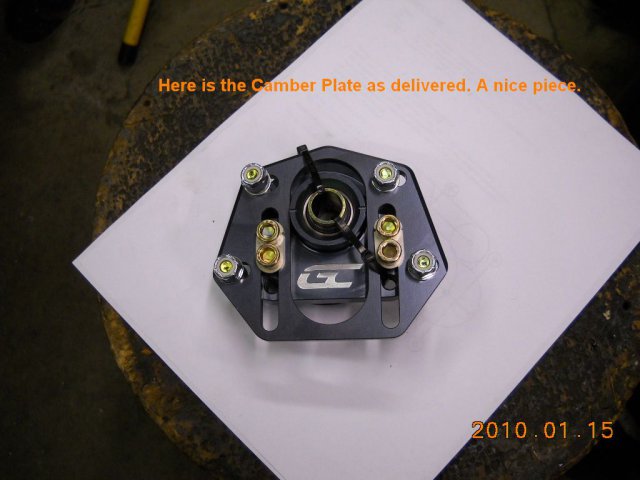
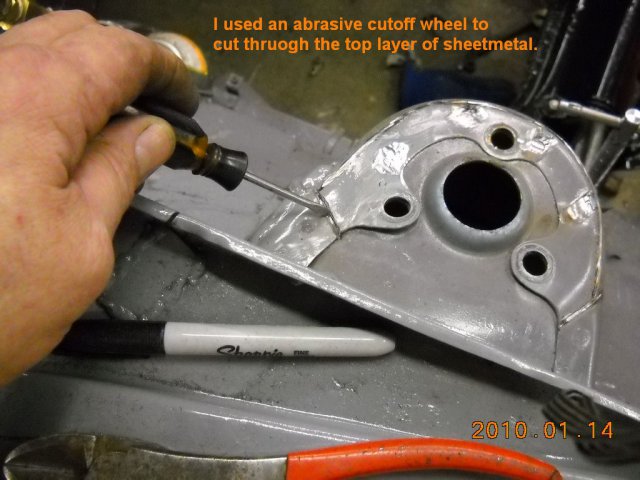
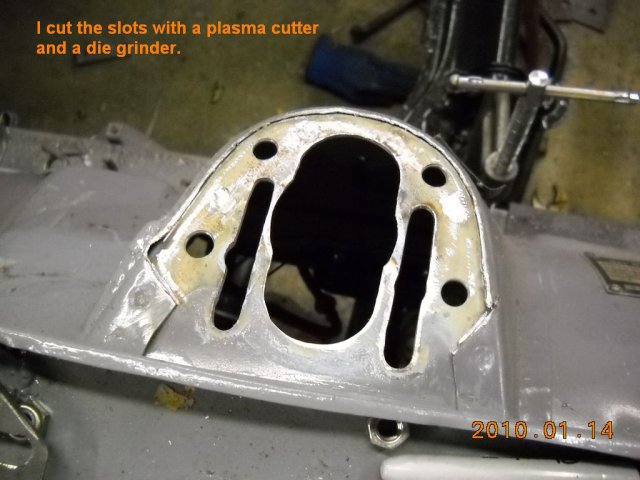
After doing a little research, I have come to the conclusion that G.C.,(Ground Control), Camber Plates have the features that I want, So I bit the bullet and bought a pair for the front struts. The fellows at GC said the plate mounts on the underside of the tower. I took a good look at how the tower was constructed and really didn't think the original tower would maintain structural integrity with all of the slots cut into it. It also would look much better with the finished plate mounted on top. The following pics show how I did my install. It is much stronger and better looking than the recommended installation. I hope these help with your project. Mongo
-
Nice ride! Good find! Mongo
-
Emergency Update!!! When I made my batch of Jam, I did a few things the recipe didn't call for. 1. Ground the all Peppers and the Carrots in a food processor to a small size. 2. I skimmed the solids that were floating just before putting in jars. 3. I also doubled the amount of Habeneros(be careful here)(optional). I am told that failure to do these steps results in a good tasting jam that looks like a root ball! LOL Sorry for the omission! Mongo
-

Tranny issue with my daily driver, need help!
MONGO510 replied to Negligence's topic in S30 Series - 240z, 260z, 280z
My Son's Saturn had a similar problem and I found it had a bad pressure plate. Fun job! Mongo -

*New* Video with my Coilovers
MONGO510 replied to SkYBlue280Z's topic in Brakes, Wheels, Suspension and Chassis
Nice Ride!! Mongo -
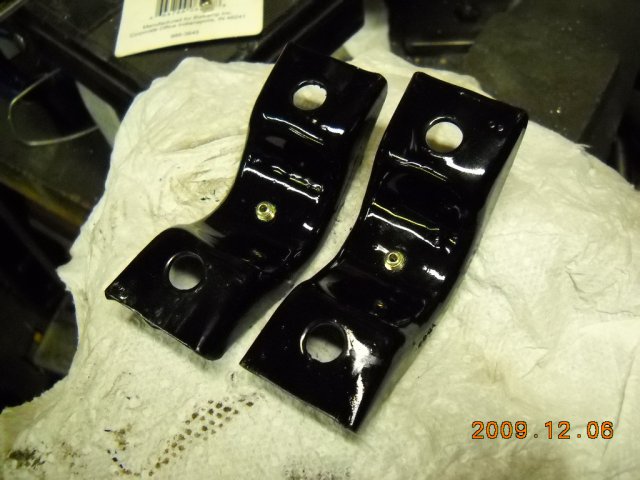
I decided while I was installing new Poly Bushings that I would install grease fittings. There were a few tricks that needed to be done for them to work properly. See pics. My Zerks were metric so I drilled all holes with a #9 drill bit, which is the correct size for a 6X1.0mm fitting. We are dealing with relatively thin material here, so you want the correct size so that the fitting will tighten up without stripping. Once the holes were drilled they were tapped with a 6x1.0 tap. This process was repeated for all of the suspension bushings.(front control arm, inner and outer rear control arm) Make sure and give some thought to where you place your fittings. You don't want them to interfere with any other parts. One thing that is a must(IMO) is to bevel the inside radius of all of the bushings as well as to put a notch in the inner edges of all of them. The notch allows for the fitting to protrude into the bushing, and the bevel will allow grease to flow all the way around the inside diameter of the bushing. When the rear inner caps are installed I will seal the caps with a high strength sealer such as Yamabond or Hylomar. The sealer should prevent the grease from squirting out the sides of the caps. I have a small grease gun that I will fill with "Sil glyde" to use as lubricant. If you are not familiar with "Sil-glyde", you should be! It is excellent brake assembly lube, internal and external, and is great for any rubber parts.
-

My thoughts on uerethane bushings:
MONGO510 replied to veritech-z's topic in Brakes, Wheels, Suspension and Chassis
IMO, the chances of ever shearing off a 5/8" bolt used in that application are slim. The load required is extremely high! A grade 5 bolt in this application might be better than a grade 8 as the higher grade is more likely to snap from a shock load. FWIW Mongo -

Importance of a tires age.
MONGO510 replied to BRAAP's topic in Brakes, Wheels, Suspension and Chassis
Glad you made it home safely! I can help you with the missing jam problem! LOL Mongo -
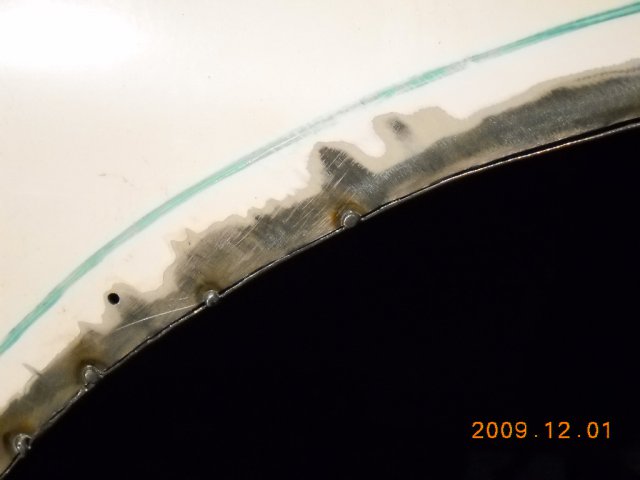
I have been installing my rear flares, as per 240hoke. They are going on smoothly and will look good on there. This thin metal is really a bitch to weld! I ended up making lots of very short beads! 1/4"-1/3". Even at that I burned a few holes in it that had to be filled. Oh well. I found out how sharp this damn sheetmetal can be when I sliced the top/side of my Rt. index finger. It was cut pretty deep so I got to do something else I always wanted to try. Surgery!! I had some sutures on hand in my F.A. Kit so I dug one out and sewed up my finger!! Cool! Didn't really hurt much, but it was a bitch trying to tie the sutures with only one hand. You all can call me "DOC" now. LOL Here's some pics of the days events. More to come! Mongo
-
I have never seen his "pressure Paper". Where can I find it? Mongo
-
Datsuns came with paper labeled fuses many years ago. Mongo
-
I tend to overdo most things involving hot peppers! LOL John
-
I've got several jars here for you and Ron! I'll bring them next time I visit! John

