
mtnickel
-
Posts
335 -
Joined
-
Last visited
-
Days Won
5
Content Type
Profiles
Forums
Blogs
Events
Gallery
Downloads
Store
Everything posted by mtnickel
-
Yes. I tried to imply that above. It is the horizontal bolt pattern.
-
Looking for brake booster. Let me know what you got and cost.
-
The 280zx brakes are a fair bit more powerful than stock drums. Will need to bias them correctly. But alas, plans have changed. Now just doing a full brake upgrade. Figured if I was ripping the car half apart to change the lines, I may as well change the end hardware too. 1" d21 master cylinder 82+ 280zx booster S12w calipers w/ machined spacer, and 84-85 300zx rotors new 79-81 rear 280zx rotors and caliper rebuild kit (also have proper bracket for this setup). I was a little worried at all the bias problems people say you get with the s12w, but doing a little math, I found that the 280zx had a 60mm front piston. calculating out the area, it is very similar to the s12w piston area. That means, it's 43mm rear piston was likely engineered to be a reasonable match. A lot have bias problems using the s13 callipers as they are often the 34mm version (or at best s14 38mm). So while my 280zx callipers are old, they bolt up, have a nice sized piston, and should bias ok. For reference sake, I've heard the 82-83 280zx booster bolts up (but just upside down). this allows you to run the other style master cylinders (horizontal mounting points). That being the d21 1" master. So while I may spend a few bucks sourcing a bigger brake booster, the d21 1" master is only $25 from rock auto. Note that it's bigger though and won't fit on the 240z. (I think clutch or throttle mount interference). Another bonus (or caution, depending how you look at it) about the D21 master is that it has 2 Front outputs and 1 rear output port. This way I can bypass all the stock proportioning valve and splitter unit. It also has a built in proportioning valve (yes, built into the master), but it can be bypassed with a few mods. Mostly remove the poppet valve on the end, I will try and document it latter as all the research I did on the same z32 master found no results on people disabling them. While on proportioning valves, I realized that these things can vary a fair bit. Both the knee point at which they act and the pressure reduction ratio that's part of the valve. Hopefully since it's just a passenger car, the wilwood unit will suffice. Also, tried to figure out if a 1" master would be too big. Well again, I looked at stock setups for a guide. The d21 which i'm taking the 1" master from has the exact same twin 43mm pistons (floating) as the s12w, so pedal pressure wise it should be ok. Definitely would want to pair it with the larger 10" booster though. I digress.
-
So I had a scary outing the other day. Decided to do a brake check/test from about 70mph and got on the brakes hard. Pressed firm at first and then attempted to apply more pressure. After slowing to about 20mph the pedal went to the floor. Turns out I burst an old rusted rear brake line. Now here's a question. Aren't the front and rear circuits supposed to be isolated? Why did I lose braking altogether? Master Cylinder is basically brand new. Or does it require at least a little bit of the pressure to be held. Anyways, ordered up some copper-nickel lines and will be re-re 'ing them soon. Not fun now that everything is installed. Will have to drop trans, maybe diff, etc. Up next now while i'm at it is a new proportioning valve and found a 280zx rear brake conversion. Maybe get a 1" master as well since the stock was pretty squishy.
-
how to conect rpm tach on megasquirt help!!
mtnickel replied to george k.c's topic in Trouble Shooting / General Engine
Can't you just use the coil negative wire like the original system did? You have just a single coil and distributor correct? No multiple spark discharge stuff (MSD)? -
what's "ridiculously priced" I'm in the market myself. Local guy here has 4.11 diffs he'd let go for $450cdn (375us or so). Also found a 3.90 for $300US shipped and am highly contemplating that myself.
-
I may eat my words a bit here. My 3.90 blew due to an out of true centre carrier. Anyways, swapped in a 3.54 I had laying around, and it is surely too long. Yes, the highway cruise at 70-75mph is nice (27-2800rpm), but the cruise at 60 is TOO low @ 2300rpm. Sort of in the droney area of the engine. To add to that, the liveliness off the line and abililty to launch has been impacted. Surely puts a much higher load on the clutch as when I went to launch hard it burned the clutch up a bit instead of working over the tires. So I will have a full recant and say the 3.90 or higher is probably a good ratio for the RB25. 3000rpm 70mph cruise is butter smooth and really not that high for a 2.5L engine at that speed. Even a buddies s4 v8 with a 6 speed cruises around the same RPM in 6th!
-
Does this help? These are I believe STI Seats, though possibly 2.5RS. Not sure what year. Saw them on craigslist for $75 for the pair and figured I had to make them work. I did extensive mods for mine though, however you may not need to go as far as I did. Car is an early 260z. Not sure about the tunnel hump. 1) I'm 6'4" so height clearance was VERY important. To get the clearance I needed, I first hacked out the stock supports a fair bit. Shortened the front height out by about 2/3 and shortened the rear down to the ground. Then reinforced the rear floor with 1/8" plate where i was going to mount the seat in the rear. 2) I fully disassembled the seat. I removed the height adjusting mechanism on the driverside as it's parts took up too much space as it was and even in the lowest setting I wasn't satisfied with where it sat. By removed, I mean I did a fair but of cutting with a cutoff wheel and then patching with steel to reinforce a few areas. Along with removing that mechanism, I also reduced the height of the seat another 1.5" by cutting off more stuff. 3) The rails were rewelded to my modified seat frame and custom feet were made to attach to the floor and the front stock seat rail. Now you may not need to go nearly this far for height change, but I certainly did with my height. I love this car and I wanted to make sure I was comfortable in it for long periods of time without having to recline it like a gangster. End result was sublime. I can sit as upright as I want and still clear the roof. The seats were tight to fit on the width. You can not reach your hand in the side to grab the recline lever, you have to use just your index finger and lift it from the forward position. The plastic trims do fit however, but more or less rubbing the carpet. I possibly could have pushed the seat a little closer to the transmission tunnel, but then if you slide the seat forward it would hit the tunnel. The tunnel gets wider at the front of the car. If you're ok with getting out an angle grinder and welding in some tabs/brackets, repositioning the rails, etc. You should be ok. If you're short you can probably get away with a lot less fab work. Love the seats. What i saved in cheap craigslist seats, I had to make up for in hours and hours of fab. I probably have over 15 hours of work into making these fit for my height. Good luck! If you want more pics, I could arrange it. stock rail support mods.
-
Yes, you can use the carrier. Whenever swapping carriers though it is important to check backlash, runout and carrier preload. As well as the axle to matching carrier caveat above.
-
Fairly sure you could. The issue with swapping center though is matching whatever center you have with whatever axles you have. Very likely the 88 Shiro axles won't fit into the centre (the 88 shiro axles are actually very oddball if i remember correctly. Nothing else fits it). Also, the short nose VLSD centre requires axles that have the extra long stub on one side that spins the Viscous centre. Otherwise you will get no Limited slip action. For S30 applications, I haven't seen anyone really use the VLSD short nose. Nothing adapts to the rear half shafts well. Plus the Viscous centres aren't really that great as far as the LSD goes. Best options are A) already setup R200 Longnose Clutch based 3.70 LSD diff (from 87-88 turbo 300zx). Roughly $700+ even better is the above, but swap in extra clutches so it holds more power C) OBX Helical centre (get the one meant for s13 cars that originally came with open diff). D) Quality Quaife, Tomei, or OS Giken Diff. Good luck
-
New CX Racing Coilovers
mtnickel replied to miky360's topic in Brakes, Wheels, Suspension and Chassis
I wasn't planning on changing the springs. The 4.0 and 5.0 rates (225 and 280) would be pretty close to what I'd want for an aggressive street car. Just stating that if I did need to change coils down the road, it's not as if it's impossible. The dealer was aware of other differences of the struts (i.e. the tube diameter), so I thought it wasn't unreasonable to at least ask if they were aware of any sub-par valving in the replica units. I'm highly leaning towards the BC simply for the customer service, but $330 (or 27% off) seemed like enough to at least investigate if the cheaper units would suffice. It's been seen before online that they are likely built in the same factory, except to different specs. Regards, Mark -
Confirmed run-out. Radial (ring centering machined edge) looked to be out about 1.8-2thou. The axial runout (flatness of ring gear surface) surely was out .002". Guess this is what grenaded the diff. http://vid1116.photobucket.com/albums/k569/mtnickel/datsun/5E470516-F6AE-44A5-87FC-5FA5617A31A4.mp4 http://vid1116.photobucket.com/albums/k569/mtnickel/datsun/42A92ED1-78D8-4C2A-82B9-F838074FED40.mp4 Lots of metal in the diff from the gears wearing so much. One side carrier bearing looks not too bad, the other has some slight slight knick/fine scratch type marks. Similar looking to this, but shinier (lower bearing race).
-
New CX Racing Coilovers
mtnickel replied to miky360's topic in Brakes, Wheels, Suspension and Chassis
Any idea if the stock valving is similar to the BC units? Also, springs could be changed after the fact, no? Assuming 2.5" standard coils. I'm not looking to do any racing so won't be adjusting the valving I'm sure. Just want a sport suspension that handles well for the street and has the ability to adjust camber a bit and ride height. I have tokico HP, eibach springs, and coilovers sleaves, but have yet to section struts for them. -
New CX Racing Coilovers
mtnickel replied to miky360's topic in Brakes, Wheels, Suspension and Chassis
Don't be sad for getting the BC coilovers. From what I've read about other applications, the BC are a step above and the customer service is much better. i think it's really a tough call on cost vs quality. -
Most holsets I've seen have TINY wastegate holes. Mainly since they regulate pressure usually around 25+psi which means it doesn't need to bleed off as much flow. Anyways, I experienced the same exact lack of control on my rb25 build. I had a 6psi actuator, 18g turbo and TD05 turbine (somewhat smallish turbine) and a slightly smaller than average wastegate port (maybe 22mm or so). Basically exhibited NO boost control. Once it reaches its' 5-6psi, there is already way too much gas to bypass and it just continues to rise (up to 20+ psi) Problem will be exacerbated if you have a really well flowing exhaust. I have 3" all the way back, no cat, straight through design resonator and muffler. I even disconnected the wastegate arm and wired it open to check. This results in the boost buildup to 6psi being a decent amount slower, but it still skyrocketed to the 15-20psi after that. Likely need to do what jeffer has said. Port as much of the flapper hole out as you can. You can hold port shut and spray paint in neon around it. That way when you open it up to port you can see how much clearance you have. There are also places you can order larger flapper disks. The DSM guys had to do this all the time. I've even resorted to welding a bead all the way around the stock flapper to enlarge it and then sand it flat again. (cheap mans enlarged flapper). Stainless filler recommended. Otherwise gotta go external wastegate. Thats the route I took. Good luck!
-
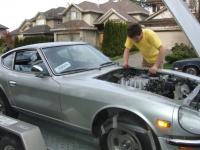
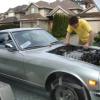
That's awesome! I got to be a first time Dad twice in the last month. First time Dad to Baby boy Andrew April 12th (10lbs 5oz). Second time Dad to first ever Z-car (my other baby) @ 2675lbs. Not that I just got it, but I've just insured it and taken it out for the first time just a week ago. Owned the car/project for 4 years and have just now enjoyed starting to drive it. Exciting on all fronts.
-
New CX Racing Coilovers
mtnickel replied to miky360's topic in Brakes, Wheels, Suspension and Chassis
Who wants to be the test subject? Price is certainly appealing. -
Many thanks for taking the time to read my post Jon. The center unit was really old stock (probably 20 years old at least) and looked really well packaged in factory box, so I thought fairly rare that it would be out flat. I do recall scratching my head a few times about why it had a tiny bit of runout (.0015) in the axial direction (radial was fine). That was probably the problem though. I was a little over eager however and thought I could get away with it since backlash around the gear was in spec (albeit varied). I followed the FSM as well which said to apply loctite to the ring gear matting surfaces; Maybe possible it was over applied and film thickness was too great in one area causing more runout. The Ring gear fit the center diff I'd say perfectly. more or less had to be tapped on with a rubber mallet. Any slight angle difference and it bound going on. Once both faces were matted you could spin the two (independently) with a little effort to line up the ring gear holes. Most machine shops would be able to true the carrier? Wonder what they use as a reference for clamping it in the same way the carrier bearings do. Could use my old diff case in the jig i suppose. Regards, Mark
-
Some Dynamat and carpet in half way through: Rear carpet in: Passenger side done: All done: Looking better: Off with the Continental DW (narrow, soft sidewall, and way too much loss of rubber contact patch from their massive rain tread), on with the RE-11A Square sidewalls look amazing. Rim protector, and they run about 10-15mm wider in the same size.
-
New 10cm td05h turbine. V-band. No internal wastegate: Jig for machining external waste gate: Cut and prepped for weld: High schedule pipe and v-band flange welded in. Used Cronotron High nickel content cast iron specific tig rod. In pipe was a divider to keep exhaust pulse energy separate Running cut at machine shop: http://vid1116.photobucket.com/albums/k569/mtnickel/datsun/7770826F-662F-490B-80CE-0DBDD4DCF043.mp4 Finished waste gate and replumb done: LS2 Coil swap: Shorten insulator: Mod stock RB springs to fit around electrode: Repurpose stock RB coil boots: Install (still need to fab more solid bracket, but they stay fairly well put as is: Mod Coil cover to allow plugs to fit: Modify wire harness (not shown), but plugs seen here. Don't be tempted to buy these. These chinese made ones made POOR connection and would be intermittent when connected. The pins carry a decent amount of current and need a solid connection and the spades were faulty. The little "feeler" or sprung part of the spade tab was poorly positioned inside the pin and when I inserted them, it crumpled up. Hard to explain, but needless to say, get some quality plugs. I made them work by unpinning the entire thing and squeezing the metal spade to put more pressure on the pins). Coils are D514A. I have read the D585 are good, but if you put too much dwell they will fire early with over dwell protection. The D514a apparently do not have that problem. Adjusted the dwell time in Nistune up to about 4-5ms and these are running fabulously (albeit just at low boost for now). Carpet and Dynamat getting nice and pliable in the sun for install: ECU mounted up on firewall:
-
Well my diff blew up. Not catastrophically, but a light whine developed, and a few days later after some more hard launches, the whine got worse. Checked the fluid and metal particles found. More details in driveline thread. Otherwise lots has progressed! Got LS2 coil swap done. Dynamat and carpet install complete. Mounted ECU onto firewall nicely Got Exhuast manifold modded for External waste gate and waste gate installed along with new Downpipe with re-entered waste gate line. Got Sticky Re-11a tires installed. Love the look and feel of them. Insured the car for spring/summer! WOOOT Car squats and hauls some serious booty. Needs suspension upgrade for sure as body roll pretty hard when pushed. Hooked up amazingly well with re-11's and LSD (while it lasted). played anywhere from 6psi up to 12psi. Up now is to tear out diff, have Centre checked (likely may need to be resurfaced as there was some backlash variance around the ring gear (.004 at tightest, .007 at loosest, i.e.. too much runout?). Figure out driveline vibration above 80mph. Start with just diff installed but no halfshafts and run up the RPM to check for vibes. May be driveline angles now that things settled? Moustache bar bushings also could be done. Anyways, will keep you guys posted!
-
Well, this thread is just a warning to those doing diff work to probably have it setup from a diff shop. If nothing more than to remove the liability if something doesn't go right. Perhaps the stock Clutch units are machined near identically and can be swapped out by a DIYer, but for all else, I'd say definitely get it setup at a diff shop! Story is: I bought a Helical centre for my excellent condition 3.90 R200 that i had to search for. Was from a low mile 280zx and felt nice and tight and smooth when I got it. LSD Centre was a japan made NOS unit from a company called XEBEC. I know a little sketchy buying a diff from a non-recognizable name, but everything I could find online from OLD posts said they were quality units. The japanese writing on the box and made in japan left me worry free. Price was pretty good too (about on par with OBX, but looks much better). Came with new bearings assembled as well. Well, I swapped out the open centre for the unit. Everything SEEMED to measure out. Backlash was between .004 and .007. That backlash variance (.003 difference from tight to loose) around different points perhaps was my problem, not sure. Runout was .001, maybe .0015. Didn't think much could be done to correct it, and figured was probably close enough considering was within spec. Bought an inch pound torque wrench to check preload. Diff slipped in with a decent amount of pressure and felt nice and tight but not ridiculously tight. Ended up not having adapter to use the wrench but figured it felt like it was going in with about as much force as the open one did. Anyways, on to install. Diff ran just fine for the first 100 miles. Then I got my car tuned a bit better and started to do a few harder launches. After the first 3-4 launches i started to hear just a slight whine. Did some reading and many said theirs just get noisy when the fluid thins out after harder runs. Didn't think much of it. The whine was still fairly mild, about the same volume as my walbro fuel pump (and similar sound too). Well, diff ran same way for another 100 miles or so and then I got a little adventurous with pushing the car. After another few hard launches I noticed a distinct increase in whine. Thought maybe since it was really hot it got louder. Decided to look into it when I got it home and looks like the diff is done for . Excessive slop, and fine metal shavings in the oil (along with the drain plug covered in about a 1/8" thick film of fine oil shavings). There was no whirring sounds and the stub axles are nice and tight. So I'm fairly sure carrier bearings are just fine. the pinion flange is also right tight up and down. But spinning the pinion flange is stiff and notchy. Grabs and binds with lots of free play to moving the output. If i had to guess, the inner pinion bearing is toast. Other background info. Car developed a fairly significant vibration above 80mph. And only other work I did on diff was to swap the pinion flange and change the seals. Tough to hold the output shafts so I just used an impact set on low setting (which usually gets me to about 100 - 140ft lbs. Used a touch of thread lock too, to be sure. My hypothesis (and perhaps others can chime in). 1) the Backlash variance was too great. .003 difference around the gear should have been warning sign? Also, the .004 end is .001 tighter than factory spec of .005. 2) By using the impact to install nut, I possibly could have overtightened? I know the r200 uses a spacer and not a crush sleeve and have read of other users doing the same, but it could have put too much torque on the pinion bearing. 3) The driveline vibration I had could have been imbalanced driveshaft and put a whack load of stress on the pinion. If it got hammered a little too much, once there was play it would only get worse from there. Not sure which of the above is the culprit, but just a warning to those to be extra particular about setting these things up. I should have pictures sometime next week. Luckily I have a spare 3.545:1. I'm keeping my fingers crossed that the centre was not destroyed by the metal particle filled oil. Best case it's all fine, next best case, just the carrier bearings need to be replaced. Worse case, it's a write off. It wasn't driven very far at all since the whine got worse, and it was still driving just fine but with a little more free play (clunk) and louder whine. Will be taking it in to have setup and inspected and report back. Thanks for reading! Mark ps. Car is 260z with RB25DET and Rb25 trans. Probably putting out somewhere between 275 and 300hp. It hooked up amazingly while it lasted with the LSD and RE-11A's. Too bad it was only for a few days .
-
I was under the impression the 280z vinyls were different.
-
Hi there, For Late 240z early 260z. Looking for vinyl pieces that go over rear strut towers as well as the forward portion of the rear tire well. Ideally just plain vinyl, but checkered vinyl or carpet pieces would likely suffice as well. Not a show piece, but decent condition would be nice. Also after some early 260z rear plastic trim covers. I have some but have usual cracks. If you have a nice set (mostly the ones around the trunk struts) I would be interested. Ebrake boot (in leather? vinyl?) Hatch seal (car side). That's all for now. Thanks!
-
I ran an r32 GTR intercooler because it could be had on the cheap. But I also had access to cheap aluminum fabrication and welding to modify the end tanks. Good core, but tube/fin design which means it probably wont' flow ridiculous amounts of HP.