

80LS1T
-
Posts
2545 -
Joined
-
Last visited
-
Days Won
3
Content Type
Profiles
Forums
Blogs
Events
Gallery
Downloads
Store
Everything posted by 80LS1T
-
Well I have been shooting sporting clays for about 9 years. I started shooting tournements about 7 years ago so I know a thing or two about over and unders. From what I have seen about 50% of all the guns being used by competition shoots are either a Browning 425 or the new 525. Everyone and their brother seems to like those guns. Their not too expensive either, some where in the range of $1500ish used for the 425 and almost $2000 for the 525. Now I personally don't like Brownings, I think they are balanced funny and don't really fit in my hands right. What you should do is shoot a bunch of different guns and just find one that fits you. Don't just buy a gun because it looks cool or its cheap. If the gun doesn't fit you it will show on your score sheet. I have recently gotten out of shooting. I just need a break from it and I am dumping more money into my car lately so I can't afford to shoot. It's too bad because I was really starting to get really good. I was in the AA class when I got out of it. The only class above that is Master. My girlfriend still shoots and she is a C class. Her sister and husband still shoot, she is a Master and he is a AA shooter(ya she's pretty good! She was the Wisconsin Ladies champ last year at the State Tournment actually!). Are you going to be shooting for fun or competitively? It can get pretty expensive pretty quick with this sport! You can't get better if you don't practice and shells are like $4.00 to $5.00 a box! I used to shoot 500-600 rounds a week but I was reloading my own shells so it was like $2.75 a box at the time to load them myself(its almost $4.00/box now to load your own!). I had a Ruger Red Label in stainless steel with the black synthenic stock. I loved that gun and it really fit me well. I could shoot Beretta's pretty good too but a Browning would mess me all up!
-
I think the sedan looks better than the coupe personally. It looks a lot like the old G35 if you ask me(we have 2 at work(nissan dealership)). They deffinetly should have made it RWD if they were going to make it a sporty coupe. It should be a pretty quick car with the 3.5L though.... Guy
-
74_5.0L_Z shamelessly emulates Terry Oxendales Hood
80LS1T replied to 74_5.0L_Z's topic in Body Kits & Paint
Now that its all one color you can really start to see what its going to look like! And its looking sick! Can't wait to see it in color! Guy -
Trial Fit 18 x 9.5 Wheels...With Pic's!
80LS1T replied to Bartman's topic in Brakes, Wheels, Suspension and Chassis
You'll be glad you did all this extra work to get them to fit! Look'n good so far! Guy -
-
Ok I have been searching the web tonight for info on how to use Tuner Cat and have found some pretty usefull info that I thought I would share! Here' and explination of the ECM Constants(Original Link)... Cylinder volume: Expressed in millileters per cylinder. *Here are a couple of formulas to get you the correct value to put here: Cubic Inches / 61.5 = Liters Liters x 1000 = Milliliters Milliliters / Number of Cylinders = Milliliters per Cylinder Injector Flow Rate (Injector Constant): For the stock 24lb injector GM has set this value to 24.91. To figure this for injectors other than stock you need to take the square root of your fuel pressure divided by the pressure the injectors were rated at, then multiply by the size of injector. Example, if you still have the stock fuel pressure regulator on your car, the LT1 fuel system operates at ~43.5psi. Now to figure the injector constant for a Ford/SVO 30lb injector you'd take the square root of 43.5/39 and then multiply by 30 and end up with a value of 31.68. The 39 represents the pressure at which Ford/SVO injectors flow was rated at. This can also be applied to other fuel injectors if you know what pressure they were rated at. MAP Threshold to Enable WOT: This is the minimum map value that the computer must see in order to declare wide open throttle. EGR enable controls: If you’re keeping the EGR system, leave these tables stock. If you’ve removed the EGR system, the easiest way to disable it is to set the EGR enable minimum rpm to a very high rpm, or the EGR enable maximum rpm really low. Fan thresholds: These are the engine coolant temperatures that the ECM must see in order to kick the fans on. For the stock 180* thermostat the fan turn on points are 226 for the low speed and 235 for the high speed. A good starting point for either the stock or an aftermarket 160* thermostat is to set the low speed fan to come on 20* after the thermostat has opened, and the high speed to come on 6-8* after the low speed. It is best to experiment and see what you‘re car likes best. Use the Fan 1 On Threshold (Low MPH) and the Fan 2 On Threshold (Low MPH) for your turn on temperatures. The Fan Threshold High Speed (MPH) allows you to give the computer a mph value to distinguish between the high and low speed fan turn on points. This gets pretty interesting. For example, you drive a lot in stop and go traffic and are consistently driving at 35mph and under. You can set your high speed threshold to 35mph and then at every speed under that the low mph fan turn on temps are active, and at any speed higher than that the high mph fan turn on temps are active. That way you can kick the fans on earlier at lower speeds to make up for the lack of airflow coming across the radiator while you‘re sitting in traffic. Then once your at a speed that allows the radiator to see more airflow the high speed turn on temps take control. Fan Hysteresis Low/High Speed: These values are the temperature changes that will turn the fans off. If you’ve set the hysteresis to 3, then the fans will not turn off until the coolant temperature is 3 degrees cooler than the fans turn on point. Fan control turn-on points based on oil temp are not used in our ECM’s since it takes no input of oil temp. There are also values for fan turn-ons based on A/C pressure. I have not messed with these values as I don‘t see an advantage to it. Fuel Cut-Off and Resume Speed: This is a MPH based setting that is your speed limiter. Fuel Cut-Off and Resume Rev Limiter: This is the RPM based setting that allows you to change your rev-limiter. VSS Diagnostic Enable Minimum RPM: Not sure exactly what this does, but I’ve been wondering if you set the rpm on this to it’s maximum value if the computer would not be able to activate the limp mode that causes the OBDI 1st-2nd shift problem. I’ve always been under the assumption that the no-shift is caused be a hard launch on sticky tires that would cause the VSS to lose it’s signal and set the trans into limp mode. Try it and see if it works for you. CARS or the Skip Shift Funtion: The easiest way to disable this is to set the enable rpm to it’s maximum value. Skip shift disabled. Low PRNDL Upshift/Downshift Speed Threshold: These tables are used when you select 1st gear manually on the shifter. If you set the Upshift Constant to 35mph the computer will automatically shift the car into 2nd gear at 35mph even if the shifter is left in 1st. Excellent as a safety feature. Set the Downshift Constant to a value lower than the Upshift. If you set the downshift to 20mph and try to downshift the car into 1st at a speed higher than that, the computer will not let the car downshift. Maximum Line Pressure: This is the maximum amount of transmission line pressure that is allowable on the A4 cars. I think that this value can not be over-ridden by the other transmission tables. Kickdown Mode Enable/Disable TPS Threshold: These are the TPS values that are used to activate the kick down mph and rpm tables that control wide open throttle shift points. Minimum Coolant Temp for Closed Loop: This is the minimum coolant temperature that the car will switch from open loop to closed loop. Minimum and Maximum BLM: These are the highest and lowest block learn multiplier values that the computer will use in order to adjust its fueling requirements. BLM Cell Map Boundary Hysteresis and BLM Cell RPM Boundary Hysteresis: The BLM table has boundaries for both RPM and MAP. These boundaries determine where on the grid (which BLM Cell) your sitting at. Stock BLM Cell MAP Bounadary is: Low 32, Mid 50, High 80. Stock Cell RPM boundary is: Low 700, Mid 1200, High 2000. Example: Suppose though your crusing right around 1200 RPM and going slightly above and below it... so suppose your doing say 1175, 1200, 1225, 1200, 1175, 1200 etc. You don't want the computer constantly switching boundaries. These two hystersis settings come into play here. in order for you to be "IN" one of these cells you must leave another cell by an amount over the hysterisis value. For either the MAP or RPM. This is used similar to fan hysterisis - you don't want your fans switching on and off rapidly as your engine temp goes above and below a certain value all the time, so you give it a hysterisis value of a few degrees celcius. DFCO Enable RPM Threshold and Enable Map Threshold: These 2 values are really used together to activate the deceleration fuel cut out mode. If engine rpm is above the RPM threshold and MAP is above the MAP threshold when you let off the gas and TPS goes to zero then DFCO will engage. DFCO Disable RPM Threshold and Disable Map Threshold: These are the 2 values that will disable DFCO. They don’t need to work together like the enable values for this feature so if either is obtained DFCO disables. DFCO Disable RPM Decrease Threshold: This is an rpm based value that if the car decelerates faster than, DFCO will disable. DFCO Enable Coolant Temp Threshold: The is the coolant temperature that the car must reach before it can activate DFCO. DFCO Enable MPH Threshold: This is the speed that the car must be above for DFCO to activate. DFCO Spark Retard: This is the amount of spark retard that the computer will use in order to slow the car down when DFCO is enabled. Knock Retard Enable Coolant Temp: This is the minimum engine coolant temperature that the computer will start to retard timing when it gets input from the knock sensor. Burst Knock Enable % Difference Air Threshold: I think that this is the percentage of airflow difference (measured by the maf sensor?) that the computer must see to enable burst knock. Burst Knock Enable Coolant Temperature Threshold: This is the coolant temperature that the car reach before burst knock can be enabled. Here's a site with LT1 files but I'm not sure if you can load them with Tuner Cat or not? They might be for LT1 Edit? LT1 FILES Some theory on how to modify your PE table(power enrichment)... From Tunercats help file: PE %Change To Fuel/Air Ratio Vs. RPM This table is percent change to Fuel/Air Ratio used when in power enrichment (PE) mode Vs. RPM. The values from this table and the PE % Change To Fuel/Air Ratio Vs. Coolant Temperature are summed to arrive at the Power Enrichment Fuel/Air Ratio. The resulting air / fuel ratio can be calculated as follows: PE AFR = 14.7 / (1 + %Change vs Cool/100 + %Change vs RPM/100) For the selected RPM, suppose the percent change to Fuel/Air Ratio from the RPM table is = - 5.1 and the percent change to Fuel/Air Ratio from the COOLANT table at the selected coolant temperature is = 22.7, then the approximate Power Enrichment AFR would be: 14.7 / (1 -0.051+.227) = 12.5:1 AFR Basically, for every 1% that you adjust the %change vs RPM table, the A/F ratio changes by 0.147. For example, if you are running 11:1(rich) and want to get to 12:1, subtract about 7% from the tables. Do the opposite if you are running lean. Here's a great site with some pretty good info on using Tuner Cat. From what I have found....you should tune your Air/Fuel ratio and then adjust your timing. What a lot of guys do is use a program like Datamaster to help adjust their timing. What they will do is record a run and then advance the timing(with Tuner Cat) a little(say 1 degree at a time). Then make another run and see if the PCM retards the timing at any point. If it does pull the timing back down 2 degrees at that RPM range. Repeat as necessary. This seems to work well for others. That's all I have for now but if I find any more info I will be sure to post it! Guy
-
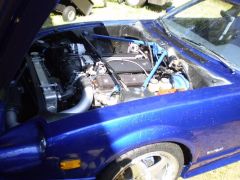
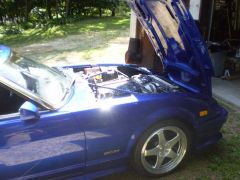
Thanks again guys! Much appreciated! Now getting this thing to run right would be nice! LOL I got Tuner Cat up and running now I just need to figure out how to use it. Lots of little gremilns to work out again. The alternator doesnt seem to be charging all the time and my temp gauge reads 250*F when datamaster says 194*F. The temp probe for the gauge is in the head though so I may move it to see if it changes otherwise I'm going to get a new sending unit to see if that fixes it. I can't wait to rewire this thing come winter time. Its just a mess of wires right now and way to hard to figure out whats what(which is my own damn fault!). Ah yes the joy of a HybridZX!LOL Guy
-
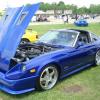
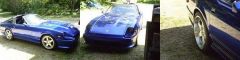
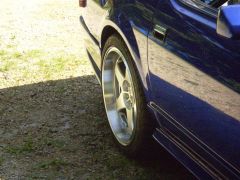
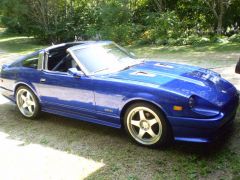
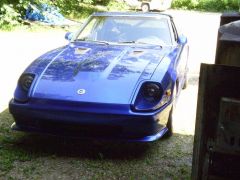
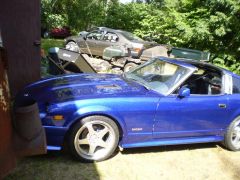
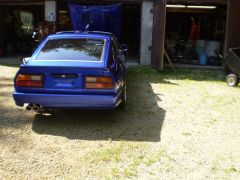
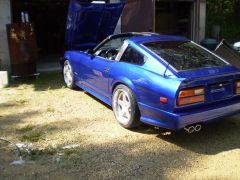
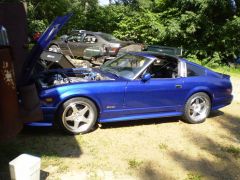
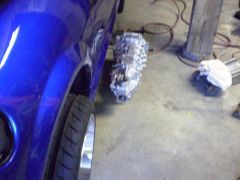
I finally have this thing out of the garage after 2+ years of doing body work! I put the tranny back in last night and earlier today and back it out of the garage! She doesn't run very good right now but that should change after I get TunerCat up and running! I washed it down a little but it's still pretty dirty, especially the engine bay(primer/paint dust is just caked on!). I still have a ton of little time consuming things to do before I can actually drive it anywhere but hopefully it wont belong before I'm back on the road! ^^^^Mmmmmmmmm dish!^^^^^^^^ Guy:mrgreen:
-
-
-
-
-
-
-

-
-
-
-
-
You deffinetyl got hosed at that first dyno. My buddy got his 350ZT dyno tuned for $120! That included complete print outs with AFR's, HP and TQ. It took they dyno operators 5 pulls to get it dialed in while adjusting his fuel controller. Another buddy got his SRT-4 done for $80 same thing but we did the tuning and it also took 5 pulls. No way would I have paid $450 for that or even $250 for what you got. A print out with HP numbers does nothing for me unless I know its safe with the AFR's and still putting out max power. Sounds like the second place was much better. Did you tell that place about the first one? Guy
-
I had 225/45's on my old 17x7's and they had a bulge to them so I think they woud be flush with the rim lip on an 8" rim. I think the 245 would have a slight bulge to them on an 8" rim. Guy
-
Mmmmmmmmmm open headers! Gotta love that sound! Looking good Clive! Guy
-
Trial Fit 18 x 9.5 Wheels...With Pic's!
80LS1T replied to Bartman's topic in Brakes, Wheels, Suspension and Chassis
Nice wheels! I like the big polished lip! Mmmmmmm dish! LOL Is the suspension compressed in those pics? I found that when my car is on the ground the top of the tire is pretty even with fender lip but up in the aire its like 2" outside the fender lip. I went with a 265/35 for my 18x9.5's and the tire is pretty much even with the lip of the rim. I think 275's would give it a very very slight bulged look. I just got some cheap tires for now which are Falken ST115's. The biggest that discount tire has for this size rim is the 265/35. I would have gotten a better tire but I'm a little strapped for cash with the new paint and a lot of little stuff for the car lately! LOL Guy -
Ok that makes more sense! LOL Man this thread sure did get side tracked! Guy
-
well I dont know what "for the win" means but if QFT means "quit freaking talking"(nice version) then I think someone needs a timeout!