All Activity
- Yesterday
-

Fast Floridian's 240Z Track Build
FastFloridian replied to FastFloridian's topic in S30 Series - 240z, 260z, 280z
Nice, cool to see you didn’t waste your time making that video. Probably running 325s on the rear, and maybe even all around (still a lot of time before I need to decide on that), I’ll need those wide fenders to fit all that rubber. - Last week
-
Hi all, hoping for some clarification on a couple items regarding upgrading from fuel only to fuel & spark (apologies if they seem to be basic/simple questions) Currently I am using MS2 V3.0 with NA Distributor and coil negative tach input. I have installed a turbo distributor with the DIY Optical Trigger Wheel and am following the instructions DIY has online: https://www.diyautotune.com/support/technical-articles/install/nissan-datsun/megasquirt-your-280zx-turbo/ https://www.diyautotune.com/support/technical-articles/hardware/nissan-trigger-disc/ I am making all the necessary changes in the ECU as per the Trigger Wheel document (like cutting out some caps/resistors) as well will add the 1k resistor to S12 & TachSelect in the ECU versus under the hood or at the distributor harness pin 24 (I believe this would eliminate the need for the 1k resistor connecting 12v to the Pin 24 wire noted in the diagram) Currently I have the shielded wire from Pin 24 going to the coil negative. With the upgrade Pin 24 wire should move to the distributor as the MS Trigger and pin 36 wire needs to be added as the ignition trigger to the coil negative. My questions.. - should the Pin 24 wire remain as the heavy shielded wire? ...spidey sense tells me the negative coil wire should be shielded not the one to the distributor. If not, what gauge wire is recommended for Pin 36 to coil negative? - should the 12v feed to the distributor be on a separate fuse/circuit or can I tap off the coil positive for this (seems like that is the way the NA Distributor module gets its 12v feed). -finally the last sentence in Optical Wheel "Wiring" section says "The primary trigger always wires to pin 24 on the main board DB37. For MS2, the second trigger wires to pin 3 on the main board DB37, or pin 7 on the DB15 if using the optional V3.57 DB15 input".....what the hell does this mean regarding pin3??? (that is a ground I believe) Thanks in advance to anyone helping me with this upgrade.
-
Fast Floridian's 240Z Track Build
Apex replied to FastFloridian's topic in S30 Series - 240z, 260z, 280z
Just randomly reading through some build threads on here and see my video linked lol Those are some massively wide rear quarters you're using @FastFloridian. Crazy stuff. -

My Z car log....small jobs done and fun things
A to Z replied to A to Z's topic in S30 Series - 240z, 260z, 280z
pulled from heat soak to almost midrange in under 10 minutes, sitting still, no additional airflow. SPAL fans are #1. Yes, it is a 3 core aluminum radiator, and a 160 thermostat, but it got heat soaked, and my twin 10" SPAL fans pulled it back down. -

My Z car log....small jobs done and fun things
A to Z replied to A to Z's topic in S30 Series - 240z, 260z, 280z
92 degree day Click below to see video: 07-27-2025.MOV -

A musician's therapist (The $300 Z)
Zetsaz replied to Zetsaz's topic in S30 Series - 240z, 260z, 280z
Final update before road tripping tomorrow. I was so bothered by the vibrations last night come back home from my niece's birthday that I decided to pull off the front diff mount and inspect. It looks like the bolt through the bushing was either loose or the upper piece of the mount was warped and didn't let the side squeeze right on the bushing. Bottom was rattling back and forth when I moved it after taking off the cross member. 3 hours worth of work later and putting the RT top mount on instead I tested and the vibrations are gone! I had to grind part of the bolt going through the bushing to pull it out because I couldn't get any leverage on the bolts going through the diff and they block each other. For a moment I thought it was placebo, so I kept finding multiple loads and speeds that it would vibrate the most at last night and got nothing. The biggest difference is the lock mechanism on the seatbelts is never rattling anymore which was a huge annoyance. TL;DR - the T3 diff mount (not the cross member itself) is probably needlessly complicated and is just too many parts stuffed into a tiny space. -

A musician's therapist (The $300 Z)
Zetsaz replied to Zetsaz's topic in S30 Series - 240z, 260z, 280z
It's going to be good! I had to wait months for it, but it once it was ready to go shopping was very fast. Even with tariffs on entry it cost me much less than it would have from a vendor here in the US -
Might help your conversation to distinguish between "no signal" and "no signal showing in Tunerstudio". The first is a problem at or with the hall sensor itself, the second could be anywhere in between or at the computer.
-

A musician's therapist (The $300 Z)
Ben280 replied to Zetsaz's topic in S30 Series - 240z, 260z, 280z
Really jealous of that diff. I probably need to do a similar thing shortly out here! -
I tried Poll Level and cranking and still no signal.
-
The hairlines weren't that bad, it was the handful that were going through the edge of the rotor that I was worried about. Friday marked my first return to the track in almost 2 years. Knocked off a bunch of rust, the car worked the whole time, and I made a couple changes that were impactful and improved the car. I went pretty slow, so y'all could enjoy some v8 sounds for longer than normal
-

My Z car log....small jobs done and fun things
A to Z replied to A to Z's topic in S30 Series - 240z, 260z, 280z
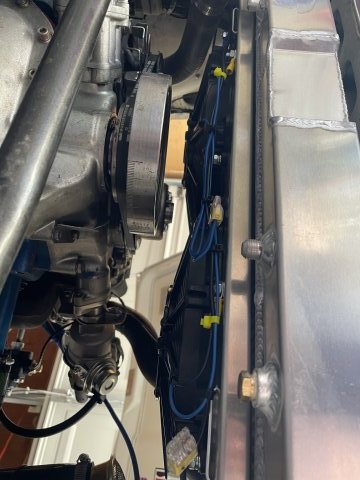
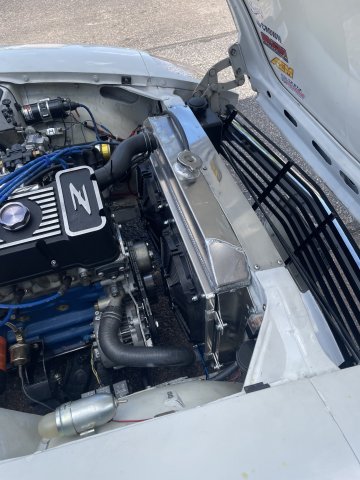
07-26-2025. Okay....radiator and fans installed and working. Waiting on the Thermostat sensor probe that is on it's way. 1 bottle of Water Wetter added. click below for video: fans work.MOV -

A musician's therapist (The $300 Z)
Zetsaz replied to Zetsaz's topic in S30 Series - 240z, 260z, 280z
Actually now that you mention it, I'm 99% certain the tires were not mounted correctly initially. The marks are long gone though, so my friend did the best he could. But This is the last trip on these tires and maybe these wheels so I'm not too stressed about it. More annoyed by the vibration under light load right now. That said, at around 70mph there's enough load in most situations that it's almost nonexistent and any slight noise it was making from 45-60ish is completely covered up by the wind and even other cars' tire noise while driving. I think I'm gonna switch back to the RT top mount tomorrow morning before the trip and if it's not better I'll just deal with it. The T3 mount they switched to on their front diff cross member is just so tightly packaged that I feel like it might be amplifying some of the noise or actually causing it. Part of me wants to just go to stock or a Kameari mount and the RT snubber on top -
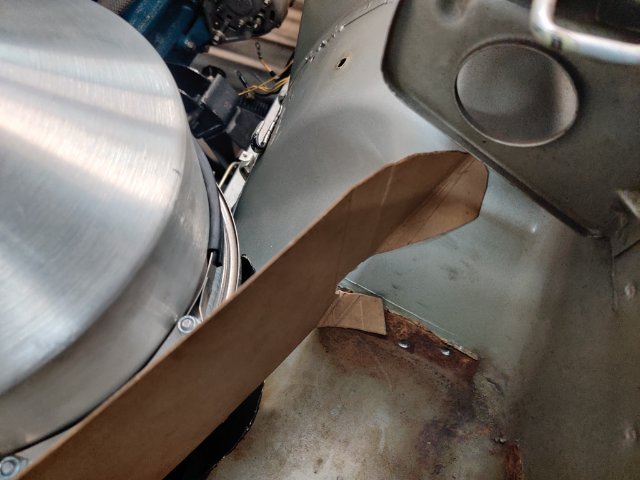
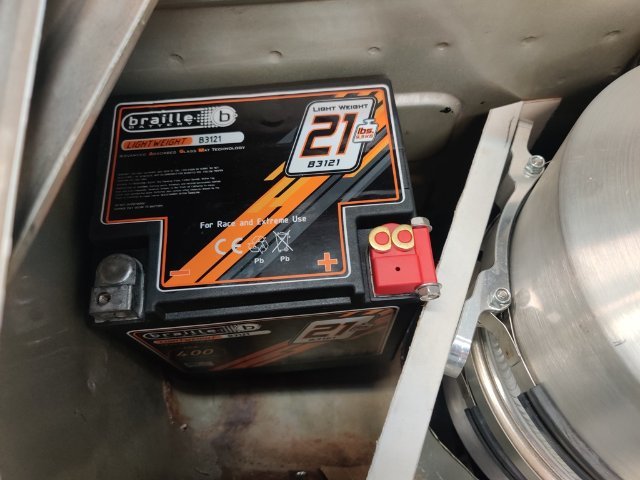
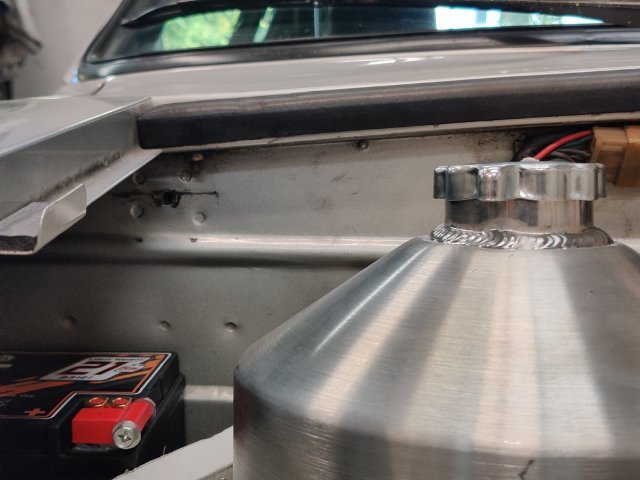
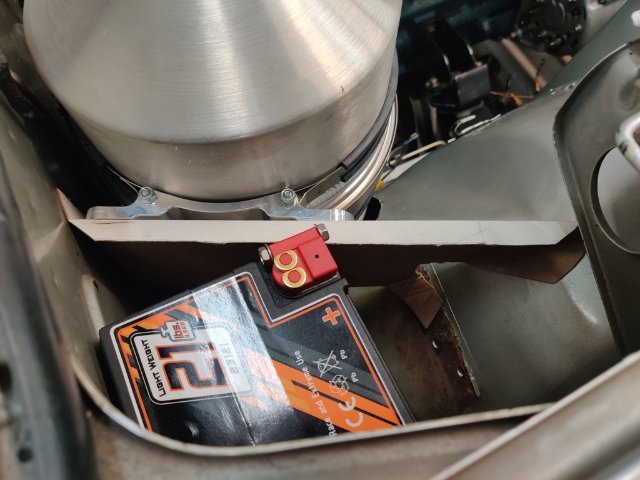
Today, I turned my attention to mounting the oil tank. Like the radiator, getting it to fit is quite a challenge. When placed against the firewall, the mounting brackets interfere with the brake and clutch hard lines, and the raised "ribs" in the firewall panel. I could space it out from the firewall, and still mount it there, but I came up with an alternative that I like. It will allow me to mount the tank far enough from the firewall to avoid wiring and hard lines and "ribs". I will be fabricating a mounting bracket which will connect diagonally from the firewall to the right inner fender. The final location of the tank will be just low enough to keep the filler cap from hitting the hood, and the drain will be located a couple of inches above the frame rail. Additionally, I purchased a Braille battery which is much smaller than the original. I will make and weld in a steel platform for it that will be similar to how it was done originally by Nissan. It will be a smaller platform, of course, but I will weld it to the inner fender in two locations and not to the firewall. At the top and bottom of the oil tank mounting bracket, I will put a 90 degree bend to add rigidity. I have some 1/8" thick 6061 aluminum I will use. Additionally, I have some aluminum angle. I may reinforce the top edge of the mounting plate with some of that. The bracket will be mounting to the firewall with two bolts (a reinforcement plate will be on the backside of the firewall), and to the front inner fender with two bolts. I may tie into the top edge of the oil mounting bracket in some way... to secure the battery in place. I want to be able to remove the battery without having to dismount the tank. So, that will be guiding my design effort for what I come up with to secure the battery in place.
-
A musician's therapist (The $300 Z)
Dat73z replied to Zetsaz's topic in S30 Series - 240z, 260z, 280z
Did they mount the tires correctly to minimize weights? I've had a couple sets of R comps mounted over the years which have balancing dots on the tire. I've found most shops don't know what the dots are used for 😅 -

Fast Floridian's 240Z Track Build
FastFloridian replied to FastFloridian's topic in S30 Series - 240z, 260z, 280z
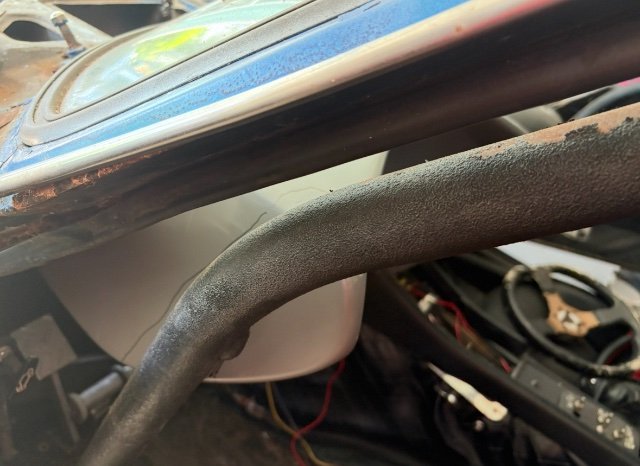
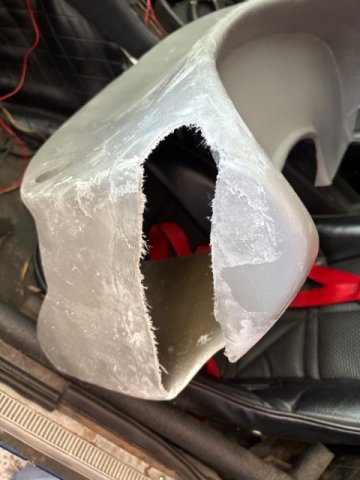
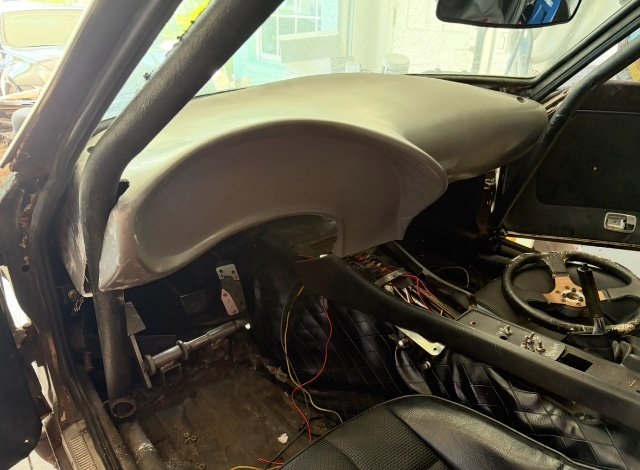
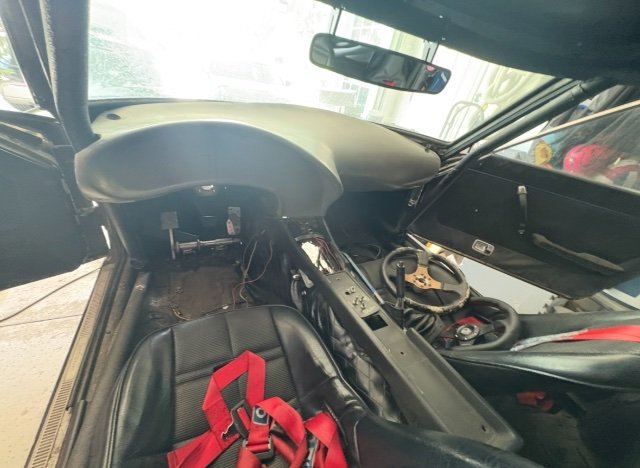
Started cutting on the dash to see how it will fit, roll cage goes through it. Now I need to mock up the digital gauge display and see how it will fit. Displays is bigger than dash think it needs to Poké above dash as steering column looks to sit too close below. Too hot out, done for the day. -

Fast Floridian's 240Z Track Build
FastFloridian replied to FastFloridian's topic in S30 Series - 240z, 260z, 280z
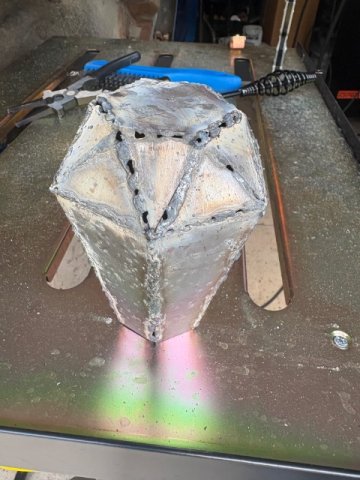
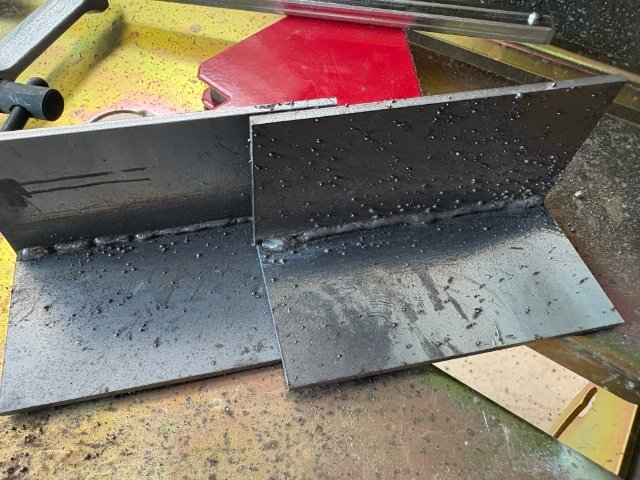
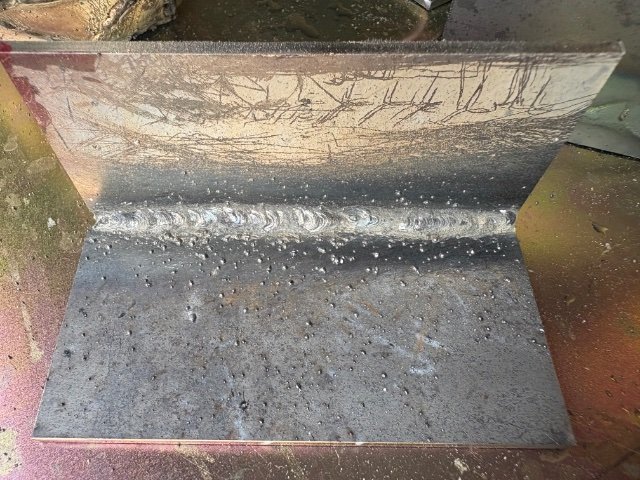
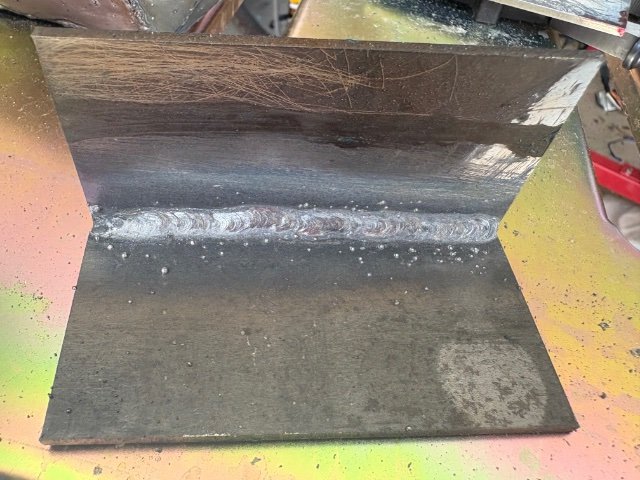
Started learning to weld, here’s my first tries last weekend and through today, about ready to weld on the car. Going to practice on some thinner stuff first to get more practice. -

A musician's therapist (The $300 Z)
Zetsaz replied to Zetsaz's topic in S30 Series - 240z, 260z, 280z
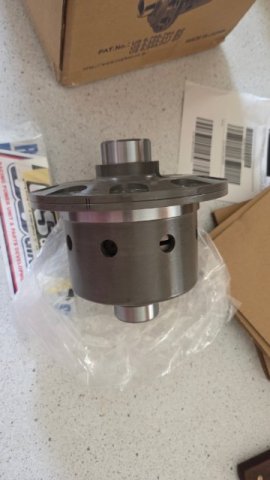
It was a good idea not to wait on rebuilding the 3.54 diff. The new LSD arrived weeks after I expected it and there's no shot I would have been able to swap it into the spare R200 before my trip. I'm excited to get this together in the winter though! -
Another S30 Restoration from Japan- no English Subtitles This short video gives the viewer how restoration can accomplished even with a badly corroded body. Note that most of badly corroded areas can be replaced with aftermarket body panels( even wheelwell edges). Also, one must realize this work took over months of bodywork by a professional. Toolman
-
L28et powerband issue
Nicksturboz2 replied to Nicksturboz2's topic in Trouble Shooting / General Engine
lol you are correct sir.... I checked the wheel bearing and there were alittle loose on the driver side [normalish] but the pass side didnt feel right [probly needs new bearing} but I got it tightened up and took it for a drive..... night and day diffence. Ive been working on everything else it didnt even occur to me to check. so thank you.- 14 replies
-
- 1
-

-

A musician's therapist (The $300 Z)
Zetsaz replied to Zetsaz's topic in S30 Series - 240z, 260z, 280z
Got the front speakers in today! Considering none of the speakers are big it's not particularly impressive, but it sounds alright for a 50 year old car. More incentive for me to go to a quieter muffler next year which I didn't get to do this time around. Got the tires balanced and was surprised just how poorly balanced these things are. My new Panasport spare only need 1/2oz, these needed... So much more I won't bother counting each. The vibrating I was tracking down is 90% gone and now I can't tell what's left of it. With the wheels and driveshaft balanced it's almost entirely gone but over 50mph I'm still getting some vibrations on very low load - so cruising speed. The moment push the pedal a bit for even slow acceleration it's gone and when I'm off the throttle it's also gone. -
Sounds like front wheel bearings. Your tires will wear out faster also.
- 14 replies
-
- 1
-

-

Throttle body vacuum lines routing
socorob replied to Daniel13brx7's topic in Trouble Shooting / General Engine
So that goes to the vacuum port on the throttle body, the other one comes from the gas tank. Where does the 3rd one go to? I have an LS swap and trying to figure out hot to hook it up.
-
Who's Online 2 Members, 0 Anonymous, 521 Guests (See full list)









.jpg.c007ffbe9bfabf6ba990513160d48805.jpg)
