-
Member Statistics
33264
Total Members5167
Most Online
All Activity
- Today
-

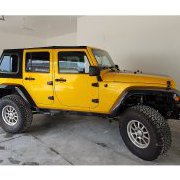
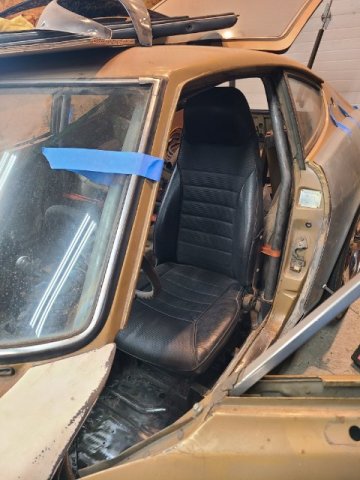
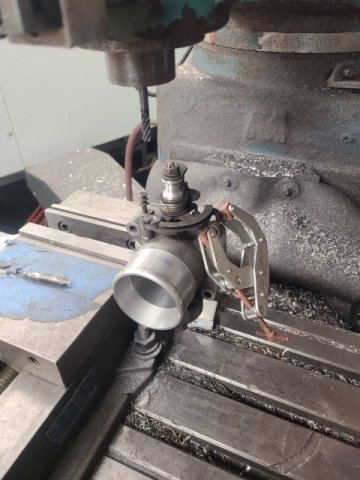
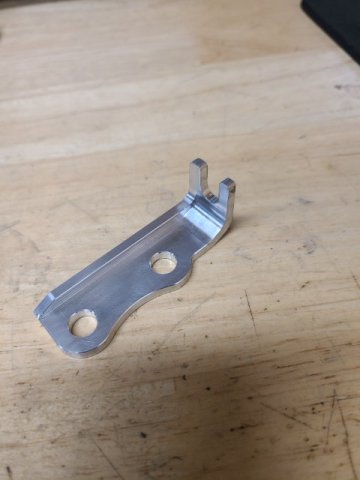
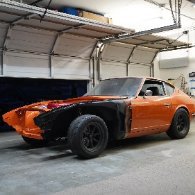
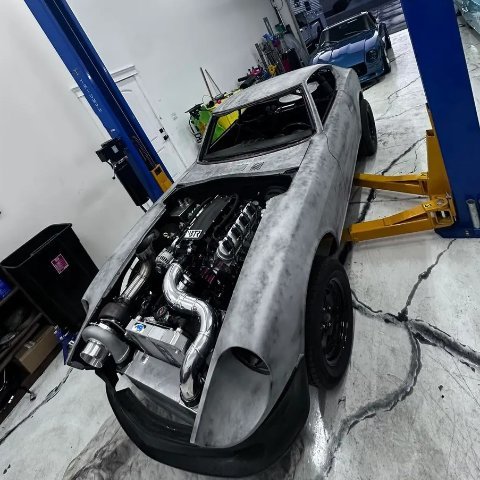
280z 1jz track build from a pile of parts
flatout replied to flatout's topic in S30 Series - 240z, 260z, 280z
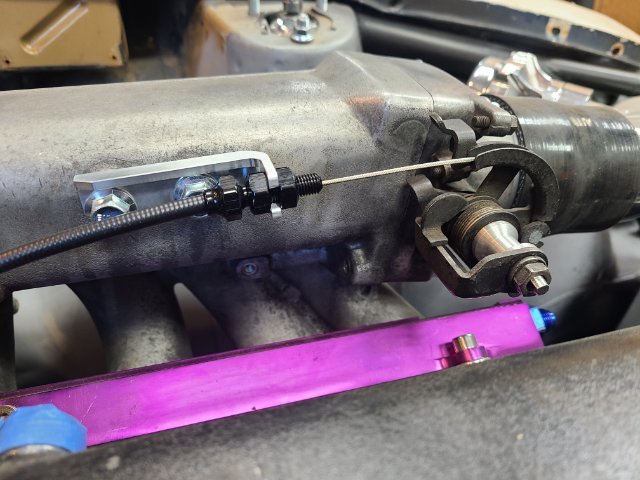
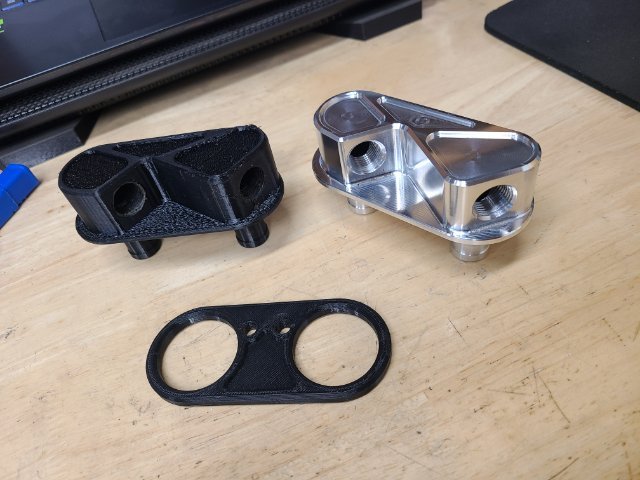
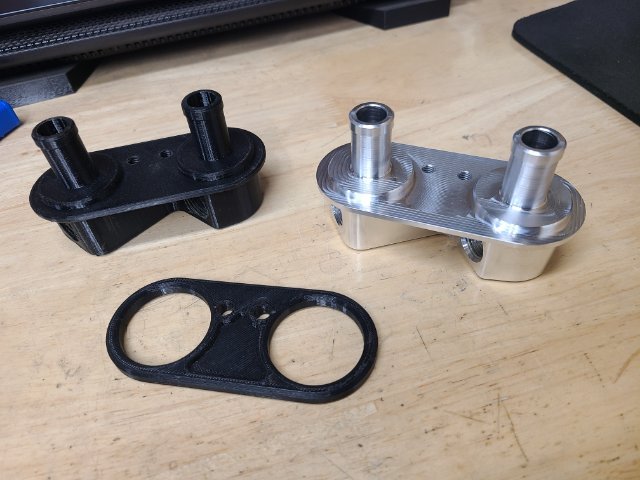
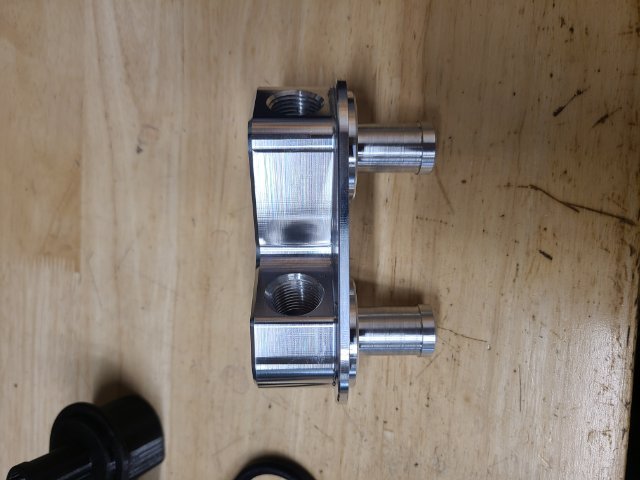
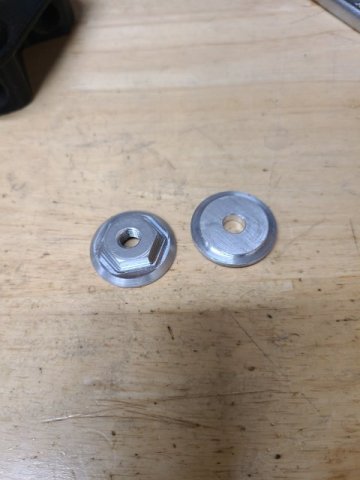
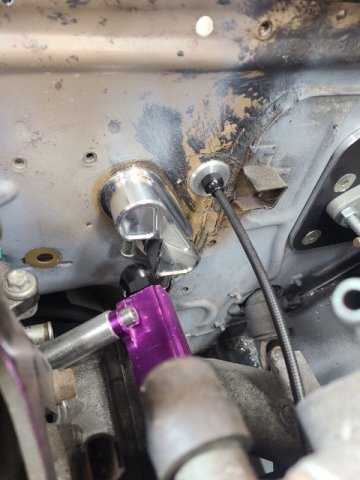
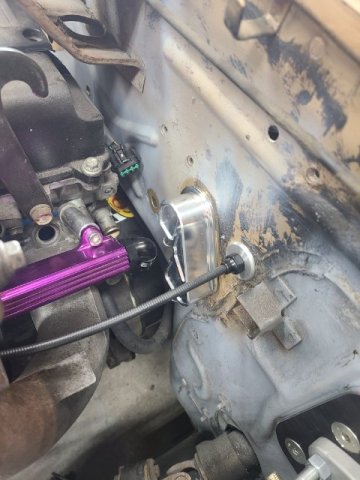
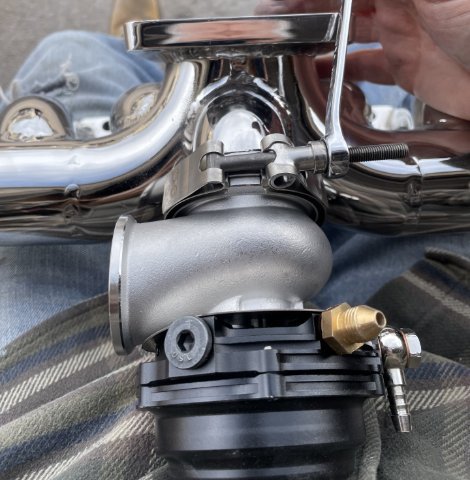
Got a few things done and checked off the list. made some modifications to the throttlebody and an adapter on the firewall to run a motion raceworks throttle cable. Made the firewall adapter have a 17mm hex to get it good and snug. This may be mostly a race car but decided to go with a small heater to make sure if inclement weather came up id atleast have a defroster. bought a maradyne universal heater to stuff under the dash. The JZ has the coolant lines on the driver side so decided to make this fancy billet firewall bulkhead. I have a couple aluminum fittings ordered and then i'll try and find some pre molded 90º hoses to fit up. The fuel rail that came with the engine appears to just be a cheapo ebay piece and the ends are cross threaded so i'll replace it. I went with a high flow 90 but may need to go with a banjo style as its close to my adapter. Started on the cage. but have been doing seat research before i go any further to make sure i can get the harness bar in a good spot. I am friends with a local youtuber so i took a ride down to his shop and sat in a bunch of his drift cars to get an idea of what seats i liked. now just to commit and hope i can make it fit in this tiny cabin.
-
New All Aluminum Body Panels of Datsun240Z manufactured in Japan
jpndave replied to toolman's topic in Body Kits & Paint
@1969honda and I are going to pop our own carbon hood and fenders. The roof and doors however, I really like the idea of those aluminum parts. That envelope needs more crash protection and the aluminum would take care of all of that. We'll see how cost and availability is. -

Heavy Duty frame rails and connectors
toolman replied to toolman's topic in Gen III & IV Chevy V8Z Tech Board
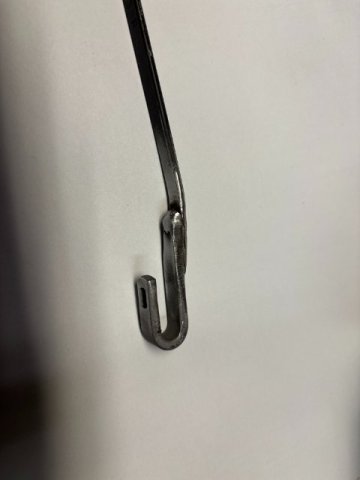
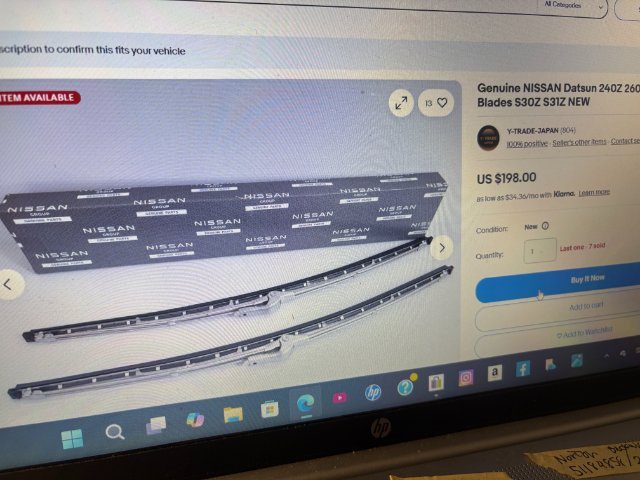
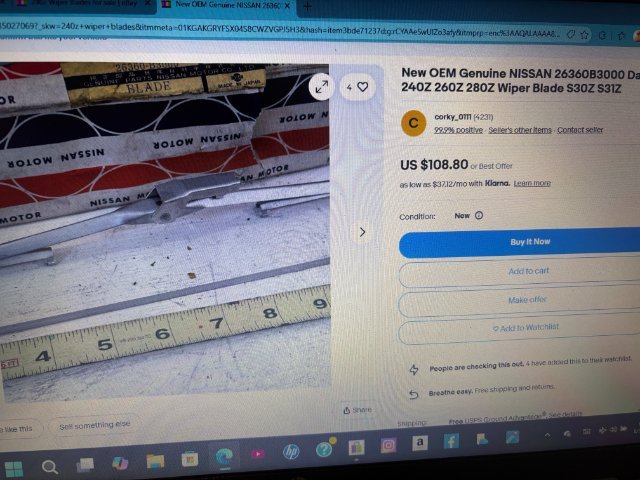
240Z Wiper Blades Problem The problem with the 240Z Wiper Blades is their availability. As these cars go older, their parts tend to almost impossible to find. When found, they cost about $200 on Ebay. Those Universal Wiper Blades use a Plastic Universal Adaptor. However, these Adaptors don not hold the Wiper Blades to the OEM Wiper Blade Arms. Mine came off during a rain storm several times. The last time It scratched my windshield glass but fortunately it was polished off. So I decided to see if I could create a better design. Most Late model cars use a "J HOOK" design Wiper Arm. So I went to the Junk Yard and got two arms. As I was a regular customer, the owner said "just take them, I got hundreds of them". After carefully measure the distance between the Wiper Nut and the End of the Wiper Blade Tip. I just cut the donor arm about 3" off. The Univerisal Wiper Blade was installed on the J Hook. Then, slide the J Hook piece on the OEM wiper arm until the measurement was acheived. A Visegrip Plier was used to hold the two pieces together. These two pieces were tackwelded together. The newly form wiper arm was installed and tested thru its full arc. When that was achieved, I fully welded the two overlapped pieces together. A Simple Fix for the Wiper Problem. Very Low Cost and ended up with a Wiper Blade that will always be Available. Those those of you who want the original Blade-just keep the OEM one in a safe place and make one for every day use. Unless you can afford $100 when your blade wears out.
-
I have an RB26 260z running EMU Black and PMU-16. You can find my thread here... https://www.gtrlife.com/threads/my-new-toy-1974-rb26-powered-260z.324573/page-12?post_id=4210907#post-4210907 That spot looks correct for the oil reference per the attached pic of my setup.
-
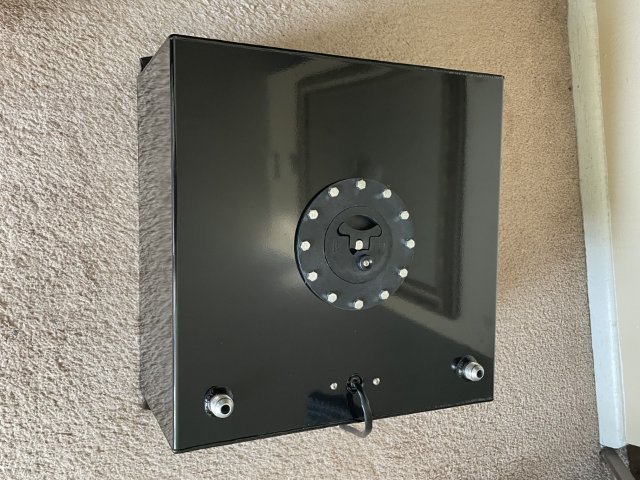
That type of fuel cell is only good for drag racing and mild street driving. I had something similar in my car when I first built it. When I started auto crossing the car, I found that the fuel had to be kept almost full to prevent starvation during braking and cornering.
-
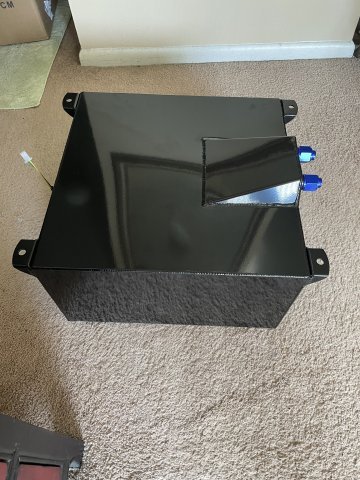
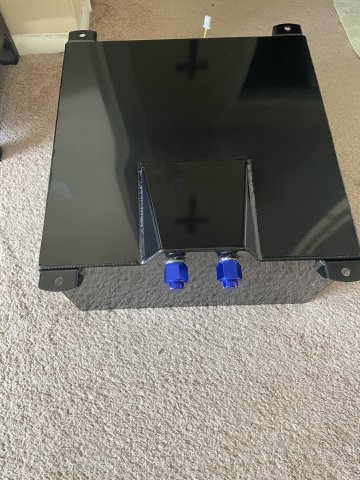
10 gallon fuel cell from evil energy arrived. it fits! very nice quality. Last pic is from the Skillard site, but I just bought this floor and will be using it with this fuel cell and a battery box.
-
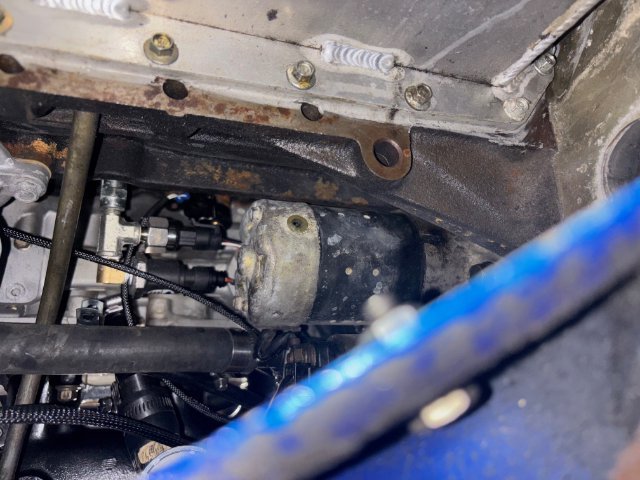
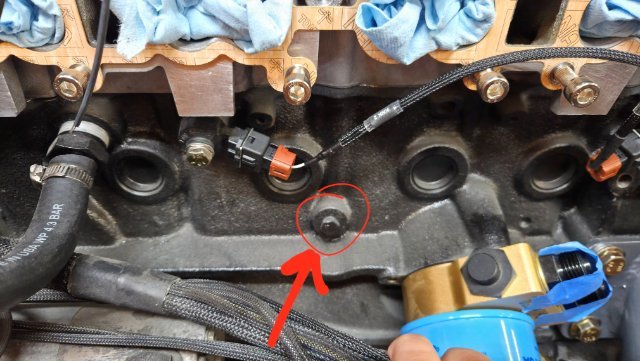
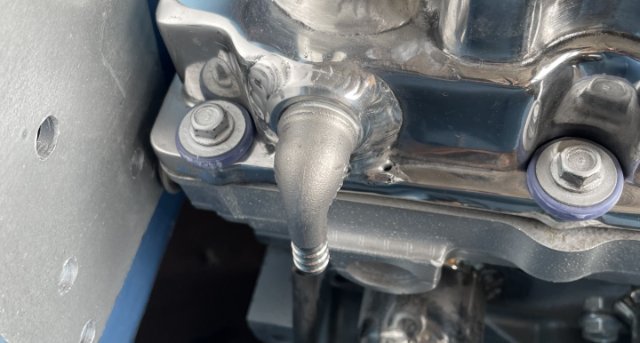
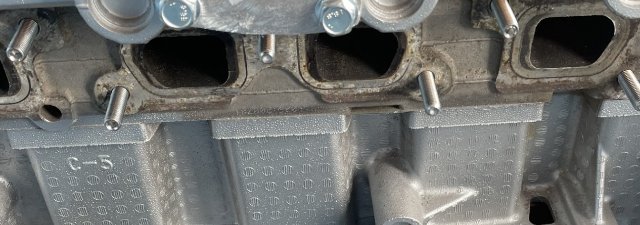
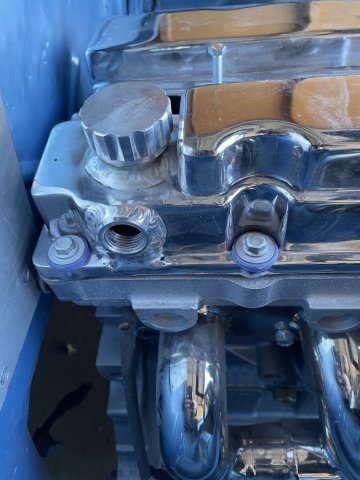
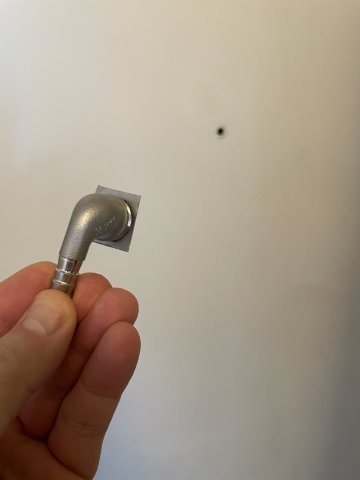
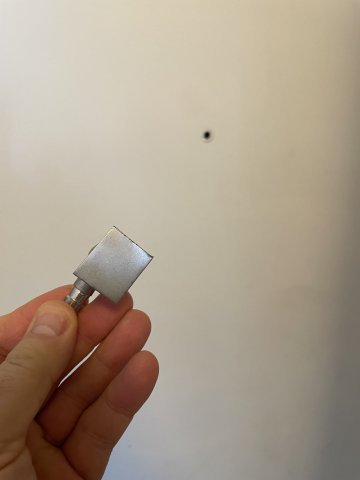
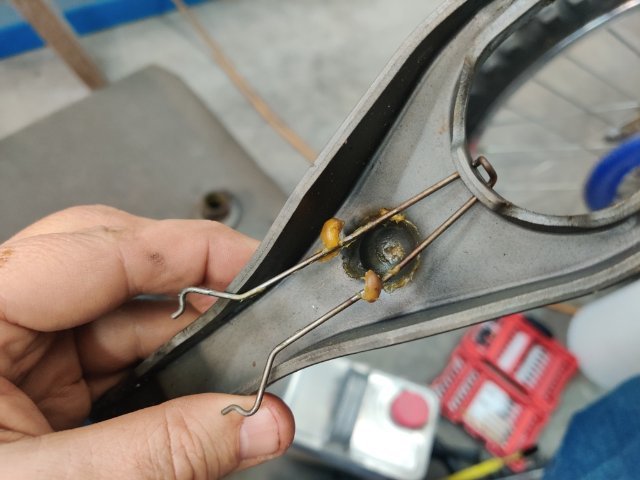
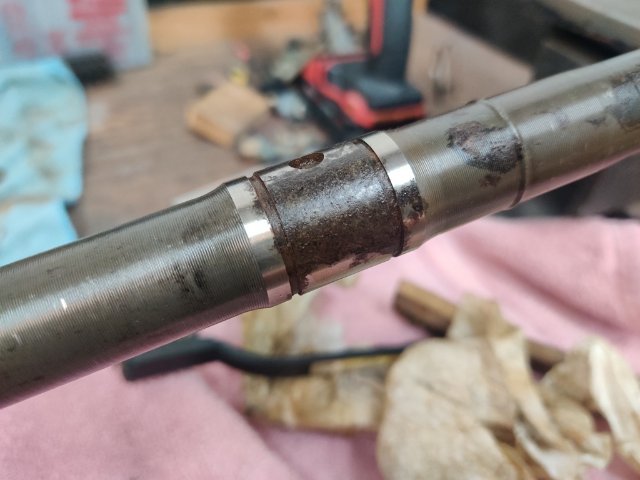
I don't know the RB that well but it looks like a coolant block drain fitting. its possible it oil but id guess coolant drain.
- Yesterday
-
I have a 73 240z with an RB26, ECUMaster Black ECU and SpeedHut Guages for Oil Pressure, Oil temperature. The ECU needs oil pressure and temperature as well, so I have 2 of each sensors. I am running the mishimimoto thermostatic oil sandwich plate/cooler which only has 1 1/8"NPT port. How or where can I install all these sensors? Does anyone know what this port is for, between cylinder 4 and 5 on the intake side of the 50U block?
-
SEMA 2025 Chinese Version of Assembled Toyota A806 examined
toolman replied to toolman's topic in Body Kits & Paint
This video is the Second Video concerning the Toyota A86 reproduced assembled body. They have several individuals that discuss the quality, licensing, and infor about this car body. In my opinion, the more detailed pics of the alignment and welds show that this body was not assemblied properly. If even used for the street, the body would require closing the panel gaps and alot more proper welding. Unitized bodies require proper panel alignment and sufficient amount of welding to provide a safe cafe. Please give your comments about this car body. Remember this same company manufactures the 240Z assembled body also. - Last week
-
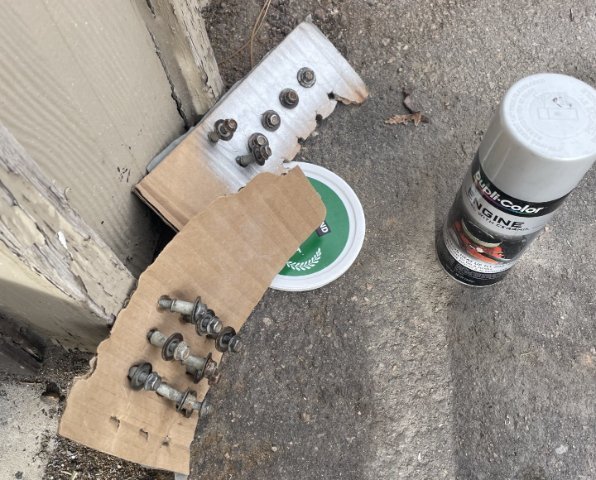
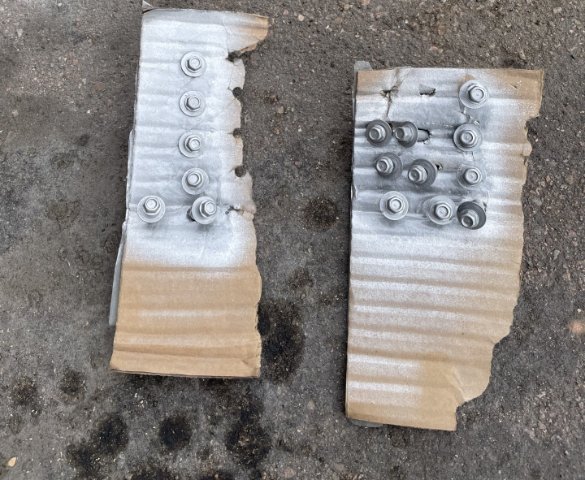
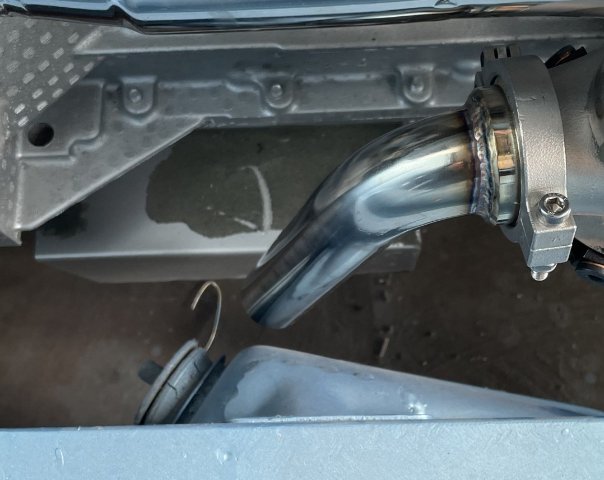
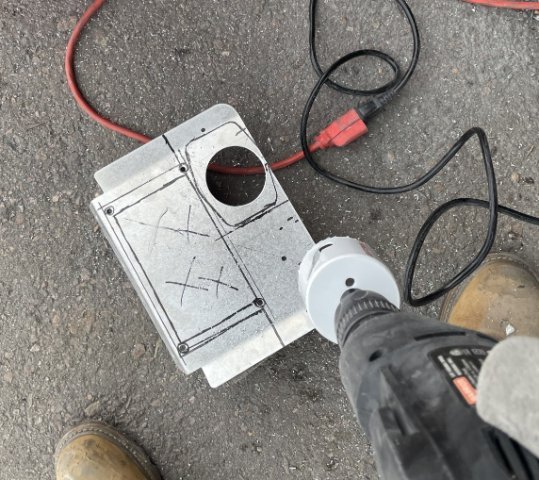
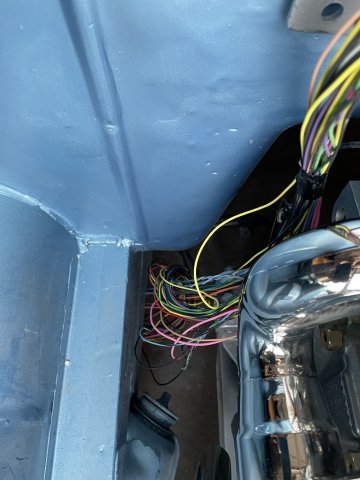
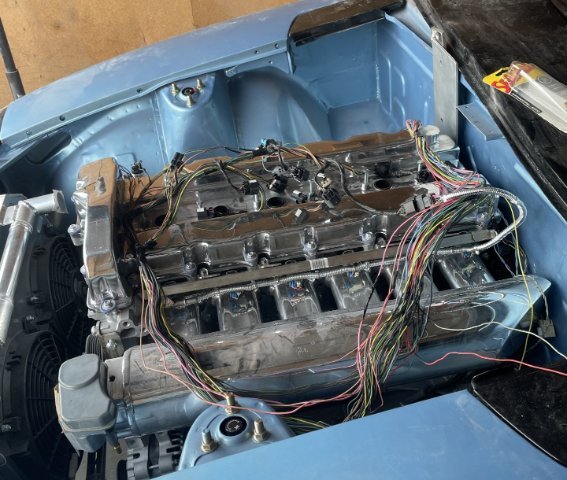
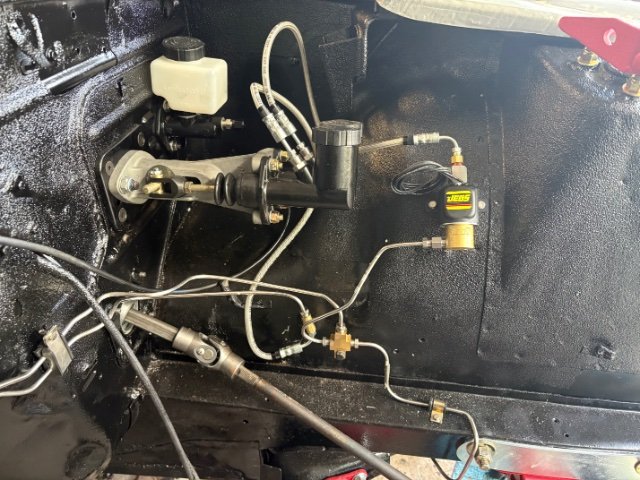
01-28-2026. Productive day. I got the remaining valve cover bolts cleaned up and painted, then installed. I then also got the fitting for the catch can installed. I drilled the access hole and got the engine wiring stand along harness laid out on the engine a couple things plugged in and fed the large end into the cabin and then set the electrical panel on tint genreal area of where it will be installed later. I also went ahead and installed the injectors and rail and pulled the header off, installed the stud kit from Atlas Industries..... installed the wastegate on to the header along with the down pipe and then got it all back on to the engine and torqued down. I took the bolts I have for holding the turbo down and turned them into studs and now I just need another turbo gasket and I can install it and be done with that. I was able to re-clock the center section, so when I get to it, I can get the oil feed and drain installed. I had enough time to get the holes cut out for my dash center panel, and with the gauges and toggle switch I can get that all assembled after I give the panel a coat of paint. Pics follow. Cheers!
-
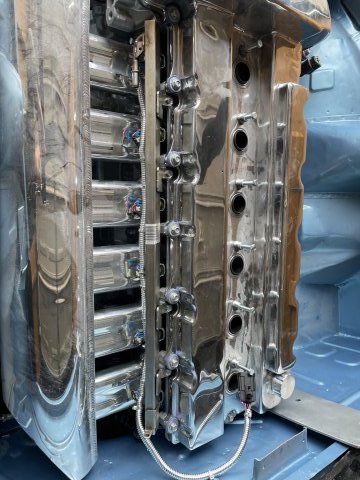
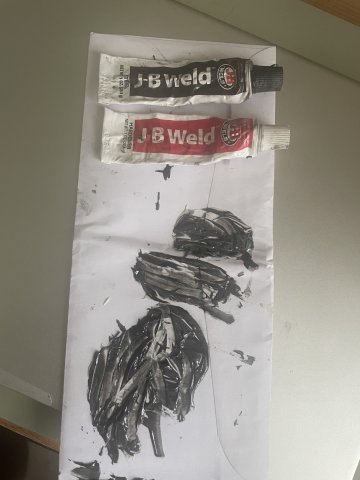
I got out to the garage for a couple hours today, and I fixed the valve cover. My original baffle for the port feeding my catch can wasn't clearing....I put off fixing it forever. Well, I am now at the point that I need it fixed now to keep working forward. So, Today I grinded it all out & cleaned it up and got the valve cover down now permanently. The location when I installed the port was against the cam and cam tower. So, What I am doing to fix it, is JB welding a steel plate on the tip of my threaded and cut down bung. Once the JB Weld is cured, I will grind it down to the same diameter as the threads, and bevel the tip, and then drill a few small holes in it. Enough to hold the oil back but the vapor can get through. My catch can is such it is easy to unscrew, pour the oil back in and screw it back on anyway.
-
I wish I would have dynoed my 2.4L with ITB, but sadly I broke my oil pressure bung mount. I will be taking that block, stripping it down and finding an expert to weld it.
-

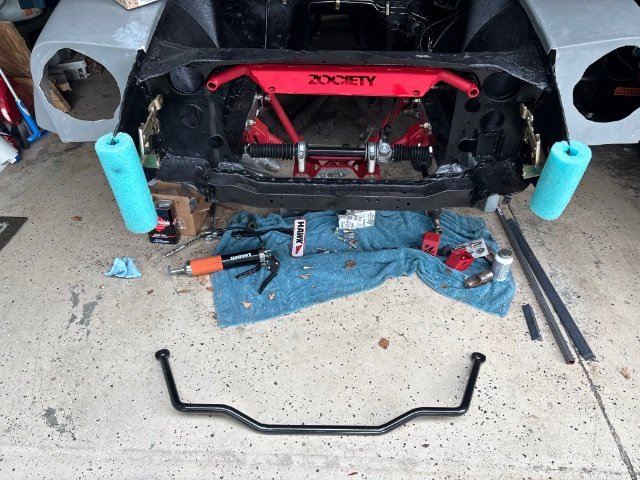
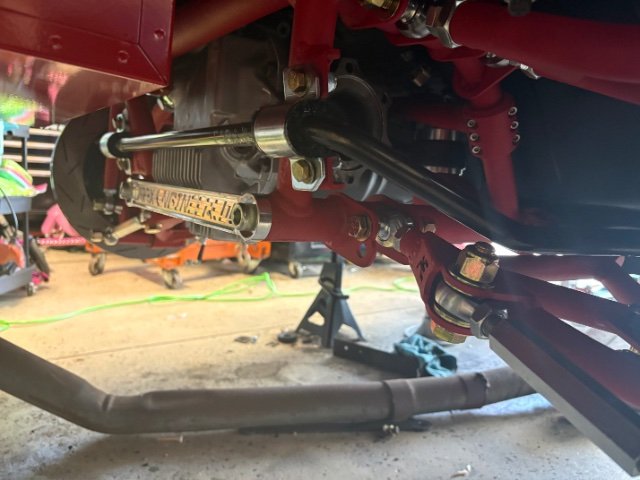
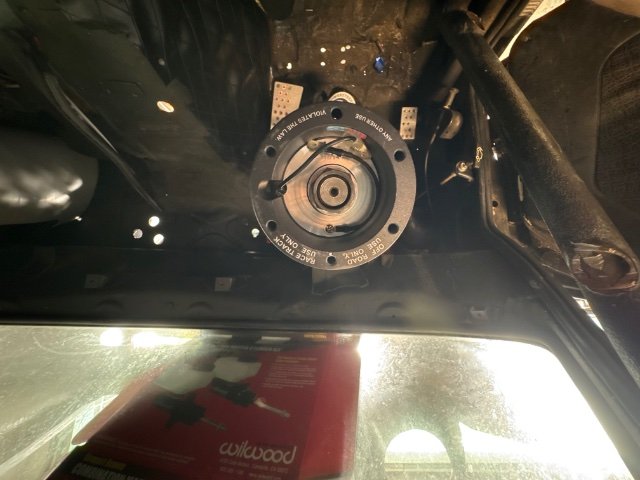
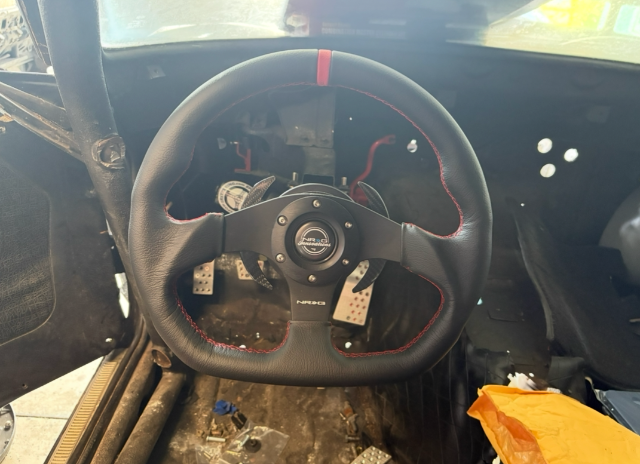
Fast Floridian's 240Z Track Build
FastFloridian replied to FastFloridian's topic in S30 Series - 240z, 260z, 280z
Got a few minor things done today. Front and rear sway bars are on. Got the steering column mounted and quick release steering wheel installed. Also plumbed up the line-lock, just need to clean it up a bit and the fronts are ready for fluid.
-
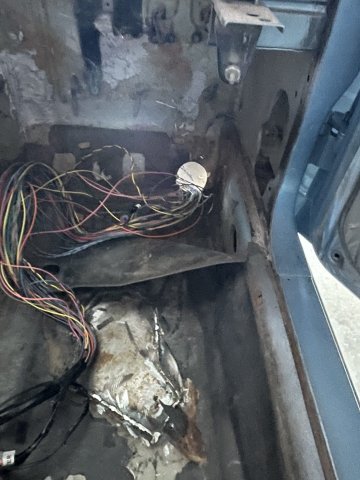
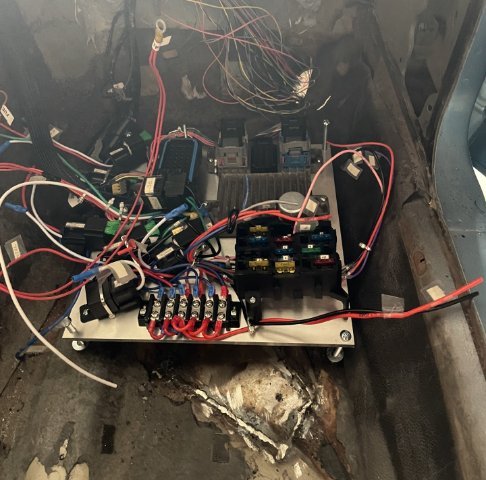
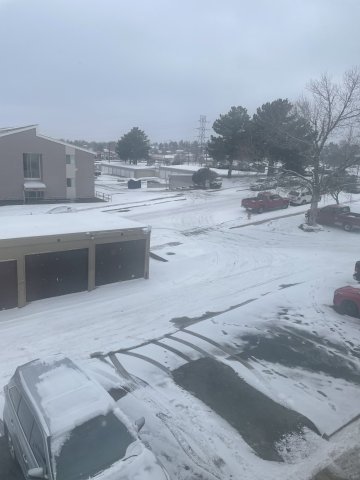
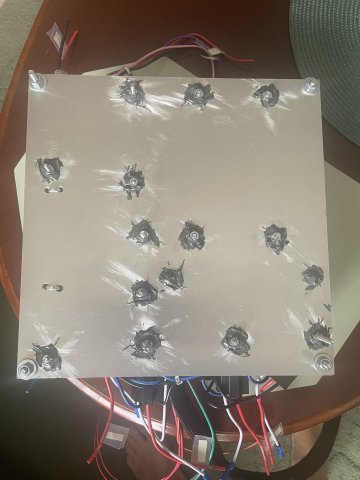
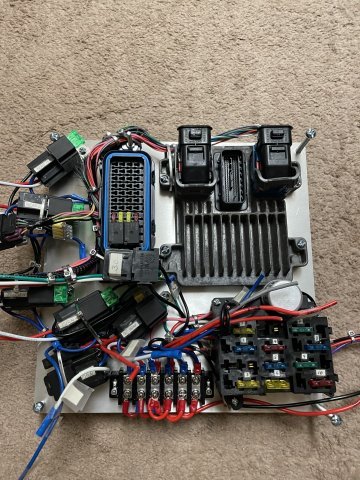
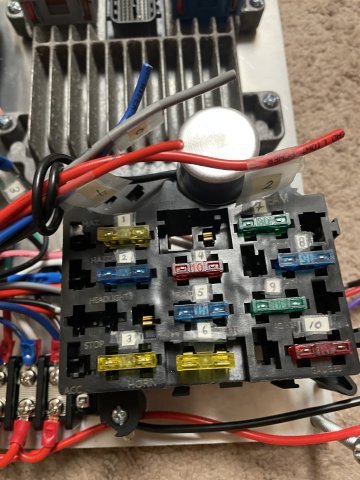
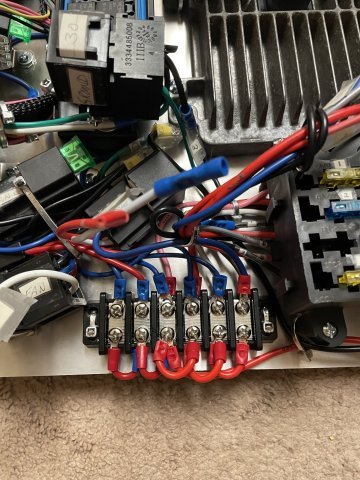
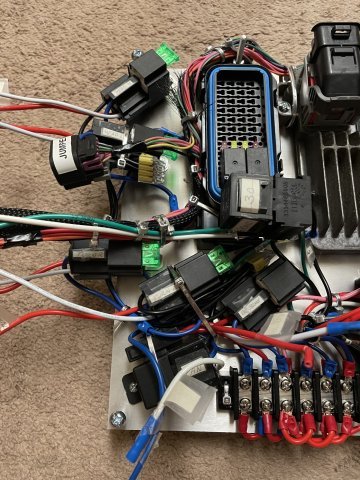
01-25-2026. Winter weather continues! And so, the work I can do inside for the 4200 swapped 260Z.....continues God willing. I flipped my electrical "Central Station" over and sanded the aluminum around each nut and sides of the nuts down to make it so the JB will stick and then coated them to make the nuts permanent. The idea being, I don't want to have to lift this back off once installed. PICS:
-
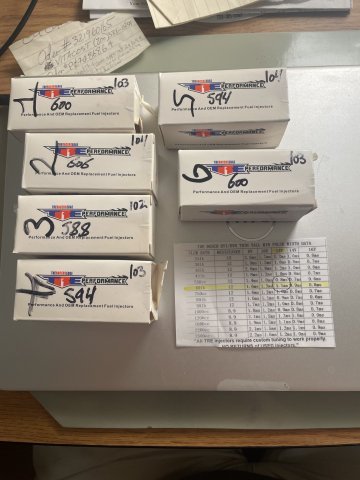
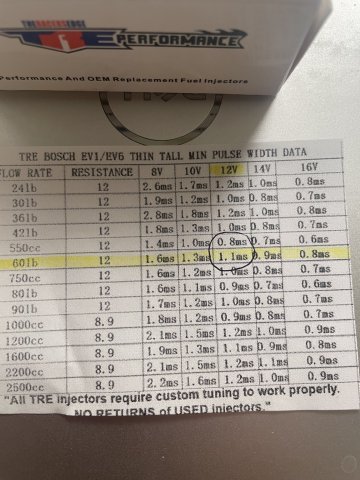
Ok, so according to TRE the numbers I mentioned are static and Dynamic values for each injector, and are used by the tuner. Cyl Static Dynamic 1 - 600 103 2 - 606 104 3 - 588 102 4 - 594 103 5 - 594 104 6 - 600 103 Interesting. Glad I took the time to keep track of which one is in which cylinder.
-
Thanks for bumping this thread, good read and some good resources for me to follow up on. I will be getting to the aero parts of my build soon and this already has given me some new ideas. Balance is definitely the big thing that can be missed and tire sizing comes into play here too which I’ve already been thinking about. Most likely going with a wide square set up for the track, so increasing oversteer with just tire set up.
-
A 2026 SEMA SHOW 260Z Build all the way from Great Britain
toolman replied to toolman's topic in Body Kits & Paint
Part 5-Liberty Walk Body Kit Installation This video covers the preparation for the installation of the Liberty Walk Body Kit. The 2026 SEMA Build starts to take shape. -
Tim D joined the community
-
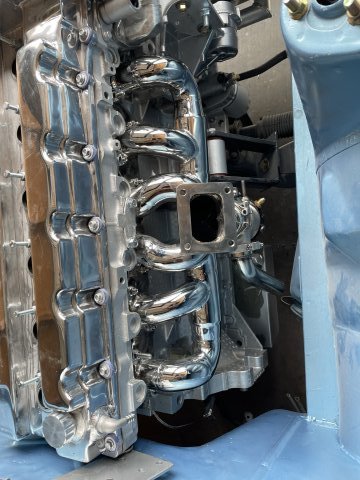
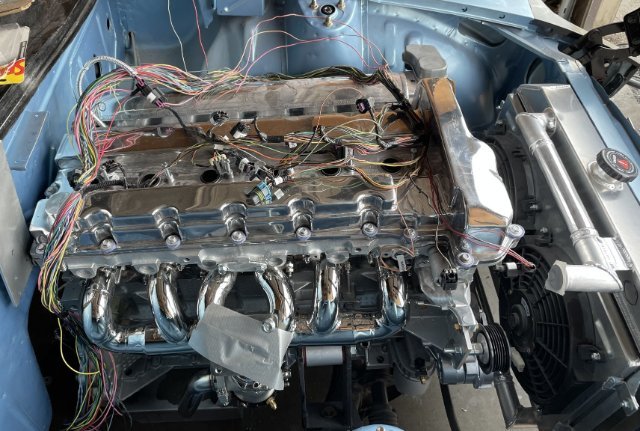
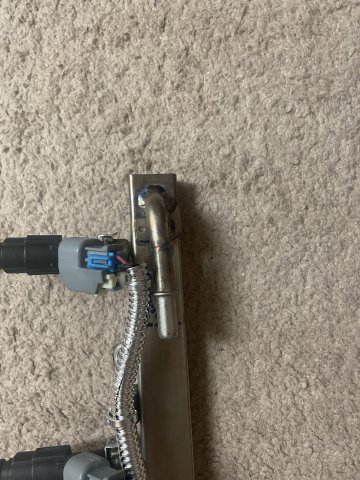
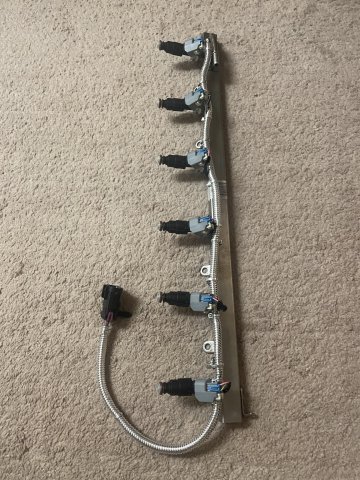
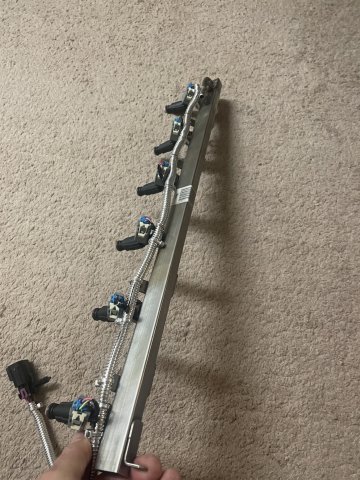
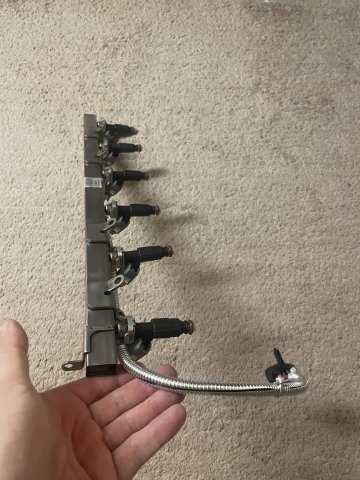
01-24-2026. Well, I went ahead and put my fuel rail together today. My factory rail I had the port for the fuel line hookup cut and custom welded on by Wagner Fabrication here in Colorado Springs, CO, for a cleaner look, and the wiring was custom made by Jemery at Lime-swap. Injectors are Siemens DEKA 60 lb EV6 injectors from TRE. You can see I put the chrome wire loom on as well and used some chrome tie wraps to make it look half decent. PICS:
-
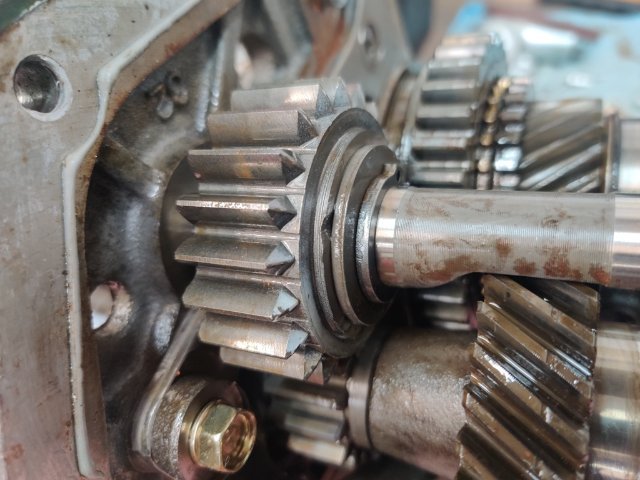
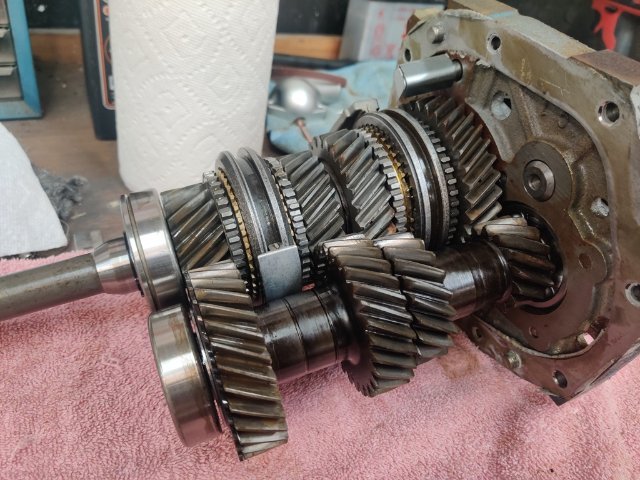
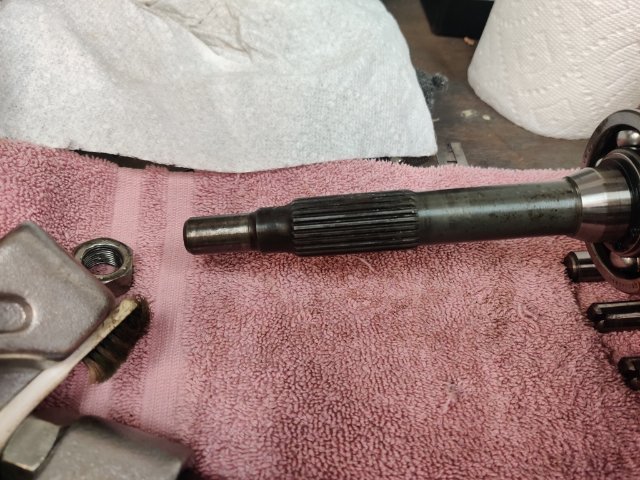
I think I scored with the purchase of a 240sx transmission. When talking to the salvage yard, they said the transmission came from a crash test car and it had 28 miles on it. Well... I was quite dubious, but they only wanted $100 more for it than one with 77,000 miles. So, I bought it. Today, I took the gear assembly out of the front and rear housings. The clutch release bearing sleeve has no visible wear marks and is packed with clean grease. The same grease is present at the clutch fork pivot. And, the reverse idler gear in this transmission which I have typically seen is chewed up on one side in used transmissions, looks like new (see the third pic)! Unfortunately, it has some specs of rust in a few places. There is one badly rusted spot on the main shaft under the speedometer drive gear (third pic) on about 1/2 of the surface on the diameter there. But, having looked it over pretty good, I think this will be a great transmission for the car. I don't need to use the speedometer drive gear because the car will now be equipped with a GPS triggered Speed Hut speedometer. I think I will just need to replace the rear most bearing (due to some light corrosion there), and give the gear set a thorough cleaning, and it will be good to go!
- Earlier
-
some pics of the setup:
-
Here is a video I made for my wiring "central station". click below" V1.MOV
-

Ford Super 8.8 irs swap thread. Rear brakes too
Invincibleextremes replied to Invincibleextremes's topic in Drivetrain
2016 camaro front struts from Strange were adapted to fit Justin Gilberts 1,xxxx hp build for maximum adjustment 2 way.
-
The Video is the most detailed Rebuild of the Power Brake Booster Unit. As the 240Z family goes older, aftermarket rebuild boosters are getting harder to find. In some cases, they are impossible to find so rebuilding maybe the only solution.
-
FYI -- I've confirmed with SuperDan that the site certificates have indeed been updated. Some users may need to refresh their browsers to update the cache or empty the browser cache. Cheers.
-
 This matches my experience too - a lot of aero “common knowledge” starts to fall apart once you actually try to measure things. The front-vs-rear balance point really stood out to me; I always assumed any lift was bad, full stop. Makes me rethink how careful you have to be adding splitters or diffusers without addressing the whole car.


-
Who's Online 2 Members, 0 Anonymous, 439 Guests (See full list)