-
Member Statistics
33240
Total Members5167
Most Online
All Activity
- Today
-
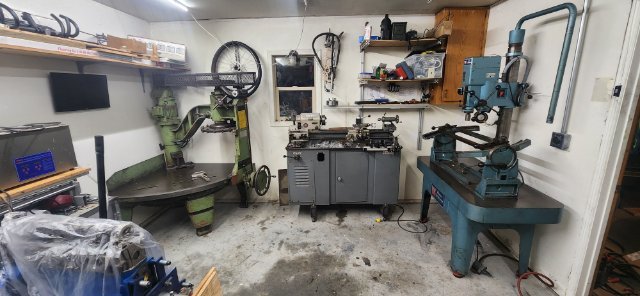
very cool, Nothing wrong with an old machine if its dialed in right and run by somebody that cares to make a good product. I run a small machine shop from my garage, just not engine related machining. Sure you could drum up some work for those machines.
-
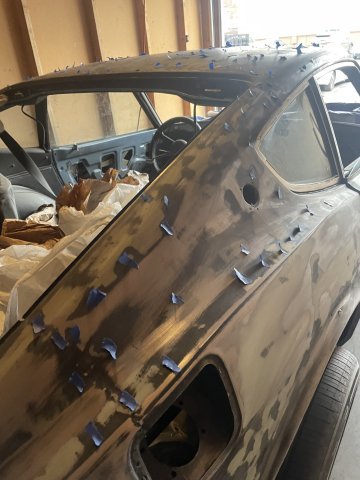
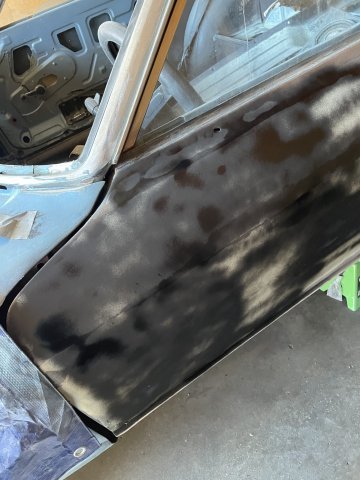
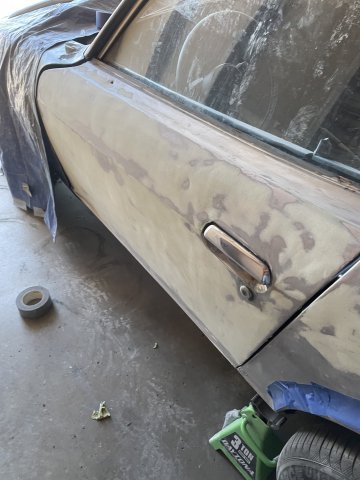
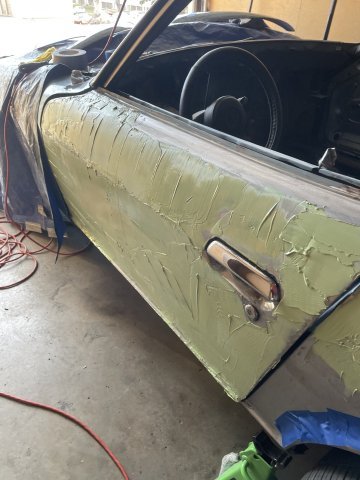
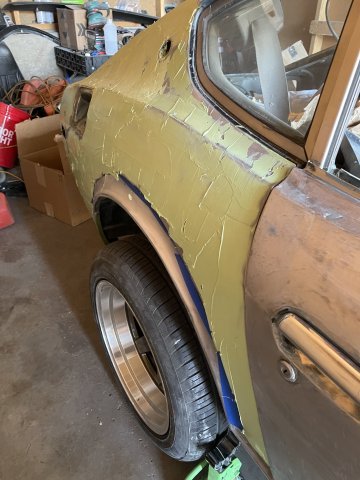
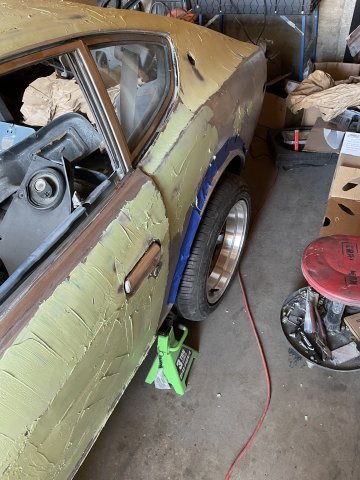
I'm keeping it simple and easy to get done. not going to a mirror finish, just a factory level finish. I build drivers, Sir. I was going to use that dry guide coat until I realized you can't paint over it.....so it is ANOTHER step to get it off then put the mud when you took it off, then smooth it out then another guide coat then block. I just used black primer, mud the deepest bottoms, and use about 4-5 coats of the THICK primer filler made by duplicolor.....specially made for deep scratches. red oxide color. Not advocating any of this it's just experimentation and finding a way that works for me. It will go quick this way. Mud only where needed. when you cover the whole panel, 90% is sanded right off. Using glaze, it sands so easy, I can block it with 220 grit within about a hour and have it ready for filler primer....will it be razor straight? No....but it will look pretty nice.
-
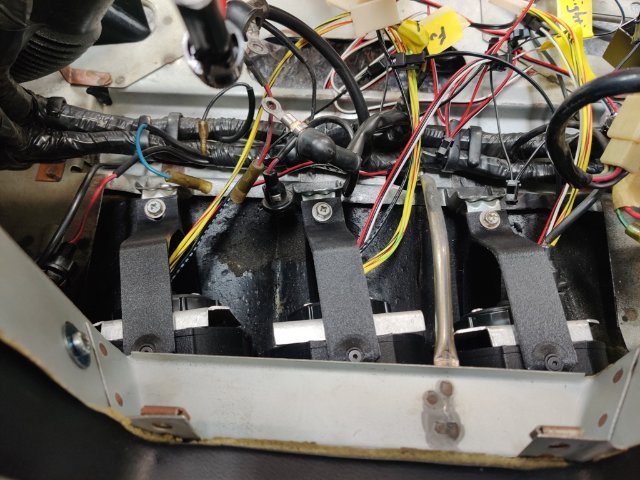
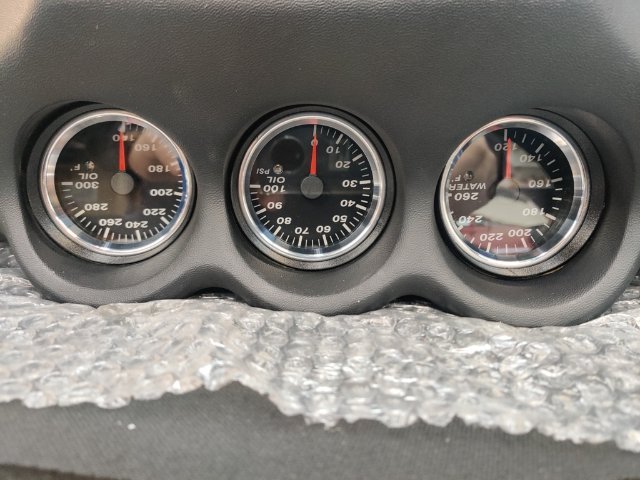
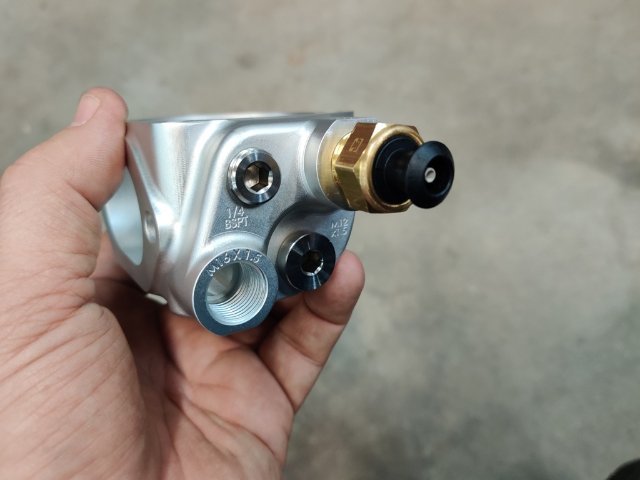
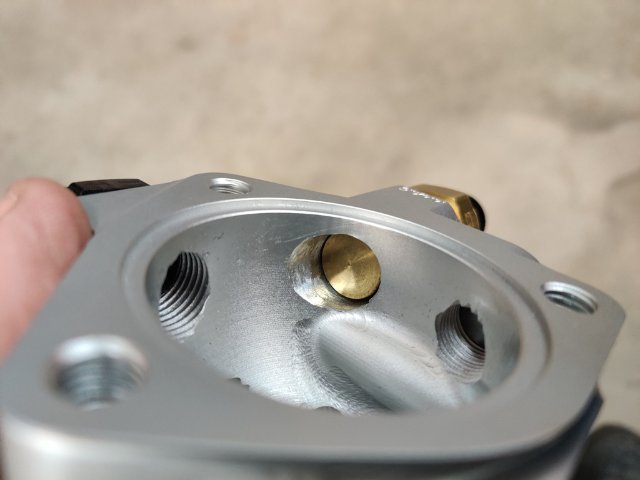
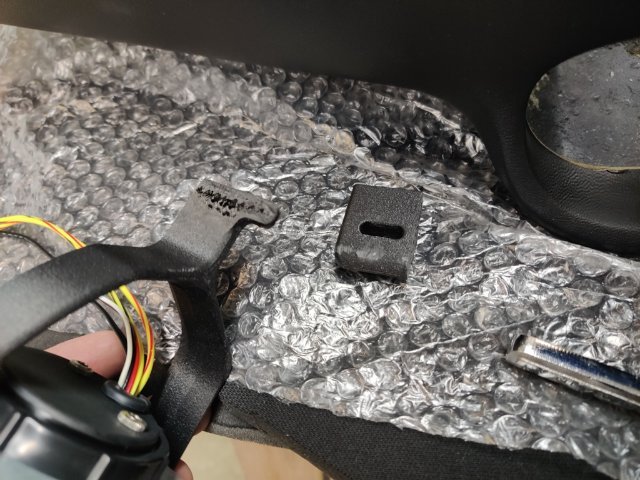
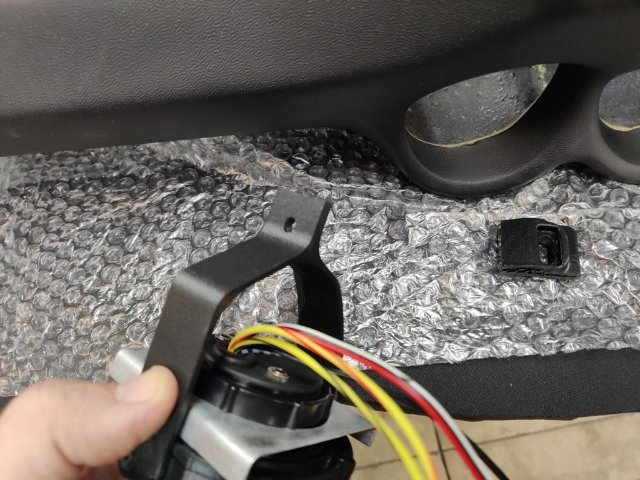
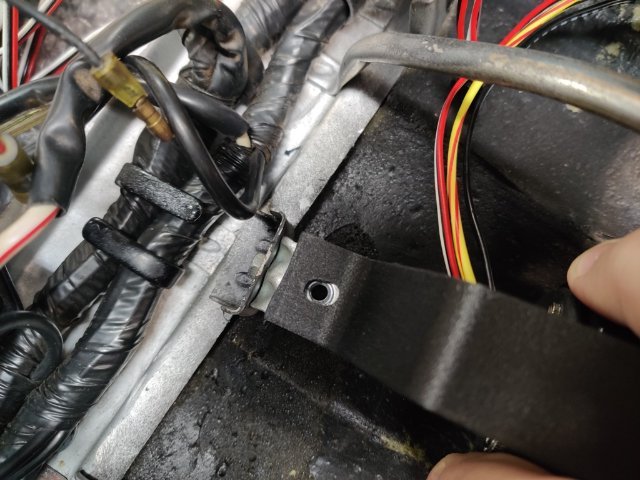
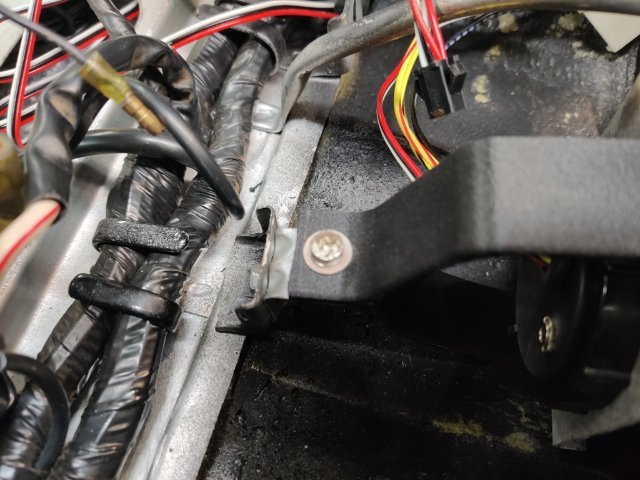
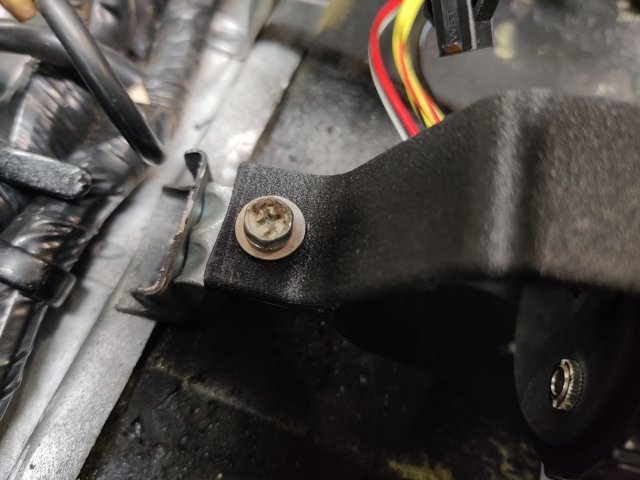
I found some time to work on the car today. Where I left off, I tried to fit the arms of the parts I bought, but I found that the parts did not fit well as is. They were a bit too long and the angle on them was not quite right. But, I was able to modify one of the 3d printed arms by cutting off the tab, and then drill a hole in the horizontal portion of the arm so that I could bolt it to the original "L" brackets that were utilized with the stock gauges. Then, I modified the rest of the brackets to fit the trio of gauges in the center of the dash. Though upside down, they look nice. However, the OD on the bezel portion of that locates the gauge in the dash is also not quite right. I have been in touch with the seller (maker of the 3d printed brackets) on eBay. He is going to make some new front portions that have a wider OD and send them to me. I will still use the modified arms I already have. Changing projects (3rd pic): I had need of mounting a 3/8 NPT threaded radiator fan switch. I came across https://protunerz.com/ while I was shopping on Black Friday - I had never heard of them before. They make some nice billet parts for Z cars. I decided to buy this thermostat housing because it has several existing openings for fittings. In addition to the radiator fan switch, I needed a spot for the water temp gauge sender, and two openings for custom lines that I have on my head to flow coolant from above the #4 and #6 cylinders. To fit the 3/8 NPT rad fan switch, I had to drill out the M14 opening. That was not fun using a vise and drilling freehand with a 37/64" drill bit... and running the tap by hand. I wish I had a drill press, though I still think it could have been a disaster trying to run the drill bit through the existing threaded hole. Doing it by hand, the bit "caught" a couple of times nearly wrenched my arms around. I had to finish the opening with a round file and VERY carefully tap the hole with a 3/8" NPT tap. It did come out well though. Only thing I wonder about is whether the sensor might not work properly without more of an "air gap" between the housing and the body of the sensor. I am assuming that the gap around the body of the sensor just needs to be large enough for coolant to get in and surround it. But I wonder... do I need to grind the opening up a little bit more around the sensor (3rd pic above) for proper funtion?

- Yesterday
-

A musician's therapist (The $300 Z)
Zetsaz replied to Zetsaz's topic in S30 Series - 240z, 260z, 280z
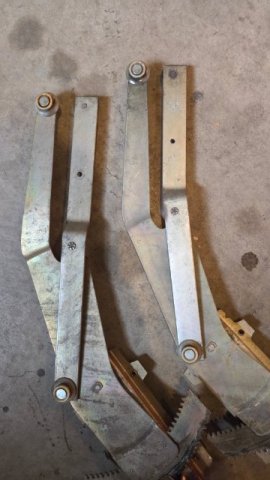
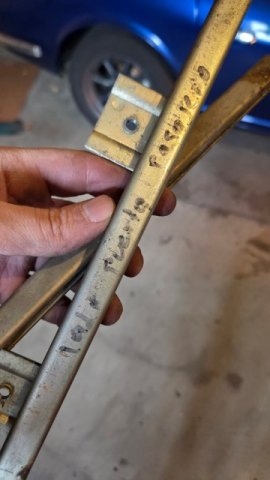
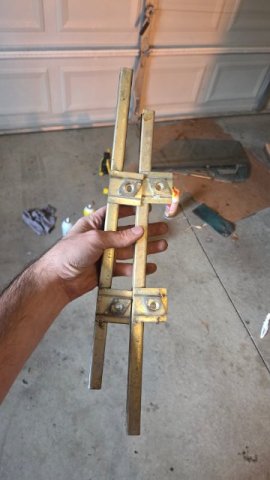
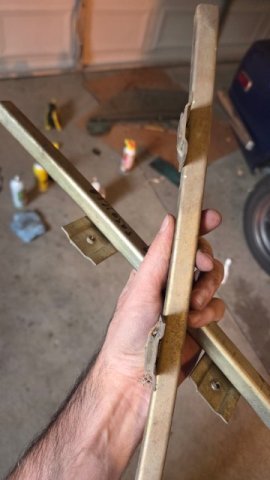
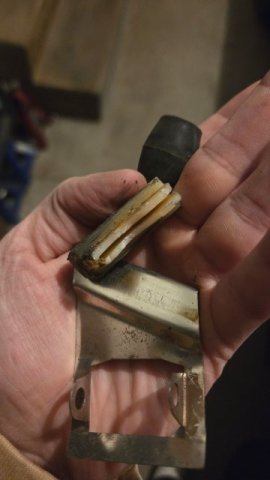
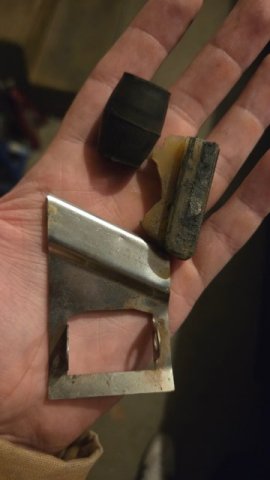
This might be the first Christmas break I haven't had parts waiting for me... It was a great feeling up until I took advantage of the warm weather Utah has had to take the car out for a soda and my window didn't roll back up. Something broke and things were jammed bad. Found multiple problems that probably eventually contributed to the failure. -The body guy who did assembly after paint put the front sash on the wrong doors when it was reassembled. It was even marked to out things back correctly! -One of the aftermarket roller guides broke. No big deal. The normally only came with one, so I'm gonna leave it as is for now. -The plastic guide on the front of the window that goes into the front sash broke There was a solution to all of these - I still have spare doors from the 76 body i started with. Swapped parts over... Still couldn't get the rear gap correct on the window despite adjusting everything as far as it went to correct. Gave myself a day to think about it and realized the regulator might have bent. Pulled the spare, then removed the glass for the third time and pulled the regulator on the car... Definitely bent. Adjusted and also swapped the passenger side front sash to the correct one and now the windows move better than they ever have! Not the most fun way to get a small "quality of life" fix on the car but I'm glad I got it done.
-
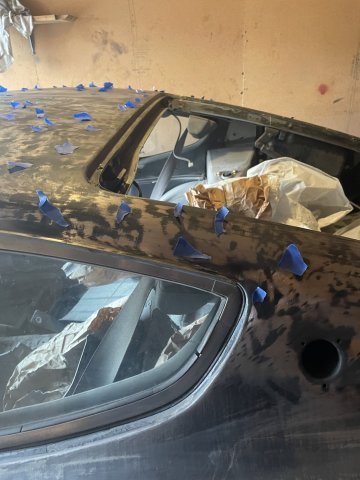
thanks a lot. I added a bit more hardener and then no problem. I will post pics later, but I put a thin coat of black primer right on the steel and then blocked it this morning. Did the same with the sail panels. It worked great. I then wiped it down with rubbing alcohol and put pieces of blue tape in all the low spots that filler primer won't fill in. I will use glaze with a hardener now. I am well versed with it and it is so easy to work. I just want a decent job, I don't need a show car body. when all is said and done, if the clear doesn't "pop" enough, I will wipe on a coat of glossy Poppy's patina. Poppy's Patina - The Original Patina Clear Coat.
-
Hi,guys, after one year off with other work, i put back the engine with reground camshafts, and ready for new start !😅 Wait and see ,and Happy new year
- Last week
-
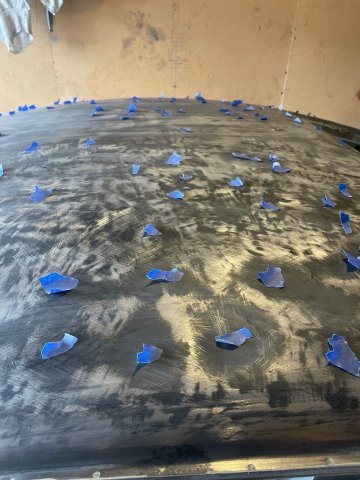
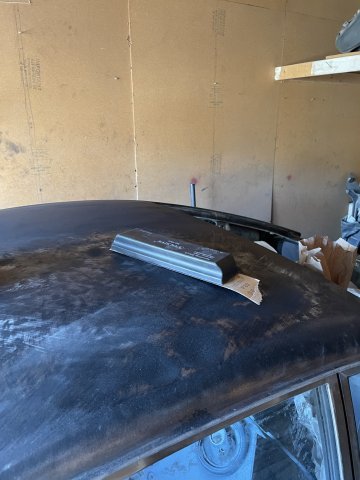
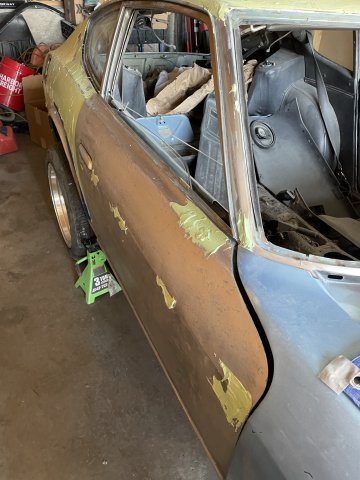
Sorry you had to clean all that gooey mess off. Maybe too cold for the filler to properly cure? Unless you have a heated work space, you might want to wait until the weather warms up a little. Making great progress otherwise! 👍👍
-
Hollowchains joined the community
-
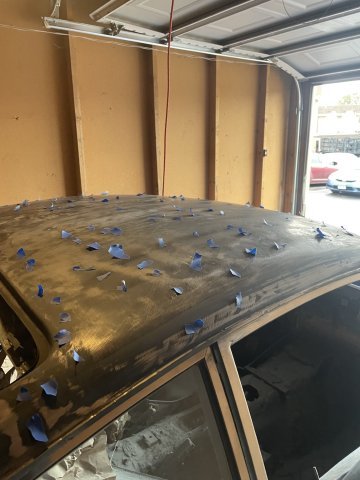
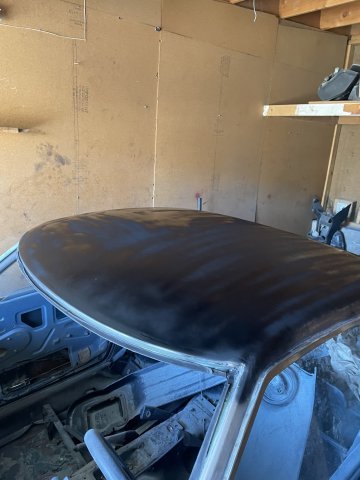
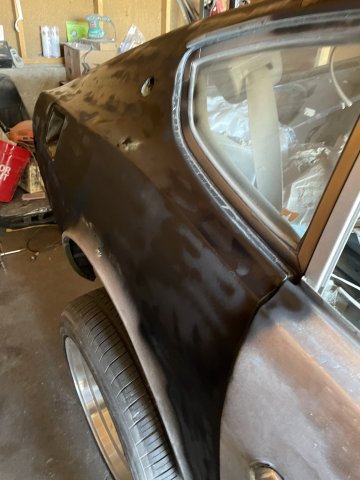
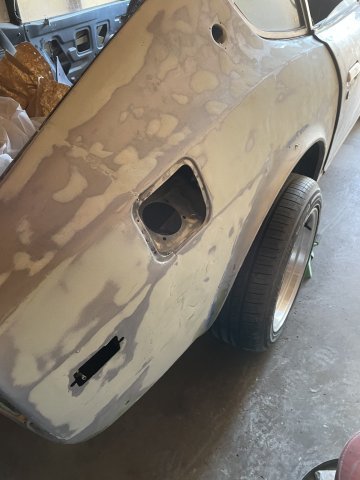
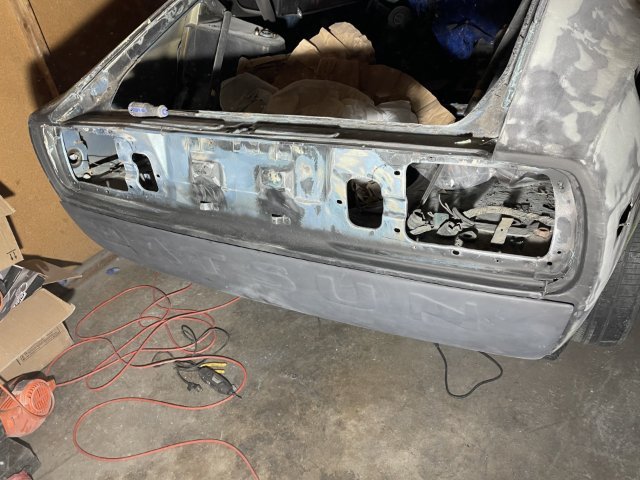
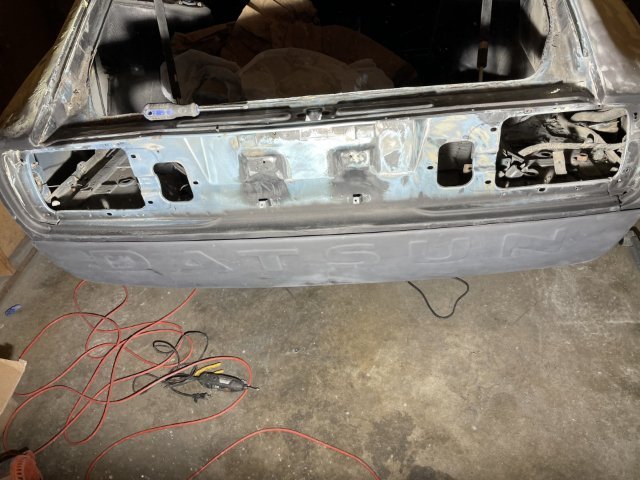
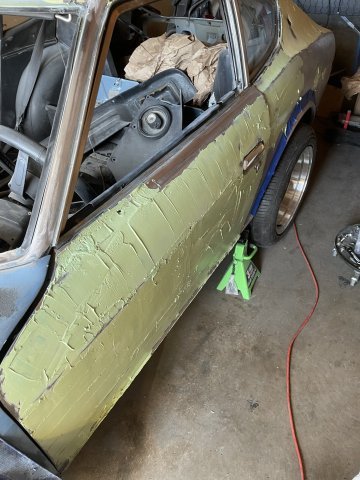
12-30-2025. The filler i had put on the roof of my 260Z never hardened up.....it just stayed "gooey", so this morning I went to it with a wire wheel attachment in my drill and got it all off. I then went ahead and sprayed some flat black primer on the roof and the sides a bit as well to go ahead and start blocking it out.
-
I just wanted to share something pretty exciting in my world. 5 weeks ago I overheard a friend talking about how hard it was to get any machine work done. And it hit me..... I know how to rebuild heads I just need equipment. Did some research and found that 4 of the main shops in the area have sold out or retired. Told the idea to my father in law. And was just spit balling with him. I dont have the cash to start anything and it was just an idea.. well he gave me and my wife a rather large gift and I have now bought a storm vulcan 85b blockmaster and a winona van norman Ph-2000L valve ane seat machine. Still need a valve grinder and obviously tons of tooling. But im excited to see where God takes this. Been 25 years since ive done and work but am excited to get back into it. Plan to get the surfacer going and try to drum up some buisness to make some income to buy more tooling. I onoe they are not the best machines bit they are functional. Just wanted to share
- 1 reply
-
- 4
-

-
There was chatter at one point about the welds on CX racing stuff being a concern (particularly the exhaust turbo header).....so you will want to check the welds carefully prior to putting everything together. Front and rear strut tower braces, a roll bar, Apex front side structure supports, and maybe stiffen up the rails .......bad dog used to make thick steel rails that fit right over the originals and then have them welded on. 500 horsepower is an incredible amount of power in a Z car. 300 horsepower in a 280Z is a windowmaker. Good luck!
-
 wheezy joined the community
 -
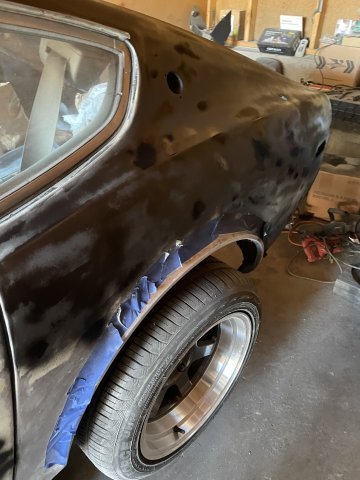
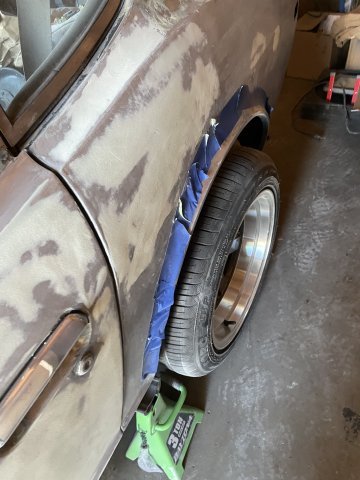
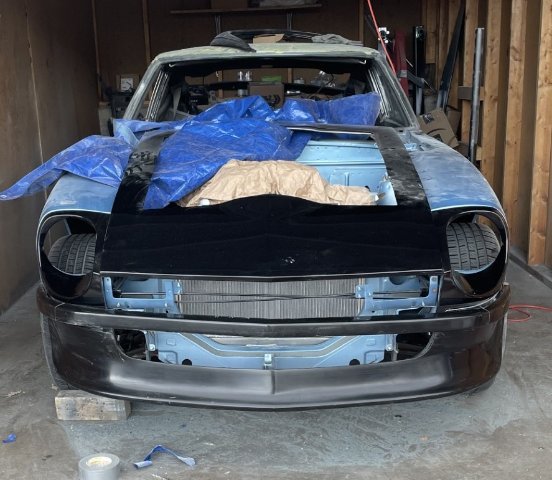
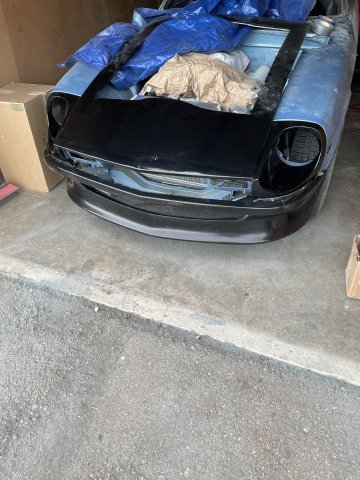
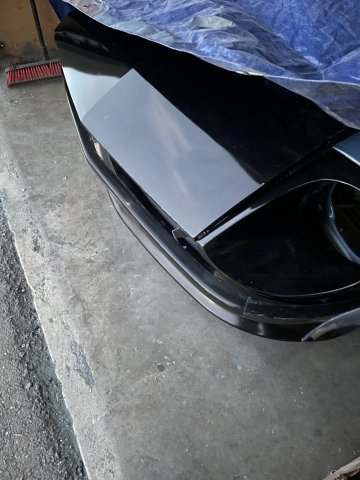
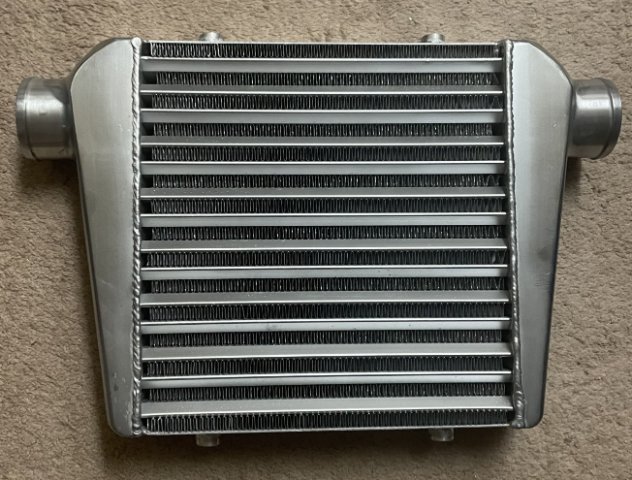
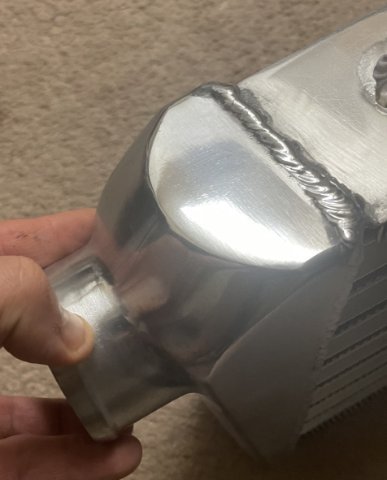
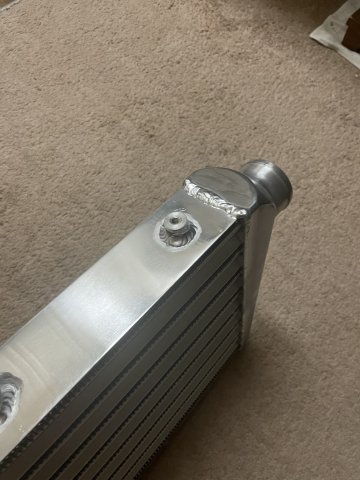
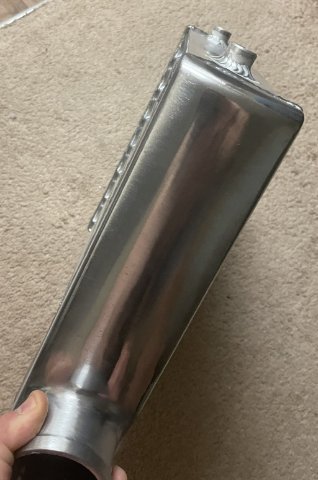
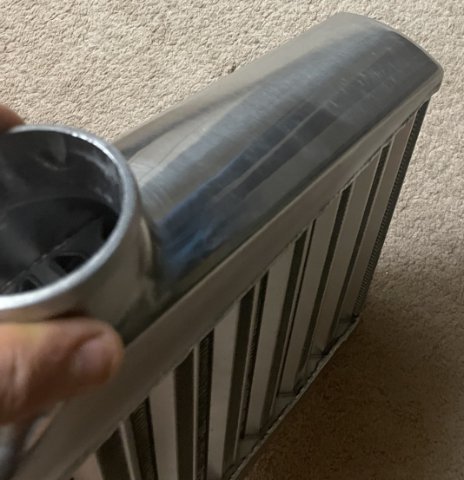
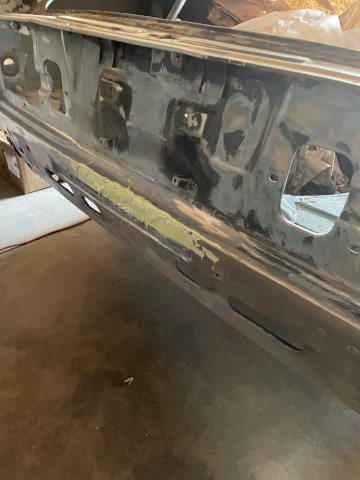
12-27-2025. Started the day by going over the dried filler with a DA and 40 grit and smoothed it up and shaped it. Next will be to start block sanding the main panels. Then I went ahead and installed the new powdercoated headlight buckets, the MSA Air Dam and the MSA fiberglass front bumper. Then went to the back and started the install of the Hot Rod Chop Suey rear roll pan. Still a bit more to do on that. As I mentioned before it is custom, had them fill the exhaust cutout. Lastly my intercooler came in and took a few pics. it's 18X12 and already polished. Pics follow. Cheers!
-
Buy it and let us know. I wouldn't worry about changing the bottom end. Stock stuff is big and heavy, should be strong enough if tuned correct, just don't rev it too high. You will want to run e30+ fuel
-

Stony's Unnatural Aspiration Part 4!!!
jhm replied to stony's topic in Gen III & IV Chevy V8Z Tech Board
That episode of "Street Outlaws: Locals Only" just aired on the MotorTrend channel. It was just as painful seeing this crash the second time; but it gave some good paddock coverage to Stony and his wife. Can't wait to see 2.0 at the track. 👍👍 -
 Larry Chen interviews the owner of the Aluminum 240Z at the 2025 Sema Show. More details of the car and its construction are given out.
 -
Heavy Duty frame rails and connectors
toolman replied to toolman's topic in Gen III & IV Chevy V8Z Tech Board
Larry Chen checks out the Aluminum 240Z at Sema Show Larry Chen reviews the owner of the Aluminum 240z at the Sema Show and gets more details about it. -
Looking for history on a 240Z that passed through here 20 years ago, by chance does anyone know a Jim that was in the Reno Area that worked on Z cars? I was able to track down a copy some note for this Z I just got, and I am trying to build a binder for it. Pretty Car when it was sold Orange 4 speed with a L28 swap.
- Earlier
-
12-24-2025. Snuck out and got some more mud on the 260Z car today
-
 I had the J pipe and down pipe cerakoted and then I wrapped them. Makes a huge difference in heat management.
 -
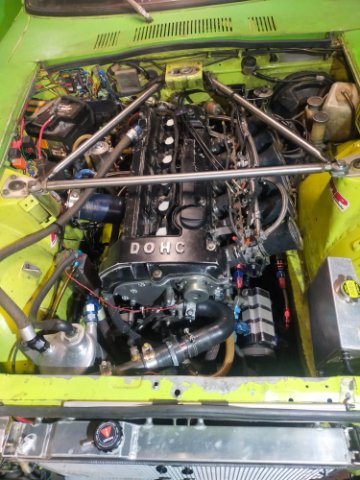
My custom modified crown turbo system on my L series six. here are pics of what I fought through and learned lessons very valuable. The Crown turbo kits, are very basic, and were designed to use stock parts to get a turbo onto the engine, and this was back in the days of carburetors and point ignitions. the factory exhaust manifold is used and a "J" pipe, made by Crown bolted on to the bottom of it and curved up for the turbo to mount on. From that point the exhaust went to the right and down, and to the left was an adaptor, the carb, and then you had to finagle on your own a throttle cable, fuel line and air cleaner. It was designed without a wastegate....the idea being your foot is the wastegate....you have to be smart enough to know when to let off. The J pipe, I had to cut off the factory flange and weld on a flange for a T3 turbo housing. I had a welder do this and he had to do so that the pipes from the J pipe came into the flange with any gaps closed off. Here is where my problems began. on the factory Rayjay turbo, the turbo flange came straight down......on modern turbos the flange is offset. So, today, you either have to make a new J pipe that is a tighter bend to make the room necessary, or what i did, which was to cut a hole in the inner fender and part of the strut tower and run the turbo halfway into the wheelwell and angle the intake out and back into the engine compartment. This required me taking the wheel off and bending sheet metal around the turbo to close it off....in effect making a channel down the side for the turbo. I recommend NOT doing that. I would recommend using a 280ZX exhasut manifold and having a T# flange welded on, or getting the CX Racing turbo header and then using the crown pieces to get the charge from the turbo into the intake manifold. Also, I initially ran this on a Mikuni 45 HRS motorcycle flat slide carb, and then went to EFI. EFI is the only way to go. You will have to weld an O2 bung into the exhaust, and while I am thinking about it, know this, with a draw through turbo setup it is MANDATORY to have the turbo rebuilt with CARBON SEALS installed. "G Pop Shop" has done them for me, cost is under 200 bucks. you can't avoid it. without the carbon seals the turbo will create pressure that will pull engine oil through the regular seals and the engine will smoke like a chainsaw. Don't take anyone's word for it that it already has them.....pay the money have new ones installed and they go through the unit and you get back a turbo that will actually work. RLR makes the intake I used. It is made for a draw through turbo to be installed on a air cooled VW engine. In the Draw Through Turbo world, the only ones who anything about it are the air cooled VW guys and the Corvair guys. 99.9% of the people you talk to DO NOT know anything about them....and I was told I would destroy my engine, it wouldn't work, they are terrible, I was an idiot etc. This is not the case. (never got any apologies)...but they are a bit of a wild animal......in a carb'ed setup, you can only tune it to a happy medium, and that frankly sucks. they only run good when floored, every other time, they are a real pain int he neck. Don't debate it with me, I have lived it. spend 800 bucks and later go EFI anyway and the money you spent for that turbo carb was wasted. The Holley Sniper 2 saved me. BUT you have to unscrew the port plug and put the plug in the threaded hole on the bottom, the base....then install a 1/16 NPT nipple into the boost port. This allows the Sniper to make corrections based on actual air fuel ratios in the intake manifold, instead of a guess by the ECU from where the fuel enters the throttle body before being charged. Turbo Joe's is a page on Facebook, and he is the sole tuning source for making these work. Thanks to him, my car runs crisp and normal. The Water methanol injection is my intercooler , is set to start flowing at 4 psi and has added over 30 horsepower on it's own and allows it to run on pump gas. Spark plugs. NGK is the only way to go period dot. NGK BPR8ES..... 2 heat ranges cooler and go .031 on the gap. Well.....Good luck. There is a draw through turbo page on facebook as well. It is ran by a 240Z guy. Pics follow, Peace and God Bless. ~ Joe Guy 12-21-2025.
-
Have you rebuilt your L28E with forged pistons and H-beam rods? Lowered compression? In my opinion that's too much turbo for the unmodified S30 chassis and "supports 500 HP" sounds good - but is it? In an unstiffened early unibody Z - probably not. We saw a 300HP RB25 swapped Z here in Phoenix tear the spot welds apart. It was a 240Z chassis and the 280 is a bit beefier but still. This is a town with no rust. The kit looks legit however (I'd still go for a different turbo, but that's me). I'm not a fan of the charge pipe config that an opposite-side intercooler requires but it's a little more difficult to get same-side charge piping through the radiator core support. Don't get me wrong, I'm in the TURBO EVERYTHING camp - but do your research, and do it the right way, and you'll have a Z that's FUN to drive and will stay together while you're doing it.
-
You're in Gilbert? Alma School and Guadalupe. I have a loose intake manifold if you'd like to look at it.
-

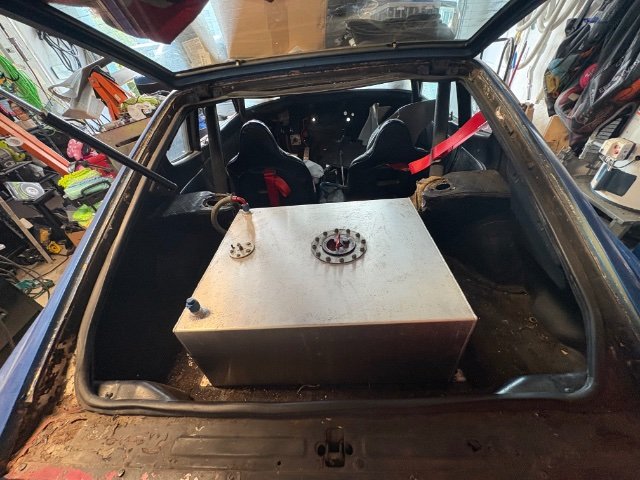
Fast Floridian's 240Z Track Build
FastFloridian replied to FastFloridian's topic in S30 Series - 240z, 260z, 280z
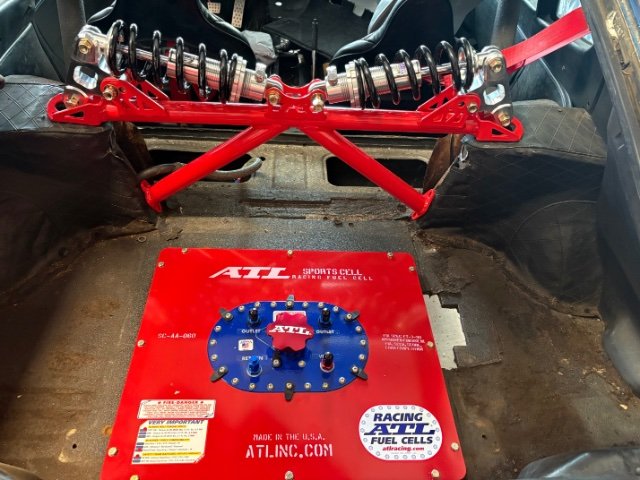
I got a little bit of garage time today. Removed the old fuel cell and got the new one in. I still need to build a frame for it, but it can sit here for a while. Rear subframe bushings came in yesterday, I’ll try and get the rear end mounted next weekend.
-
thank you very much Kevin! i appreciate you taking the time to post the info with links. Im getting them now so i have them later for reassembly. awesome post man!
-
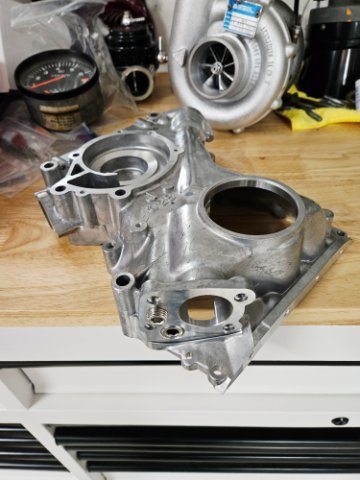
Have been busy with the end of year and splitting time with other project vehicles but called my machinist and found my parts have been ready for the past month. Still going through things but for the engine cover I opted to plug the supply and return holes with NPTF type flush plugs. I've seen the block plugged as well but I figured this allows maximum flexibility on internal/external oil supply and feed without significant motor disassembly. This next month I will need to figure out specifically which mil spec bulkhead connectors I will need as I welded and shaved the firewall harness holes before dropping to car off to the restoration shop. For the turbo build I'm thinking to convert the ignition to crank fire and leave some extra pins for future expansion.
-
These seats would color coordinate real nice. Any of you have any experience with this company? Miami Blue Universal Adjustable Black Luxury Racing SR3 Style Alcantar– Bull Boost Performance


-
Who's Online 2 Members, 0 Anonymous, 774 Guests (See full list)