

zcarnut
-
Posts
820 -
Joined
-
Last visited
-
Days Won
3
Content Type
Profiles
Forums
Blogs
Events
Gallery
Downloads
Store
Everything posted by zcarnut
-

Quest Van wheel stud specs
zcarnut replied to Dan Juday's topic in Brakes, Wheels, Suspension and Chassis
You need to get the Quest rear wheel studs. They have the correct knurl diameter (12.9mm). The front Quest stud has a knurl diameter of 14.3mm. http://forums.hybridz.org/showthread.php?t=111512 -
safe amount to mill off stub axles
zcarnut replied to bobbyc's topic in Brakes, Wheels, Suspension and Chassis
The amount you need to remove to fit the Altima/240SX rotor over the rear stub axle flange is fairly small. I think I needed to grind off maybe 1/8 inch on each of the four corners. I just used a bench grinder. I was putting vented rotors on the rear of an S30. I ended up using the early Maxima rotor which is slightly smaller in diameter than the Altima/240SX rotor (but otherwise the same) with some Mazda RX7 rear calipers and a custom bracket. -
I have re-used head bolts and never had a problem. And over the last thirty years I have re-built over a dozen L-series engines and probably replaced that many blow head gaskets on other L-series engines. Of course never reuse a bolt that has obvious damage like rust pitting.
-
Having previously lived in Knoxville for over twenty-five years I would recommend Automedic. Kim Taylor, the owner, is a good friend and he has been a Z car enthusiast for many years. I also would encourage you to attend the next meeting of the local Z car club, The Smoky Mountain Z Car Club and ask the members for their recommendation. They meet on the second Thursday of each month. Next meeting is Thursday 7pm, March 12th at the Downtown Grill and Brewery, 424 S. Gay St. in downtown Knoxville.
-
Will a 260z air cleaner fit on my 240 su's
zcarnut replied to 240zJon's topic in S30 Series - 240z, 260z, 280z
Use the 1970-72 air cleaner assy. The “flat top†carb air cleaner housings (both the 1973 and 74) has less height and therefore the air filter has less surface area and will be more restrictive. Using a 1970-72 air filter in a later housings will result in a gap between the cover and the back plate. -
These questions are covered in the “3.0 and 3.1 liter FAQ “ I wrote years ago: http://www2.zhome.com:81/rnt/L28conversion/3031FAQ.html
-
Trevor is correct. The spacer I initially designed has nothing to do with positioning the caliper and therefore it has nothing to do determining what the wheel to caliper clearance will be. My spacer positions the rotor with respect to the caliper. As I stated way back in post #6 of this thread, the S12+8 caliper is not as wide as the S12W caliper and using this caliper will you obtain more wheel to caliper clearance. My spacer can be used with either the S12+8 (wide version) or the S12W calipers. Its thickness only depends on what hub (240Z or 280Z) is used. BTW, all of the Toyota calipers will end up protruding beyond the plane of the wheel mounting surface of the hub. If this is an issue then the solution is to use a another different type spacer between the wheel and the hub and swap out the wheel mounting lugs to longer ones.
-
The 1982-86 transmissions will interchange. Just measure the tailstock extension on your present transmission and make sure it matches the replacement. Your existing tailstock should be 16.0 inches but there was also a version that measured 16.75 inches (usually rounded up to 17 inches). You said the truck was a 4x2 and I don’t think a 4x4 transmission will work (I don't remember why). Good luck... The 5-speed transmissions on the 720 Nissan trucks was always a problem area. The junkyard trannys will need to be disassembled for inspection and may even need a re-build (new bearings). I had a 1983 5-speed that I drove for 250K+ miles. Good little truck, but I had to re-build the tranny twice!
-
steering rack boots suck together from vacum..
zcarnut replied to philipl's topic in Brakes, Wheels, Suspension and Chassis
This typical on the S30, especially if the rack is “overpacked†with grease. As the steering wheel is turned, the rack bellows on one side compresses as the bellows on the other side expands. Nissan fixed this condition on the 280ZX (and later Nissan vehicles) by using nipples on the bellows and a plastic air balance tube. I liked this fix so I copied it for use on my 260Z using the nipples from a junk ZX rack. I tried to use the ZX bellows on my 260Z rack, but the dimensions were a little different. Do not attempt to fix this by just cutting a hole in your bellows. This will suck in water and dirt which will have a adverse effect on the life of the rack. -
SEARCH! http://forums.hybridz.org/showthread.php?t=136947
-
That’s not unusual. All the R200 diffs I’ve re-built required some insertion force to seat the carrier side shims so that the correct pre-load is obtained. On a high mileage diff the bearings have enough wear so that the carrier usually falls out under its own weight upon disassembly. There are two preload specs. The input (pinion) bearings must be preloaded as well as the side (carrier) bearings. The correct assembly sequence is: 1. Set the pinion preload. With the carrier removed, set the pinion bearings preload with the correct sized pinion bearing spacer (shim washer). Note: use the original pinion height adjusting washer. Measure the pinion preload with an inch-pound torque wrench. Should be 10 to 15 inch-lbs. 2. Set the side bearings preload and ring gear backlash. Leaving the pinion gear with its pinion bearings installed in the diff case, install the assembled carrier gear into the case. Use the original side shims in their corresponding (left or right side) locations. As long as the ring gear turns freely do not be concerned with the backlash or wear pattern at this time. Measure the side preload at the pinion nut (where you measured the pinion preload). It should have increased by 5 to 10 inch-lbs. The total thickness (left and right sides) of the side shims determines the side preload. How you divide them between the left and right sides determines the backlash. 3. Measure the ring gear wear pattern. Paint several teeth of the ring gear with the indicator paste and rotate several times. The ring gear should be “loaded†to get a more accurate pattern. This can be achieved by wedging a piece of wood between the outside of the ring gear and the diff case. If you are lucky and the wear pattern is correct, then you are done. If not then you will have to adjust the thickness of the pinion height adjusting washer. This means disassembling the diff and repeating the above steps. Consult any number of the differential rebuilding sites on the web for better pictures of the correct ring gear wear pattern and how to interpret the wear pattern so you know how to proceed.
-
If all you did was change the bearings then 90% of the time you can re-use your old shims. Bearings are made to very exact tolerances (at least the non-Chinese ones are). Go ahead and re-assemble the differential and then measure the backlash, pre-load and wear pattern. If one of these parameters is incorrect, then address it with different shims. If you need different thickness pinion shims then you can obtain cheap ones from http://www.phoenixspecialty.com. BTW, I hope you are using the factory service manual for you re-build instructions.
-
There are two diameters for the bolts on the R200 ring gear, 10mm or 12mm. The early R200’s used 10mm diameter bolts and the later (1984 and up) used the 12mm. You should confirm what your existing LSD unit is drilled for.
-
Apparently they are for the “Sports Option†roll-over bar: http://www.classiczcars.com/forums/showthread.php?t=7844
-
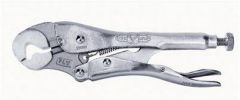
Yes, Vice-Grips will work. Just use the correct one. These have a “V-slot†to better grip the hex nut. I use mine exclusively on brake line fittings: Irwin Vise-Grip Locking Wrench — 7in., Model# 04 http://www.northerntool.com/webapp/wcs/stores/servlet/product_6970_200306847_200306847
-
-
-

-
http://www.atlanticz.ca/zclub/techtips/afm/sizeupgrade/index.html
-
The USA 1972 model year cars had the re-designed center console with the ashtray behind the shift lever and the cigarette lighter moved to the dash. These started production in August 1971 and were usually sold as 1972 model year cars because they complied with the 1972 safety and emissions standards. Check the build date on the ID door plate. If the date is 8/71 or later then it probably is the correct and original dash. If the date is before 8/71 then it’s probably had a later dash installed in it. BTW, such questions are better answered at the Classic Z Car Forum: http://www.classiczcars.com/
-
What you need to measure is the circle diameter of the ring gear [securing] bolt pattern. This is not the ring gear outside diameter measurement. Nissan changed the bolt circle diameter of the R180 ring gear from the 110mm to115mm in August of 1976. Since the LSD differential housing bolts to the ring gear the R180 LSD changed as well. In addition the method of securing the axle shafts into the LSD changed from a bolt to an internal C-clip.
-
Is there a bolt on the bottom of the bellhousing?
zcarnut replied to Mycarispurty's topic in Nissan L6 Forum
There are two bolts which connect the rear engine plate to the bottom of the transmission. They need to be removed. They are usually hidden by grease and dirt. I assume you also removed the starter? -
Reminds me of the wooden 280ZX hybrid I saw at one of the Z Car Conventions (I think it was the one in San Diego). The builder made the body from wood and used a ZX drivetrain and suspension. Ugly as hell, I recall. It looked more like a boat than a car. I’ll see if I can find a picture of it.
-
Yes, provided the Z31 hubs are the non-turbo ones. If so, then the front wheel bearings are the same so they will work. The issue is what (inner) seal to use. This thread has some seal part numbers, but I have not verified if they will work or not: http://forums.hybridz.org/showthread.php?t=122054
-
Sharing my new front brake design
zcarnut replied to snarpee's topic in Brakes, Wheels, Suspension and Chassis
You are using the 1987-89 Z31 Turbo front hub and not the 280Z one. Somewhat hard to find in the junkyards.