cgsheen
-
Posts
676 -
Joined
-
Last visited
-
Days Won
9
Content Type
Profiles
Forums
Blogs
Events
Gallery
Downloads
Store
Everything posted by cgsheen
-
74 260z ignition cylinder removal ?
cgsheen replied to Dans toy's topic in S30 Series - 240z, 260z, 280z
The pin IS small - and it's made to be difficult to remove, on purpose... (Although I don't quite know why. Once you're there, you can take the switch off the back and turn it with nearly anything to get the car going.) -
When we turbo swapped my Son's '76 280 I used the existing wiring to connect the Tach. Can't remember if we pulled his transistor ignition module from under the dash though... The Tach signal wiring has a connection to it. His Tach worked fine for over 4 years then turned flakey just a few weeks ago. We abandoned the existing Tach feed and ran a new wire straight from the coil to the resistor. His Tach is back to working correctly. (I regretted using the existing harness shortly after I did it, but never changed it until now...) On my 260, I ran it that way from the start and have never had any trouble. Wirng the swap on the 260, I used all of the 280ZXT donor wiring I could, ran new where needed, and abandoned as much of the stock wiring as possible.
-
Turbo swap jumping tach and missing
cgsheen replied to abc_was_here's topic in Trouble Shooting / General Engine
Double check your power wiring from the ignition switch to the coil and ignitor. My son's L28ET had an intermittent short that showed these symptoms. Check both FSM's and make sure your coil wiring is as per the L28ET diagram. -
Sounds like an L6! Good job...
-
Those are the same type we put on my Son's '76 280Z 7 years ago. Same ones I used when I did my turbo swap 2 1/2 years ago. We soldered them in, used the heat-shrink tubing, they work great. We know how to take them off without breaking anything, but honestly, how often do you pull your injector connections off? I never have once since they were installed...
-
IF Skittle is talking about his '76 Z, I'm with you. The '74 - '76 Z's have a simple 3-wire switch (which I have taken apart on my 260 five times in the last 9 months, sigh...) and you don't need to fuss with the Hazard Switch at all. Each time I've repaired mine lately, I've contemplated tossing the original switch and finding a reliable replacement. The Turn Signal Switch on the '73 and earlier Z is much different...
-
Not only "paint hides nothing", I'd have to add: "paint exposes every flaw"... I think you'll find that, from start to finish, the more attention you pay to every step - the easier each following step will be. The converse is also true - a sloppy step will make each succeeding step that much more difficult - especially with paint... Take your time with the body work / primer stage(s) - probably do primer more than once. Guide coat your primer, Block it smooth, look at it from every angle. On the trouble spots, do it again (and again)...
-
Love Marcos, glad to see him win - especially when he's beating Kyle Busch...
-
They attach with metal clips, no adhesive unless someone else added it... They're pretty easy easy to remove and re-install without any fuss. Go slowly to get them started coming off. Much easier to remove than the drip rail IMO. I recommend taking them off (because it's easy) - you'll have a much nicer paint line.
-
Ya... It really does...
-
Help me identify my front bumpers, and what I am missing
cgsheen replied to drvrswntd's topic in Body Kits & Paint
The 1st and 4th pictures show the correct front bumper mounts for a 1973 model year 240Z. A build date of 12/72 should be for the 1973 model year I believe... Pictures 5-7 are of the 1973 model year bumper that uses those mounts. I believe you're correct about the "g" shaped bracket being from an early model 1974 260Z. The "early" 260Z had thin bumpers much like the 240, but it was mounted on pistons and pushed forward from the body to meet US crash standards. The "late" model 260Z had the heavier bumpers like the 280Z's. Just because the front bumper came off a 08/72, doesn't necessarily mean it was the bumper (or type of bumper) the car started out with - unfortunately. I thought the early 260 bumper was fairly different than the 240... But, if the bumper from the 08/72 fits the body lines, I'd get someone to make a new set of brackets (that mimic the style of the bracket on the '73 bumper)... Brackets that will bolt to the bumper like the "g" bracket, using those big bolts that hold the "overriders" on, but are designed to mate to the body brackets you have installed on the car... -
Even from that angle, you should be able to see part of the j-pipe. (hose to the j-pipe connects to that tube that's open in the middle of the intake - we should see part of the j-pipe under that tube) It's definately missing. I think you should be able to see at least part of the turbo (part of the wastegate actuator or arm maybe) - the turbo may also be gone... Definately looks to be a turbo car, but I think parts are missing.
-
To me it looks pretty close to the "Daytona Blue" from the 350Z's...
-
This is totally a matter of personal preference... Both of my son's have used aircraft stripper on fenders, hood and cowl. We've also sanded multiple paint layers. I can sand the fender in the same amount of time it takes my son to use aircraft stripper. It's just that I sand, and sand, and sand - he brushes, scrapes, washes, scrapes, brushes again, washes, scrapes again. And the fender still needs some sanding or wire brushing. Both methods make a mess. One is a dry powdery mess all over everything, the other a wet, gooey paint flake mess (but you can contain it to a smaller area usually...) Your paint looks to be pretty thick... You should try both ways and see what you like best. Both have their "positives" and "negatives"... Well, no - paint removal is mostly negatives to begin with, so it's actually a "lesser of two evils" kind of thing...
-
Here's a pic that shows the lower mounting points in my early 260. Couldn't find a decent pic of the uppers - the upper "reel" bolts to a bracket at the sides of the hatch. My son's '76 280 has the upper attaching to the strut towers IIRC...

-
Car not starting 1983 280zx turbo
cgsheen replied to WaiDai's topic in Trouble Shooting / General Engine
Did you pull the plugs to see if they were fouled? -
A stock L28ET swap into an S30 doesn't require dumping the stock clutch fan. A different configuration might - radiator thickness, intercooler piping - any modification that limits or impinges on the space between the front of the engine and the radiator...
-
Opinions - Just picked up a '72 240 - Hybrid or stock?
cgsheen replied to cgsheen's topic in S30 Series - 240z, 260z, 280z
I have my 260, my youngest son has his 280 (and we just finished body and paint on it - turned out awesome). This Z we picked up as a shop project. We want to get it running, make the body and paint near perfect. I don't know long we'll keep it though. My oldest son, who runs Sakura Garage, already is working on '68 Datsun Roadster, a '71 1200, and his 240SX drift car... So, I don't think he'll want to keep it. -
My sons and I just picked up a '72 240. Engine pulled, newest PO was having it rebuilt. Machine work is done, needs to be reassembled. My oldest son has a couple of RB20's and our first thought was: sell the L24, swap in an RB engine... Then we unloaded everything. Turns out the chassis and engine numbers match. It's a 240, an Arizona car so it's pretty light on rust, body is good, interior is not. PO did some body work and paint that didn't turn out stellar (but that's our specialty, so who cares). The original paint was: 113 Green Metallic. I don't necessarily like that color, but you don't see many of them. What do you think? Put the original L24 back in it and return the color to stock? Keep it restorable? Or, Engine swap and update the color?
-
I think you're talking about the fuel pump relay. If you need it, just pull the plug and as much wire as you can get - you'll need to do a little re-wiring anyway if your swapee doesn't already have a fuel pump relay...
-
Good luck! Let us know how it turns out.
-
Yup, like I said above... Then you just need to couple that diagram with this one:
-
If it's a keeper, and you have the money, pull the glass and weatherstrip and have a quality paint job done. "All out" means different things to different folks... You can get a very good (and long lasting) paint job without necessarily going full restoration or custom. But then, that depends on your pocketbook.
-
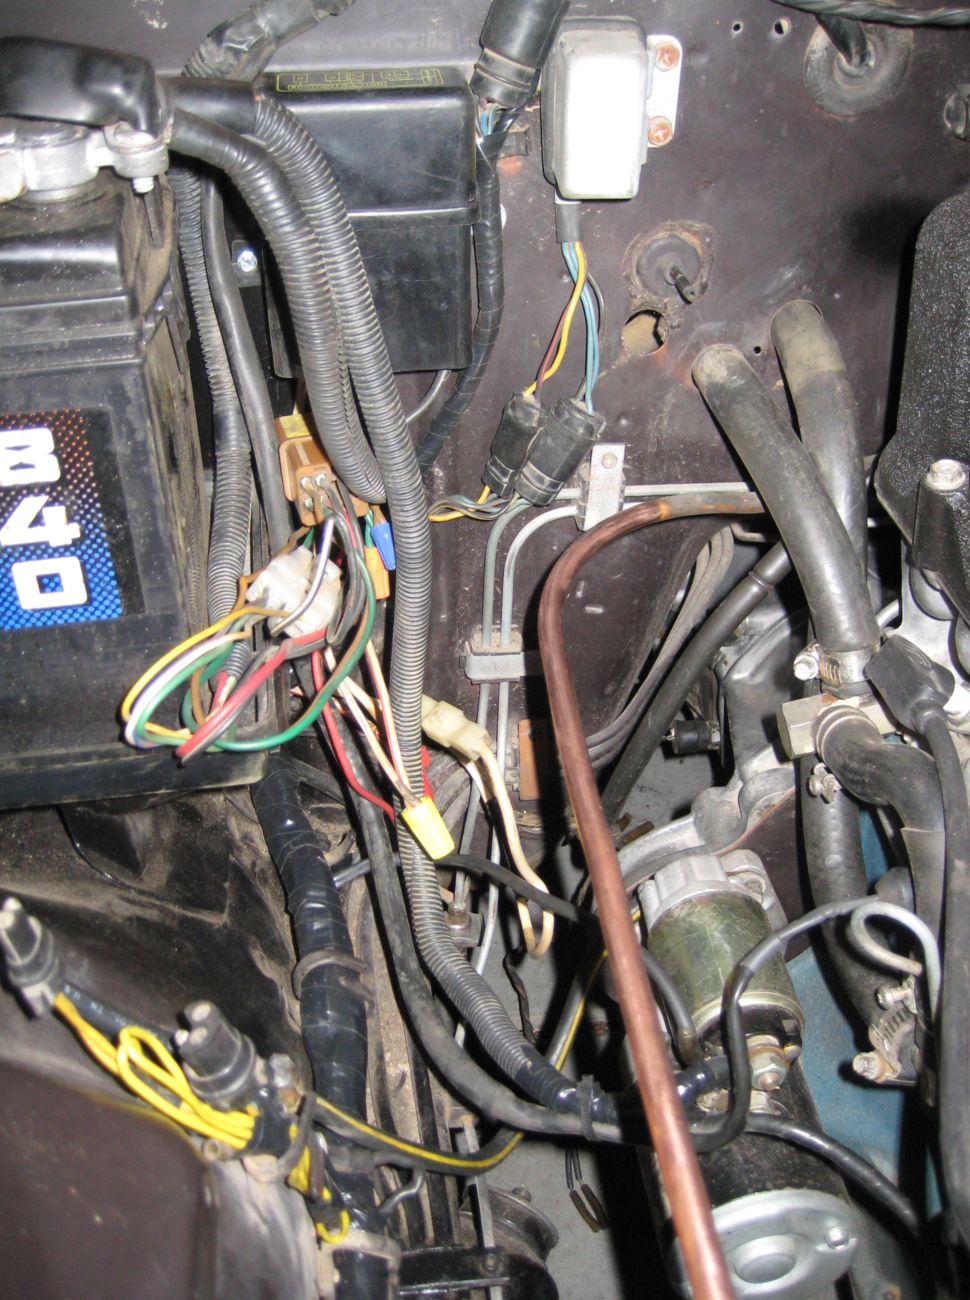
There's an "FAQ" on "turbo alternator upgrade" or just "alternator upgrade". Take a look at that. (swapping an L28ET and using it's alternator in your otherwise stock 280Z, is the same as doing an alternator upgrade on your L28E...) Yup. In the 280ZXT, the ECU controls the fuel pump through the fuel pump relay. You need to understand how your stock fuel pump relay is "switched on" so you can change it to be controlled by your new ECU. As for the coil/ignitor: The Blue wire goes to the Tach through the resistor under the dash. Mine was behind the glove box. The resistor is big and square-ish and sticks out of the harness with 2 wires attached. The Yellow/White goes to the ECU through one of those white connectors near the end of the ECU (ECCS) harness. Important, because that's what tells the ignitor to fire. The Black/White ties to a Black/White on the ignition switch. Also important. In the 280ZXT, Power for the injectors and ECU is supplied from the battery, through that black box with the fusable links, to both a brown and a green wire ("connector #1" in the wiring diagrams). that run accross the firewall and into the ECU harness. I'll try to find the wiring diagrams you need most and post them... It's true this type of post is not meant for this particular Forum - should be just about turbochargers themselves or related to turbochargers... People make mistakes - the Admins will move it or kill it if it needs to be done. We'll start again in a more appropriate place if we have to. If an Admin (or established member) scolds you, simply apologize and be more careful in the future. (Don't know how much experience you have with Forums, sometimes it's best "not to feed the trolls"...)
-
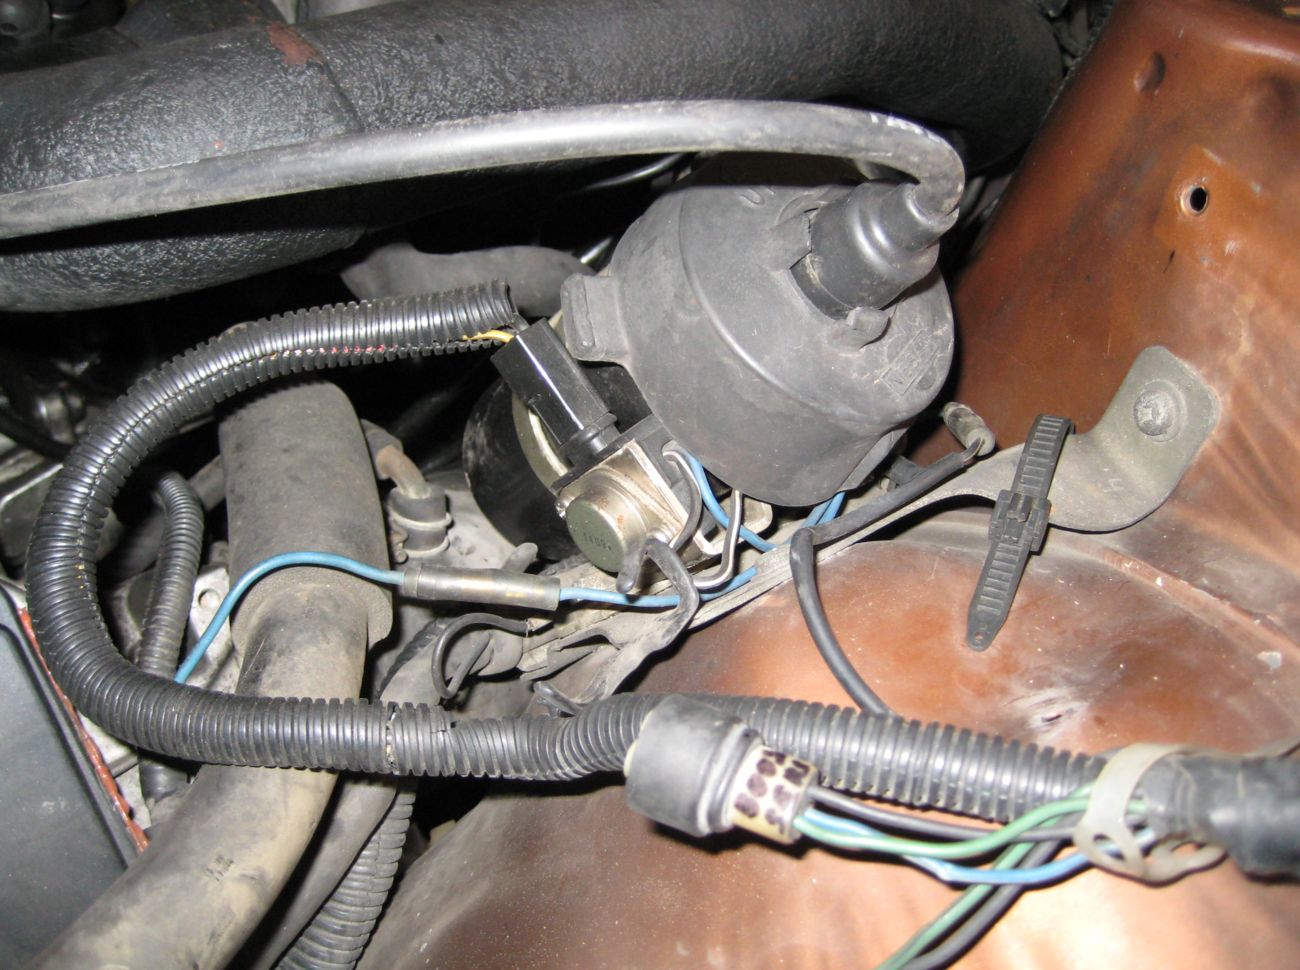
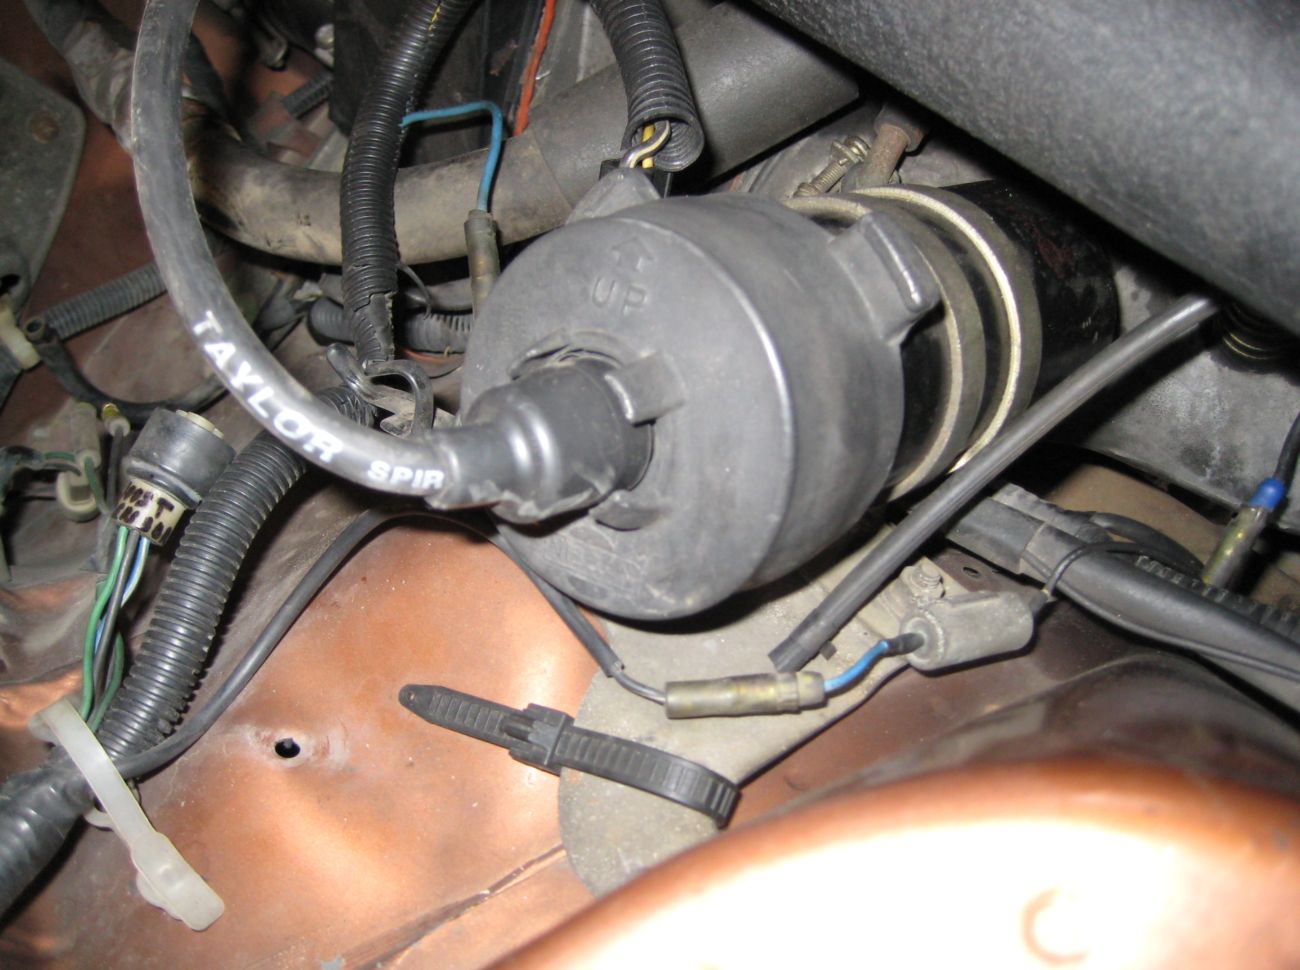
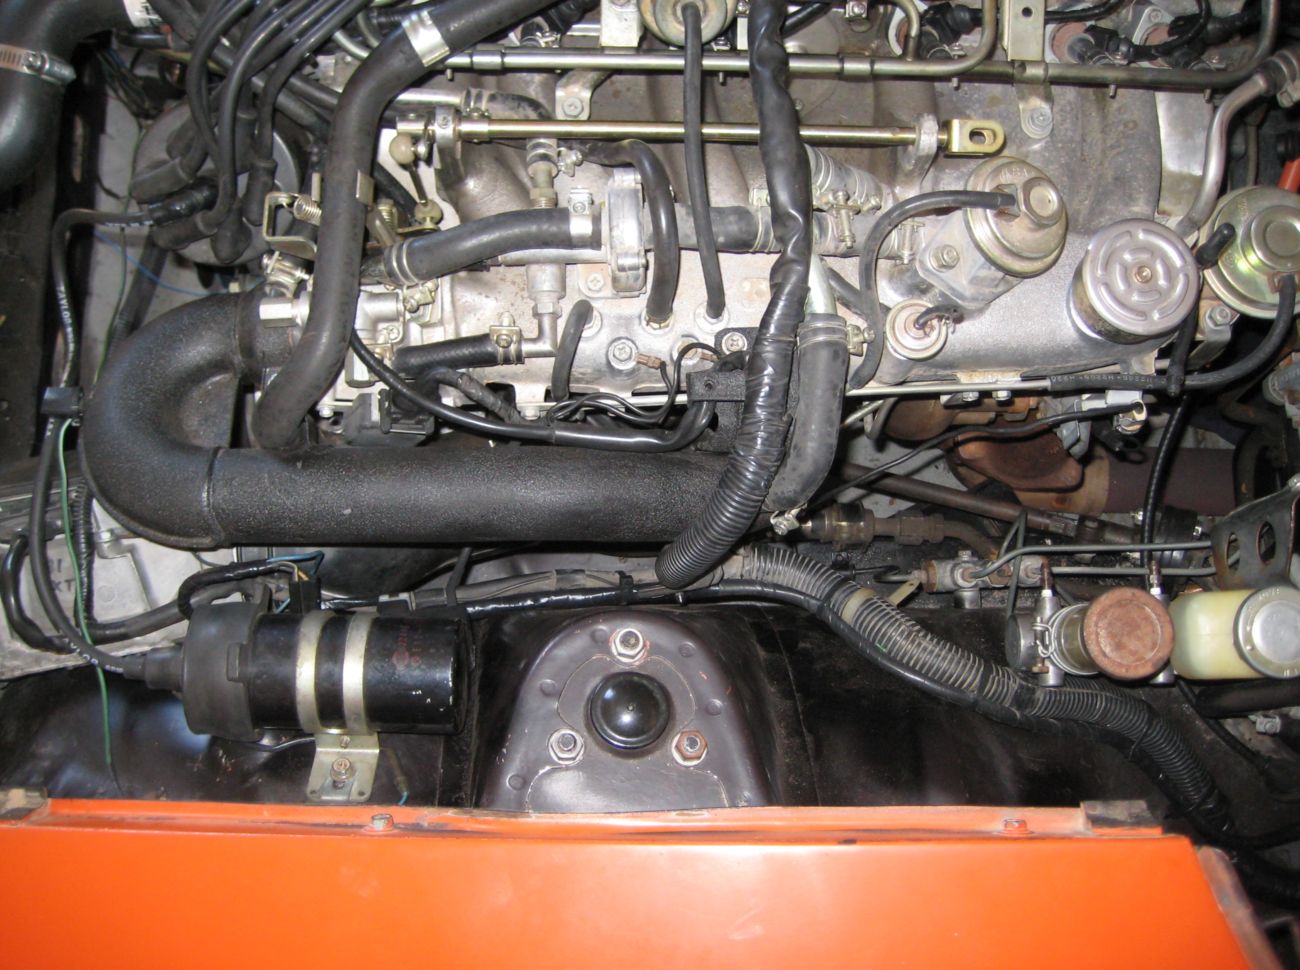
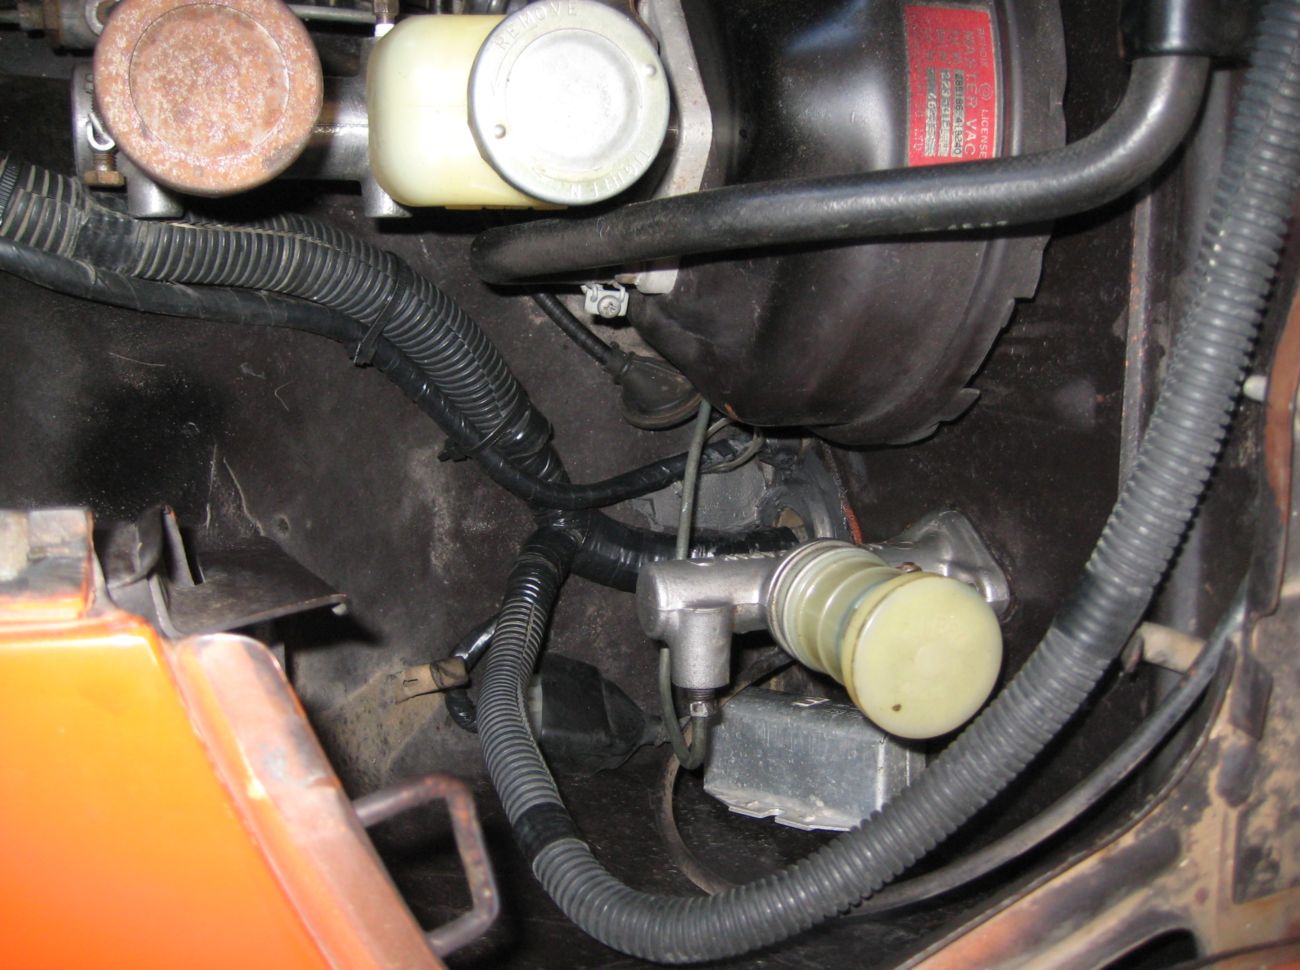
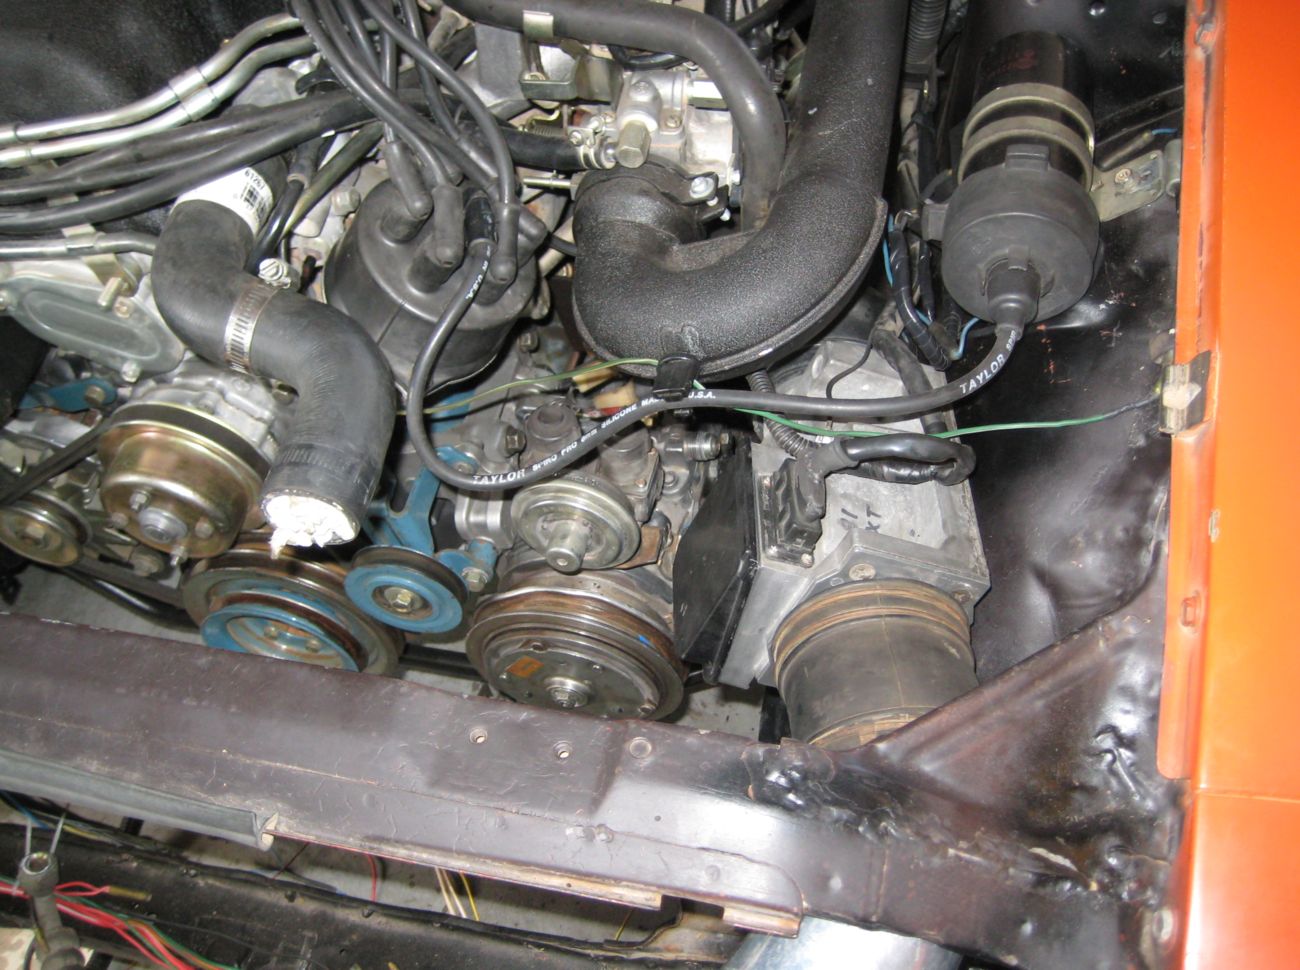
These are pics of how the coil sits in an '81 280ZXT. The harness runs through the fender back to the left side cabin on the 280ZX. The Stock ECU mounts under the dash beside your left foot. That 3-wire connector in your ign harness picture above is a connector for the Boost Sensor. Here's how I ran the wiring in my 260: You can also kind of see how I mounted the AFM... Yup, it's upside down in my car. We mounted the AFM in my son's '76 280 mostly rightside up - it's harder to fit. We did his 4 years ago, mine 2 years ago. Doesn't seem to make enough difference to care... Here's an early shot of how the coil and AFM went in my 260 swap: Don't let this deter you, I changed a LOT of the wiring in my car while I was doing the swap. My 260 was never set up for EFI, and I knew I'd be using the 280ZXT Alternator. I eliminated my external voltage regulator and the shunt that drives the ammeter guage during the re-wire and installed a volt meter. Plus I eliminated the original coil wiring since I used the harness from the donor... I used a LOT of the wiring from my '81 280ZXT donor car - including the Fusable Link box: