Nelsonian
-
Posts
918 -
Joined
-
Last visited
-
Days Won
11
Content Type
Profiles
Forums
Blogs
Events
Gallery
Downloads
Store
Everything posted by Nelsonian
-
Looks like a lot of fun. I'm having trouble viewing the video.
-
I'm pretty sure that car was at the MSA nationals back when they switched up venues to the Canyon Santiago location back in '07 I believe. It was in a primer red color and not as well finished off at that time.
-
I just stumbled onto this video and can't stop listening to that engine sound.
-
I have welded mine as well and one day will be in the same boat as you guys, so am eagerly watching this.
-
Yasin, Any new pics of your car?
-
~73 Turbo L28 to N/A RB25 240z Project~
Nelsonian replied to ~KnuckleDuster~'s topic in S30 Series - 240z, 260z, 280z
Well done, that sounds great ! -
There from a Lancer Evo 9 from 05' - 08'. The Evo 8 had a blue cloth middle insert only.
-
Wilwood 1" MC issue
Nelsonian replied to 2eighTZ4me's topic in Brakes, Wheels, Suspension and Chassis
Sounds good. I have a new in box 15/16 mc, but it seems to make more sense in going with the Wilwood 1" mc. -
I like both options (bumpers/bumperless) for these cars, but mostly favor keeping the bumpers. I think after modifying the rear bumper to fit the flared sides, it will help visually complete the visual flow of the car. Now if it were me and I was going without the bumper, I would most definitely fill in the indentations.
-
Wilwood 1" MC issue
Nelsonian replied to 2eighTZ4me's topic in Brakes, Wheels, Suspension and Chassis
Would like to know the outcome. Did this ever get sorted out? -
~73 Turbo L28 to N/A RB25 240z Project~
Nelsonian replied to ~KnuckleDuster~'s topic in S30 Series - 240z, 260z, 280z
We demand an exhaust video clip -
Having trouble viewing the provided link^^
-
Wow KTM that looks great! That is really a vibrant color and shows off the detail of the crisp lines in the hood. Out of curiosity, who did you use for the re-chroming? Always looking for chrome options.
-
I must pitch in on my past experiences with John Washington. Several years ago I purchased the full subtle z kit as well as headlight buckets and f/r bumpers. John worked out a deal with his friend/delivery driver who was bringing other items to southern California and saved me a tremendous amount on the shipping. As time rolled we kept in touch and on one of his summer visits to San Diego we met in person and he offered to drive my front fenders and head light buckets back to his shop and have them grafted together and also bevel in the BMW side lights that I provided. He then brought the finished fenders back again in his RV on another trip out this way. Now if that doesn't show consideration and dedication to a customer, I don't what else to say. John still occasionally contacts me to see how things are going with the build. I can't say enough good things about him and his approach to business!
-
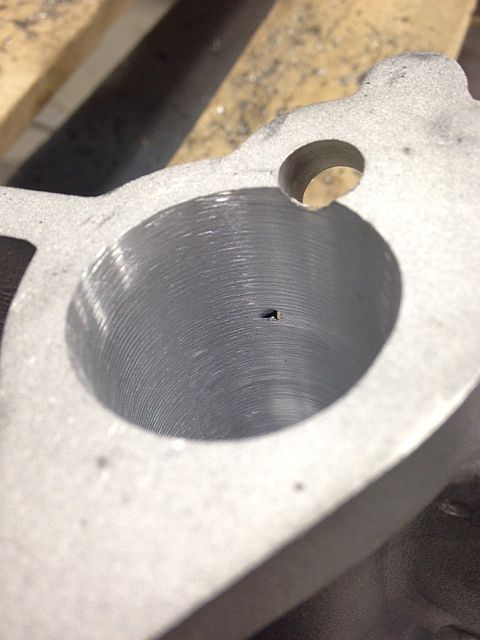
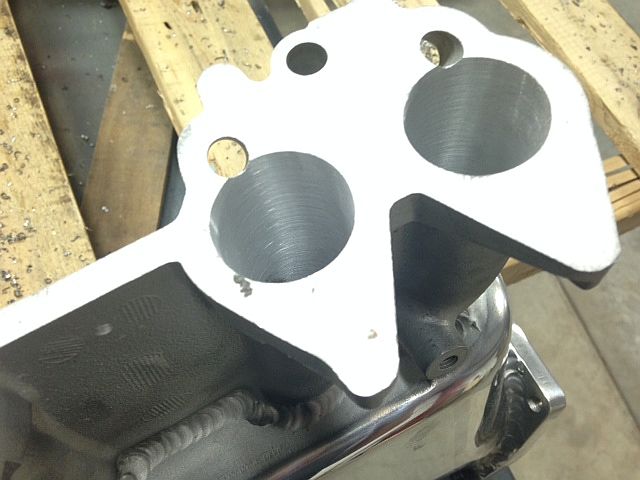
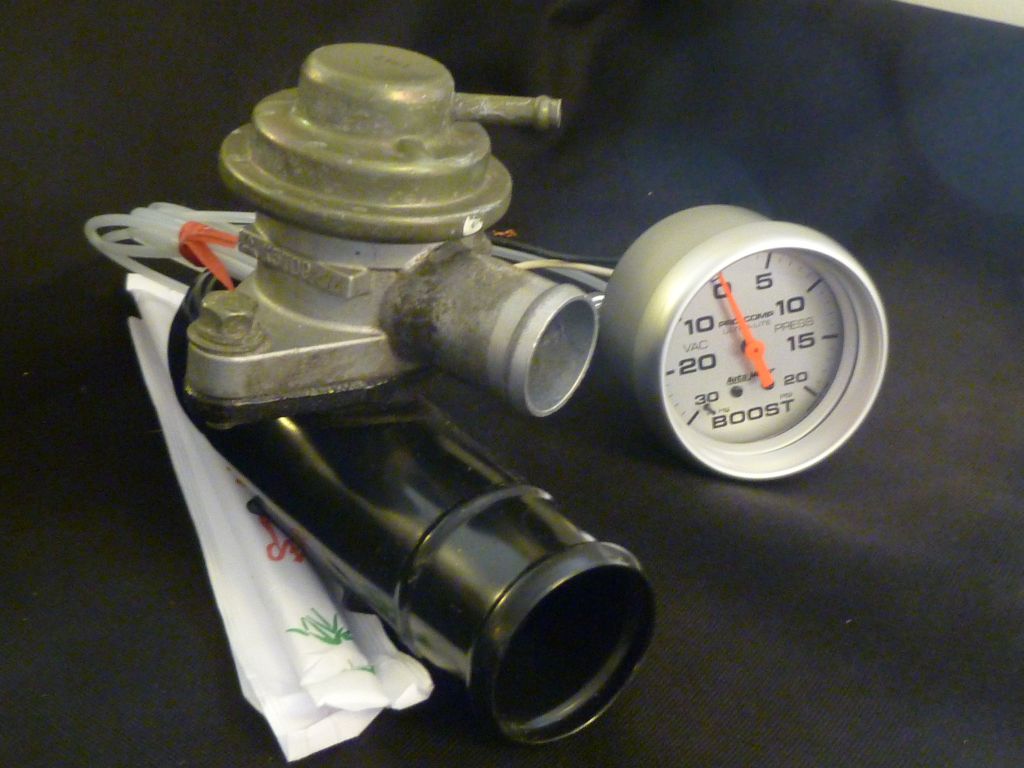
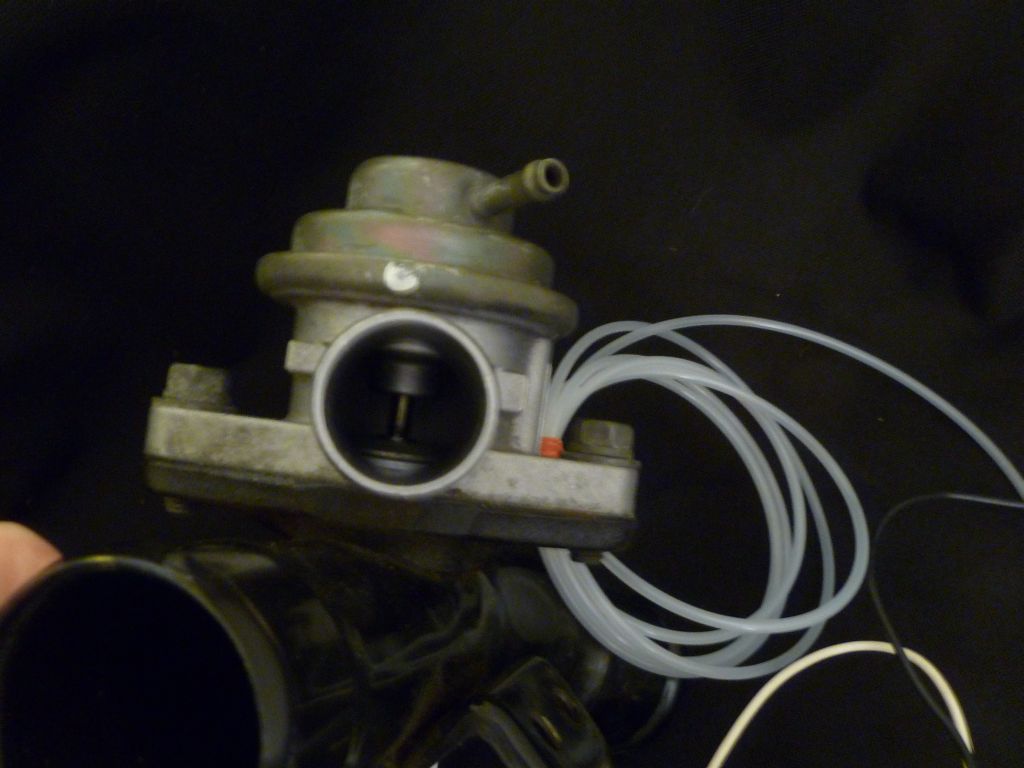
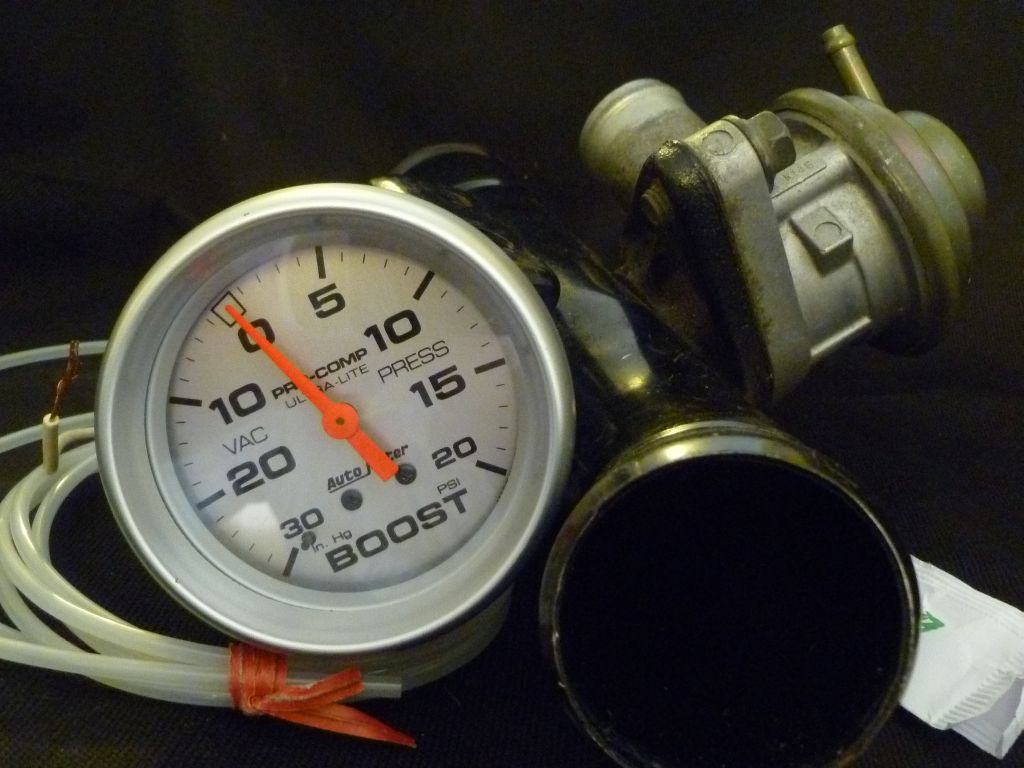
Casey sent those pics of the manifold and patched up two small holes before sending it out. I am very pleased with dealing with Casey (Senza Pari). I originally sent in a non webbed, smoothed, manifold that I had someone local do the porting on, but it was determined by Casey that the runners were way to thin like tin, and bent way out of shape to bolt up. I had to scramble to find another webbed intake to get out to him. Though this was another costly lesson for me, it was something to learn from in this ongoing education as I see it. That's one bit of advise from my father (a professor of 50 years at NCSU), that sticks with me, never stop learning. I'm trying to keep a black and brushed aluminum theme consistently flowing in the cabin. Will be using silver Autometer Pro Comp, ultralites, Momo Race steering wheel, Momo air race shift knob, etc... I still have some smoothing to do on the new mounds and then focus will shift to the ignition clam shell. I have purchased some Chavant Y2-Klay from Fibreglast.com (http://www.fibreglast.com/product/chavant-y2-klay-industrial-design-clay-1122/clay). I want to create a mold of a single gauge pod on the top section of the clamshell, then fiberglass it to the top. I still need to get the angles correct with my new adjustable profile gauges I recently picked up from EastwoodAuto, (http://www.eastwood.com/adjustable-profile-gauges-5-10-15-inch.html). Looking forward to doing some clay modeling.
-
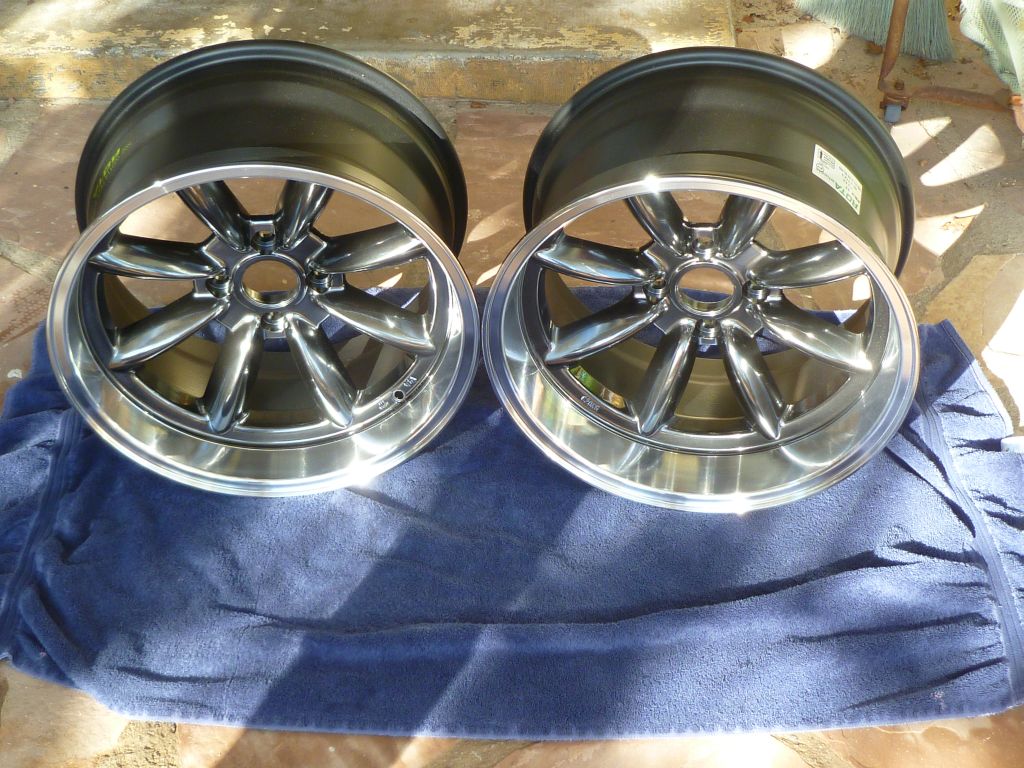
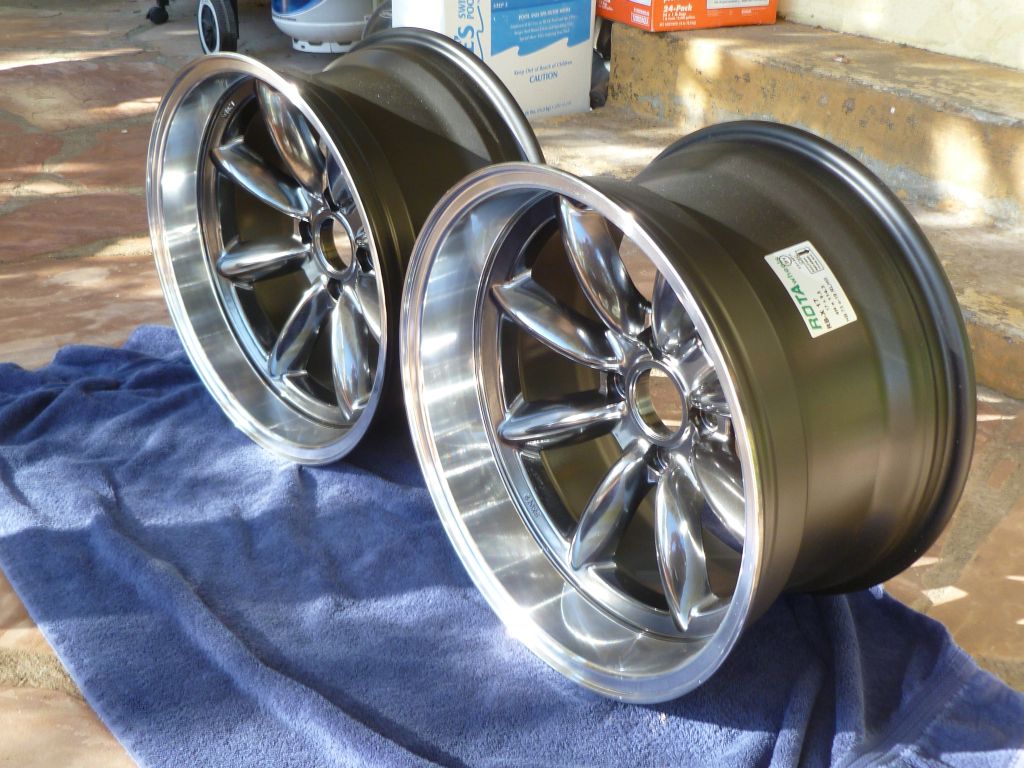
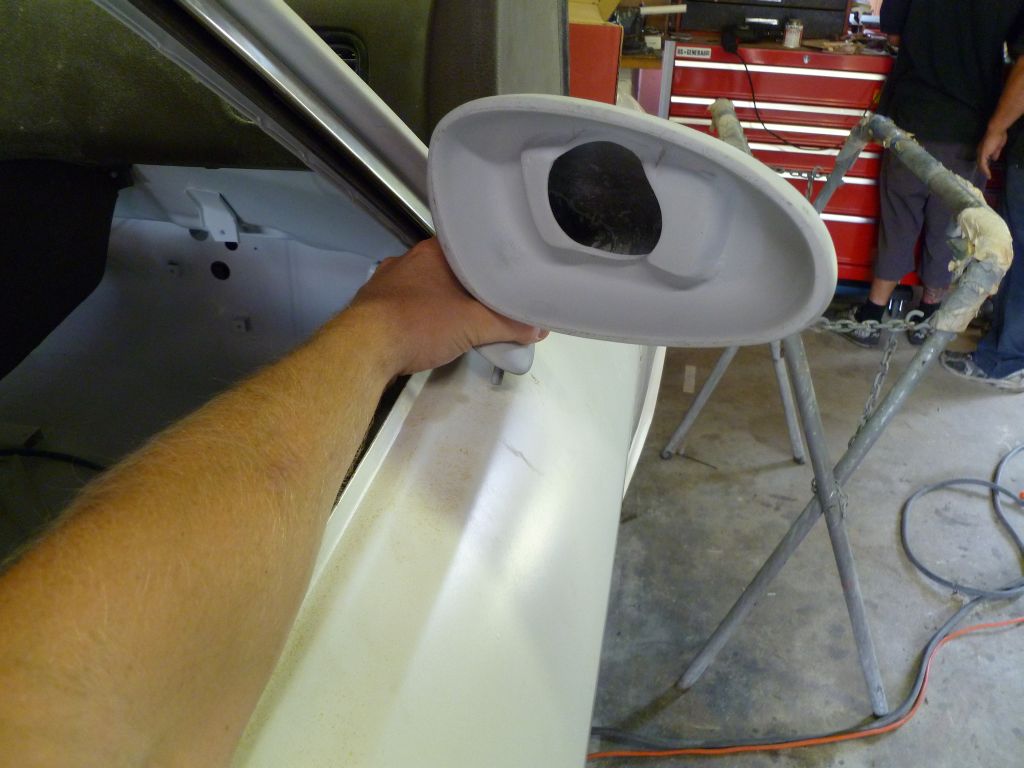
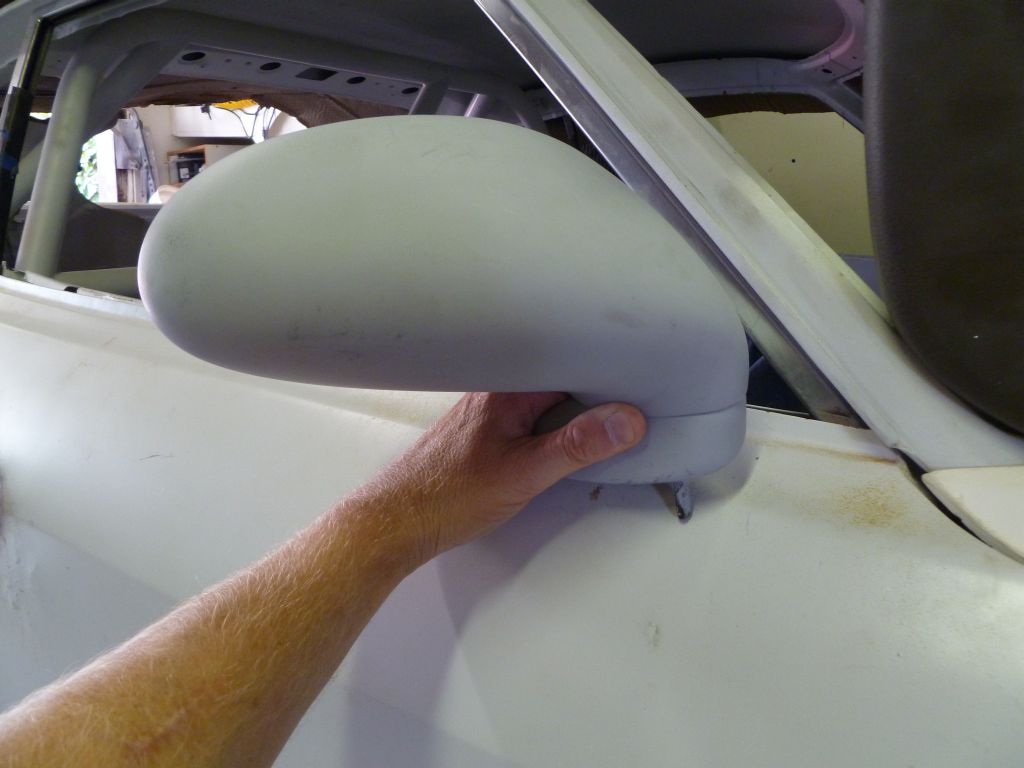
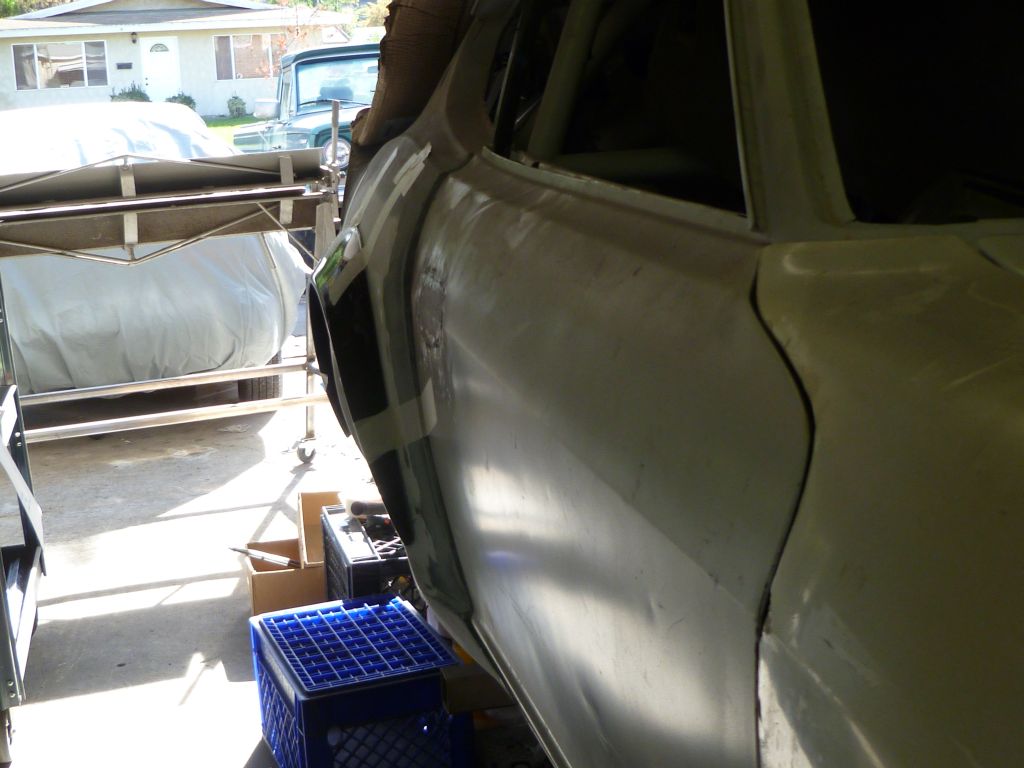
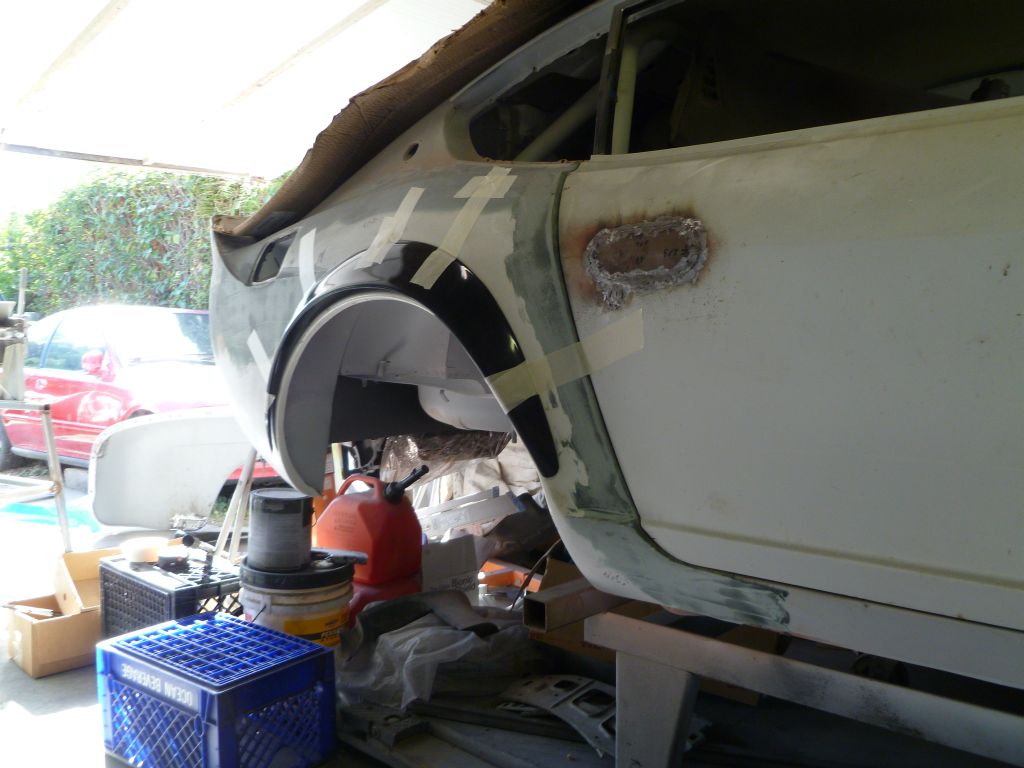
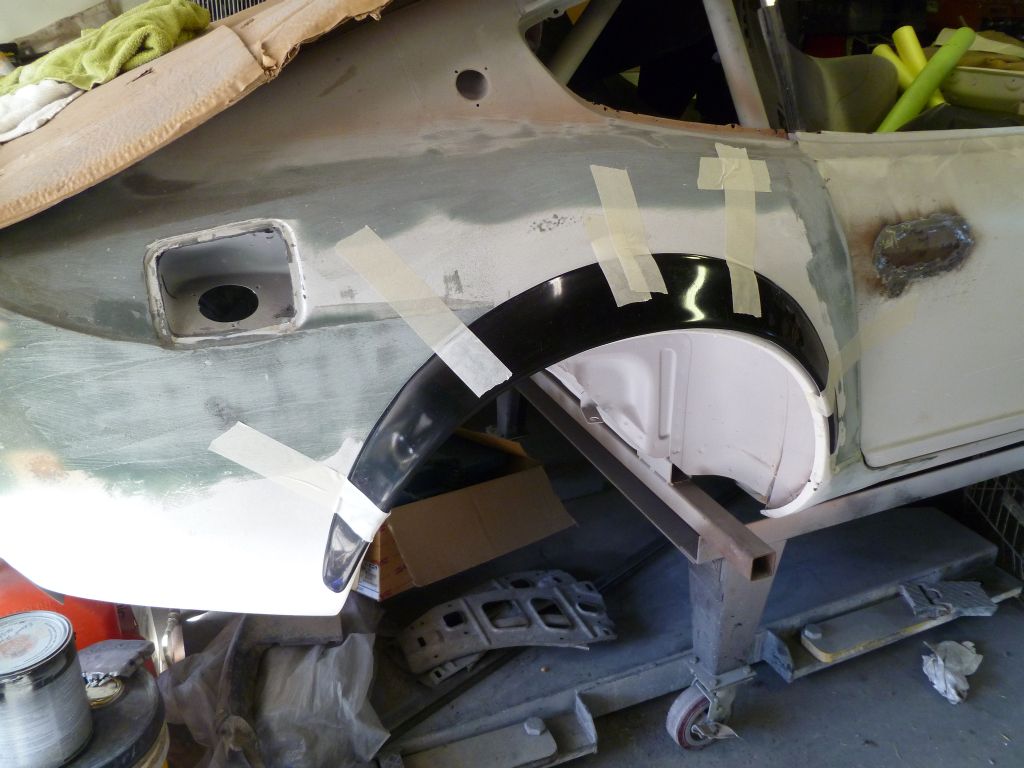
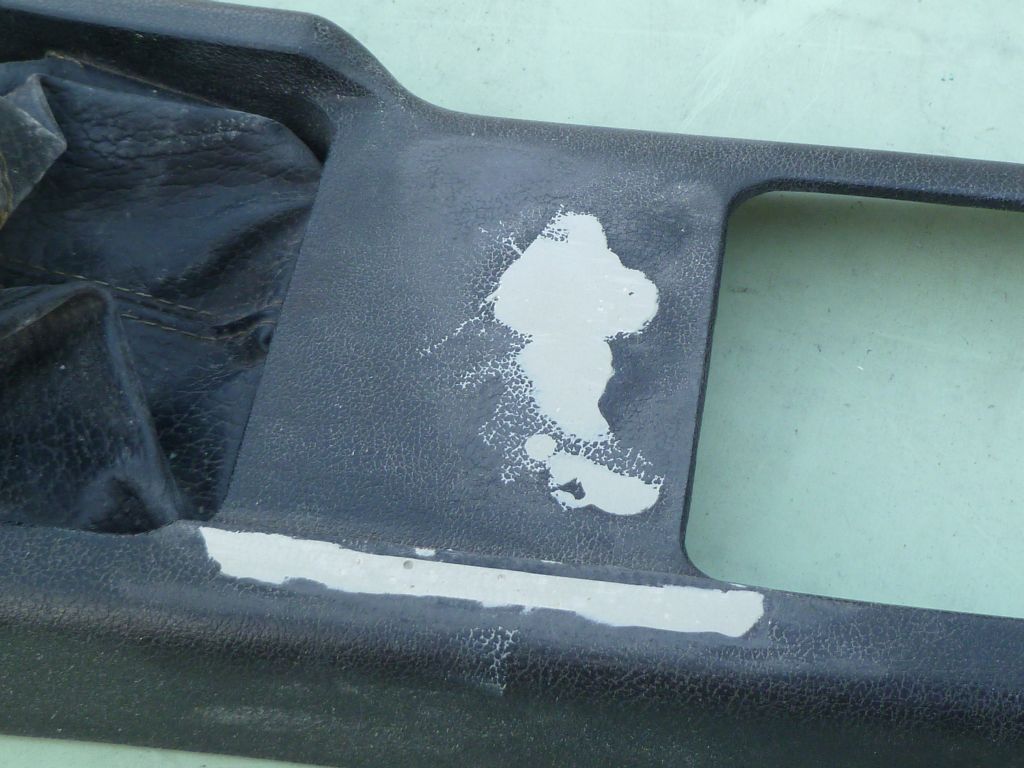
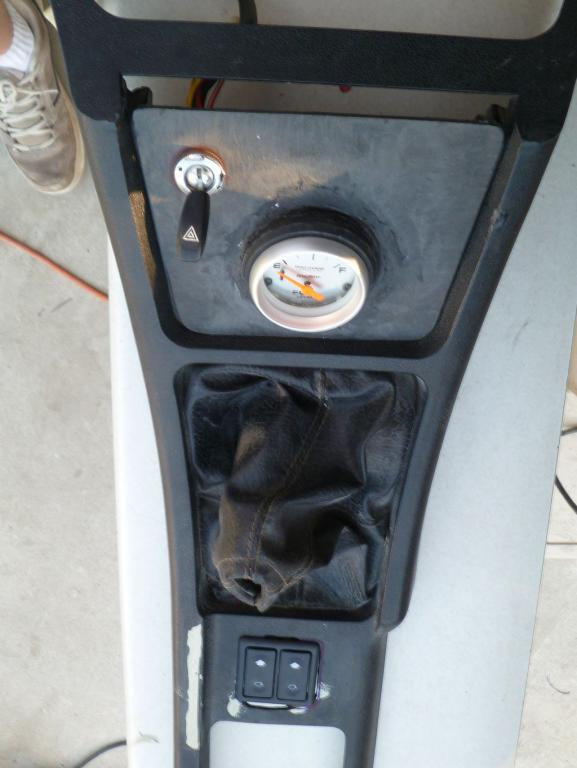
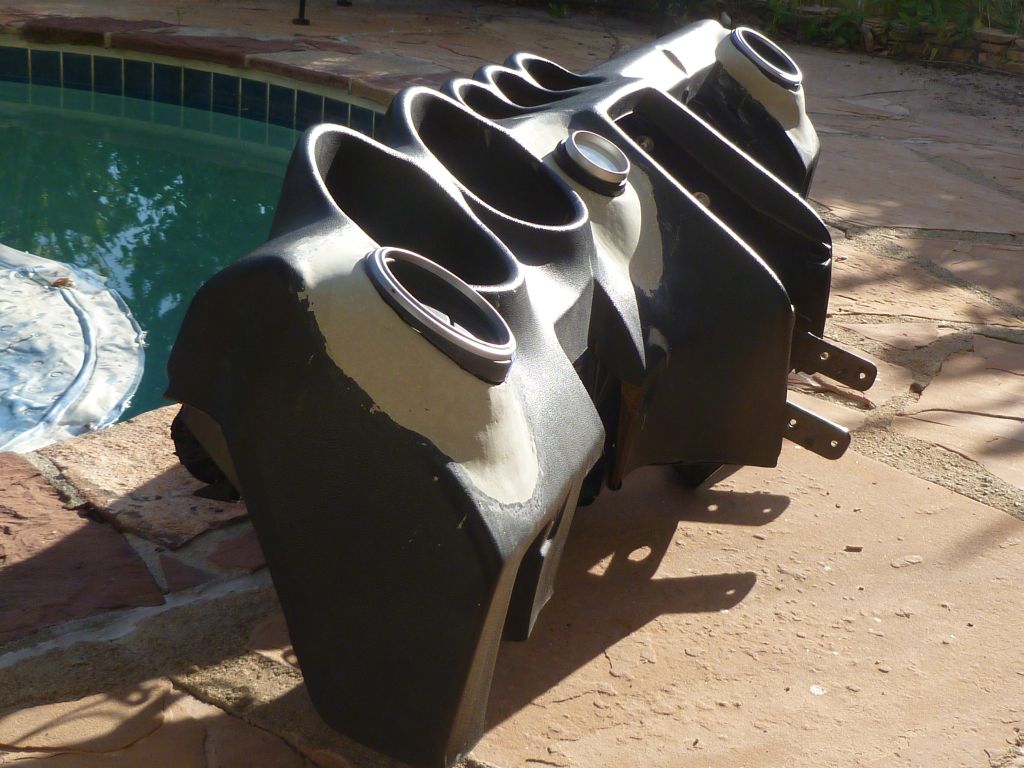
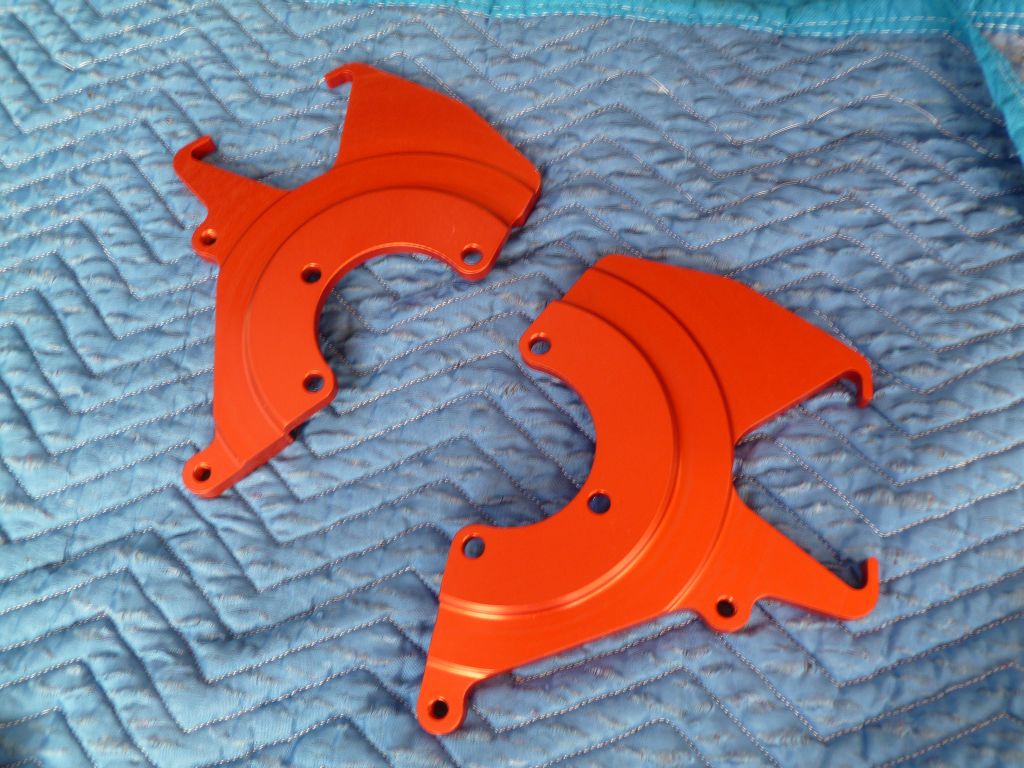
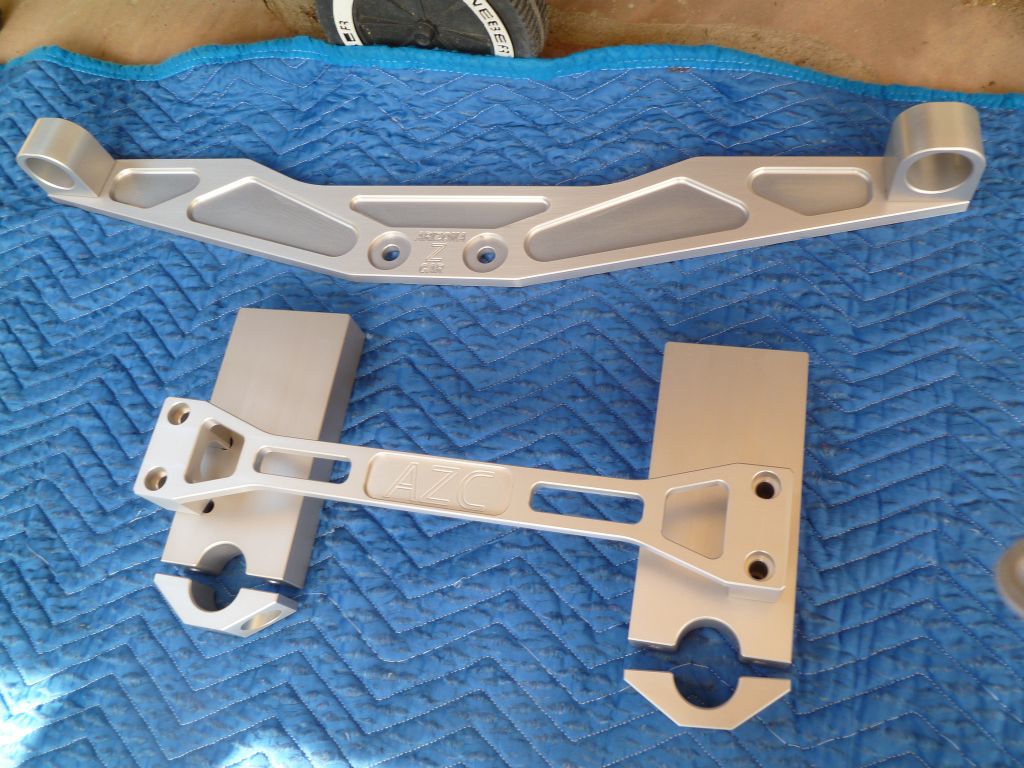
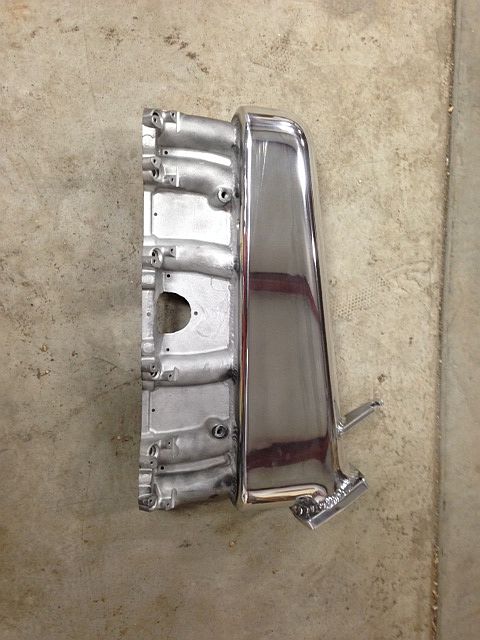
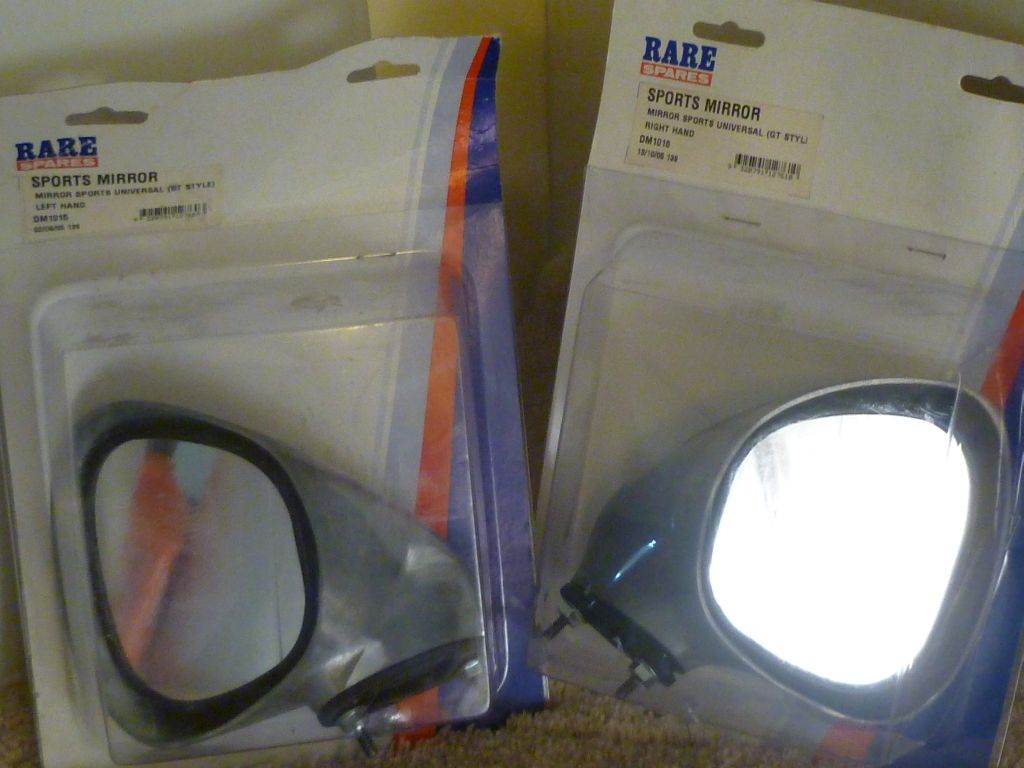
Guess it's been quite awhile since any updates so here's what's been progressing with the rebuild. Sadly no major body work has occurred for the last year plus, as Stuart (body/paint guy) has been busy with other prior obligations. This down-time however, has afforded me with the option to square away financial obligations and to scratch off and pick up many parts from the "to get" list. The most current body work done (4 weeks ago) was to make the new Zedd findings rear lower panel fit the curvature of the car. After all the effort to cut and weld in the junk yard repair pieces, it was determined that the new panel was the way to go. A little more effort is in order to finish the rear panel and the focus will move to the engine bay/front, with adding tube bracing from frame rails to shock towers, to the firewall. I will also have a tube added to stiffen the outer portion of the wheel house, all very similar to the previously posted photos. I have been on the fence with committing to venting the high pressure zone and using the Hyundai finned vents. I finally decided to go forth with it and dimple die cut the inner rear fender area for air extraction. The vents will be blended into the fender to look as if intended from the factory, and a tube or tunnel will reside form the cut holes to the inside of the vents. I have recently purchased the group buy Rota 17" x 9/9.5", Royal Hyper Black, staggered set of rims with intentions of running a 275 rear tire. I have not started researching the tire options yet, as the funds have diminished rather quickly with the current spending spree. I wasn't sure if the subtle z flared kit would allow that size rear tire, so I picked up a rear set of MSA smooth ZG flares. I just quickly taped them on to the car and took some pics to get a quick visual. The position of them on the car is not set in stone. If I do go this route of blending them to the subtle z rears, I will add fiberglass from the lower dog leg portion to fill in what is visually missing and block a little bit more of the air hitting the front of the tire. The rear portion will blended in as well to keep with the visual continuity. I also picked up the Arizona Z car R200 mustache bar and uprights. I cleaned up most of the small knicks and machining marks with scotch bright and had these anodized in clear. I also purchased custom rear parking brake mounts for Wilwood p brake from TimO and had them anodized red along with re anodizing the AZC hubs. I used a local company Anocote Metal Finishing Inc, in Mira Mar for the anodizing and am happy with the results. I ended up scrapping my plans to use the Australian Holden Falcon repro door mirrors from Rare Spares. I ended up going with repro Porsche 993, aero door mirrors from another local company Better Bodies Motorsports in Otay Mesa. These are fiberglass and not only have a clean sweeping profile, but will provide a much larger glass panel which will help with the flared rear end of the body. Lastly, for the past 5-6 weeks of spare time, I have been rebuilding and customizing my dash to accept new Subaru BRZ vents. I came to the realization that It was going to be cost preventative to continue with the planned 240sx dash swap. I really, really wanted to try and use the Porsche 996/ boxster gauge cluster in the 240sx dash, but found out the Porsche gauges are controlled by wheel sensors and a dedicated computer, which = out of my budget. I used the well documented route with SEM bumper repair syringes and am happy with the outcome using this product. I firstly had the dash frame blasted, primed and painted by Bob Rector the blaster, using quality PPG paint. I then beveled the small cracks and filled in with the bumper repair. This stuff sands very nicely. After getting used to the product, and having fun actually doing something again for myself, I decided to build up sides for the BRZ vents, and filling in the cigarette lighter and hazard toggle to create a boost gauge pocket. I had some Autometer angled cups and cut them in half to slightly give a canted angle to the driver for the boost gauge. This will be changed in the future with a piece of aluminum machined pocket that allows the gauge to sit into it, in a similar fashion to the stock provision above it. When the dash is found to be sanded and smoothed enough to the upholsterers liking, it will receive black alcantara with French seem stitching, as inspired by Rovdriver's incredible dash. Since I eliminated the cigarette lighter and hazard toggle, and needed a spot for one more gauge, I had to make a custom center console fuse panel. I sourced a series 1 fuse panel - ashtray thinking this would solve my problems, but quickly found out it was longer and more narrow than my 73' console. I patched up all small cracks as well as filled in the choke lever slot and cut out a slot for the Spal electric window switches. I over cut the window switch slot and after speaking with the upholsterer, will cut out a square panel from aluminum to fit the over sized hole. I'm thinking about moving the cigarette lighter to the passenger side up forward on the console. I plan to have the center console wrapped in alcantara just like the dash. The last purchase I am eagerly awaiting on was the custom Senza Pari intake manifold that I had him port out. Well lots of work still left to do on this build, but making some slow progress. Here are some relevant pictures to go with all the jibber jabber above.

-
I would love to see how this progressed as well. This thread introduced me to Time Machine Racecraft, aka: Tho Chung, the profoundly talented fabricator. I had him do the majority of fab work/ rust repair on my car build thanks in part to Nope, for posting those pics of Tho's welds.
-
Contact John Washington of Reaction Research.com http://www.reactionresearch.com/automotive.html
-
I would gladly pay for the shipping as well.
-
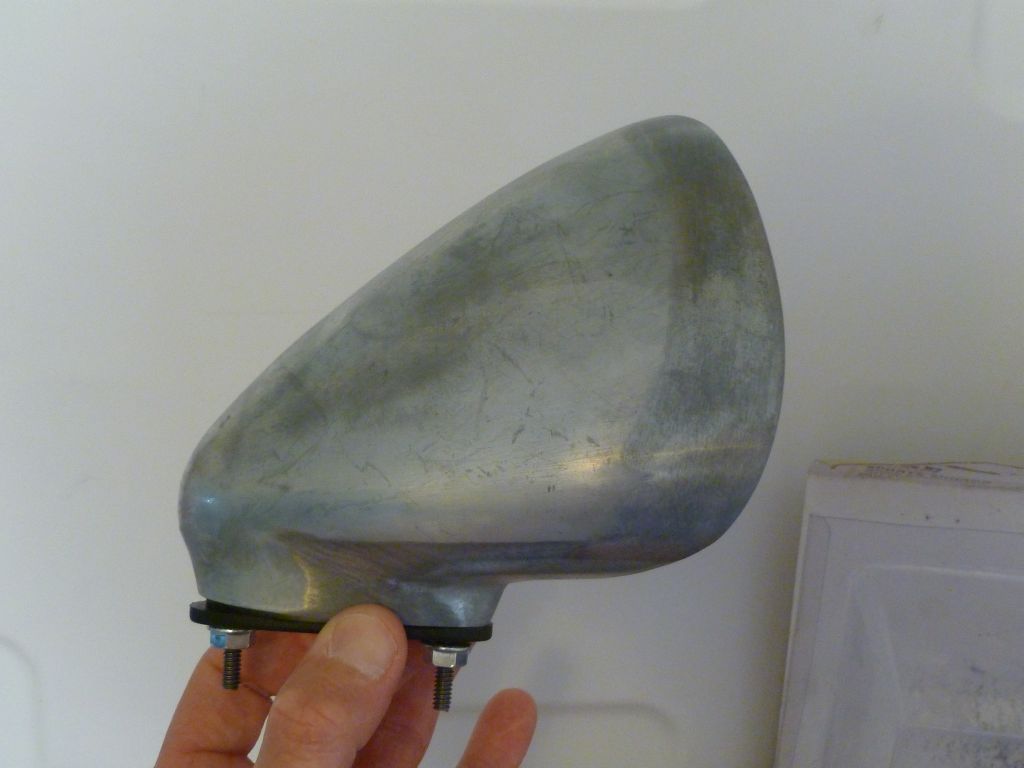
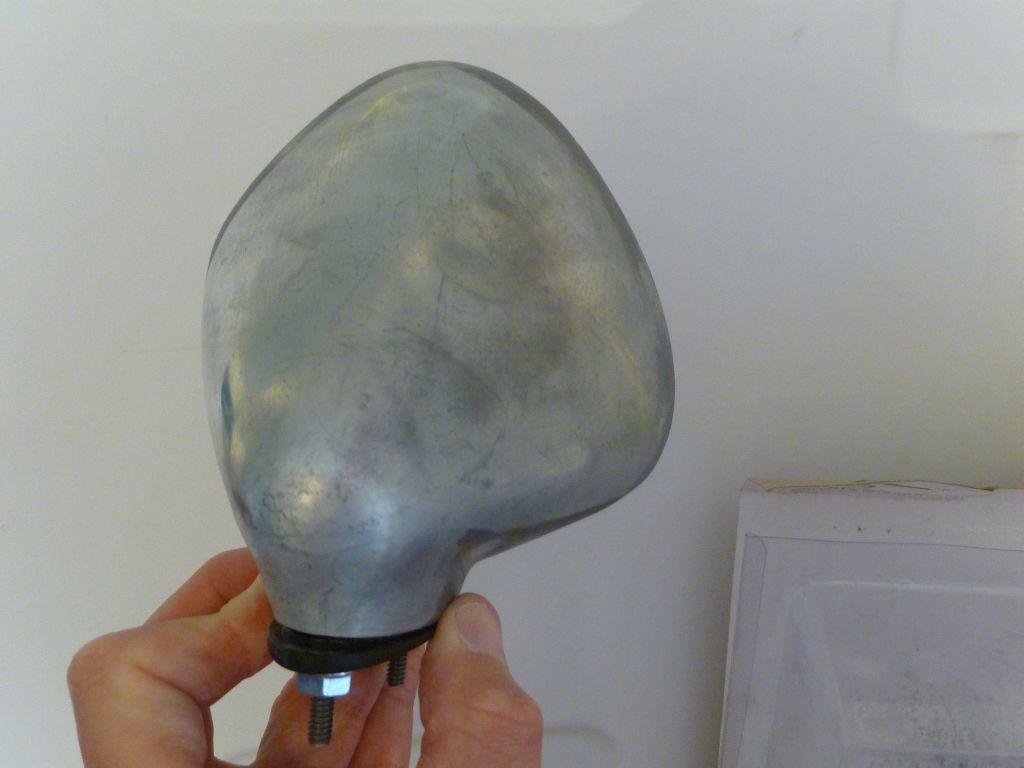
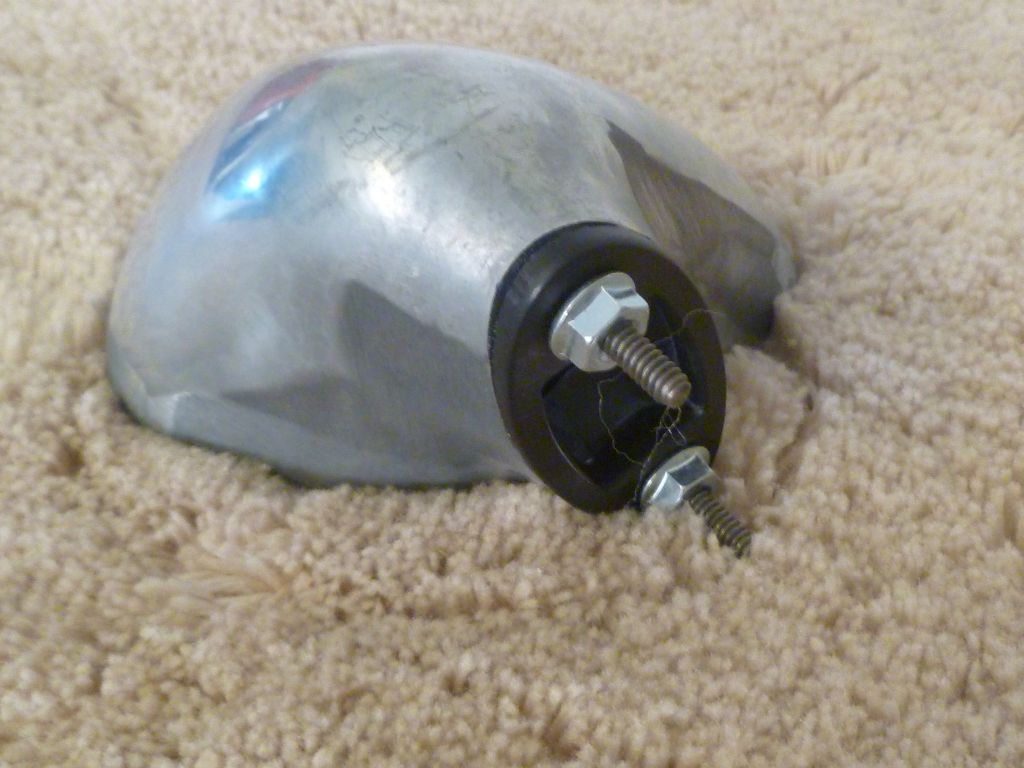
I have a new set of Holden Falcon door mirrors from Australia to sell, as I decided to go with some Porsche 993 aero mirrors instead. They are solid, made of metal and have a unique look. A few pics of them as well as on a few S30 cars.
-
datsun 240z with porsche 911 flares :)
Nelsonian replied to Einar240z's topic in Fabrication / Welding
Still one of my favorite builds on here! Your and RovDriver's dash/center console alcantara treatment have a inspired me to abandon the 240sx dash/console swap and follow your paths. Keep the updates rolling with lots o pics please. -
I have one that has been media blasted and it's in epoxy primer. It does have a small amount of rot through in a corner however. Can provide pics after work today if you are interested.
-
I am not familiar with these and can not comment on their quality. I have briefly looked into pricing on connecting rods to build an L28et with a local company to where I work. Pauter Machine ( http://pauter.com/parts/rods/infiniti-nissan/), quoted roughly $1300 which comes with ARP rod bolts.
-
After searching through boxes I have come to the realization that I must have sold the last throttle body that I had, sorry.
-
Bov...