NewZed
-
Posts
6700 -
Joined
-
Last visited
-
Days Won
72
Content Type
Profiles
Forums
Blogs
Events
Gallery
Downloads
Store
Everything posted by NewZed
-
Just remembered something that I did on the very first clutch I ever worked on - put the disc in backwards. It rubbed on the flywheel bolts and wouldn't disengage.
-
Interesting. My thought process just opens up the spec. for that measurement down to 82 mm. Thanks for sharing. I think that your mechanical parts are fine. 92 mm has worked for many people and it's probably no coincidence that your new pressure plate gives that number. I'd go back to that 0.4 inch of travel from your hydraulics. You can probably explore that further with the slave cylinder hanging. You were getting less than 1/3 of the stroke you should have been getting.
-
I was giving you the benefit of the doubt, re the poor punctuation.
-
Seriously, you're just spinning your wheels and wasting money if you don't at least take some sort of measurement before buying parts. You can even make a test light with a battery, a light bulb, and a piece of wire if you're poor. Or go to Harbor Freight and get a $4 meter.
-
Buy this app and learn how to use it - https://itunes.apple.com/us/app/imultimeter/id420797671?mt=8 Since you're on a phone.
-
Your method gives the distance from the end of the crankshaft to the top of the ears then. Not the same as what I showed but it does imply that your old setup was shorter than what I recommended since the method measures a longer distance. I'd just flip, stack, and measure. Here's another picture for future reference. Should have mentioned it sooner but I forgot. It shows where the end of the clutch fork is, indirectly showing what you have inside, on a properly working clutch. I came up with as a way to check the collar and pressure plate stack height from the outside. It's been a while since anyone had a problem though.
-
You haven't shown that it's charging at all. The only number you've shown is battery voltage. Are you saying that the problem is that it doesn't charge until 1500 RPM? How big is the pulley? You want a small one to get low RPM charging. Are they different size between your old one and the one you have now?
-
Not sure what you're measuring there. I don't see the pressure plate. Here's an old picture showing the distance to measure. Same ear you were on but measure down to the pressure plate flange. At the flywheel surface. The caliper isn't quite on the straight edge in the picture but it's close. You get the idea. Hard to hold a camera and caliper and push the button.

-
Actually, Wagner's description fits. "Unfueled" air is drawn in to the intake manifold. Seems very crude. And this was 1981. Apparently the PCV and carburetion system are tuned as a complete system. Here's a pciture from the 1981 truck service manual.. They even call out the "dirty" air, apparently it's not even pulled from the filter side, Funny story - I helped a friend get his car running after he filled it way over with oil, soaked his air filter through the PCV hose, and the engine wouldn't start. I threw the filter away to fix it.. He didn't know anything about engines (hence the overfill) and had beat the piss out of it which caused much of the oil vapor to get pushed through the hose. I told him to take it easy, the motor was on its last legs. He beat the piss out it again that night ( a bunch of us met later that night and he was complaining about the smoke) because it ran so much better, parked it in front of the house with the room he was renting, and woke up to a muffled boom as the oil on the super-hot exhaust manifolds caught on fire. Burned to the ground. I think it was a Yugo.
-
Sorry about that, forgot about 77 and 78. By the way, if you want to look knowledgeable when stating that someone is wrong, you demonstrate why. Like I just did. Edit - more knowledge. 1975 and 76 don't have hood vents. That's where I got the idea.
-
Here's some interesting reading - http://speedtalk.com/forum/viewtopic.php?f=1&t=37104&start=0 http://mewagner.com/ Here's a fair summary of the basics. They still seem a bit confused about where "fresh air" comes from - http://mewagner.com/?page_id=434
-
280Z's don't have hood vents.
-
Twin cam head for the L6 from Derek at Datsunworks
NewZed replied to Derek's topic in Nissan L6 Forum
Derek, your avatar still shows that old dinosaur head. -
He built his own head. How'd you miss it? I think he's running ITB's also. I posted in front of you. A good catch can would probably keep your carb clean. Cleaner for longer anyway. More hoses though.
-
You'll pull "unfueled" air in to the intake manifold that way. It will not have passed through the carburetor. It will lean out your mixture. That's why the systems that use intake manifold vacuum are "sealed" systems, and the open systems empty before the carburetor. The hot rod V8 guys have this same problem. You might search around those sites. I think that one reason for using a PCV valve on whatever you use to pull through the crankcase is that it controls flow. If flow gets very high the spring will compress and the valve will close. The PCV valve is essentially a two-way check valve. You don't want huge volumes of air passing through pulling all of your oil out in vapor form. That's why people use catch cans. Fix on top of fix. It can get complicated. Before PCV they just left the crankcase open with a breather type filler cap. Probably got messy with old engines.
-
New Techno Toy Tuning Big Rear Brake Kit!
NewZed replied to Turbo6.0's topic in Brakes, Wheels, Suspension and Chassis
The bleeder should be at the highest point of the internal passages of the caliper. That's the basic principle. Some people tilt the caliper, I imagine you could tilt the car to get the same effect. Whatever it takes. Bubbles rise. Be the bubble. -
Use a meter and measure voltage at various places along the path to making the bulb filaments glow. Or measure resistance to find which components or wire paths aren't allowing current.
-
New Techno Toy Tuning Big Rear Brake Kit!
NewZed replied to Turbo6.0's topic in Brakes, Wheels, Suspension and Chassis
Is it possible to get the bleeder on the bottom with the Wilwoods? I notice in your pictures that the "d" is up on end (front or back), and the "w" on the other. If he plumbed the front and rears differently and you got the calipers swapped, you'd have a bleeder position problem. On the stock system, the calipers will swap side to side and cause that problem. -
I meant the FS5R90A or FS5R30A versus the FS5W71B or ...C . BW versus Nissan. Left out the wrong letters. I thought of why the slave piston might not pop out if the short collar is used with the short pressure plate. Maybe the back of the fork bottoms out on the edge of the hole in the case. It would probably leave a mark.
-
How much radial rotor runout is acceptable?
NewZed replied to jt1's topic in Brakes, Wheels, Suspension and Chassis
If the rotor is freshly surfaced the pads will just make a new path. You could have the wheels balanced with the hub and rotor bolted on. I've not seen it done, but it seems to make sense even without a runout problem. The casting inside the vents looks pretty rough. Can't be that well balanced from the start. After balancing you'd want to mark the wheels to the hub to keep them indexed. Or you could do a wheel, then bolt the hub and rotor on and re-run it to see if it even matters. Don't forget to also have your machinist take the edges off so the wear pattern doesn't look funky. Kidding... This is kind of like the assumption made for internally balanced engines, and flywheels, and pressure plates. Each part is assumed to be "in balance". If you start looking a round there are all kinds of ways to be out of balance. How many people rebalance their wheels after rotating tires? Of course, the racers probably do, but still. Most of us wait for funny noises. http://www.brakeandfrontend.com/on-car-wheel-balancing-wheel-to-hub-indexing/ -
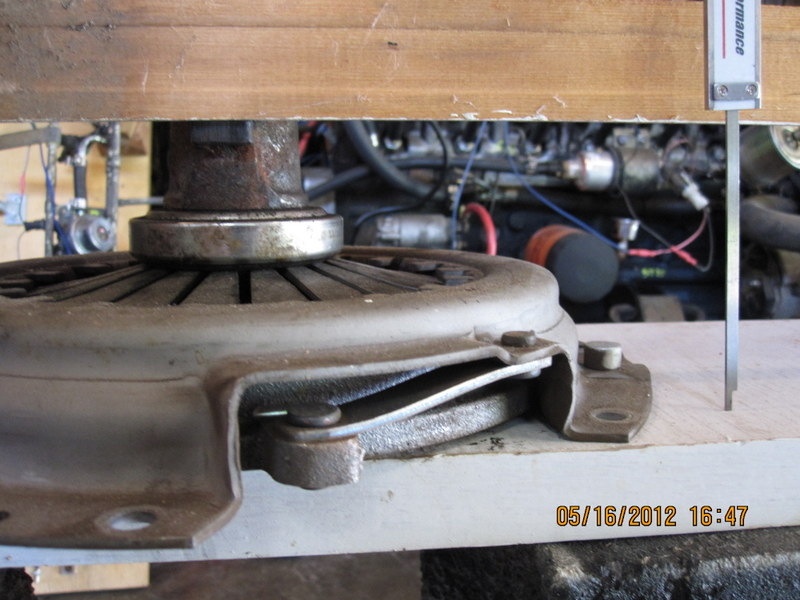
You're not getting the whole picture. The collar and the pressure plate are a matched set. There are several pressure plate heights and several collars to fit those plates. The matched set should have the ears of the collar 92 mm away from the flywheel surface with the collar in position on the pressure plate release levers (fingers). Hold a straightedge on an ear and get that measurement. I will never install a transmission in a Z without ensuring that 92 mm distance. +/- a couple mm probably okay, but 92 is the target. Several others have verified it. It works because the pivot point for the clutch and the mounting position of the slave are the same across many years of Z's and ZX's. 71B and 71C transmissions. Not sure about the FS5... series. Likely the same though since the same clutches are used.
-
The headlights and signals are easy to figure out and fix. You'll probably wish that you had never had this thought. Browse through the wring diagrams here and see if it still looks like fun - http://atlanticz.ca/zclub/techtips/electrical.htm
-
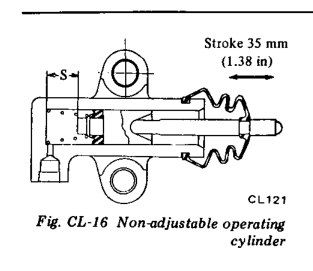
Since you have the clutch exposed now you can address z-ya's suggestion about the collar. It's the distance from the two ears (on the collar) the clutch fork sits on, to the surface of the flywheel that matters (assuming that the flywheel is the factory-set distance from the engine). That distance should be about 92 mm. You didn't answer the question about if the kit came with a new collar. Or if you checked the slave boot for fluid. Or if you measured stroke at the master cylinder One thing on the slave travel distance - it's seemed to me that the slave piston would get pushed out of the bore if the short collar was used, since the next stroke after the master cylinder refills should "over-stroke" it.. Since the slave piston gets pushed back in its bore only as far as the fork pushes it in it would start way down its bore. A long collar stopping full engagement makes sense but I can't figure how a short collar stops disengagement. It should just allow the slave piston to pop out. If you've already put it all back together you can get an idea of how far down the bore the slave piston is by pushing it back in by hand when it's mounted. It will just push fluid back in to the reservoir. Wouldn't be surprising if you just had a bad seal in the master cylinder. There are two seals, one to create pressure and one to keep all of the fluid inside. The pressure-producing seal (primary cup) can leak inside without an external leak.
-
Cheaper to just mount the fuel pump in rubber. BMW made a nice rubber capsule for the Bosch external pumps on their older cars. But even a rubber washer under the mounting points will make a difference.
-
CV Joint replacements for half-shafts
NewZed replied to Medic8's topic in S30 Series - 240z, 260z, 280z
That's a mistake in some database that's out there. I actually sent the manufacturer that started the whole mess an email about it and they said that they had just assumed that all of the halfshafts (drive shafts) were the same. Too late, they couldn't fix it, now it's out there for ever, like rebuild kits for FS5W71A 280Z transmissions. CV half shafts didn't show up until 1981.