-
Posts
5399 -
Joined
-
Last visited
-
Days Won
58
Content Type
Profiles
Forums
Blogs
Events
Gallery
Downloads
Store
Everything posted by RebekahsZ
-

Coil-over install - sectioned struts
RebekahsZ replied to redneck1545's topic in Brakes, Wheels, Suspension and Chassis
I didn't use this kit, so I only have a few thoughts. I wouldn't worry about the lack of anodyzing-it scratches off when you adjust the threaded collar anyway. There will be a little play between the spring threaded collar and the strut tube, but I don't know just how much you have. I would think that as long as it doesn't fall off of the seat, you should be OK-it stays put thanks to the weight of the car. My threaded lower seat has virtually no play in the thread pitch as compared to the threaded collar, so that makes me think they sold you junk. On the different length springs: I would be concerned that the odd-ball may not be the rate that they quoted you-is the spring rate marked on the spring in some way? It won't affect performance if one spring is a little longer than the others. I set my ride height by moving up or down equally. If you have an odd-length spring, you will just have to remember which one it it-I'd rather have them all the same. My S10 truck does not have an equal ride height even from the factory and no one has commented on it-it only bothers me. -
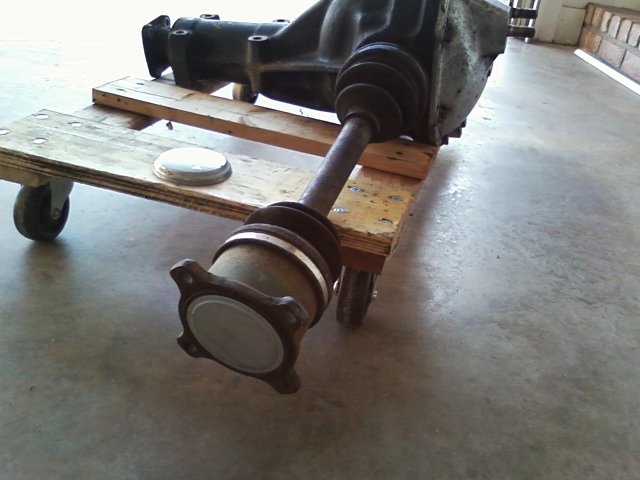
I just bought a set of 4-bolt 1988 Z31 turbo CV axles, but unfortunately, one side is missing the end cap. If you have one (or two), I'd like to buy it (them). If you have a source, I'll take that advice too. I also need advice on how to remove and install them without damaging them.
-
ZT-R is right-the strut rod (shaft) will always try to rotate when you tighten the retaining nut. Some brands of struts have the threaded portion cut in a D-shape that fits into a corresponding D-shape in the insulator, that retrains rotation of the strut rod and you can tighten those up really easy. My tokicos have two flat spots machined on the sides of the strut rod, but they are not a standard size, so I don't have a wrench to fit them; I will someday make one from flat metal stock that will fit (another dam_ project). In the meantime, I have just done what ZT-R recommended: use an air impact wrench to tighten them. That has become my method for loosening or tightening anything that I cant restrain rotation on, like differential flanges, etc. Tightening that nut may solve all your problems-kiss your wife for helping you! After you tighten the nut, go for another spin with your wife and see if that fixed it-you could still have a de-bonded insulator or simply an improper parts stack within the upper spring seat/insulator assembly. When you tear down to install softer springs, I think you could go with the same spring length that you have now. Call betamotorsports and see how much a set of DP camber plates will cost you. If you install them, you will be at least an inch lower just from the plate, and you could convert that extra space into available suspension travel between your gland nut and the camber plate just by raising the lower spring seat on the threaded collar. You could also get rid of the old spring seat. Betamotorsport will have to know either what brand of strut you are running, or you will have to tear down and measure the top of your strut rod so that a compatible spherical bearing can be selected.
-
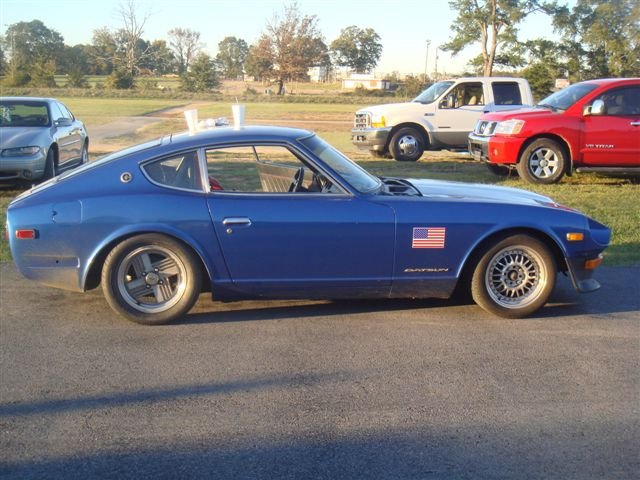
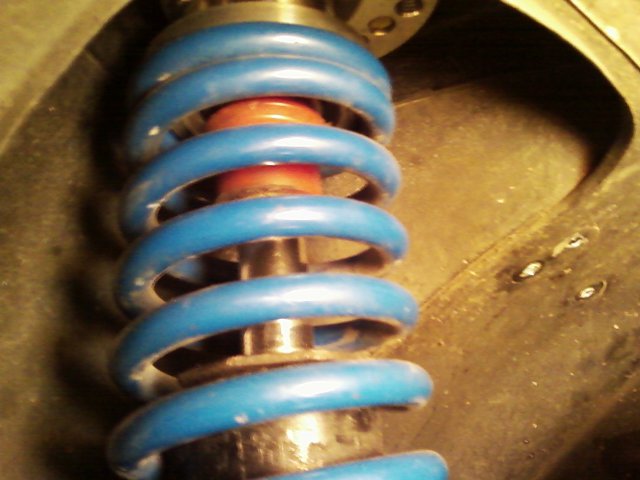
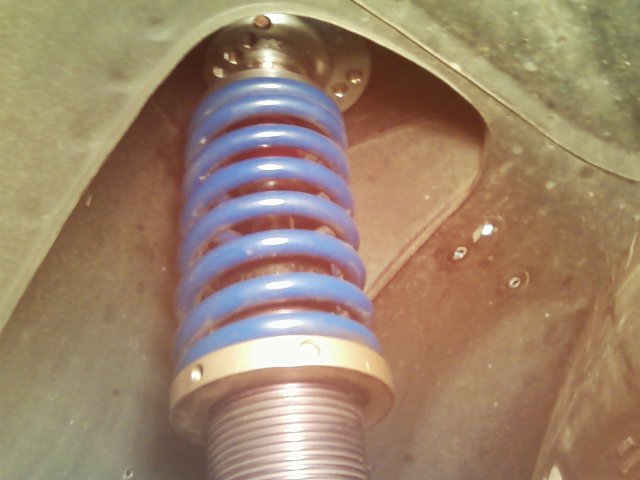
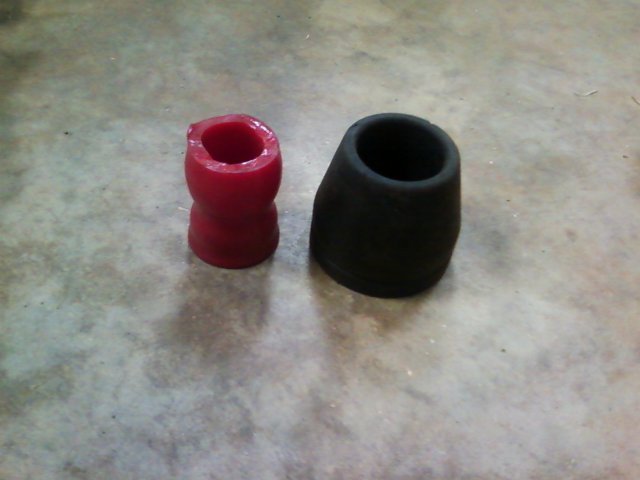
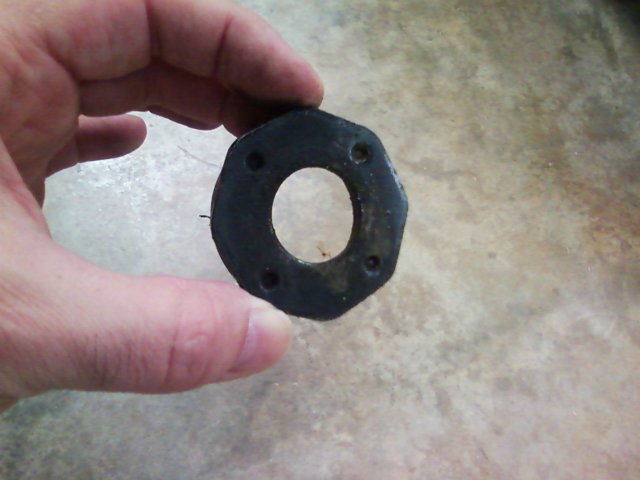
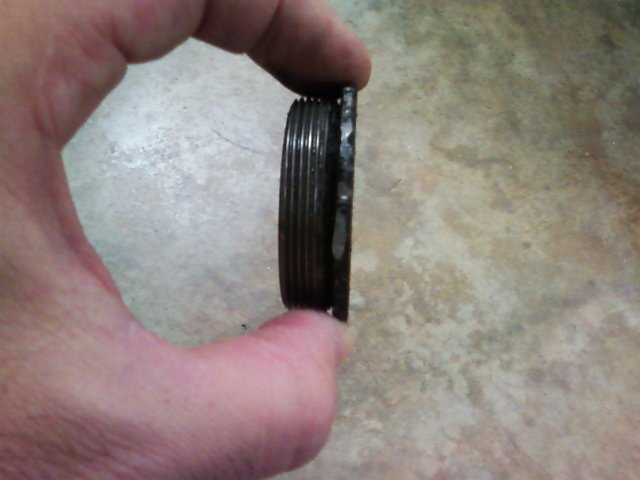
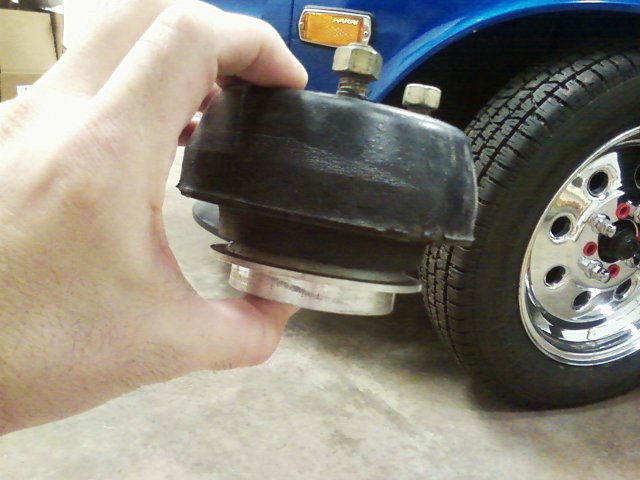
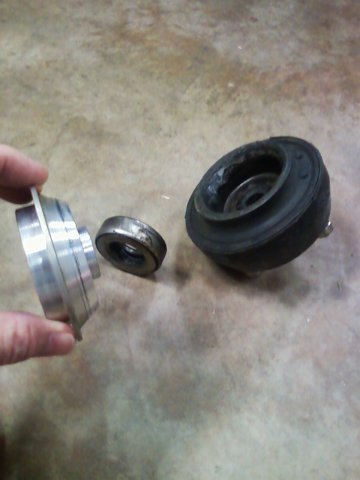
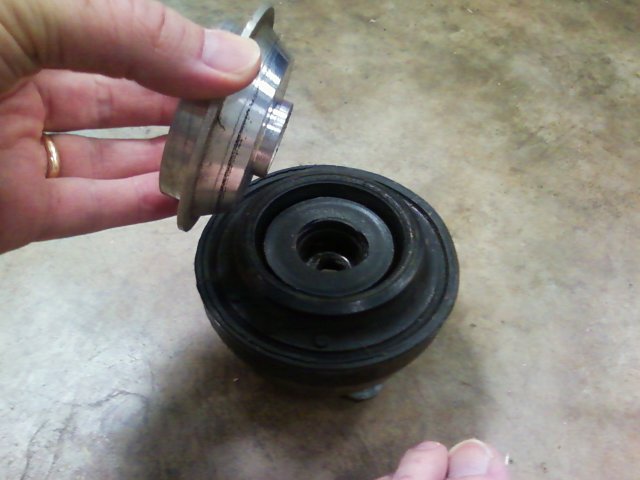
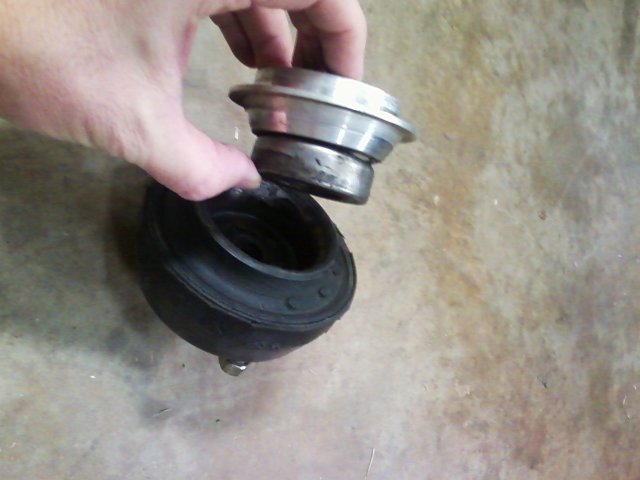
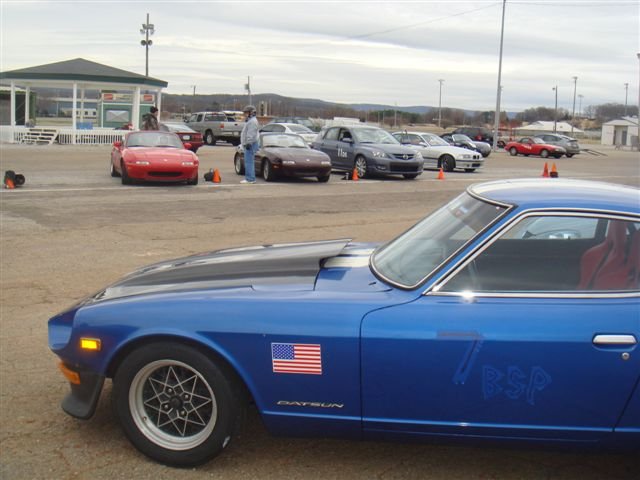
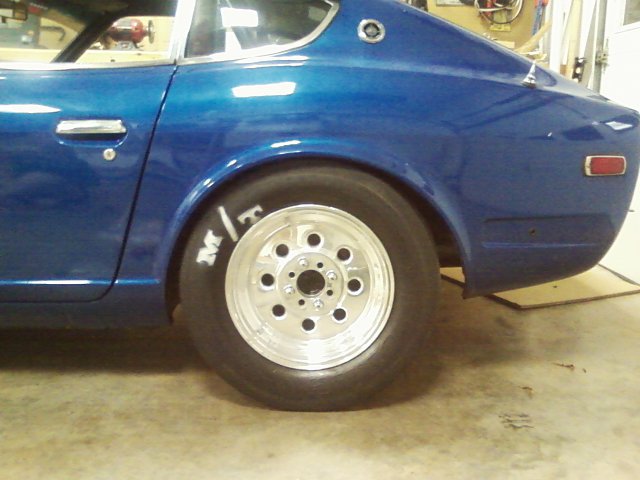
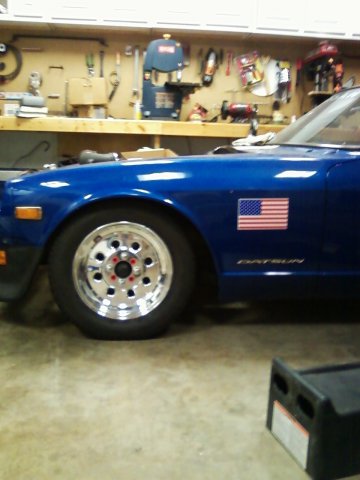
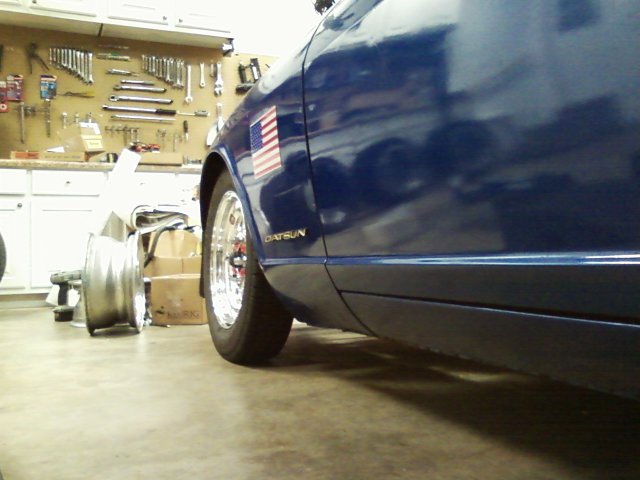
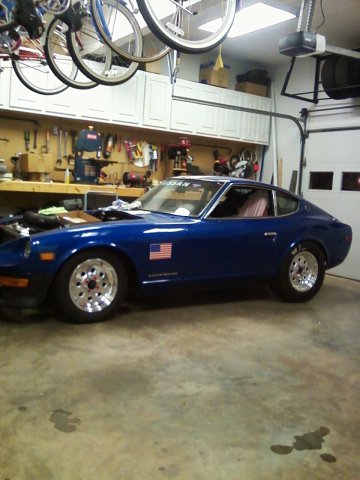
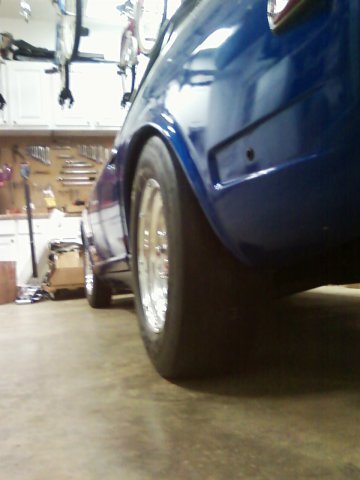
This is my set up which I love. My spring rates are Front: 225, Rear: 250, or perhaps 275. Pic 1 is rideheight w/ 225/50/15 drag radials on back, 205/50/15 street tires BFG on front. Pic2 shows my front kit w/ car on tire on ground w/ full weight. First you will notice that I have a lot less crap inside my strut tower than you do. The shiney part at the top is a EMI camber plate assembly from BetaMotorsports-they are no longer available, but a similar product is the DP bolt-in camber plate, also from BetaMotorsports.com. Distance from gland nut to top spring seat is 3-1/2" with 1-1/2" taken up by polyurethane bump stop mounted on shock tube (I have probably twice the travel you have. I don't have pics of the back, but when I got out my flashlight, the travel is about the same-you could use lots more travel. Pic3 shows that i am maxed out on my threaded collars-since I installed camber plates, I need longer springs-I'd really like to go up another inch or so (that would give me yet another inch of travel). Pic4 shows two different kinds of bump stops; the red one came with my tokicos and i cut it in half-it was double that length, the black one is from MSA or somewhere-it is loose on the shaft and would need to be glued to either the upper spring seat or the gland nut. Pic5&6 show you what a gland nut is. You should have at least a few threads exposed when the gland nut is fully tightened-if you don't, your shock is loose in the tube. What is a "top hat." I'm not sure what other people mean. I like to be more specific in my terminology. Pic 7 is a custom upper spring seat and insulator assembly that I had machined because initially I was too cheap to get camber plates. The black thing on top is the stock insulator, the shiney thing on bottom is the upper spring seat. Pic 8 shows the components of the assembly which include the stock insulator, the steering bearing, and the upper spring seat. All of this should fit snuggly together and the upper spring seat should rotate inside the insulator to allow steering function. Pic9 shows you the assembly for the rear, which has a black rubber donut in place of the steering bearing, since you steer the rear of a z-car with the throttle pedal! Pic 10 just kind of shows how you stack the assembly up. Pics 11&12 are just additional photos of my car with different wheels and tires-I can't seem to find a photo of my car with 16X8 RBRs with 225/50/16. If you want me to, I can get out my micrometer and send you simple drawings and measurements of my custom upper spring seats so you can have some milled, but if you want to skip that step and go all the way, just call BetaMotorsports and get DP camber plates for all four corners. Remember to check your half-shaft u-joints: shove a big screwdriver into them and pry around-you should have no looseness. Let me know how it turns out. Keith
-
Hey, great pictures-your car is sweet! The picture file nambes don't show on my browser, so it is a little hard to follow you. I like the lowered look in the pic that you like, so lets try to get you driving around like that, but not in misery. Did raising the rear ride height improve anything? Your springs are not progressives, so that is good, they are not coil bound and are probably not the problem. I think the pic you sent showing remaining travel is of the front, not the back (but I'm not positive). We need some idea of what travel is left in the REAR when the car is on its weight, but it is hard to get visibility inside the rear fender. Try taking off the rear tire and jacking under the control arm until the control arm is at the same angle as the other side (to mimic having the tire on the ground): perhaps you can see how much travel is left then. Maybe you could put some chewing gum on top of the strut and see if it gets squished? If that photo is of the rear, it ought to be ok. Did you check gland nut tightness? I can't see the gland nut in any of the photos, it almost looks like the threaded collar is longer than the strut? If your strut is loose in the tube, it could explain your trouble. Check your half-shaft u-joints, I can't tell for sure from the photos, but they look crooked?? That could make a rattling noise. On the "top hats" I am not familiar with the way your kit is assembled, retaining the old large spring seat and a small aftermarket spring seat together. I had upper spring seats machined from billet that allowed me to retain the top insulator (the big rubber biscuit that bolts in with 3 nuts at the top of the strut tower (chassis), and to eliminate the large stock spring seat. In your case, the old large spring seat may be clanging around. Did you put the kit together, where there instructions that told you to keep the old upper seats? Question: Is your ride harsh, or just noisy? I'm gonna shoot some pictures of my stuff and edit this post in a few minutes. Try to answer all my questions so I can help you. Keith
-
FYI: I had trouble contacting the zbarn a few months back. If I remember correctly, Roger (the owner) lost his wife, and wasn't doing too well. Hopefully my memory is flawed, the zbarn has been a wonderful resource for a long time-I hope he's doing better.
-

how much HP can a stock 240z frame take?
RebekahsZ replied to logan1's topic in Gen I & II Chevy V8 Tech Board
Funny that pretzel comment got so much air time. Anyway, the problem I have had with my z-car is cracks in the paint and metal at the spot weld/lap joint locations I referred to-the rest of the paint is beautiful, so I don't want to screw it up to fix the cracks-paint work is such a drag. However, once the paint cracks, rust starts on the raw steel, and now I am afraid to park my car outside for fear of rust in those weakened areas. I got all those cracks with a stock L24 motor, alas I have no chassis reinforcement. I have no idea how many miles my car actually has-probably a million (it had 5 coats of paint on it when I bought it). My springs and sway bars are stiff enough to lift a wheel everytime I go in and out of my driveway-had to get a posi just to get in the garage! I am putting an LS2/T56 in it right now and will drag race it with slicks. I have autocrossed it with BFG R1s, so I ask a lot of the old, tired sheetmetal. The driver side door won't shut well with the tires on the ground, but it shuts fine if I put it on jackstands positioned on the frame rails close to the middle of the car, so I must have some amount of chassis flex. I'm planning on continuing to beat the tar out of it inspite of the chassis damage I have. Anybody ever had a chassis snap catastrophically-I don't really know? I don't expect to lift the front tires with only 400hp and no nitrous, so I should be fine. Next major component to be replaced WILL BE the chassis tub, and I plan to do some serious strengthening with an integrated non-SCCA-legal cage before swapping all my components over. The windshield frame is just so frail-that is where I plan to concentrated. I won't be reinforcing to improve performance, rather I just hope to keep the paint from cracking and compromising my tin due to rust in stress areas. That's my 75-cents on the need for chassis strengthening. Good luck. -

Weber jets??All who live for their triples please read this
RebekahsZ replied to datfreak's topic in Nissan L6 Forum
I ran 32 venturis in my Dellortos to get it running right. I even had a set of 28s on hand just in case that didn't cut it. I think most of the kits were sold with verturis too large. Unfortunatly, none of the parts interchange with Weber. I think you are doing the right thing to down-size your venturis. -
Rossman, where did you get those bus bars and fuse blocks?
-
I trashed all that stuff-I hope it works. We like global warming in Alabama and have no safety inspection or smog inspection. Smoke a doobie and you wont care either (that's a Colorado joke). Give me liberty or give me death!
-

how much HP can a stock 240z frame take?
RebekahsZ replied to logan1's topic in Gen I & II Chevy V8 Tech Board
About 150 hp/150 tq. The Z-chassis is a noodle. Add 40 years and it is a pretzel. If you drive it hard or soup it up, it will crack at the a-pilar and b-pilar and at the weld between the rockers and the quarter panels. I just let it crack. -
JMortensen-I'll be ordering axle shafts from you, may not wait for the group buy just to save $50-I'm in way over that! Do you have a link to your campanion flanges you recommended? Finally, anybody got any help for me on replacing the end-cap?
-
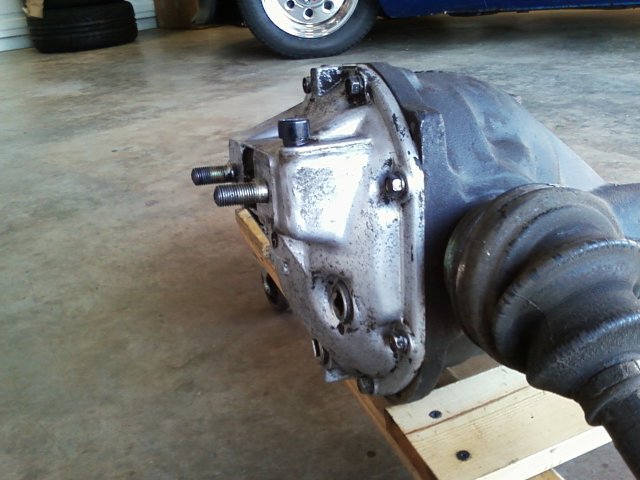
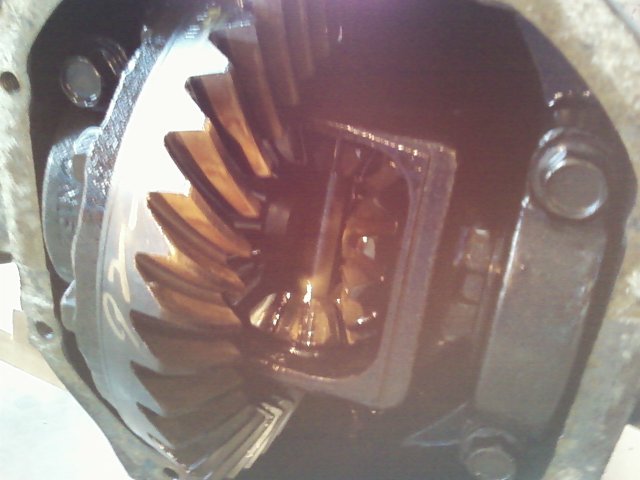
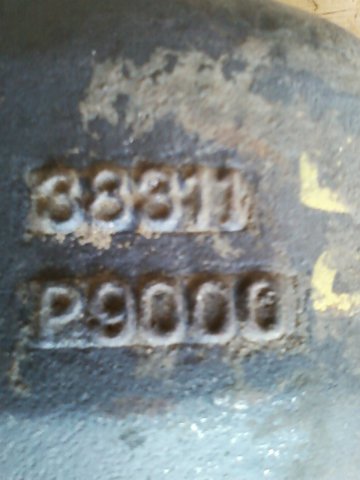
I got this R200 with axles as a gift from a friend (Jacob1971). It is reportedly from a 1988 ZX Turbo. We were hoping it was an LSD, but alas it is not. First, the diff: The ring gear and spiders look in good shape, and the unit is tight. The ring gear does not show a ratio, but it has 39 teeth. The case has 6-13 in yellow paint on the case, and the ring gear has 8-92 on it handwritten in yellow paint or wax pencil. There is some really small print (numbers and letters) stamped on the ring gear if you want me to post that. Is this the correct cover to allow bolt into a 240z with a 280z mustache bar? What ratio is it likely to be? Bottomline Question: Is this a good platform to send to John Coffey for him to but one of his CLSD units into (that is my plan)? Second, the axles: Are these a good model to use? (I know there are 6-bolt and 3-bolt vesions of the CV axle). Is Modern Motorsports the only supplier for 280z stub axle compatible companion flanges (have read posts with trouble getting product from MM)? Can anybody walk me thru the procedure of "flipping the carriers" and cutting off the ends of the shafts to shorten these? I haven't seen a description of the procedure that is fit for an idiot like me. I need a new end cap for one axle (the one that cam with it is all domed out, kind of like it exploded out of its place, although there are no signs of someone prying it out). Anybody got one or a source? When inspecting the axles, what am I looking for in terms of signs of wear? Thanks, Keith
-

Wheel Show! Post your pics of you wheels
RebekahsZ replied to k3werra's topic in Brakes, Wheels, Suspension and Chassis
Even after you mount those with screws, you should leave the tape on them-kind of looks cool with the Ratsun scene that is taking off. They don't call it "racer tape" for nothing, and in the Army, we called it "100-mile and hour tape." It's like tape-on horsepower! -
1 tuff z- Make sure to clue the forum in on the need for bigger wheels with the Silver Mine kit, also, can you address e-brake function with the Silver Mine kit? I think most of us who try to do a "simple disc brake conversion" quickly gain a lot of respect for the engineers who designed the original system. I really appreciate all the time you spent advising me on my brakes.
-

Wheel Show! Post your pics of you wheels
RebekahsZ replied to k3werra's topic in Brakes, Wheels, Suspension and Chassis
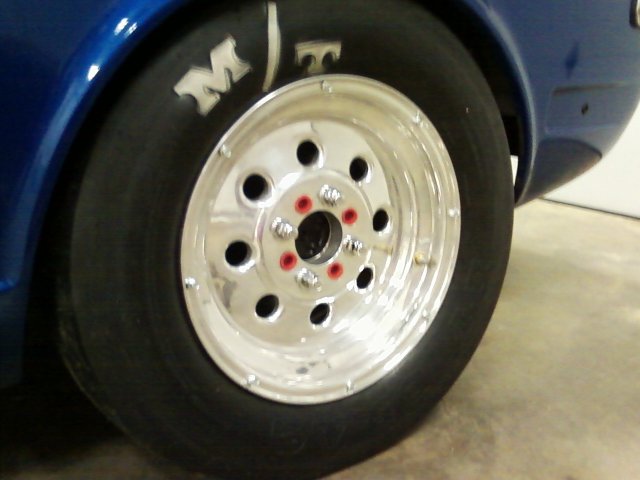
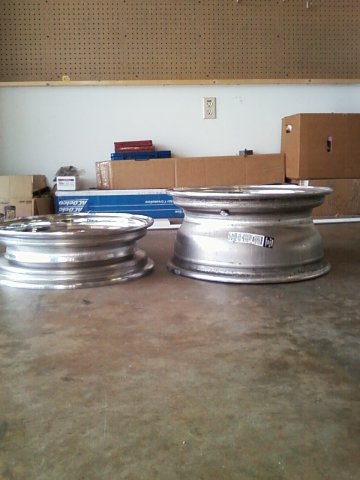
Drag setup. Weld Draglite. FRONT: 15X4 with BFG 155/80/15 gives 4.5" tread width. REAR: 15X7 4.5" backspacing (4.75" backspacing would be better) with MT ET Drag 26X8.5X15 tires (8.5" tread width) with tubes and screws. Car has un-flared, un-rolled fenders, but has coil-overs with camber plates tilting the tires in a bit to clear the fenders safely. Hope to install AZC rear LCAs to pull bottom of tire under to reduce negative camber while maintaining fender clearance. That is going to have to be enough tire for me. -

coil over swap/conversion questions
RebekahsZ replied to afbrian13's topic in Brakes, Wheels, Suspension and Chassis
You HAVE TO section the struts if you lower the car more than about an inch. Tomorrow, email johnc and tell him what you want to do and get a price quote from him for: 1) Struts appropriate for coilover. 2) DP camber plates 3) Ask john what length and rate of coils to get. 4) Ask him what he will charge you for a kit. Be honest with john about your plans for your car and how you plan to use it. Go to Speedwaymotors.com and price 2-1/2 springs and threaded collars with lower seats (but check with john, as he may have his priced competitively). If you buy these parts, you have everything you need. The upper seat and the DP camber plate is all one piece. You eliminate the stock top insulator, which lowers you an additional inch! Call john if you are really serious, he doesn't like tire kickers, but he is really helpful and won't steer you wrong. When the parts arrive, start cutting and welding. Don't start until you have the parts. The diameter and contours of the strut rod must fit the spherical bearing of the camber plate-that is why I recommend buying them together from John. Otherwise, you may have to have machine work done, etc. All the other parts don't really matter. You could probably get away with cheap shocks for what you want to do, but you could run into imcompatability problems mating them to your camber plate. You need to be a pretty good welder to do this job. You will be cutting a tube, rewelding it STRAIGHT and hoping to insert a strut insert into it (I bought my struts already sectioned from a retiring road racer and I still had to use a rheemer to get slag and excess weld out of my tubes-it was a total pain. As I said, if you are not prepared to cut your tubes, do the 1" cheap lowering springs and go no further (stay away from progressive springs). My opinion on urethane bushings-not worth the trouble. Keep stock bushings except for steering rack bushings and plastic steering coupler, mustache bar bushings and RonTyler front diff mount. Replacing all the bushings is a HUGE, miserable job. Heck, getting the steering rack bushings in is tough enough. Do not disturb your rear spindle pins. Drop the whole suspension and work on the tubes with the lower control arms attached. Struts from cheap to expensive: KYB select-a-ride, Tokico Illuminas, Koni. John may only have camber plates for Tokico and Koni. I don't know why we all want "adjustable" shocks-I never adjust mine. The advice I have given you will save you a month of pain. With a tight, lowered suspension, your z will be more responsive and a lot more fun-you can get a ton of fun from it even with your stock motor. It will seem like you put in a new motor. The difference is like night and day. You can start autocrossing now, you don't need to modify your car to start autocrossing, although some new or used 225/50/15 tires on 81-83 280zxt swashtica wheels (or something similar) will really help. If you are still running stock 5 inch rims and 75-series tires, a set of wheels and tires will totally transform your z-car. Other easy improvements that really help include smaller (cheap Grant brand-$50) steering wheel and new plastic shifter bushings ($5). The 76 280z is a good platform for an LS swap later, much better than my 240z. By then, I should have a LS swap "how to" cook book available to forum members. You'll be able to use it as a base and incorporate any new ideas you come up with. -

coil over swap/conversion questions
RebekahsZ replied to afbrian13's topic in Brakes, Wheels, Suspension and Chassis
When you lower a McPherson strut-type suspension, you lose suspension travel. Bottoming out a strut feels terrible and I actually started developing stress cracks in my roof after I cut the springs on my 240z (20 years ago). It bottomed out constantly and became no fun to drive. As part of most coilover conversion, you cut a section of length out of the strut tube-this restores the suspension travel that you lost when you lowered the car. Because you are shortening the strut tube you need shorter inserts. Putting the stock front insert in the rear works great, but the front needs something different, either from a VW Rabbit or an MR2 (I don't know what years). A coilover kit does allow you to change your ride heigth anytime you want, but don't forget, you need to adjust toe-in after making adjustments in ride heigth. It takes me about an hour to raise or lower my car, but until now I have always had to take it to a shop to have the toe-in adjusted for $35. I just bought a toe-in guage, but the last time I had the car aligned (a couple times a year), the dude tightened the lock nut so tight I can't get it loose to adjust, so I guess I'll spend $35 one more time! Anyway, coilovers also allow you to change springs (rate and length) with relative ease, and aftermarket springs only cost about $50 each, so it makes it much cheaper and easier to play with your setup. For example, after now adding camber plates, my car is really too low even with the coilovers adjusted as high as possible, so next time I think about it, I'm ordering new front springs in the same stiffness, but 2" longer-no big deal. Once I have my new springs, it will take me about 2 hours to change them out. You need to have your strut inserts on hand when you cut down your strut tubes so you can cut them down to the proper length (it would suck to cut them too short). Make your life easy and just order your strut inserts from Betamotorsports and talk to John about what you are doing so that all your parts are compatible. You can get threaded collars and springs from Speedwaymotors.com pretty cheap-it looks like that is where Ground Control got the parts that they sold me after marking them up 100%. One of the issues with a coilover system is the top spring seat. Plus, lowering makes you have positive static camber (and lots of postive dynamic camber) in the front and increased negative static camber in the rear, a combination that increases the understeering tendencies of the z-car. For a lowered z to handle with neutrality, you need lots of static negative camber up front and some in the back (search for JohnC's alignment recommendations-he's just plain right). Go ahead and get DP camber plates from John at BetaMotorsports.com because they bolt right in and have an integrated spring seat, so in one part you get spring seat, camber adjustment plate, and steering bearing. The strut inserts and camber plate must be compatible (different brand strut inserts have different diameter rods and thread sizes), so consult with John before trying to put your kit together. You also need to know what you want in terms of spring rates before ordering. There is much debate, but you gotta go stiffer than stock (whatever that is). The aftermarket "lowering springs" people sell can't seem to quote a specific spring rate-so who knows what you are buying. You gotta go stiffer than stock because when you are lower you really need to go more stiff to keep from bottoming out and breaking things. I am very happy with 225# front springs and #250 rear springs. A good rule of thumb is 50# stiffer in back. Avoid "progressive" springs at all costs. My rates are a good compromise between street and track. If I start drag racing a lot, then I may go a lot stiffer on the rear to stop the car from squatting on launch-again, it will cost me $100 and about 2 hours to do the whole mod. A coilover system is the very best mod I have ever made to my car-even more value than installing a V8. A z-car is really nothing special until you coilover it, that is really all they did in the 1970s and they took the racing world by storm! I recommend you have at lease $1000 on hand before starting this project and it may even take $1500 before you are finished-but I say "Go For it." You don't need to do any searching, I just gave you everything you need to know. There are a lot of guys who all have their opinions but I just gave you the bottom line. PM me if you need more help once you start. -
Looks GREAT! I am not familiar with the caliper you used, but I used a Maxima caliper and oriented it hoizontally as you did. Be prepared for trouble when you bleed this system, just as a heads up. You may be fine, but if you can't get a firm pedal, remove the rotor and bleed it while holding it at a variety of angles, using a block of wood as a mock-rotor, in order to make sure all the air comes out. The air will rise to the top. Since your bleeder screw is at the top, you should be fine, but just in case be prepared to flop it around a little. Also, watch for brake line to half-shaft clearance when you go to full squat of your suspension. Mine is close and may be a problem under hard accelleration, and I may have to move the bracket that holds the hard line at the frame rail. I also had trouble with the e-brake cable hitting the strut tube and the mustache bar and I had to spend a lot of time working to get the angle just right. See my Hydraulic Drifting Handbrake thread from earlier this year for similar arrangement. Really nice work. You can PM me if you run into any snags.
-
I would kill to have started with such a great car. When I bought my car it had 5 different coats of paint on it and a cookie sheet for a driver's floorpan, held in with caulk. Nice purchase!!!
-

LSx s30 Longtube group buy thread
RebekahsZ replied to 1 tuff z's topic in Gen III & IV Chevy V8Z Tech Board
He quoted me $225 when I paid him for the basic setup. Let's not complicate this. $225 is the going rate and I don't want any delays. I sent him an email asking him when I could send him some money, but he hasn't had time to reply. Please just deal with him directl-if we get really complicated we may never see our headers. -

LSx s30 Longtube group buy thread
RebekahsZ replied to 1 tuff z's topic in Gen III & IV Chevy V8Z Tech Board
Wow-1tuffz, those are the best prices I've seen. I may splurge for Stainless 100%! If you have any, please send me some pics of your exhaust system. You can send them PM if you want. Thanks. -
This is a great thread. When I changed to an F-body alternator, there were tons of truck alternators at the scrap yard, but only one F-body alternator, which I had to have rebuilt. Good to know that the rear bracket is not needed. That opens up lots of alternators to us. Thanks for keeping it real. I have had the same problem with a tall hood (she is 5'2"). When Rebekah drives at the track, she complains about the hood scoop. I fix it with a pillow in her seat.
-

Megan coilover ride height
RebekahsZ replied to nissun1's topic in Brakes, Wheels, Suspension and Chassis
If your springs are fairly stiff (even just 200# or more), you don't need tons of travel, you just need "enough" so that the strut isn't bottoming on a regular basis. So long as the strut isn't bottoming out (and you will feel that), you won't hurt anything. If you want to go lower than Megan has pre-set you, you will just have to adjust as needed. The beauty of coil-overs is that you can customize ride height yourself-I wouldn't worry about any warranties on racing parts-you are kind of beyond warranty mentality when you start mod-ing your car this way. Racing parts break sometimes, it is just a fact of life when you are "abusing" your car, and we shouldn't hassle the folks who bring us these products; they should all be purchased and used from a "buyer beware" standpoint-that is really what "for off road use only" means. Warranty statements are really just legal disclaimers for the general public who are out of touch with reality and living in a "production car" world, expecting other people to solve all their problems. You are now on a different plane of existence. I say "go for it" and just baby the car over deep dips and train track crossings. Drive it hard as you like on smooth pavement, like a drag strip, autocross track or a road course. If you drive it alot in town, a few months after you lower it to where you "think" you want it, you will be bringing it back up a few inches so that you can get in and out of your driveway, over speedbumps at the grocery, etc. I had to raise mine just so I could get it onto a trailer when going to the track. It is even a ***** getting a lowered car onto a maintenance rack to change the oil, fix a crack in the frame, fix an exhaust hanger, etc. Have fun, I hope I've giving you the courage to finish up.

