Search the Community
Showing results for tags '240z'.
-
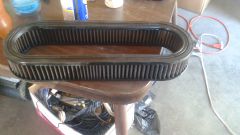
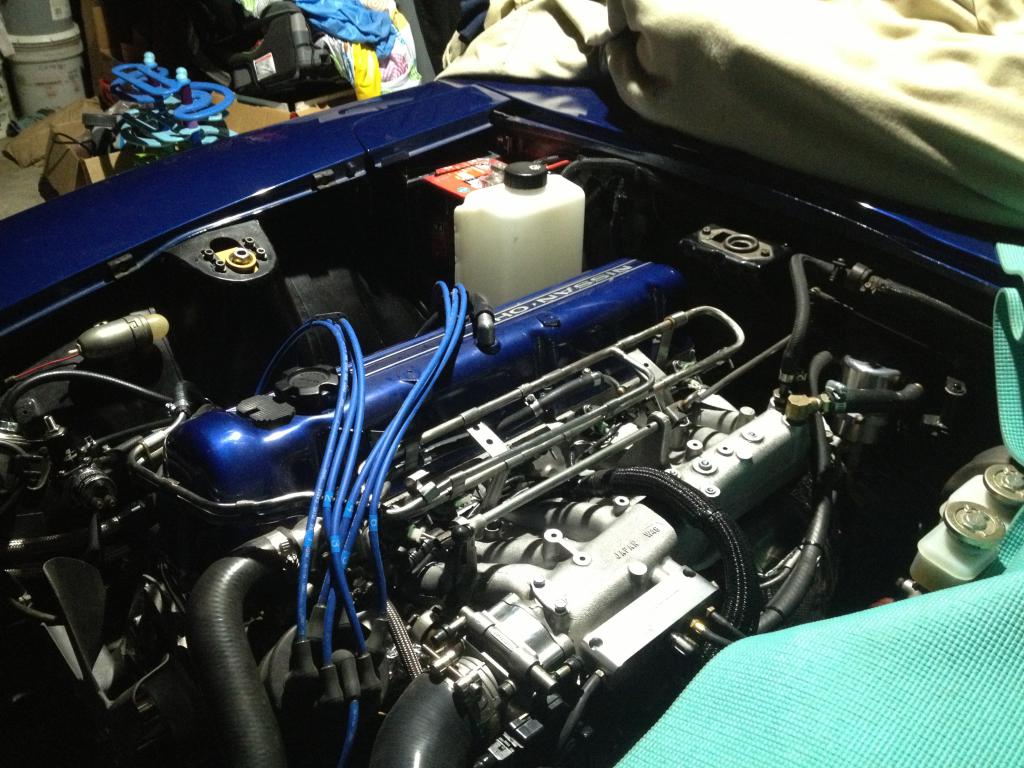
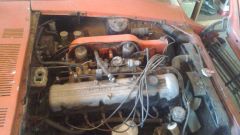
From the album: 71 240z
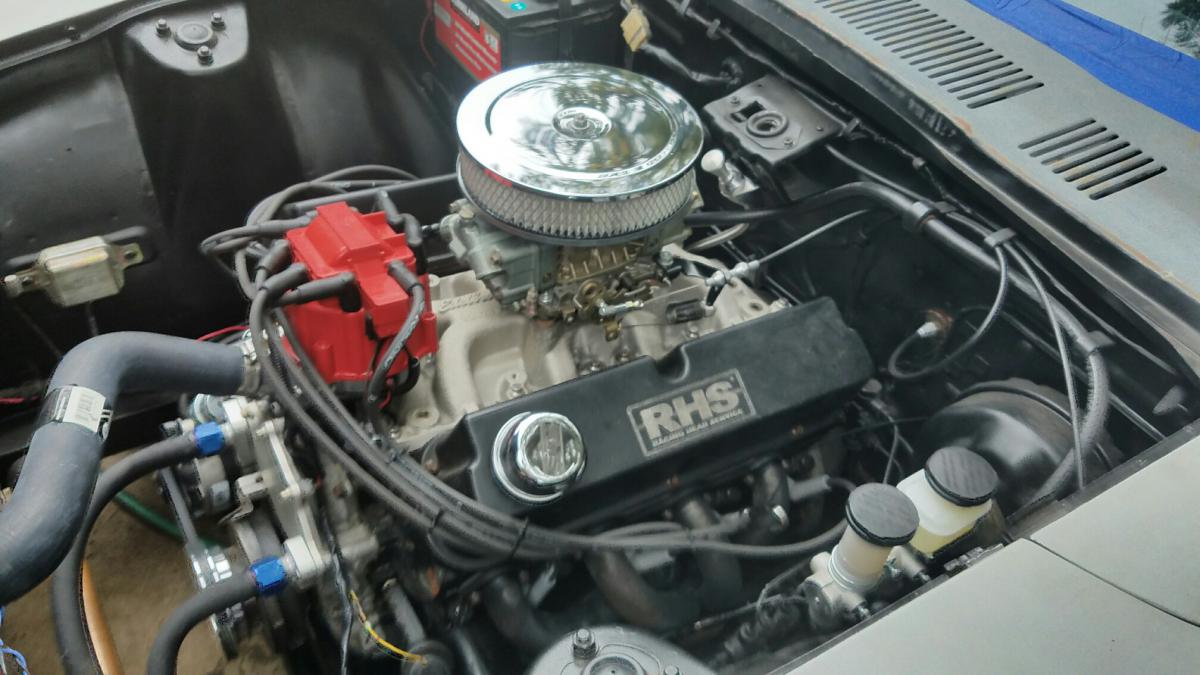
I discovered that my Z came with a K&N air filter. -
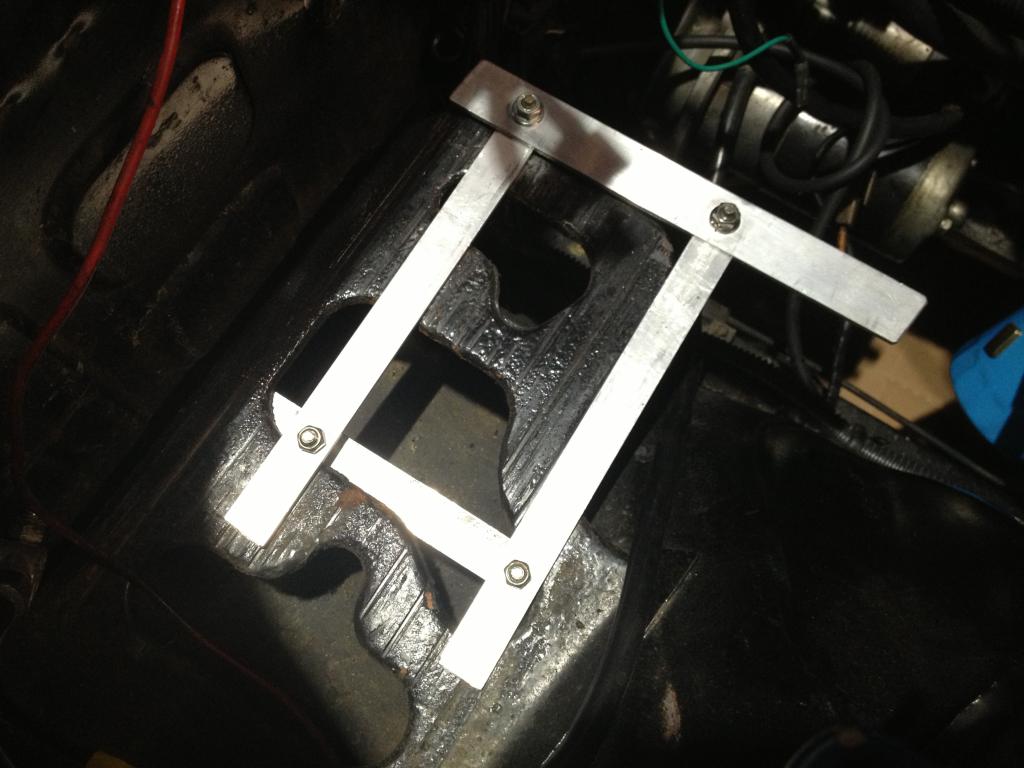
From the album: 71 240z
-
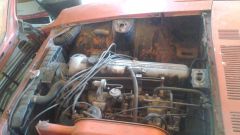
From the album: 71 240z
-
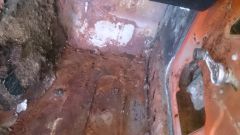
From the album: 71 240z
-
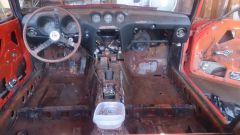
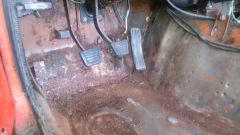
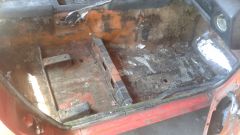
From the album: 71 240z
Pulling out old carpet and sound deadening. -
From the album: 71 240z
-
From the album: 71 240z
-
From the album: 71 240z
-
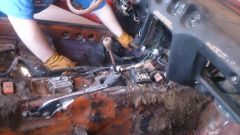
From the album: 71 240z
-
From the album: 71 240z
-
From the album: 71 240z
-
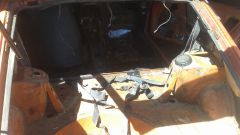
From the album: 71 240z
-
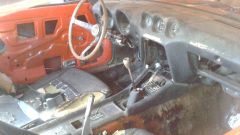
From the album: 71 240z
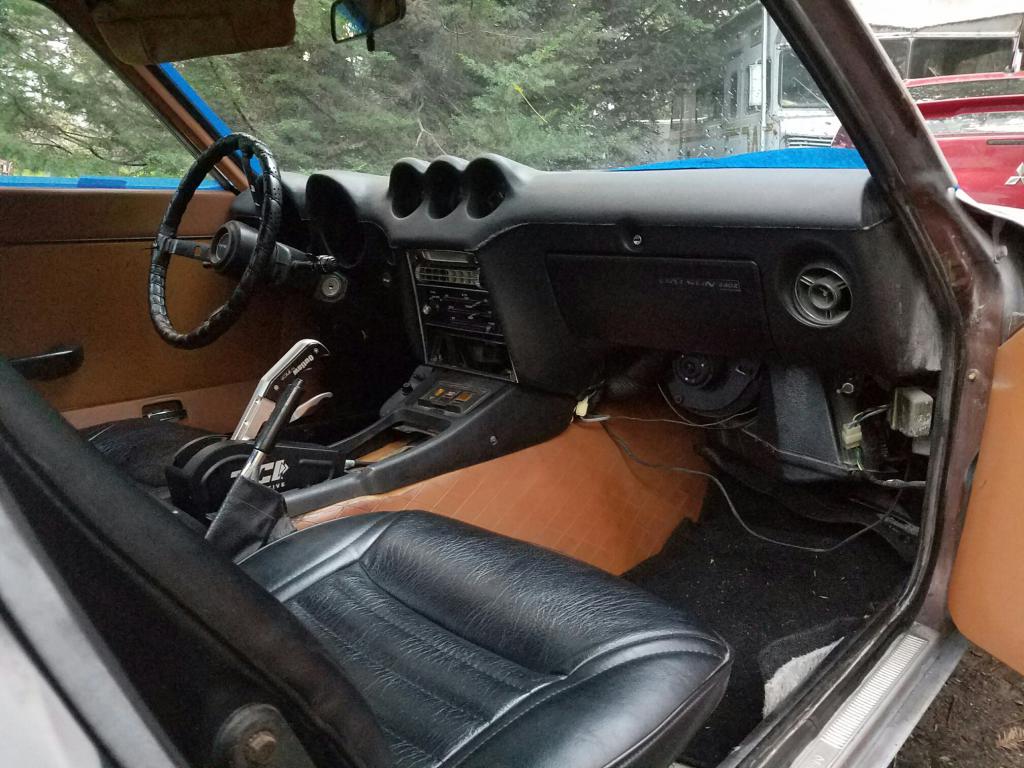
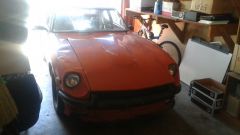
My 1971 240z. -
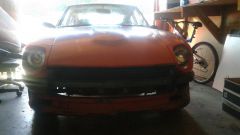
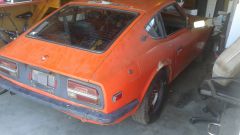
From the album: 71 240z
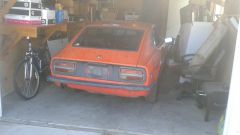
My 240z in her new home. It's a little cramped but I'll be taking care of that soon. -
From the album: 71 240z
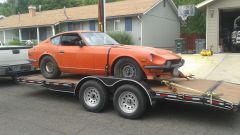
I picked up my new 1971 Datsun 240z this weekend 06/17/2017 and getting ready to bring her to her new home. -
I have a 1972 240z, and the guy I bought it from got a viper security system and a beefy sound system wired in (very poorly might I add). I need to rewire a lot of the engine bay and the wiring diagrams available are not helping, a lot of wires are spliced and replaced that don't match up or are just taped off and lead nowhere. If anybody has a diagram of all the 10 pin connectors that are located underneath the passenger side of the dashboard it would help a lot, or if anybody has any self made diagrams that are at all related to engine bay wiring please post them, anything might help me out.
-
Version V1
48 downloads
Simple roll center calculator for the Z car based on measuring the angle of the control arm. I tried to list all the definitions and assumptions. Please drop me a comment if you see any errors or improvements. I checked it against my professional software and got the same values when using the same inputs so I think the math is correct. -
 Fellow 240z Gearheads, I am looking to trade a semi complete 240z with a SBC for an extremely clean and professionally done rotisserie 240z shell. That means, all I want is a super clean and primer(ed) body, doors, hood, and ATTACHED interior dash/electronics/center console. If your car is already a high glossy black or super dark cherry red with high gloss, then that is ideal for me. I will do a straight trade if yours has all the normal parts but just not installed or partially installed. If its missing parts then lets talk about it. My 73 240z has a Chevy 350 engine already in it and it is pretty much ready to go, but it needs a bit of work on it. This car is perfect for a reasonably good mechanic with access to a lift as most of the work needed requires it. I bought the car some years ago to test how a 240z Chevy 350 conversion would run before going to a more serious setup. I am now ready but want to move to an LS7 conversion instead which will require new mounts and tranny setup. So I want to start with a very clean base. This car is ok as a daily driver and possibly a go fast daily car. I need something a little more show ready and super solid for a strip and road race car. Here are the problems with it. The flexplate (gear that engages with the starter) needs replacing. It also needs the timing set. When it ran it was pretty strong and it smoked just a bit (I am assuming because of the tuning issue). I also started replacing the transmission cooling unit but did not complete it. It will also need a radiator flush. Lastly, I have two starters for the car. One is too big (Chevy regular starter size) to fit on the custom headers. The other is the right size but I think the flywheel issue may require another. I installed a brand New Holley Street Dominator Carburetor, distributor, custom exhaust, Borla muffler, and custom headers. If interested send me a note to lvto2000@gmail.com or just contact me here. BTW - if you don't live in my state then your parts car needs to be able to be shipped or if you live close by (within 200 miles of Alexandria Virginia) then I can pick it up.
 -
 Hello everyone on HybridZ! First a quick introduction, as this is my first post here on the forums. About a year ago, I bought a 1971 240Z which I bought from a gentleman Tecumseh, Oklahoma (right outside of Oklahoma City). I don't know much about the car's history aside from the fact that it sat at the gentleman's house since about 2008 because he thought that the engine was blown. Well long story short, the carbs were way out of tune and the distributor was turned about 180 degrees. Now a year or so later I haven't been able to get much work done, however I am in the process of stripping down the whole car, bagging and tagging everything. Being that the car will hopefully be completely stripped of all of its parts soon, I am looking into fixing the rust that exists on the car. The floor pans are long gone as well as the entirety of the passenger footwell all the way up under the cowl, just on the passenger side fortunately. The other hotspots per se are the driver's side a pillar which has a large rust hole, and a few other spots here and there. I am wanting to remove all of the rust that I can in order to ensure that my long-neglected Z doesn't have rust issues in the future. I plan on having it media blasted and epoxy primered (to prevent rust until I can have it painted), I was quoted about $1500 for the media blasting and primer work. I plan on replacing the floor pans, the frame rails, the rust hole on the a pillar, battery tray, etc. Now for my actual question, thank you for staying by the way. My main question is, in what order should I go upon repairing the rust and body flaws? Before or after the media blasting and primer? I've got a lot of work on my hands and I appreciate any advice that you've got. Thanks!
 -
Hey all, I’m a Datsun newbie! Always wanted a 240z/510 project and finally made it happen over the weekend. I picked up the 73 Datsun 250 miles away from home with the “guaranteed to make the drive” from the owner – which it did not but we’ll get to that later. 1973 Datsun with a SBF 306 engine with GT40p heads, single plane intake, 750 Holley HP carb, speedway headers, 3” exhaust, manual valve-body c-4 transmission with SFI bell housing and 9” stall converter, TCI shifter, R200 posi rear end, Meziere water pump. I realize the 750 carb is probably too big, I think its what the PO had around and tuned it work. Motor seems to run strong, starts up pretty easily from a cold start and sounds like a beast. I however am a complete V8 newbie. Here are some pics of the car/engine. I ended up having to tow the car after 40 miles of driving as smoke started to fill the cab, when I pulled over it seemed like transmission fluid was dripping onto the exhaust. Upon examination we found the speedometer (speedometer and tach not hooked up) cable opening was closed with a rubber bushing and a wingnut. I tightened up the wingnut and have taken it for some short trips and it has not leaked yet. So that seems to have fixed the problem. I am not a huge auto guy and would prefer a 5-speed. I don’t even know where to start with wrapping my head around what that would entail. I have 2 large questions at the moment. The first is the transmission which has no transmission cooler – and it not hooked up to the radiator for cooling – is this a problem? The second is the flywheel – it looks like casing was trimmed back for some reason and the flywheel is exposed – is this a problem? Thanks for any help.

-
Would someone be so kind as to look for me and tell me which side the wiring comes out of for the steering wheel, left side of it or right side of it, that would be super helpful. I'm having trouble getting the reach I need and I think I installed incorrectly.
-
Hey all, I took my 240Z to the track last weekend, and because it was a bit wallowy at high speeds and had a lot of body roll, I'm now looking into changing up my spring rates. Current setup: 200 lb/in front springs 22mm front sway bar 250 lb/in rear springs no rear sway bar pretty thin RCAs on the front (18.5mm) lowered somewhat but not a ton 205/55R16 bridgestone RE-11s Koni yellow single-adjustable (rebound only) race shocks -2.0º camber front and rear 2.5º caster (can't run more until I modify bodywork or relocate strut mounts rearward) 0 toe front 1/16" total toe in rear Next steps I was initially thinking of: put thicker (30mm) RCAs back on increase spring rate to 300 front, 350 rear (or even 350F, 400R) add a rear strut brace (front has a triangulated strut brace already) However, I was reading about tender + main spring setups and they seem really interesting (To be clear, I'm using the same terms Eibach is here: helper springs: soft, just keep main springs seated at full droop. tender springs: have sufficient spring rate to impact driving under other conditions; I've noticed that some people use these terms the other way around). It sounds like it could provide a good compromise between a car that corners fairly flat and doesn't move around to much on load transitions, but still has higher ability to absorb bumps well. One setup I was thinking of was: 350# main springs in the front, with #300 tenders, yielding an ~160# effective rate until the tenders reach coil bind. And something similar in the back. But, I also see lots of downsides: it seems like with the simple shocks I'm using, you'll only be valved decently for either the soft or the firm part of the range. it seems like this setup would actually be worse than my current setup for high speed stability by reducing the effective rate in those conditions. the bump absorbing ability would only be improved when the suspension isn't already compressed, so it does nothing to help when cornering near the limit and hitting some uneven pavement, i.e. conditions where you actually want this. the sudden transition from 160# to 350# spring rate after an inch or so of compression sounds like a great way to unsettle the chassis. Anyone here have any experience experimenting with a setup like this? It sounded good on the face of it, but I'm not convinced it can work. But if it can't, then why does these setups exist? Is it just another compromise between comfort and handling, or are there actual rear-world handling benefits from a setup like this? My goals for the car are: 1: fun to drive on back roads, and okay to drive on regular streets and highways. and that performs well enough on the track that it's fun to push it to its traction limit (which it wasn't really with the high amount of roll and floatyness I got last weekend) doesn't have be super comfortable on our pothole ridden California highways, but I do want to be able to drive it fast-ish on less than perfect surfaces, so it should be compliant enough for tires to remain in contact with the road most of the time. Some pics to show the amount of roll:
-
Been working on power steering. I decided on a 2004 Subaru WRX steering rack. I did some measuring to make sure everything would work. First I needed to figure out how much to cut off the steering rod. In steering, the pivots are the key to getting it to handle correctly. The stock pivots on the 240z steering rack is 616mm. The WRX rack is about 634mm. Some individuals use older Celica inner tie rods with the stock Subi outers to get everything to fit, but my rack is the "late" Subi rack. The threads are larger, M16 x 1.5, on the "late" Subi rack and the Celica rods didn't fit. I did some online research and found that 2000 Hyundai Sonata rods had the correct length and thread. The added bonus is that the inside of the Hyundai rods are vented and stepped to allow for more steering angle without shortening the outer tube of the steering rack. The step did have a lip that had to be ground down though. The step on the Hyundai rod is 5mm which adds 10mm on the travel on the steering. So, while I cut 18mm of the rod, it reduced the travel by 8mm. Stock 240z travel is 120mm, Subi is 132mm. Now the travel is around 124mm because the measurements are not perfect. So I added a little travel, hopefully it doesn't bind the steering knuckles. Here is a picture comparing the shortened Subi rod vs. the 240z rack. The final measurement was 576mm for the steering rod. Then I mounted the subframe on the engine to check clearances . In this swap, the engine mount perch has to be clearanced to make room for the angle of the Subi steering shaft. Also, the subframe has to be clearanced for the rotary valve and lines. Also checked the clearances with the A/C compressor mounted and to plan the pressure line. I cut the end of the steering shaft off to weld the Subi U-joint to the 240z steering shaft. I just shaved the weld and pulled the shaft out the Subi joint and the 240z shaft diameter was exactly the correct diameter to push inside and weld. I think it looks better that the stock Nissan weld, and that lasted 45 years. Hope I didn't cook the grease out of the joint when I welded it. There wasn't much smoke, so I think I am good. The stock Subaru rod ends ended up only having about 12mm of thread engagement when the alignment was roughed in and I wanted more. I did some research and figured out that 2003-2009 Mazda 6 tie rod ends are 7mm longer than the WRX ends. They are curve and have a left and right though. The taper on the stud seemed to match the original Datsun rods as well. Now I have plenty of thread engagement. I used compression fittings to move the hydraulic lines to where they would fit around the subframe. They worked out well and only one needed to be tightened up. They are 1/4 inch fittings. This is how much I had to cut out of the subframe. Metal was added to strengthen the subframe. If the engine mount becomes a problem, then I will gusset it. I used the RB25 (R33 non HICAS) pump, which is the same as most 240sx pumps. I built the pressure line out of -6AN Fragola PTFE hose with a M16 x 1.5 banjo metric adapter and the M14 x 1.5 power steering fitting for the rack. I did kinda skimp on the reservoir though and will switch it with an OEM style later. I used a 120 degree end on the rack side so it will clear the A/C pump later. Should have used a 150 degree though. The feel is great and feels about as a power steering car should. I dont have too many bumpy roads around here, so I cant fully test for bump steer. Havent felt any yet and we do have some railroad crossings that I have tried. There arent too many curvy roads either, but parking lots seem to be way more tolerable. The steering ratio seemed to stay about 2.7 and without a degree wheel to measure it, will stay "about". If there are any questions, let me know and I will ad them in the first post to help keep everything together.
-
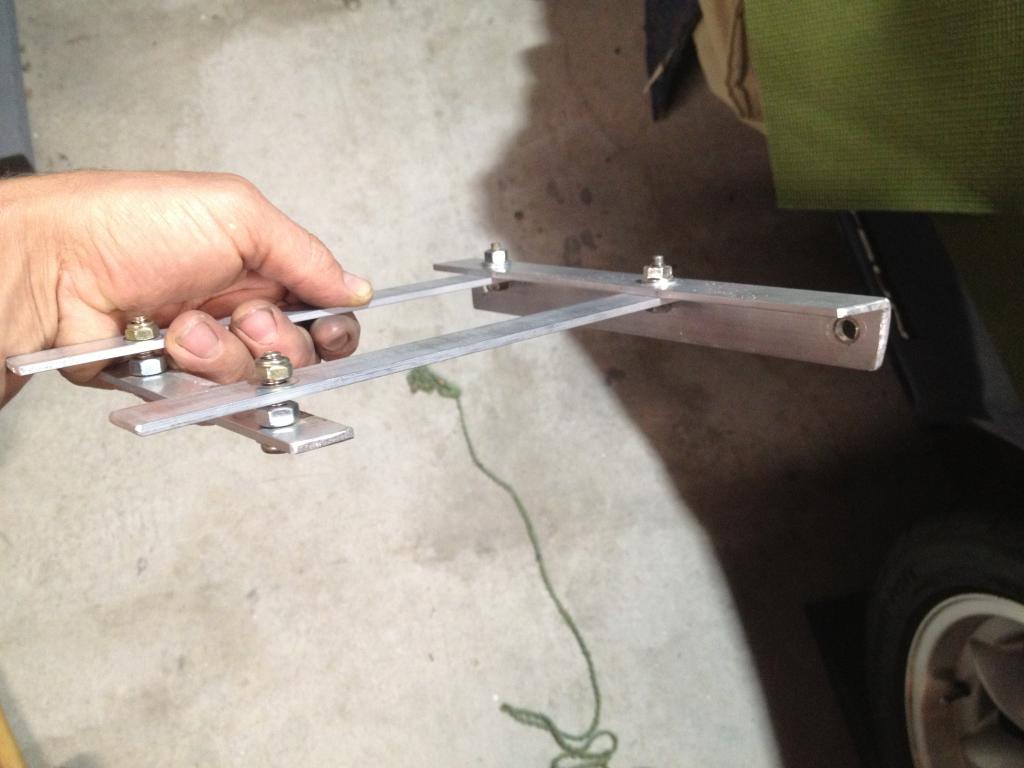
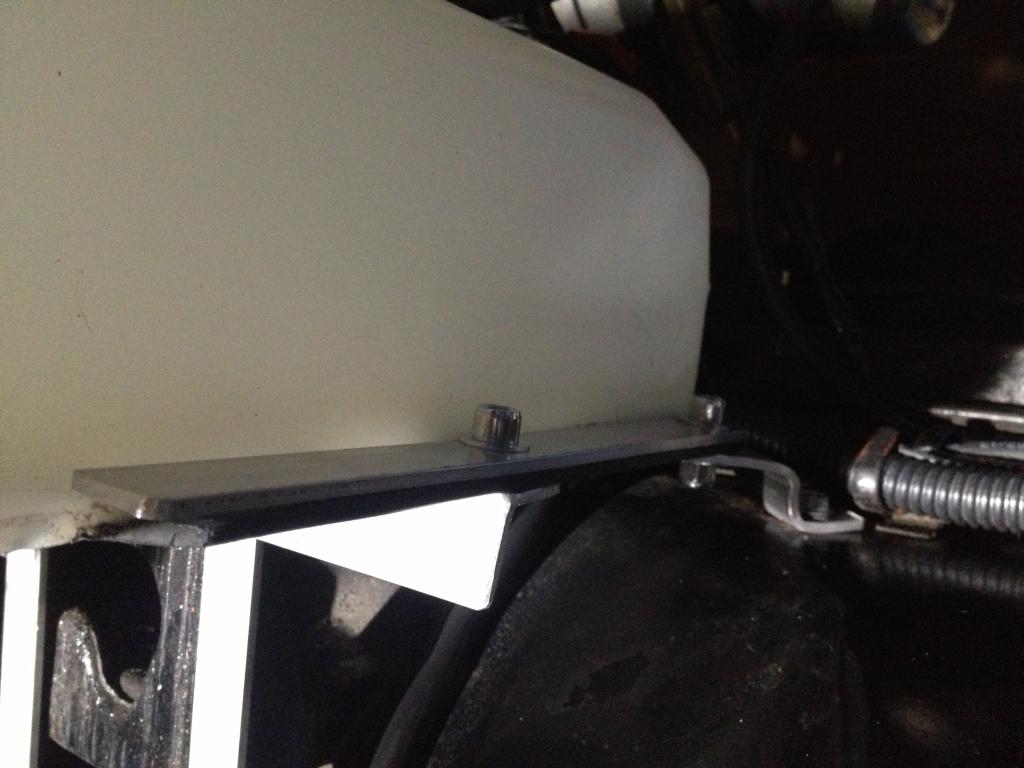
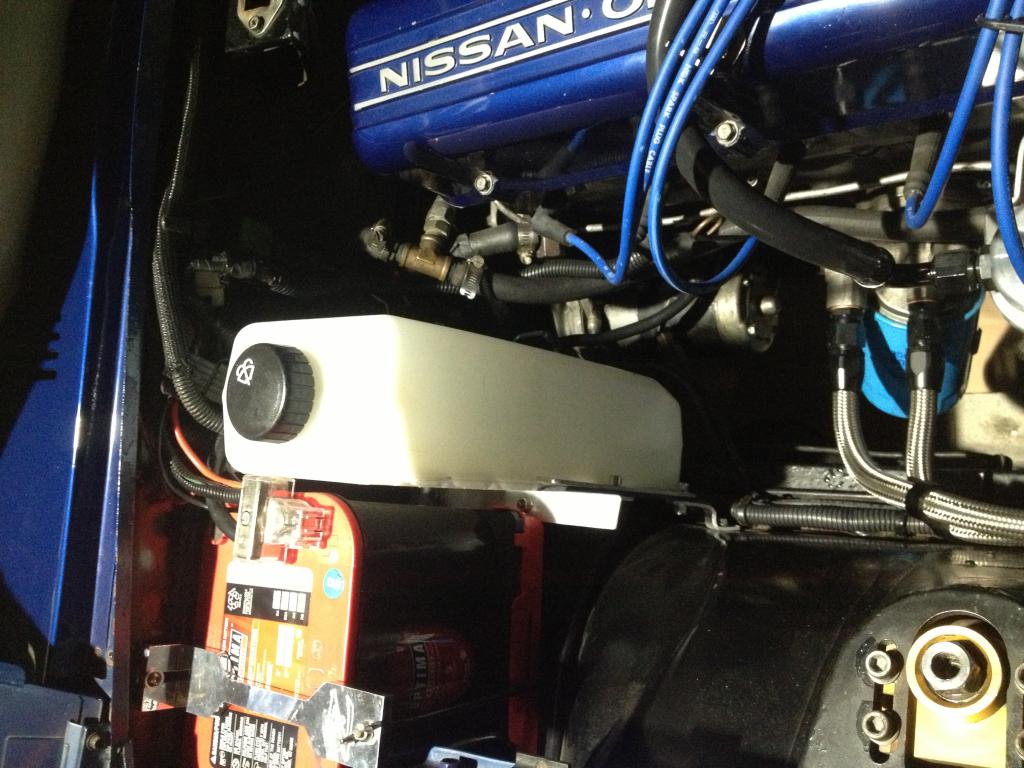
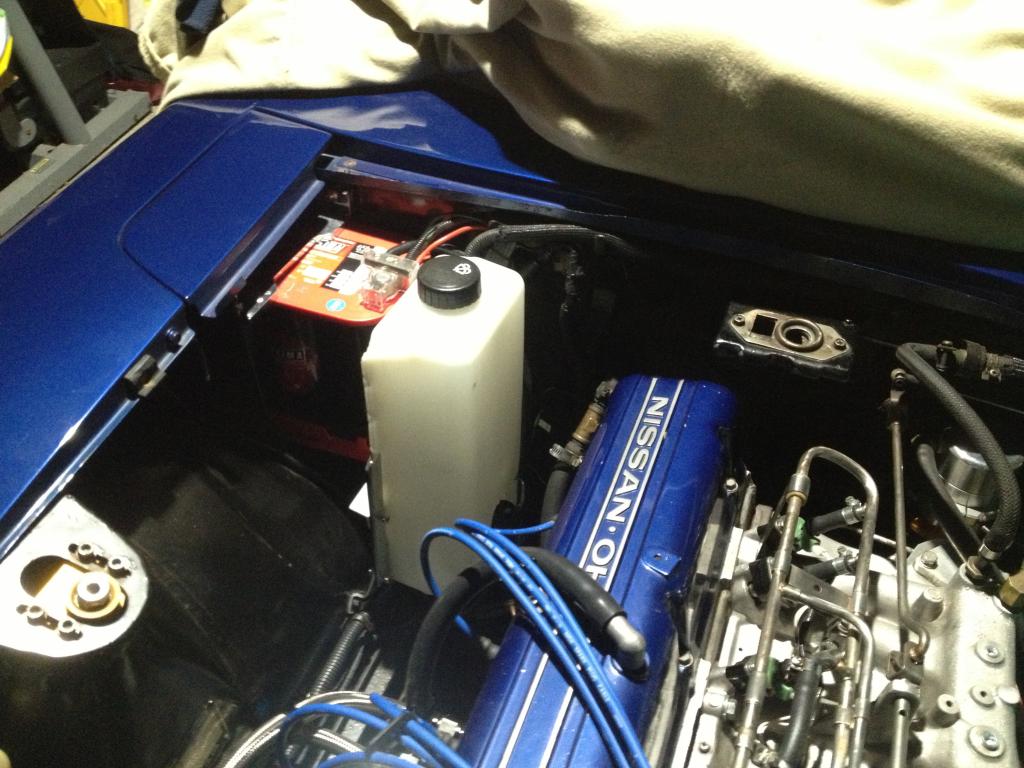
I want to share with everyone my DIY intercooler sprayer. I went to find a windshield fluid reservoir from a junkyard but couldn't find anything that I liked. Then I ran into this: http://www.midwestbusparts.com/index.php?main_page=product_info&cPath=16_319&products_id=2046 My Streetsmart boost controller controls a relay that powers the built in pump and activates at certain boost pressure or RPM. I made a bracket from cutting up a straight price of aluminum from the Home Depot and bolted it to the factory battery tray and a factory hole in the fender.The size is awesome and it fits perfectly using factory mounting holes. I have two patio mister nozzles each attached to the front license plate mounting tabs. With my setup, if I put them higher than this, the water sprayed all over the hood/engine leaving spots every where. This initially created a syphon when first kicked on as well but I fixed that with a simple anti syphon/drip valve designed for backyard misters. Theses where hard to find ironically and only found them on Alibaba Express and I had to buy a 50 pack for $10 but only needed one. Windshield washer fluid has worked the best when it comes to minimizing water spots under the hood. Alcohol would be better but washer fluid is cheap. I haven't measured the benefits yet but when I do I'll post it, I can't imagine it's not effective. It drains quickly if I set the boost controller to activate it at lower psi, slower if set to higher pressures. Same would go for RPM triggering. This same system can work with a basic switch versus using an electronic controller if so desired.
-
Hello, My name is Joey, and I am looking to start a dream project. Thing's I care about: -Little to NO rust -Title/Paperwork Thing's I don't care about: -Engine Please contact my gmail @joepez56 or via text @773-719-9133 (Please do not abuse my info, I only am giving it because I will resond faster to those)