Leaderboard


Popular Content
Showing content with the highest reputation since 11/17/25 in all areas
-
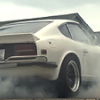
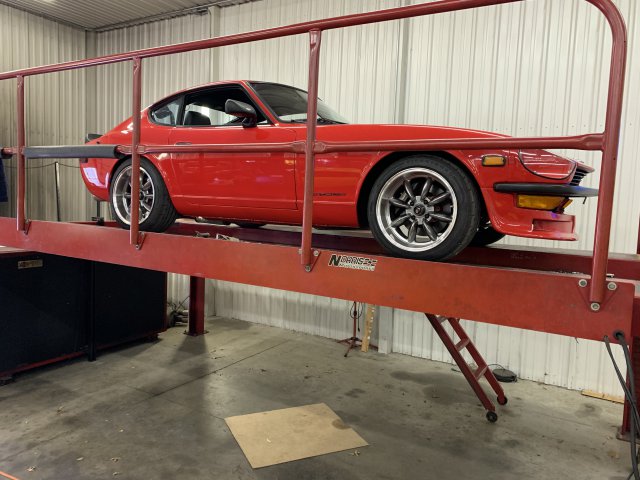
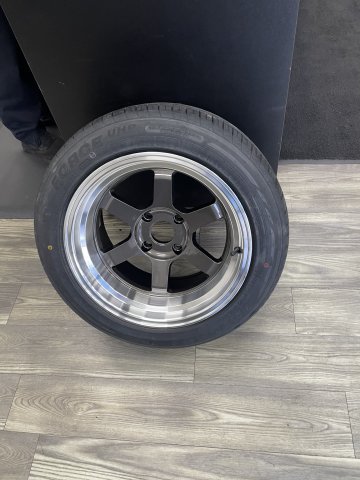
Been a while since I posted any updates. Been moving along. For the Turbo car I decided to build my own wheels. Ill CNC machine the center sections myself and have the lips and barrels spun for me. I really like the old SSR RS8 wheels but finding them in the correct bolt pattern, offset, and caliper clearance is impossible. I fould a set close, from Japan and had them shipped over. Since this car uses Z31 hubs and such, the spacing is out much more than a standard Z so I need a bit more positive offset. I dissasembled the wheels and scanned the center section into my computer and reverse engineered the shape. Next I re-assembled them and had the 245-45-16 tires Im going to use mounted. I test fitted them to the car, and close, but not good enough. This is the fist time this chassis has been rolling on its own wheels in 27 years. Its been on a cart or a lift. Felt good to see some progress now that the suspension, brakes, and cross-memeber are finally complete Scanned this complete assembly and put it in CAD. Now I have the exact shape of the tire on the rim. Cool cross section of it. Finally I scanned the side of the car, put it into CAD. Now I can adjust my wheel center offset for caliper clearance, and adjust it to work with new Lips and Barrels I will order for the proper offset and fit to the car. Having it in CAD alowed me to look at it from every angle and check all clearances, for calipers, springs wheels lip, ect. Even compressing the suspension to make sure I have fender clearance at full travel Final wheel spec is: Rear - 5 lug = 245-45-16 on 8.5" width rim- 27mm positive offset, 2.25" outer lip on the rim Front - 5 lug = 245-45-16 on 8.5" width rim - 31mm positive offset 1.75" outer lip on the rim Next I need to find some time to program the CNC and start cutting chips. But I got distracted on the NA car, so that update is next.
 4 points
 -
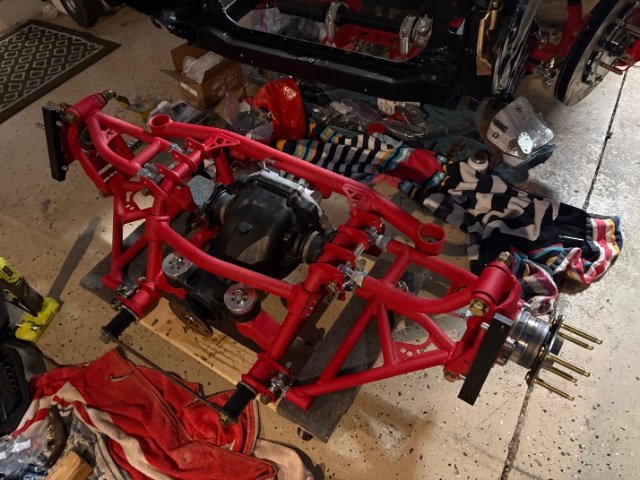
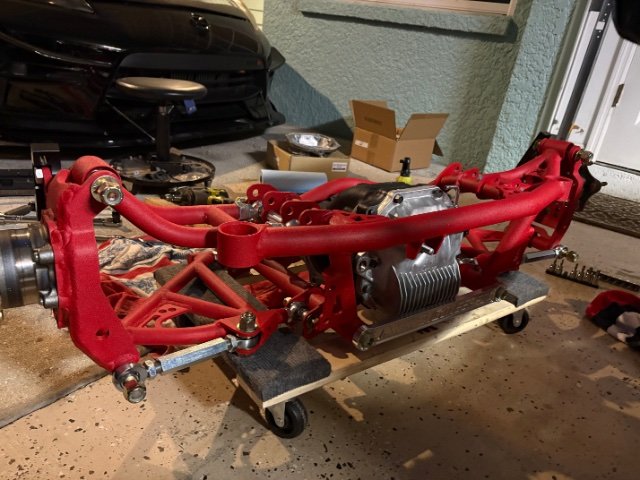
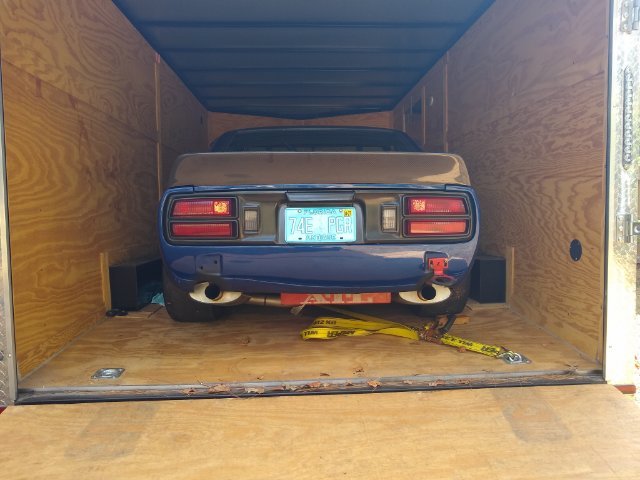
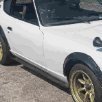
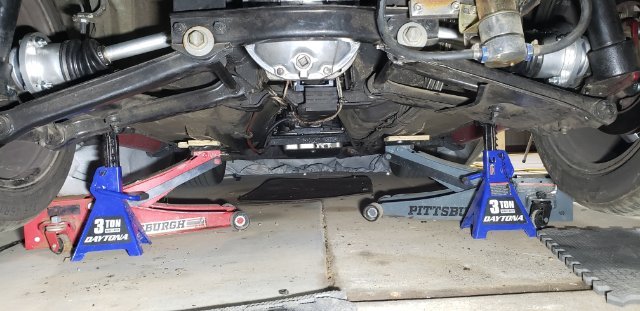
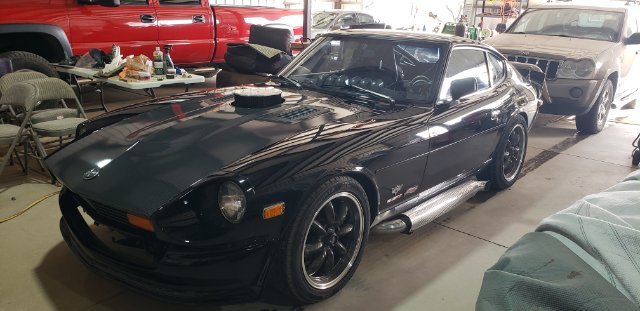
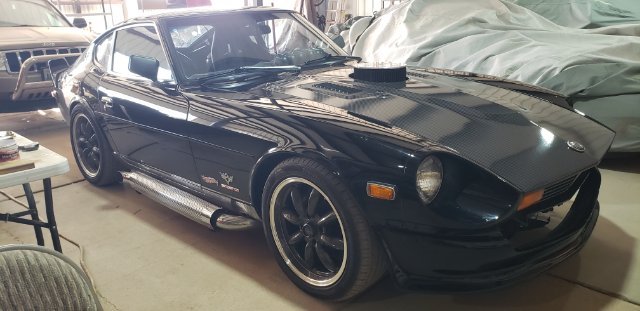
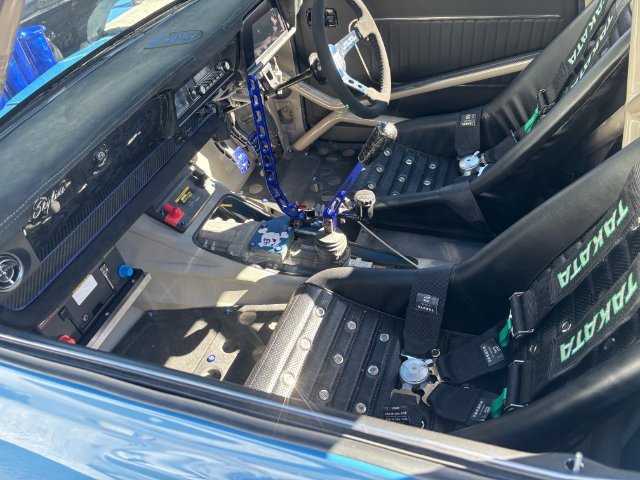
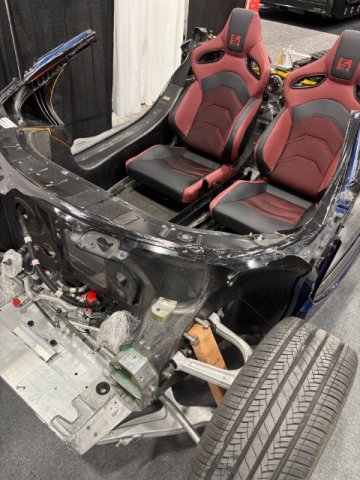
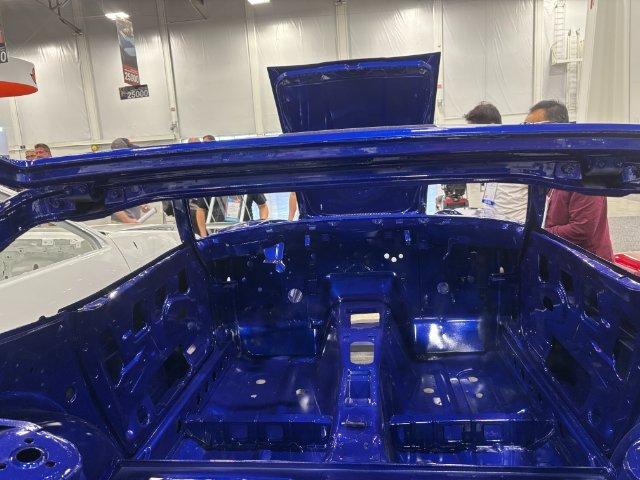
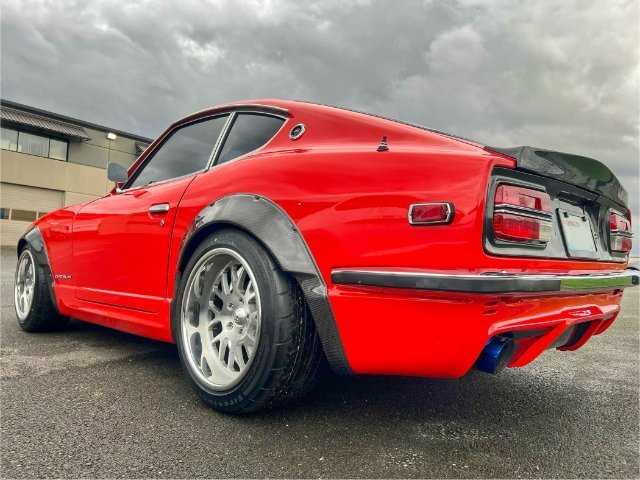
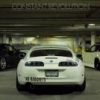
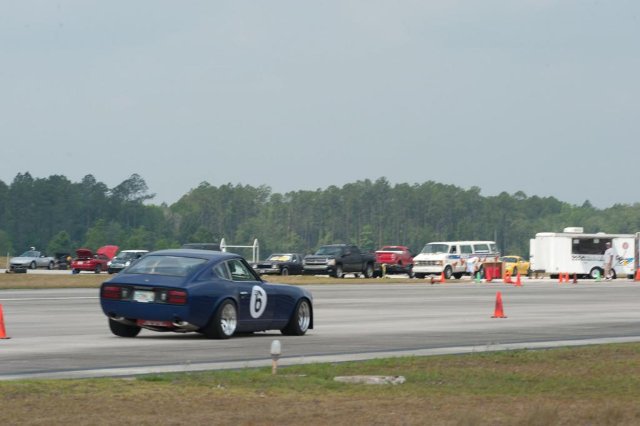
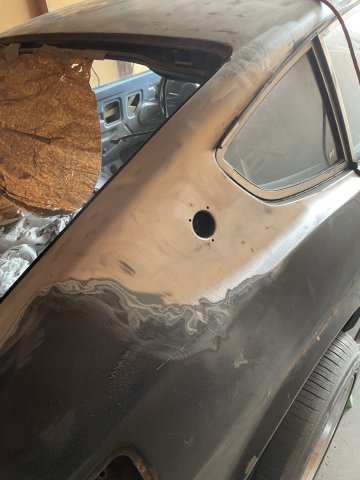
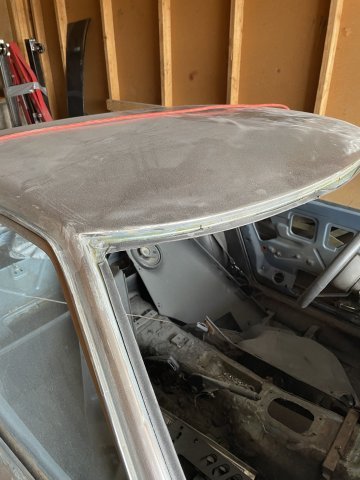
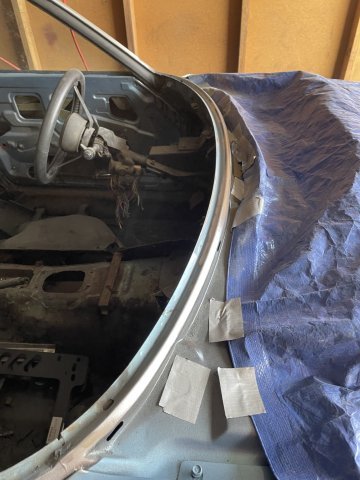
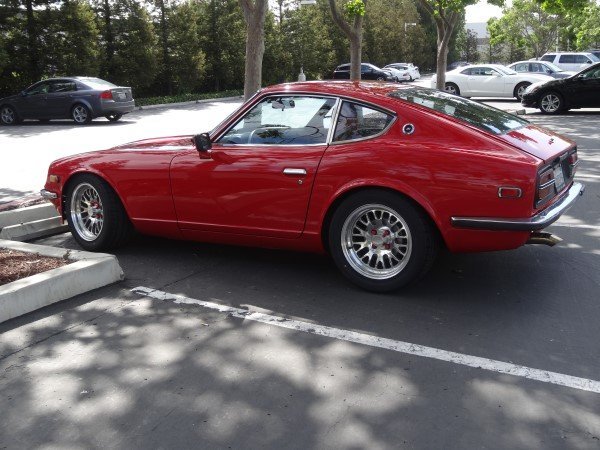
Hi All! I've owned a few s30's in the past and finally decided to build one. My car background is a lot of JDM cars including Supra's, AE86s, S13s, Skylines, a Stagea 260rs, etc. I have always loved the style of the s30 (don't we all), the aftermarket support for it and the random people who would stop me and tell me about their "Z" story. The story of this build started over a year ago when I purchased this 1978 Datsun 280z. The story behind the car (that I know of) was it is an American car that was brought to Washington and held at a speed shop awaiting restoration. Then was bought and stored in a heated warehouse for years in BC before i bought it. A little side story, I originally purchased a 1971 240z from the same person and they also had the 280z for sale but was well out of my price range. I would have loved to restore the 240z but unfortunately the amount of work it needed was well beyond my budget and experience just to get it to a useable condition. If you looked at it funny, rust would fall off the car. Mistakes we made. I was sold on what it could be but not what it will take to get there. almost a year later the 280z was still for sale, and the price was a little better. With some luck, i was able to convince the owner to trade back the 240z and cash for the 280z. Success!...Now, it seems the 280z was re-sprayed a British racing green but wasn't done the best and was flaking so i believe that's why it originally underwent the restoration in Washington. The car was just a rolling chassis, the front end had been primer epoxy'd and luckily had everything in boxes and labeled like "driver door guts", or "Rear hatch slam", which was nice to see. Now the goal of this project was to be a fun drivers, resto-mod car. It will be getting an RB26 from an r33 GTR, an RB25 transmission, DBW for the factory ITB's, Techno Toy Tuning full suspension, brakes, differential swap kit, running a Haltech S3 ECU and Wiring Specialties Harness, Poly fuel tank with an r32 skyline Radium hanger and Hellcat fuel pump. The bigger ticket items like turbo/manifold, radiator/fans, and then some smaller things are missing but most of the project is there now. I do plan of re-wiring the whole car considering I'm spending money in every other area. Now, just like anyone, I did set out with budget but considering since I last built a car, prices have gone up for parts which I stupidly didn't account for. Also a lot of, "well if i'm already doing this, then i might as well do that", and "since i have this off, i might as well get that." So the budget has been blown....but at least I'm happy! (maybe). BUT as it stands, the suspension and diff swap kit is in and the car is currently at the body shop getting the sunroof hole patched as well as some of the smaller trim holes plugged and a few small rust spots taken care of. Here are some pics throughout the build and as it stands. Any questions, advice or help for some "gotchas" will be welcome!3 points
-
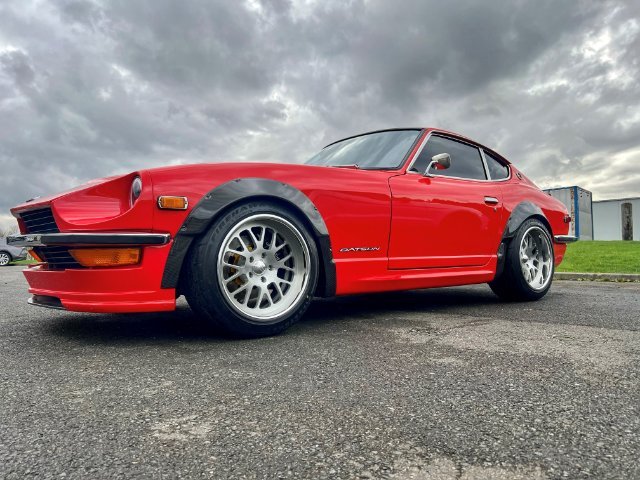
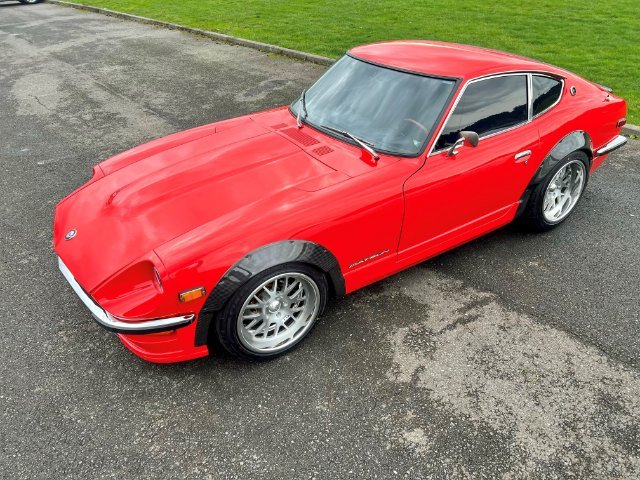
Great work so far! I’m sure this will be an awesome build. I suspect you will be running fender flares or a wide body kit seeing as your wheels are poking out a bit?3 points
-
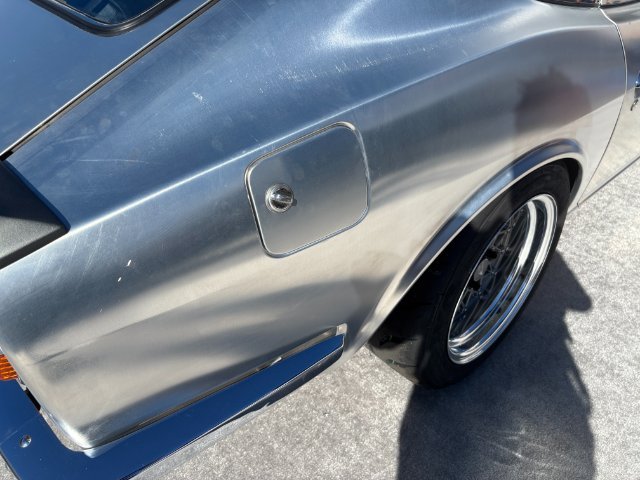
The access panel is to get to the fuel filler neck. I think I got the panel from Allstar Performance. I wish the panel was just a little bigger so that I could remove the filler plate though the opening. The one I have is just a little too small...
2 points
-
I have the ATL 12 gallon cell in mine. I also use the ATL Black Box sump with pump. The fuel return dumps into the top of the Black Box. I can use pretty much every drop of fuel in the cell without fear of starvation. My cell is below the rear deck and offset to the right for weight distribution reasons. You can just see the bottom of the cell in this picture:
2 points
-
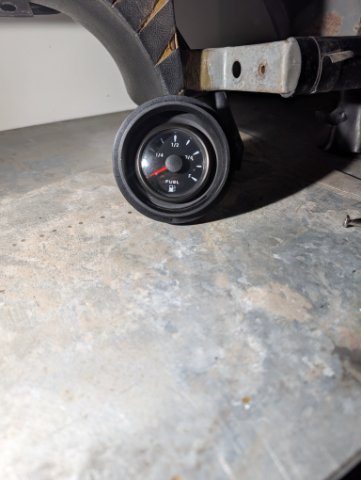
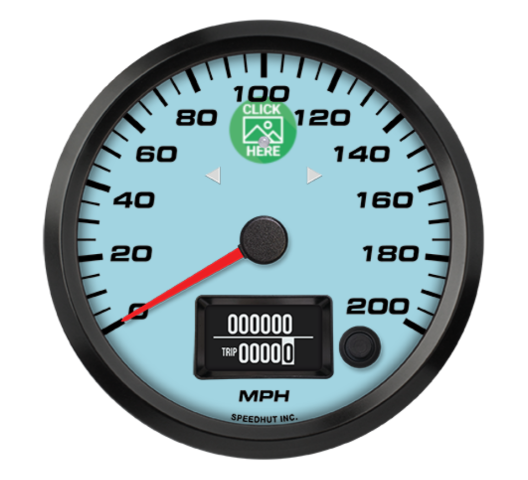
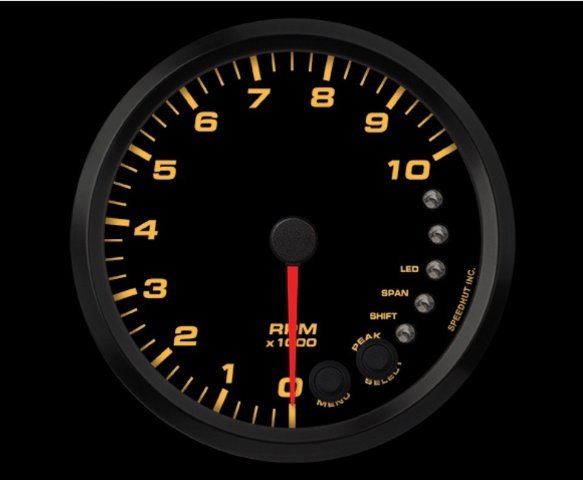
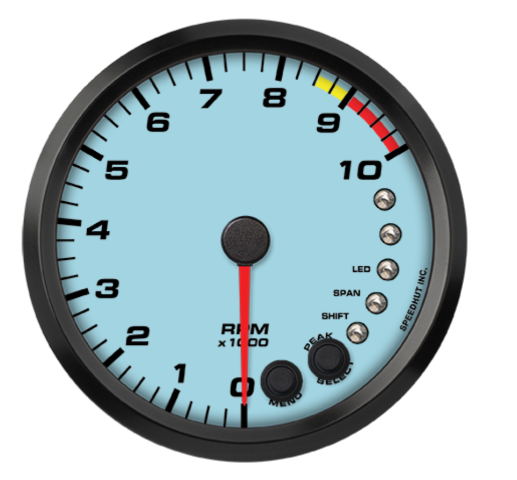
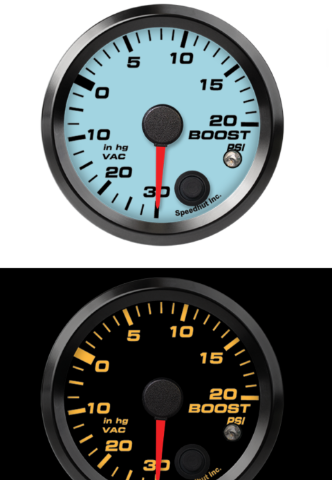
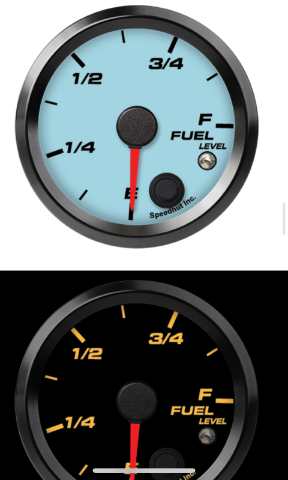
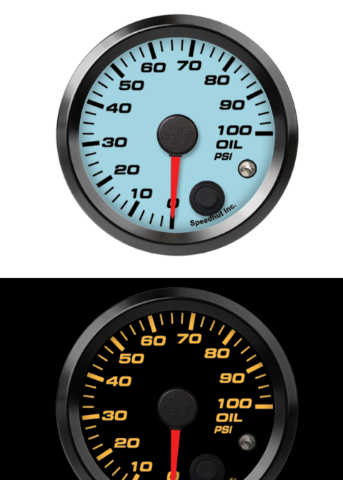
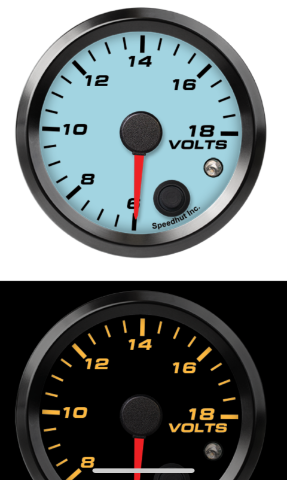
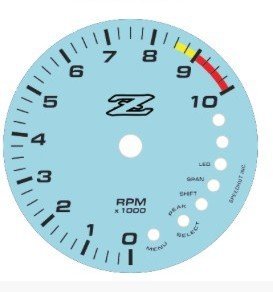
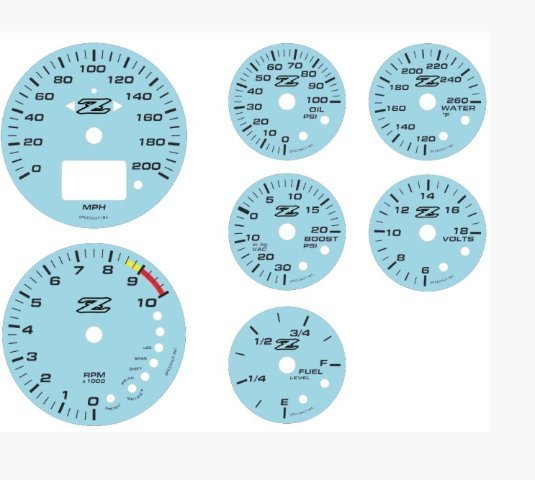
Got my proofs back from speedhut with the Z in there.
2 points
-
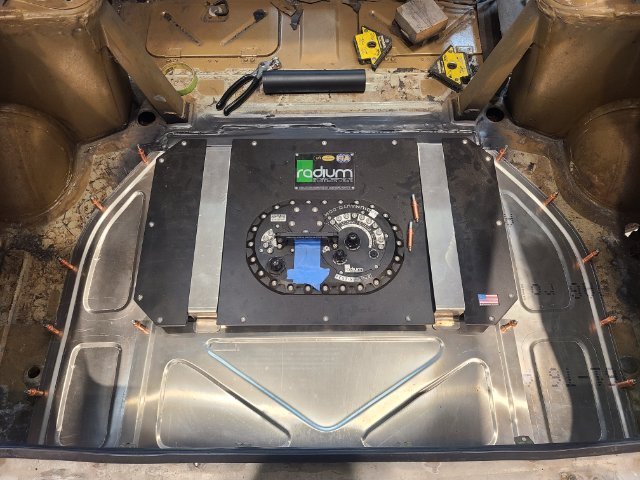
I did a 14 gallon radium cell in mine because i plan on possibly running e85 and we have some 30-35 minute sessions with some clubs. I have it raised like an inch and a half out of the floor to make the bottom height where I was visually happy. My cell is advertised at 11.7" tall so if the ATL 10 or 12 is shorter then flush with the floor should be perfect.
2 points
-
I just found this site as i started building my Z, and will be following along as you finish up this project. We are on somewhat similar paths so this will be fun to watch it come together.2 points
-
Lower than 100kpa at WOT could be elevation too, if this log happen to be somewhere higher than your used to logging take that into consideration aswell. Id think where you have the filter should be a good spot for air. unless the aero is really creating a negative pressure spot for some reason. If thats not the case id think your on the right track with looking at valve train stuff. But don't rule out the sensor itself or the hose feeding it.2 points
-
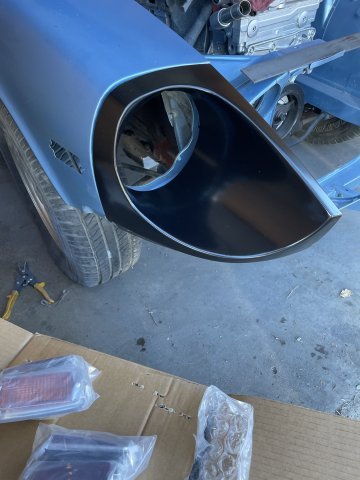
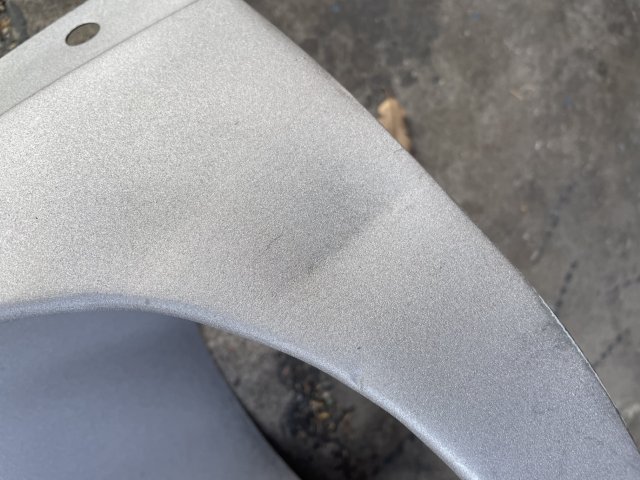
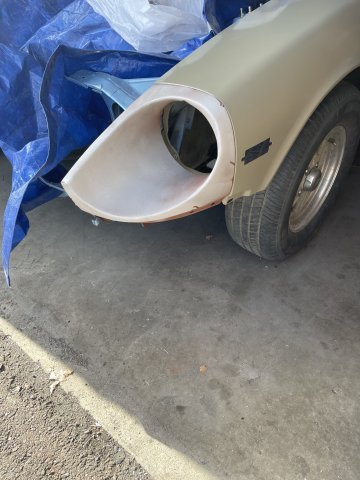
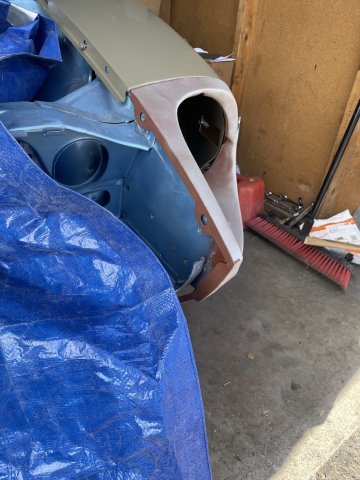
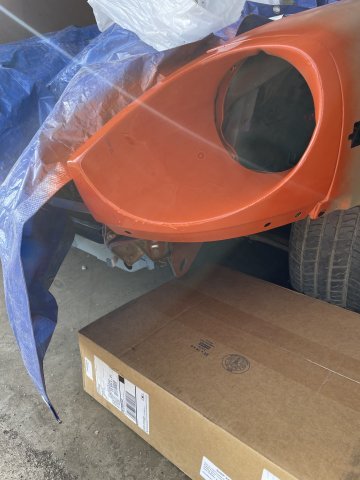
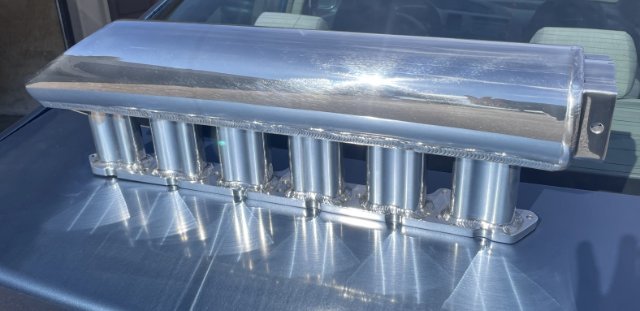
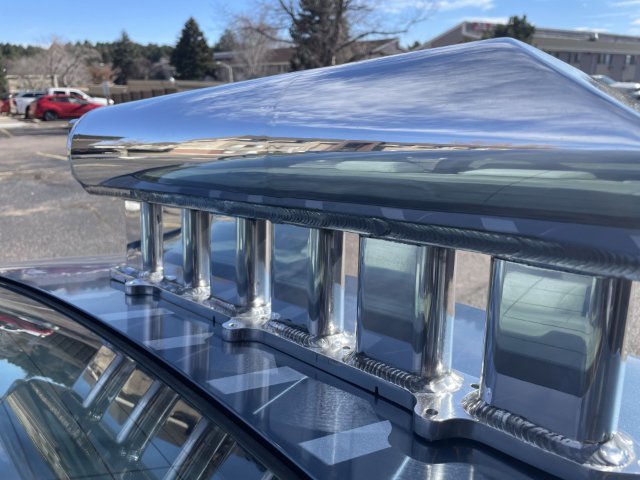
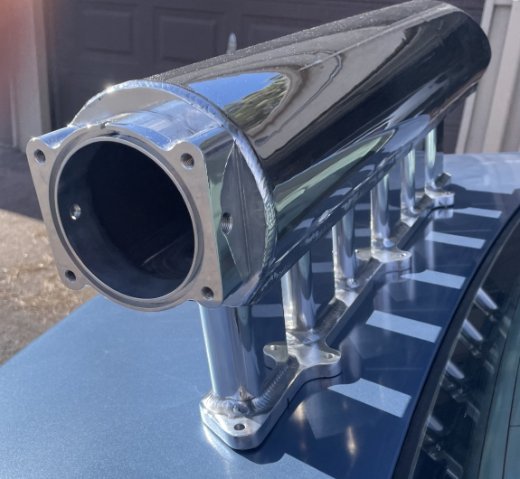
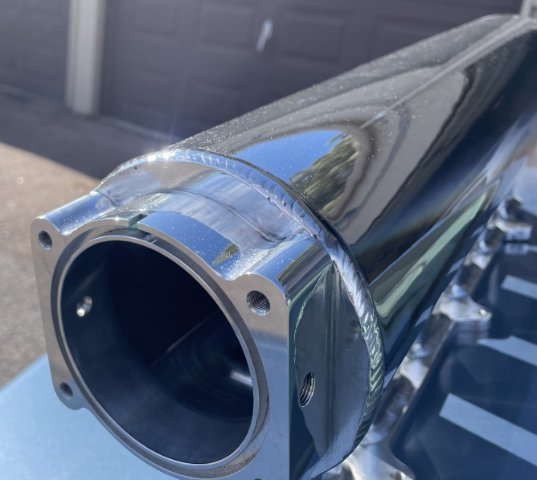
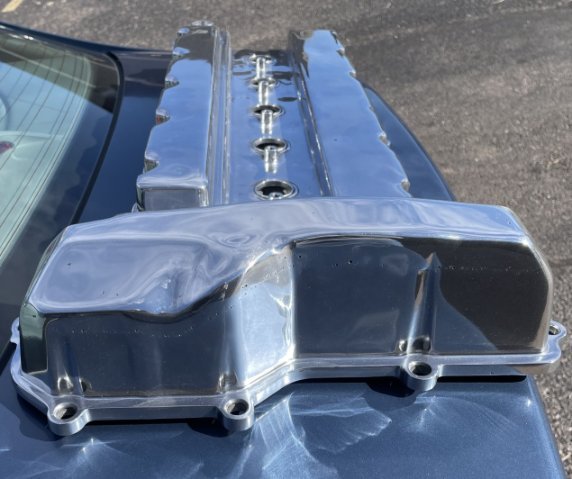
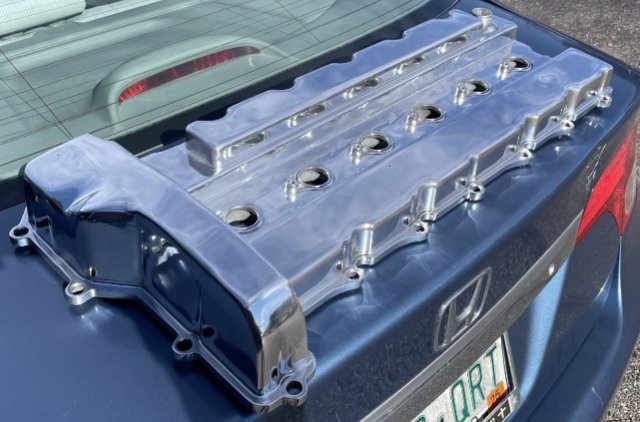
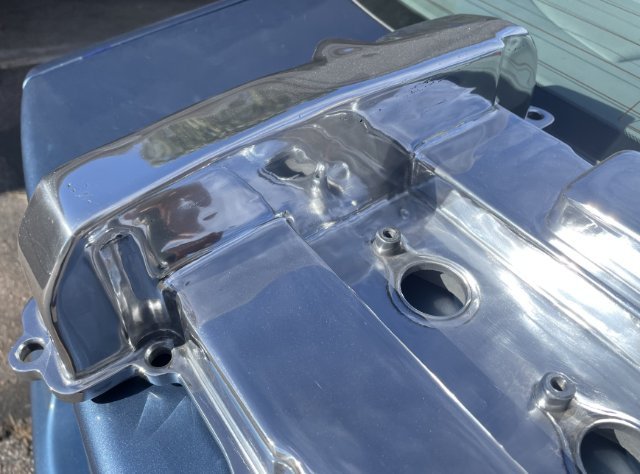
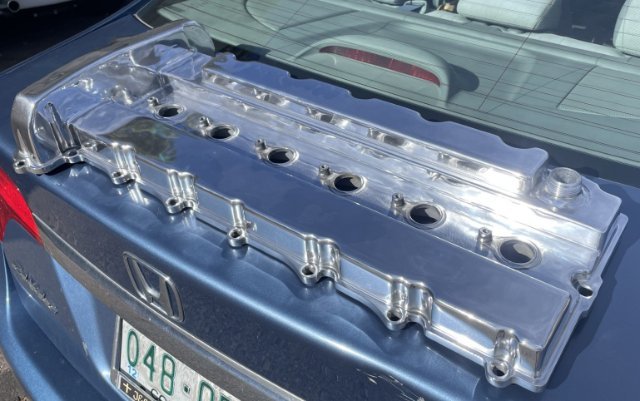
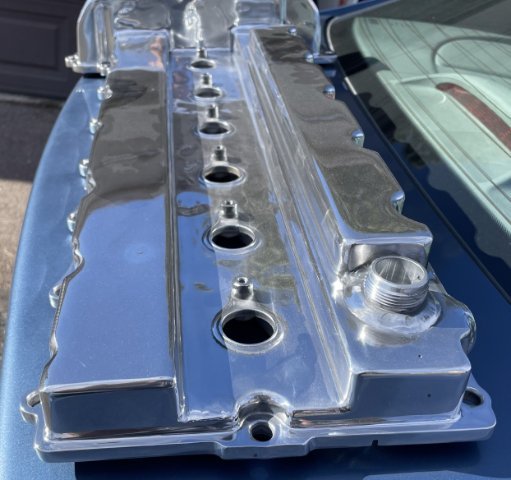
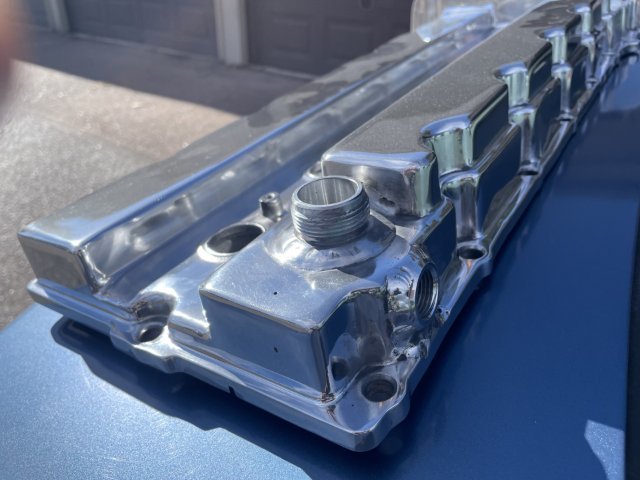
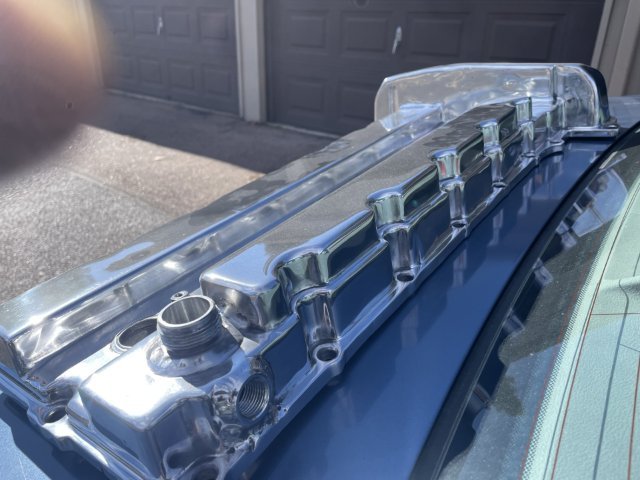
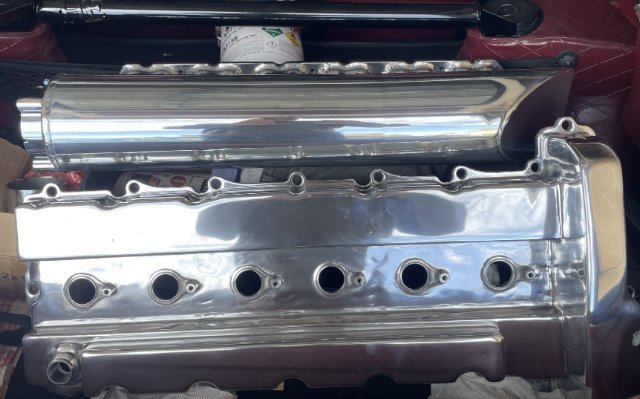
11-26-2025. I got the rear tires mounted on the wheels and balanced, and I was able to attach one headlight bucket and then started painting several coats of filler primer for deep scratches. The bucket has deep scratches in the metal in the bottom of the scoop portion, so this will get a start on filling them, and then I will put some glaze on there and sand it smooth and sealer prime it before color and clear. The other headlight bucket, after sandblasting revealed a crease in it, and I don't have the moxie to want to fight and fix a crease and make it look good, so I ordered up a reproduction bucket. I then got a call from J&S Polishing, and ran down there and picked up my intake and valve cover. Pics heavy.
2 points
-
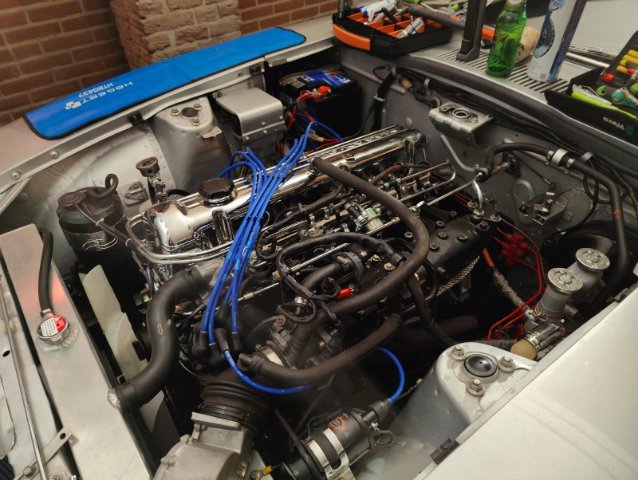
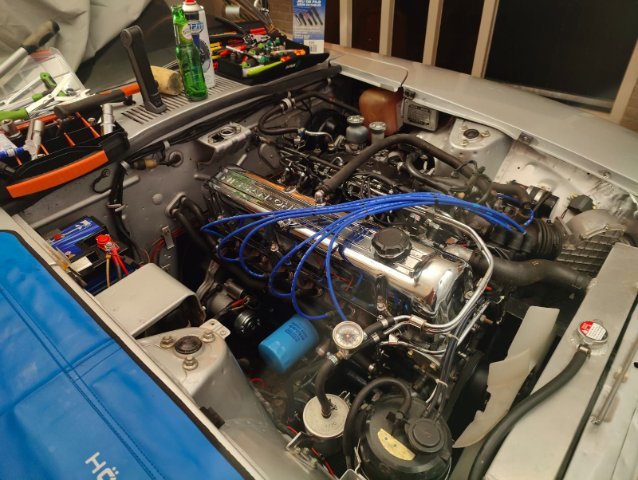
Time to update the build threat again. Things are moving slow at the moment but none the less progress is being made. I have contact with two local body shops in the area for the frame rail repair and to measure the body to see if it’s twisted in any way. One of the body shops is specialized is classic car repair and restauration but will probably be quite expensive but none the less a representative will come by to look at the car this week. The other body shop is a more generic one that also does a lot of classic BMW’s and has done some paint work for me in the past. There hourly rate is a lot cheaper, I know they deliver great work and I know they sometimes are willing to do cash work. To save money on the body shop hours I decided to bite the bullet and order a bunch of parts from Apex Engineered which should arrive somewhere next week. Deciding what to buy was quite difficult as the shipping rate varied a lot but in the End I got the shipping down to $284. I all I bought the frame rails, front fender braces, front and rear control arms, steering knuckles, front crossmember and the rear strut brace. As importing stuff from the US is pretty expensive I decided to place a bigger order then what I strictly needed to maximize the value for my money. As the car needed to get welded anyway I ordered the front fender braces as well to reinforce the front of the car as they weren’t that expensive and seemed to me as a worth wile upgrade. As for the control arms my main reasons for buying those was to delay any major body repairs. If my body turns out to be twisted repairing it would turn into a full on restauration project. I do plan on restoring and repainting the car some day but not now, so as a temporary solution the adjustable control arms allow me to tune the effects of a twisted body out a bit. At some point I would like to get the full Apex Engineered Retro Mod suspension so this will give me a great starting point to work from anyway. To save some more money at the body shop I will strip down the interior and remove the fuel lines myself before sending the car of for welding. But before doing that I still have a chance to fix some small stuff surrounding the engine. My backorder from Zservices in France finally came in together with a used Bosch AAR from a Porsche 944 as my original AAR turned out to be broken. So last week I took the valve cover off to adjust the valves and replace the gasket as it was leaking a lot of oil. Good thing I did as the valves where very out of spec. The adjusters where a pain to get loose but after that adjusting them was very easy. I put everything back together with some new NGK spark plug wires and started her back up. Even with near freezing conditions the car started right up and idled better then ever before. The engine still runs very rich at idle and I suspect it might be an injector issue but other then that the engine runs great and the emissions are within the limits so I will place that issue on hold for now. My plans for the coming weeks are to strip down the interior, remove the fuel lines, front fenders and doors. This will also give me the opportunity to clean and inspect those parts of the car for more hidden surprises. I will also repaint the fuel lines as they are full of undercoating and try to restore the dashboard as with any Z mine is cracked. As for the doors I want to rebuild the door hinges and maybe try and reupholster the door cards as mine are actually of a 2+2 and have a giant hole instead of a second door latch. I’m hoping to get the car back on the road after this so I can finally start to enjoy my 280z this spring. Video van WhatsApp op 2025-11-24 om 10.58.36_fab92d46.mp4
2 points
-
Got a lot of the rear track attack kit put together today. It went together pretty well, their videos are very helpful. Only minor issue was these lock washers being too big, just ground them down a bit.
2 points
-
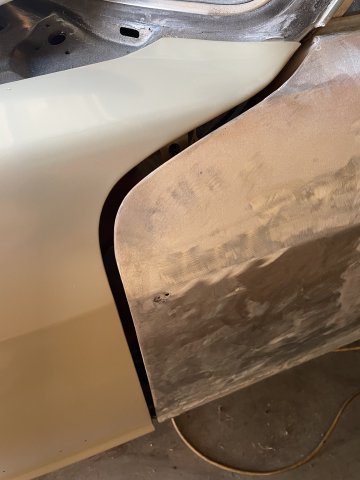
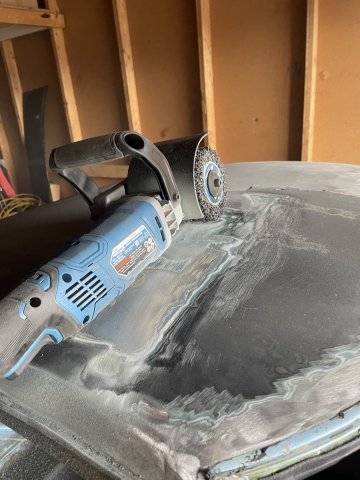
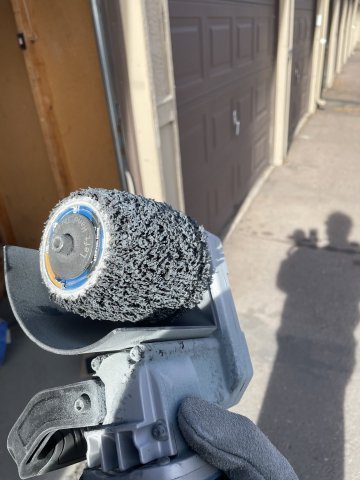
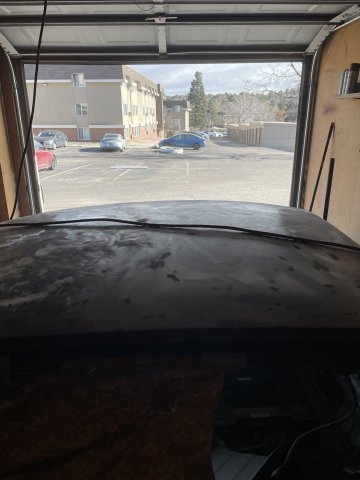
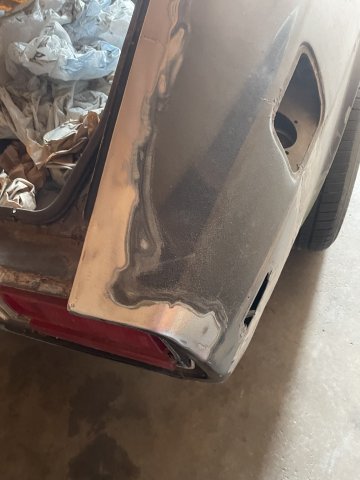
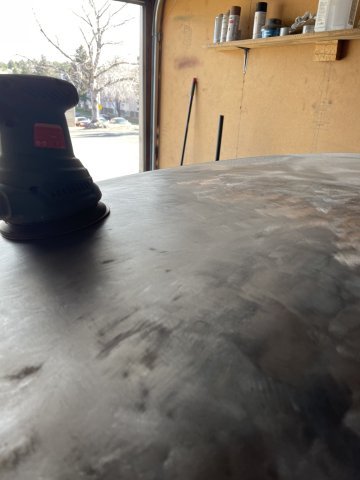
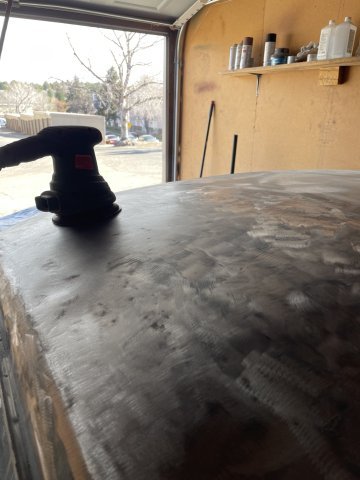
12-16-2025. Drum Sander. I have been advised to use a drum sander, as it is easier on the sheet metal than a flap disc on an angle grinder. Well, yes it is! However, even at 40 grit, I finished the roof, started on a rocker and a few other spots and wore that drum half way out! Pics follow, you can see the difference comparing both methods side to side. I also took a couple pics to show how it will look ran over with a DA on 80 grit to prep it for filler. DUSTY! closer to starting the blocking.
1 point
-
Got it off Amazon: https://amzn.to/4aS32Br And picked up a male pigtail off eBay: https://www.ebay.com/itm/134129914749 I actually replaced the wiper arms too. I used 93 miata arms which bolt up to the stock datsun wipers mechanism. Passenger arm is a little long so I may shorten it. For wiring, I followed this guide: https://www.electronixandmore.com/resources/automobiles/datsun/index.html Note this is very specific to the later wiring for 1978(maybe 1977 too) and would not be applicable to earlier years.1 point
-
I have two Datsun 240Z cars both with stock body running 245 45's on 16" x 8" rims with no flares. I find it funny where people flare their car yet do not make use of the extra space. I also like Z cars with flares but why do it unless you get the right offset to maximize the tire size?
1 point
-
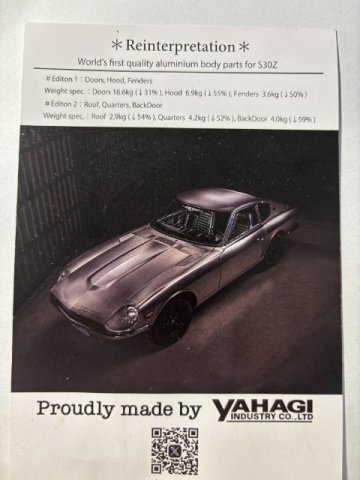
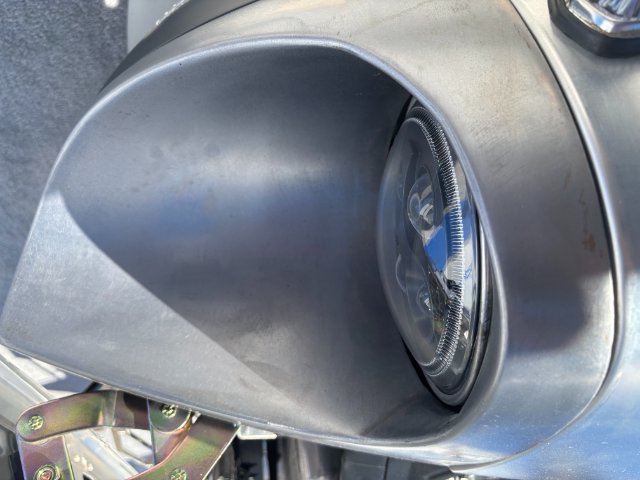
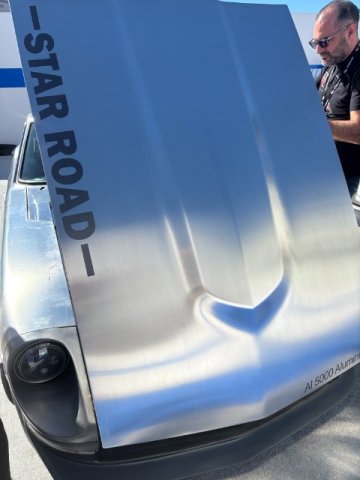
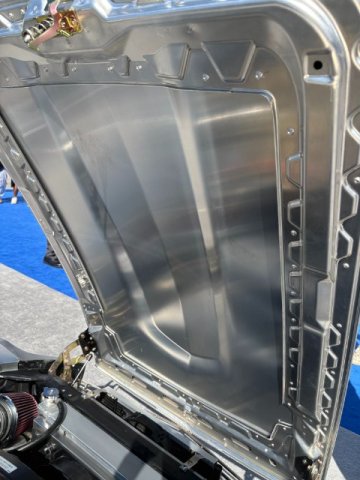
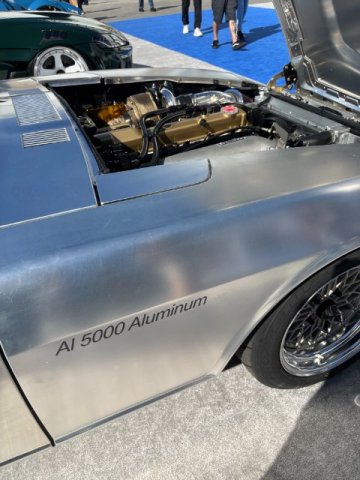
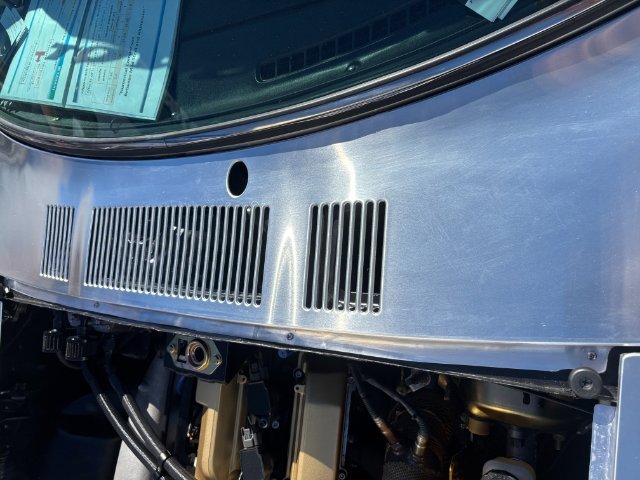
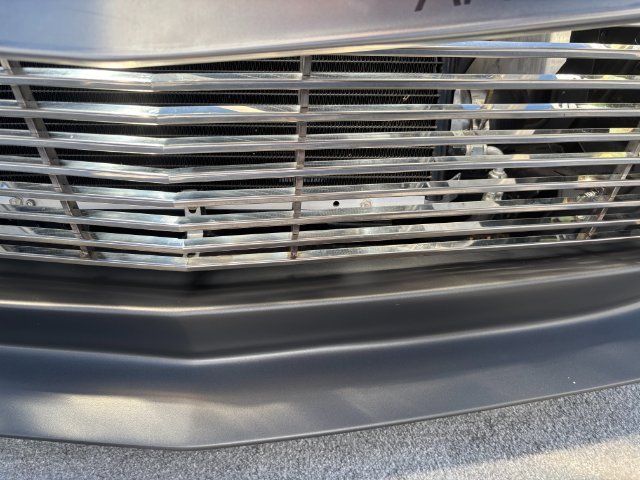
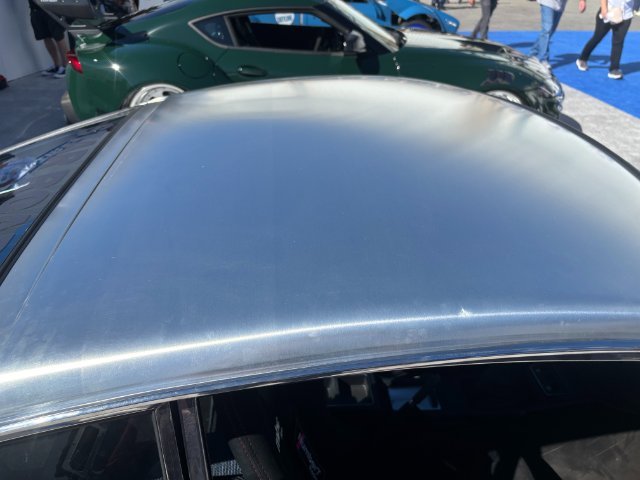
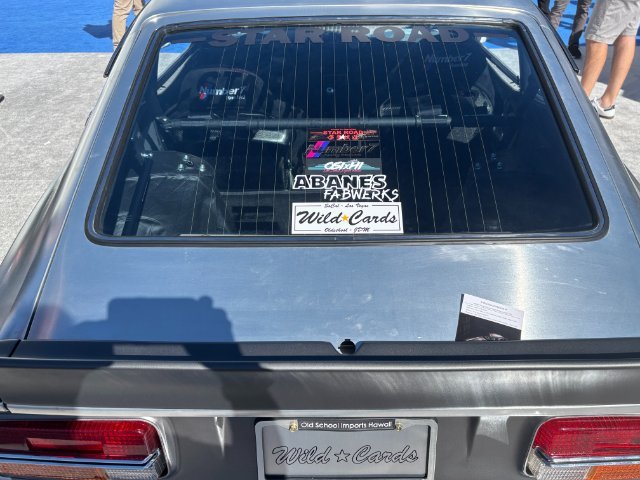
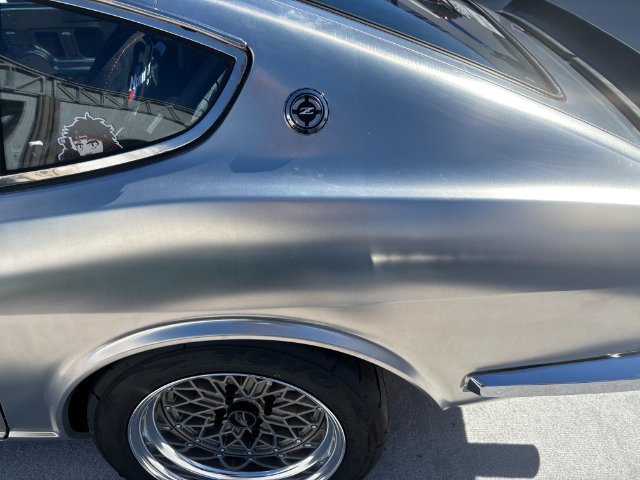
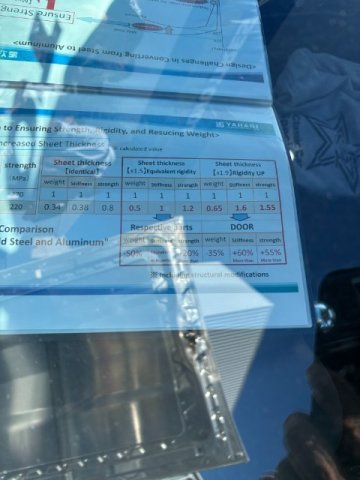
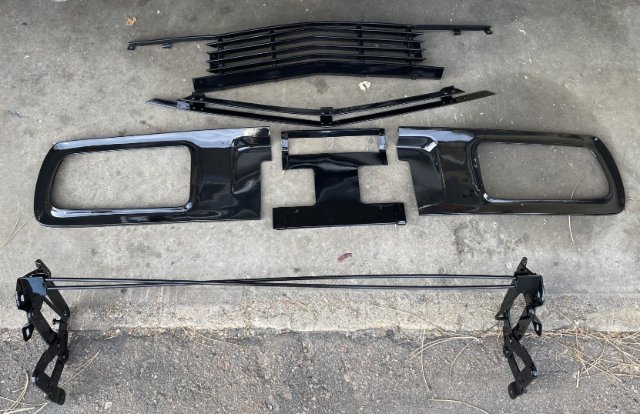
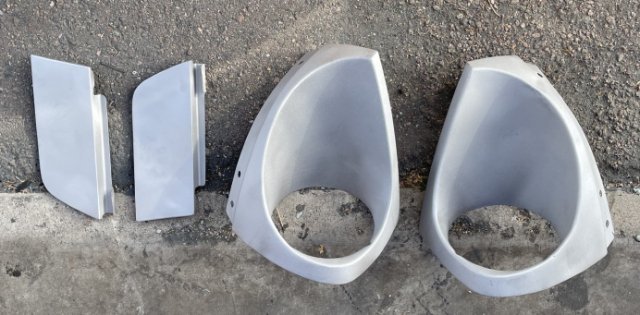
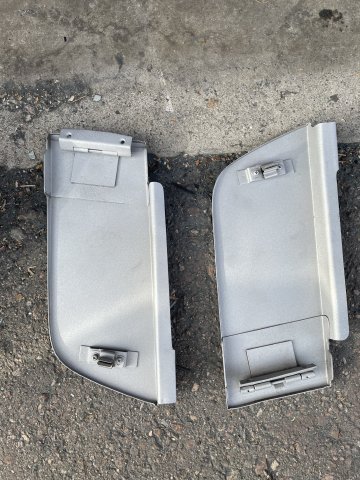
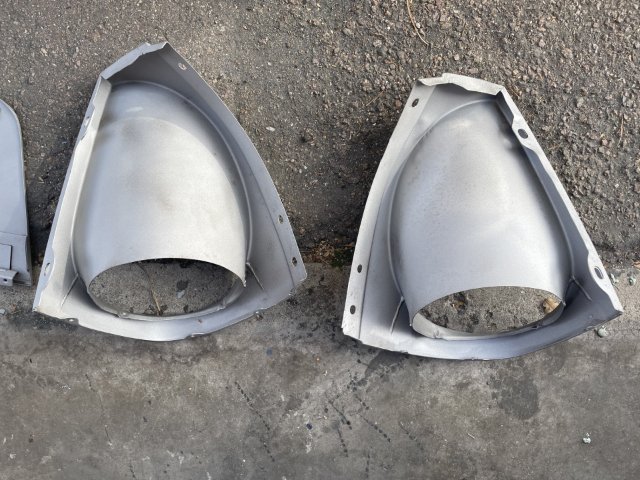
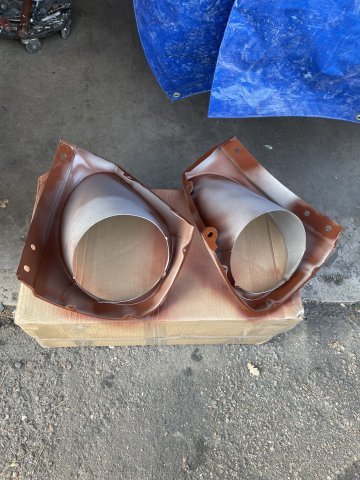
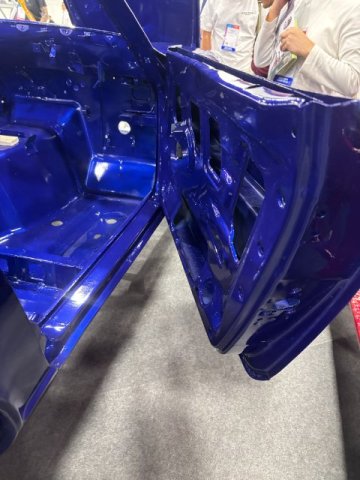
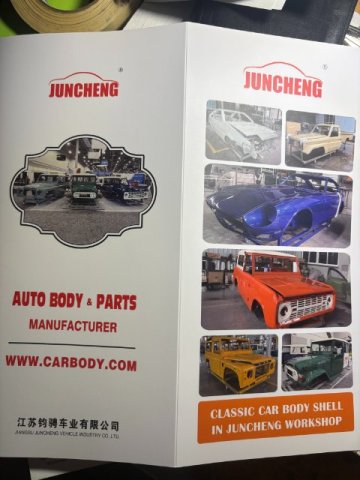
These Aluminum Body Panels were introduced to the Public at the 2025 SEMA SHOW in Las Vegas. They were manufactured by Yahagi Industry Company located in Japan. The 240Z vehicle was in the Toyo Tire Booth at the Show. Front Head Light Bucket Front Hood Bottom Side of the Hood Right Front Fender Front Cowl Panel Front Aluminum Grille Right Front Fender Roof Right Rear Quarter Panel and Fuel Door Rea Hatch Pic Rear Panel left Rear Quarter Panel Flyer that describes Weigh Savings between Steel Panels and Aluminum Panels They would not give the price at the show but say it would be give out at the end of the year. I believe they are waiting till the Tokyo Auto Salon Show happening in Tokyo in January 2026. They were planning a production run of 100 of these Aluminum Panels. The well known Japanese Performance Company-Star Road is handling the sale of these 240Z panels. The panels have an excellent fit and well constructed. I would definitely recommend them.
1 point
-
Good work! You seem to be making some great progress these last few weeks. As for me I just got my 280z to run a bit better. Today my final part from Apex Engineered should come is so I will strip the car this weekend so the car can be send off to the body shop.1 point
-
Looks good! Atlas is going to look great under the hood! Have you seen @Invincibleextremes 8.8 differential kit? then you can lay the power down, lol. Keep up the work, you've got a cool build going1 point
-
Next I need to pull my current engine as I need the oil pan from it along with the new timing chain guilds and oil pump and everything else. Thats new from when i built it a year or so ago. With it being a front sump I'm going to look into adding some oil baffling of some sort. I cant remember if there is any. Need to button up my 4n71b Jatco from the 84 300zx turbo and finish the inner hub for my adjustable cam gear. But I cant finish that till I pull the old trans as I need the bellhousing. Then I go down the rabbit hole of needing a new driveshaft but also wanting to swap in a 8.8 out of an ford explorer... ..1 point
-
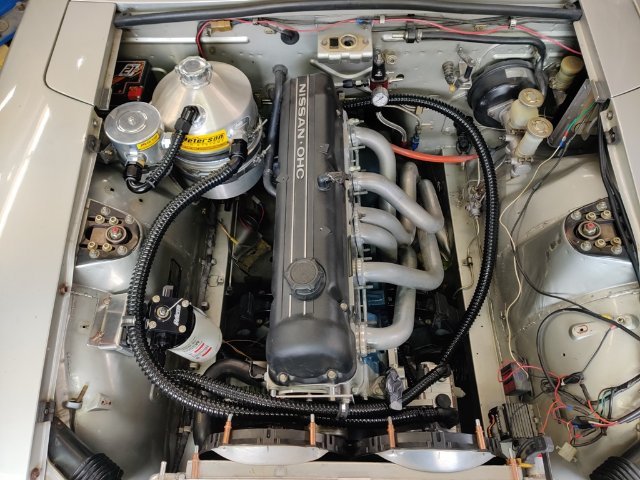
The head is an E88 casting which came from a 240z. So, that opening was there for the stock fuel pump already. Though not a desirable head as is, this one has been milled quite a bit to get the combustion chambers to be usable for this engine set up.1 point
-
DJHsuperZ The pics are fantastic of your build. Actually did not take you very long to completion since you purchased the MFactory LSD. The fabrications along the way are really spot on. Great choice on the stubs and axles . Have to say congratulations on a mighty fine build. Enjoy the ride you deserve it. Chip JDMPowerhouse1 point
-
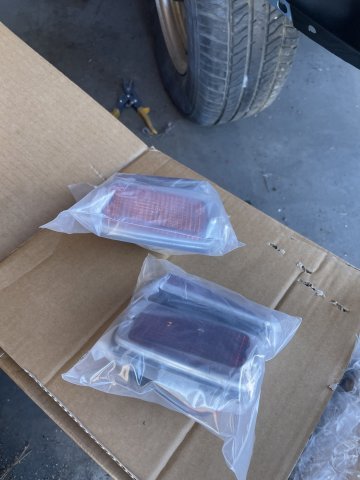
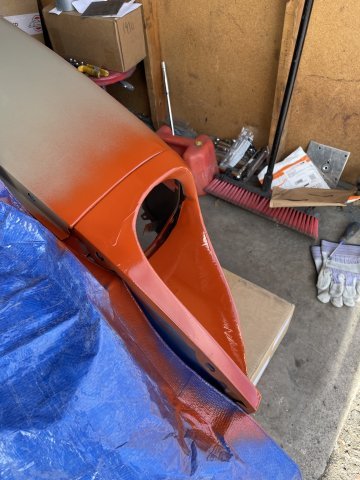
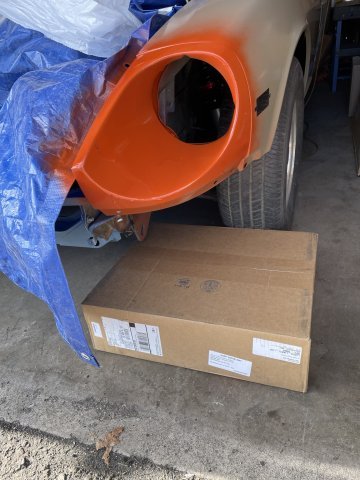
12-01-2025. First day of December. My right side headlight bucket I ordered form Z Car Depot came in, VERY nice part. Also a new set of front and rear side marker lamps. Why restore the old ones when new ones are available and affordable! My new 260Z fender badges should also arrive in the next day or so. Cool stuff.
1 point
-
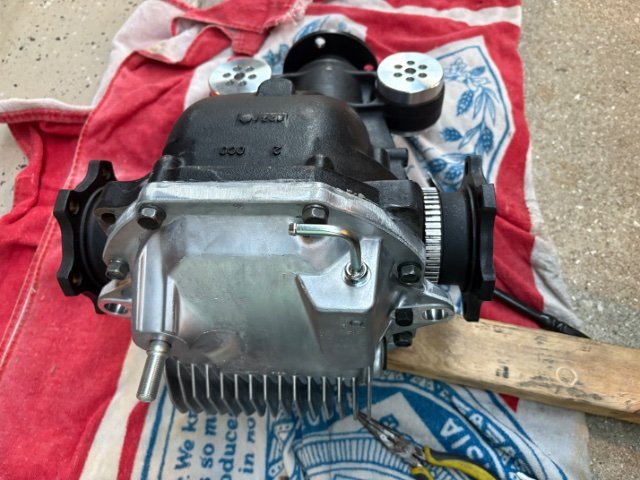
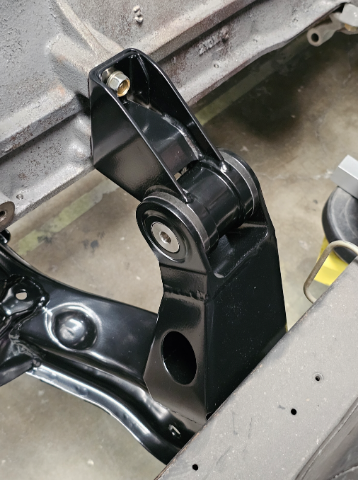
I replaced the stock 370Z diff cover with a Nismo one, and got it bolted and torqued to the subframe.
1 point
-
Decided to go with the ATL 12 gallon, just ordered it. It’s 10”. Will need to build a frame for it, should be good little project to practice some more welding.1 point
-
Thanks. That’s the fuel cell that came with the car, it’s too big (20 gal) and I don’t like it mounted on top of hatch floor. Going to explore Black Friday deals, thinking of going with an ATL because of the bladder and other safety features and I’ll recess it down as far as I can, hopefully it’ll sit flush. Trying to decide if I should go with 10 gal or 12 gal, 12 gal is a little cheaper for whatever reason. I should burn approx 5 gal a session at Sebring, the track I’ll frequent most.1 point
-
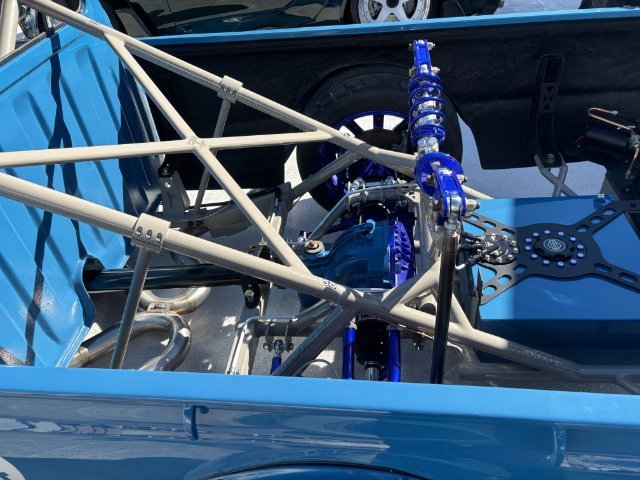
Wow, great progress! I love the cantilever design on the rear suspension. A few guys here have previously designed their own custom cantilevers; but AE is the only vendor that I'm aware of that has ever "mass produced" a system like this. Really interested to hear your feedback on how the whole TA package works once installed. Is that the final resting place for the fuel cell? If so, are you going to have a way to isolate it from the rest of the driver's compartment?1 point
-
Not super sure. At 100% throttle, the MAP sensor is really slow to respond and only climbs to 91.8kPa (atmospheric should be ~100). Here's a log at a good period of full throttle in 4th gear. Just pulling super lazily. This motor has always behaved like it's getting enough airflow. With 3rd gear sorted, I should be able to get it back out and do some testing. One theory is that with all the front end ducting, the motor is pulling a vacuum in the engine bay. Another is that the cam timing is off and needs to be tweaked. I think I might pull the front cover off and see what's up, and if there is anything obvious there before I get back out for next season. I've done cylinder temps, compression checks and leakdown and everything seems happy enough mechanically. Just something silly happening somewhere in the system.
1 point
-
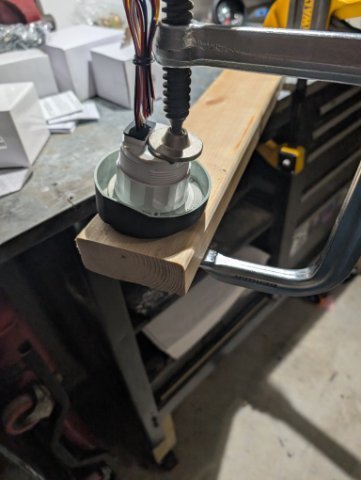
Hey, the new Speedo looks great! I just installed a set of cheapo Amazon gauges in my dash and it was also a bunch of little, fiddly, time-consuming work. The supports on the back were the hardest parts. Great work!1 point
-
Ya il be running fender flares but not with these wheels. because i went 5 lug, these were all i had to roll the car around, although they do look good hhaha ya the T3 stuff is amazing, it all fit without any issues so I was surprised with that. I had a L26 with a big cam, carbs and and exhaust and I loved it in my old 260z but this car came with nothing so it was an easy choice to go RB!1 point
-
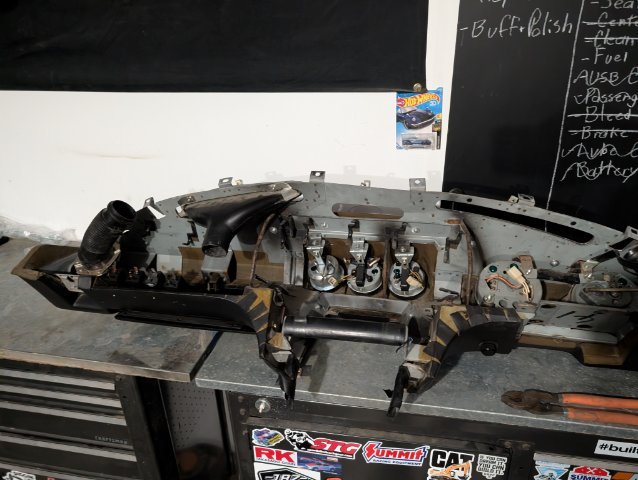
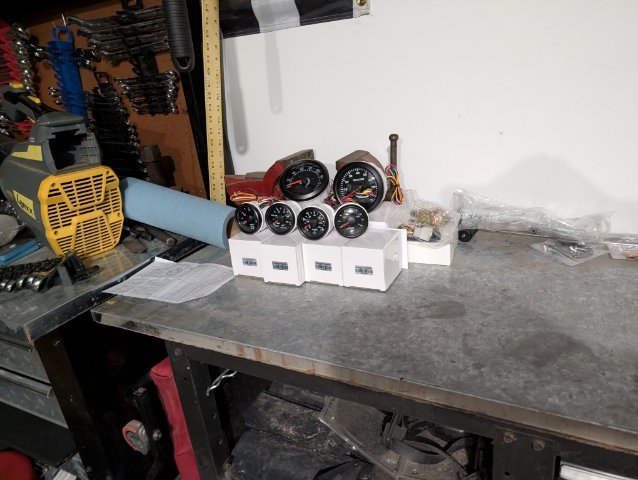
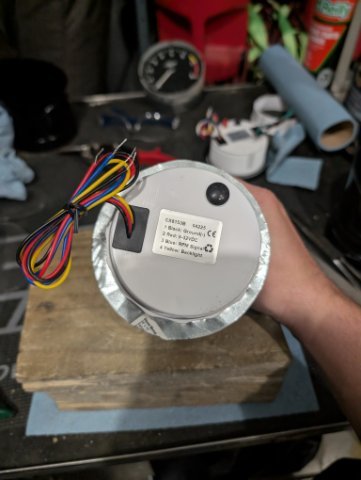
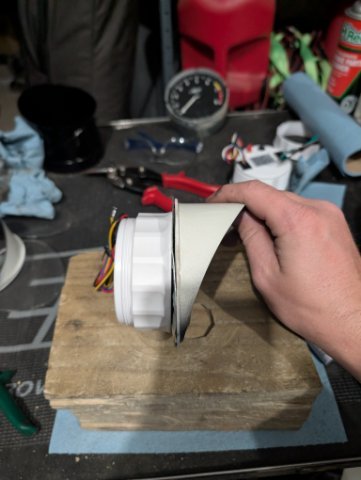
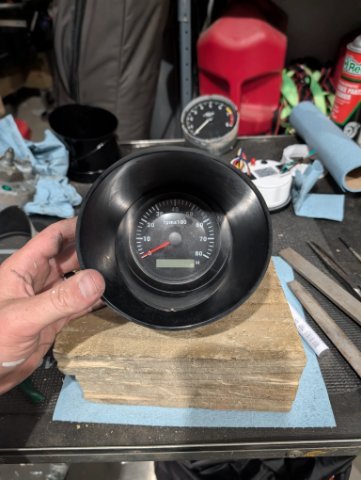
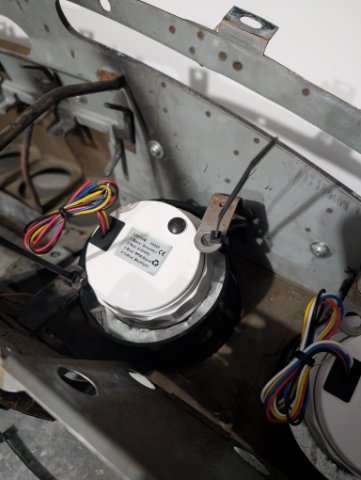
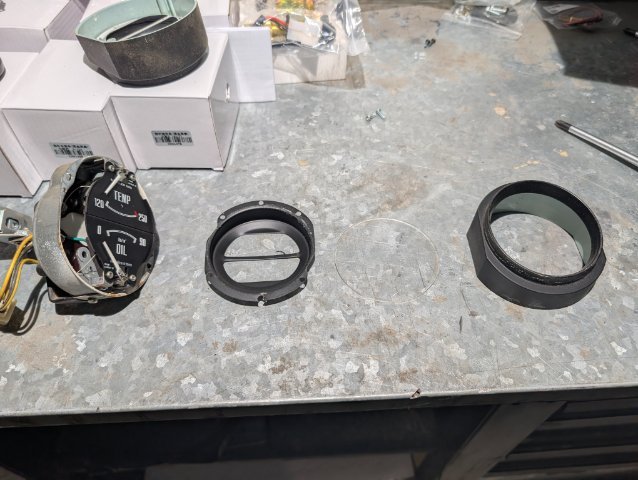
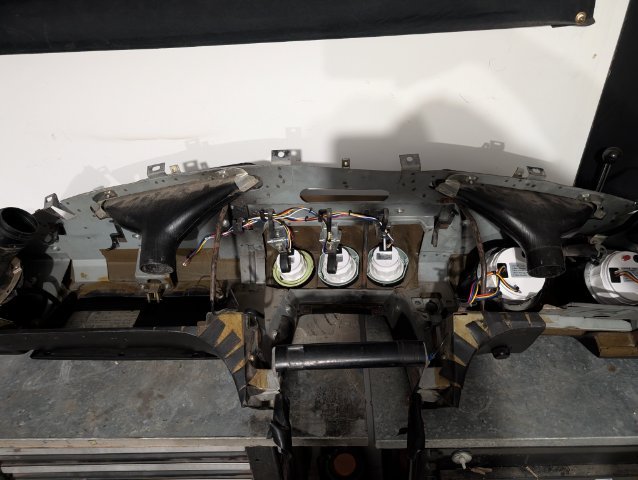
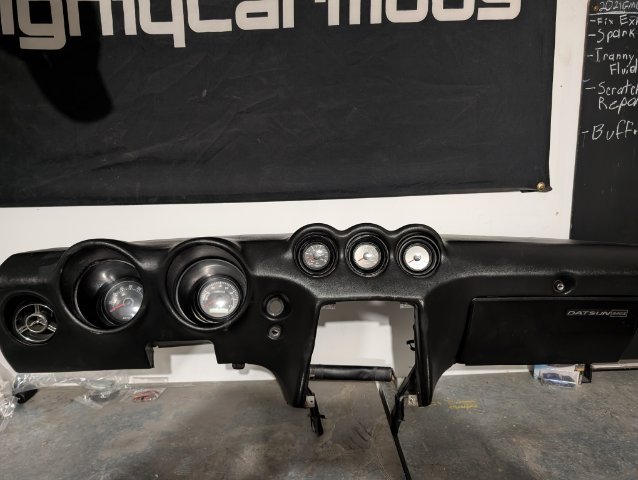
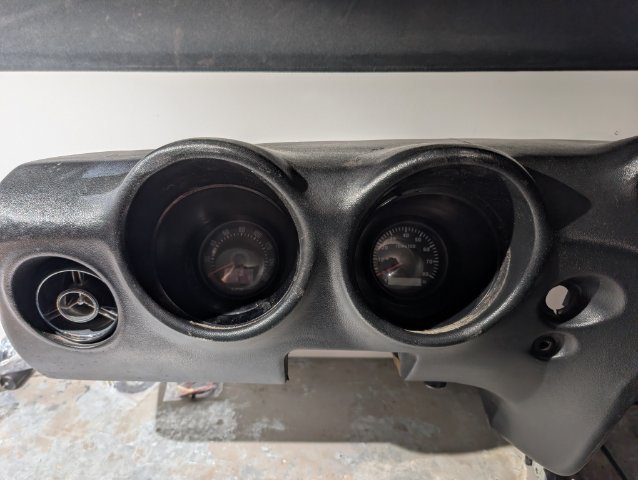
I just got a new job and will be moving, so I haven't made a ton of progress. But before I pack up all the tools for the move, I worked on getting the new gauges in a better looking dash that will be installed with the new EZ wiring harness. I started with a dash pulled from the parts car. The gauges weren't fully working and the previous owner wired in a sound system and some other "upgrades" in a way I didn't like. So I gutted the dash of all the stock and aftermarket wiring from the previous owner. This car won't have a sound system and I have a new harness so I didn't need any of the old stuff. Next, I busted the new Amazon cheapo gauges and started mocking them up to see if they would fit in the stock dash. They were quite a bit different, so I had to rip the old gauges apart and combine their guts with the new gauges to get them mounted in the dash. I tore apart the old gauges. I removed the old gauge mechanism, but kept the small and larger housings. I'm not sure what they are actually called. I cut out small circles from some sheet metal that had with an i.d. for the new gauges to screw and tightened onto, but also an o.d. that would matches the inner housing on the old gauges. Then I screwed the inner housing into the larger one. I did this for both the Tach and Speedo. Next, I mounted the gauges into the dash. The old gauges were much larger and held in by screws and bolts. I mounted both as best I could with zip ties. I'll think about a better permanent mounting solution in the future. They are obviously smaller than the stock ones, but for less than $200, I'm happy with how they turned out. The smaller gauges were both easier and harder. I tore the old ones apart and threw away the gauge guts just like the big ones. However, there was an inner metal ring that was perfect to screw the new gauges onto after I trimmed them a tiny bit into a circular shape. It saved a lot of time, but the original gauges had like plastic rivet, type things holding it together. They were easy to drill out, but I had no way to easily reassemble with the new gauges. So, I glued them, clamped them, and let them sit for a couple days while I packed my house up. After I got everything glued up, I installed the gauges and they are obviously smaller than the stock ones. But I don't think they look that bad. For $160 and a couple evenings of modifications, I think they turned out really nice. I had to modify the old mounting system on two of the smaller gauges to keep them in place and had to use some bolts for the third because it's old gauge was set up differently. I got all five gauges in the dash and they turned out better than I expected. I have a set of the Speed Hunters adapters for their gauges, but the adapter set costs just as much as I paid for all these gauges. This kit also came with the sensors needed and a voltage meter that I won't be using because I have a voltage meter/ phone charger in the car right now that I really like. It was another cheapo Amazon purchase. I installed it on the hole for the old cigarette lighter in my current dash, and that's what I'll do again. There won't be any progress for a while, because I'm moving back to Ohio and starting house shopping so I won't have to move again any time soon. But the next thing on my list is making a plate to go on the hole where the climate controls and radio used to be and mounting a phone holder there. I have that in the car now and it's really useful. Then I'll be installing the new dash and EZ wiring harness. Assing I can do that, the gauges all work, the alternator puts out more than 13 volts, and the car still runs and drives that'll be the last major thing done to this car for a while. After that, I think I'm gonna get started on the "parts car project." Please let me know if you've seen any silly mistakes I've made or anything that would make my install easier or better. Thanks!
1 point
-
Impressive work! I have most of the T3 stuff and their brakes but I bought bit by bit over many years so I'm always a little bummed I never got to lay out all my suspension like you have. It's fun to see all the shiny new parts in one place RB was my dream too before I had a deal too good to pass up on my L28ET. Love to see it1 point
-
Your work looks great. There isn't as much activity here anymore, but some of us are still watching closely. I really like the battery bracket. The more spread out the support is, the more secure you can make the battery without damaging it. I've always disliked the common OEM-style hold down bar.1 point
-
11-20-2025. Well on the 260, interior, especially dash is a LONG way down the road, but all these black Friday deals going, and talking to speedhut they cut me a great deal, I went ahead and got the gauges I wanted for this car. They will go in my dash with a full cap, and the center section will be a blocked off plate and will house 2 gauges from speedhut along with some switches. At any rate, The gauges are going to be "Gulf Racing Blue", in modern script, and show black with orange lit numbers at night. I have some pics here but they don't show the "z" script I am having added to the faces. it is just the thin black outline of the original "Z" badge. Anyway, here is what they will look like, without the Z, there is a pic of the script at the end. These things are crazy expensive. I love that the speedo is GPS. Pics:
1 point
-
As listed in the post above I did order those parts. Shipping is indeed expensive but that’s not Apex’s fault, they use UPS and when you fill in your address you just get a direct calculation from UPS. I don’t know where you live in relation to Apex (Milwaukee Wisconsin) but I know that shipping across Europe can reach the same prices. As for me my shipping came down to $284,50 which is a lot but still respectable. Unfortunately I also need to pax an extra 4,5% import duty and 21% tax on top when my package arrives at customs. The kits don’t come pre assembled but they do have great product installation videos on their website which make installation basically a step by step tutorial. I don’t mind at all, installing car part is basically a very expensive version of adult Lego.1 point
-
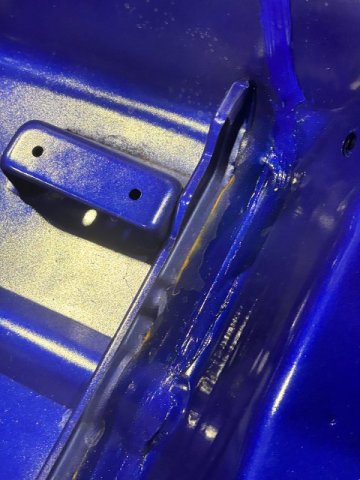
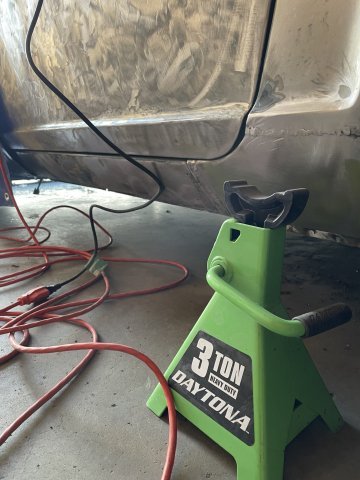
Today I picked up some sandblasting and powder coating from R&S Powdercoating here in Colorado Springs: And......you seem to always find hidden damage once everything is stripped off, huh?
1 point
-
Thank you., JHM . Appreciate the offer. But if you had any kind of sloshing out on the street, then no, it won't work for the track. With a full tank and 40 tread wear tires up to temp at a place like Streets of Willow, every left turn with the car's physics fully loaded right sends a cascade of fuel out of the cap, down the fender, and gets me black flagged off. Darom -- I think that's the cap that's now out of stock. Unless you have a source for it we don't know about?1 point
-
Got out there this morning to gather some stuff to take to the powder coaters. It was also a good time to clean up the front suspension bits so I can put the front end back together. It was a dirt/oil glob on both sides, so with cleaner (g@s) and a toothbrush, a rag, a screwdriver, and a wire wheel attachment in my drill I got everything cleaned up enough to put together in my effort to get this hulk to the body shop for some block sanding and a coat of blue and clear, color sanded and buffed.
1 point
-
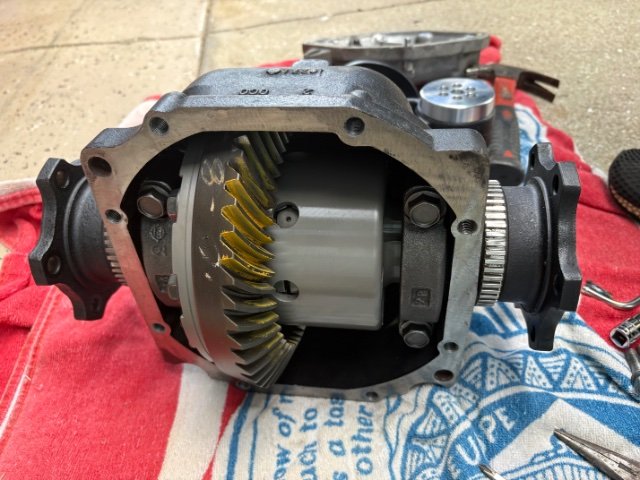
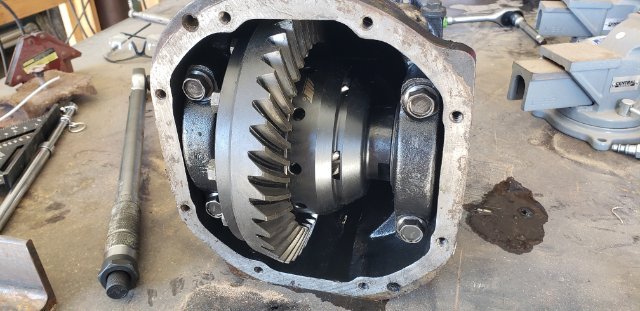
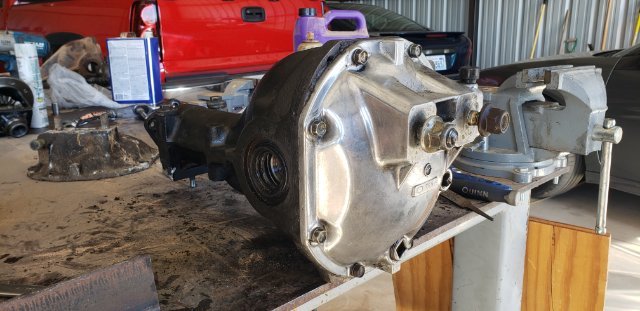
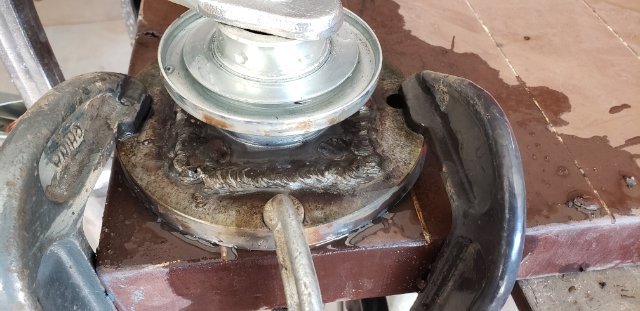
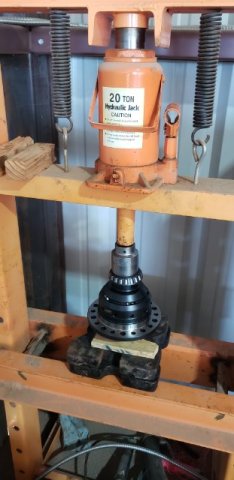
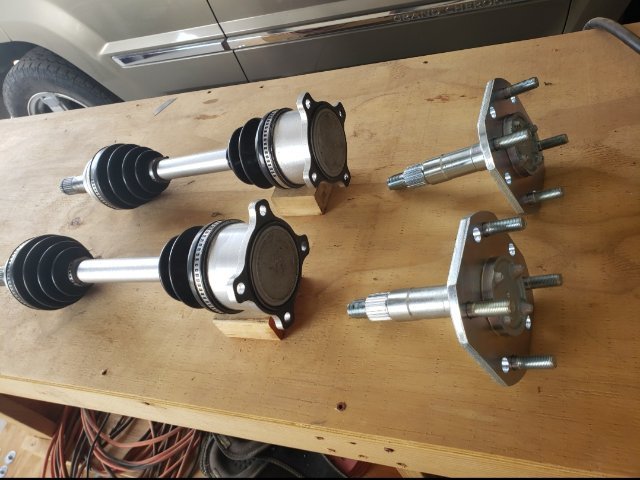
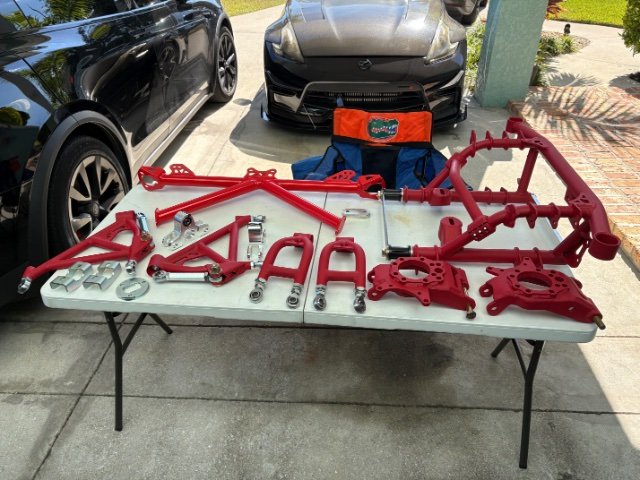
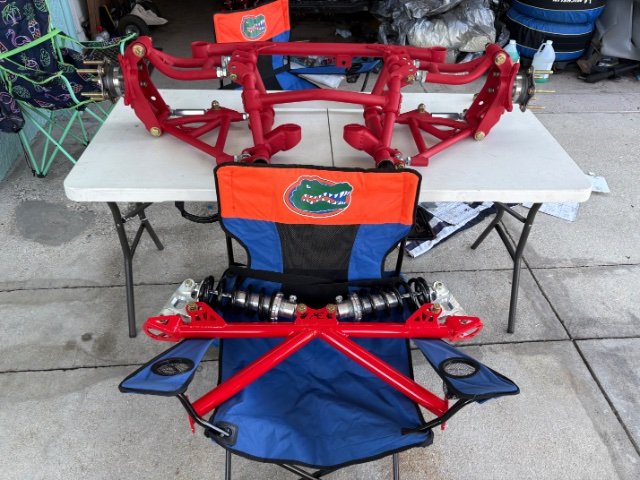
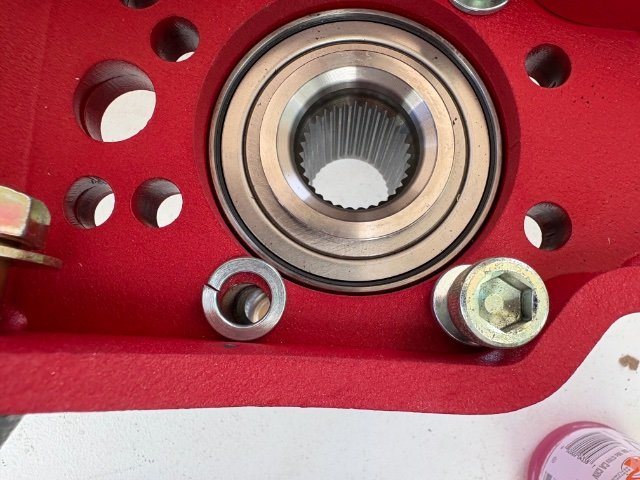
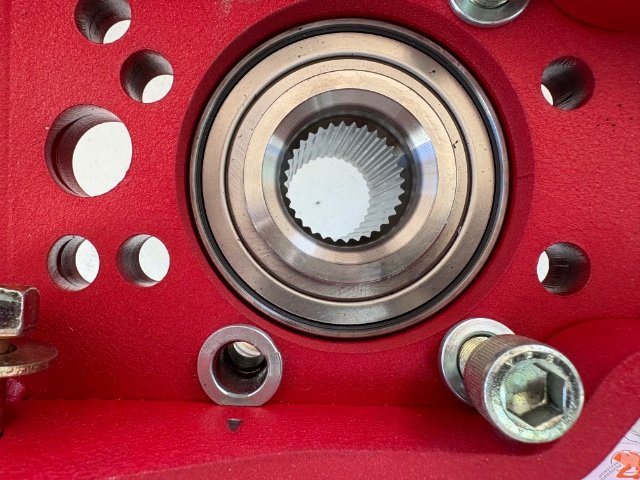
I bought, and installed my new Mfactory Helical lsd ... I also installed techno toys 4340 billet stub axils that i did have to make 4mm spacers where the bearing is pressed on against the flat plate side with wheel studs other wise the plate would tighten up against the bearing housing locked to where it would not spin freely , and I also used OEM 300zxt axils that were in fantastic shape like new internals i installed new grease ,and boots flipped the bearing cage on passanger side axil ,and painted them .... the adapters were from silvermine motorsports i came up with a method to center the companion flanges to adapters by using jb weld and using a digital measuring caliper to center before jb weld hardened holding the companion flange in a vice and putting the 300zxt adapter on top while jb weld cured to hold parts in position for welding ... i used a 2 1/2 thick machined flat large metal plate with 5 clamps to hold the companion flang ,and 300zxt adapter round plate tight with force on the 2 1/2 inch metal plate for welding process to keep every thing from warping, and it worked perfectly . I left it clamped until everything cooled down after welding ... The adapter ,and companion flange after this clamped welding run /spin true flat with no up and down or side play in movement while spinning zero vibration while running on the car .. every thing is worked out pretty good so far every time my TCI street fighter 700r4 hits 2nd gear both rear tires bark posi , and around the corners it feels great tracks fantastic ... some pictures
1 point
-
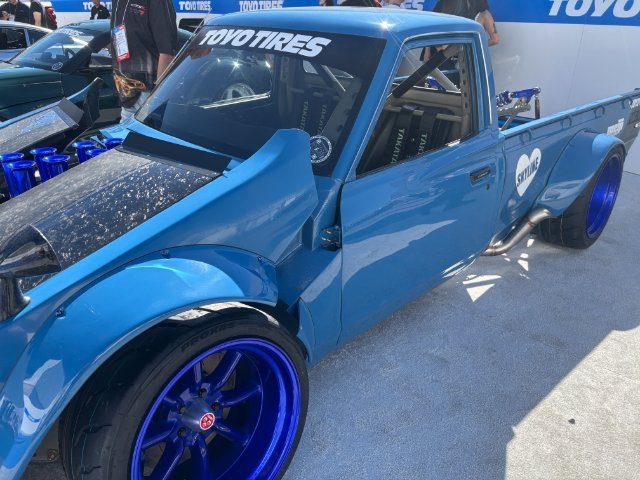
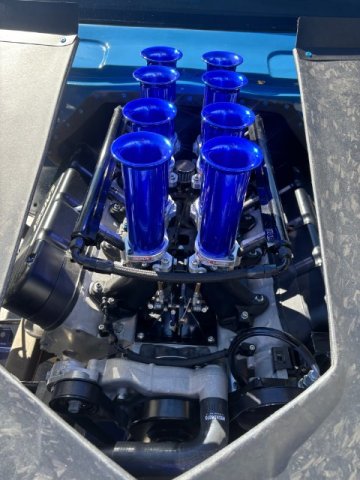
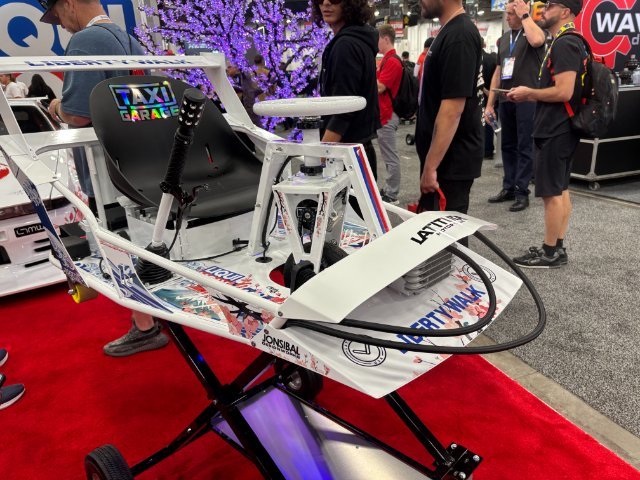
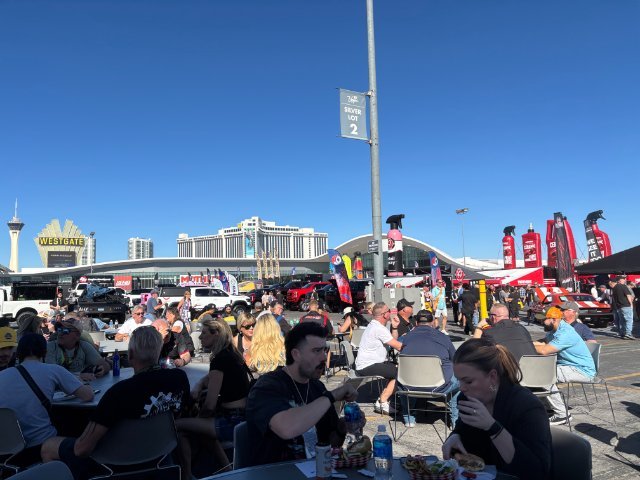
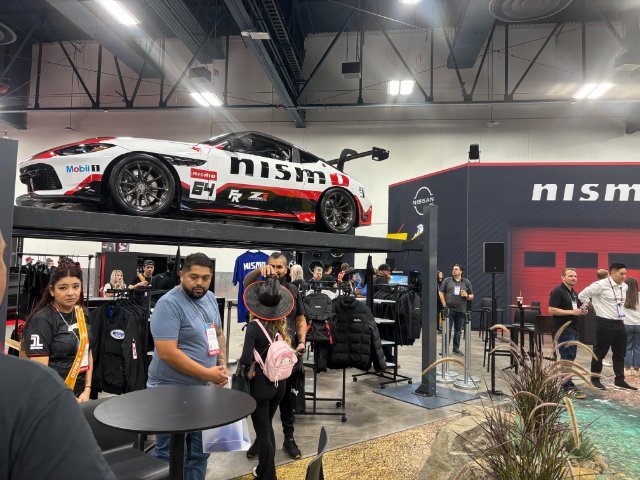
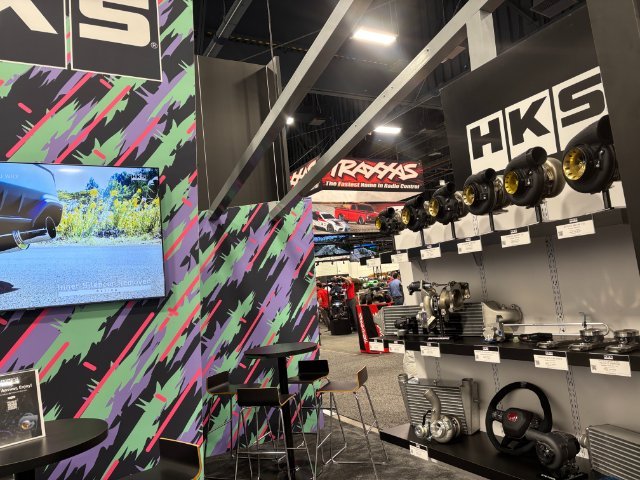
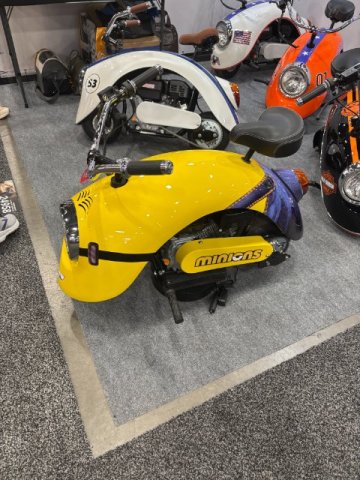
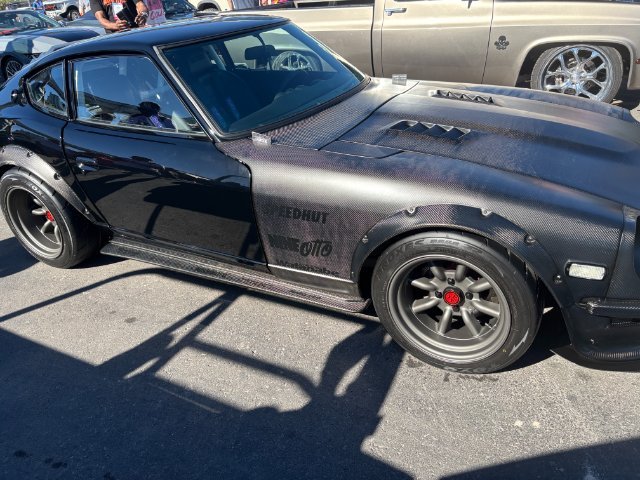
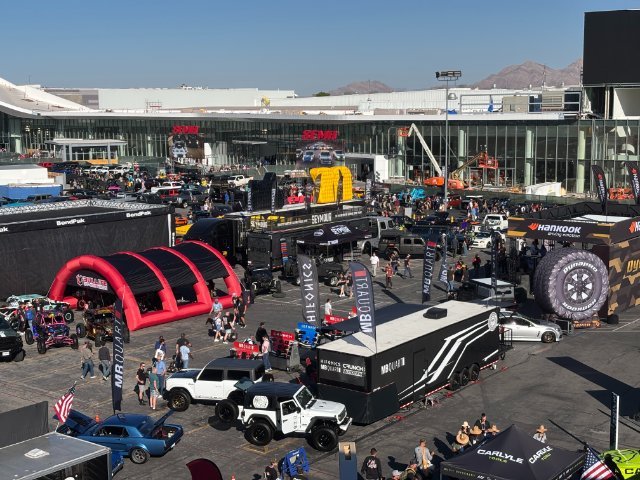
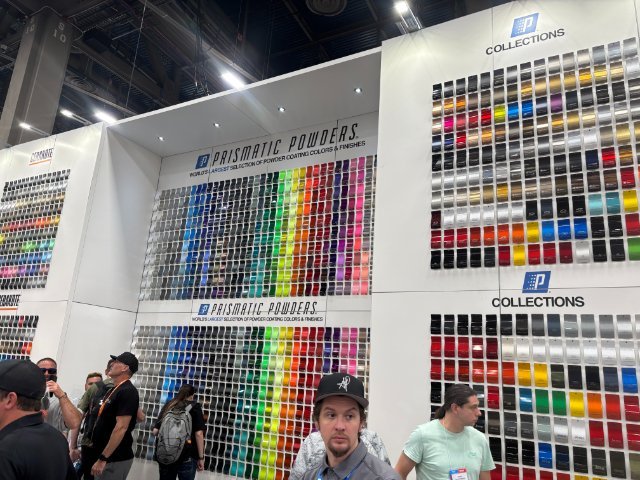
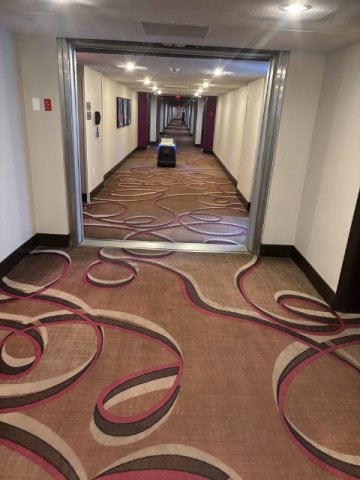
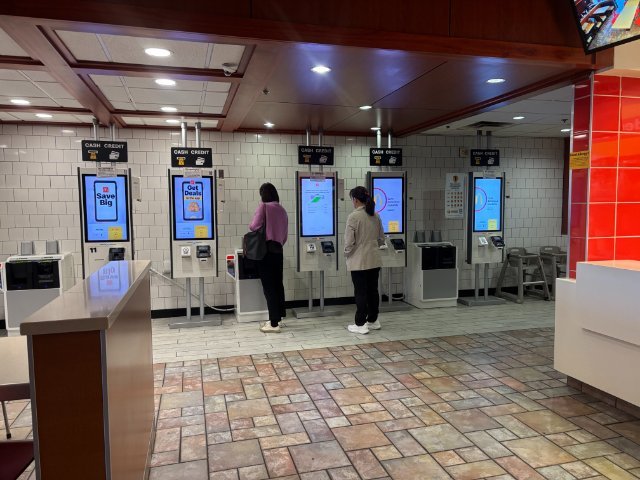
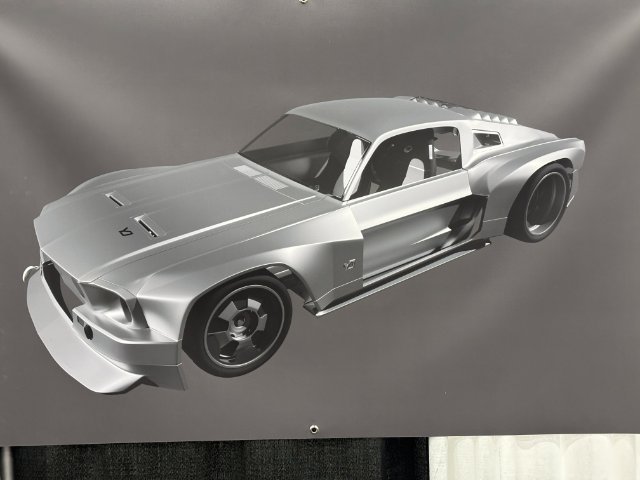
More from Sema Show- Fully Modified Toyota Truck with Tilt Front End nject Fuel Injected V8 motor to power it. Interior of this Race truck Rear Suspension for this OFF ROAD RACE TRUCK Eating Lunch at a Food Truck outside. Mc Donalds Extra Value Meals like Cheese Burgers Deluxe Costs $35 on the Strip. All the Strip Hotels charge for Parking. Even if you did not ask for a Room with a View. you may be charged for it and you don't find out till you are checking out. Even though I enjoy going to Las Vegas for the Sema Show, the cost of going is not worth it to me. So this maybe the Last Time that I go the Vegas! Even the hotel that I stayed at-Harrah's was empty. This pics show a Robot Vacuuming a Hall Way. Even McDonald"s on the Strip was empty. Eating Lunch at one of the numerous Food Trucks outside of the Main Convention Buildings A Razor Crazy Fully Modified with a Disc Brake with Taxi Cab Performance Casters and 48Vt Electric Motor. I still don't know what the Front Cooler is for. My guess would be the Cooler is for cooling the Electric Motor. Nismo Race Car on a Lift at their booth. Ford Gt with a Coyote Motor in it. HKS Booth with their Turbos, intercoolers and many other accessories. A Cute Mini Bike with a VW Fender Covering it. 240z with many Carbon Fiber Parts all over it. As you can see, the attendance is definitely down. this pic was taken in the Front Entrance of the Main HALL. Normally, there would be Wall to Wall People. Outside View Prismatic Powders-Wall of their wide selection of Powder coatings. Make you own Mid Engine 67-68 Ford Mustang You cut out the Mid Section of your Mustang forn the Firewall to to Rear Tail Light Panel then insert his new frame into the space. The Finished Product should look like this pic. I stiill working posting pics that for some reason are not posting.
1 point
-
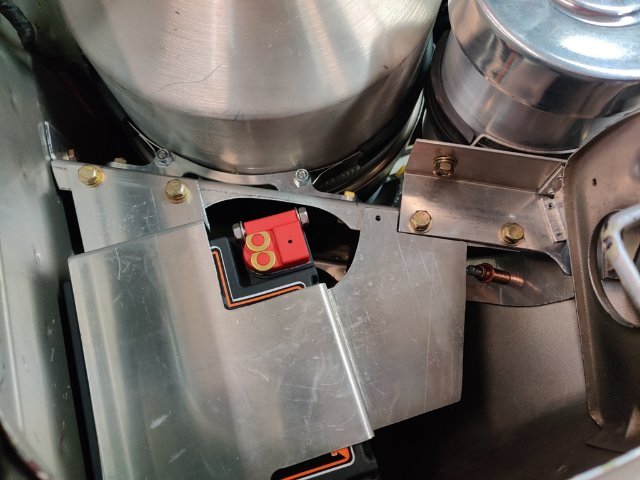
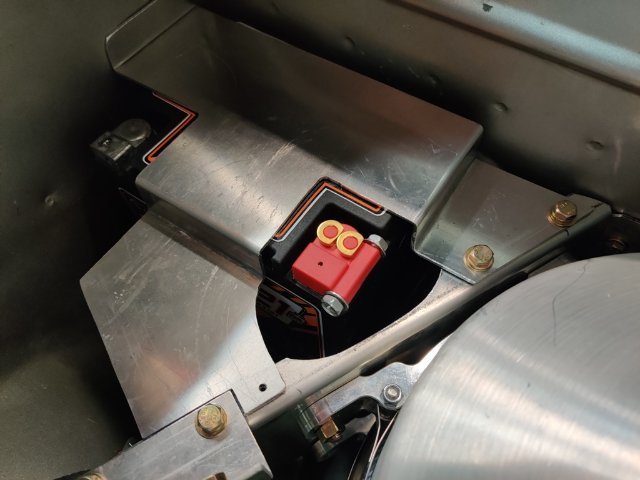
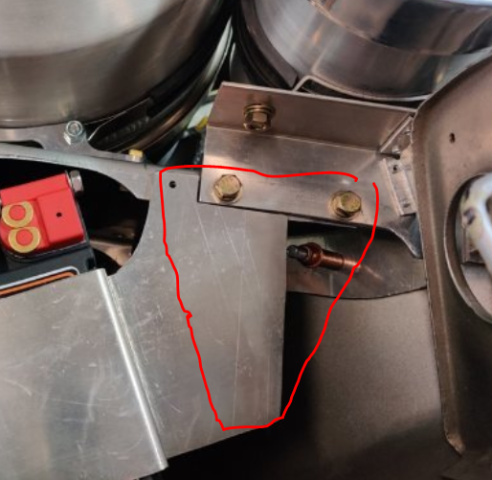
It seems there isn't much activity on this forum vs. about 10 years ago. I guess not as many of these cars are still being modified now. Anyway, an update on some progress. The pool hose I am using here is just for mock up purposes. It has the right ID to fit tightly on the fittings. I just heat up the the hose (a plastic/vinyl material of some sort) and then slide on the fitting. I believe this is helping to establish the actual hose lengths I need as well as "clocking" or indexing the fittings to the hose. Additionally, though I did not plan it this way originally, I came up with a great design for securing the battery to the tray... and made this upper battery mount bracket in such a way as to tie in to the bracket that I made to mount the oil tank in the car. The upper bracket I made today not only clamps the battery in place, but also ties into the oil tank bracket and the engine compartment panel, triangulating everything. This design makes the mounting for the tank very rigid. I still have a bit to figure out with regard to mounting the forward most part of the bracket that I made today to go on top of the battery. I think I may cut a plate like this red outline and rivet it to the upper battery bracket. This panel will sit atop of the angle piece that presently holds the breather tank in position. Then the two bolts (within the red outline representing the new panel) will join all three layers. The result here is that the triangulation appears to substantially strengthen the tank bracket. I won't have issues with the weight of the oil in the tank causing the brackets to bend/fatigue.
1 point
-
You don't really need the brake line differential pressure warning switch. It does function as a decent junction block. You are also likely to want an adjustable proportioning valve instead of the stock unit unless you plan to run stock brakes.1 point
-
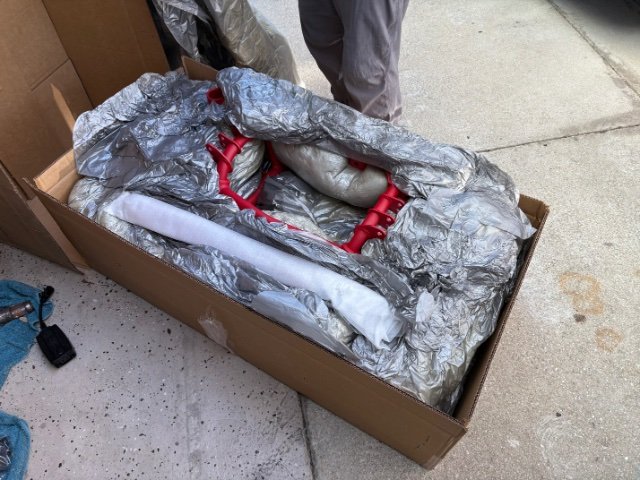
After many nights thinking about it, the current Black Friday sale and optimizing my order for the most value for my money I finally decided to pull the trigger. Maybe it’s because of the size and weight of the total order but the calculation of the shipping was a bit weird. As the parts will need to be shipped to the Netherlands I knew the shipping would be expensive but my shipping came down to almost $600!! By combining some stuff I got the shipping to drop down to $280,- while still giving me the stuff I wanted and basically a free rear strut brace. Here is a list of all the stuff I got: - Front fender brace - Frame rails - Rear strut brace - Front control arms - Steering knuckles - Front crossmember - Upper steering rack clamps - Rear control arms While weighting my options Apex dropped there Retro Mod line of suspension which allows you to keep the stock R180 or R200 long nose differential, axles and spindles. I really wanted to get the new rear suspension and subframe but found it to be too expensive for me at this time. By dropping the rear subframe I got to order the front crossmember, control arms and steering knuckle and still be a lot cheaper off. Weirdly ordering all the front suspension bits separately was almost $300,- cheaper than buying the Retro Mod front suspension kit. Seeing as I don’t need the tie rods (and the steering rack, you need to buy that separately) I’m even cheaper off. I’m hoping to get the frame rails and fender brace fitted over the winter and have the car ready before next spring.1 point
-
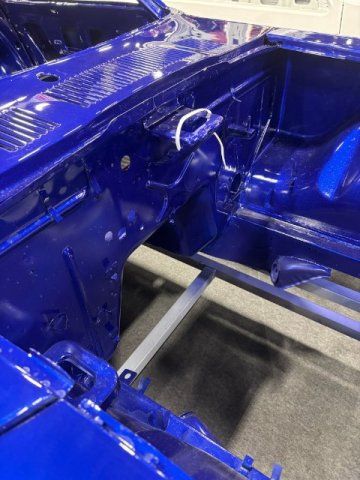
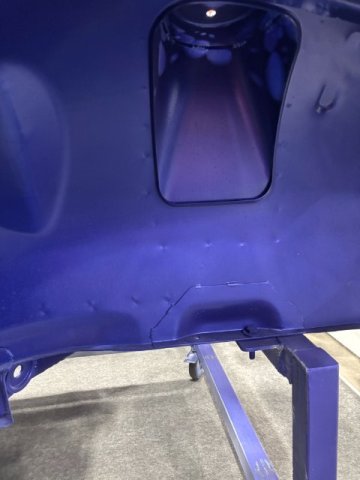
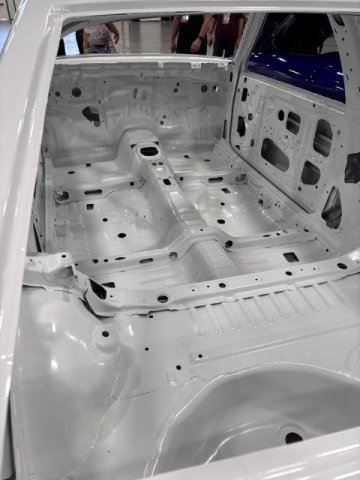
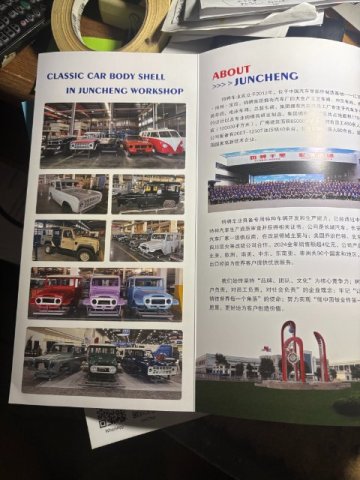
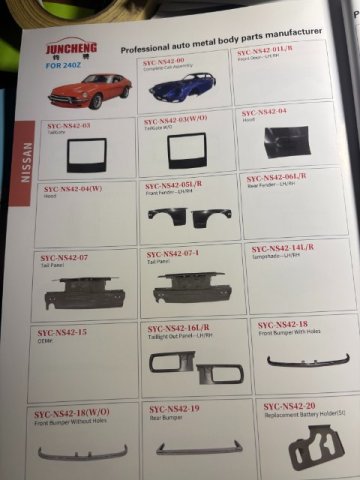
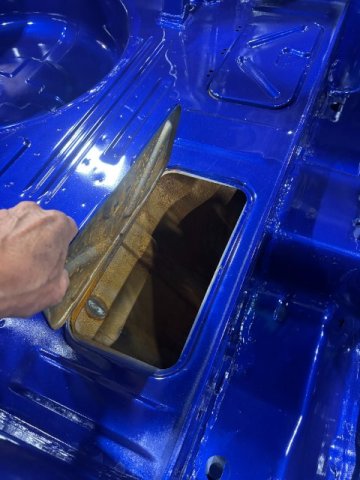
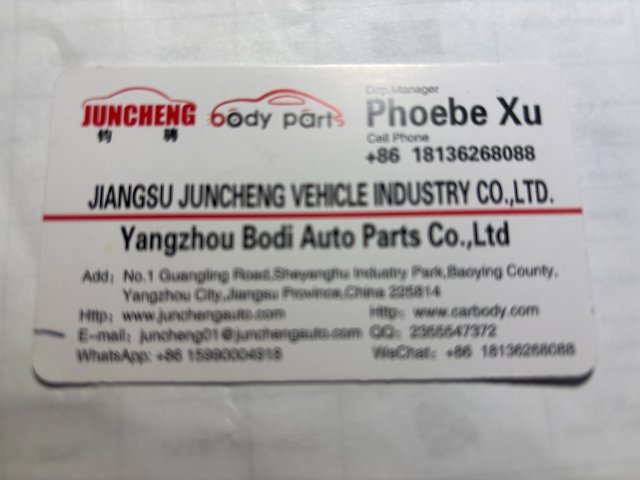
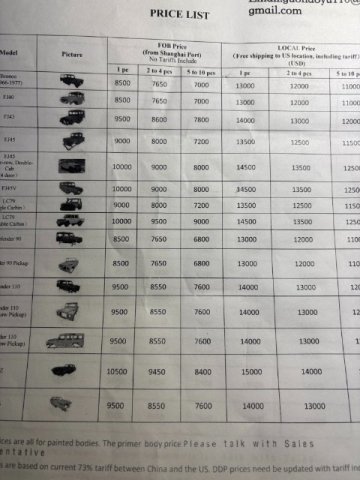
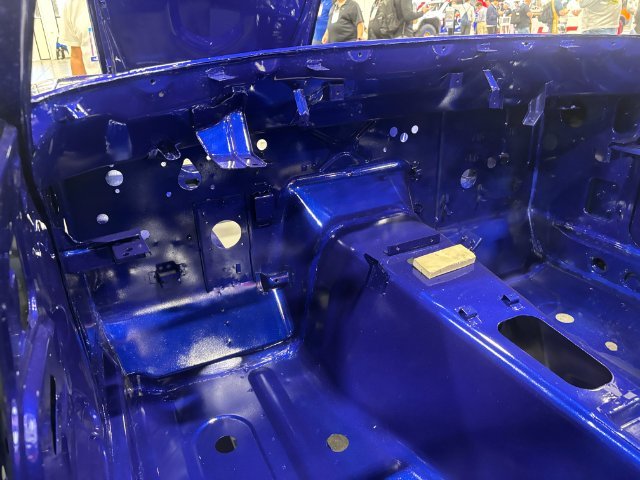
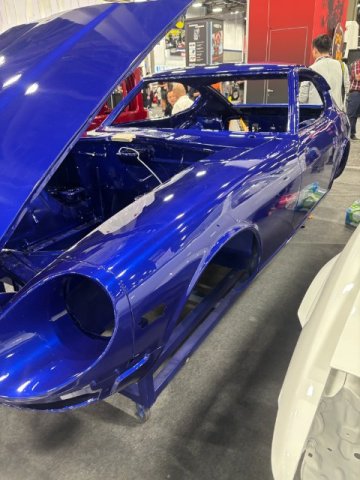
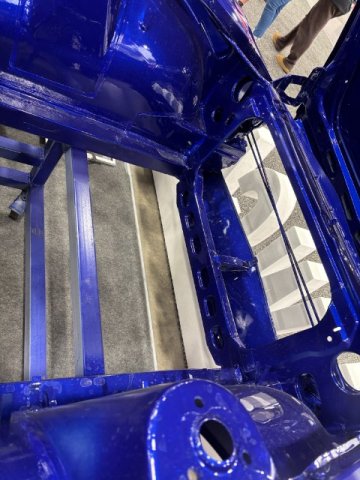
SEMA SHOW-Complete Early Model 240z and All Aluminum Body Panel 240z This After Show will give you details about the latest news of Early Model 240z Body Panels. The First will a Complete Assembled Sheet Metal 240Z manufactured in China. Jiansu Juncheng Vehicle Industry Company makes Toyota La Madzand Cruiser 40,60 and 70 series,Land Rover 90/110 series, Ford Bronco1966-1977 Nissan 70-74 240Z, Volswagen T1, MadzaRX-3,and ToyotaAE86. Individual Body Parts(Doors, Hood, Fenders, Grilles,etc besides complete Body Assemblies. Right Front View 240z Interior View 240z Engine Compartment Pic 240z Front Wheel Well 240Z Right Inside Door × 240Z Interior Compartment Front Core support Interior Compartment Seat Mounts Toyota A86 Interior Compartment These pics taken of their brochures. This is a page from their catalog. It shows the individual 240Z Body parts which are available. My opinion is they should try to sell the body parts that other than what is presently available. Parts like inner body panels, whole floor pans, inner fuel compartment, etc should be sold. Parts that are commonly needed to fix corrosion prone areas. After all, they already made the panel molds. Also, I have another comment about their body parts. Their Firewall does not have a Vehicle identification Number stamped on it. Without a manufacturer identification number, vehicle registration maybe difficult in most states 240z individual body panels Their Price List shows the Full Assembled 240Z costs $1500 arrived at Port of Los Angeles. Let me tell you my Automotive Background -I was a ASE Certified Automotive Mechanic and also ASE Certified Automotive Collision Repairman and Painter before I give you my opinion about these Chinese Body Parts. I gave this 240Z a good inspection and asked a lot of questions concerning the manufacturing of these parts. Their Sales Team was not very informed about the actual process of manufacturing of the body parts. So I had to go with what I could see and feel for this opinion. The parts seen to fit together ok but without a Frame Measuring Gauge( Tram Gauge I could not determine the Frame Squareness and Length. The biggest problem with these parts is their Corrosion Control Methods were lacking. They should be at least be coated Epoxy Primer before welding the car together. Nissan factory cars are completely immersed in tank of primer. This method insures primer covers even boxed sections of the vehicle. This a pic of the Storage Compartment behind both seats in the car. No Primer-Corrosion already on surface Maybe the Manufacturer was rushing to get the 240z into the Sema Show or maybe this is normal. This company was still looking for someone to distribute their parts in North America so we have wait and see. For more information- email this address Next-All Aluminum Panel 240Z manufactured in Japan
1 point
-
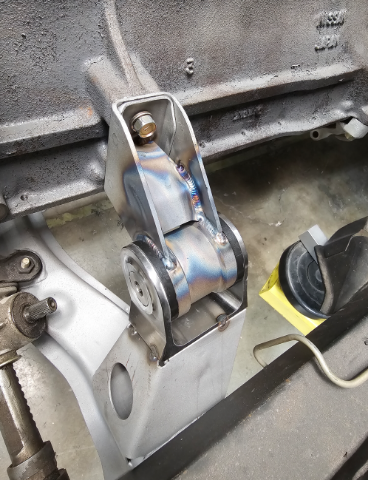
Dual L6 knock sensors using the stock block m6 hot water pipe mounts. They are actually about perfectly placed! These are just ti prototype. I am designing my own and will be adding them to the things I make and sell.
1 point
-
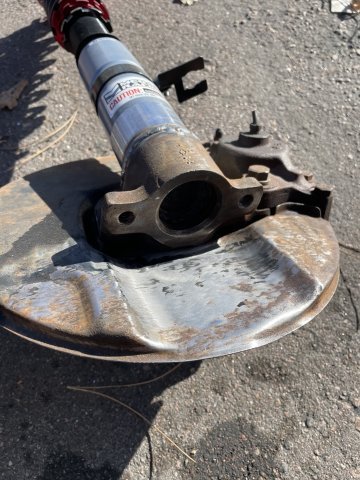
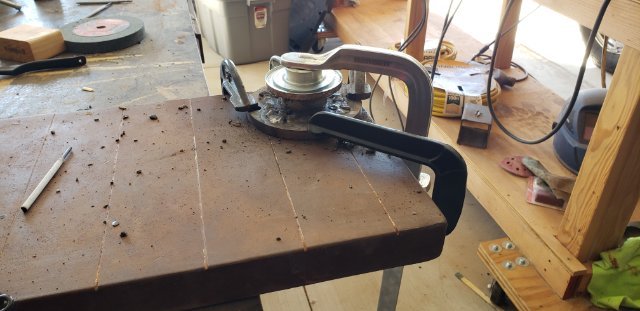
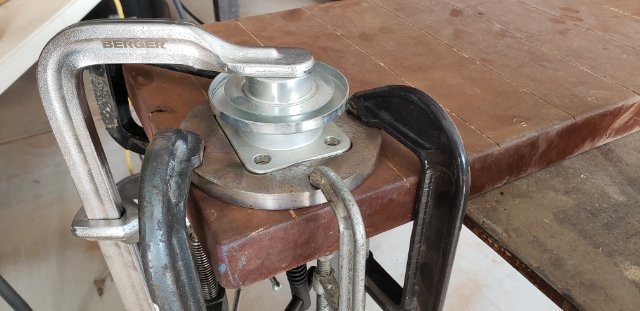
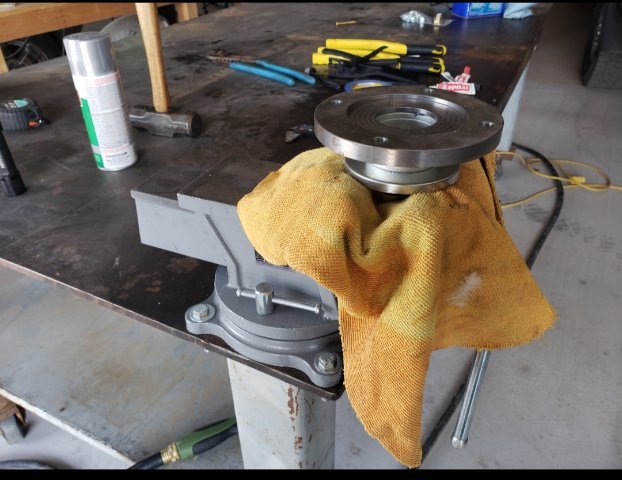
More pis of it finished up The bottom plate was beat up a bit and bent from floor jacks. So I took off the old one by drilling out the spot welds. I then drew up the shape and had a new one laser cut. The center plate that is welded to this plate, I re-made it as well, but out of 304 stainless steel. This way I can leave it a brushed stainless finish after powder coating and it is a good place to use a floor jack. I then spot welded on the larger plate in the original locations I then tigged the seam between the spot welds Then tigged on the center stainless plate Then blasted the entire cross member and powder coated it in a super black semi gloss powder coat. Powder coated the motor mounts as well I always first do a primer powder coat that is sandable I sand most off this off to fill the small blemeshes Then final coat Finally the brushed stainless plate for the floor jack Next up is getting a new transmission, then finishing the exhaust
1 point
-
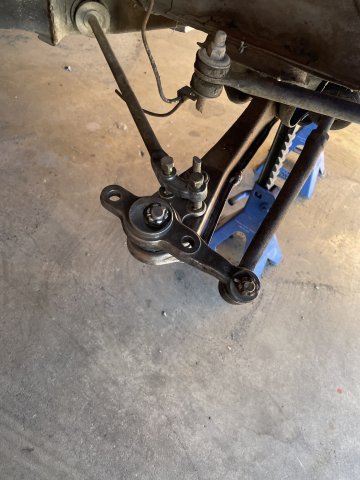
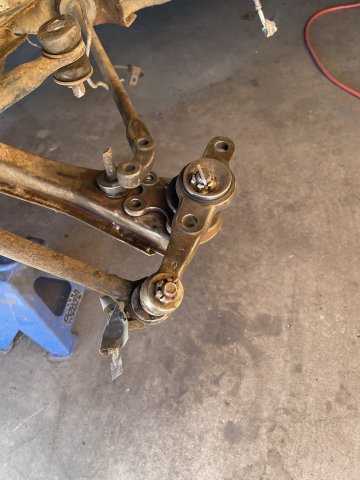
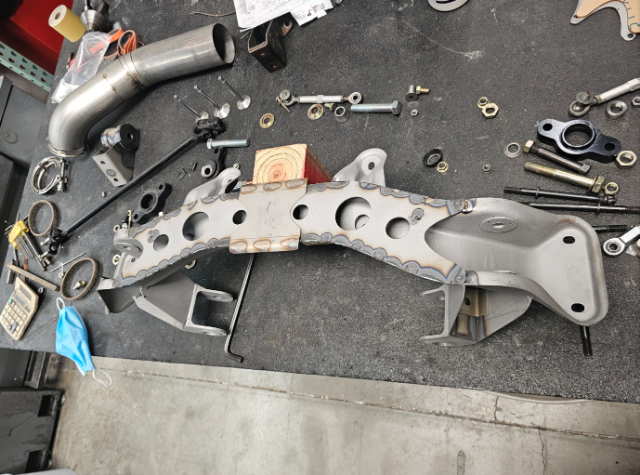
I finished up the front crossmember and motor mounts Started with a stock crossmember with the need for new engine mounting since I moved the engine in the chassis back about 1 inch. I extended and boxed in the existing upright Some grinding and blasting to clean it up 3 D printed mockup of a machined bracket I made to accept the moustache bar busings. I designed these years ago and have been in the NA car for 15 years. Worked well I machined this weld in bracket out of a solid chunk of steel because I wanted the details for the bolt holes and you could not do that with bent sheet metal. Stupid but fun. More soon
1 point
-
So that was a lie. Better late then never I suppose...
1 point
-
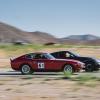
Did a dyno run today . 226 HP and 226 torque . pretty happy considering I’m running a stock N42 intake .
1 point
-
I'm doing exactly the same bottom end and after hearing that now I really need to move it along. Sounds great. You know a KN20 head would solve that pesky power drop off problem:)1 point


.jpg.1582ea6be675beb3dbd84333530dceda.jpg)