ktm
-
Posts
1725 -
Joined
-
Last visited
-
Days Won
3
Content Type
Profiles
Forums
Blogs
Events
Gallery
Downloads
Store
Everything posted by ktm
-
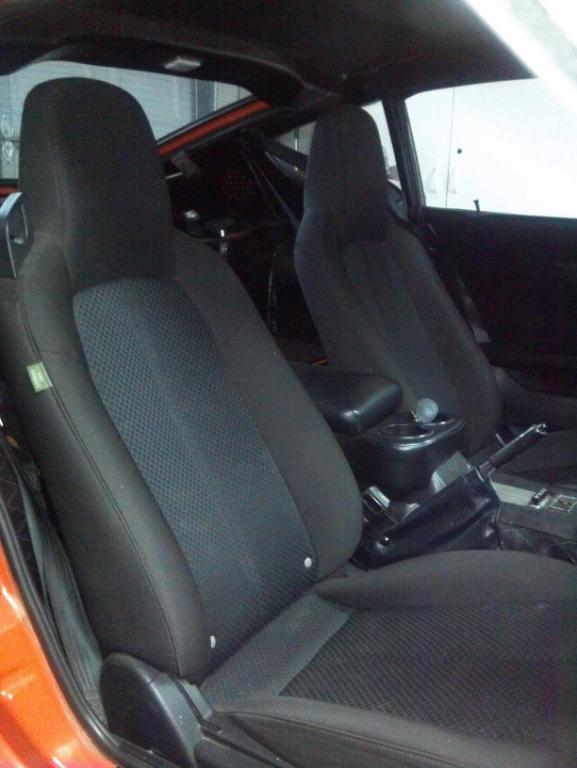
I have 2008 Miata seats in my car and they are fantastic. I did not have to do a thing to the seat itself.

-
Not to be an ass, but the topic of rear ends comes up all the time and has been beaten to death. Copy and paste the following into your Google search bar: R200 V8 site:hybridz.org
-
I never notice how small a Z really is, till this photo
ktm replied to PLATA's topic in Non Tech Board
Still, looking at a 4 door 510 next to a Z and realizing that it is a sedan versus a 2 seat sports car puts things in perspective.
-
I never notice how small a Z really is, till this photo
ktm replied to PLATA's topic in Non Tech Board
Park a Z next to a 510 then it will look huge! My Z parked next to my wife's Prius really drives home just how small the car really is. Hell, I have to look up at Fiat 500 drivers...... -
Suspension Techniques vs MSA Sway Bars
ktm replied to Phantom's topic in Brakes, Wheels, Suspension and Chassis
The best way to search any site is on Google by the following method. Enter the search topic in the window and follow it by site:xxxxx.xxx For instance, to search the topic of rear sway bars on Hybridz.org you would enter: rear sway bars site:hybridz.org This way the ONLY results that are shown would be from Hybridz.org. -
Check the C-channel welds/connection to the R200. The R200 flexes under load and the engine & transmission twist under load. It sounds like something may be fatiguing.
-
I had a drone at 2500 rpm with my first exhaust (same as in the clip) but it did not have a resonator. I forgot to mention that the setup in the clip has a resonator. Following is a clip of my first exhaust without the resonator. You can hear that it is a bit louder at idle. Take the claims of poor flow with a grain of salt. Unless there is proven dyno comparisons people are only comparing flow bench numbers like magazine racers. Even so, unless you are trying to eek out every last bit of power, who cares if you lose a little bit of flow? Go for the sound you like. I researched my setup for hours and finally decided on the Flowmaster because I liked the sound.
-
JTR shorties to a 3-in. single into a Flowmaster Series 40 muffler.
-
I was turned onto them about 6 months ago. I did not see this particular episode though. I really like their down to earth approach and appreciation for all things automotive.
-
"oooooooh.....clank clank clank.....yep, I just did that" Good to know that even the "professionals" **** up once in a while.
-
I just had my car painted (February 2014) and the front windshield replaced. The local auto glass shop found a replacement without the blue tinting for me.
-
240z Wilwood proportioning valve fitting leak
ktm replied to Curtball's topic in Brakes, Wheels, Suspension and Chassis
I had leaks too until I reflared my lines with a good flare tool (Rigid) and Cupronickel lines. -
Looking for feedback on LS 240z swap
ktm replied to FrankieD's topic in Gen III & IV Chevy V8Z Tech Board
Frankie, the car looks fantastic. You have to take everyone's quotes for swap prices with a grain of salt. Everyone does things differently. My swap cost me around $8,000 and that includes the price of the engine and transmission. I did all of the work myself, but my car was previously setup for fuel injection from my earlier turbo build. If I had to include the cost of setting up the car for fuel injection, I would be at $9,000 to $10,000. FYI, I hope the shop is not manufacturing their own mounts. You can pick up JCI mounts, which includes the driveshaft, for $600. Buy the ceramic coated headers from JTR for $500 and you are set. Everything else the shop will need to build. -
SuperSamuri, nice looking car at least on the outside. Welcome to the forum and addiction.
-
I would not say you are wasting anyone's time, they don't want to see you make a serious mistake and render your car basically undriveable on the street (or at least make it less safe for street use).
-
I always.....ALWAYS send my injectors out for cleaning if I buy them used. When I bought my LS1 I sent the injectors out for cleaning. When I did my first turbo swap I sent the Supra 440's out for cleaning and then again when I bought a set of Siemens 757s. It is cheap ($100) insurance.
-
This. I routinely average 20 mpg in my car with 3.70 gearing and an A4 transmission with tires 1 inch taller than stock. I should get about the same fuel economy given that 4th gear is at 0.696.
-
Looking for feedback on LS 240z swap
ktm replied to FrankieD's topic in Gen III & IV Chevy V8Z Tech Board
Sounds like my suspension setup. I have an LS1 with a 4L60E in my 1972 240z. My suspension is Tokico HP shocks with 280z springs. If you are running the 240z springs, I'd ditch them if possible. I had them for 5 years and they were coil bound the entire time. Switching to the 280z springs made an amazing change in the ride quality on our So Cal roads (I live in Diamond Bar). I also have an Suspension Techniques front and rear sway bar. My bushings were all swapped out for poly bushings when I bought the car, and the steering rack coupler is poly as well. The car rides firm but not overly harsh (once I got rid of the 240z springs). As Keith stated, 50 or 60 series tires really help with the ride quality as well. Stick with 15 or 16 inch wheels and give yourself some sidewall for comfort. I disagree with Keith about the fuel tank though. If you are not tracking the car, you do not need to do much to the tank save for increasing the feed line diameter. Just keep at least 1/4-tank of gas in the car at all times. I had my return and feed lines extended to close to the drain plug and increased in size to 3/8-in. (stainless as well). You do not need to do this, but increasing the diameter will help with any cavitation/starvation issues. Saying that, if I had to do it all over again (and I may) I would add an internal baffle/sump to my tank for F/I. Where in So Cal are you located? -
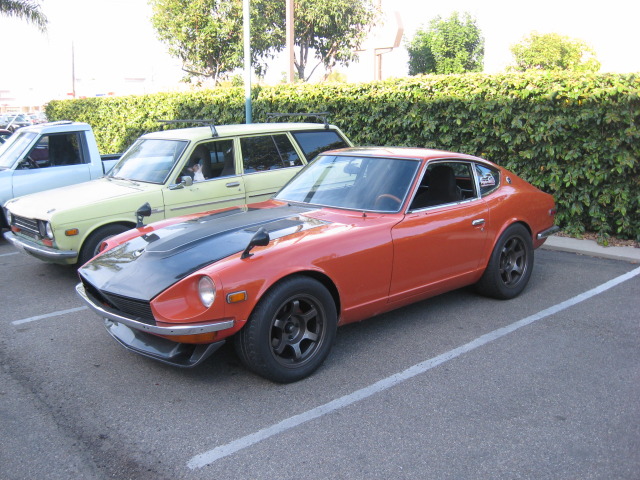
Update. The color is Audi Solar Orange.
-
Looking for feedback on LS 240z swap
ktm replied to FrankieD's topic in Gen III & IV Chevy V8Z Tech Board
I ran half-shafts on my old 410 wheel torque L28ET for 3 years and now on my LS1 for 2 years without issue. Use your tires as a safety valve. I have 245/50 340 treadware tires. I could spin them in 1st and 2nd, with a nice little partial slip in 3rd at times. If you go with stickier tires then you will need to be concerned about the half-shafts; if you drive smart, have fun and understand the limitation of your drive train you'll be fine. In the end I upgraded to CVs because I got tired of spinning my tires constantly. Yes, its fun when you want to do it......no, its not fun (and can be ******* scary) when they break loose when you are not actively trying. -
I never had issue with the Z's pulley on the alternator. It looks rather large but it is a v-groove versus the serpentine belt setup on the CS144. Don't discount that you got a bad alternator just because it's new. If you turn the key off the battery will drop to around 12.7 volts; it does not hang at 14 volts. If your battery drops to 12 volts then it is nearly discharged. Have you measured the voltage at the back of the alternator while the car is running? Have you measured the voltage at the sense wire while the car is running?
-
CV half-shaft swaps in 2014 any less expensive alternatives?
ktm replied to gvincent's topic in Drivetrain
That is one of the reasons why I went with the Wolf Creek Racing setup, as well as trying to source a good pair (or pairs) of 300zxt CV axles. You can only get the 280/300 axles used whereas the Wolf Creek Racing setup comes with brand new axles. The price Wolf Creek is charging is very fair if you think about it. The adapters and new CV axles cost $900; MM/Checkered Flag adapters are $400 and then you need to source the axles which can easily run $300 for a pair but they are still used. You still have to flip the cages and worry about binding. -
Tail Lights - Replacement connector *non-stock found inside*
ktm replied to ktm's topic in Ignition and Electrical
Post has been updated with photos. Click on the photos to see the text. -
Tail Lights - Replacement connector *non-stock found inside*
ktm replied to ktm's topic in Ignition and Electrical
I'll post some photos tonight. -
Are you in need of a replacement connector for your tail lights but don't want to use or gamble on a used connector? Would you like to upgrade to a different bulb type (3156/3157) that does not require a spring as well as twist in turn action? Well, I found just the one for you. Introducing the Dorman 85881 connector for late model GMs. It utilizes a 3157 bulb (two filaments) but can be used for every light in the tail light housing. For the reverse light you just don't wire up the third wire. Now there is just a tiny amount of modification that needs to be done to both the connector and the housing, but it is very, VERY minor. First, the housing. You need to trim a small portion of the housing between the two stock tabs that are at 10 and 12 o'clock to make it one big opening. The second thing you need to do is take some 80 grit sand paper and lightly sand the perimeter of the opening. The Dorman connector is almost a perfect fit and just a tiny bit of sanding will allow it to pop into the housing. As for the Dorman connector, you need to trim the tab that sits at the 6 o'clock position in half. You want to remove the portion of the tab that has the trapezoidal end so that the remaining portion is just a rectangle. The connector below does not appear to be correct where the wires attach (though that one could be better) but the bulb socket is correct. The Dorman 85881 connector I utilized has the body of the plug behind the black weatherstrip project 90 degrees from the socket. That's it. The 3157 is a two filament bulb and can be used for all of the lights. The connector is a three wire connector as well and can be wired up in any combination. What I like about the connector is that it eliminates the metal housing that is subject to rust/corrosion. It eliminates the spring as the bulb just snaps into place. I don't believe that the mods make the housing unuseable for the stock connectors either. You may have to modify the connector to allow it to spin 360 degrees instead of "locking" so that all three tabs are covered, but that's it.