Miles
-
Posts
2393 -
Joined
-
Last visited
-
Days Won
37
Content Type
Profiles
Forums
Blogs
Events
Gallery
Downloads
Store
Everything posted by Miles
-
Did you try Black Dragon? http://www.blackdragonauto.com/features/z/ZBMC.htm
-
Here is athe link to the JTR smog rules site: http://www.jagsthatr...0_V-8_Smog.html HybridZ: http://forums.hybridz.org/index.php/topic/90059-more-california-smog-info/page__p__854361__hl__smog__fromsearch__1?do=findComment&comment=854361
-
Lozer They didn't raise any issues about the year of manufacture? I have wondered about how they could make much of a deal about small block chevy engines since they were pretty similar from year to year. For example, is there really a difference between say a 1972 SBC and a 1976 SBC? The 76 SBC may have had some different smog equipment on it then the 72, but the engine is basically the same. So did they treat your 68 Camaro engine as a generic SBC and issue the bar tag or is the rule about using and engine the same year or newer not valid?
-
I believe that the car has to retain whatever smog/vapor control equipment it came with such as the fuel tank vapor recovery tank, hoses, connections to engine etc. Best thing is to read the actual current Califonia DMV rules.
-
The engine has to have what ever smog equipment was required for the year the engine was built. For example, a mid 1960s engine might only have an EGR or a smog pump. But here is the rub: to be a legal swap the engine has to be the same year or newer than the vehicle it is going into. So a 1975 240Z would have to have a 1975 or newer engine to be legal. If you don't plan on building a smog legal 240Z V8 then you can put what ever you want in it. Try googling California engine swap laws. Also the DMV website has info on engine swaps.
-
This has been covered extensively. Buy and read the Jags That Run manual from the JTR website and read the manual several times before you start your project. JTR covers most of basics concerning smog legal v8 swaps. A 1975 and older car is only exempt from the smog inspection., It still has to have the year-appropriate smog equipment to be a legal engine swap. Keep searching.
-

checked out my first Z today...1s and 2nd gear didnt rev high.
Miles replied to mattausten23's topic in Miscellaneous Tech
Look at some other Z cars before you decide on this one. -
Strut options for Street Z's
Miles replied to Xnke's topic in Brakes, Wheels, Suspension and Chassis
I've used Arizona Z springs with Tokico blues on two V8 Z builds. Both cars were built as daily drivers. Both drive like they were on rails. The springs are a good match for a basic 240Z V8 project and they maintain the stock ride height - the 240Z is low enough for street use. Even at stock ride height I have bottomed out on speed bumps so I wouldn't want the car any lower. Add poly suspension bushings and it is an even better ride. The Arizona Z spring rates are 180lb/in front and 200lb/in rear. See them at http://www.arizonazc...om/springs.html -
Raising engine to remove front crossmember
Miles replied to mclark999's topic in Gen I & II Chevy V8 Tech Board
Just pull the engine and trans as a unit. It doesn't take that long. Otherwise you may end up building a man trap of jacks and jackstands. Personally I wouldn't put a jack under the oil pan. When I changed my engine mounts I used an engine hoist to lift the engine one side at a time. It only moved 1 to 1.5 inches. -
Bellhousing/engine basic question
Miles replied to oakland240's topic in Gen I & II Chevy V8 Tech Board
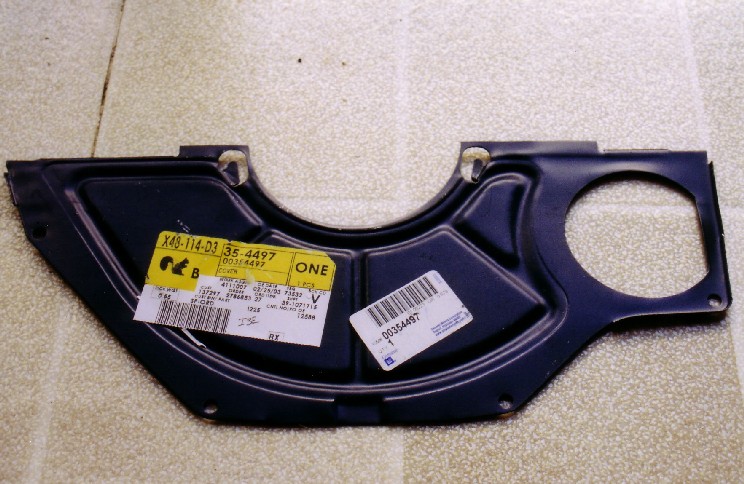
On my first 240Z build in 2001 I was able to buy the dust shield from a GM dealership. For my second build in 2009 GM told me that the part was NLA. So I searched wrecking yards for about a month, couldn't find one, and finally just cut one out of sheet aluminum. -
Look here: http://www.pape.ws/a...%20a%20240Z.htm Also, Google 240Z Corvette rear. There are a number of Corvette swap links.
-
Loose fan belt. Suggest that you just replace it and tighten it properly.
-
Bellhousing/engine basic question
Miles replied to oakland240's topic in Gen I & II Chevy V8 Tech Board
The part you are lookig for is NLA from GM. See picture for what the part looks like. I made my own out of sheet aluminum using the bellhousing as a pattern.
-
Can't open Driver Side Door ('76 280z)
Miles replied to Leash's topic in S30 Series - 240z, 260z, 280z
If the door mechanism is like a 240Z there is a nylon adusting nut on the linkage that connects the door handle to the door mechanism. If that nut has backed off the linkage will not push the door mechanism connection far enough when you pull up on the outside door handle. Sometimes the linkage just falls out place. The nut adjustment effects the door lock plunger and the throw on the outside door handle. Just experiment with the adjustment until everything works right. Remove the door panel and roll the window all the way up so you can see the door handle and linkage. -
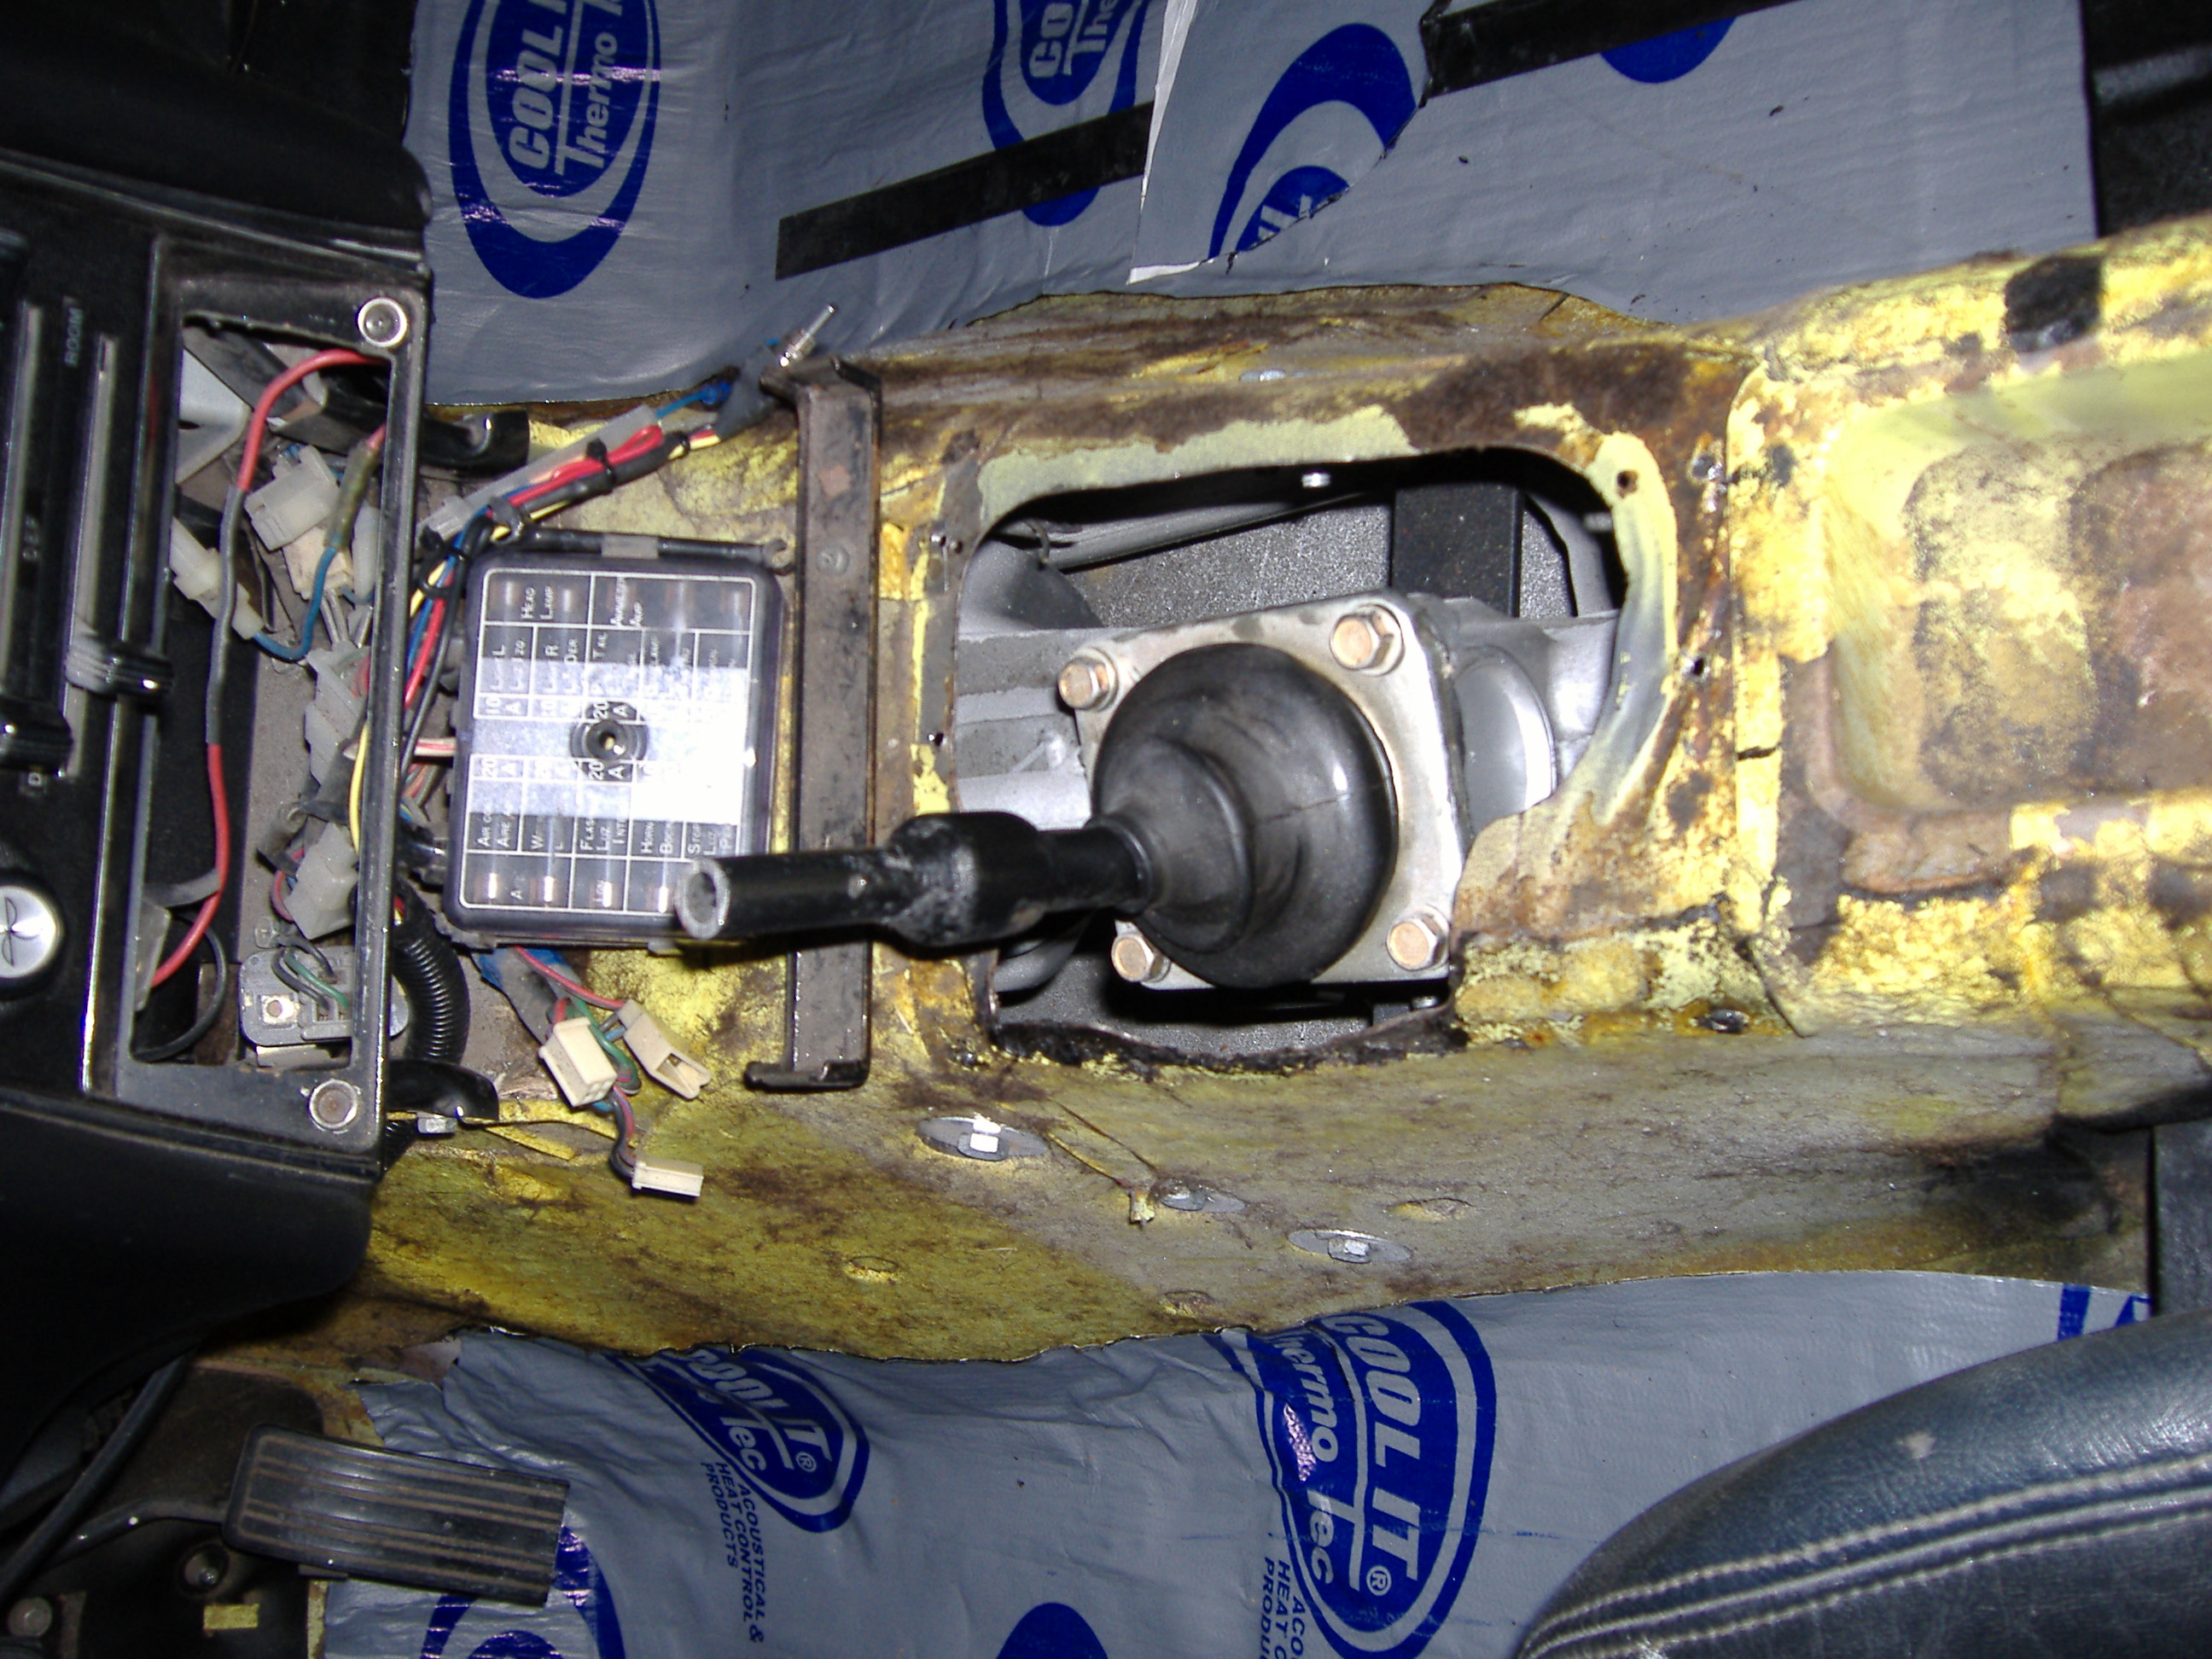
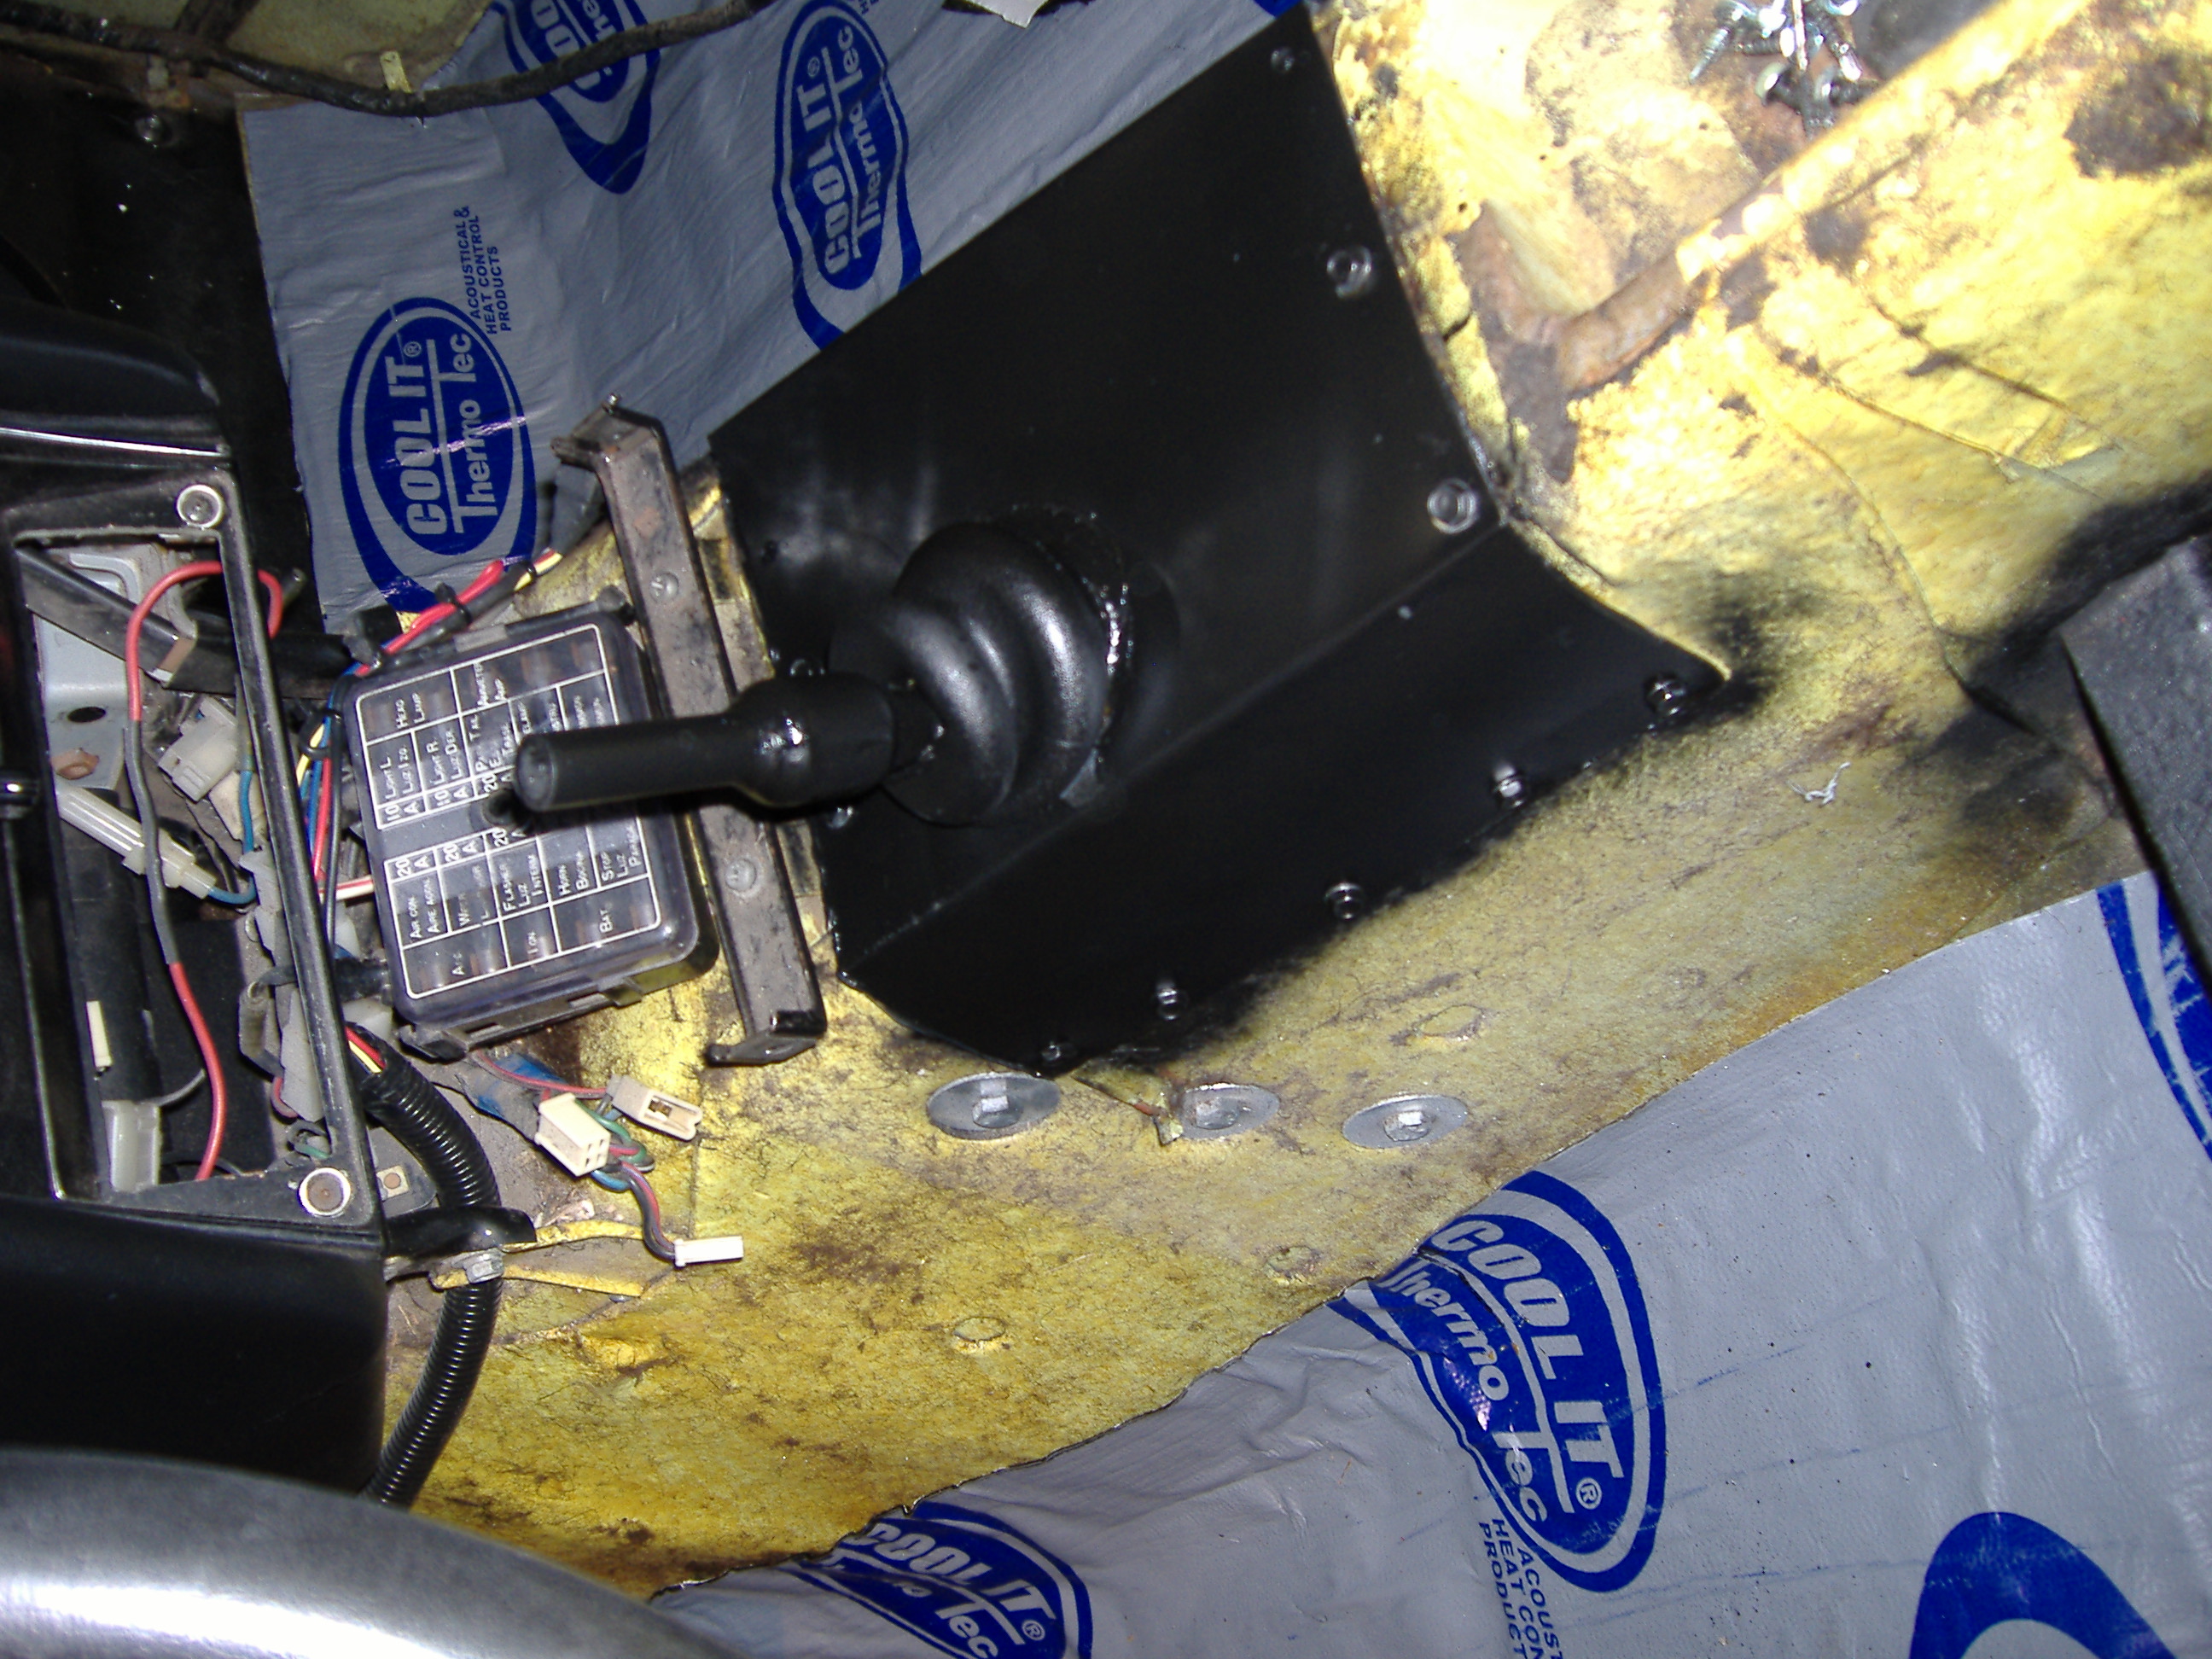
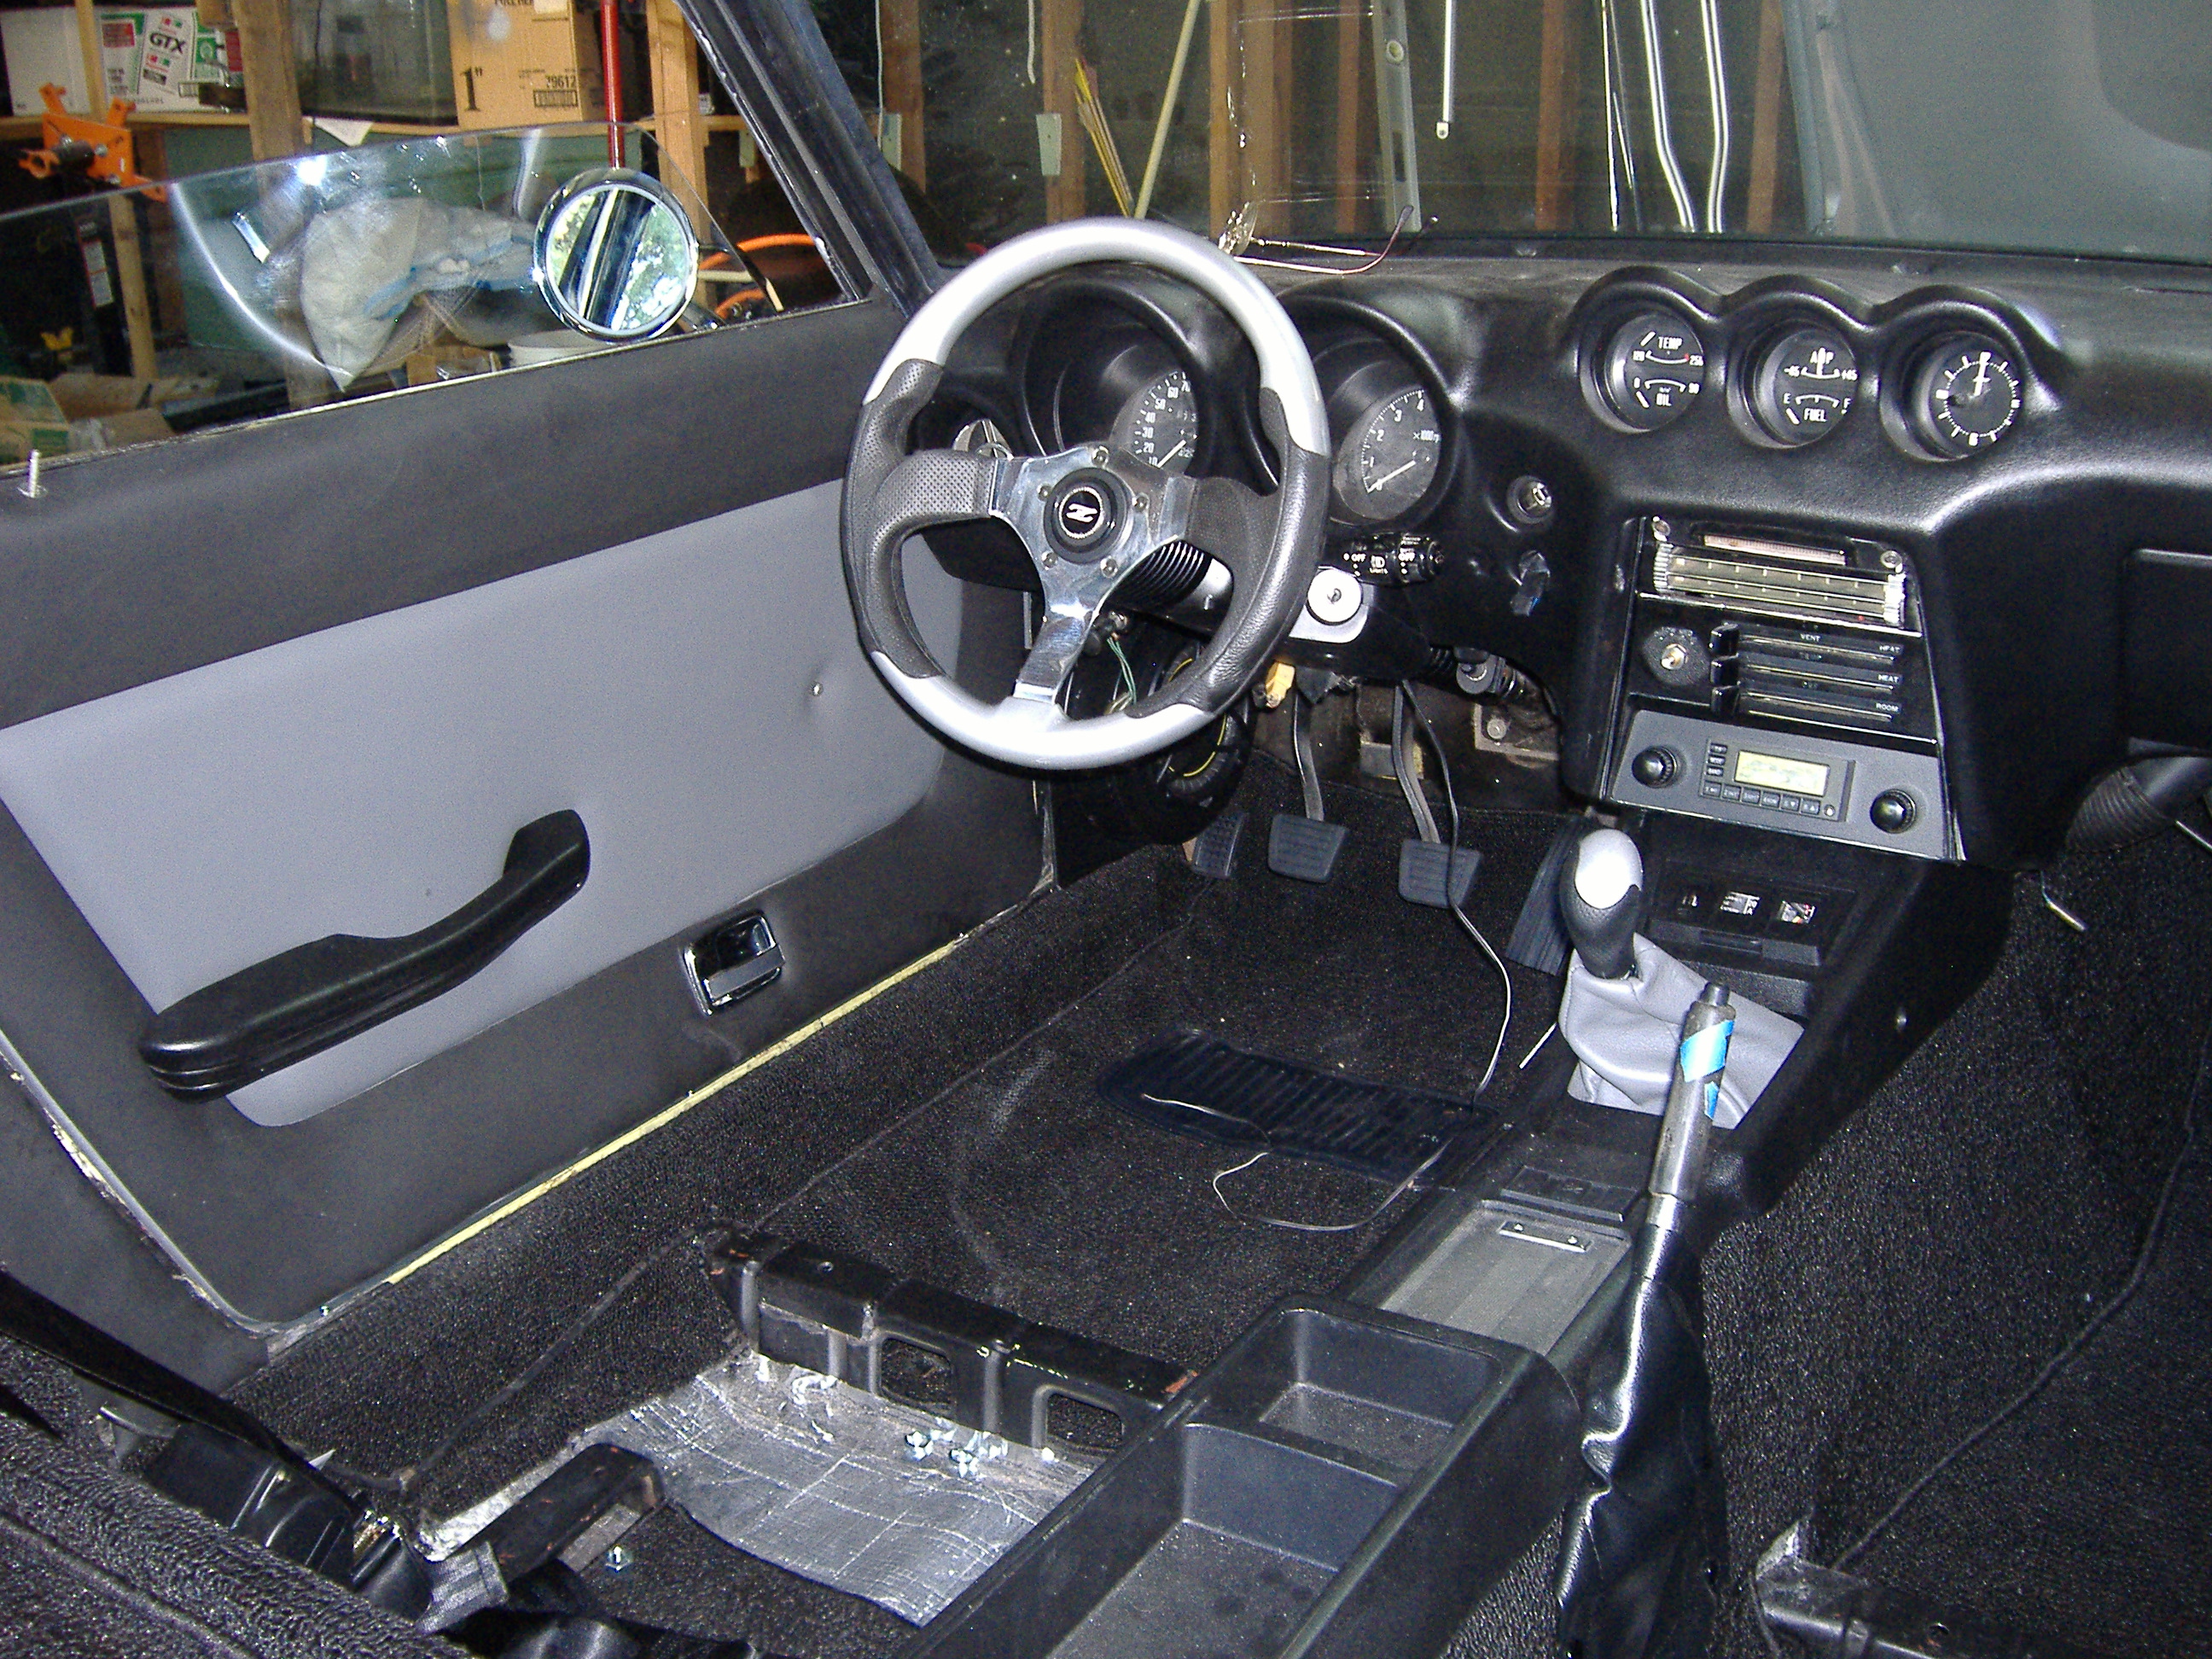
The 15 deg tilt is not a problem and can be cosmetically covered up as can be seen in my build pictures. By modifying my center consol with some sheet plastic (making the shifter hole smaller), shortening the shifter and cuting down a leather shift boot I completely covered up the 15 deg tilt. Just be sure to cut out enough of the tunnel so that the shifter tower doesn't touch the tunnel when the engines torques over. Another approach, you can buy a B&M or Hurst shifter that has a 15 deg tilt that make the shifter look straight. I tried both and didn't like the look and the Hurst shifter kept jamming. I am using the stock Camaro T5 shifter cut down and it shifts perfect. The other option that has been used here at HybridZ is to substitute the tilted Camaro bell housing with one from a Corvette or some other chevey BH which then tilts the T5 shifter to upright position, but then you will have to fabricate a tilted rear trans mount to compensate for the 15 deg tilt. A lot of extra work since you can cover up the tilt by being creative with the center console/shfter boot arrangement. Note: in the finished picture the shifter is in 1st gear. The shifter looks centered when in neutral. Suggestion: Purchase the Jags that Run (JTR) manual as it will explain many of the questions you have about 240Z V8 swaps. There are many pictures of various transmission/bell housing combinations. Google "Jags that Run"
-
Looks like you have a JTR install with a Camaro T5 trans which is tilted 15 deg to the left. It is the normal position for a T5.
-
There seems to be a misunderstanding about my parking brake question. The question was for Aplyedmind's idea: I am using Toyota 4x4 vented calipers in the rear Just like in the front I am interested to see how the parking brake set up works if Toyota calipers are used for rear brakes.
-
The Las Vegas kit looks like it does not use Toyota 4x4 calipers.
-
Will your set up include the parking brake?
-
modern motorsprts s30 rear disks
Miles replied to Fuzzydicerule's topic in Brakes, Wheels, Suspension and Chassis
This is covered in brake section and also the FAQ brakes sticky. E brake hook up is discussed in several threads. See picture for how I did mine. Note that the 240SX E brake bracket has been modified by replacing the 240SX cable socket with one from a 240Z. That way the E cable fits/locks in place like stock.
-
Dave also makes and markets a plug and play headlight relay harness. He sells it directly (see vendor section) or you can get it at MSA. The harness takes about 20 minutes to install, takes the load off of the light switch and the lights are much brighter.
-
Most people use the Painless kit which has been written up extensively here. There is a thread that explains how to connect the Painless kit to the combination switch. There are also write-ups on other kits as well. I have never heard of an after market stock wiring kit so Painless (or other brand) kit is the way to go. There are a number of good write-ups on the ClassicZ website too.
-
There are a number of good threads on this. Also, go here: http://www.zhome.com...h/autometer.htm
-
Source for 15/16" or 1" brake master cylinder
Miles replied to wheelman's topic in Brakes, Wheels, Suspension and Chassis
RockAuto" http://www.rockauto.com/catalog/moreinfo.php?pk=309611 -
Porterfield brake pads/not the right size?
Miles replied to LoneStarS30Z's topic in Brakes, Wheels, Suspension and Chassis
From the Porterfield site AP137: Front for TOYOTA: 79-87 Pickup 4WD, 88 Pickup 4WD 4 Cyl exc. Turbo, 88 Pickup 4WD Turbo, 84-87 4Runner, 88 4Runner 4 Cyl, 76-89 Landcruiser Common brake pads for 240,260,280Z Upgrade Do you have this Toyota upgrade? What year Toyota? solid or vented set up?