-
Posts
1384 -
Joined
-
Last visited
-
Days Won
12
Content Type
Profiles
Forums
Blogs
Events
Gallery
Downloads
Store
Everything posted by rossman
-
So many questions (L28, California Datsun, Build options)
rossman replied to Stokked240z's topic in Nissan L6 Forum
CZCC is Classic Zcar Club.- 27 replies
-
- l28
- california datsun
-
(and 1 more)
Tagged with:
-

So many questions (L28, California Datsun, Build options)
rossman replied to Stokked240z's topic in Nissan L6 Forum
That's good to know!- 27 replies
-
- l28
- california datsun
-
(and 1 more)
Tagged with:
-

So many questions (L28, California Datsun, Build options)
rossman replied to Stokked240z's topic in Nissan L6 Forum
Stokked, Welcome to Hybridz! That seems high but I haven't priced an engine build since 2008. For reference, my Rebello (Google it) built long block wasn't much more than $5K back in 2008 for a long block build with forged internals, custom cam and mildly ported head. You can do the math. I'd recommend shopping around, and be sure to read about HZ member experiences with California Datsun. I believe they used to be called Datsun Parts. Good luck with that! Not personally, but search around there are quite a few people who have paid for their services. Search and form your own opinion about California Datsun, a.k.a Datsun Parts. Talk to Rebello Racing (or read more HZ) and get ready to open your wallet. You won't be able to run pump gas with that kind of compression. It's all here, right at your fingertips. I certainly don't have the time or will to spoon feed information maybe some other nice soul will. FWIW, the best way I've found to search Hybridz is to open a new tab, go to Google type in your search term followed by "site:hybridz.org". For example "250hp l24 site:hybridz.org" results in this post: Lots of good information in there. Good Luck!!!!- 27 replies
-
- l28
- california datsun
-
(and 1 more)
Tagged with:
-
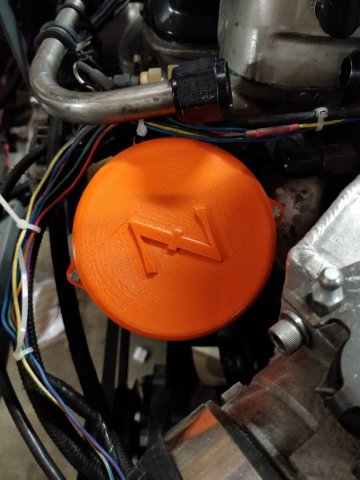
I developed a 280zxt rotor cap for my car. I'm considering printing/selling more. Let me know what you think! Here is version 1.0, test fit on the dizzy. I didn't spend much time making it look good, just testing the fit. Turns out it fit perfectly. Here is version 1.1 as-uploaded to my print queue. I spent a lot of time sketching the "Z" and optimizing the look. My printer is a Markforged Mark Two. The material will be Onyx, a chopped carbon infused nylon. I'm not sure how well it will stand up to engine heat. My other option is Stratasys ABS although, if I sell these I'll farm them out so there are many other options including metal. They could also be machined but the Z will be difficult to produce correctly due to the tiny radii. Any feedback is appreciated!
-
Nice! 👍
-

ANOTHER Datsun Z/LS3/T56 Swap Thread
rossman replied to Ironhead's topic in S30 Series - 240z, 260z, 280z
Yah, me too. I've seen at one other person on HZ notice the issue. Maybe others just don't realize it's moving around. I also found it ridiculous that T3 put the cut-out for their logo right in the load path, further reducing the stiffness of the mount. -

ANOTHER Datsun Z/LS3/T56 Swap Thread
rossman replied to Ironhead's topic in S30 Series - 240z, 260z, 280z
Your bracket looks like it will hold the load much better than that flimsy T3 bracket. To drive the point home all you have to do is run some simple numbers. Lets assume your engine will be putting out 400 lbs-ft of torque at the crank with a 2.66:1 first gear ratio, 3.7:1 differential, and the mount is 6" from the center of the output flange. With that setup your engine will be applying (400 x 2.66 x 3.7) / .5 = 7,873.6 lbs at that interface! And that's just constant load, not considering the dynamic effect when you dump the clutch from a stand still. That case would be at least 2 times higher. To make things worse, the t3 bracket is cantilevered so you're applying that load in bending on chassis mounts that were designed to take the straight pulling load from a stock, ~150 lbs-ft engine. -
I didn't. RTV will eventually break down but it's soft so it may be OK.
-
Autopower makes more than one version for the S30. I recently purchased the one that attaches to the wheel arches for ~$500 from MSA. http://www.thezstore.com/page/TZS/PROD/50-1924
-
Of course you can. Underneath the larger blobs of epoxy are screws that you'll have to remove. I cleaned all the epoxy off mine, and just reinstalled it without the epoxy. Use Loctite on the screws. I'm not getting any excessive oil in my catch can. This is a common issue with these old cars. Search around to see what others did.
-
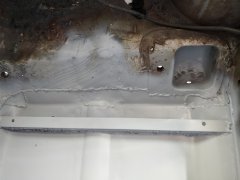
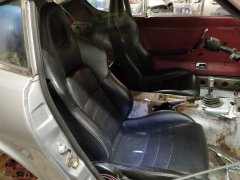
The holes in the rails are currently just plain holes. I just purchased a cool rivnut installer so I'm planning to drill it out for 1/4" rivnuts. Regarding the angle, I just used 1x1 angle, tacked it to the sides then welded on 14 gauge to the side to tie in the floors. If I did it again, I would just use 1x2 as you mentioned. The challenge is getting the angle to fit on all sides to the irregular shape of the floor. I made many, many trips back and forth from the car to the bench grinder. Probably should have just clamped the grinder to the floor pan in the car to save myself so many trips! If you're that tall I wouldn't recommend using S2K seats. They sit very tall even with shortened rails. I'm a tad under 5'11" but have a long torso. I can only get 3 fingers between my head and the headliner.
-
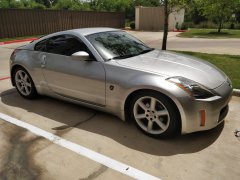
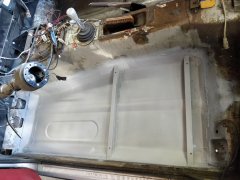
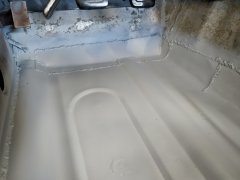
Update time! I've been working on the Z intermittently, the inside part of the floor pans are painted and ready for sound damping. I'm currently working on the underside, wire brushing the surface rust off. I'll follow that with Ospho, etch primer then finally 3M underbody coating. Top side of the floor pans done... Test fit the S2K seats...yah these are gonna work Oh, and I got my son his first car, a Z of course 2004 with only 37k on the clock. Spoiled rotten kid!
-
From the album: rossman240z
-
From the album: rossman240z
-
From the album: rossman240z
-
From the album: rossman240z
-
From the album: rossman240z
-

Fuel Pump Whine, hows my fuel line routing?
rossman replied to ~KnuckleDuster~'s topic in Fuel Delivery
Did you figure out what was wrong? -

Fuel Pump Whine, hows my fuel line routing?
rossman replied to ~KnuckleDuster~'s topic in Fuel Delivery
First thing to check is your pre-filter but it seems the pump would always struggle, even at startup if it's blocked or restricted. Where is your vent line going? Could it be blocked somehow? You might just try removing it and your gas cap next time your fuel pump starts humming again. If it clears up then you found your problem - the tank isn't venting properly. Open your tank to air and see if the humming goes away. -
Welcome back! The new turbo and turbo setup looks pretty slick. I like the way you integrated the adapter with the wastegate port - all of the angles look like they will flow well. I have a GT3576R (pre X model) with a .63 A/R turbine and seems to work well with my engine. I'm sure the X version would perform even better.
-
They are the same. The only one that's different to my knowledge is the diesel version.
-
It looks like your setup is good - pretty much the same as mine. Since your coils are wired to the Wolf channels in the correct firing order, I don't think it matters where your 0 is as long as you sequence each channel in numerical order and "0" (#4 in this case) is at TDC on the compression stroke when the coil fires immediately after SYNC. If that is the case then it seems that the firing order of 3,4,5,0,1,2 would work.
-
That's what I thought. I guess I could have read your original post more carefully! I didn't go by the v500 manual - there is a simple (at least to me) how-to set up in this forum that I followed. Seems like the manual is telling you to find "0," like it's an unknown setup. I just set it on cylinder 1 since that is the first ignition timing event and it keeps things simple. That said, it all depends on your "Engine RER/SYNC Setup" and "Trigger REF" setup. I may be able to help more if you post screenshots of those. Edit: I just realized you're using v550 not v500. As you probably noticed, this forum is not active and I don't know if there are any other active people here using either v500 or v550.
-
What do you mean by "0" point?
-
I think you're over thinking it. I have my injectors set up the same as you: coil/injector 1 on cylinder 1, coil/injector 2 on cylinder 2, etc. Since the firing order of the L6 is 1-5-3-6-2-4 and Wolf starts with counting with 0 instead of 1, your offsets should be 0-4-2-5-1-3. You are correct that the ignition pulse skip should be 5 since you have a 6 event trigger wheel. Sequential injection is set up exactly the same way. Hope this helps.

