rossman
-
Posts
1384 -
Joined
-
Last visited
-
Days Won
12
Content Type
Profiles
Forums
Blogs
Events
Gallery
Downloads
Store
Everything posted by rossman
-
As you already know, engine specs are not arbitrary. If it were my engine, I'd save up the money and fix it right.
-
Yes, exactly use it for what it's for what it's intended for: 3Mâ„¢ Super Weatherstrip Adhesive For adhering all types of rubber weatherstripping to car doors and trunks. An excellent adhesive for bonding engine gaskets. Black formula is a strong, flexible, rubbery adhesive that withstands vibration and extreme temperature variations. Primarily designed for use on t-tops, moon-roofs and sun-roofs. If the method works and the gasket is reusable (think Nissan Competition gasket) then why would you have to clean off the weather strip adhesive?
-
This is what the machinists at my work do to shape laminated shim stock. I plan to modify my N42 MLS gasket by clamping it between two pieces of hard wood and drilling holes in a progressive manner - small -> large.
-
Interested in seeing the vinyl wrap. Where is this Old School meet?
-

Has anyone tried this Camber Adjustment Kit
rossman replied to swe_crazy's topic in Brakes, Wheels, Suspension and Chassis
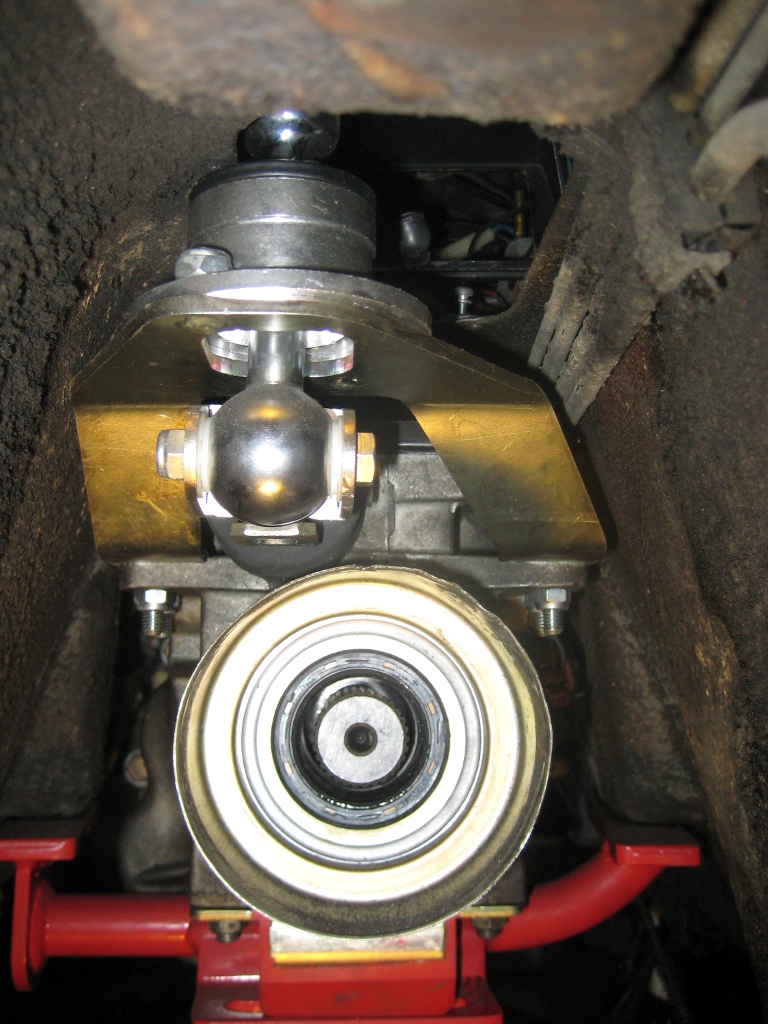
There are pictures of the Zerk fitting (A.K.A. grease nipple) in the kit. I installed these on my S30 along with adjustable T/C rods to deal with the suspension geometry change that JMortensen mentioned. I still don't think the geometry is perfect but it's better than with the stock T/C rod. -
How to Modify recommends bonding the gasket to the oil pan with weather strip adhesive and applying anti-seize on the block side of the gasket. I assume it would allow removing and replacing the oil pan without replacing the gasket.
-
Ideas for engine rebuild/ Performance build
rossman replied to datsun280zx's topic in S130 Series - 280ZX
You heard correctly. -
I've had to shave down the bushings on every set I've done. A lathe or belt sander comes in handy for the job.
-
Oh, because everybody knows that the L6 bottom end is weak because it only has two main bolts. Nobody does it because it's not needed. Your old engine throwing a rod had nothing to do with the fact that L6's only have two main bolts.
-
HP rating for a stock Z 5 speed?
rossman replied to 2eighTZ4me's topic in S30 Series - 240z, 260z, 280z
ROTFLMAO
-
HP rating for a stock Z 5 speed?
rossman replied to 2eighTZ4me's topic in S30 Series - 240z, 260z, 280z
I don't see it either. IIRC it wasn't on the a year ago when i purchased it. Try giving them a call. Ditto what KTM said. Also going to need a custom drive shaft. It's covered in the stickies. -
HP rating for a stock Z 5 speed?
rossman replied to 2eighTZ4me's topic in S30 Series - 240z, 260z, 280z
Here is another pictures showing a Z32 gearbox in a 240Z tunnel. The custom brackets are made by McKinney Motorsports.
-
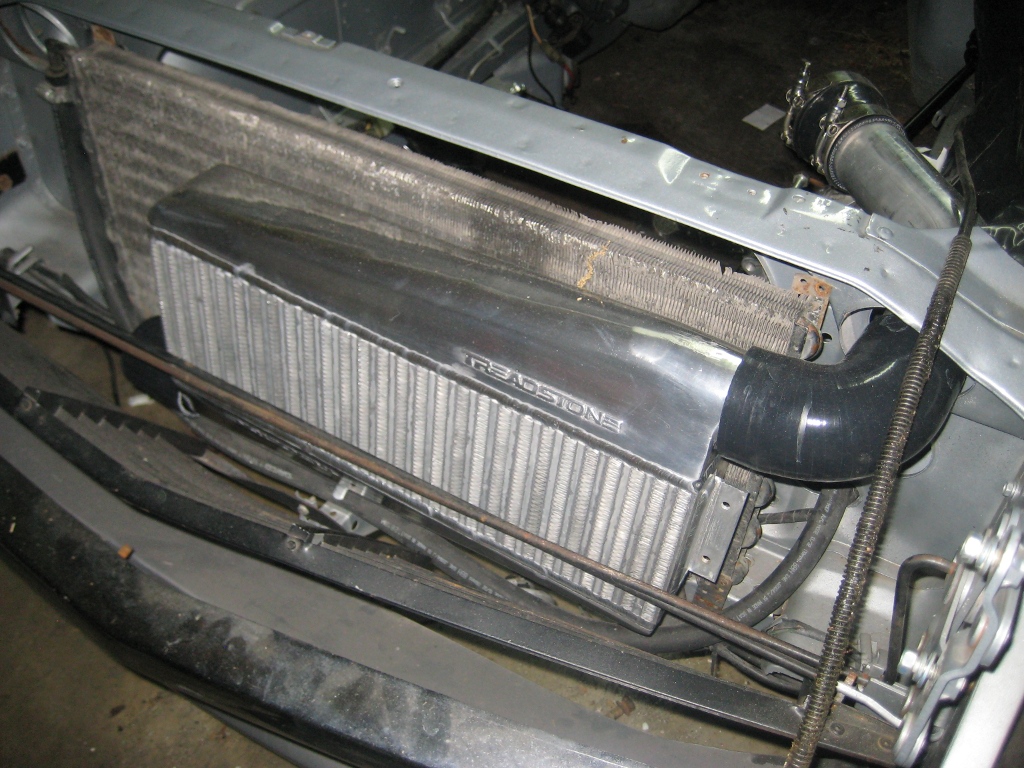
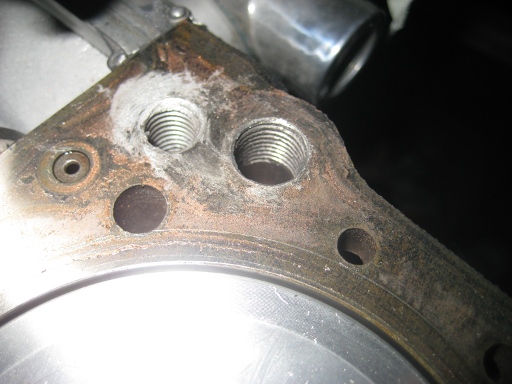
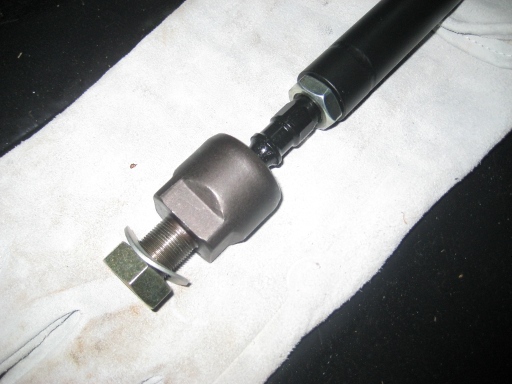
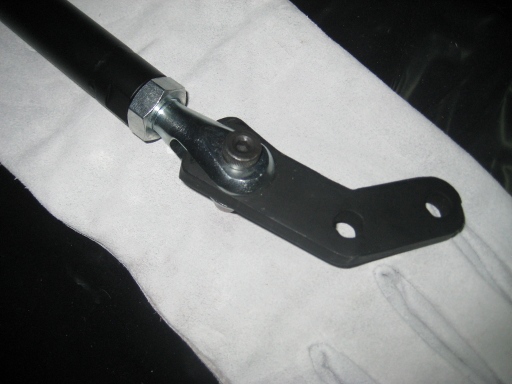
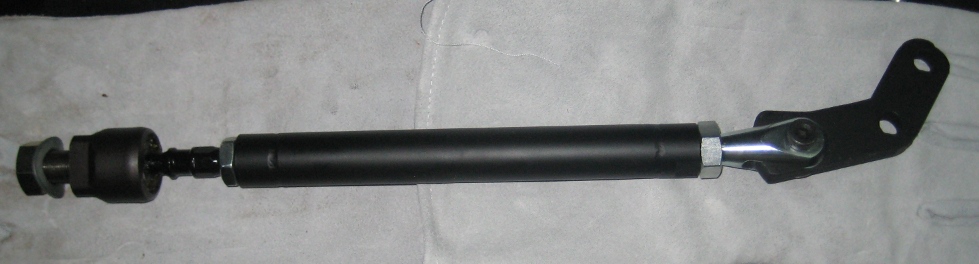
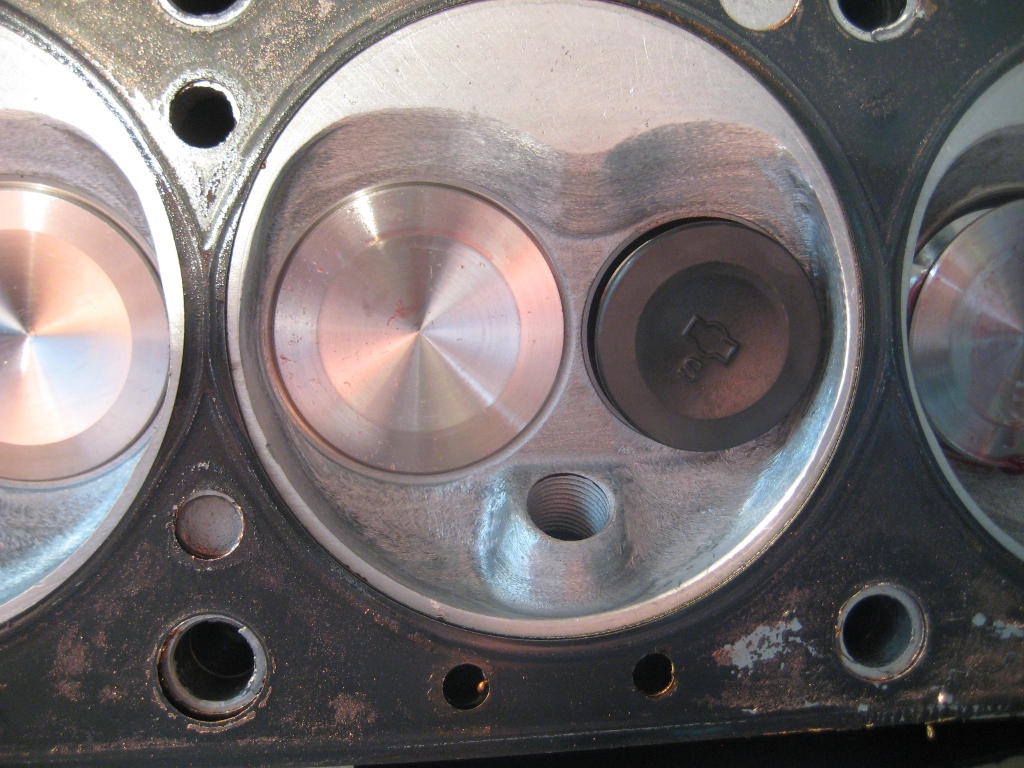
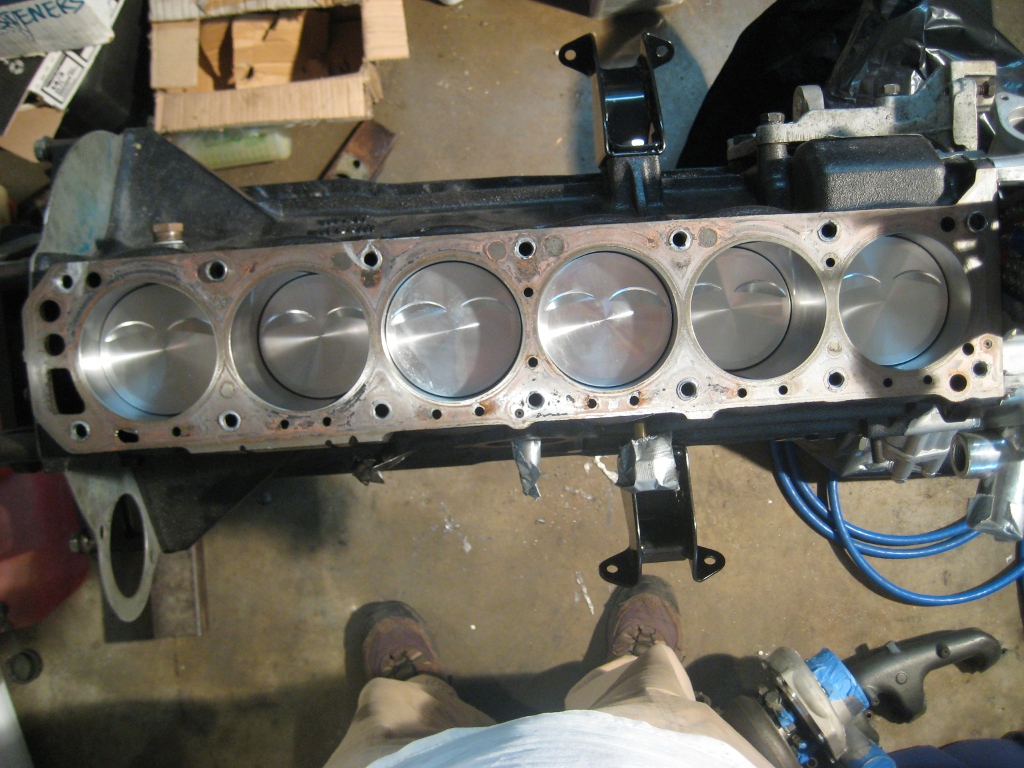
Pictures as promised. The deck. Some copper coat and gasket coating remains. The head. You can see some of the graphite gasket still stuck to the the face. The metal head gasket still stuck to the head A close up of the combustion chamber. The silver valve is a custom over sized stainless valve. It looks like there may be some slight detonation damage in it's former service life A comparison of the two injectors. These are 3000GT injectors. They are the right size for 11mm fuel rails and stock S30/S130 injector o-rings. You can barely see the plastic junk near the valve seat. Miata Seat Treadstone Intercooler with opposite facing end tanks. Threaded block breather hole Threaded coolant bypass Z Car Customs - JDM adjustable T/C rod
-
Update time... Pulled the engine from the car. I did this mainly to run the fuel line up in the tunnel. It's going to be tight. I'll be surprised if I get it right the first time . While I had the engine out, yep, you guessed it, got another case of "while I'm at it." Decided to look for the plastic pieces that chipped off my brand new Precision injectors. Wanna guess where they are? That's right, down in the combustion chambers, cylinders and valve seats. Oh well, I can only blame my self. Mea Culpa! In my frustration with the Precision injectors I purchased a new set of RC injectors that have machined aluminum tips. Hindsight I should have just replaced the pintle caps on the Precision injectors but its too late for that now. Anybody need a essentially new flow matched set of Precision low impedance 11mm o-ring injectors? IIRC they are 750 cc. I'll make you a good deal. I put #1 on TDC compression stroke, wedged my trusty craftsman screw driver handle in the timing chain and pulled the head. The metal head gasket came off in one piece. I called Dave Rebello to see if I can reuse the gasket. He has done it before with no problem. Just need to apply a thin coat of Permatex Copper Coat. When we were talking I mentioned that the cam sprocket and timing chain were both on #1. He stated that my recollection was most likely wrong and advised me to check it. He instructed me how to verify and it checked out 1 on 1. I think he is still in disbelief but it checked out. I'm going to check it again when I get the head back on. While the head is off I threaded the 12 mm (!) coolant bypass passage in the block. The turbo coolant lines will serve as a sufficient bypass. Got the idea from Tony D. on the Head cooling thread. The specifics start on post 423 or so. Threaded it 1/4-18NPT. Also threaded the crank case ventilation hole 3/4-14NPT. This will allow me to add a much more compact 3/4 NPT to -10 AN elbow for crank case ventilation. The stock vent pipe was interfering with my 9" K&N air filter. Problem solved . Purchased a new set of Z Car Customs - JDM adjustable T/C Rods. These will allow me to run adjustable front LCA bushings without any suspension bind. Checked the front Tokico springs for coil bind. Looks like ~1/4" between coils. Doesn't seem like enough to me. I may just go ahead and replace them with Eibachs. I loved them on my '76 S30. Ordered a new intake/exhaust gasket since the one I had delaminated when I removed the manifolds. Purchased a new Treadstone intercooler because I was unhappy with the fit of the AVO intercooler. It is a couple of inches too wide and i don't want to hack up the radiator cross brace. Picked up a cheap set of Miata seats. Gonna have them recovered. Things to do in the near future: Drill and tap the head above #3/4 exhaust ports per the Head Cooling thread. Drill out and tap the rear heater hose mounting boss for knock sensor mounting. Clean the pintle cap pieces out of the head - blow out with brake parts cleaner or compressed air Re-install head and verify cam timing (again) Test fit the new RC injectors and fuel rail. Adjust the fuel rail brackets if necessary. Maybe do a little bit more exhaust manifold porting Install Intake and exhaust manifolds Install fuel injectors and fuel rail Install oil pan and oil pick-up. Purchase and route turbo drain hoses Purchase and route turbo coolant and oil feed and drain lines Purchase and route head coolant bypass lines. Grind down the McKinney shifter mounts for more clearance to the transmission tunnel Slot the McKinney Z32 gearbox mounting holes. The McKinney motor mounts pulled the engine a little more forward. Run/bend the fuel lines Reinstall the engine/transmission Mount Fuel pump, FPR and filters Run intercooler piping Mount intercooler Grind down the 240SX damper bolt to prevent bottoming out in the crank Install damper and modified damper bolt and fat Volvo washer. Torque to Wire up the ECU Install differential Install drive shaft Install Z31 half shafts Remove front LCA's to shave off the tips closest to the Arizona Zcar brake disks. There is very little clearance even after grinding down on-car. Install Z Car Customs - JDM adjustable T/C Rods Install crank case vent hose and catch can Modify and install CS144 alternator Install headlight relays and H4 headlights Fix floor pan rust hole Install sound deading Reinstall interior Install Miata seats. Check fit the seating position first before I spend $ on covers. and so on...will it ever end?? probably not Pictures to follow. My son is hogging my desktop where my pictures are stored. I can access them remotely but can't resize them properly on my old school T42 (don't have the software). I'm rambling.
-
Mark the cam gear relative to the chain so you can get it back together correctly. Then just turn the cam with the head sitting on the block with the alignment pins holding it in position. You don't need to turn the timing chain to check this clearance.
-
Do a little search. It has been discussed quite a bit on HZ. Some say it's needed some say no. Place the head on the block, rotate the cam/valve train and see for yourself.
-
Suspension Bolts - Inventory
rossman replied to Lazeum's topic in Brakes, Wheels, Suspension and Chassis
I put this list together a while back. It covers most of what is here and then some. Pay attention to the notes column as some of my bolts are a custom length. -
Need a very specific picture of an L-series valve cover
rossman replied to iBang's topic in Nissan L6 Forum
Hmm, that picture looks familiar! I guess you don't need another picture from me? -
I'm not a fan of big loud sound systems but you did a Great Job. The interior looks very nice.
-
Fuel cell or modded tank, and what's a good budget?
rossman replied to MazterDizazter's topic in Fuel Delivery
I had a sump added to my stock tank. I like it because it's less complex than adding a surge tank, at least for my setup with the big azz A1000 pump and big pipe required. One pump vs. two, one tank vs. two. Simpler plumbing, etc. I was also worried about fuel temperature with a small surge tank (small enough to fit under the car). Not sure if the temperature issue is real, it's just what I read somewhere... -
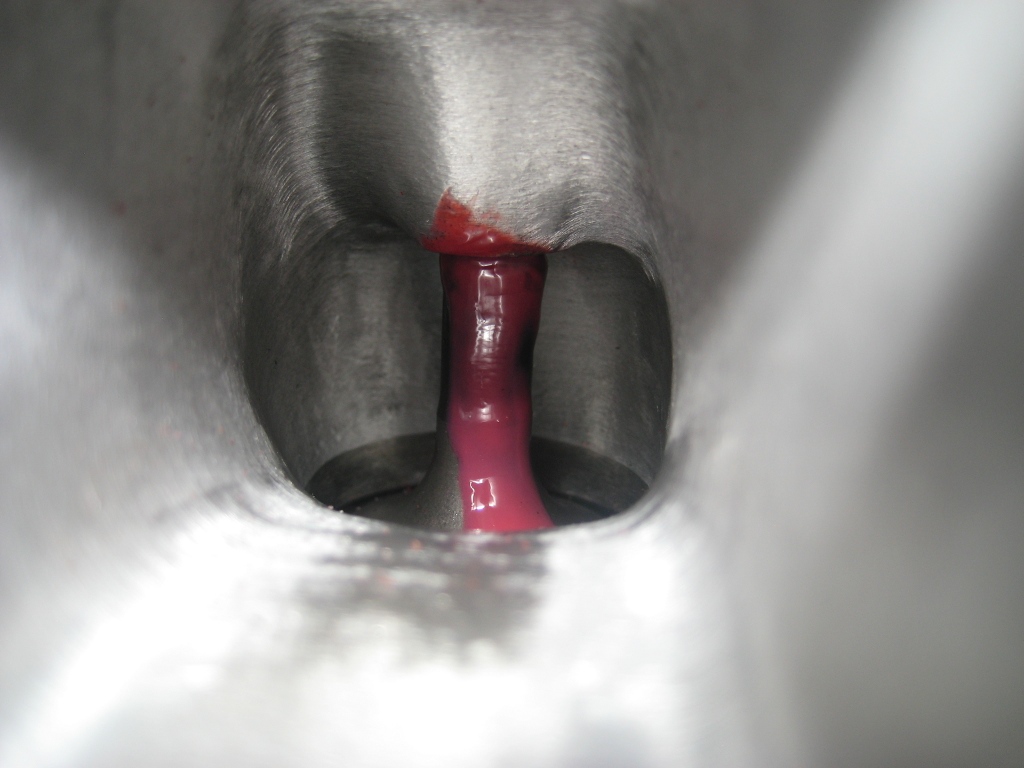
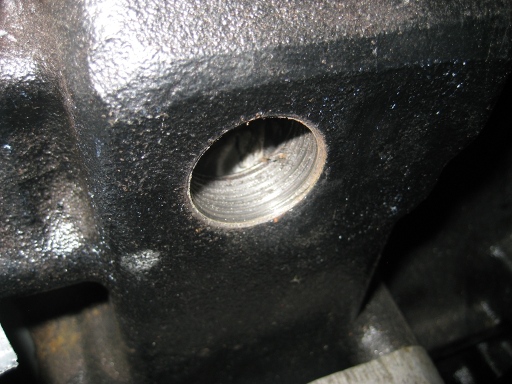
Tony - Are you referring to this hole? Tapped and plugged from the deck side?
-
Aarang - you're probably right that he has a noisy hydraulic lifter but note that just because he has a P90A head does not necessarily mean it is hydraulic. P90A's came with either hydraulic lifters or solid lifters. I have a solid lifter P90A head.
-
L28 timing chain/ tensioner holding tool
rossman replied to skirkland1980's topic in Nissan L6 Forum
That's a neat little gizmo. I've always just used the handle of a large Craftsman screwdriver. -
azcarbum: http://www.zccjdm.com/
-
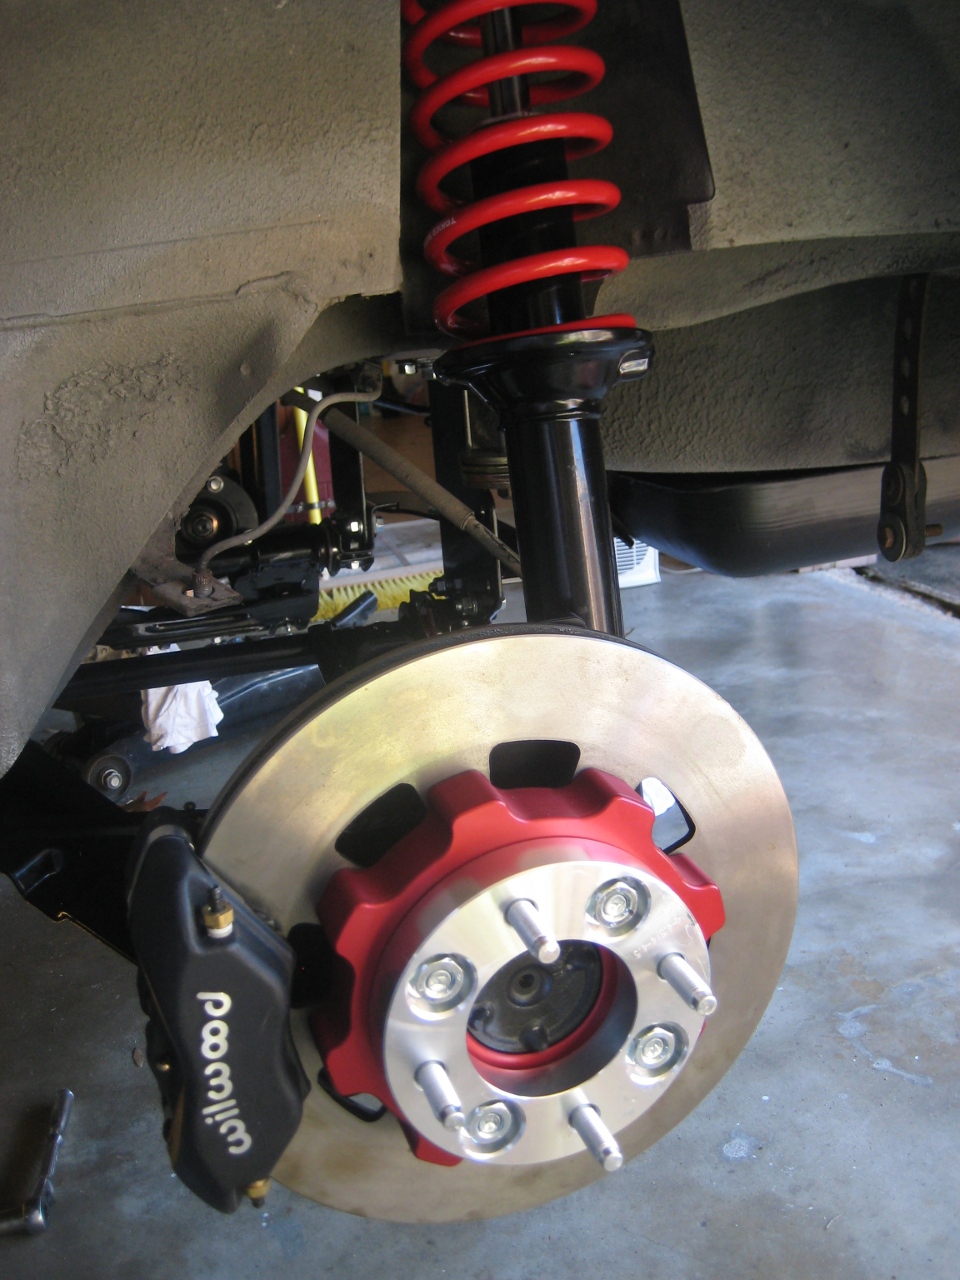
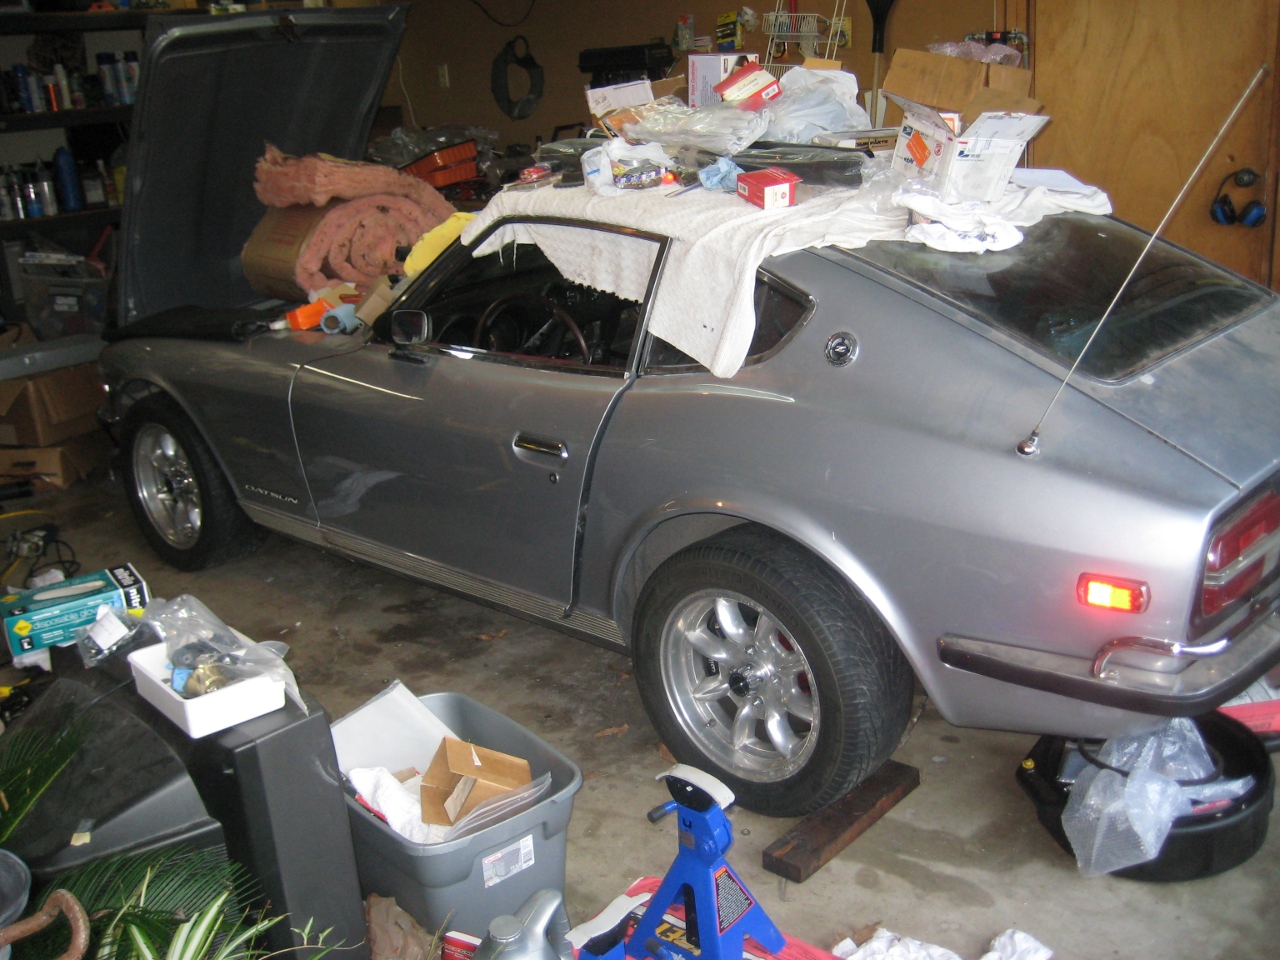
Did a lot of work today. The suspension, brakes and wheels are back on the car. The car is FINALLY rolling again . I had a big scare. While jacking the front of the car, the jack slid off the front of the cross member and the whole car slammed down in a fraction of a second. Luckily I never get under a car during jacking for this very reason. The jack caught the front cover and bent the oil pan flange. I can't see any other damage. I was really worried it damaged the steering rack, crank or damper but they appear to be OK. The engine is only bolted down on one side so the whole weight of the car wasn't pulling down on it. I consider myself lucky this time. Here are a few pics. I didn't install the differential so I have some room to work during the next step - installing the hard fuel line. I'm going to pull the engine and transmission so I have full access to the transmission tunnel to run the hard line. Here are a couple pictures. Excuse the mess in my garage