Miles
-
Posts
2391 -
Joined
-
Last visited
-
Days Won
35
Content Type
Profiles
Forums
Blogs
Events
Gallery
Downloads
Store
Everything posted by Miles
-
I just re-read my old post referenced above by Stravi757 which contains this Beta Motors Sports link http://www.betamotor...00handling.html. One of the variables not mentioned is strut length which would change the geometry of the strut/control arm/half shaft assembly which would also affect strut travel and the telescoping action of the half shaft. Here is the question: Are the rear struts on a 280Z longer than the 240Z struts? If so, would a longer strut add to the droop of the control arm and prevent the half shaft from compressing to its' limit (bottom out)? I have done a few R200 swaps and never had a problem, but I also install stiffer rear springs (280lb/In. spring rate). The cars are daily drivers and not race cars so I may never push the suspension to its' limits. Since the 240Z and 280Z half shafts appear to be of the same length how did Nissan handle this problem? If someone has a 240Z and a 280Z rear strut they could measure the length of each one and also post some side by side pictures.
-
Both Motor Sports Auto (MSA) and Black Dragon sell carpet kits and panels etc. I buy the custom carpet kit from MSA and the plastic interior parts from Black Dragon. Some trimming is required for the plastic parts to get them to fit. Use the search function in the Interior section as these topics have been covered extensively. Happy hunting
-

Shock absorber stuck in strut housing
Miles replied to Josh280z's topic in Brakes, Wheels, Suspension and Chassis
Where in the strut did you find the O ring? Never seen that before. -
Shock absorber stuck in strut housing
Miles replied to Josh280z's topic in Brakes, Wheels, Suspension and Chassis
Use the HybridZ search function as this has been discussed many times. Also you can search at the ClassicZ website. Happened to me on two Z cars. Sometimes the shock will not come out of the strut tube no matter how much force you use and you will have to replace the whole strut. Before inserting the new shock put some ATF in the strut tube which will make it easier to remove the shock in the future. Be careful not to dent the strut tube or the threads for the gland nut in your efforts to remove the shock. -
Need help with gland nut...
Miles replied to Josh280z's topic in Brakes, Wheels, Suspension and Chassis
Leverage and grip is required. Remove the strut from the car. Place the gland nut pointed down in a vise. Place a three or four ft. pipe over the wheel spindle to provide leverage and push/pull to break the gland nut loose. Or , with the gland nut in the vise, you can use a pipe wrench on the strut tube with a three or four ft. pipe lever over the handle of the wrench. Problem with placing the pipe wrench on the strut tube is that you can deform the tube. I have done it both ways and the gland nut just breaks loose. The object is to provide a lot of leverage and a solid unmovable grip on the gland nut. I have tried all of the suggested techniques and this works. What ever technique you choose do be carefull not to deform the threaded end of the strut tube. -
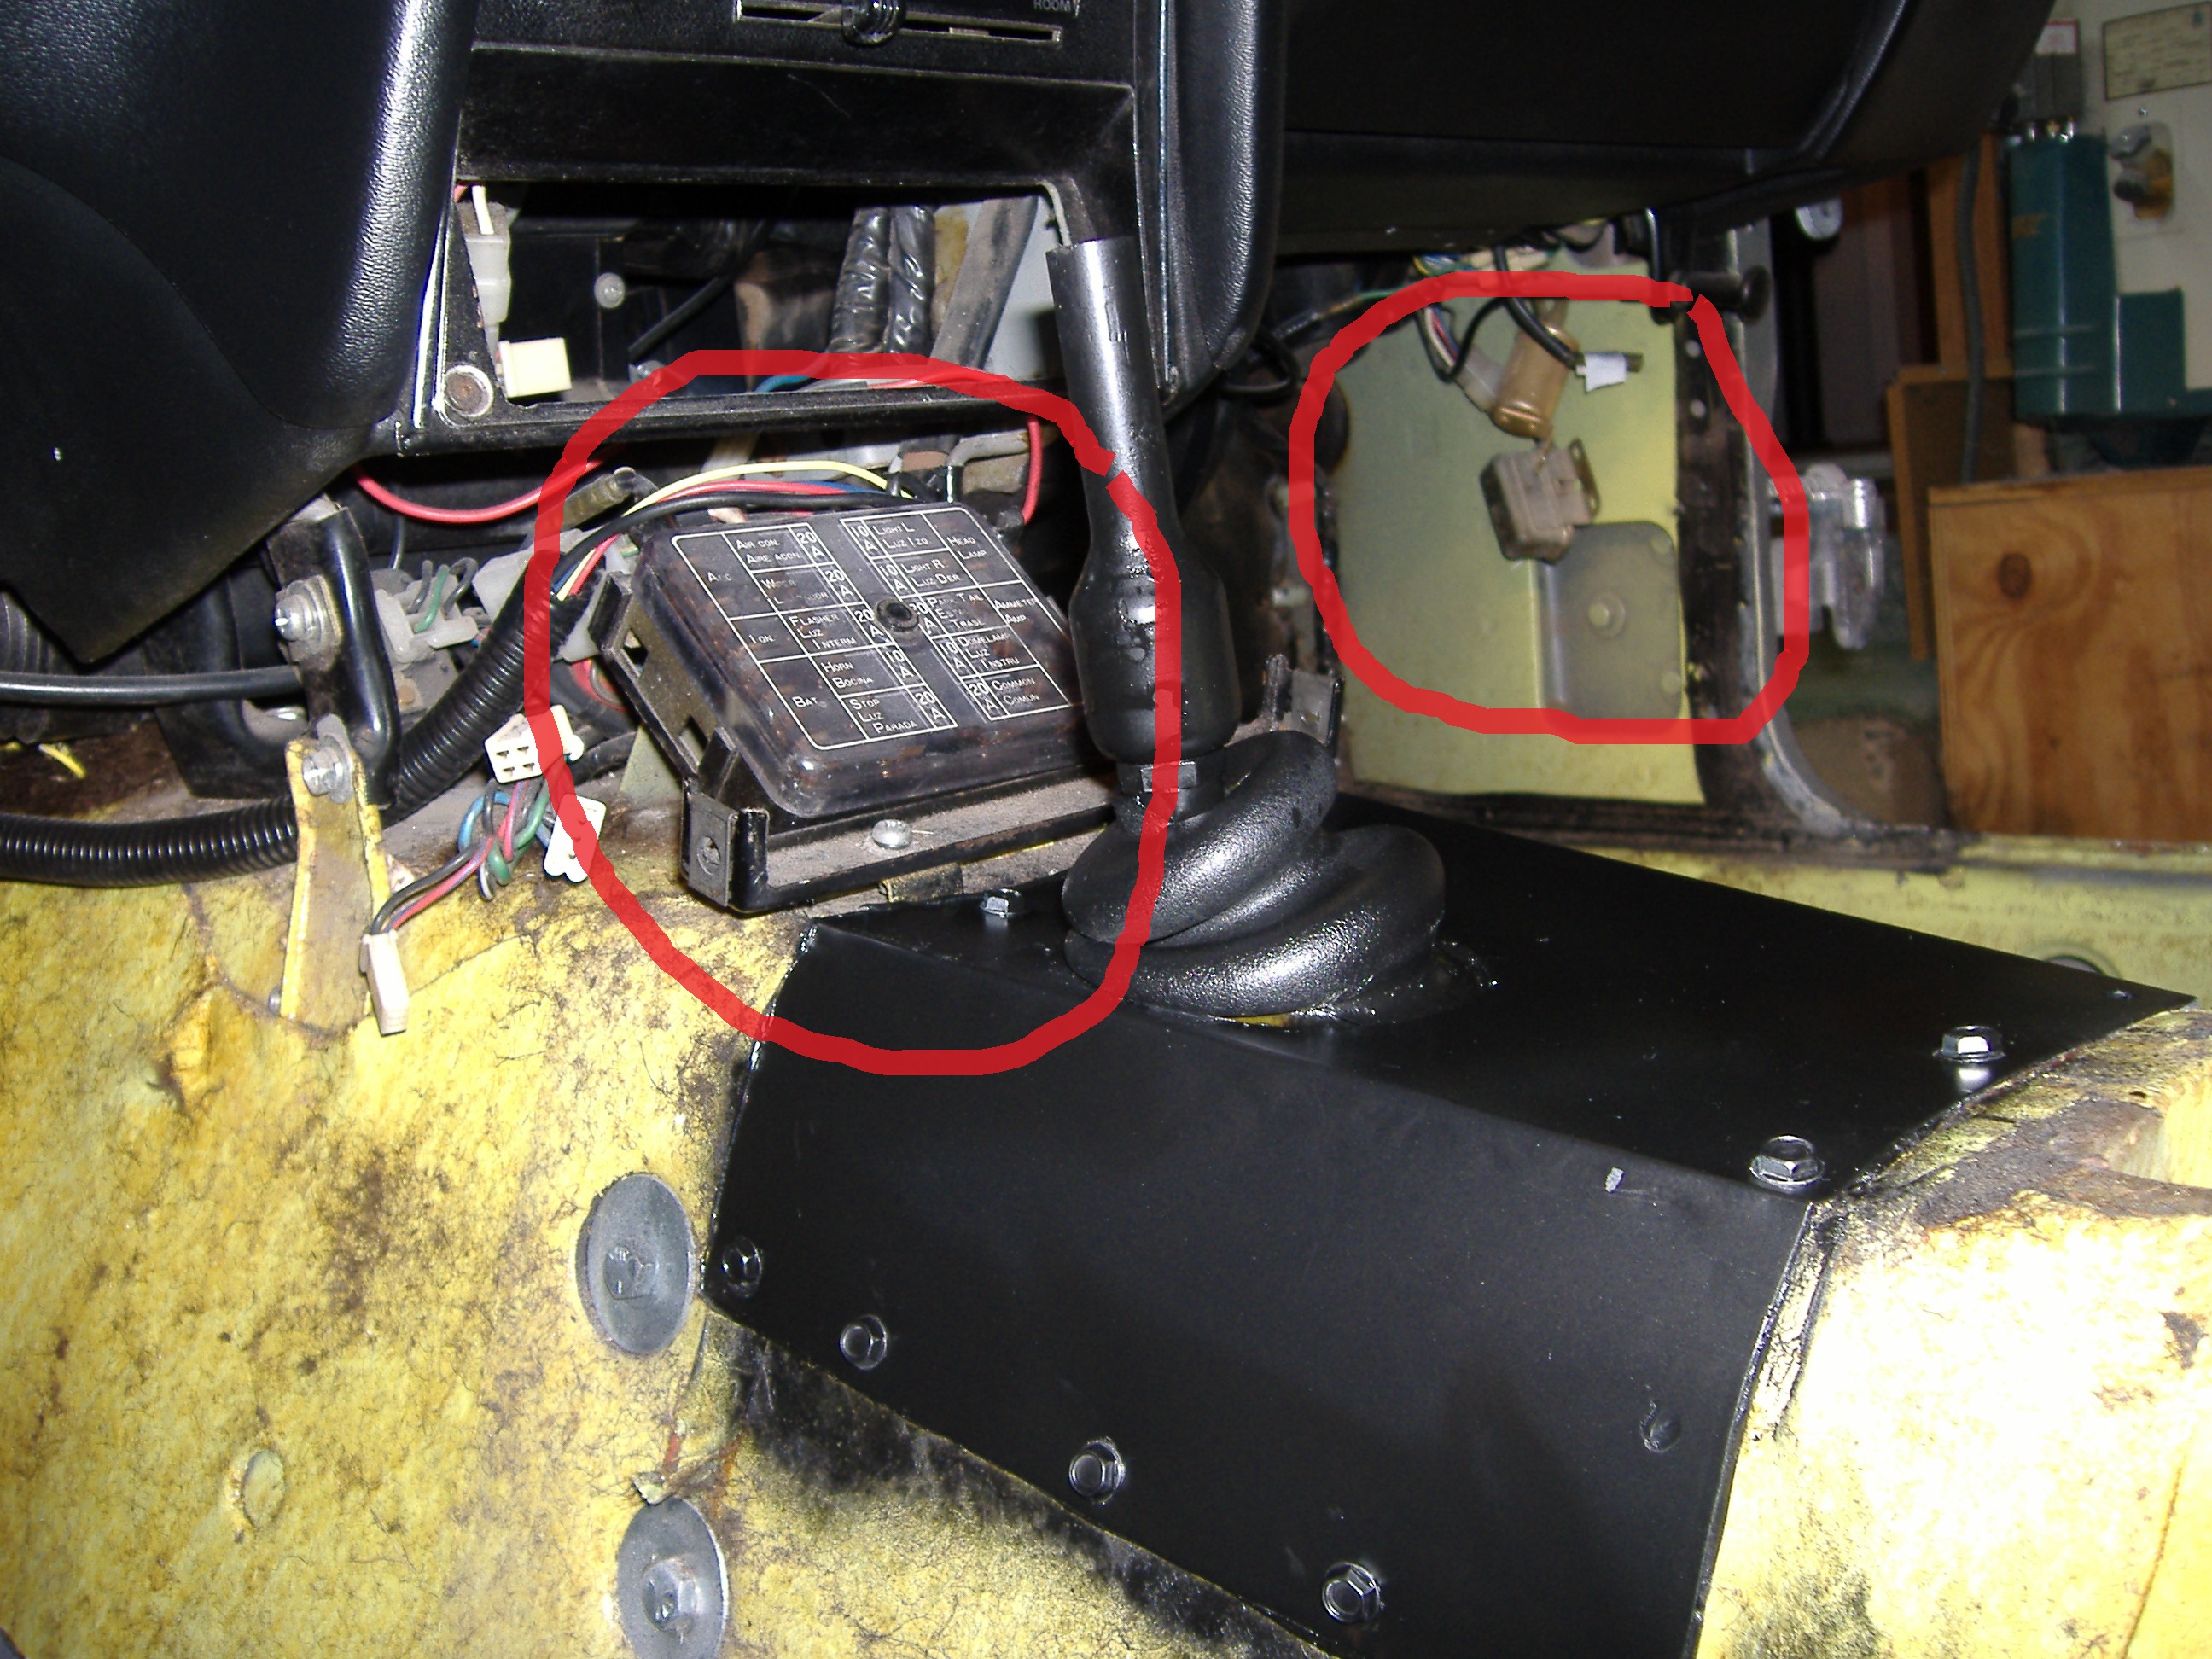
The fuse block is located below the radio under a flip up door. Relays are on the right side kick panel. Check the fuses and the plastic fuse block noting any wire(s) associated with any spot that is melted. Are there any blown fuses or signs of melting on the fuse block? With the ignition switch on are you getting any power to the fuseblock?

-
Wiring help? I'm ready to fire this beast up
Miles replied to ottoauto's topic in Ford V8Z Tech Board
You don't provide many details about your install such as: - Is this a JTR install ? - Did you use an HEI distributor? - How did you wire the distributor? - How did you wire the fuel pump? Per JTR with an oil pressure switch? - Did you follow the JTR wiring instructions? - Where is the relay located? Is it the relay mounted to the passenger kick panel? - Why did you run an ignition wire to the relay? Do you mean a fuel pump relay or the relay on the passsenger side kick panel? - Did you change or modify the ignition switch wiring? - Where did you connect the wires? Include wire color and tracer color. The more details you provide the easier it will be for someone to help diagnose the problem. -
The bottom picture is the brake switch.
-
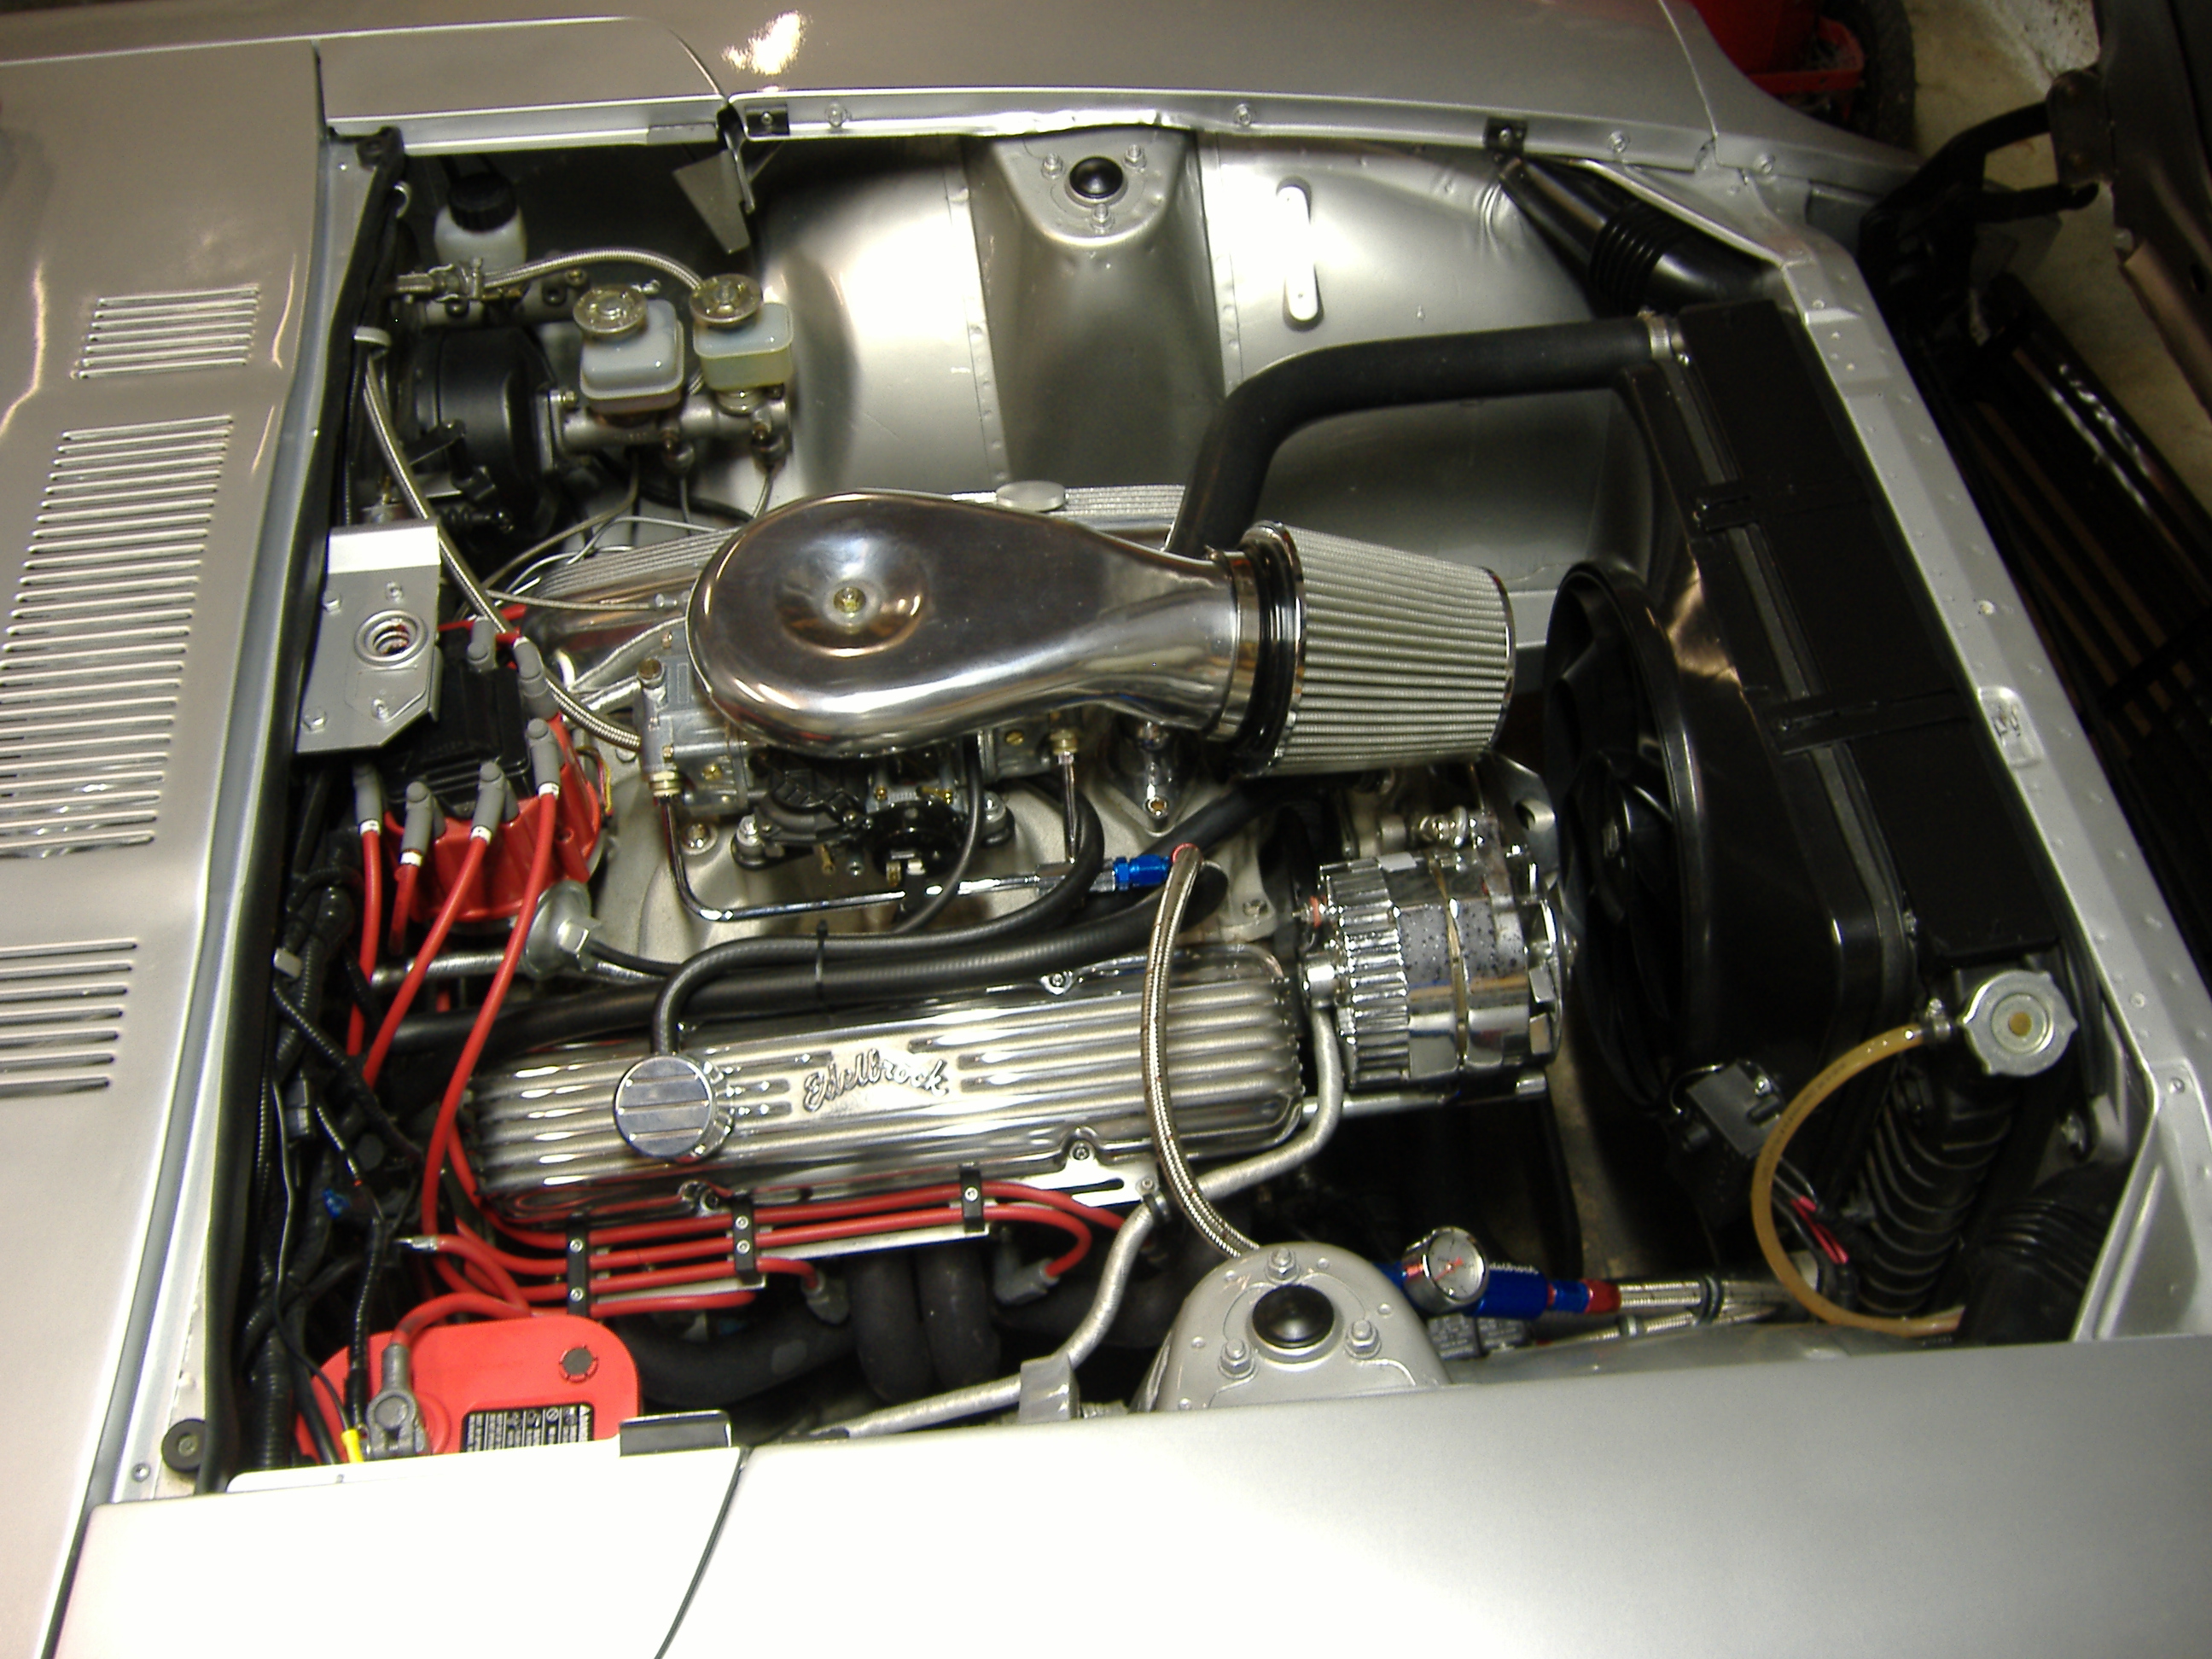
Typical V8 swap.
-
" i looked at the fsm, quality sucky but illl try it again. I got the fuse box to because the glass fuse type burnt a hole straight threw the plastic. Yeah the smoking happened before the fuse box issues. Maybe if i print it out it will look a little better. " You have a dead short. You don't need to unplug your amp meter. You need to find the short. What circuit does the fuse that burnt through the plastic serve? Look at the plastic fuse cover and it will tell you which circuit the fuse goes to. This will be your starting point. Get both Haynes and Chilton 240Z manuals. They both have schematics. Find the offending circuit on the schematic and trace it in red pencil and then go find it in the car. Then go point to point until you find where the circuit is shorted. Unplug things to see if the short goes away. Note some of those fuses share more circuits than what they are labled for. So you will have to use a schematic to find all possible conductors on the shorted circuit. In my experience chasing shorts, it is usually something that got moved/changed such as removing lights for paint and then pluging them back in backwards so the power goes to ground instead of to the bulb. A paint shop did this to one of my Z cars and the first time I drove it at night my marker lights went out and kept blowing fuses. Turns out the paint shop plugged in the right rear marker light backwards. So what did you do just before you started blowing fuses or seeing smoke.
-
Basically you need to: - Determine what wires the engine/transmission combination you are installing requires: ignition, tach, oil pressure, water temp, alternator, starter, wires for automatic trans function etc. - Before removing any wires tag and number each wire in the engine bay. Write color code, tag number and function in a note book. - If you are not sure of the function test the wire in question with a volt meter while turning the ignition off, on and start position. Check the schematic. Note function. - Disconnect the wires from the engine and carefully pull the wiring harness over to the passenger fender. - Unwrap the harness. - Separate the engine wires you tagged from the rest of the harness. What wires you use depends on the type of engine etc you install. - Draw a schematic or make a list showing what wires (with tag numbers) you are going to use. - Don't cut any of the wires until you have figured out how you want to route them in the engine bay. - When everything checks out, and the wires are attached to where you want them, re-wrap the wiring harnesses you took apart. Just take one wire at a time and understand its' function vs what your install requires.
-
Buy the Jags That Run (JTR) 240Z V8 swap manual. The JTR manual explains the v8 swap including electrical wiring details. The swap is fairly simple, but it requires attention to some details that are covered in the JTR manual. Also get the Haynes and Chilton 240Z manuals as they both have schematics in them that you will need to complete the V8 swap. A number of Z clubs have posted electrical schematics for the S30 series so you can do a search for those as well. http://www.jagsthatrun.com/
-
Jnewby MSA does not explain what is in thier kit very well. Call them and confirm that you want the kit that covers side rails, floors, trans tunnel, riser, wheel housings, strut towers and rear deck. That is what came in my Delux kit from MSA. The MSA kit is well made and fits well. Edit: MSA calls it the Custom kit in thier on-line catalog. p/n 40-2596G
-
BRAKE MASTER CYLINDER LEAKING
Miles replied to J240ZTurbo's topic in Brakes, Wheels, Suspension and Chassis
It is not clear why you want a 280Zx MC. Motor Sports Auto (MSA) sells master cylinders for Z cars. So does Courtesey Nissan and Black Dragon. MSA or Courtesey Nissan might even still have and OEM MC available. Unless you have done it before, I don't advise you to rebuild your MC. There is more to it than just replacing seals. If the bore is worn or pitted it will continue to leak after the new seals are installed. If you have a stock 240Z then you do not want to install a 280ZX MC unless you have also installed some kind of big brake kit like the Toyota 4x4 calipers with vented rotor up grade for front brakes. If you install the larger bore 280ZX MC on your stock 240Z you will notice that you have to push harder on the brake pedal. Be safe. If you are not familiar with doing brake work you may want to consider taking the car to a brake shop and have the MC replaced. -
BRAKE MASTER CYLINDER LEAKING
Miles replied to J240ZTurbo's topic in Brakes, Wheels, Suspension and Chassis
Replace the master cylinder. Be sure to properly bench bleed the new master cylinder before installing it on the car. Search the Brake section for how to instructions as it has been written up several times. -
You will need to trace the power circuits with a volt meter or test light. Check to see if your fuse box melted.
-
Searching found this in the FAQ thread http://forums.hybrid...gine-swaps-bar/
-
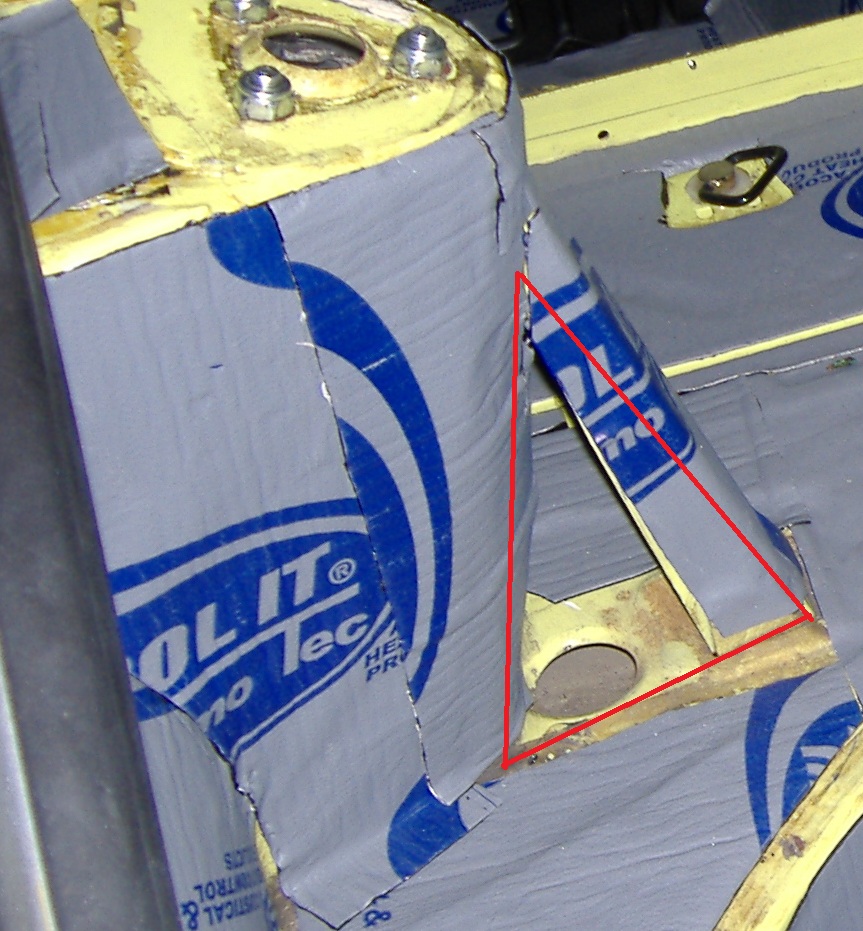
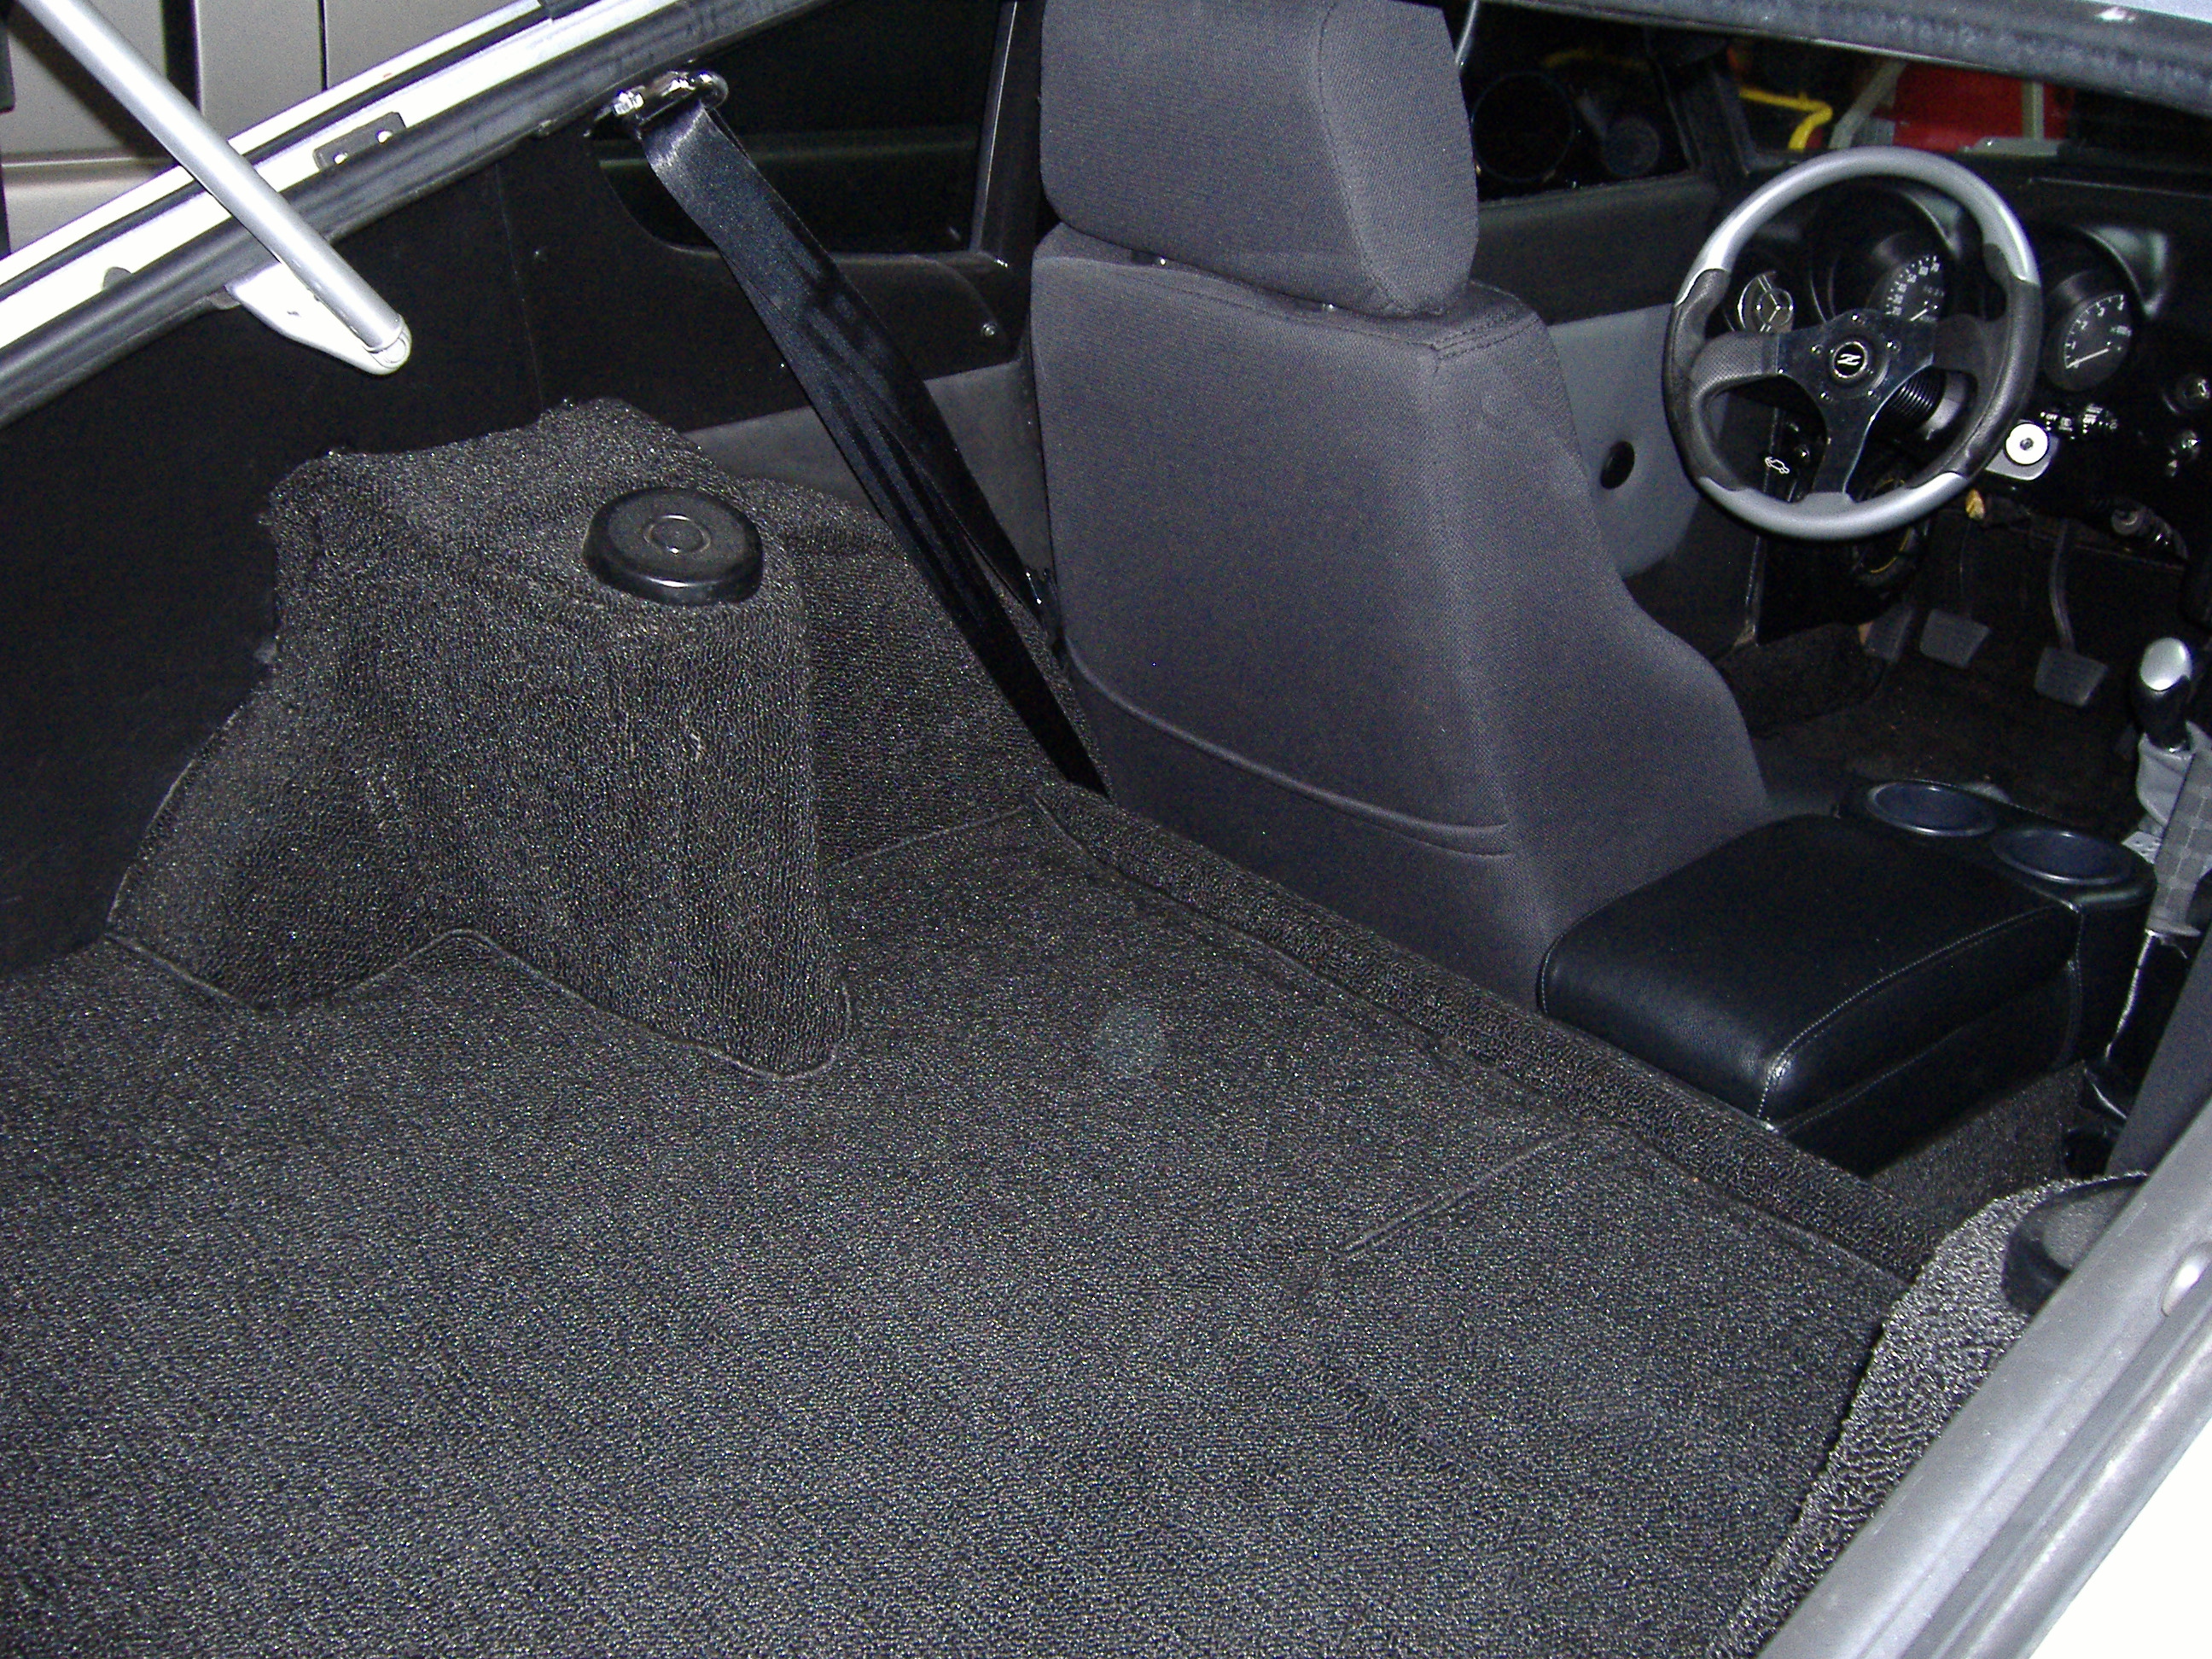
I wasted about three months researching carpet and followed many false leads. The MSA Delux kit is fine. Note that the strut covers fit best if you fill in the holes in the strut frame with some thin wood sheet material. I just cut the wood sheet to follow the angles of the strut frames and glued them on. This will hold the shape of the carpet over strut tower better. See attached picture for area to be filled in. Also, there is no hole cut in the strut cover carpet for access to the strut attachment bolts. I carefully cut a small hole in the carpet just big enough to access the bolts. I was able to install the new plastic strut caps to cover the holes so it looks stock.
-
I fixed those links in my post above. I found several Ford and Chevy sites talking about the Taurus fan and relay configurations with how-to instructions. Seems to be a popular install.
-
I used the MSA Delux kit which covers the floor, trans tunnel,side rails, riser, rear deck and rear strut towers. Looks excellent. No fitment problems. I glued all of the carpet except for the rear deck. I installed sound and heat insulation before installing the carpet. It was easy to do as long as you don't rush it and plan ahead what pieces to install first.. By the way, does any company make an actual molded carpet kit for the 240Z, 260Z or 280Z? The so called "molded carpet" kits I found were actually sewn sections.
-
Check out the test data for the MK VIII fan on the http://forums.corvet...spal-duals.html/ link. It plots CFM vs amps at various static pressures.
-
Here is a link for more info on the Volvo relay for two speed fan operation. Some links and side bar discussion for two speed relay controls. http://www.nastyz28....ad.php?t=200028 Link to MK VIII fan performance data: http://forums.corvet...spal-duals.html Link to Hollister comapny that makes a relay kit for the two speed MK VIII fan http://www.hollisterroad.com/proddetail.asp?prod=MarkVIII
-
Here is the Miata tire size calculator: http://www.miata.net/garage/tirecalc.html You will need to input the original tire specifications. Followed by the desired tire size. At the bottom of the page it will tell you what your speedometer error is if the diameter of the tire is larger or smaller than the original tire diameter. If you want to keep your speedometer accurate then keep the stock tire diameter. If you want a larger diameter tire and keep you speedometer accurate then you would need to play around with changing the speedo drive gear ratio in the transmission. With the tire size calculator you can simulate how changing tire size variables (wheel diameter, aspect ratio etc.) relates to speedometer errors.
-
Best link I found for a Ford build: http://lainefamily.com/240Z_V8_Conversion.htm
-
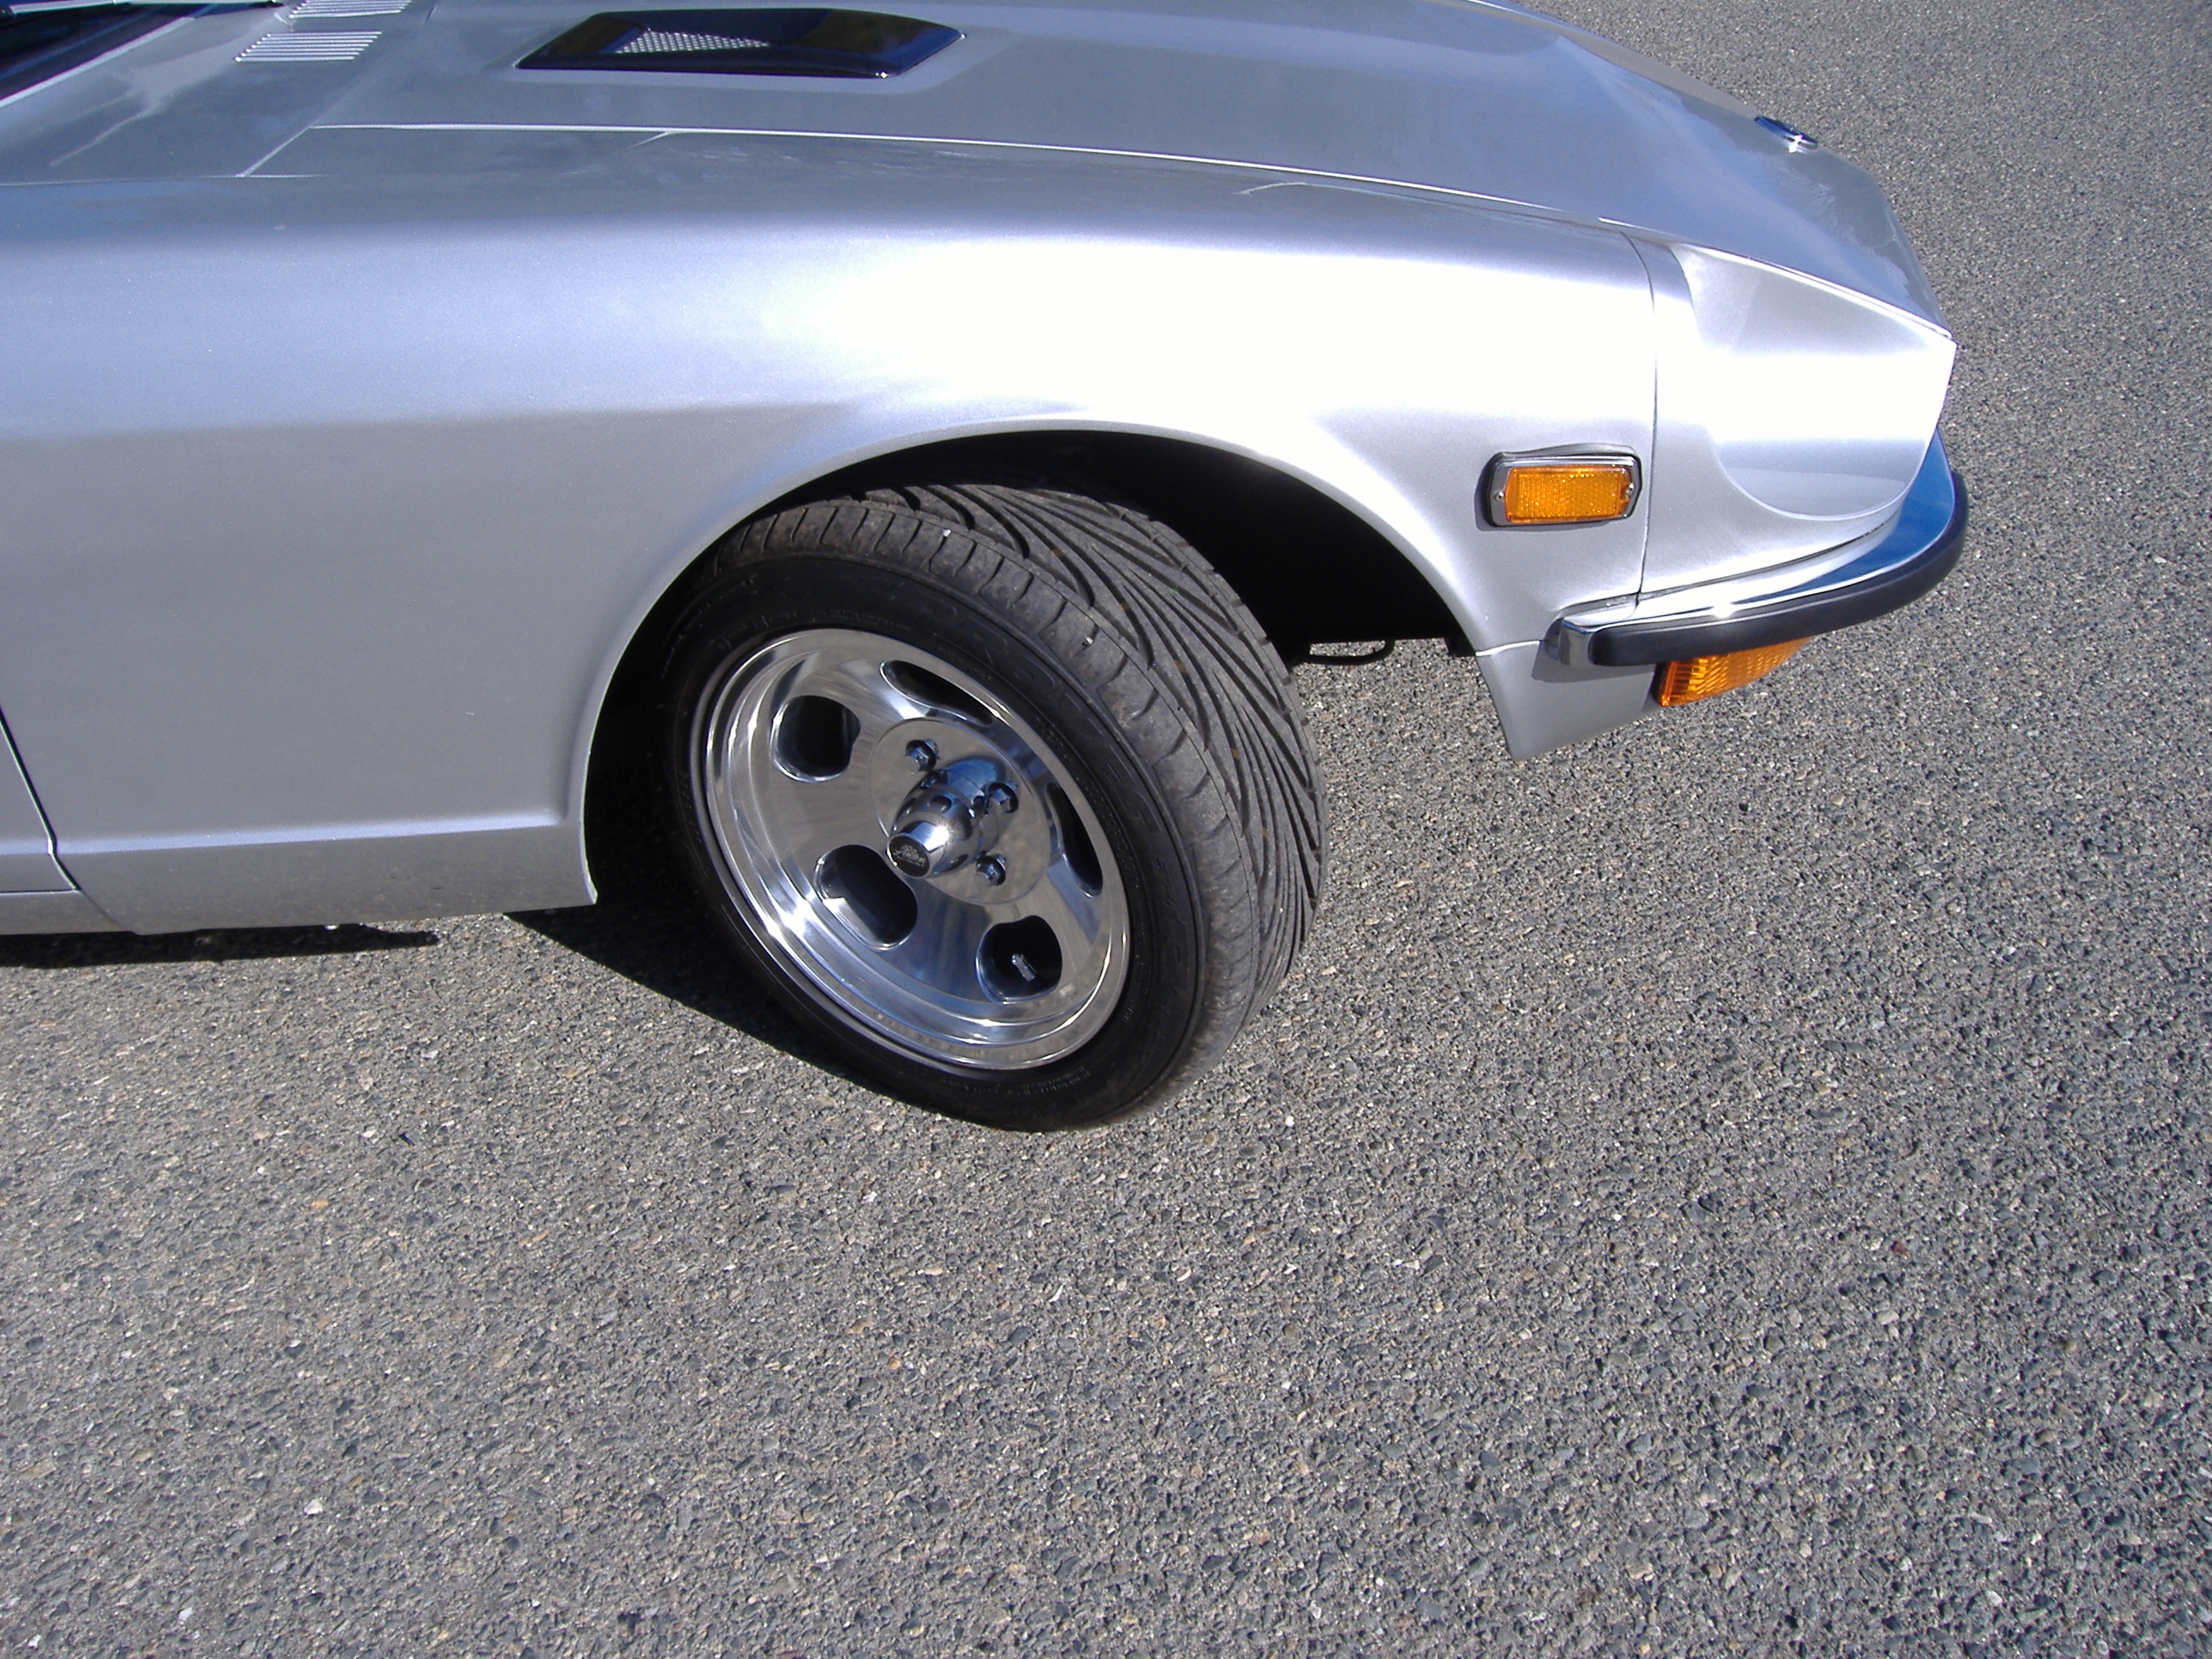
I have been using Toyo Proxes on my stock and V8 240Z cars for some time. All of my 240Z cars have been daily drivers in a sunny warm climate. I have not had a single problem with these tires. I bought a set from Les Schwab last year for about $130 each. Note: if you change your tire size it will throw your speedometer off. There are a number of tire size calculators on the web where you can simulate different wheel and tire combinations and determine the effects on your speedometer. You will need to know the gear ratio of your differntial which you can research here in the drivetrain forum. Look in the threads for differentials.