lowrider
-
Posts
404 -
Joined
-
Last visited
-
Days Won
3
Content Type
Profiles
Forums
Blogs
Events
Gallery
Downloads
Store
Everything posted by lowrider
-
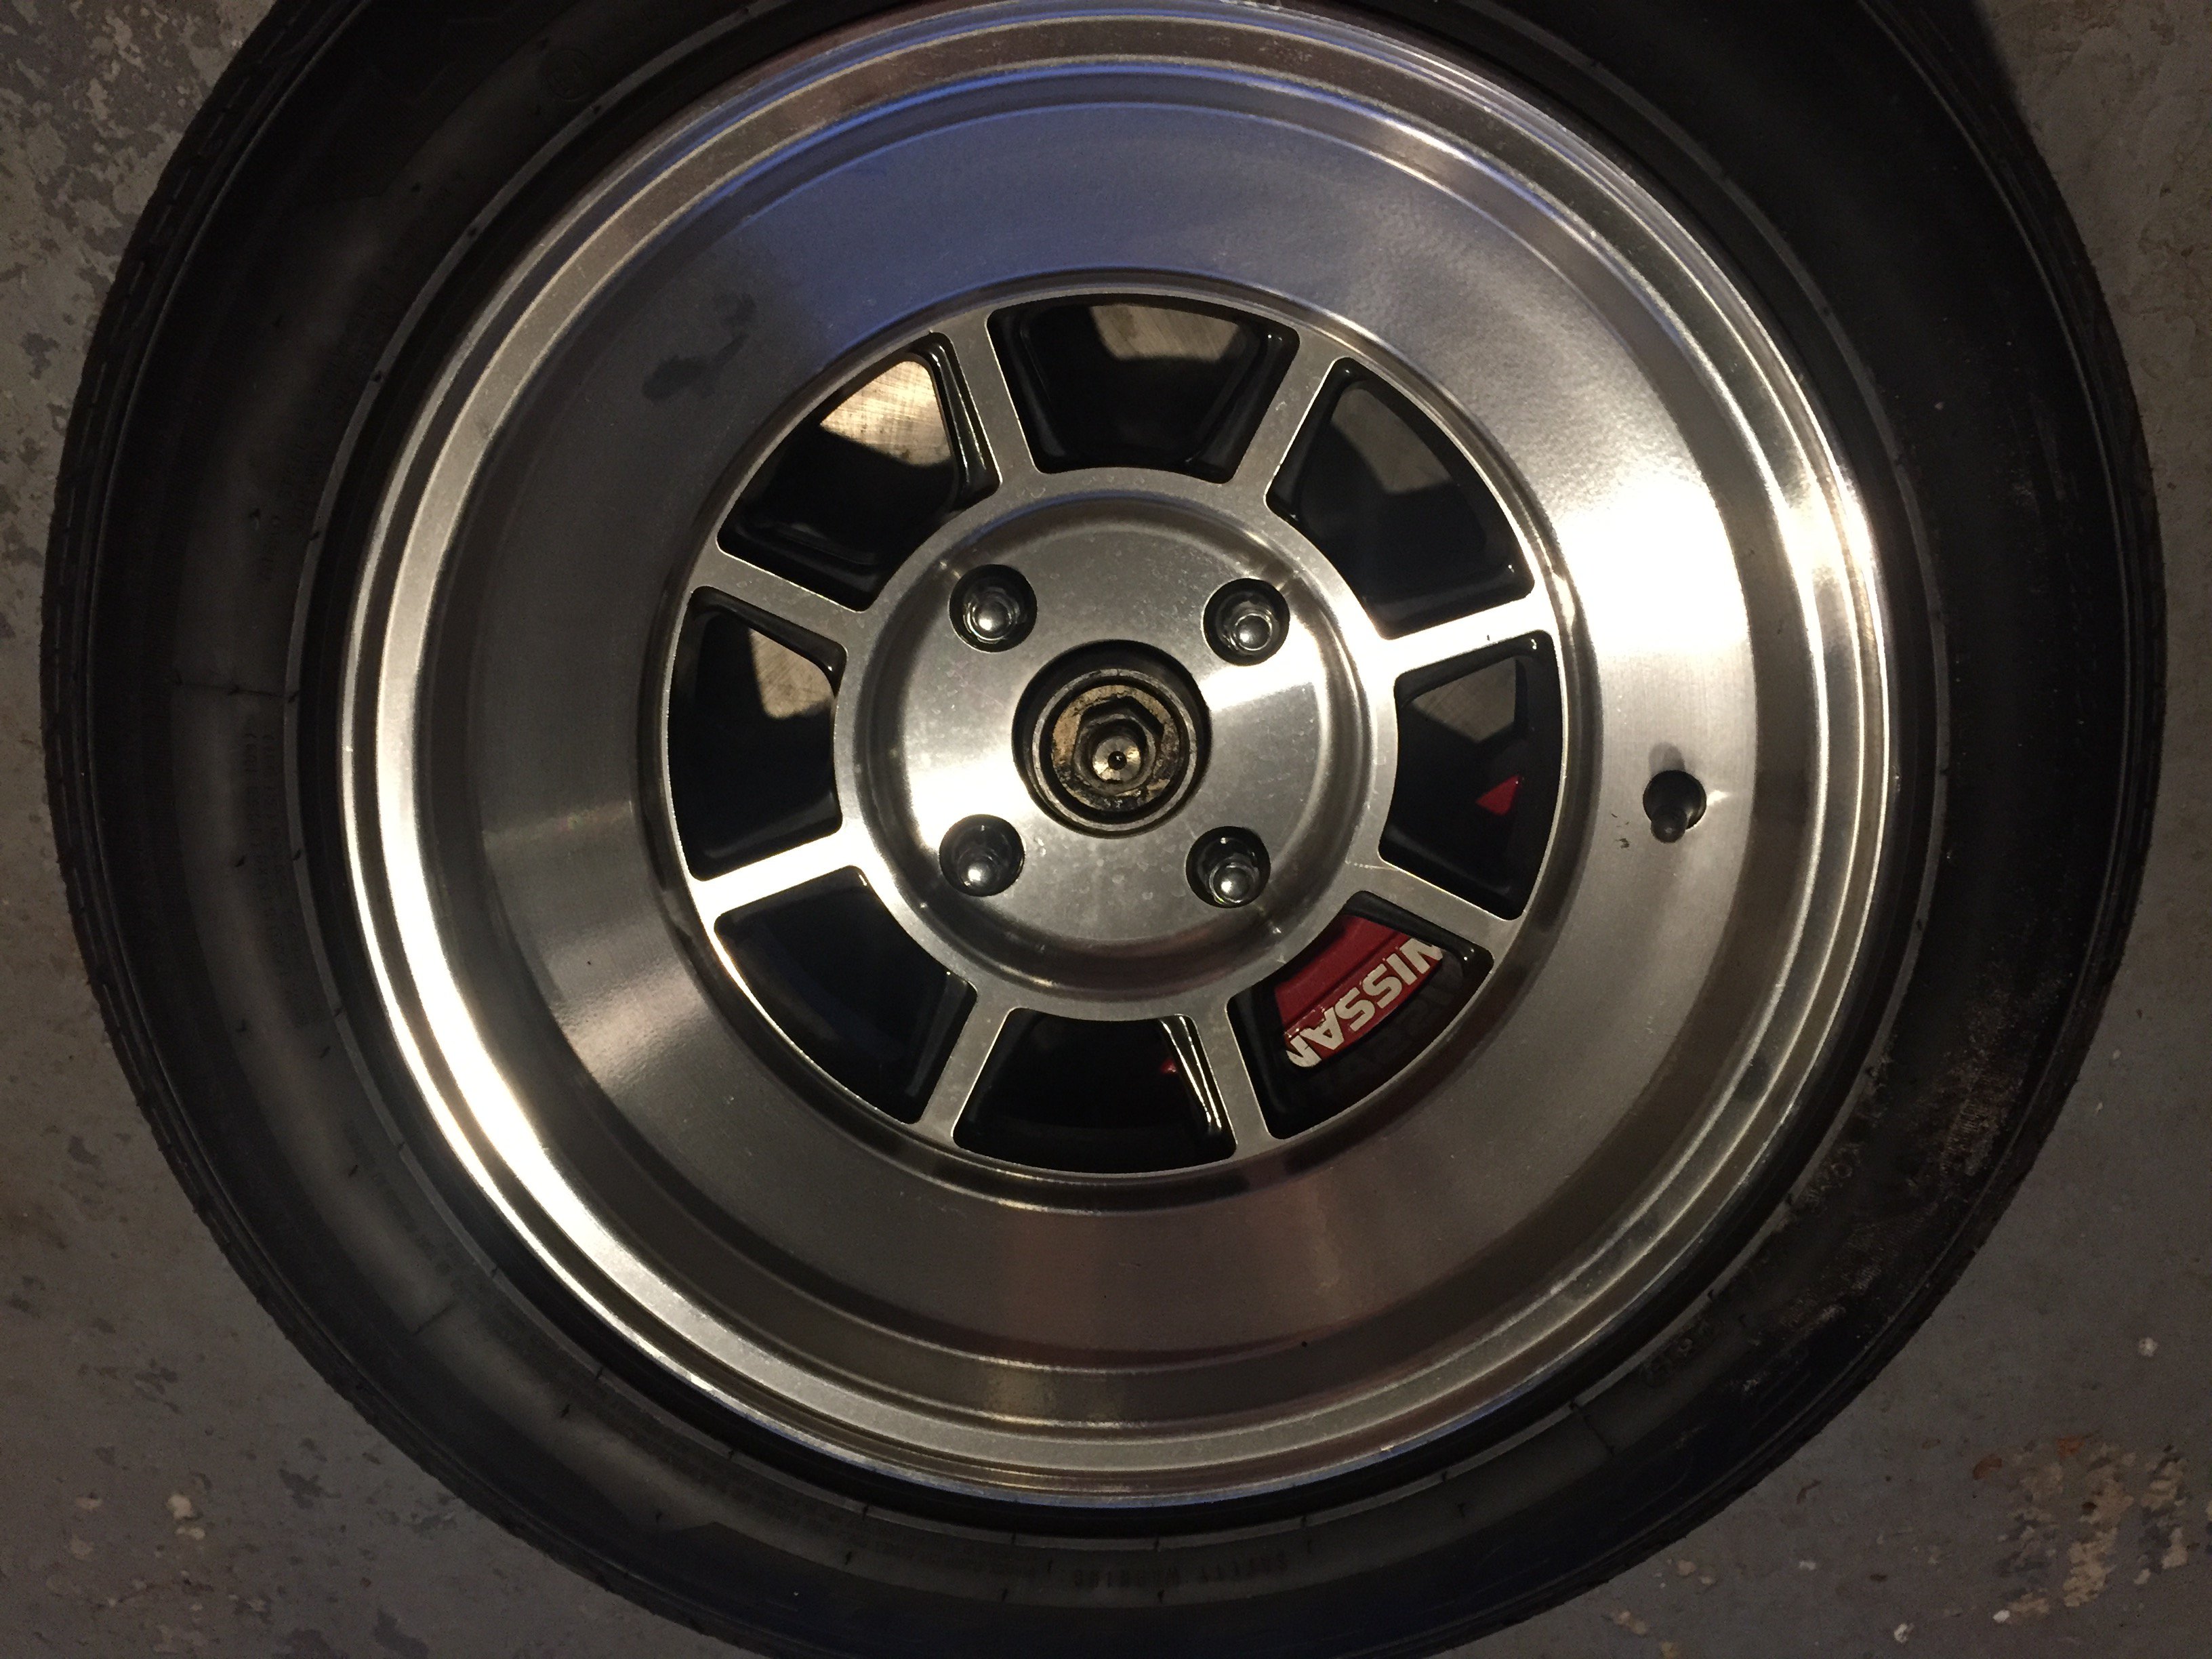
Leon, I got the email with the file! Thank you for sharing! I was able to put the wheel into the rear brake assembly and it appears to have more clearance then my interpretation of your measurements. They look like they will fit perfectly. In return for sending me the scan, I’ll gladly shoot you my bracket models if you’d like.
-
I'm working in Solidworks, so a step, parasolid, or Solidworks part file will all work. The Step or SW Part file would be preferable. When ever you get the file, my email is: andrew.mielke74@gmail.com That's awesome that you have access to a 3d scanner! That would make life so much easier when trying to model pieces that have complex shapes!
-
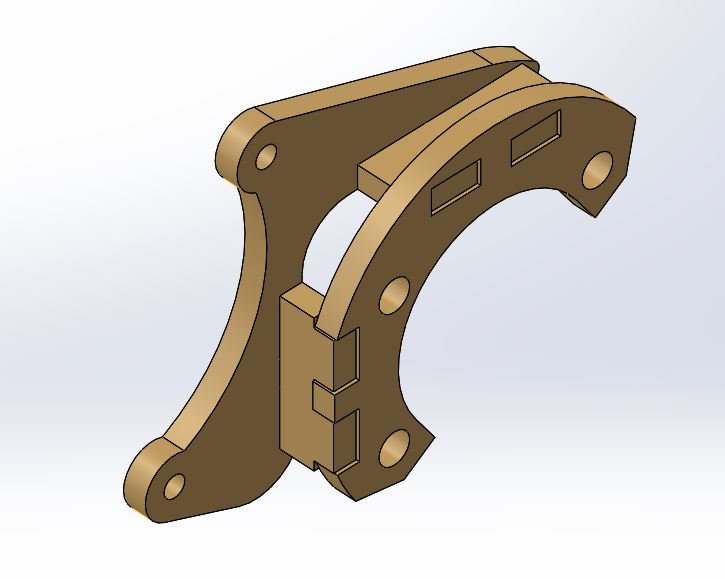
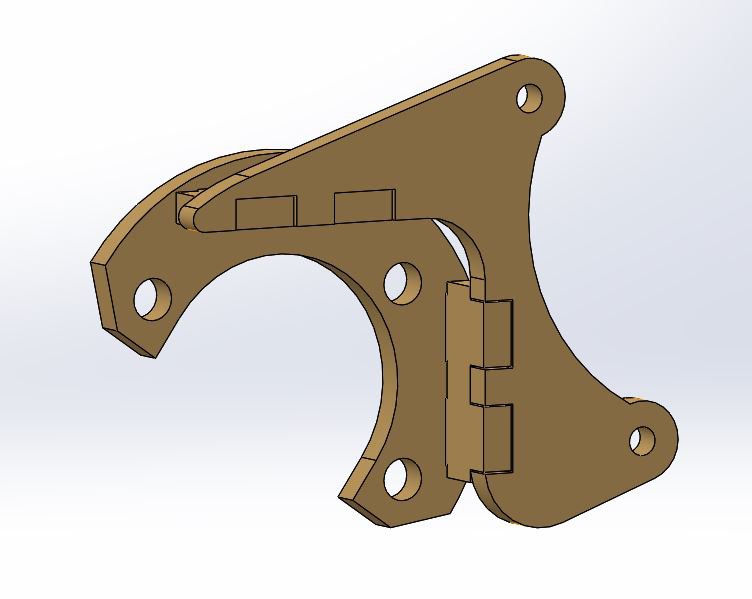
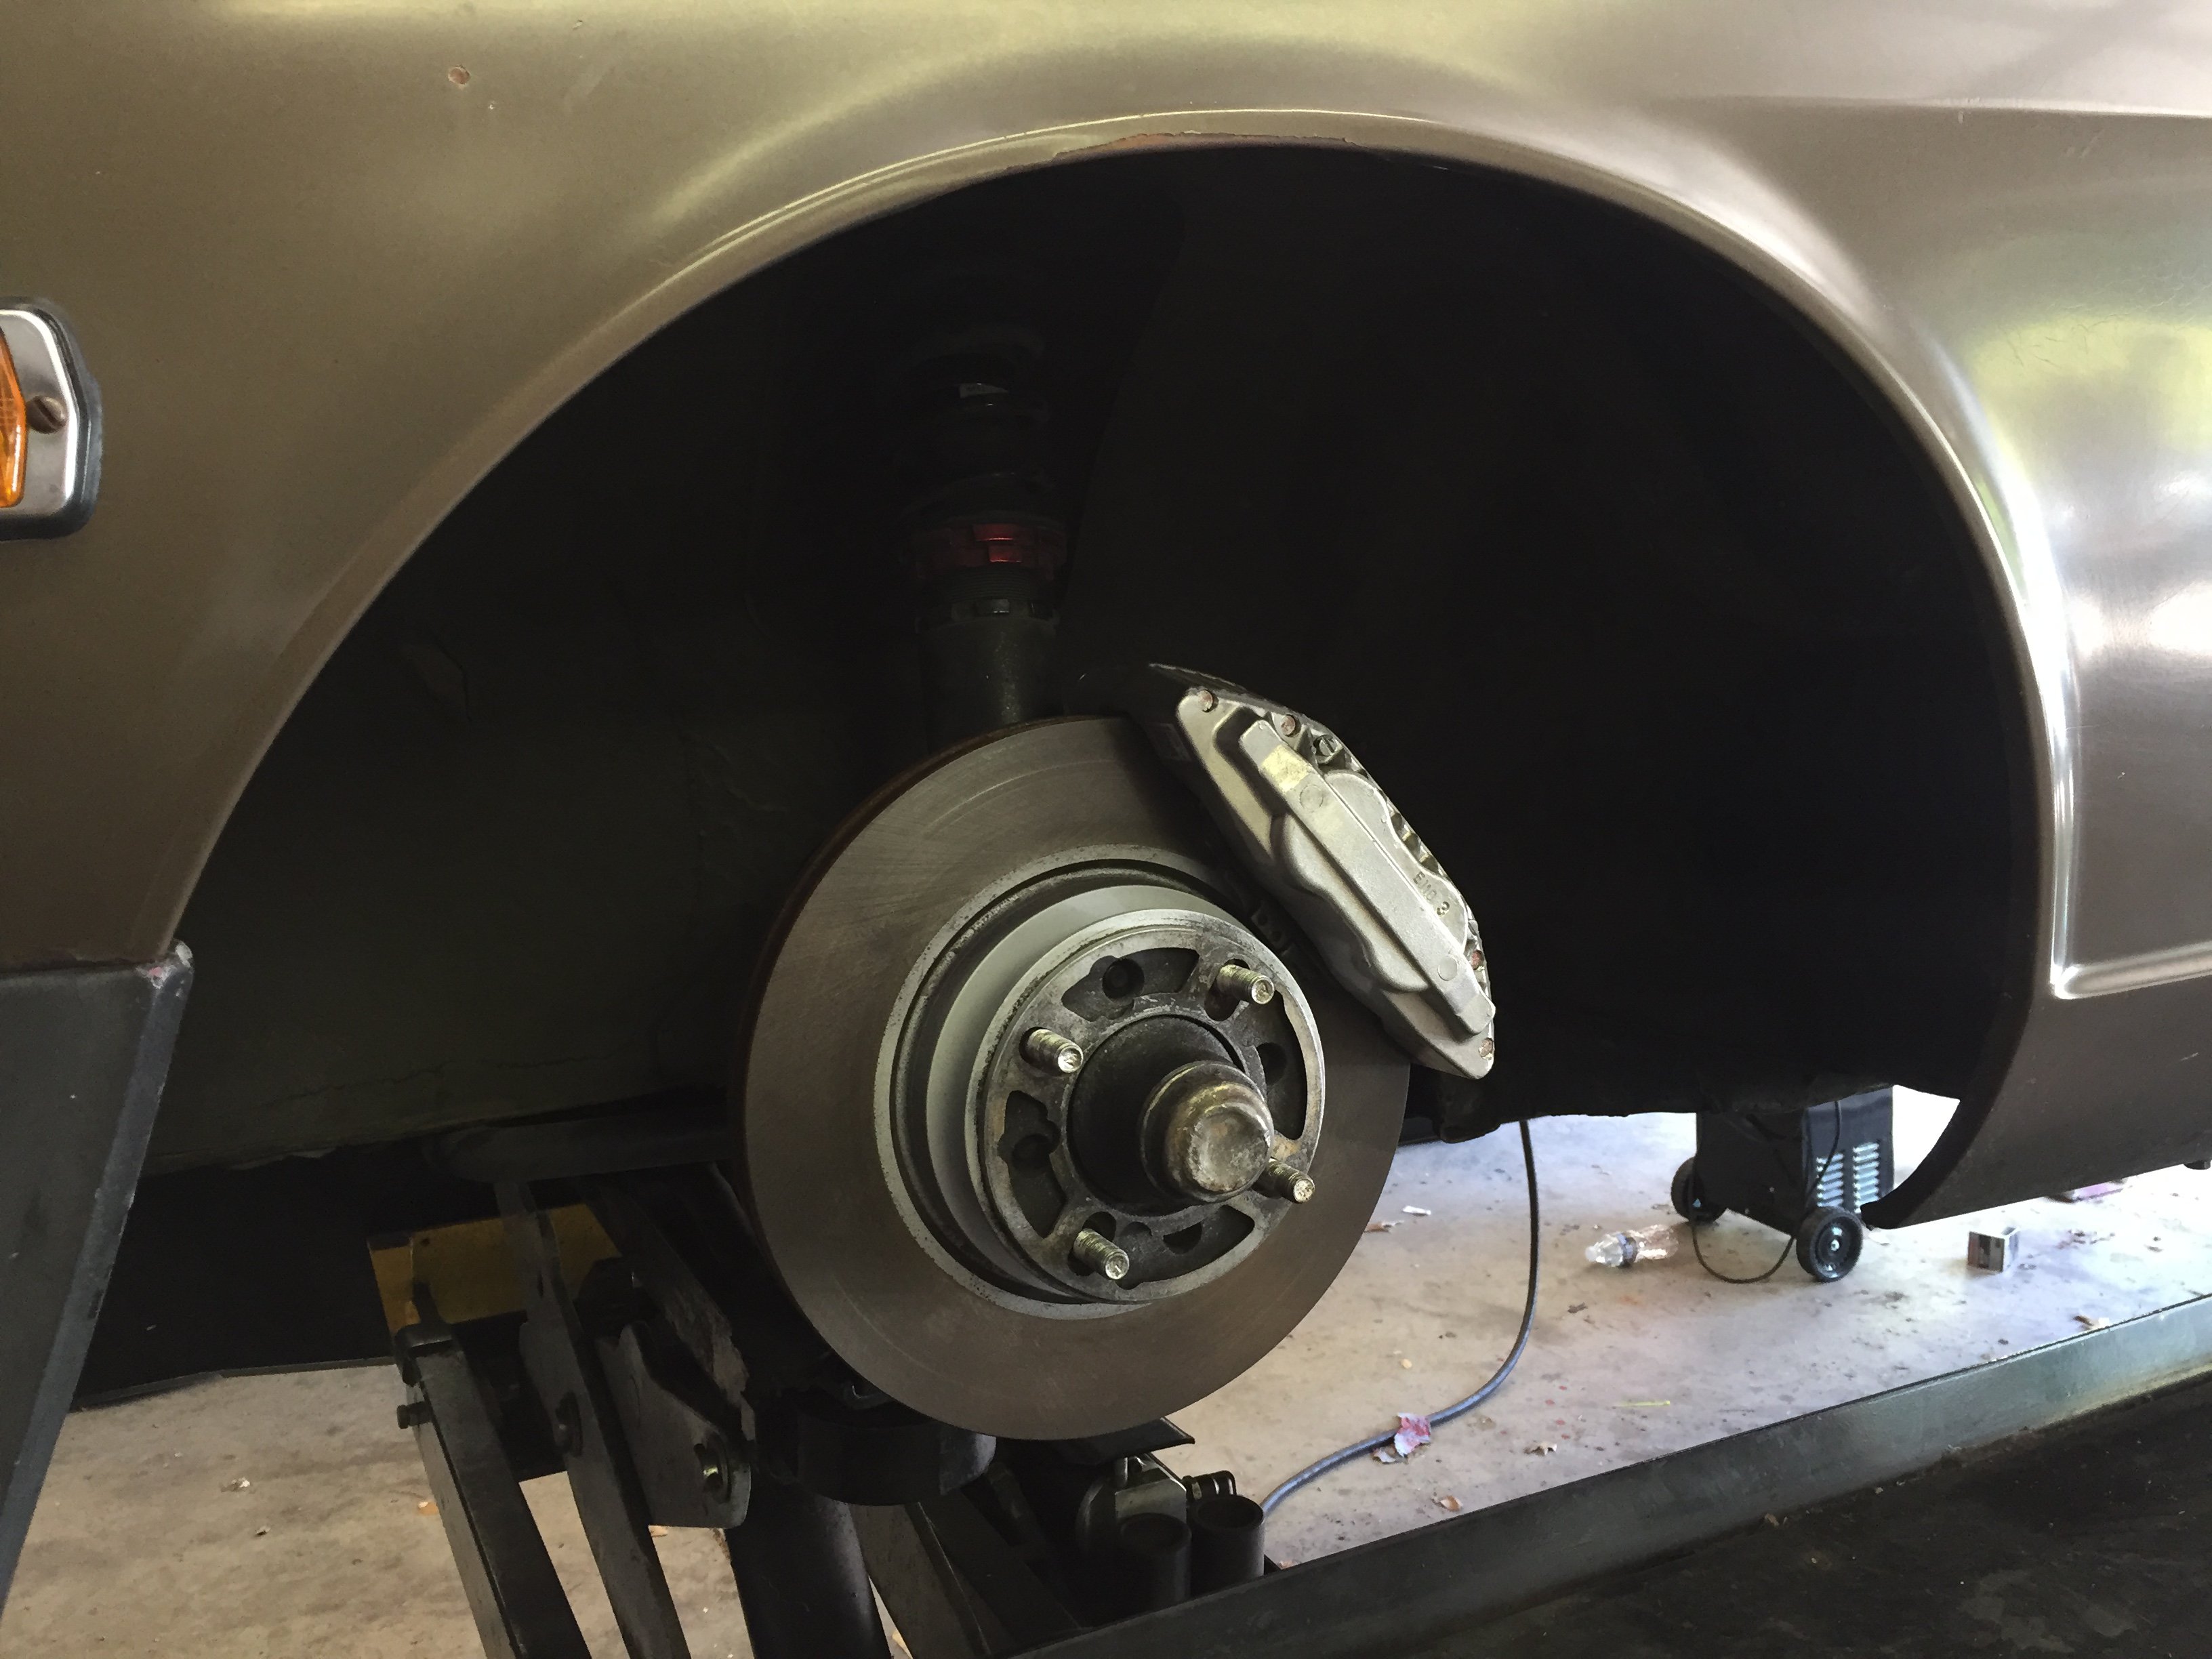
I was finally able to create a representation of wheel and pop it in the rear brake assembly model. It appears that it would fit just fine. I was able to roughly measure 4.75mm between the caliper and the inner barrel of the wheel at the front face, though this is assuming that I interpreted your measurements correctly. When you get the wheel scanned (and if you would like to share) I can place that in the model and be a little more accurate. I've also included a few pictures of the caliper bracket assembly to kind-of show how it was designed, it might give you some ideas for yours. I went the multi piece route because it was easier/cheaper for me to have all of the pieces laser cut and weld them up versus paying for the machine time to whittle one out of solid stock.

-
I really didn’t do much sharing in the way of documenting the design and building process. The brackets are made of 4 - 3/8” thick 1045 steel pieces that are laser cut and welded together. An FEA on the assembly was conducted and the brackets have a huge 2.65 safety factor at loads that are highly unlikely for even a dedicated race car to see. I went a bit overboard in comparison to most other people rear brake setups (I enjoy the details). I’ll try and model up a representation of the wheel tomorrow and toss it in the assembly to check interference. The rearward offset of these rotors/calipers really help get the caliper away from the wheel (back?) face.
-
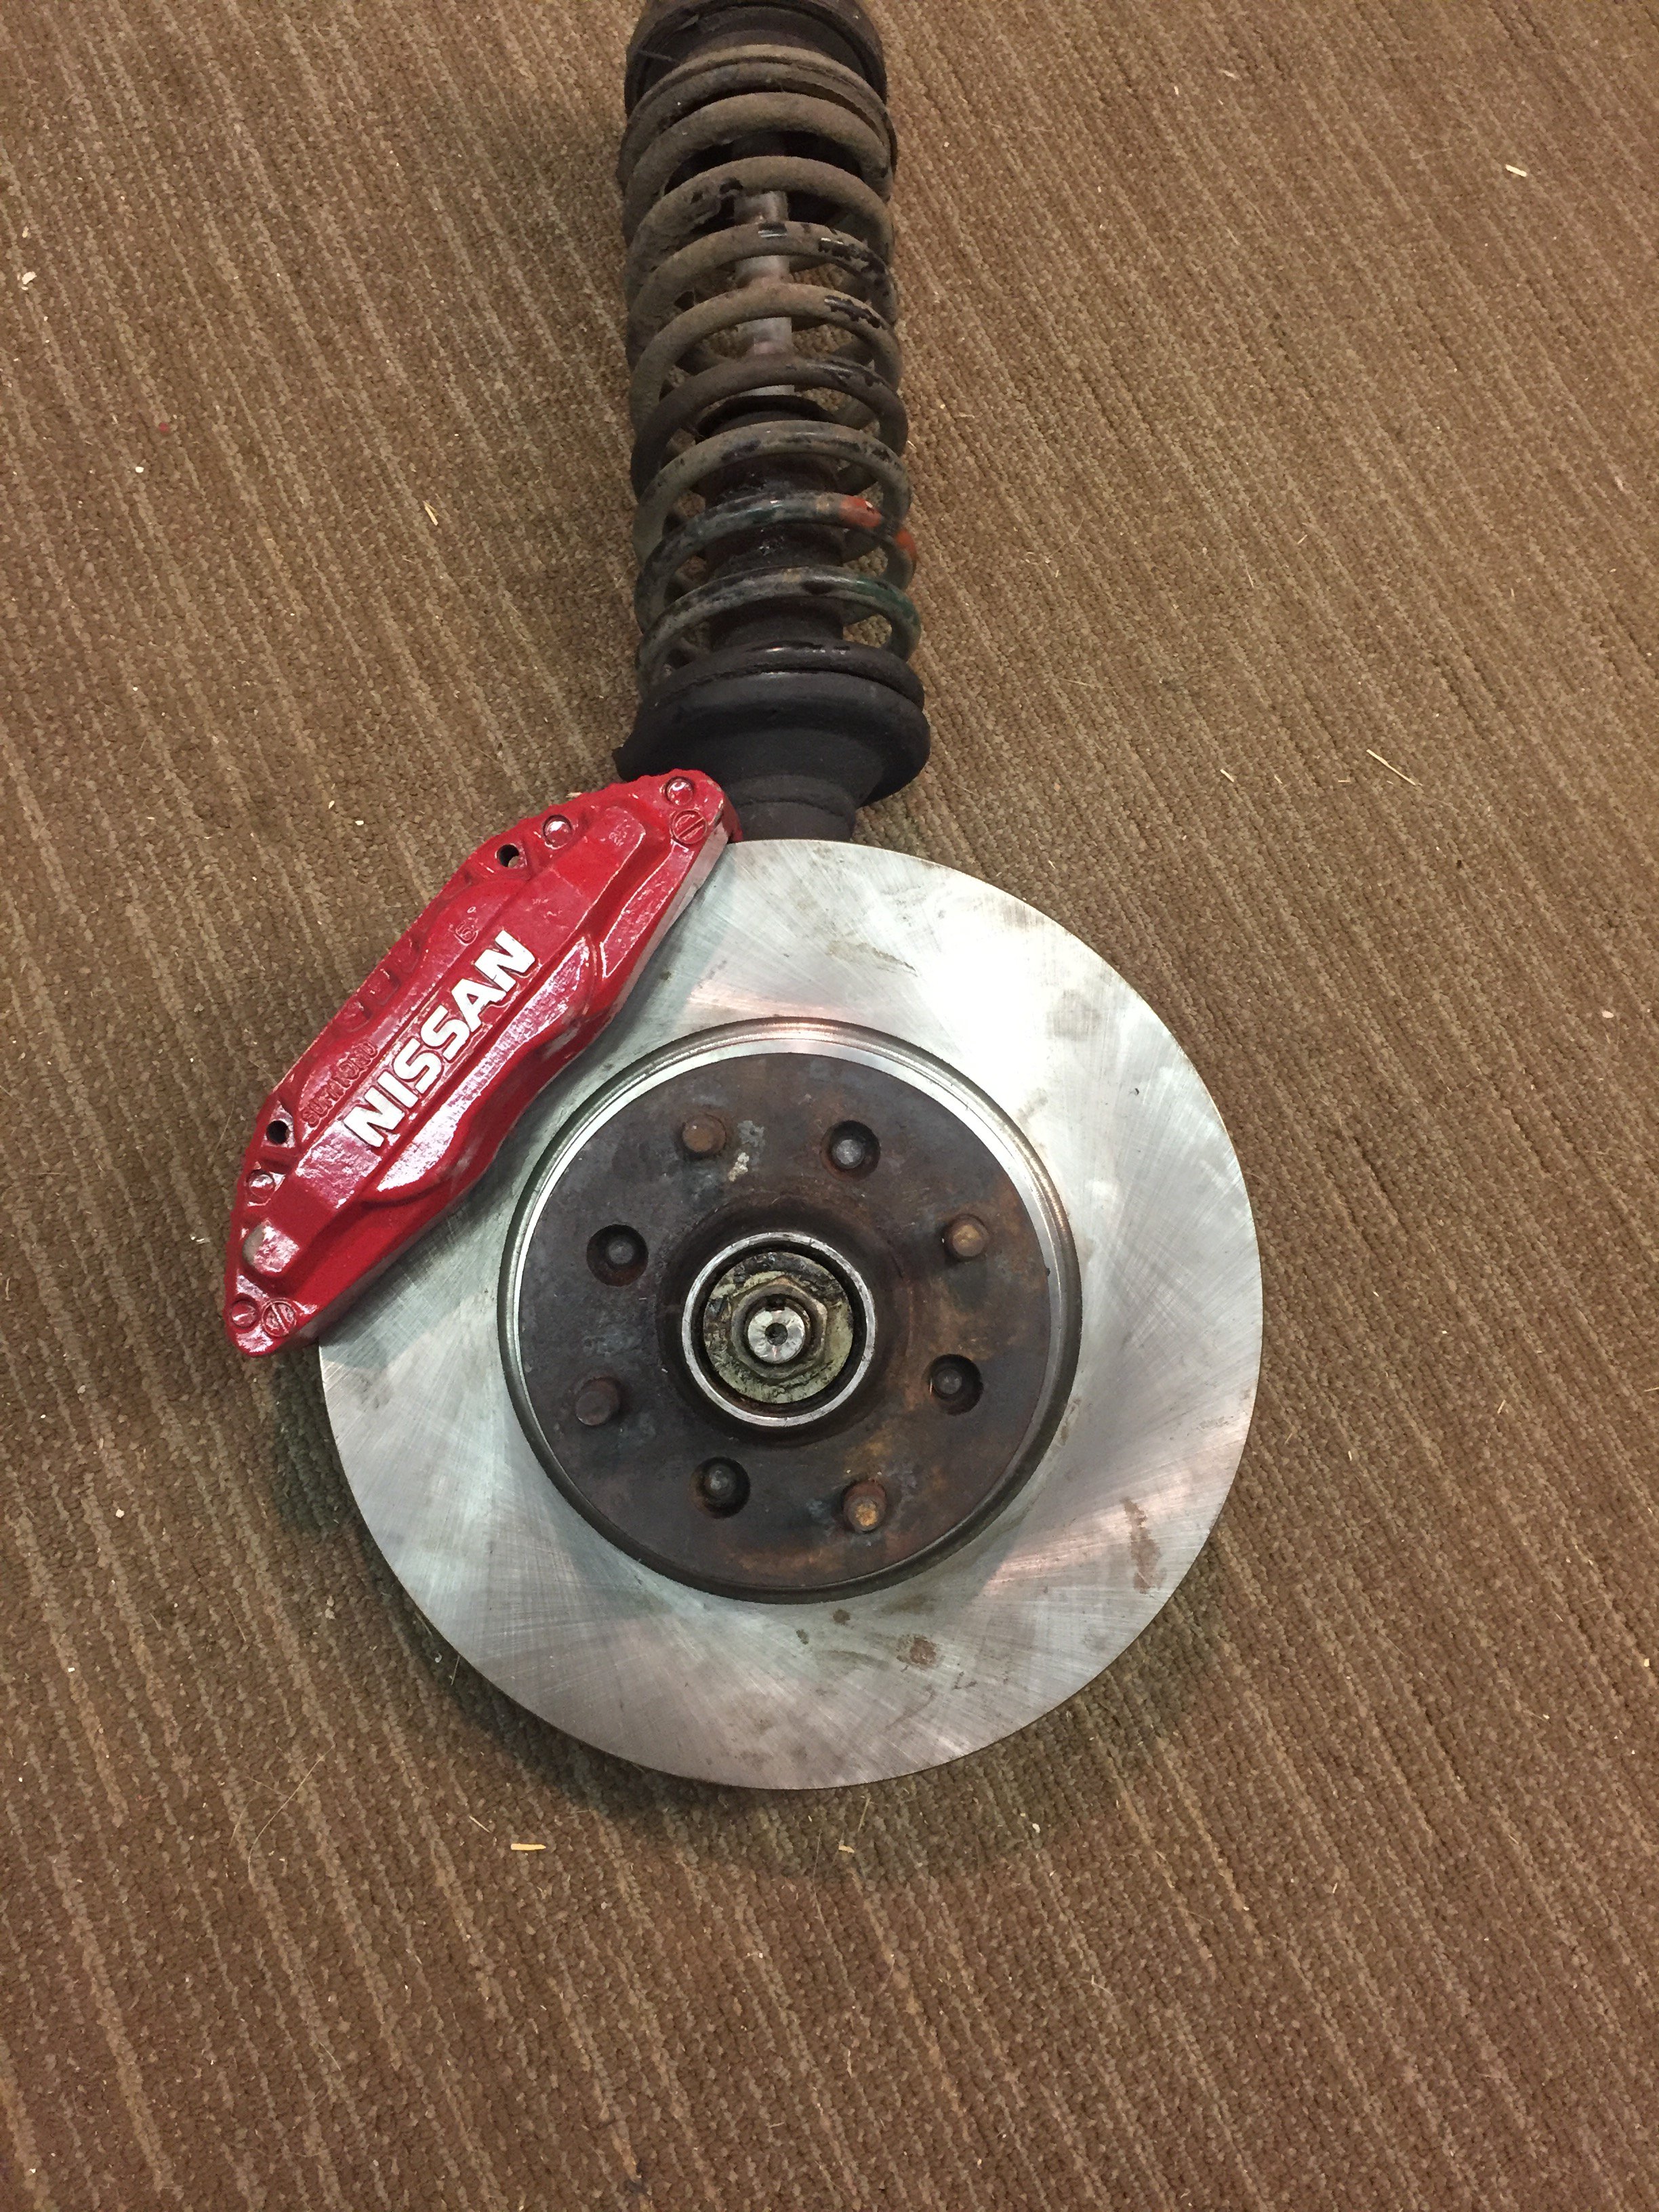
What rear disk setup were you using that didn't fit? I recently went through a design exercise to develop a rear disk setup that would give a good rear bias to my Z32 front calipers/ Odyssey rotors, fit under 15" wheels, and retain a mechanical e-brake function in the calipers. I ended up using all late model Z31 Turbo components which gave me the mechanical parking brake, a 11.1" vented rear rotor, and a matching bias to my big front brakes. If you would be interested, you could take some measurements of the wheels I could pop it in the solid model to see if everything would fit. The front brakes that these complement:
-
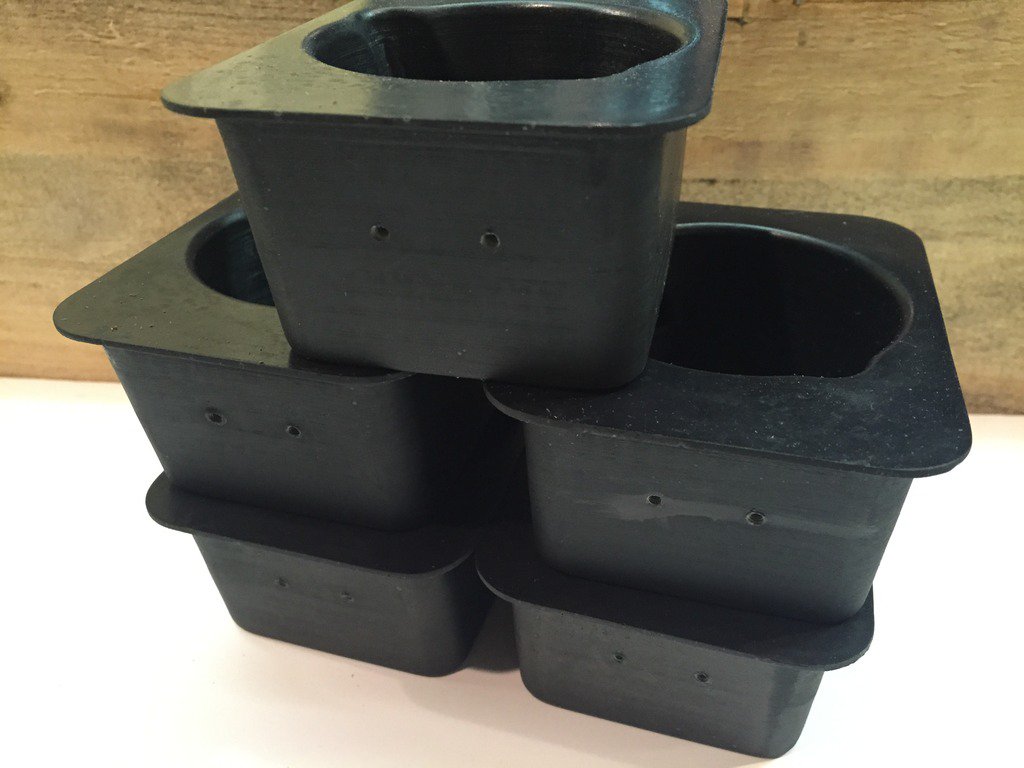
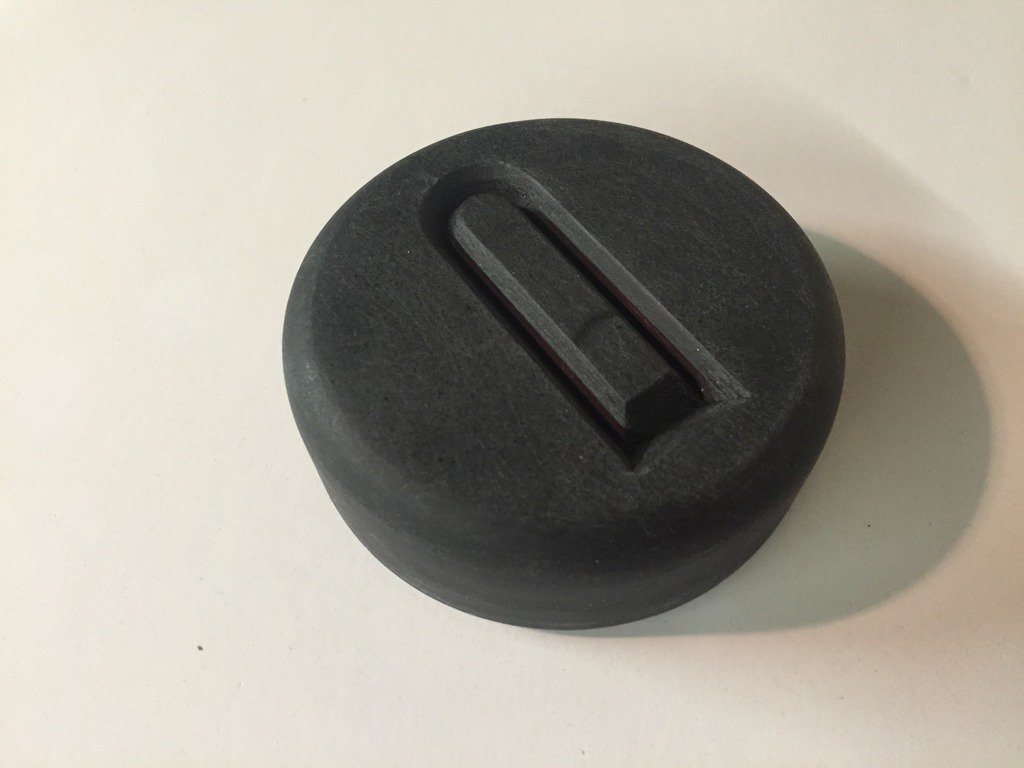
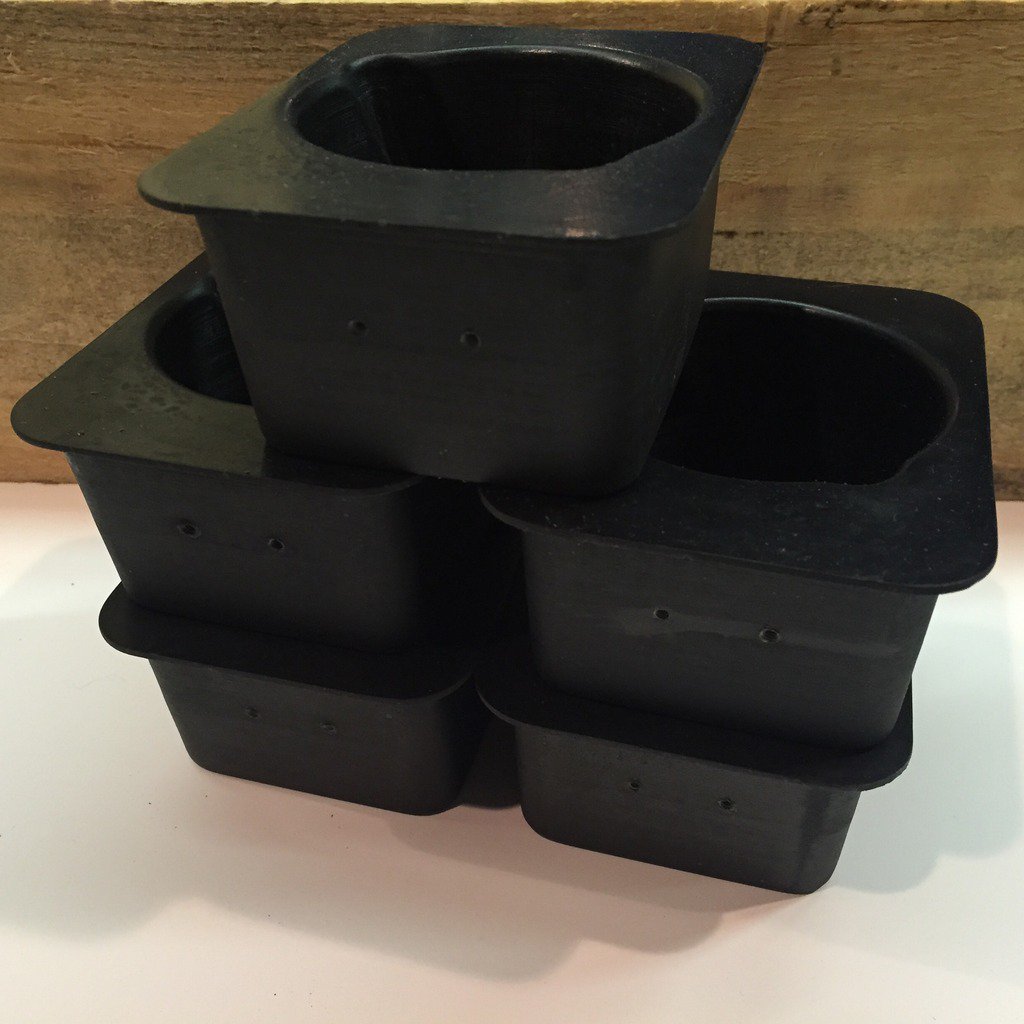
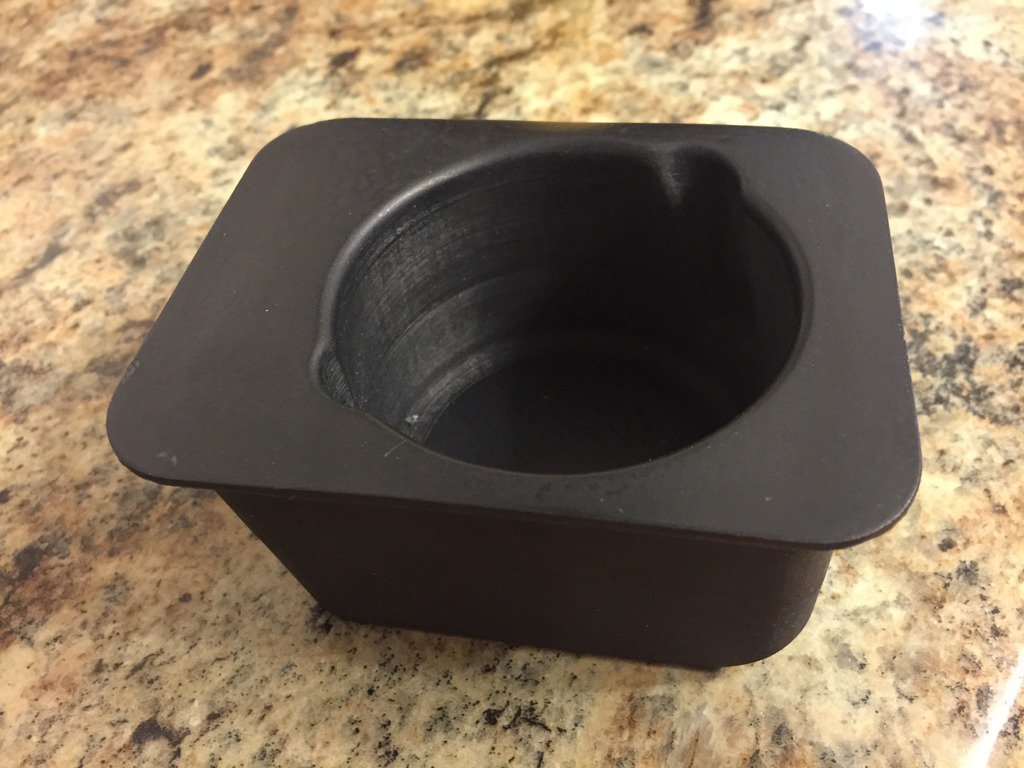
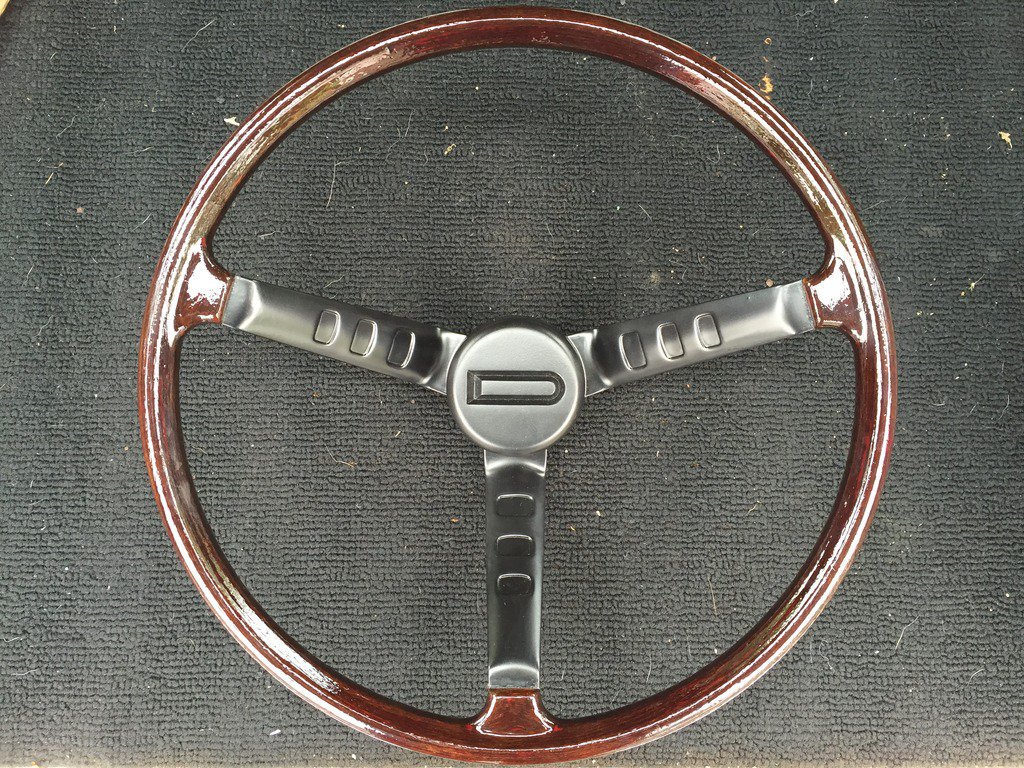
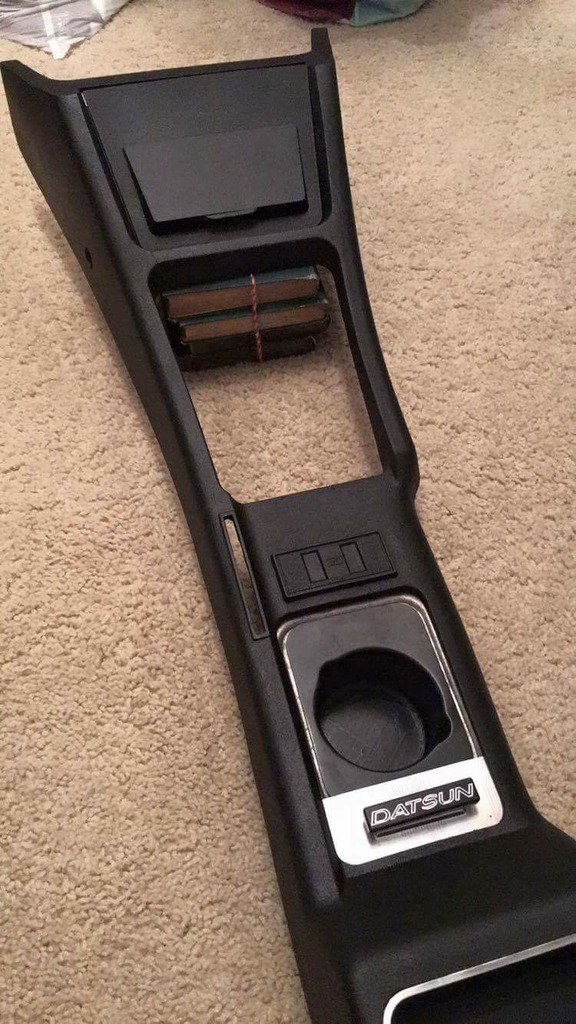
Have you thought of using the print as a plug to make a mold and plastic cast the final piece? I've done this with several projects that need to have a higher heat resistance than what what a typical PLA or Nylon would have. The reason I typically plastic cast is due to cost as well, I don't own a 3D printer and it can become expensive having someone else print in these exotic materials that have a higher heat resistance. It's more cost effective for me to have the print made cheaply in PLA and use it to make a mold to cast from. Here are a few parts I've made using the casting process: The material these are made from has a heat deflection temperature of 250 degrees F. I have seen some resins that are resistant to heat up to 400 degrees F as well. Ash Tray Cup Holder: 240Z Steering Wheel Horn Button:
-
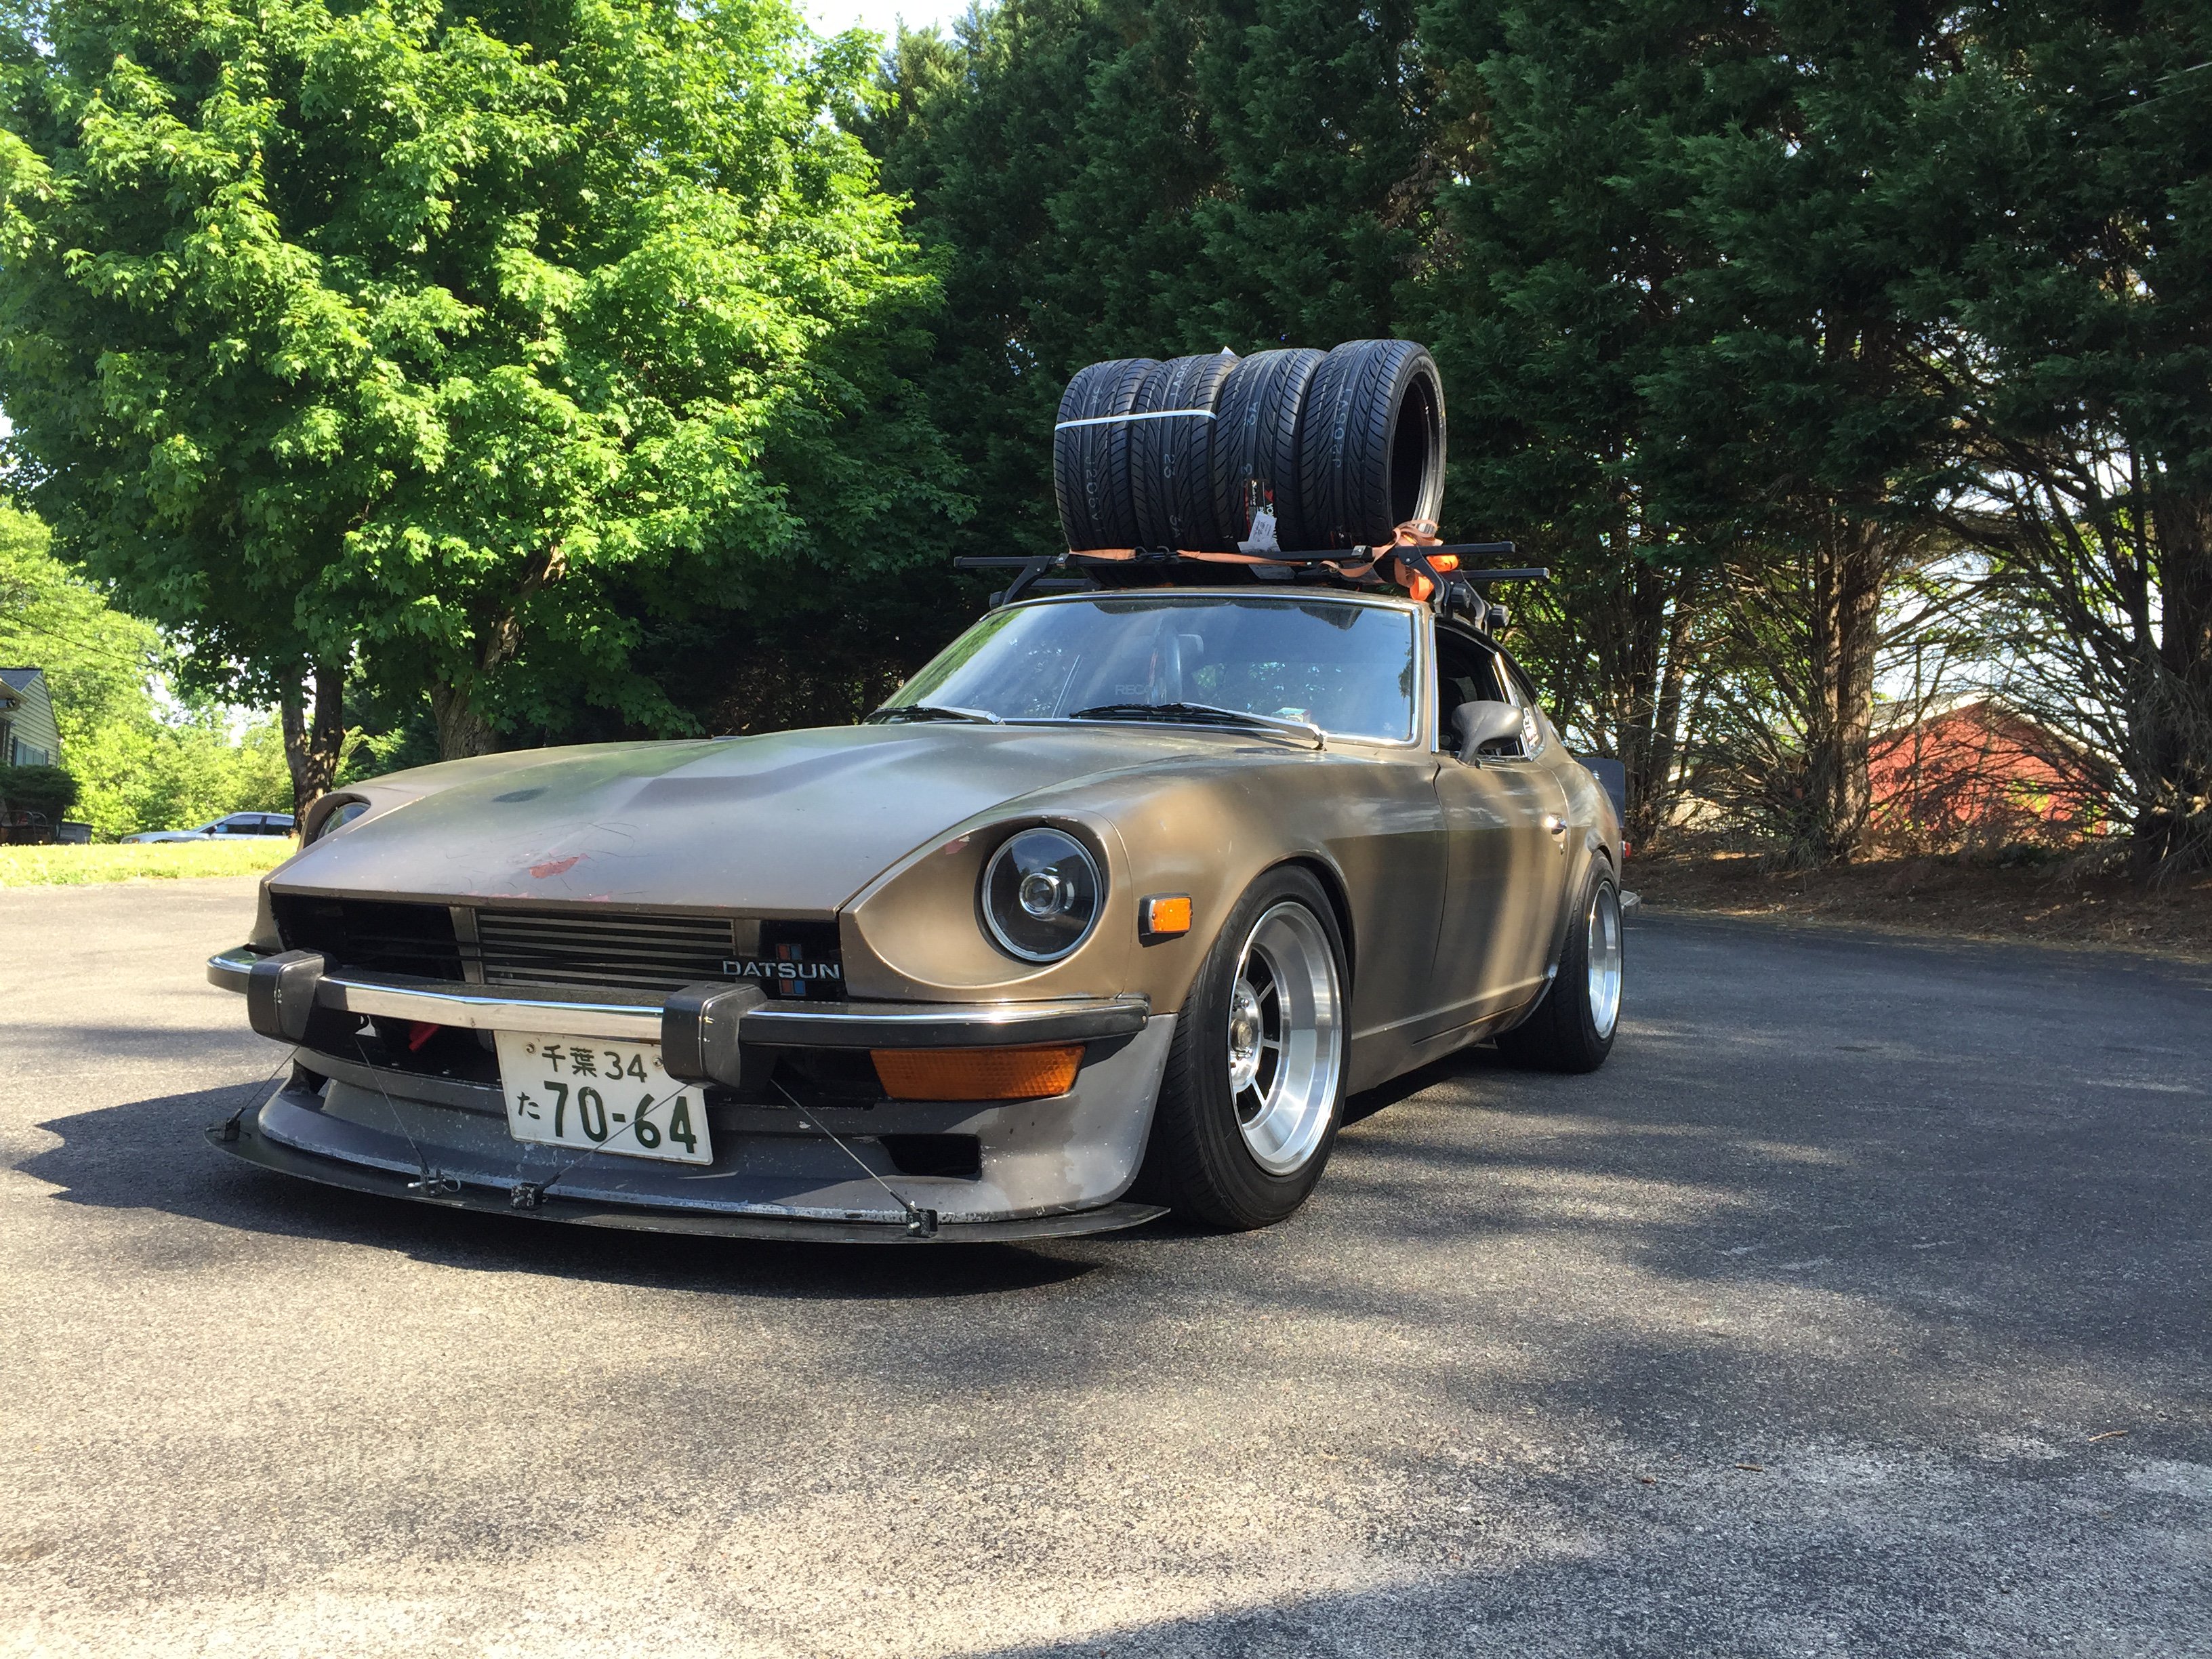
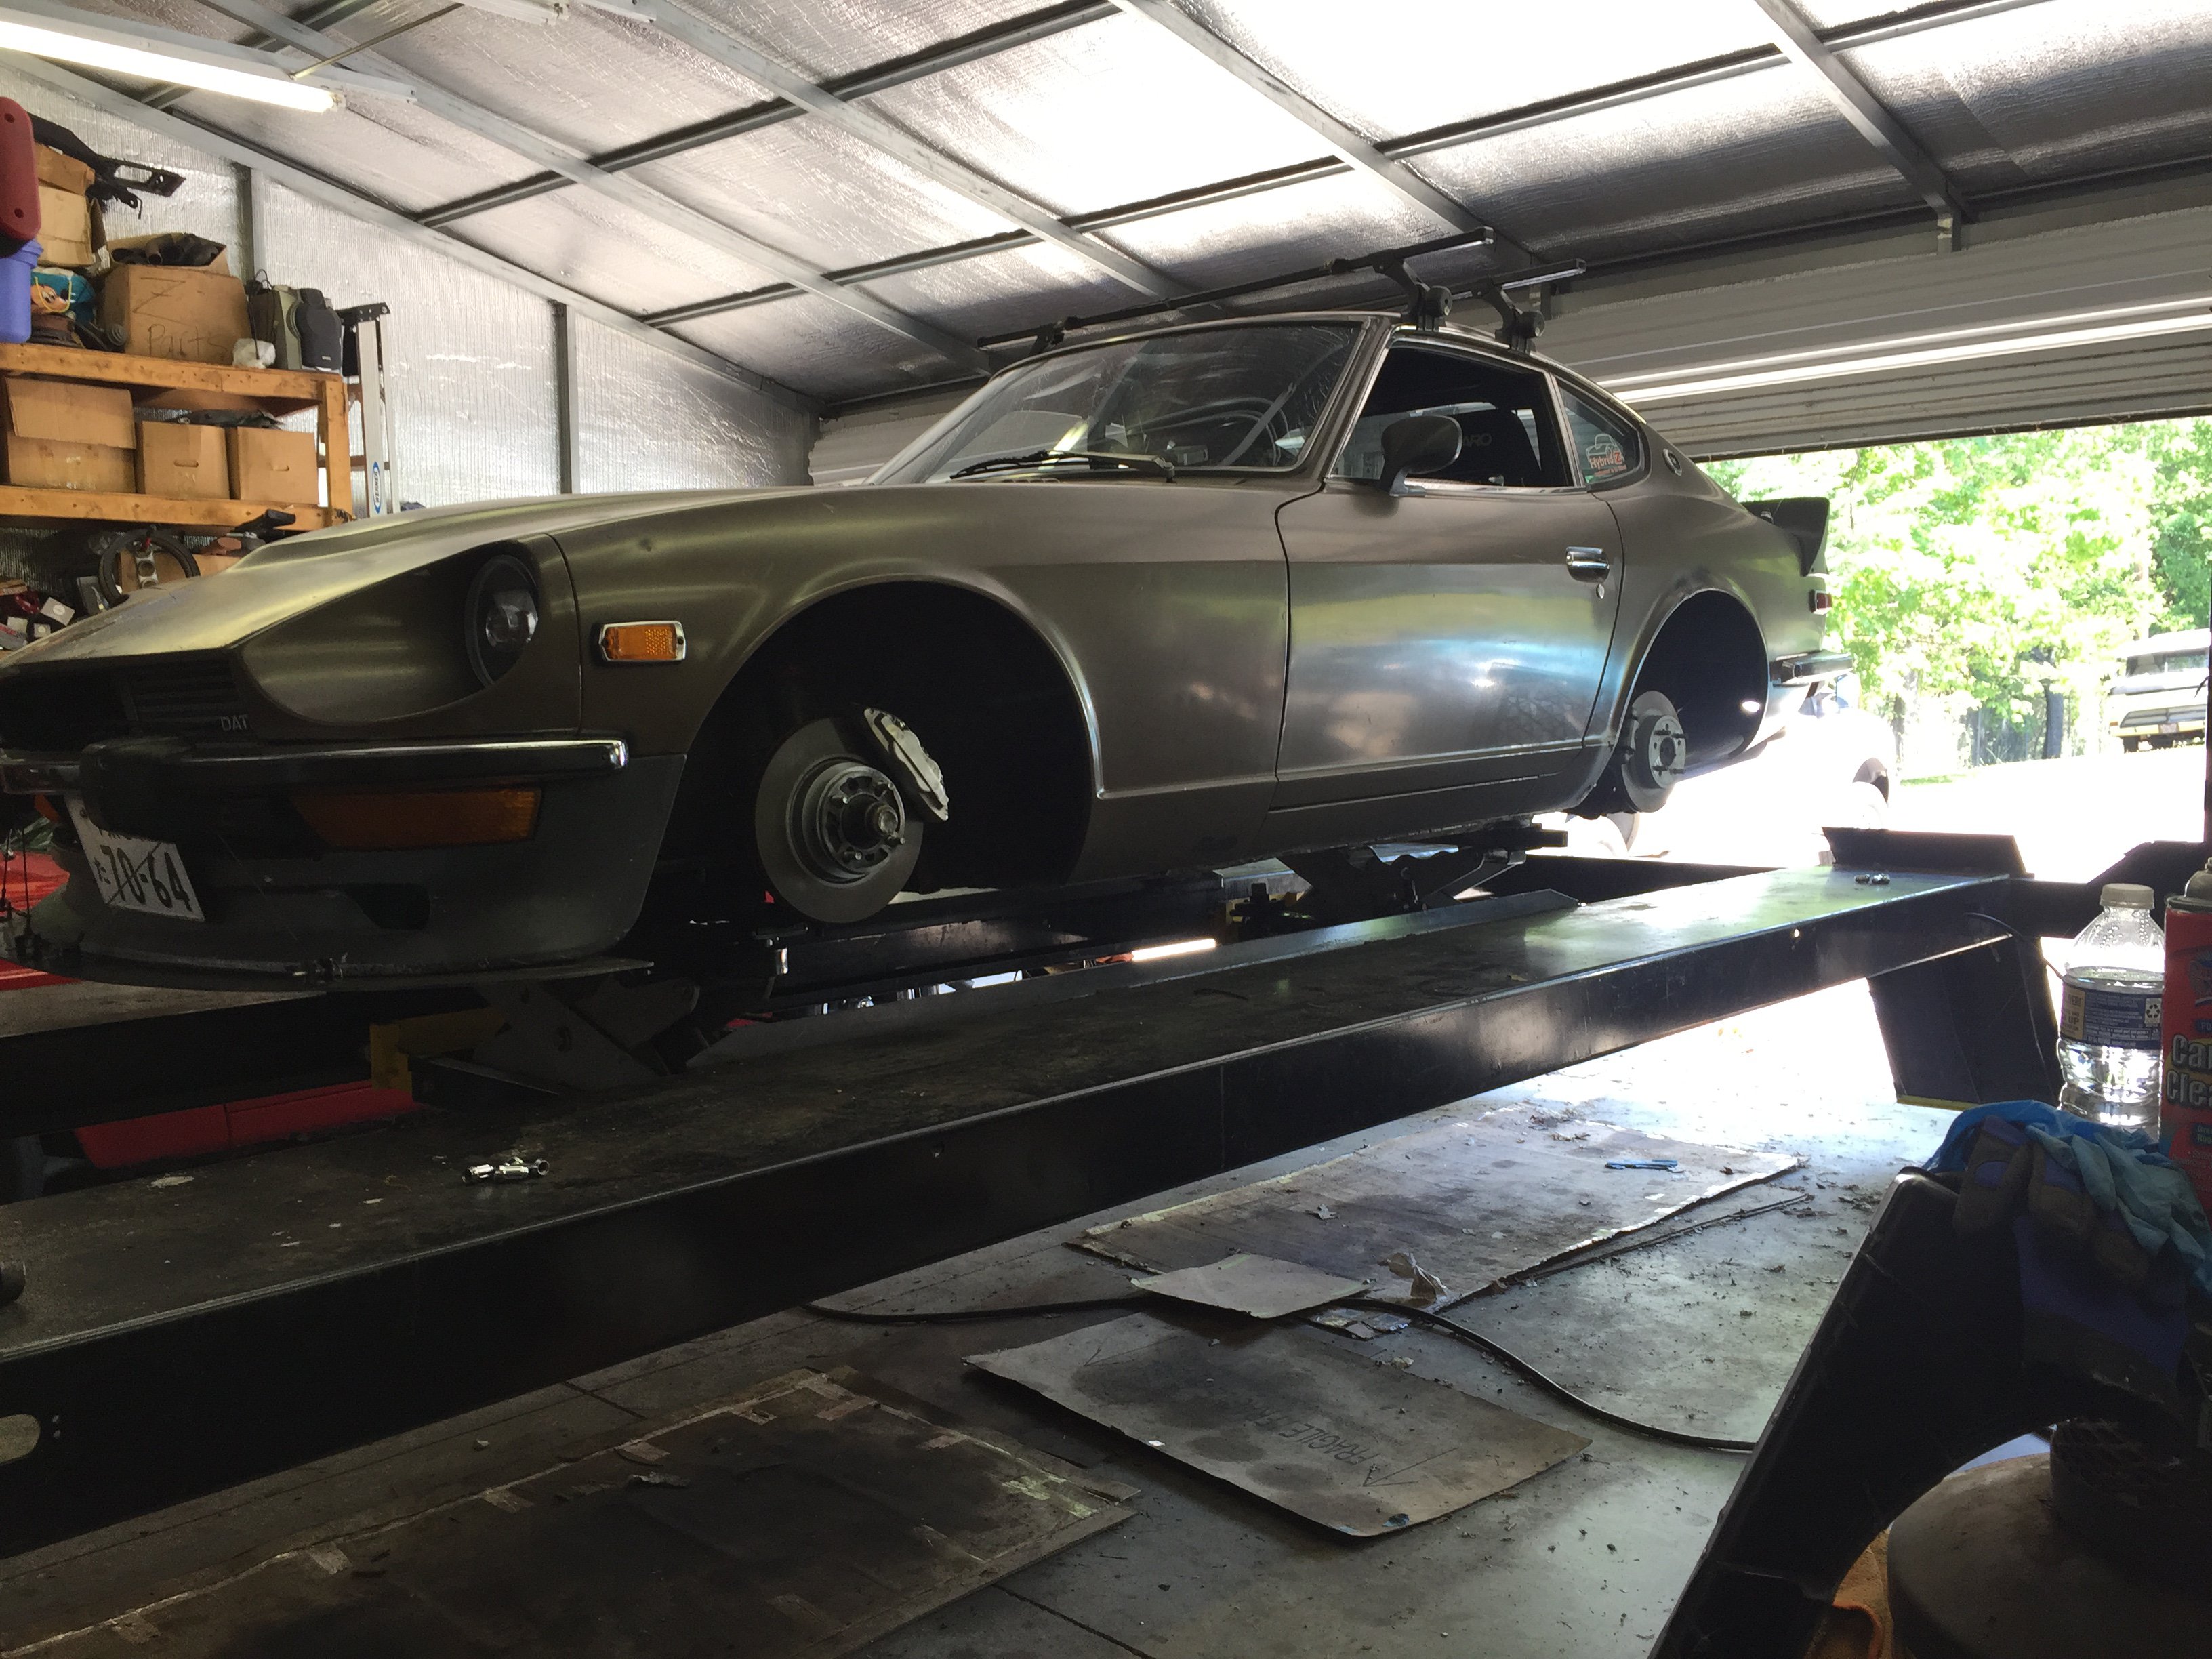
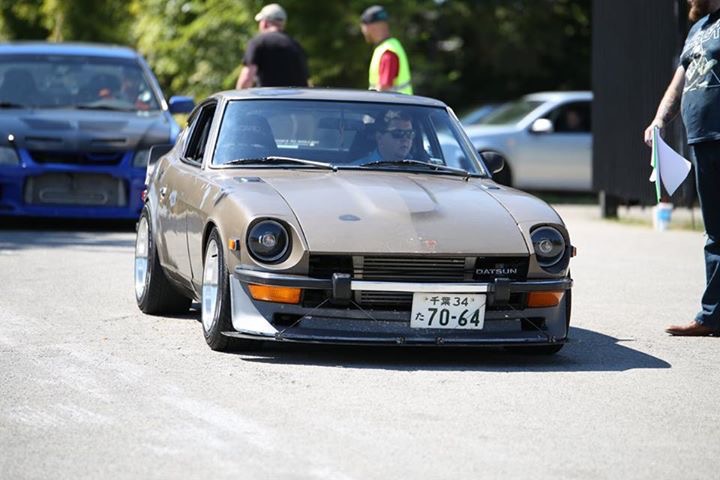
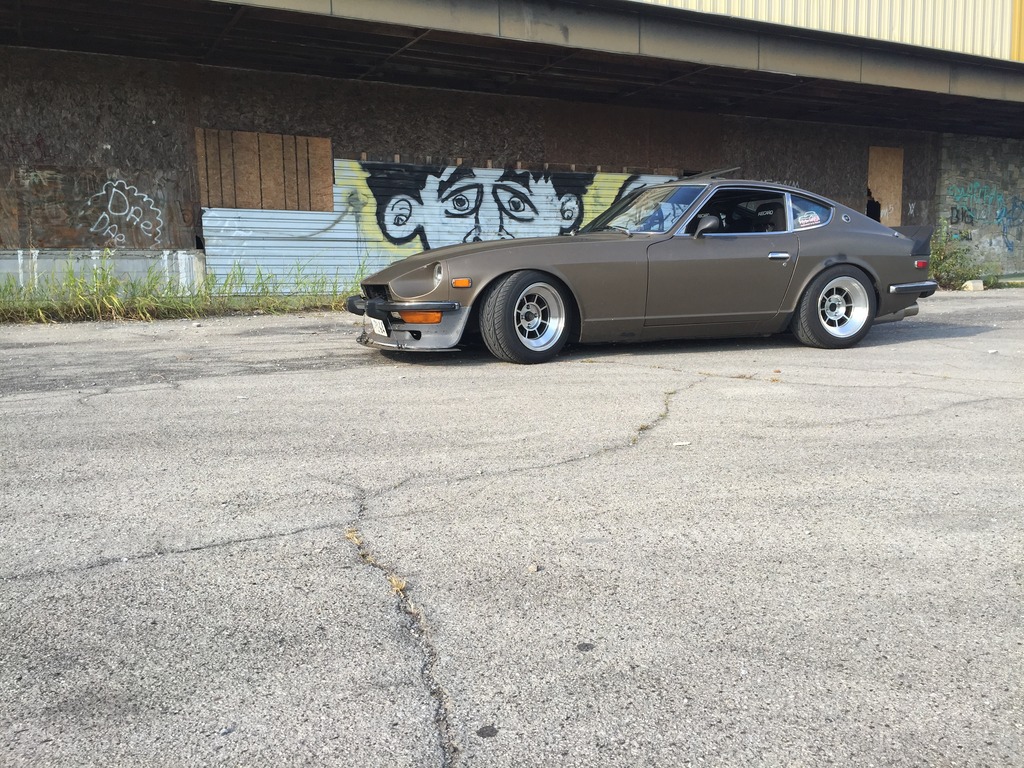
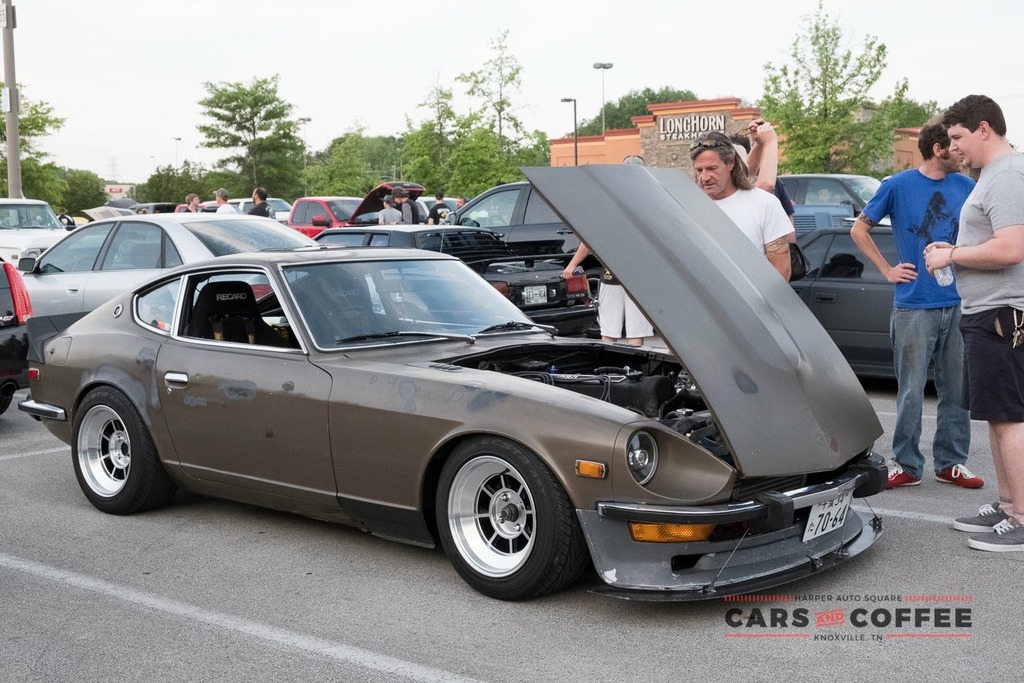
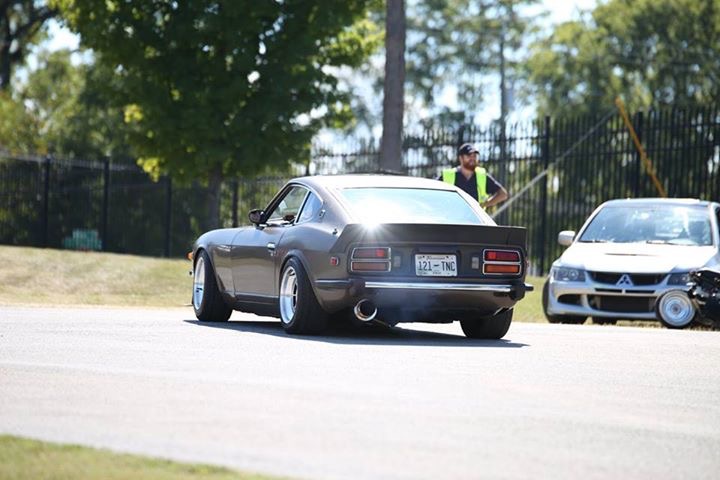
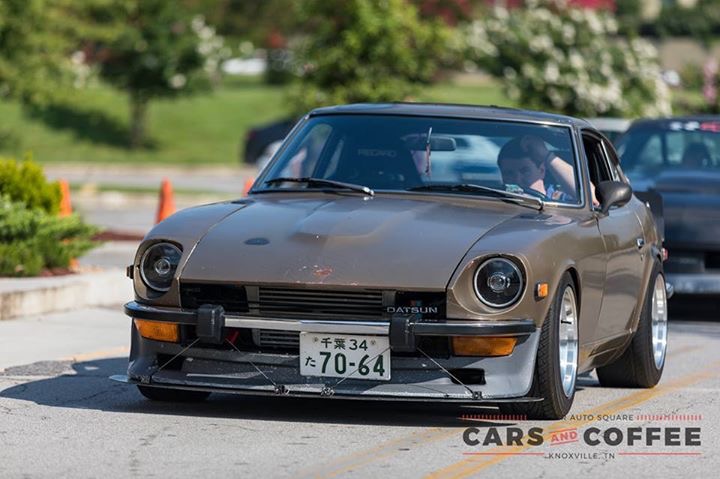
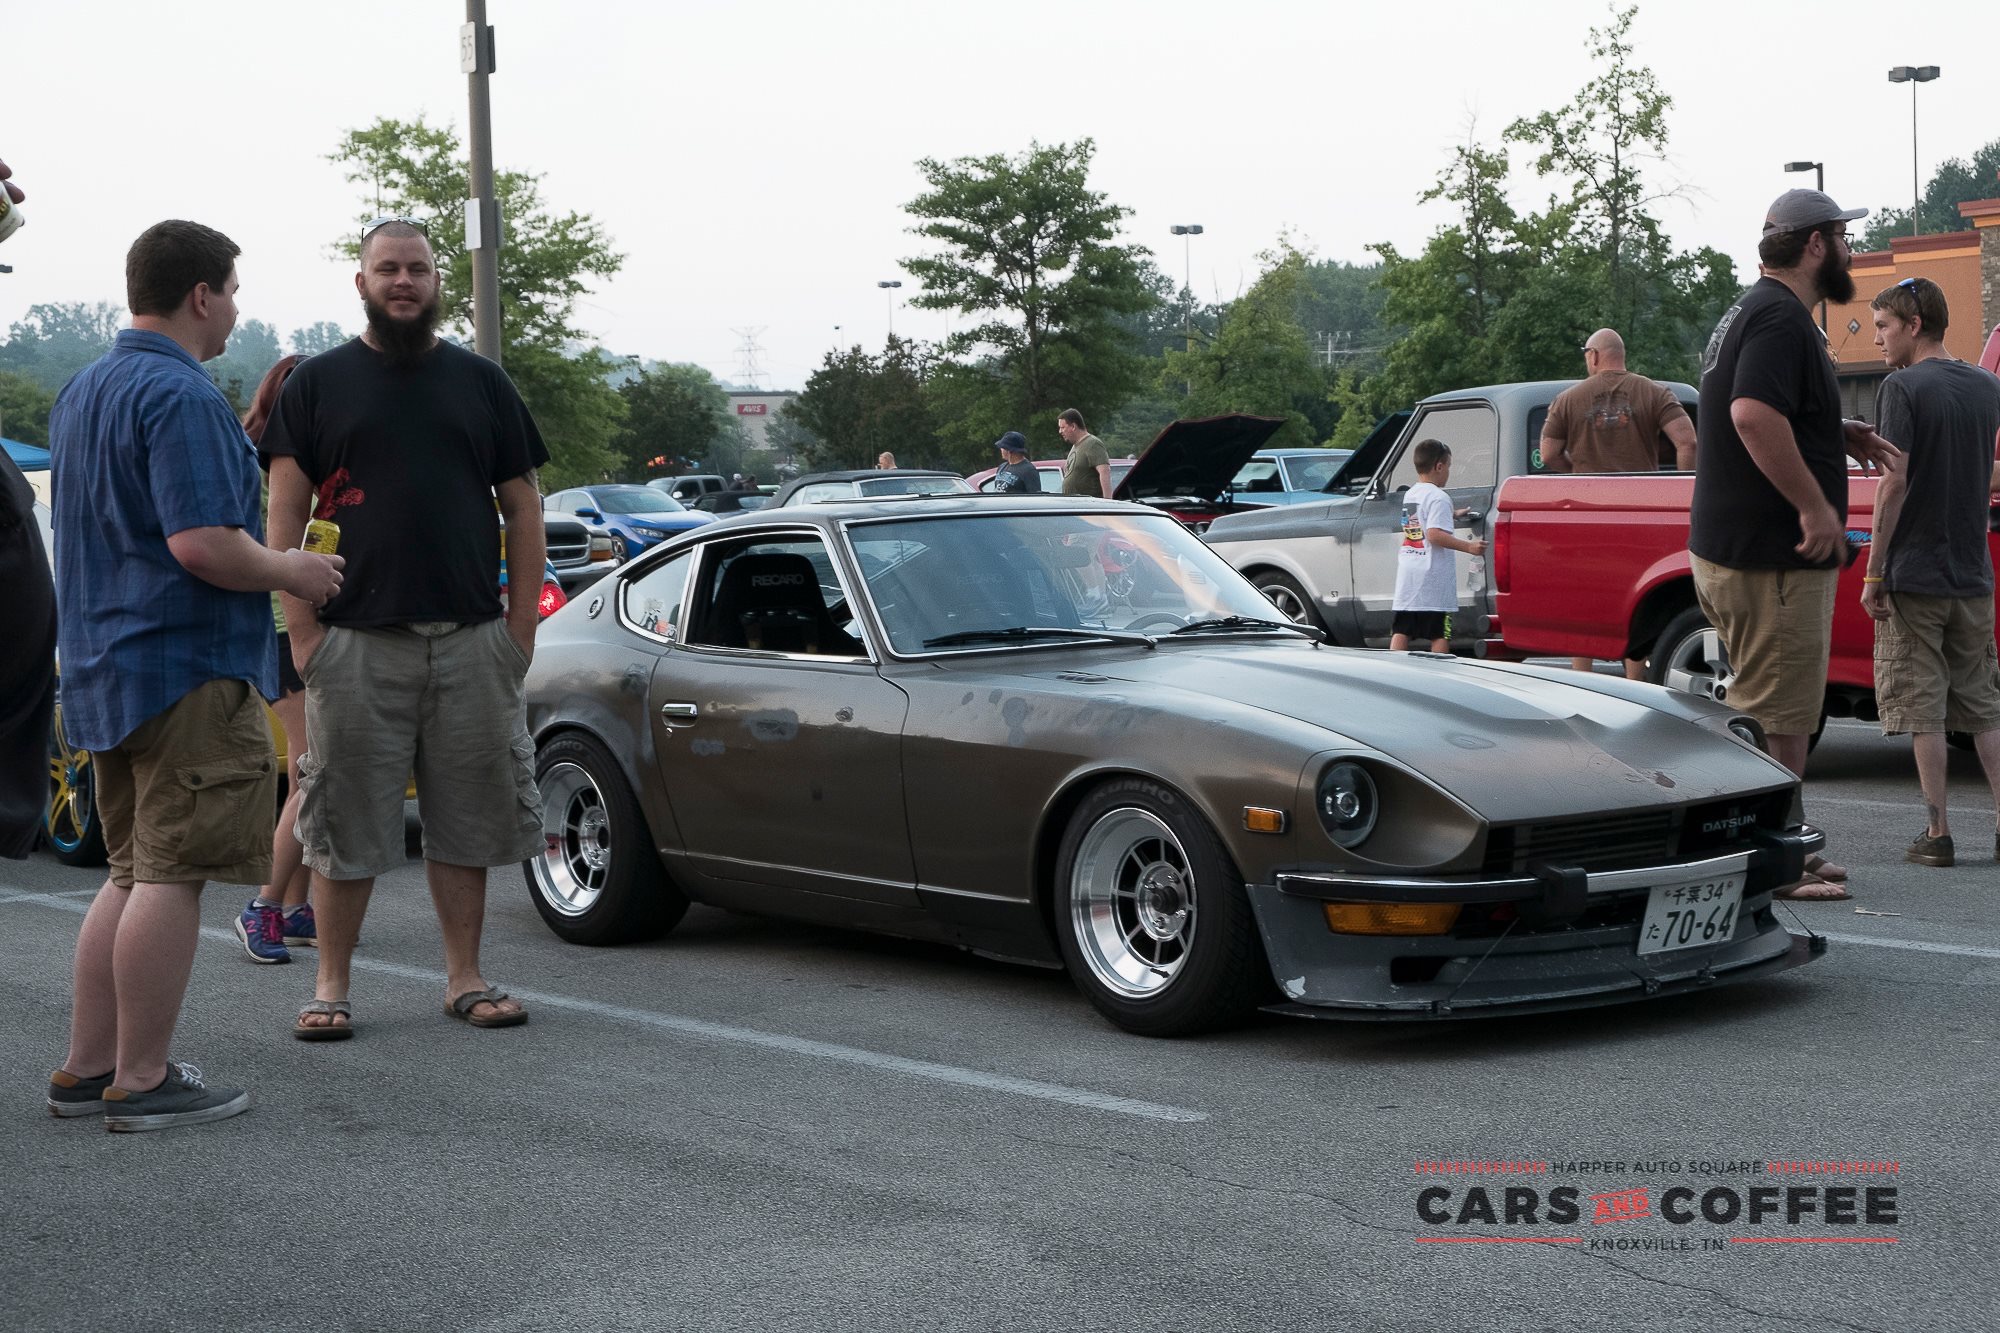
Update: The last post covered the most of the prep work that I had done before Zdayz this year. I finished up my brake install, as well as installing the gas tank/surge tank. Before I "slayed the dragon" I wanted to make sure I had adequate brakes and sticky rubber to match. I re-bled the brakes at my dad's shop on the lift, and talk about feel awesome. I have a ton of stopping power now and it seems like the calculations I did has biased the brakes perfectly. It really makes me wonder how I've done without thus far. The next thing on the list was to install some new sticky rubber before my trip. After a lot of research in trying to find a 200tw street tire that didn't break the budget I found that I would likely end up having to go down a size from 225 - 205. I finally settled on the Federal 595rs-r' s and tried to buy a set that would be delivered it in time for Zdayz, but I had no such luck. Apparently these bad-boys are highly sought after in the autocross crowds and as soon as they hit the shelves they are gone. I called every company in the US that sold them and everywhere was factory back ordered 3 months. I did some more research and finally settled on a set of 205-50-15 Yokohama S-drives which were delivered 2 days after I placed the order. I don't trust tire shops raising/taking the wheels off of the car so I decided to take a trip to my dad's shop to put the car on the lift, remove the wheels, and take the tires to be mounted. The only issue was I had no way to get the car and the tires to the shop without a huge logistics nightmare. So, I made use of that awesome roof rack I purchased several years back. I loaded all 4 tires across the roof rack and strapped them down tightly so there was no chance of a tire escaping during the 15min drive to dad's. I thought it looked freaking awesome but I got a ton of odd looks and stares driving down the road. Got to dad's and the got tires mounted and the wheels back on the car just a week before Zdayz. The trip to the Dragon was a blast. I woke up around 8:00am, washed the car, went over the check list, and started my trip. It takes me around 2 hours to get from my house in North Knoxville to the Overlook at the beginning of the Dragon. I made one pass through feeling out the tires and brakes (the roads were wet from a morning shower) and headed to Fontana Village to check out the Zdayz festivities. I parked the car and walked around looking at the cars entered into the car show and generally parked around the campus. Around 12:00pm I loaded up and decided that I would start making my way back home. On the way back through the sun had been out long enough to dry up the roads from the shower it had gotten in the morning. Since the roads were dry I felt a little more comfortable pushing the car on the way back, and boy was I impressed. The new tires were tons better than my past sets of Kumho ecsta ast's. On top of the tire grip, I was actually able to brake properly with more force and without having to worry about usage that would lead to brake fade. I was incredibly satisfied with the tire and brake combination. Unfortunately I didn't have anyone running with me to compare how well the combination improved my pace. I pulled over at the Overlook and inspected the brakes, which were barely hot. Sucess! I was fortunate enough to have been highlighted by a few companies that take pictures from the sides of the road on the dragon. Below are a couple that I found on their facebook/websites.
-
I searched for one a few years ago and also a month or so ago to no avail. I built a surge tank instead. I've also seen people use Holley Hydramats in the bottom of the stock tank. talk about some pretty wild products..
-
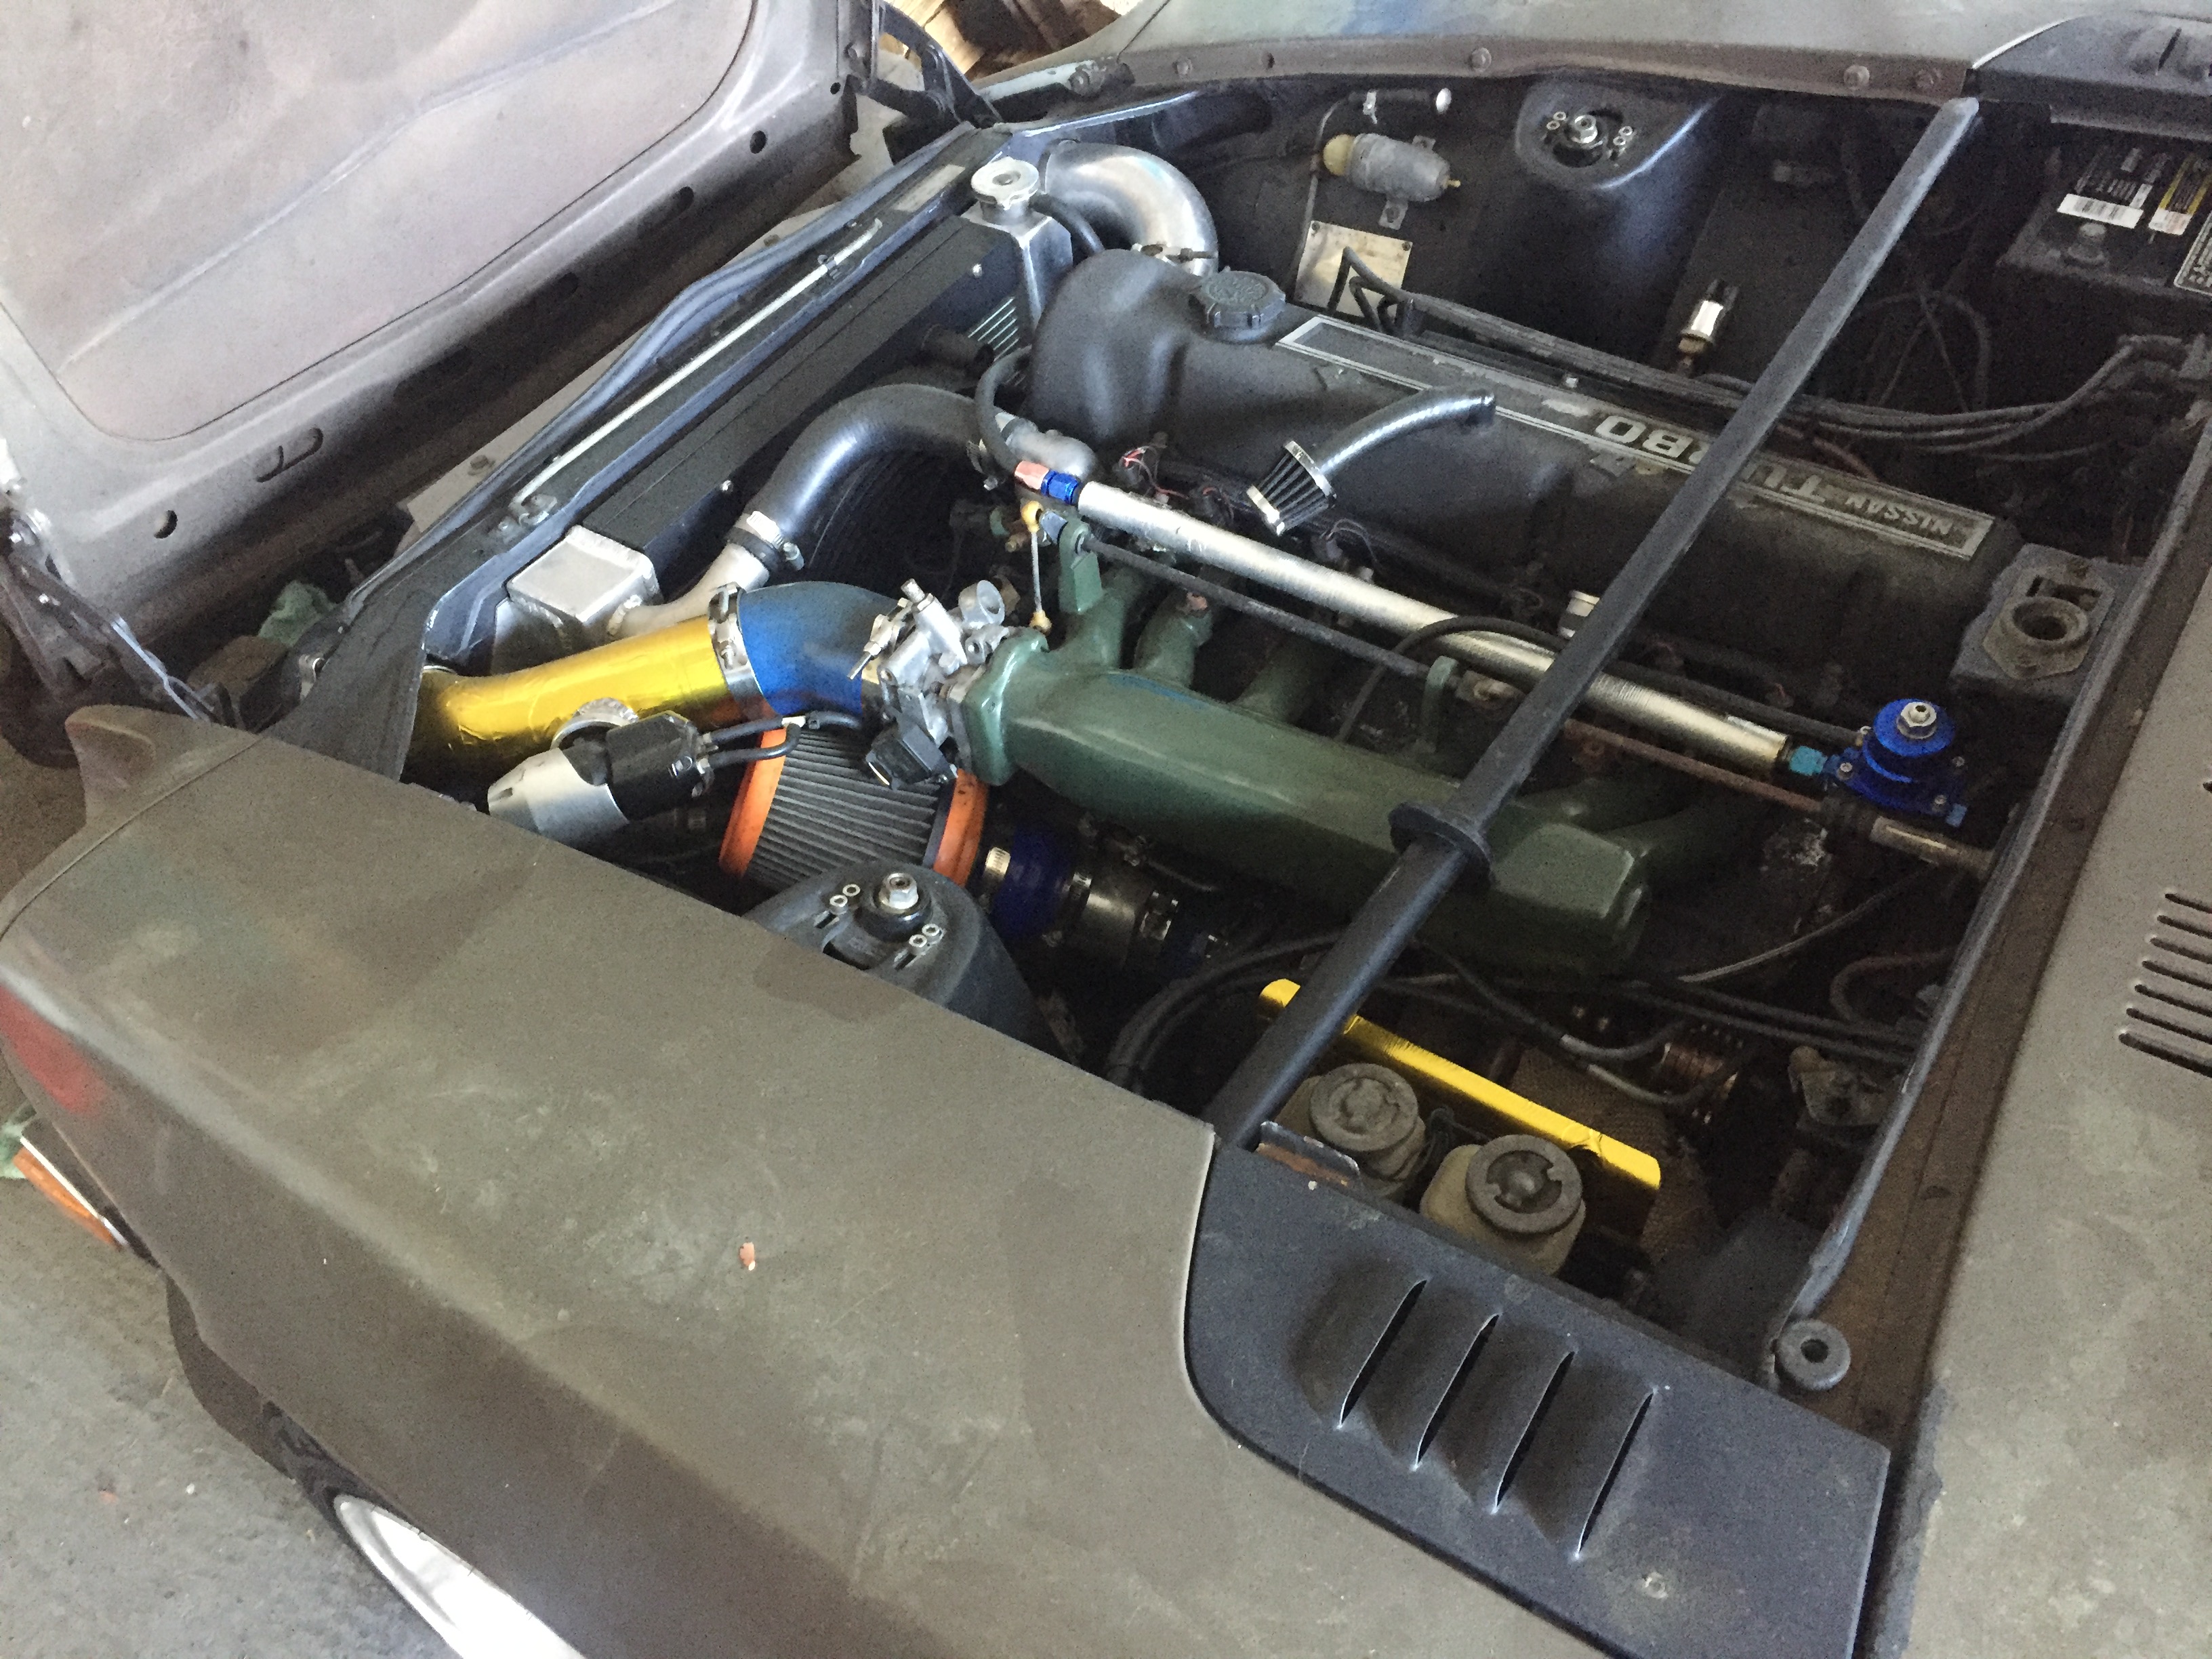
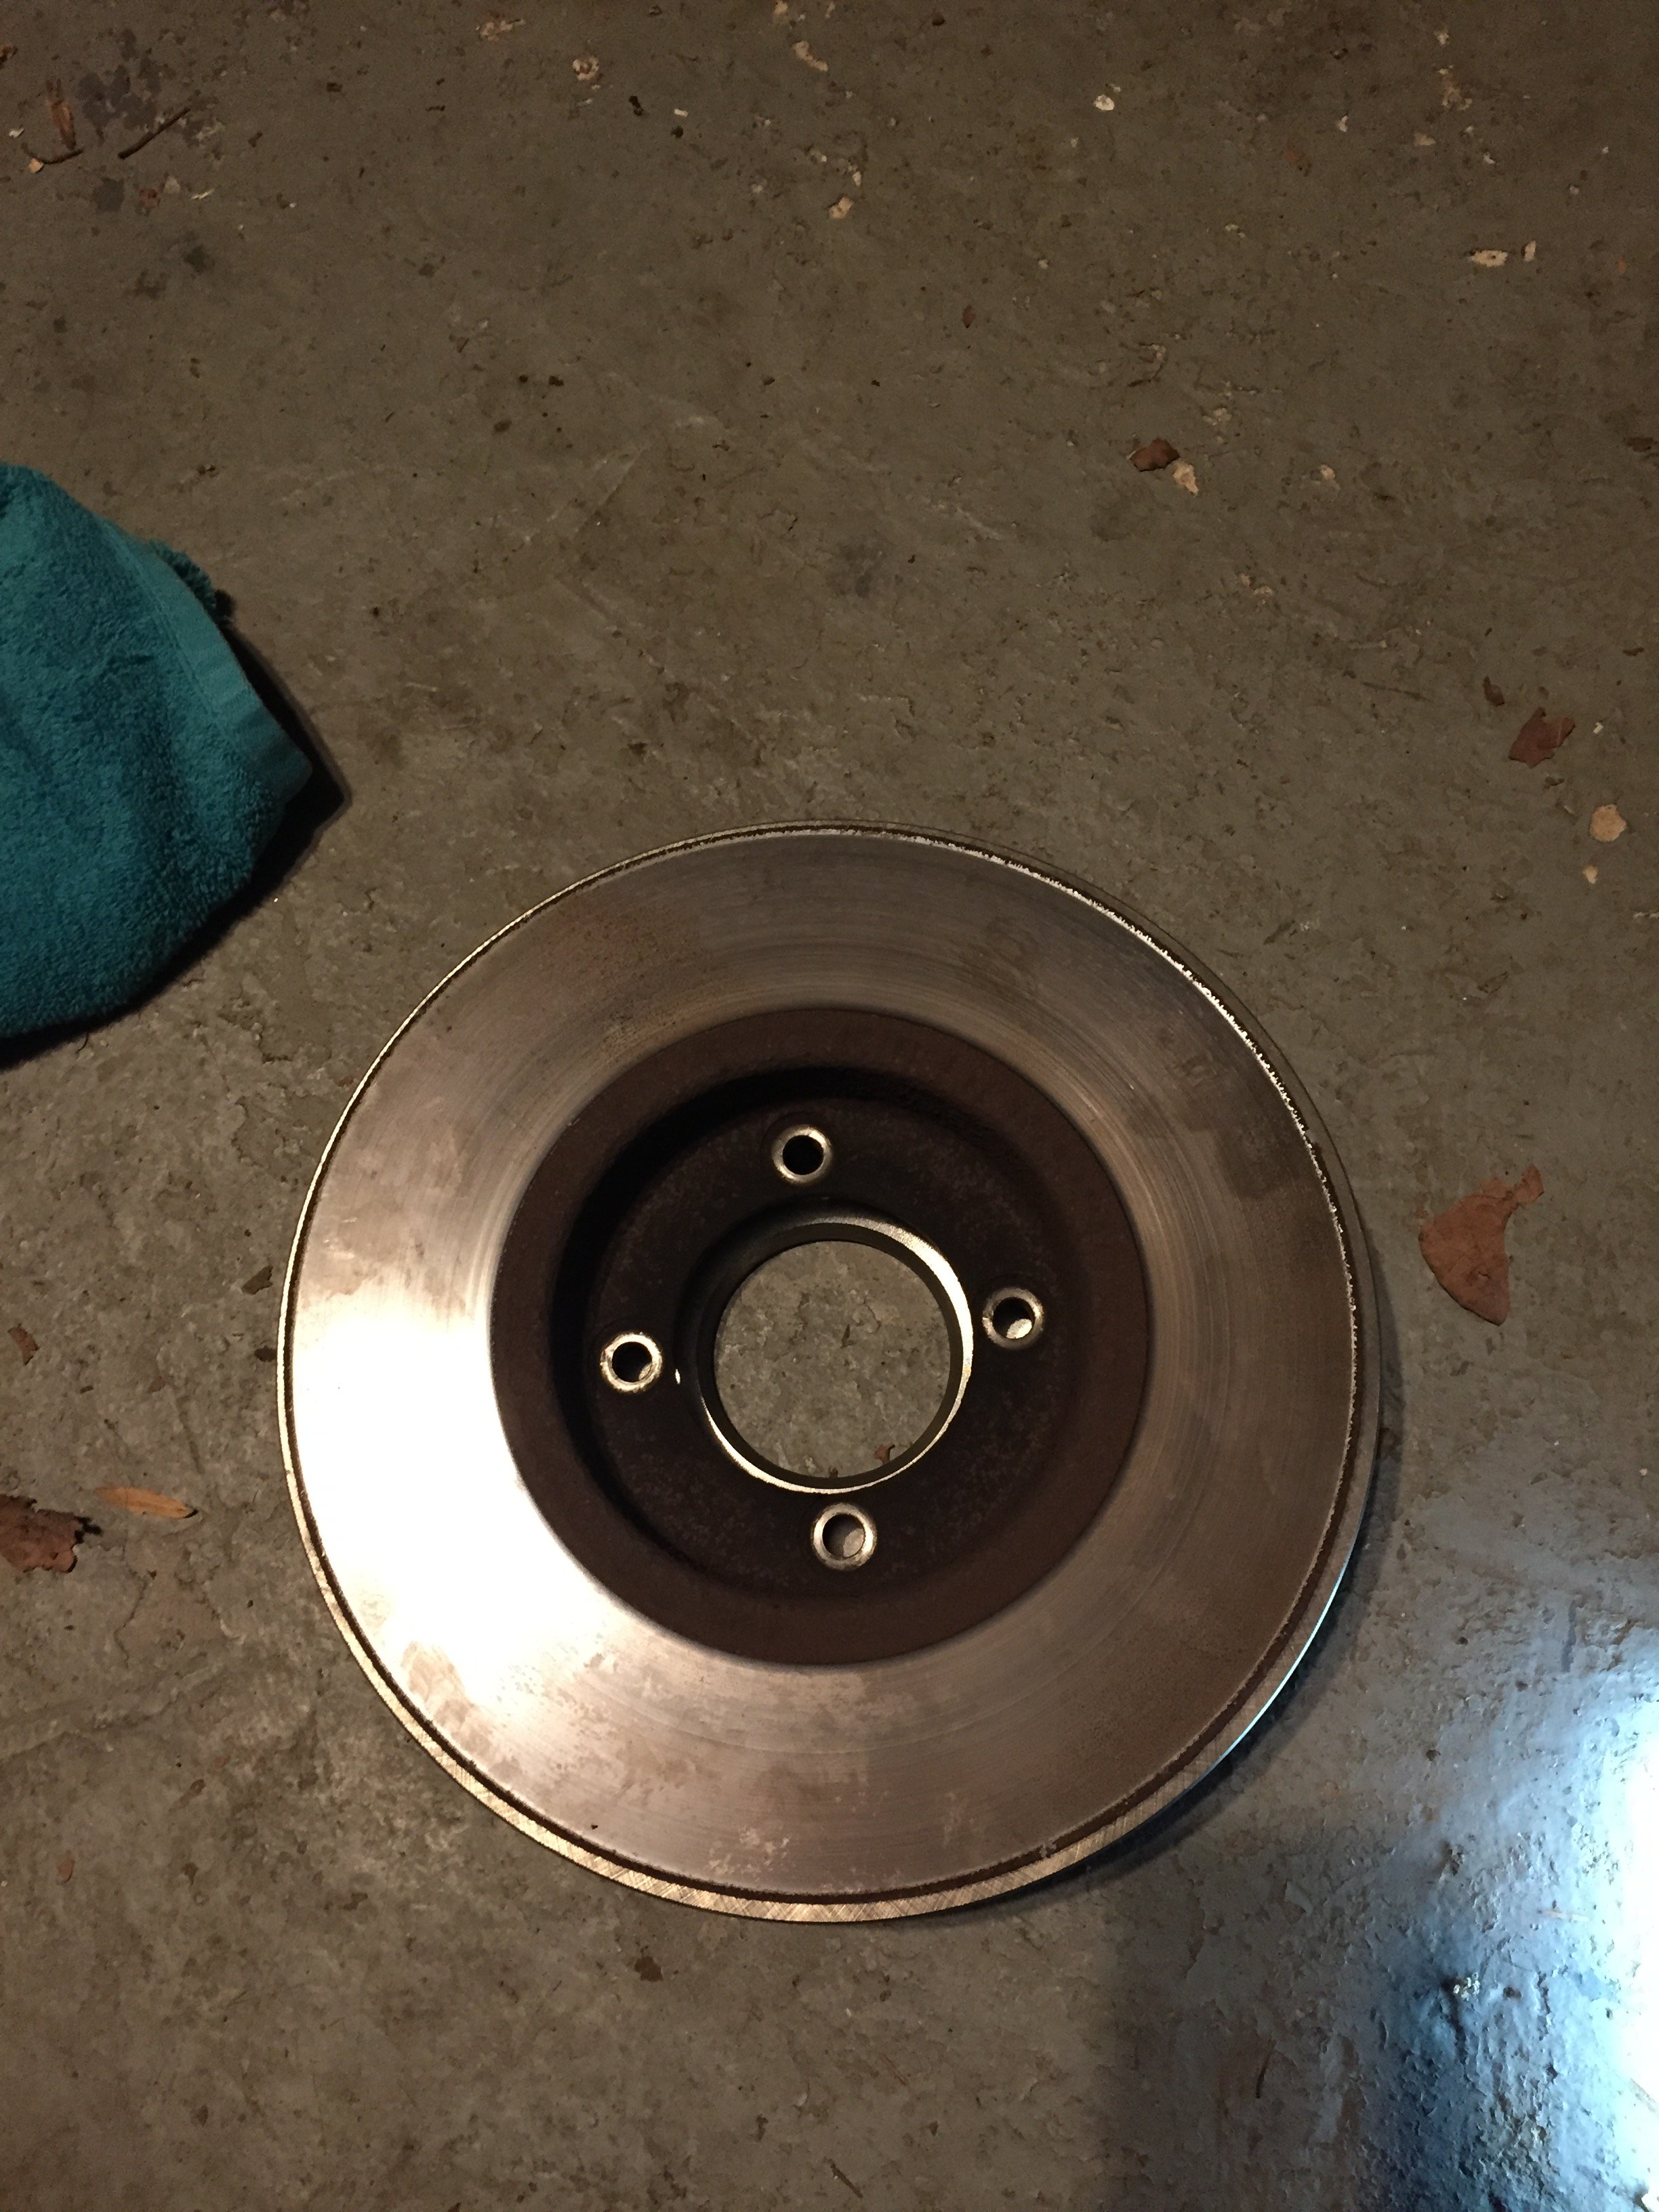
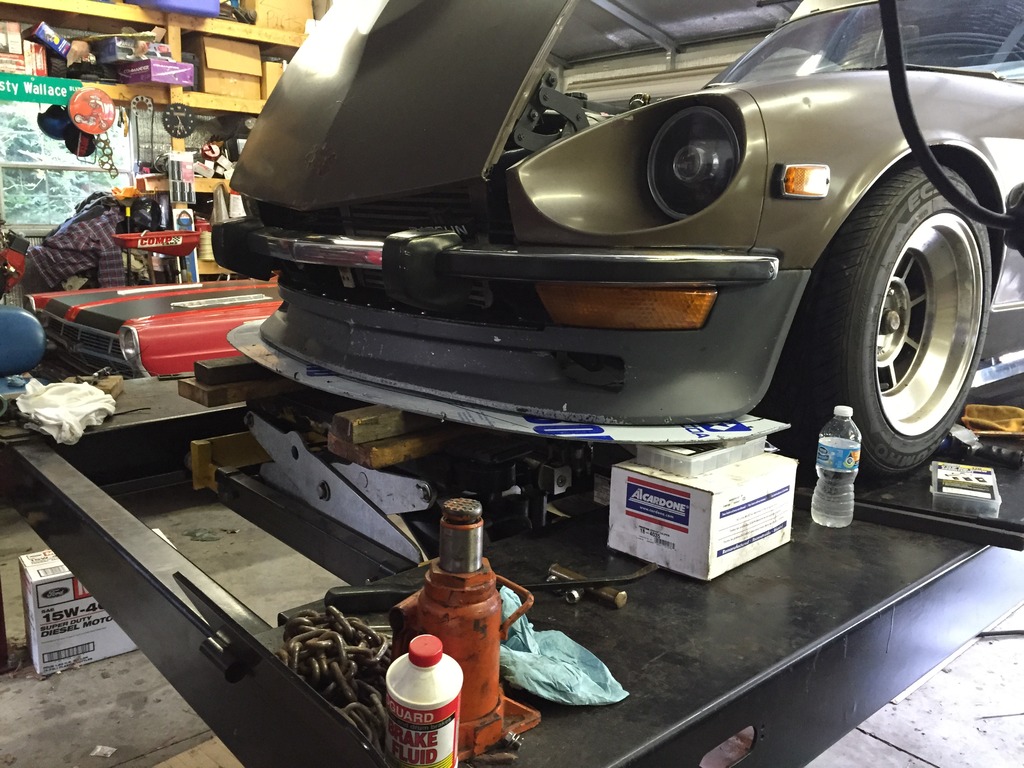
Update: I finally have the brakes assembled on the car. It's been IN-OP for too long. I had a laundry list of things that I wanted to get done along with the brakes before Zdayz this year. These included: 1) Finishing up the brake upgrade 2) Cleaning/ installing new fuel tank 3) Re-installing the surge tank that I made a few years back 4) Re-vamping the engine bay/ adding thermal wraps and protection to a few things 5) Getting the car to run cooler with A/C on. So far, I've completed the first 3 items on my list. I installed the new to me fuel tank and surge tank this passed weekend. I ran into some issues with the surge tank that ended with a ton of spilled gas. I had originally sealed the hole that the wires for the pump inside the surge tank with JB weld. Apparently JB weld degrades with time and exposure to gasoline, I didn't find this out until the surge tank was filled by the lift pump and the fuel poured out of the top of it. I dropped the surge tank and pulled one hose off to drain a portion of the fuel out before using gas tank repair epoxy on the wire opening. I wasn't able to get to it that evening (due to a dinner date with the wife) so for an extra precaution, I placed vice grips on the tank supply line to keep the fuel from siphoning out of the tank and into the surge tank. Apparently I didn't clamp it tight enough, I returned from dinner to find a river of 93 octane gas running out of the car port and into the drive way. DOH. I re positioned the vice grips and it quit leaking, thankfully. I put some epoxy on the wire opening the next morning and all was well again. I got the chance to take the car down the road briefly and found out that I need to clearance the front calipers a bit.They were making a terrible racket rubbing against the front wheels. I need to fab up ebrake brackets for the rear calipers to completely finish the conversion. I also need to re-bleed the brakes the peddle is very mushy. The rear brake disks are actually larger than the original front rotors... One of the biggest reasons that I've been forced to re-vamp the engine bay is due to rats. The car has been parked in my enclosed car port for a good while now and I live next to a cow field. Apparently the field rats decided that the engine bay of my car would serve as a suitable hangout. Fortunately, they had mostly just hung out on top of the intake and valve cover and hadn't built a nest. They at some point during their hangout session decided to chew through one of the injector wires and the wires to my boost control solenoid. The war to kill/keep them at bay has been trying to say the least. I can't catch the little buggers in traps and they apparently wont die of poisoning (They have eaten almost 3 lbs of poison). I'm trying a bunch of repellents and such now with pretty good results thus far I am now looking into putting a garage door up to permanently solve the problem, but I freaking hate these suckers. I've started on number 4 on the list as well. I've added some of the DEI gold heat reflective wrapping to the cold intercooler piping to try and reduce the amount of heat soak, as well as coating the heat shield for the brake master. I've already got a new turbo blanket and some DEI Titanium exhaust wrap to re-wrap the exhaust manifold and down pipe with. I'm also planning on using a reflective heat barrier on the heat shield that goes under the intake manifold as well. I'm tired of having heat issues in the humid 100+F southern summers.
-
Interesting concept on the intake manifold! I'm curious about the flow characteristics with the inlet coming into the bottom center of the plenum. I could see the flow becoming pretty well mixed up after it hits the top of the plenum. If you'd like to send me the model, I could put it in Solidworks' flow simulation to see what it'll do.
-

Intake manifold (N42) cleaning and 60mm port matching questions
lowrider replied to Zetsaz's topic in Nissan L6 Forum
In previous manifolds that I have done I sand blast to remove the final layer of grim to get a consistent finish, then I powder coat them. Although if you don't have access to a sand blaster seattlejester's suggestion with the solvents and fire sounds like it would be the way to go. The heat shield, I've high temp spray painted which holds up well for a few years. As far as the gold foil tape, I would be hesitant placing it on something that close to a possible 1500+F heat source. Depending on the manufacture, gold foil tape isn't rated to handle those types of temperatures. I've actually been doing a bit of research on better insulating the intake manifold via beefing up the heat shield design, and I'm going to be placing a sheet of THIS on both the top and bottom of the stock heat shield when I tear it down in the next month or two. I've previously been running just the factory heat shield that is painted and I'm tired of the numerous heat soaking and vapor locking issues that I have been living with during the summer in the south. So, this year I'm taking a few measures to control under hood heat with the intake manifold heat shield being one of the areas of focus. For porting for the TB, Ive always used carbide burr bits (like below) in an air grinder to smooth the transition between the throttle body diameter and the opening of the manifold. I was able to dig up a picture of my current intake manifold in the process of being shaved and ported that shows the start of smoothing the inlet for a Weber TB. In the end, I removed the casting bumps that protrude down from the top of the opening as well. I hope this gives you some ideas.
-
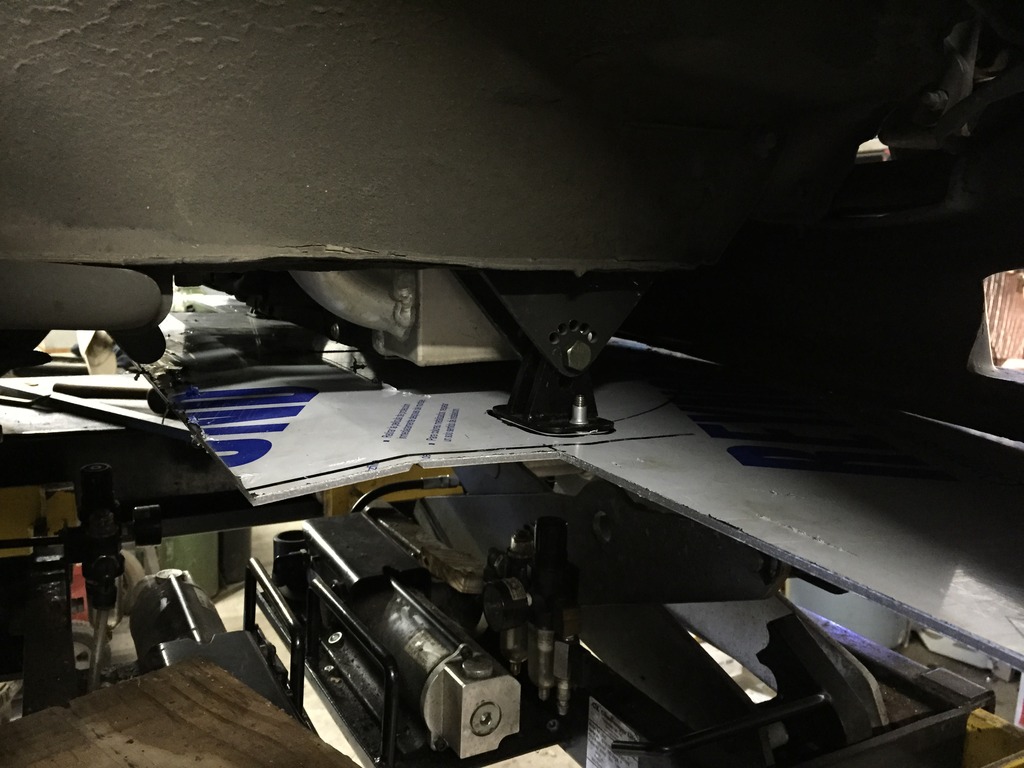
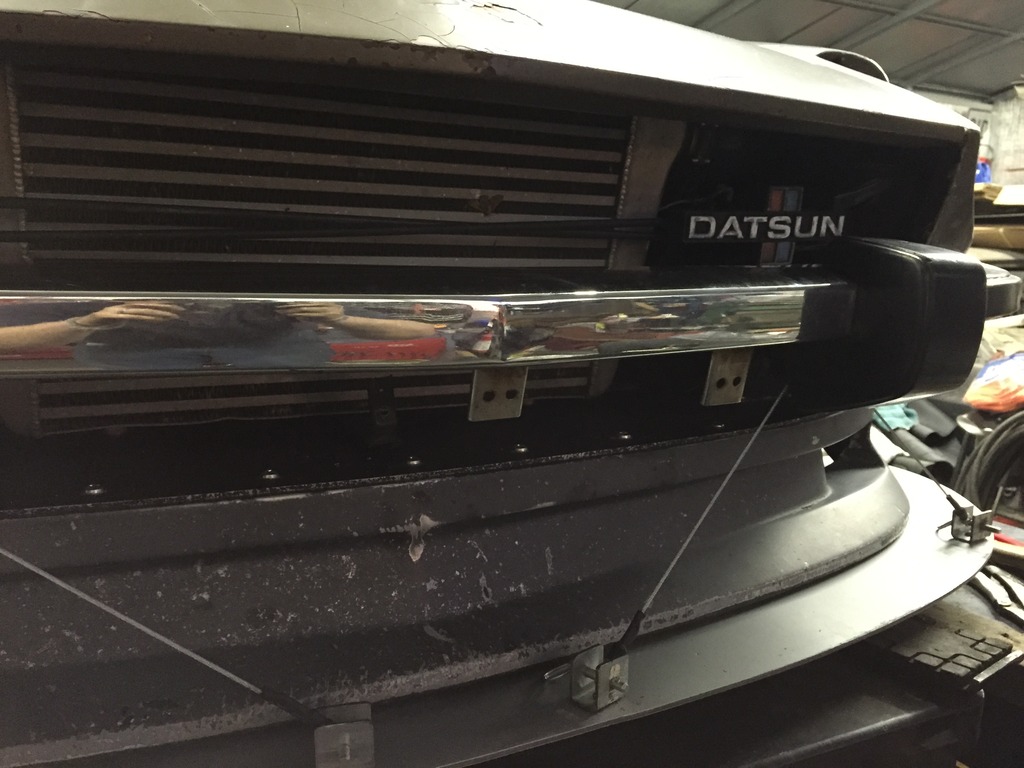
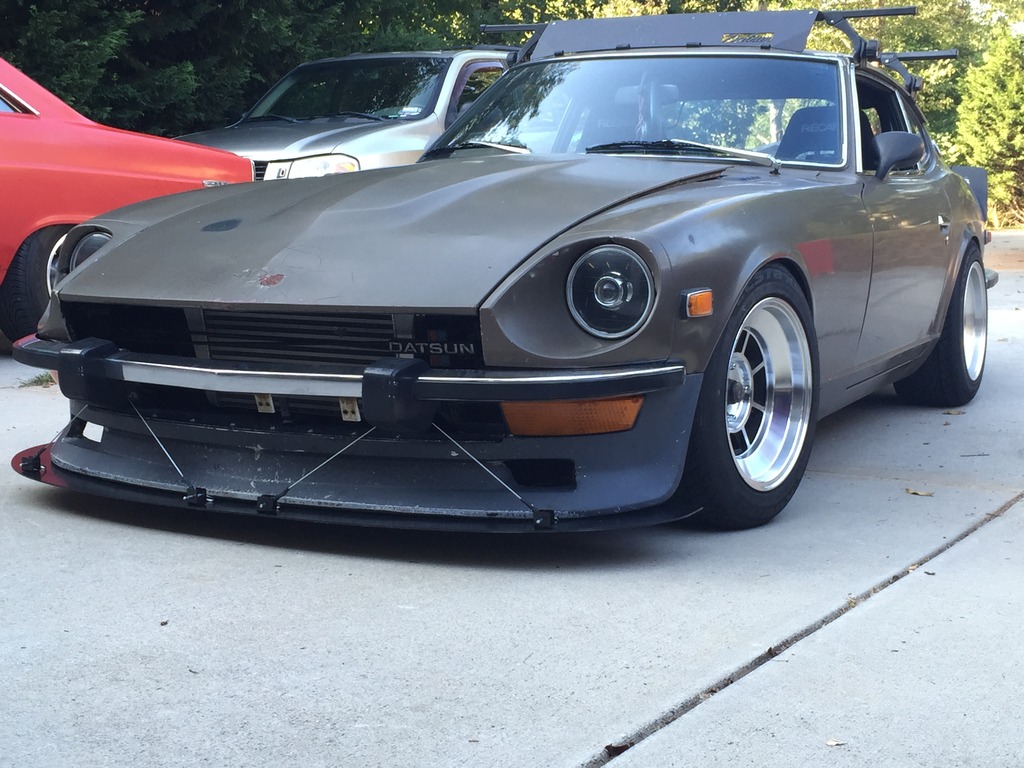
I thought I included a picture or two of the rear mounting point with the pivot. The pivot is made of 1/4" CRS that was laser cut at the same place I did my CoOp. I attached the mounts to the same location that the factory tow hooks attached to on the front frame rails. The front cables were made to "pre-load" the front of the splitter and slightly deflect the air dam to get a decent seal along the front edge. The picture above just has the front sat on boxes for mock up, hence the gaps.
-
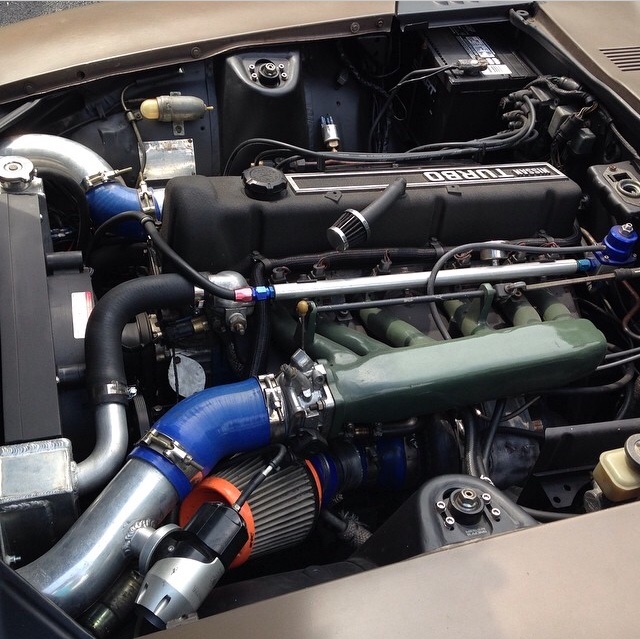
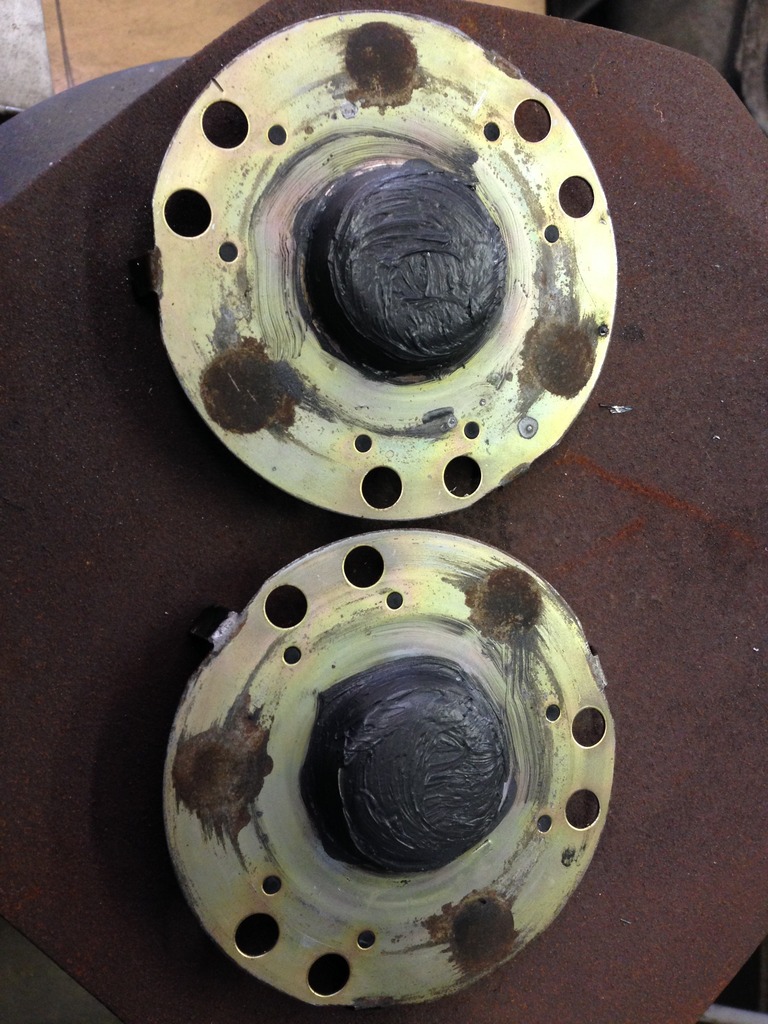
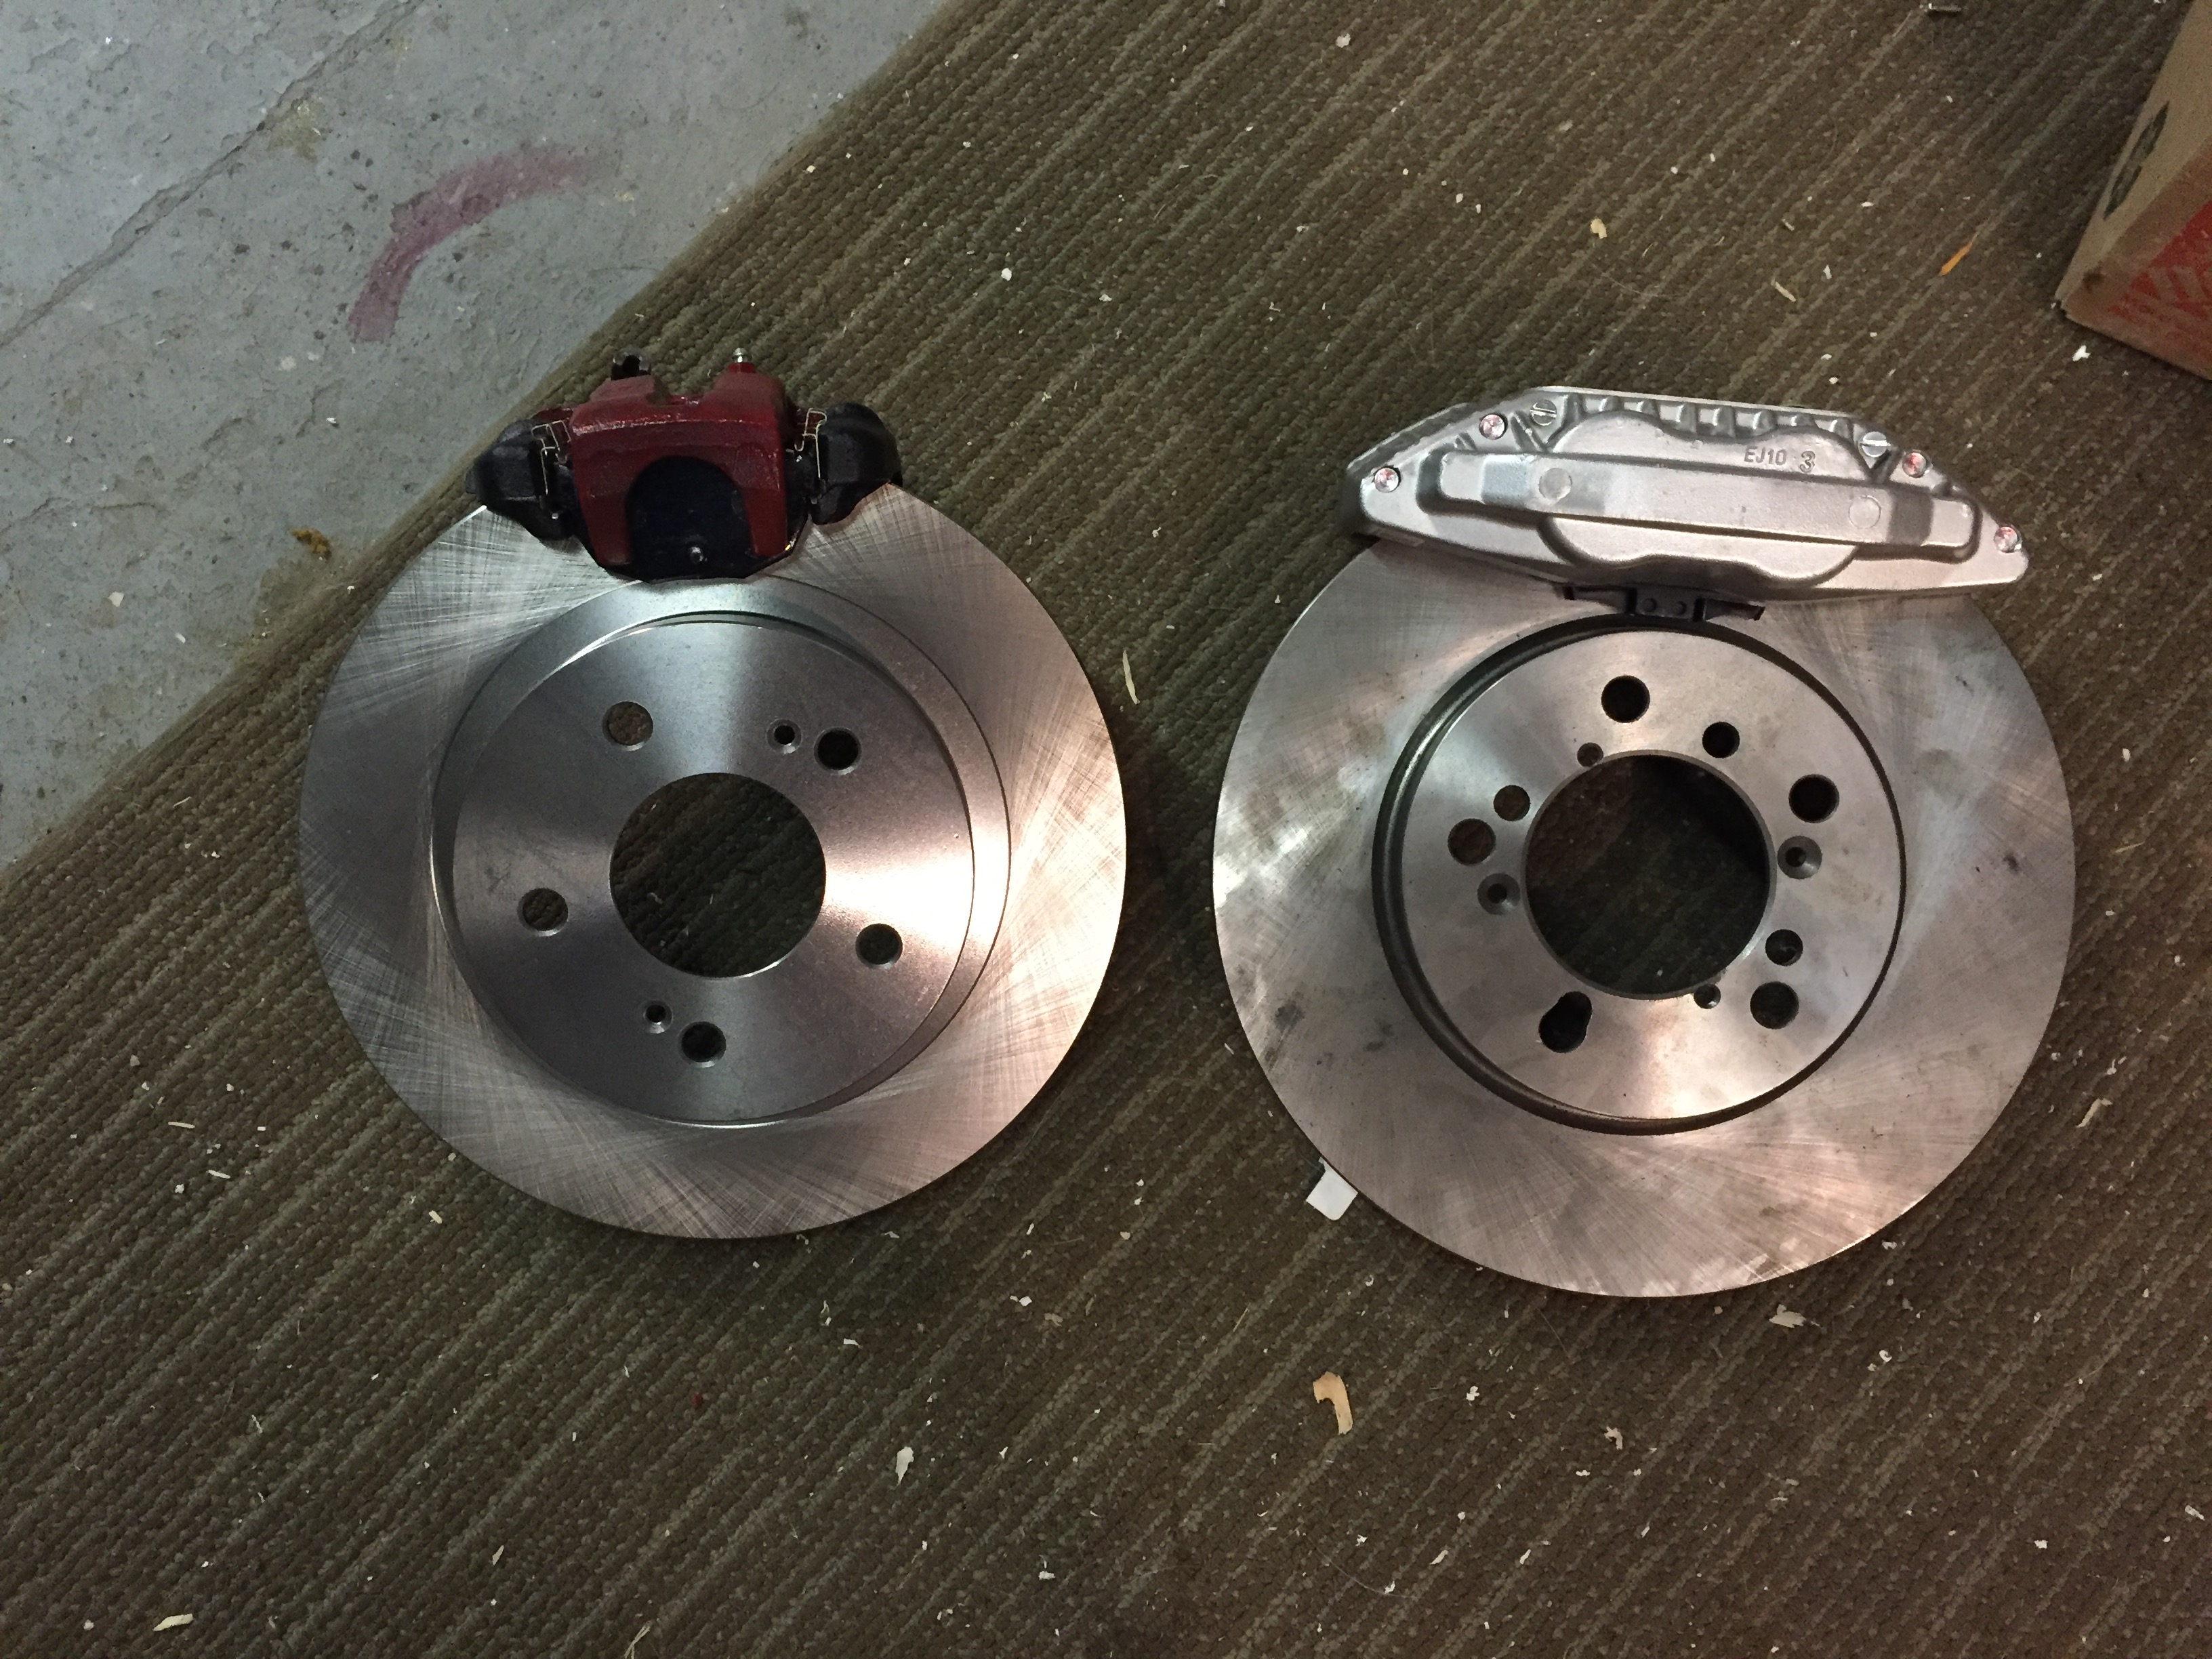
I have been lurking alot more on the forums recently, and I've started to feel guilty about the lack of contribution on my end in the past several years. Life has gotten in the way, but my Z has slowly still been progressing. Since my last update, alot has happened both with me and the car. I graduated college in 2014 with a BS in mechanical engineering and started work as a manufacturing engineer. I got married in 2014 as well and we bought a house in 2015. Enough about me, the car has also progressed quite a bit in the passed couple of years, unfortunately I haven't documented everything well picture wise. The last update I had mentioned replacing the stock radiator with an aluminum cross flow radiator. I had to make all kinds of modifications to the generic eBay radiator to get it to fit the car. I cut off both the inlet and outlet of the radiator and had to weld a 90 degree section of tubing on both of them to keep from hitting my intercooler piping and the alternator. I also had to fabricate some brackets to hold it in the car. I ditched the twin 12" eBay fans in favor for a Derale 16217 2 speed 17" fan with the new radiator. You can kind-of see the radiator and fan in the engine bay picture below: I finally bit the bullet and did a CV-axle swap using 280zx Turbo cv axles. I had a friend of mine that was parting a zx turbo out and in exchange for helping him pull the motor, trans, and a few other various parts I got the differential, axles, and stub axle flanges. I had done some reading and read that the 280zx turbo stub axle spline was the same as the 240Z which would have made the axles a bolt in affair. However, one of the joys of owning a 260z is not knowing what component parts you have. I made the assumption that my 260, being an early 74' with 240z struts, would have the smaller 25 spline stub axles but I was wrong. This meant that the zxt stub axle flanges would not bolt up so I had to go back to the drawing board. I did some more research and a fair bit of measuring and decided to make an adapter that would bolt to the existing stub flange and convert to the zxt cv bolt pattern. A couple of hunks of CRS, some time in the lathe and the mill, and I had myself a set of cv axle adapters. The install was straight forward, and only required the modification of the sheet metal grease shield of the outer cv joint. The difference that the cv-axles made in the smoothness of power delivery is amazing. The car used to shake and rattle on acceleration when it had the half shafts installed, all of that went away after the cv-axles were installed. After the CV swap, things started slowing down as far as upgrades are concerned. I spent the majority of the time driving and enjoying the car. I had identified a few areas that I wanted to focus on but I had recently bought a house, so the attention kinda was shifted towards that. I had wanted to construct a support for my flexible xenon front air dam for a few years, so I went ahead and build a bar to reinforce the lower lip of the air dam. The while I'm at it bug hit during the project and I went ahead and constructed a front splitter for the car as well. I constructed the splitter from a scrap bit of .25" alumalite my uncle had brought into the shop from his job as an industrial sign maker. I designed the splitter to mount to the tow hook on the front frame rails of the car. The mount would allow the splitter to pivot in the case of it contacting the ground leaving steep driveways or contacting curbs when pulling to close into parking spots. Because it was pivoted and I wanted to allow movement upwards in case of contact, that meant I couldn't use the usual support rods that are seen everywhere. I chose to secure the front of the splitter with cable so that it could have to freedom of movement upwards but as soon as the high pressure air in front of the air dam would try and force it down, the cables would be in tension and not allow downward movement. I looped the support cables through the bumper mounts and attached both ends to u-shaped mounts on the leading edge of the splitter via ball detent pins for quick removal. Overall, the addition of the car makes the front feel more stable at higher speeds. I have yet to use my monomer to determine the pressure difference on the front of the air dam before and after the splitter addition, but I can say that it cost me 2 MPG with what I assume is drag created by the addition area for the high pressure region to act on. I have taken the car to a few different meets and shows below are a few pictures from those: Recently, I have been planning/building my brake upgrade. I currently have 4 piston Toyota front calipers with the stock drums in the rear. I've kind of taken it as a design exercise to fit a set of front and rear disk brakes to the car that have a few criteria: 1) The calipers and rotors are easily sourced at local auto parts stores. 2) Both front and rear brakes are vented to reduce thermal overload and cause brake fade. 3) Must fit under my 15" wheels. 4) Must retain ebrake function. I started with the idea of using Z32 front calipers paired with Honda Odyssey front rotors. I then did a little research and some calculation which let me to the idea of using late Z31 rear calipers and rotors for a closely matched bias. I then had to come up with some way to mount the calipers and rotors to the struts/spindles. I modeled both the front and rear struts and designed mounts for both the Z32 front calipers and the Z31 rear. This pretty much brings me up to date on the car. It is currently sitting in my car port awaiting for me to install the front and rear brakes. I had both the front and rear caliper mounts made, I purchased my rotors and calipers for the front and the rear as well as drilling the rotors to accept the respective 4-lug patterns. I have tested fitted the front brakes using a spare strut and luckily everything fits and clears the wheels, just barely.
-
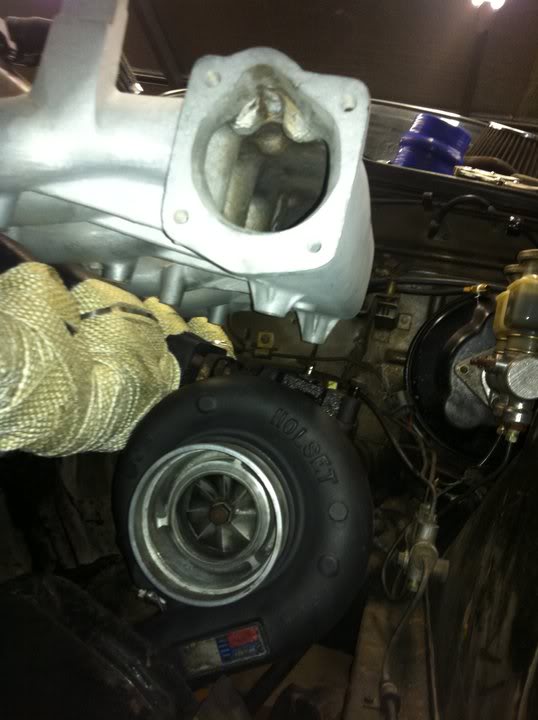
I've been running a bone stock N42 bottom end coupled with a P90 and Holset HX35 at 18PSI for the last 4 years without any problems. Make sure you check the ring gaps / gap them on the large side to accommodate the extra thermal expansion of having a turbo feeding it.
-
Where is windtunnel data and videos at?
lowrider replied to Ivan280zt's topic in Windtunnel Test Results and Analysis
Fail-Bucket strikes again. I can't see any of those pictures. -
L28 Build Thread 75 280z (N/A to Turbo Conversion)*UPDATED
lowrider replied to RefreshRate's topic in Nissan L6 Forum
I have been running a NA-T conversion in my 260Z for the last 7 years. It has gone through several iterations and also several bottom ends (due to me being a noob at tuning). I started out with a stock 83 zx motor / efi and added a stock T3, locked the dizzy, and added a potentiometer inline with the head temp sensor to add some more fuel. It was crude but it worked for a while. I am currently making around the 350ish HP range with a Holset HX35 at 18PSI strapped to the side of a bone stock N42 Bottom end topped with a P90 head and megasquirt 2 orchestrating everything. This bottom end has lived for about 4 years unopened with nothing but the oil changed at regular intervals. To back what everyone else has said, these motors are tough. By far the biggest weakness in my experience are the pistons. If you plan on using the stock pistons, don't rev past 6500 or else it will pull the ringlands. Also, I've lost a couple of ringlands on the pistons due to the ring gap being too tight with the extra heat from the extra compression the turbo adds. If you do crack the motor open you may want to gap your rings a little wide than stock. Granted that failure happened at higher boost pressures and horsepower than you may be wanting to achieve. As turbogrill said, a wideband is a must for any turbo venture. -
I've always been of the opinion that the health of an engine isn't determined by a certain value of compression. The more important thing is that the individual compression on all of the cylinders are within a certain percentage of each other. I typically say that if the difference between your highest and lowest cylinders is within10% The engine is healthy. This is what was taught to me and makes logical sense to me, so take this with a grain of salt.
-
Home Built Z 'Full video build'
lowrider replied to Home Built by Jeff's topic in S30 Series - 240z, 260z, 280z
I love how relate able the videos you make are! Like everyone else has said, its something that one of us would be doing with our cars versus a professional shop. I have also started watching the home built house videos you have made. I absolutely love it! These are similar things that I am doing with my house/want to do in the future and it has given me some awesome ideas. Please keep it up! -
I like the direction that the car is headed. I really love the Shakotan/Boso style, but I'm not extreme enough to pull it off. It seems like you have a really nice base to start with as well, that makes all of the difference as far as being able to allocate funds to stylistic/performance mods instead of rust repair, body work, or general maintenance. I see you're in Morristown, I'm just a little ways south in Knoxville. If you need parts or a hand let me know. There is also a facebook group called "East TN Z Club" that you might be interested in joining if you aren't already a member.
-
The TpsDot threshold is mainly set from the amount of noise that you have in your system. How I tuned my L28 is by turning the accel enrichment off and data logging the car driving steady state speed on a flat straight road. The data log will record the MapDot and the TpsDot. You want to set your threshold above the steady state TpsDot value so that your enrichment isn't being activated when cruising. Granted, I am using a blend of TpsDot and MapDot. I chose to go with both because of the lag of my turbo and boost onset when shifting gears. It was terrible with the larger exhaust housing I had on the turbo. (Disclaimer, that may not be the correct way of fixing the problem. I'm a novice tuner)
-
Those diesel water pumps sure have gone up in price...
lowrider replied to mutantZ's topic in Non Tech Board
That's insane... It's gotten to a point that I take the price of things one ebay with a grain of salt. I had a small lot of these diesel pumps that I happened upon a few years back at a local mom and pop auto, I wish I would have hoarded those few instead of re-selling them. After a quick search, this popped up : http://www.ebay.com/itm/AISIN-Water-Pump-BA010-17S27-/361779382253?epid=75011233&hash=item543bbb47ed:g:0QsAAOSw4CFY0ZX2&vxp=mtr Seems a bit more reasonable. -
PM sent.
-
1- XL short sleeve T-shirt, Asphalt Grey Zip code: 37849
-
I would suggest investing in a good wideband O2 if you don't already have one. They are an incredible tool when tuning and when diagnosing problems if they were to arise. With 300-350 horses your going to need to address your clutch, the stock clutch and pressure plate aren't going to cut it. You could either upgrade the clutch disk and pressure plate for the 225mm flywheel you have, or you can upgrade to a flywheel and clutch setup with more contact area. There are a few options of the latter around including the 240mm zxt / 2+2 flywheel and i believe someone makes a spacer to allow the use of an RB flywheel. The trans should live for a while (I got close to 5 years out of my 83 zx trans) but I would be looking for a beefier solution in the future. That's about it off of the top of my head, if I remember anything else I will be sure to post it.
-
The motor is the leftovers of a warranty replacement in my dads old Silverado. From what I gather it had some issues with the crank angle sensor not picking up properly because the crank thrust was out of spec. I know that when I get to it, I will probably need main bearings. Currently the motor doesn't have an intake manifold or front accessories which really opens up possibilities as far as purchasing replacements that would work better with the chassis. I was curious about the truck intake because they are plentiful and can be had for cheaper than the ls1 or ls6 variants.That and it is rumored that they flow almost as well as the ls6 manifold. So, are you saying that the truck fuel rails have a fuel regulator at the rail versus integrated into the fuel pump? I will have to keep that in mind when I go parts shopping. I plan on fabricating my own mounts similar to yours, I can't stand paying money for something I am capable of doing with a little bit of time. Ultimately the plans for the car is to force feed the 4.8 with a T76 with Megasquirt orchestrating the whole show. If it makes 400-500 horses I will be tickled pink; I feel like that is a pretty attainable goal. There is no telling when I will have the chance to get to it though, between the house projects and keeping up my fleet of family cars I seldom have time to tinker. lol