Leaderboard


Popular Content
Showing content with the highest reputation since 12/17/24 in all areas
-
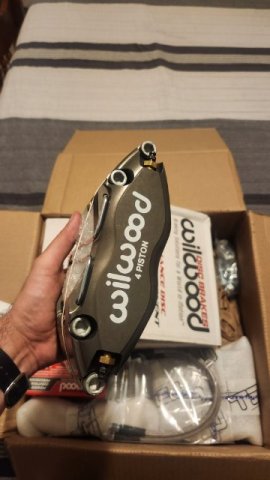
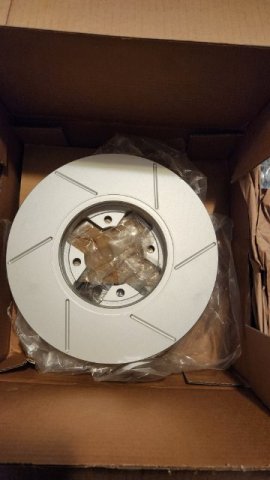
Three weeks until I'm home and properly working on the car before a long road trip. I've been creating a detailed list on some Google notes of everything I hope to accomplish. I'll update once I truly get to it, but for now just wanted to share my excitement for my new brakes. Was in Utah about two weeks ago for a handful of days for a music conference and my brother was kind enough to let me borrow his truck to drive up to Logan just for one evening to have a quick dinner with the siblings up there and I took a quick trip to my folks' place late in the evening and opened up some of the parts to keep my motivation haha. Also had a big box of new seals from Resurrected Classics. They were kind enough to give me a steep discount on their weatherstripping kit when I asked if I could get it without the door seals since I had already purchased the S30 world seals before they released their kit. Looks like they were kind enough to give me the discount and kept the door seals anyway! I'll be making a thorough comparison of it against the Precision kit I have, mostly to see if it's truly far better for some of the worst fitting parts.
 5 points
 -
I have two heads in stock as I type this so the head can actually be purchased. I can't help that you can't afford it. That's a feature not a bug. For the very beginning my goal was to provide the components so that talented engine builders could make the decisions on the types of components they wanted to use. Based on what I've seen and taking the pricing of the relatively simple L6 head as the baseline I highly doubt it. I'm not really sure what I did to put a burr under your saddle but you remind me of the guy that starts a fight in the line to get into the club because he can't afford the cover charge. Just get out of line and go somewhere else.5 points
-
Been a while since I posted any updates. Been moving along. For the Turbo car I decided to build my own wheels. Ill CNC machine the center sections myself and have the lips and barrels spun for me. I really like the old SSR RS8 wheels but finding them in the correct bolt pattern, offset, and caliper clearance is impossible. I fould a set close, from Japan and had them shipped over. Since this car uses Z31 hubs and such, the spacing is out much more than a standard Z so I need a bit more positive offset. I dissasembled the wheels and scanned the center section into my computer and reverse engineered the shape. Next I re-assembled them and had the 245-45-16 tires Im going to use mounted. I test fitted them to the car, and close, but not good enough. This is the fist time this chassis has been rolling on its own wheels in 27 years. Its been on a cart or a lift. Felt good to see some progress now that the suspension, brakes, and cross-memeber are finally complete Scanned this complete assembly and put it in CAD. Now I have the exact shape of the tire on the rim. Cool cross section of it. Finally I scanned the side of the car, put it into CAD. Now I can adjust my wheel center offset for caliper clearance, and adjust it to work with new Lips and Barrels I will order for the proper offset and fit to the car. Having it in CAD alowed me to look at it from every angle and check all clearances, for calipers, springs wheels lip, ect. Even compressing the suspension to make sure I have fender clearance at full travel Final wheel spec is: Rear - 5 lug = 245-45-16 on 8.5" width rim- 27mm positive offset, 2.25" outer lip on the rim Front - 5 lug = 245-45-16 on 8.5" width rim - 31mm positive offset 1.75" outer lip on the rim Next I need to find some time to program the CNC and start cutting chips. But I got distracted on the NA car, so that update is next.
4 points
-
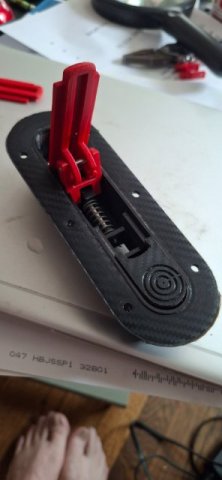
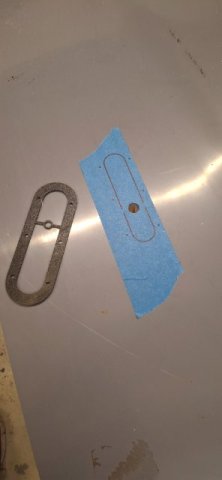
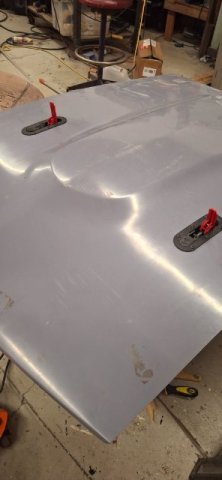
My custom made 3d printed aero hood latches are mounted.
4 points
-
Went out for some Auto-x this weekend, and had a proper blast. Highly recommended for anyone here who still hasn't gone to try it. Enjoy a slow lap, some V8 noises and straight cut gearbox whine. I have a handful of things to think about and address moving forward, but overall I'm very happy with where this sits. Next up is OnGrid at the Ridge in late July for more testing, and maybe, just maaaaybe a little redemption.4 points
-
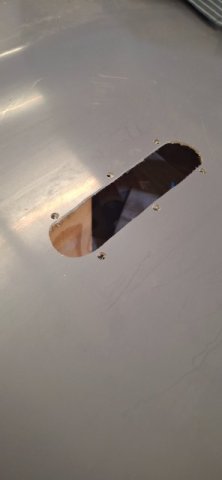
Good progress over the long weekend. Paint, bondo and fiberglass is mostly a waiting game which is pretty annoying. Got the duct glued together and painted so it looks like something. Trimmed it up a little and we are in great shape! The holes in the hood are a little bit large, but that's ok, and will likely get solved with a new hood (fiberglass) or something on top. Also got the transition piece painted which is exciting! This will help blend the splitter into the air dam, and will get taped onto the splitter once I put some trim on top of it. Need to get to work on the new intake pipe as well, going to put the filter over near the wheel for now. In the future, I'll flip the manifold and pull air from the cowl/wiper box area, but that's a bigger lift in terms of fabrication. Can't tell you how excited I am to have a metal fabrication project after 10 months of composites.
4 points
-
Meh, he's a paid supporter of the site. I figured I'll give him his moneys worth4 points
-
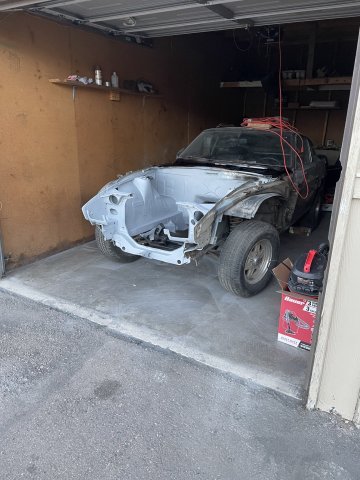
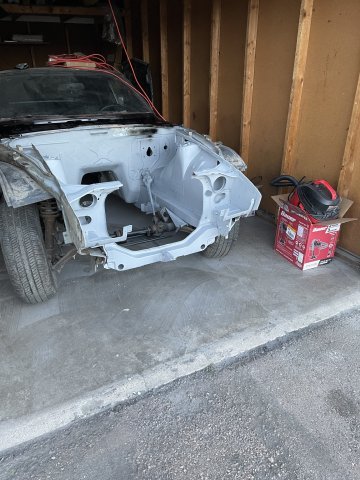
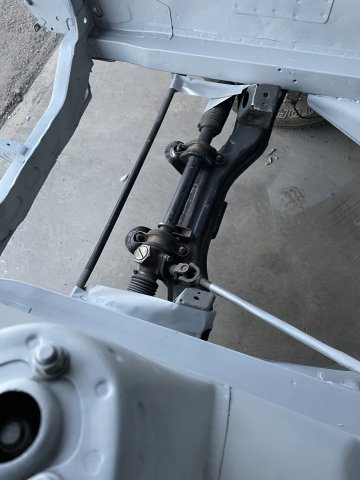
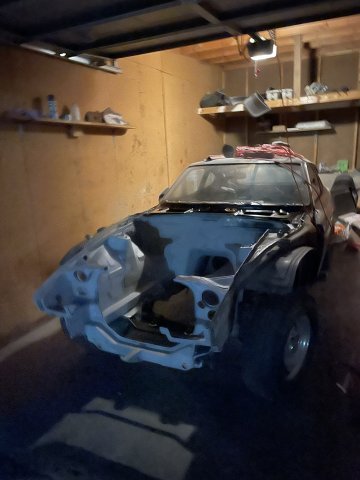
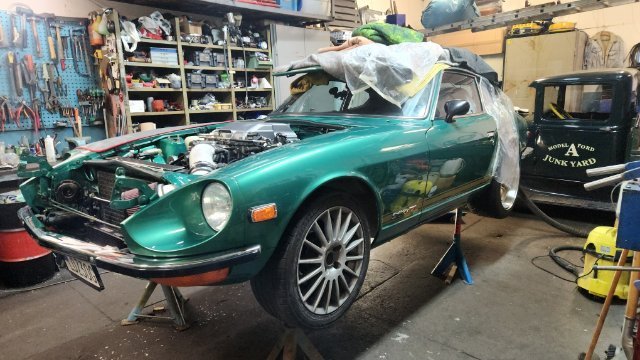
Hi All! I've owned a few s30's in the past and finally decided to build one. My car background is a lot of JDM cars including Supra's, AE86s, S13s, Skylines, a Stagea 260rs, etc. I have always loved the style of the s30 (don't we all), the aftermarket support for it and the random people who would stop me and tell me about their "Z" story. The story of this build started over a year ago when I purchased this 1978 Datsun 280z. The story behind the car (that I know of) was it is an American car that was brought to Washington and held at a speed shop awaiting restoration. Then was bought and stored in a heated warehouse for years in BC before i bought it. A little side story, I originally purchased a 1971 240z from the same person and they also had the 280z for sale but was well out of my price range. I would have loved to restore the 240z but unfortunately the amount of work it needed was well beyond my budget and experience just to get it to a useable condition. If you looked at it funny, rust would fall off the car. Mistakes we made. I was sold on what it could be but not what it will take to get there. almost a year later the 280z was still for sale, and the price was a little better. With some luck, i was able to convince the owner to trade back the 240z and cash for the 280z. Success!...Now, it seems the 280z was re-sprayed a British racing green but wasn't done the best and was flaking so i believe that's why it originally underwent the restoration in Washington. The car was just a rolling chassis, the front end had been primer epoxy'd and luckily had everything in boxes and labeled like "driver door guts", or "Rear hatch slam", which was nice to see. Now the goal of this project was to be a fun drivers, resto-mod car. It will be getting an RB26 from an r33 GTR, an RB25 transmission, DBW for the factory ITB's, Techno Toy Tuning full suspension, brakes, differential swap kit, running a Haltech S3 ECU and Wiring Specialties Harness, Poly fuel tank with an r32 skyline Radium hanger and Hellcat fuel pump. The bigger ticket items like turbo/manifold, radiator/fans, and then some smaller things are missing but most of the project is there now. I do plan of re-wiring the whole car considering I'm spending money in every other area. Now, just like anyone, I did set out with budget but considering since I last built a car, prices have gone up for parts which I stupidly didn't account for. Also a lot of, "well if i'm already doing this, then i might as well do that", and "since i have this off, i might as well get that." So the budget has been blown....but at least I'm happy! (maybe). BUT as it stands, the suspension and diff swap kit is in and the car is currently at the body shop getting the sunroof hole patched as well as some of the smaller trim holes plugged and a few small rust spots taken care of. Here are some pics throughout the build and as it stands. Any questions, advice or help for some "gotchas" will be welcome!3 points
-
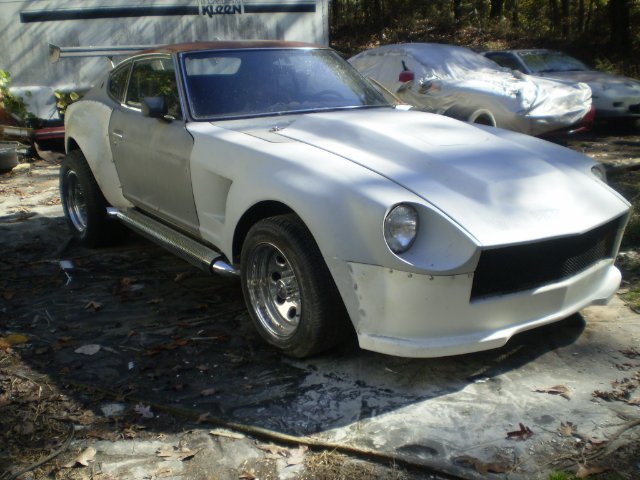
Great work so far! I’m sure this will be an awesome build. I suspect you will be running fender flares or a wide body kit seeing as your wheels are poking out a bit?3 points
-
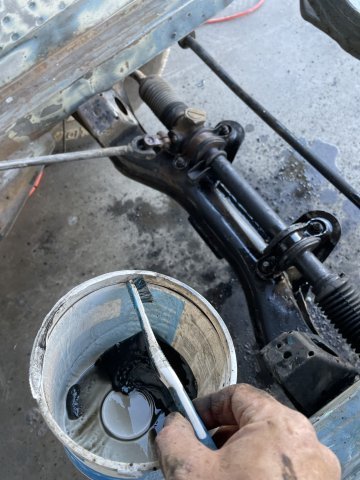
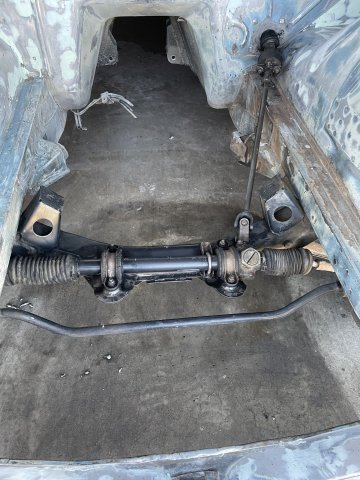
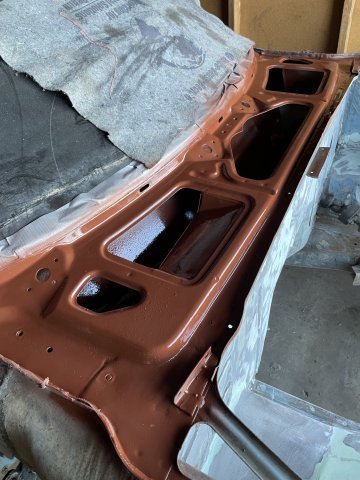
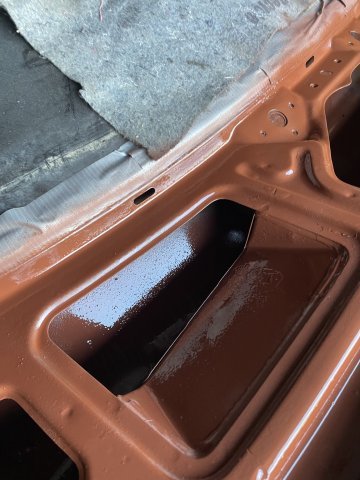
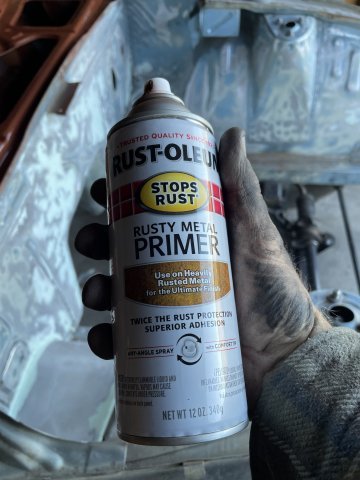
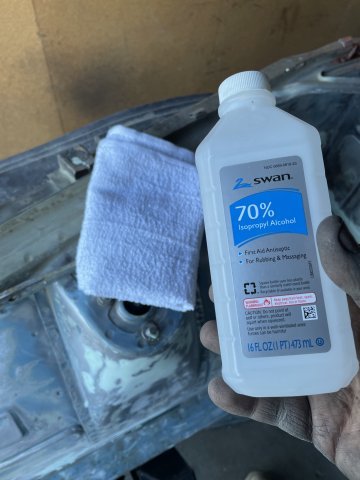
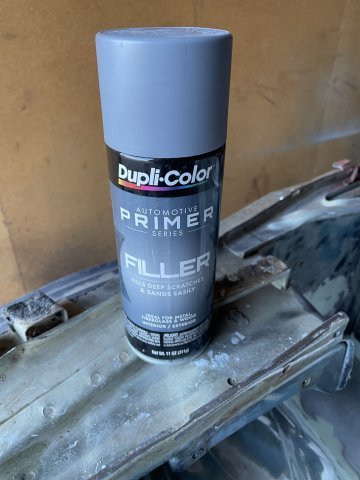
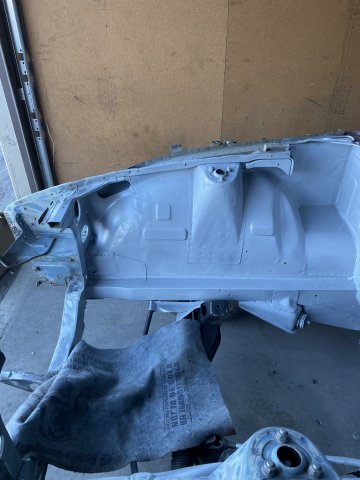
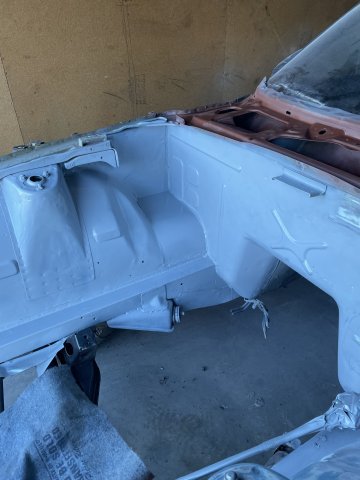
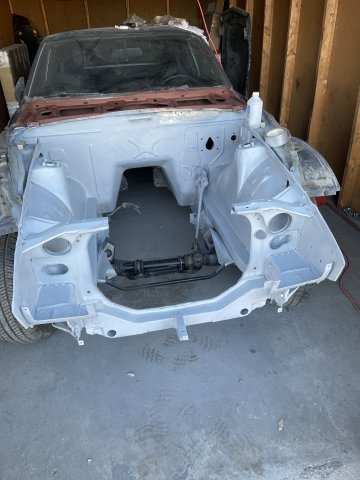
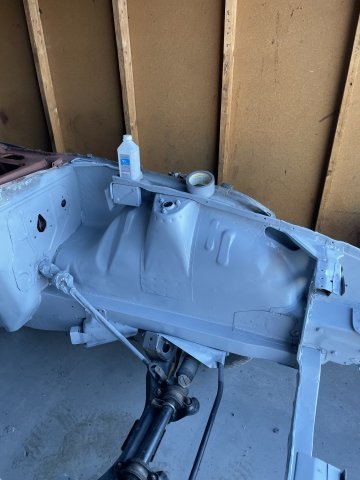
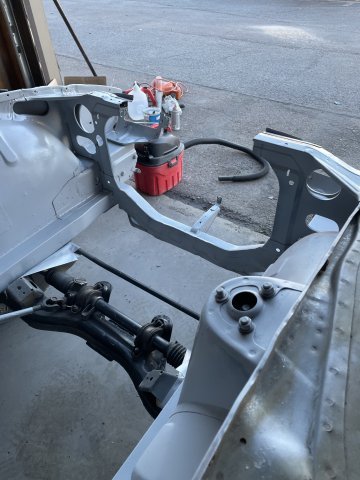
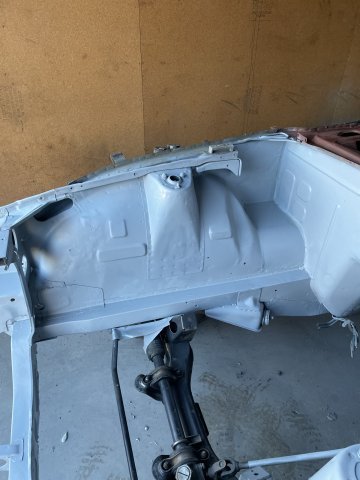
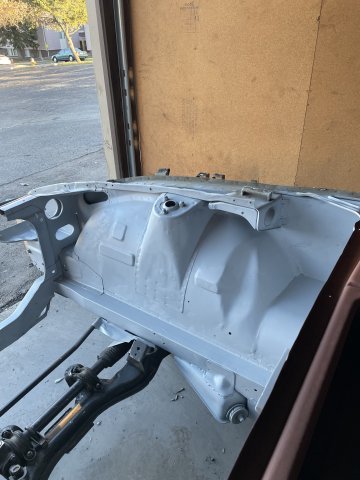
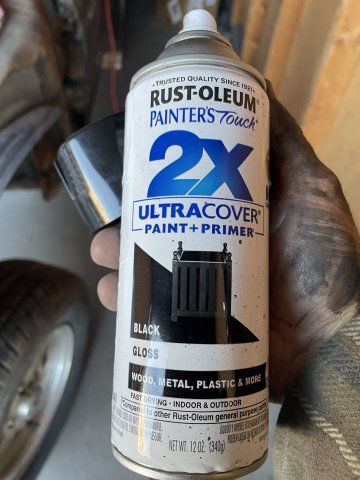
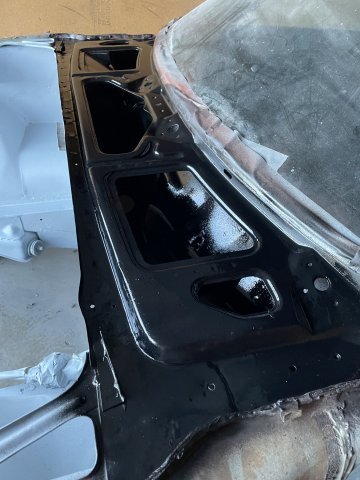
11-01-2025. 260Z work. I got the engine compartment sanded down after the glaze and then cleaned up the crossmember and rack with cleaning solution "g@s" and a toothbrush, and then steel wool, etc. Then I vacuumed out the cowl and primed it with rustoleum rust primerand top coated it with gloss black paint, then painted the engine bay with filler primer. Once dry I will use some spot putty I picked up on the areas that need it, hand sand it smooth and filler primer over that. Once it is good, then I will progress to color and then clear. Busy day! Pics:
3 points
-
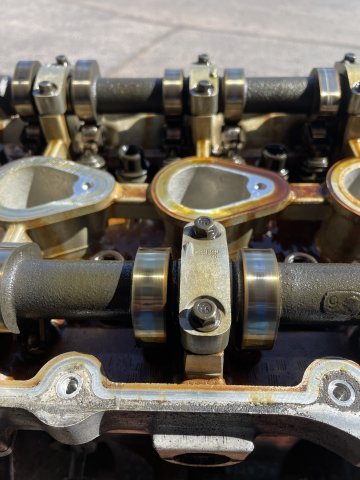
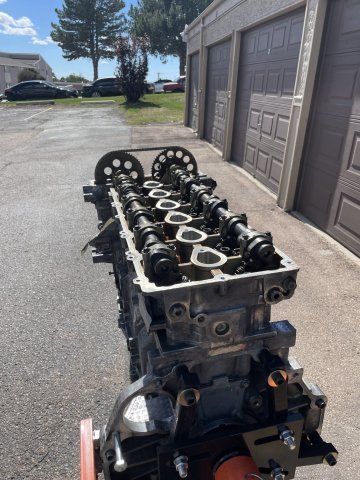
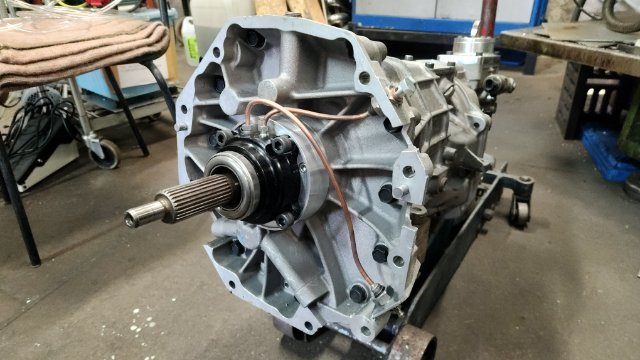
Yes, still working on then, just have not posted anything. Bought some expensive components that take time to recover from. A blank PAMS head, that I then designed and has DelWest make me titanium intake valves, Inconel mnemonic stainless steel exhaust valves, also MoldStar 90 seats and guides. Had it assembled, and ports cleaned up for some nice flow numbers. Also purchased a Nismo 6 Speed Trans that was also strengthened and modified by HPI in Japan. I take some progress pics soon.3 points
-
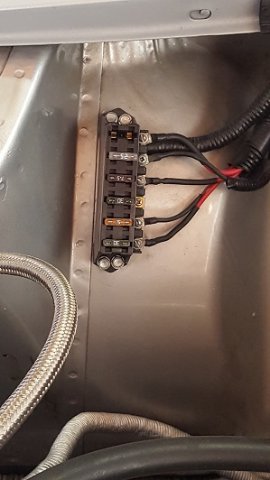
Picked this up from local hot rod shop for my 240z SBC 350 project about 13 years ago. Circuits: Electric fan relay Fuel pump Radio and amplifier Power windows Summit Racing/parts store etc probably have this fuse box.
3 points
-
Got the sensor figured out. It is idling around 130-140 F. Should be OK. I have to post a video. Sorry but I think this thing sounds bad ass. I have an insert in the exhaust so I dont need earplugs.3 points
-
Update: after speaking to Cortex and getting some spindle dimensions from them for CAD mockup, looks like I’ll be using their Radial X spindles. Very exciting stuff, I am a bit weary about using aluminum spindles but the car is a track car and last weighed at ~600# over each front wheel so I think I’ll be alright. Thanks! Excited to share my progress with you guys. I’d eventually like to make my work/design open source and see what more talented suspension engineers can do with it. If I didn’t just buy one of these yesterday I’d offer to trade you a complete kit for one of them KN20 heads XD. A bummer indeed, just another bump in the road! Funny you mention Stock Car blade-swaybars. It’s basically all I’ve been looking at for switching over to that design. Plus the parts are pretty cheap & standardized. Thanks everyone.
3 points
-
This is awesome. We haven't had a good engineering project on here in a while, so this is a good to see.3 points
-
The hairlines weren't that bad, it was the handful that were going through the edge of the rotor that I was worried about. Friday marked my first return to the track in almost 2 years. Knocked off a bunch of rust, the car worked the whole time, and I made a couple changes that were impactful and improved the car. I went pretty slow, so y'all could enjoy some v8 sounds for longer than normal3 points
-
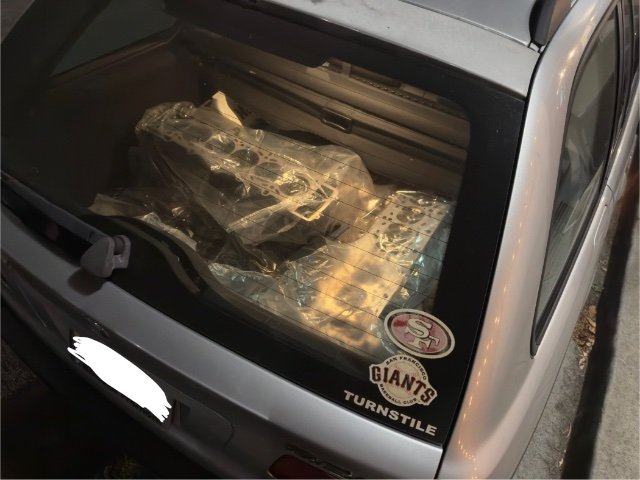
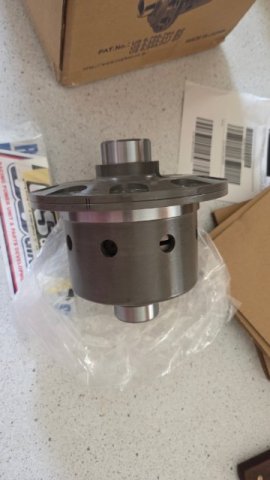
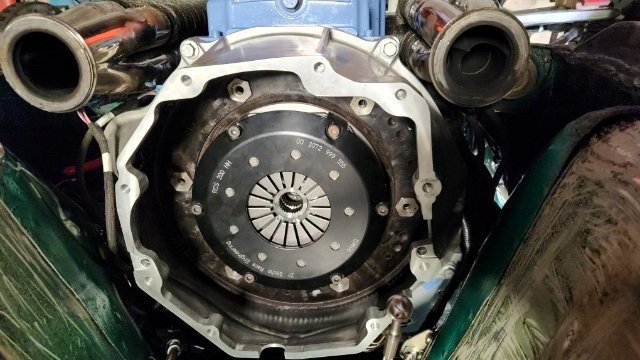
It was a good idea not to wait on rebuilding the 3.54 diff. The new LSD arrived weeks after I expected it and there's no shot I would have been able to swap it into the spare R200 before my trip. I'm excited to get this together in the winter though!
3 points
-
Some of their stuff is good and some is hot garbage. Max the owner doesn't stand behind his product and has a tendency to try and blame "modifications" to your car as the reason. I have a lengthly (4 page) post on classic z car about my problems with his door assemblies. Resurrected Classics door problems I have their door weather strips and their fuel filler neck and the are excellent. My advice is no matter what you buy test fit as soon as it arrives and go from there. The doors were so bad that I ended up not using them. Max refuses to refund my money so I make sure to take the time to tell people about my experience. Do not trust what he says as he says whatever he needs to to get out of doing the right thing. Caveat Emptor with this guy for sure.3 points
-
You should really just post on FB because they love trolls and useless posting there3 points
-
I track my Ford powered 260Z. My personal experience is that transmission gearing is extremely important to getting the most fun on the track. In Florida, you will most likely be doing track days at Daytona and Sebring. Both tracks have very fast sections. Before doing track days, I autocrossed the car. In autocross, you only really need second gear if you have the right differential / tire height. I used Hoosier 275/35-15 tires and have a 3.36 rear end. With a 1.94 second gear in a T-5 and 6,500 rpm, 2nd gear was good for 73 mph. When I started doing track days, I needed all the gears. I had replaced the stock 1st through 4th with G-Force gears and shafts, but fifth gear was still stock. With that set-up, these were my gear ratios. 1st 2.95:1 2nd 1.94:1 3rd 1.33:1 4th 1:1 5th 0.59:1 Worked great until I needed 5th gear. that big a drop absolutely killed the fun (no acceleration in 5th). After my first time a Daytona, I changed 5th gear to 0.81:1. The .81 gear absolutely transformed the car. Now 5th gear is warp drive. The transmission that you show probably doesn't have a good selection of gear ratios, and probably won't hold much power. If it were me, I would get the new TKX with the close ratio rears. That transmission will handle the power and maximize you fun on track. If I didn't already have so much invested in my T5, I would get a TKX. This is the TKX I would get: https://www.speedwaymotors.com/TREMEC-TCET18084-TKX-Close-Ratio-5-Speed-Ford-Manual-Transmission,452007.html?srsltid=AfmBOoq-x1paVSDoNvgI38myLy79UBWXzZFW-QeQ4bK1_vWnSHM7bEEJ Gear Ratios 1st - 2.87, 2nd - 1.89, 3rd - 1.28, 4th - 1.00, 5th - 0.81
3 points
-
For a street car I think the rails make sense. For a race car that has a cage perhaps not. For a similar amount of weight you can triangulate the cage with tubing on top of the floor that extends to the suspension pickup points.3 points
-
So.......it's been 7 years since my last post. The car basically sat in that drive way for a few years then pushed it in the garage for another4 years where the mice got to it. The gas in the tank and lines went to shit. I replaced the fuel pump and got it kind of running again. Obviously having the car sit outside for so long it pretty much ruined everything in the fuel system. This is where a project goes to die .....you lose interest and end up selling for cheap because it doesn't run. Well ......not this time. Last year the house where I was storing it had to be sold so I needed to find a home for it while getting it road worth again. My best friend who lives in Rochester, NY (I'm in Massachusetts) told me to trailer it to his place and we can work on it together. I know that the carbs need to get rebuilt so I decided to send them to Kyusha House. Here is the before pictures. And after Taka's absolutely amazing work.....3 points
-
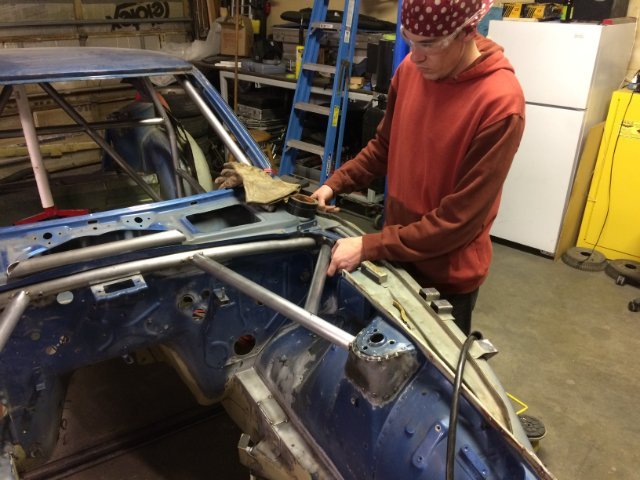
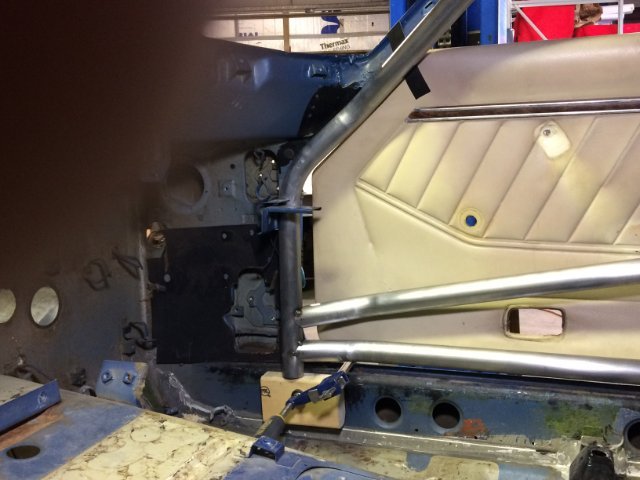
Here comes the Project thread that I should've started when I picked up the car in 2021...... Firstly, I'd like to thank the person who has been the biggest help with this car, and who has ended up being one of my best friends, Andrew Mielke (who owns Milkfab Engineering). Without him the car would not be where it is today! His hybridz profile (check out his z) also shameless plug for his business: MilkFab Engineering Z acquisition: I had always wanted an s30 after growing up hearing my dad tell stories about how much he loved the gold 240z he had when him and my mom were dating. Any time we would see them at car shows or out and about i'd be drooling over them. When I started dating my now wife, I noticed a copper colored Z sticking out of a storage building on the road they lived on. Her and her family started jokingly calling it 'my car' due to me staring at it every time we'd drive past. Fast forward 3 years from then, we were married and looking for a house. She gave me a call because as she was driving to her parents house she saw the car outside and they were working on it, asked me if she should stop by and ask about it. I said 'yeah' never expecting it was actually for sale, and when they told her it was and priced it I was super surprised. This was in early 2021 when Z prices were going up dramatically, and she knew that. I told her we shouldn't get it, that it would be unwise since we needed the money for a house down payment, we had no place to put it, etc. BUT, she made me buy it, saying 'You never know if the prices are gonna keep spiking and you never be able to get one....'. So, we bought it, my parents drove over two hours to come pick it up and take it to their house where I could work on it/store it until we had our own place. My wife is a nurse and worked weekends for a while, which meant I spent many a saturday getting up at 5am, heading to my parents, working all day, then driving back in time for dinner. Over the course of 2021 I got the car 'ready' to come home, and we bought a house for it to come home to. The short of it: Where we started (There is probably more than this I'm currently not remembering) L28ET with no E or T round top su carbs lots of electrical gremlins from previous owner cutting random stuff to try and get the car running Radiator support bent from car being wrecked nasty gas tank Where we are now: Frame straightened L28ET with the E and T many fewer electrical gremlins cleaned gas tank coilovers proper race bucket seat (passenger still gets to bounce around in a nb miata seat lol) More posts to come with some build processes, pictures, stories, and more general nonsense.3 points
-
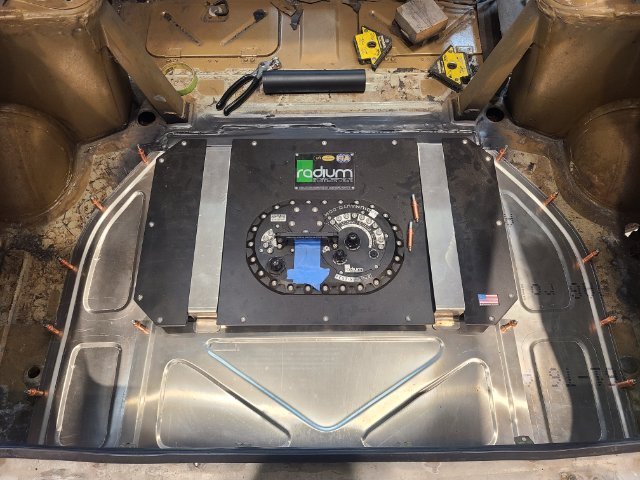
I did a 14 gallon radium cell in mine because i plan on possibly running e85 and we have some 30-35 minute sessions with some clubs. I have it raised like an inch and a half out of the floor to make the bottom height where I was visually happy. My cell is advertised at 11.7" tall so if the ATL 10 or 12 is shorter then flush with the floor should be perfect.
2 points
-
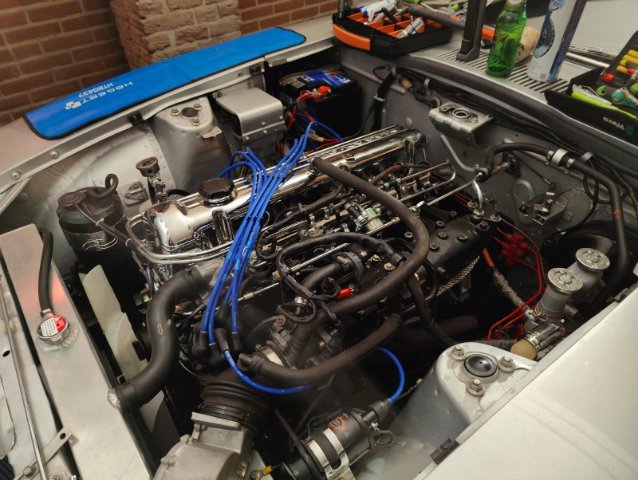
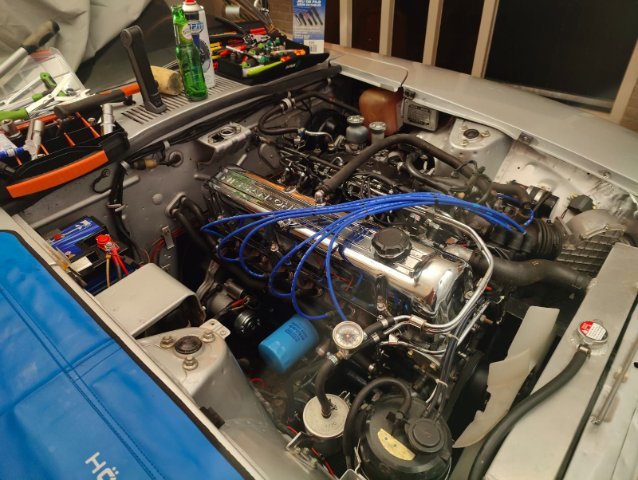
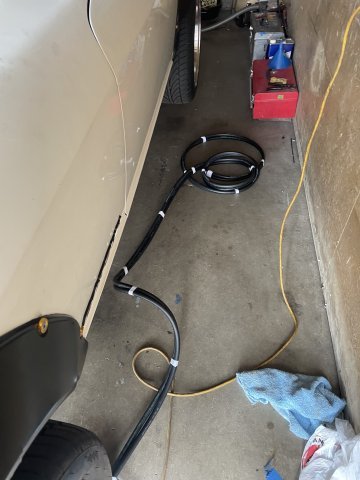
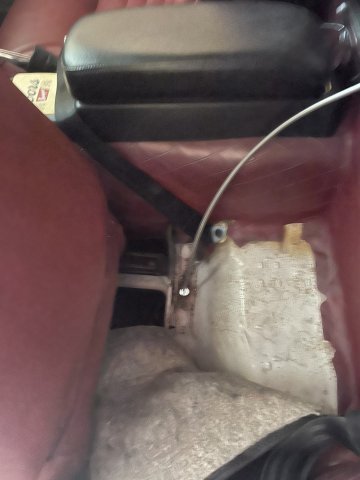
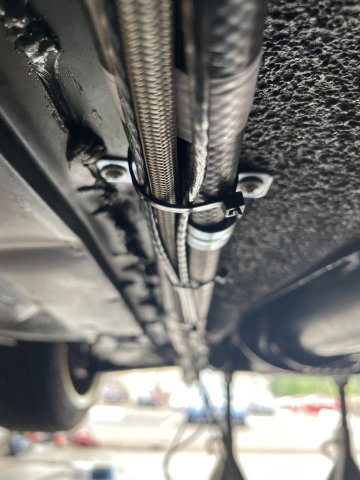
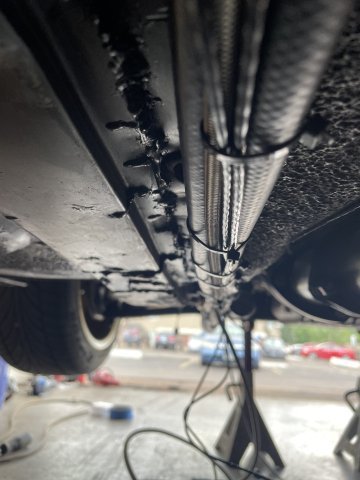
Time to update the build threat again. Things are moving slow at the moment but none the less progress is being made. I have contact with two local body shops in the area for the frame rail repair and to measure the body to see if it’s twisted in any way. One of the body shops is specialized is classic car repair and restauration but will probably be quite expensive but none the less a representative will come by to look at the car this week. The other body shop is a more generic one that also does a lot of classic BMW’s and has done some paint work for me in the past. There hourly rate is a lot cheaper, I know they deliver great work and I know they sometimes are willing to do cash work. To save money on the body shop hours I decided to bite the bullet and order a bunch of parts from Apex Engineered which should arrive somewhere next week. Deciding what to buy was quite difficult as the shipping rate varied a lot but in the End I got the shipping down to $284. I all I bought the frame rails, front fender braces, front and rear control arms, steering knuckles, front crossmember and the rear strut brace. As importing stuff from the US is pretty expensive I decided to place a bigger order then what I strictly needed to maximize the value for my money. As the car needed to get welded anyway I ordered the front fender braces as well to reinforce the front of the car as they weren’t that expensive and seemed to me as a worth wile upgrade. As for the control arms my main reasons for buying those was to delay any major body repairs. If my body turns out to be twisted repairing it would turn into a full on restauration project. I do plan on restoring and repainting the car some day but not now, so as a temporary solution the adjustable control arms allow me to tune the effects of a twisted body out a bit. At some point I would like to get the full Apex Engineered Retro Mod suspension so this will give me a great starting point to work from anyway. To save some more money at the body shop I will strip down the interior and remove the fuel lines myself before sending the car of for welding. But before doing that I still have a chance to fix some small stuff surrounding the engine. My backorder from Zservices in France finally came in together with a used Bosch AAR from a Porsche 944 as my original AAR turned out to be broken. So last week I took the valve cover off to adjust the valves and replace the gasket as it was leaking a lot of oil. Good thing I did as the valves where very out of spec. The adjusters where a pain to get loose but after that adjusting them was very easy. I put everything back together with some new NGK spark plug wires and started her back up. Even with near freezing conditions the car started right up and idled better then ever before. The engine still runs very rich at idle and I suspect it might be an injector issue but other then that the engine runs great and the emissions are within the limits so I will place that issue on hold for now. My plans for the coming weeks are to strip down the interior, remove the fuel lines, front fenders and doors. This will also give me the opportunity to clean and inspect those parts of the car for more hidden surprises. I will also repaint the fuel lines as they are full of undercoating and try to restore the dashboard as with any Z mine is cracked. As for the doors I want to rebuild the door hinges and maybe try and reupholster the door cards as mine are actually of a 2+2 and have a giant hole instead of a second door latch. I’m hoping to get the car back on the road after this so I can finally start to enjoy my 280z this spring. Video van WhatsApp op 2025-11-24 om 10.58.36_fab92d46.mp4
2 points
-
I don't know how you have the engine placed, but I would offset the engine about 1 inch toward the passenger side. The drive shaft angle is easier to minimize with the engine shifted in-line with the pinion. This also makes the weight distribution a little better when you are in the car.2 points
-
Please do post updates! It's always great to have another project thread on the site2 points
-
When are you hoping to get this car on track? I'm hoping to do an SCCA track day at Sebring in February. It would be nice to see you guys there.2 points
-
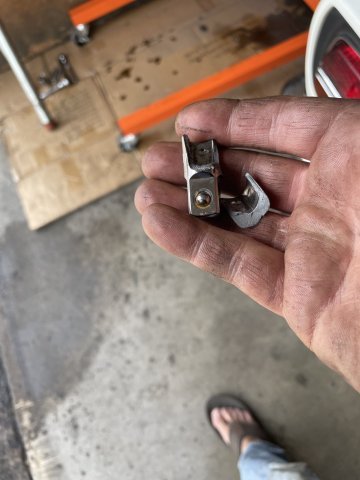
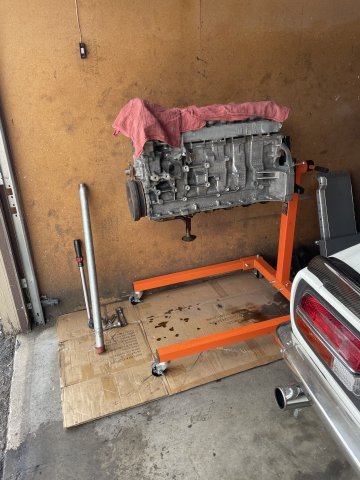
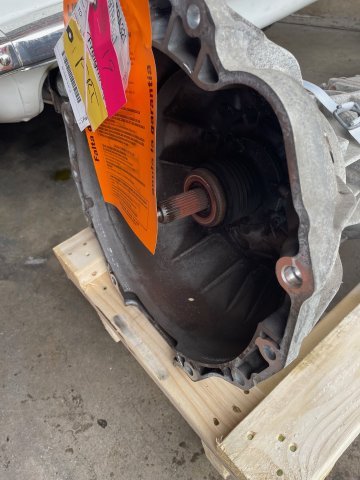
More work on the 4200 today. cleaned up the rest of the block and head, and then pulled the oil pan and cam cover. NO SLUDGE. very clean inside. I got the outside of the cam cover clean enough to at least get started on the modifications I will do to it (add an alloy oil fill to the back, add a breather port, shave off 2 original ports, cut off unnecessary brackets, weld up the original oil fill hole and probably lower it a bit as it is very tall . To fit under a Z car hood it has to be chopped about an inch......although a small rectangular hole in the hood with the polished cover sticking up can be made to look really cool. Yeah I had an adaptor snap on me, the crank bolt is SO tight, I will probably need heat and PB blaster and smack it a few times to shock the treads to get it off. I need to clean behind it and it needs to be cleaned up and painted.......I wonder if the heat will ruin it? Before I called it a day, my AR5 transmission arrived.....in need of a rebuild, the pilot shaft has wiggle room. pics follow:
2 points
-
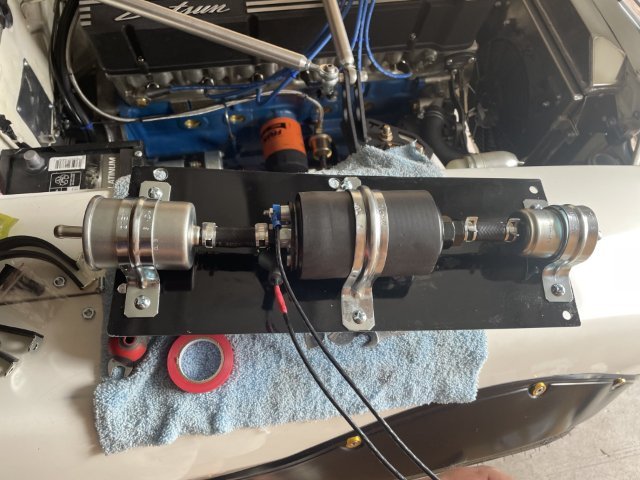
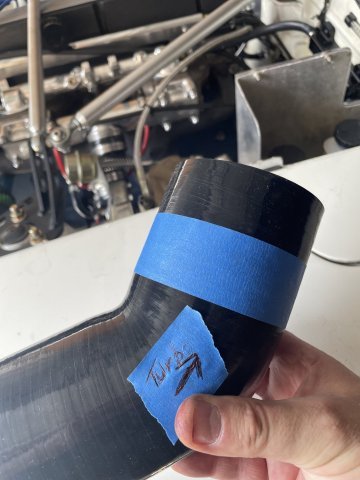
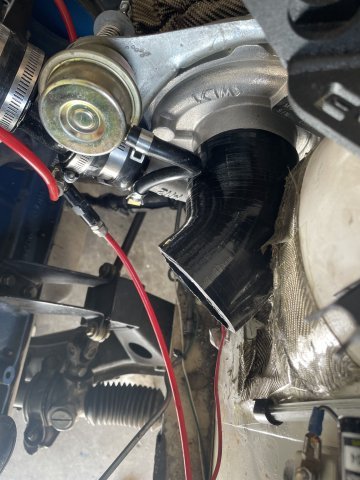
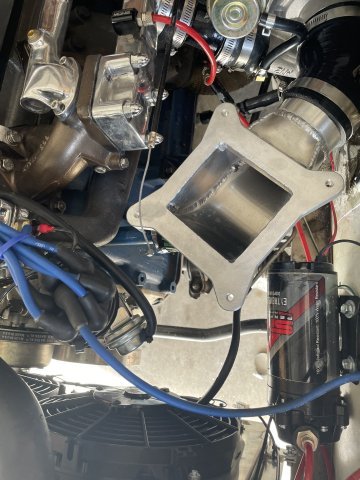
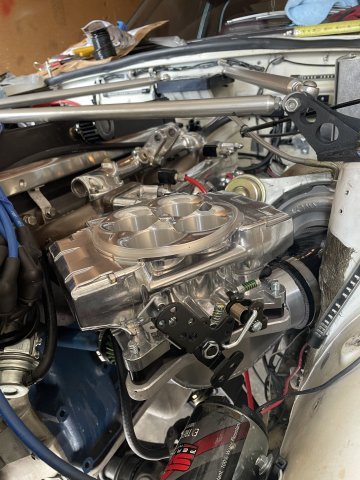
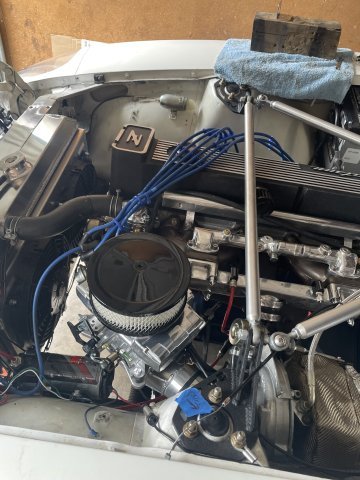
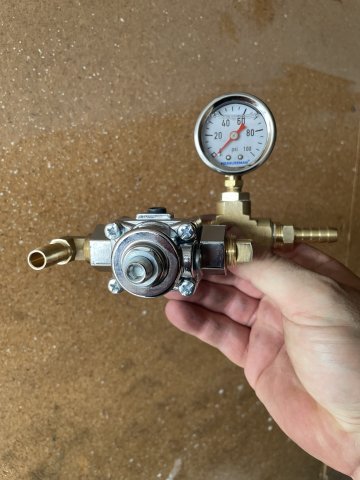
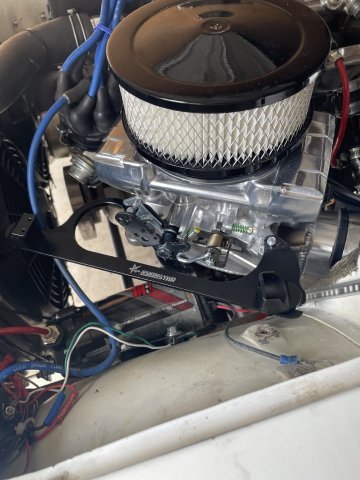
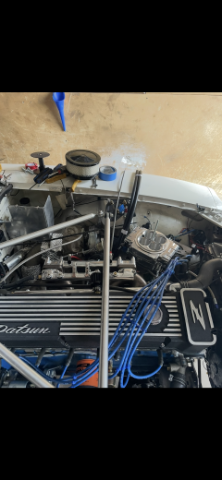
So after doing a valve adjustment my ITBS did sync up better . I guess I will have to keep an eye on that. I took out most of the injector trims and my afrs between the banks paired up better -especially at light cruise . I also worked out linkage issues I was having. You get no instructions with this kit and there was adjustments that I could have done better like the main rod-the only rod-to bellcrank. I didnt have it pulling the linkage in a straight line. Also found the linkage on the side of the ITB loose . This caused the linkage to rub against the body of the ITB. I got all this sorted right before ZCON . It was 4.5 hours to Nashville on smooth highway. 80 mph is where she likes to cruise . AFR's were around 15 on flat ground. No issues on the round trip. Got some great compliments from Peter Brock on my airbox . Cold idle is still 650rpm and about 800rpm when hot . AFRs at idle are normally around 13.1 Now to move on to IAC . I gave up on it right before I left .2 points
-
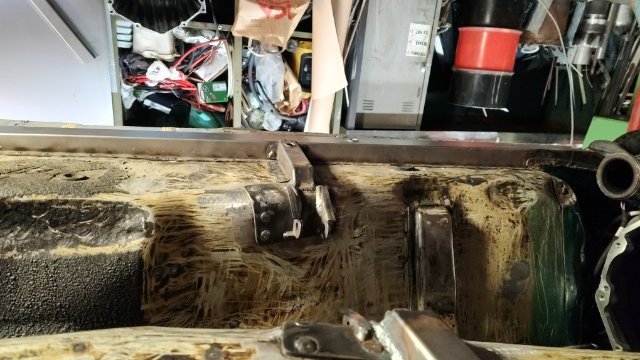
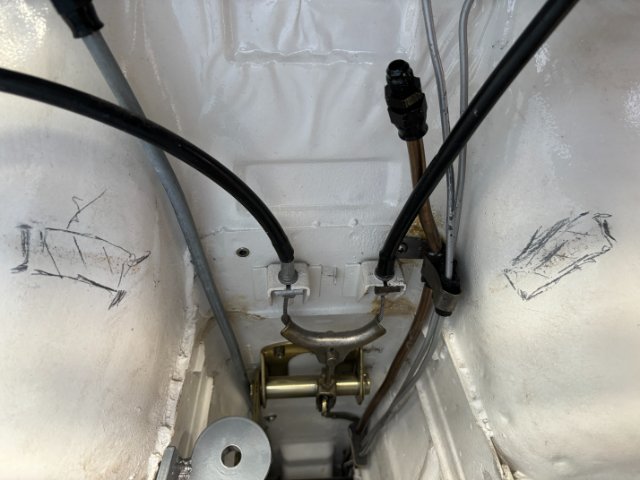
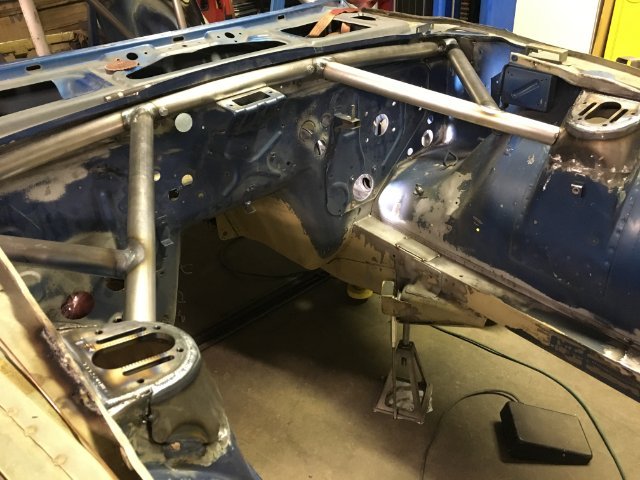
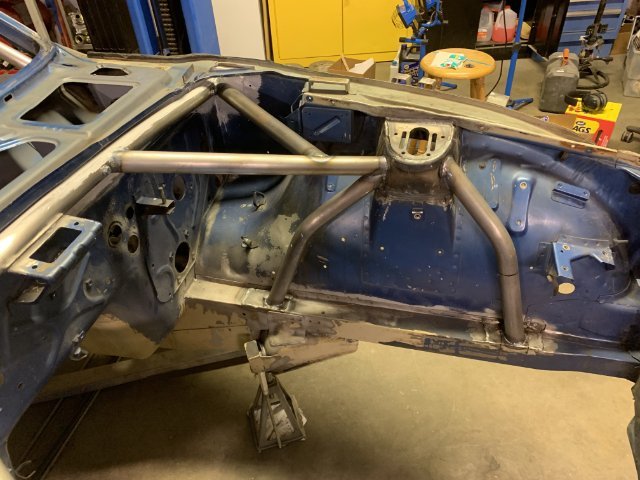
The two areas "1" are a great place to attach tow hooks.
2 points
-
Day 1 of installation. almost 12 hour day and got a lot knocked out. Pics below:
2 points
-
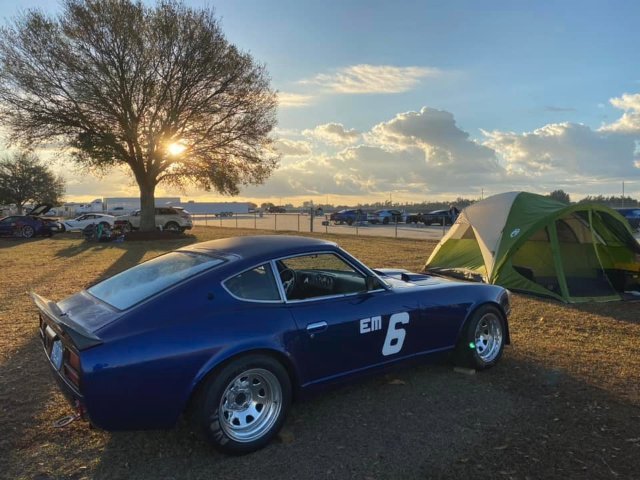
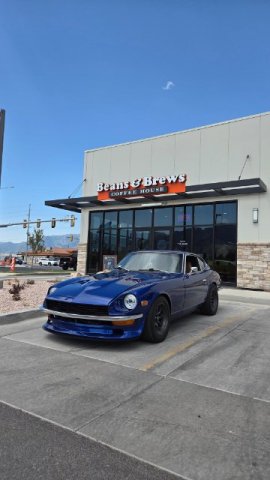
People's Choice at a small cars and coffee in town this weekend. Brakes feel really good. It's weird feeling how firm the pedal is compared to the originals now that it's all stainless hoses and the rear has been upgraded. Even the parking brake is better than I expected! Getting wheels balanced today - I know for a fact one had a couple weights knocked off, I can see where the adhesive was, and I'm still upset about how many weights they used to balance one corner. Someone wasn't doing their job right when they mounted the tires I think, because there's no way you need two long strips on opposite sides to get a wheel balanced.
2 points
-
Good evening gents I got my first inspection cleared with some minor things to fix so now i have five years to finish the build (he wanted to see me at the end of August ) . With that done i was able to pain all the weld, start interior work and mount the Datsun back up again, sooooo, it's done just waiting for my half shafts. The half shafts is actually the only thing that keeps me from a test run. Brakes, clutch are bled, emergency brake mounted, it's pretty much only interior work that has to be done Cheers Christian
2 points
-
Those hairline rotor cracks are common when running giant rotors. Even though you are getting very little rotor wear due to the size of the brakes, the heat cycling eventually forms the cracks. I've ran them on track probably about twice as bad as your pictures.2 points
-
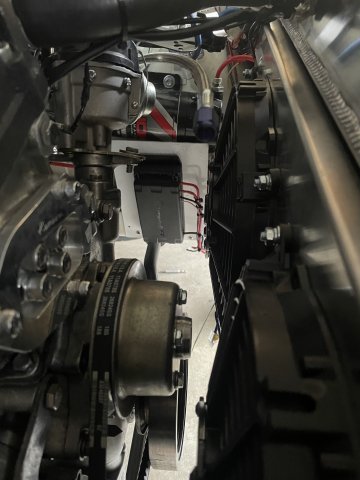
Heat wave going on here +27 in the shade, had to test how hot this can go on normal driving. that small 10" fan goes on 87celsius and it can keep it cool in the city, second large CFM fan goes 92celsius. oil coolant pump goes on 85celsius and highest i saw was 92celsius, 96celsius goes coolant fan2 points
-
Good post. I was frustrated for a long time with companies not sharing spring rates on these parts. FWIW, Viking is legit, lots of fast SCCA guys run those things with good results. IF those spring rates were chosen to prevent bottoming out of the shocks, that's pretty poor design. My guess is that the motion ratio of the bellcrank will be the limiting/bottoming out feature here, and that the conversion to pushrods has resulted in some high force multipliers. My guess would be Viking starting point is mounting in a "muscle car" front end, where the motion ratio is fairly low. I'll be interested to hear what the APEX guys say!2 points
-
Also not a facebook user here, but speaking in generalities: 1. In 2025, I would think seriously about the value proposition of buying a Z. Some of us have been dabbling in this hobby/affliction for nearly 30 years, starting back when these cars were cheap, plentiful in junkyards, and blank-canvases for modification. And today? Completely different game. Hard to tinker with a 50 year old car, just as a tinkering-car. Even harder to get the performance out of it, that was the stuff of our dreams in the 1990s. 2. These cars are becoming expensive. Even woebegone projects are becoming expensive. For the less-familiar, it's a costly trap!2 points
-
A lot of work for sure, getting me pumped for my own build!2 points
-
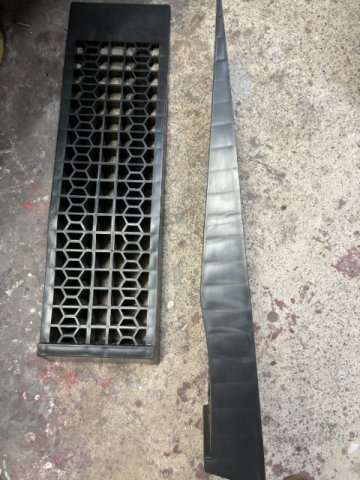
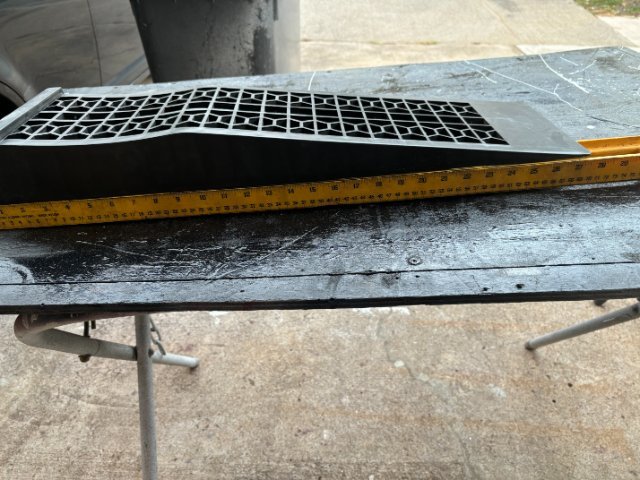
Small fiberglass update. I got the general shape made, and it's ready for trimming and bonding together. I'd like to test fit it on the car, and make sure the radiator is picking up in the right spot. Excited for this, we've got fully ducted air going into and coming out of the radiator now!
2 points
-
Let that ship sail! Find another decent body for a few grand and save yourself a ton of time and money. I've seen many "resto plans" dye on the vine after the joy has passed, months and years go by and the person doing it burns out. Just my ywo cents!! Good luck.2 points
-
Work on this has continued: I went over the whole engine, looks great now: All metal work was finished Most bodywork was finished # Interior Painted Engine Bay Painted Underbody Painted Back on its wheels Full body will soon be in paint.2 points
-
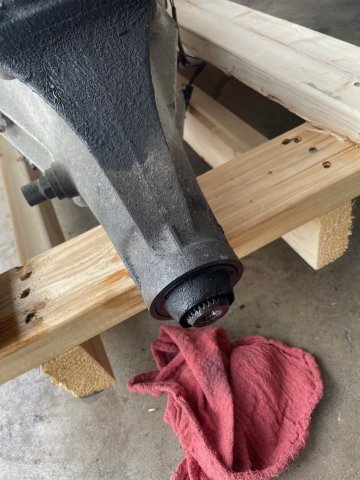
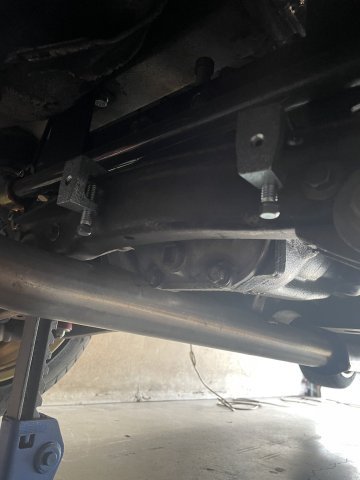
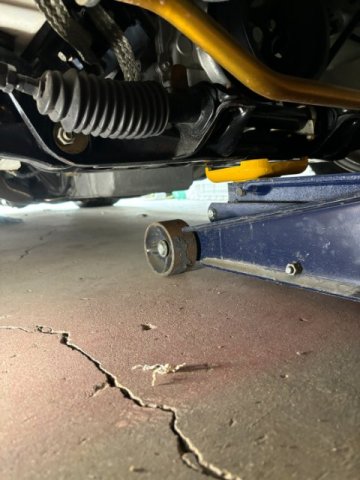
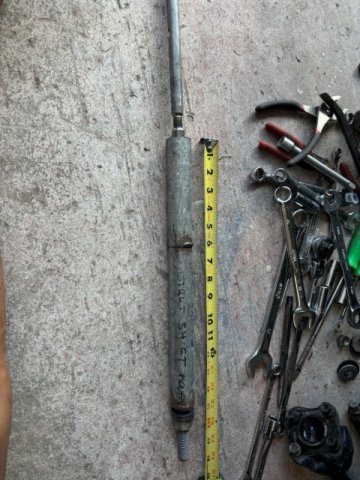
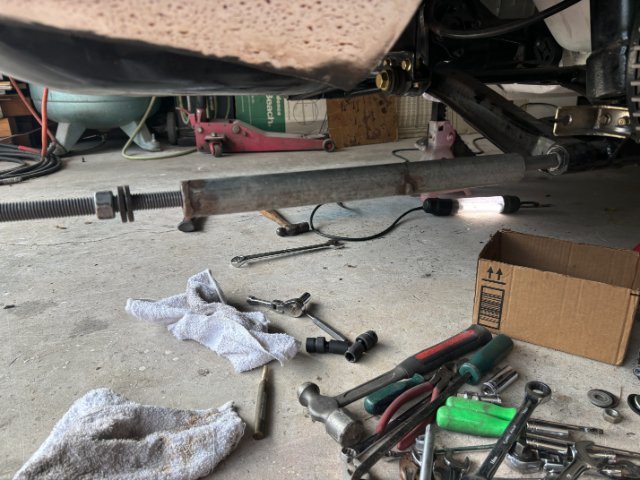
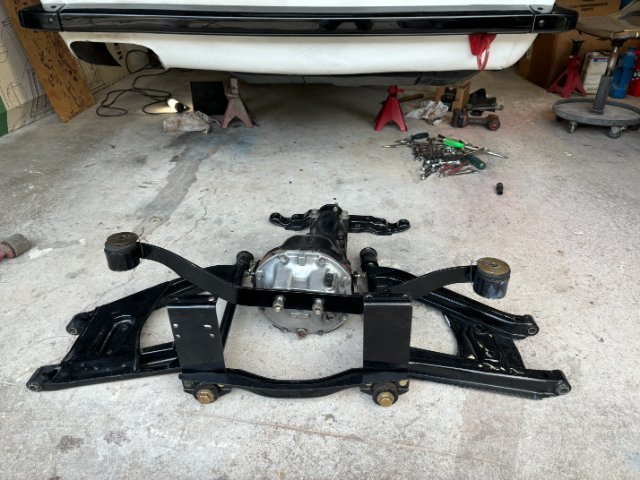
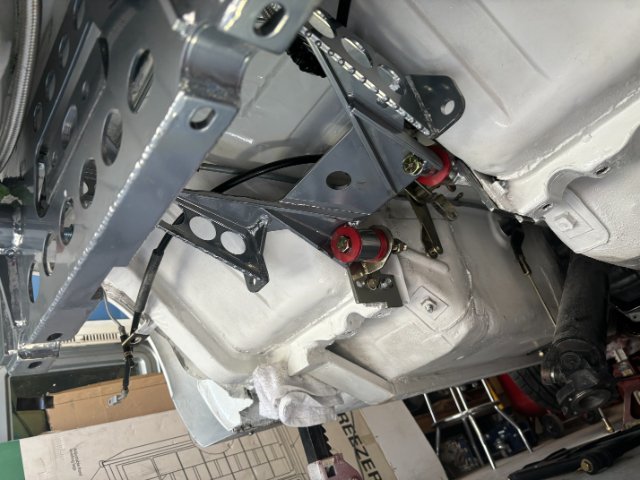
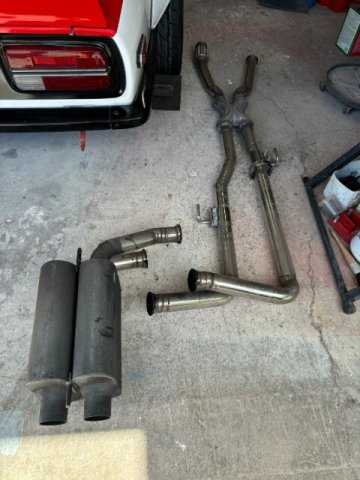
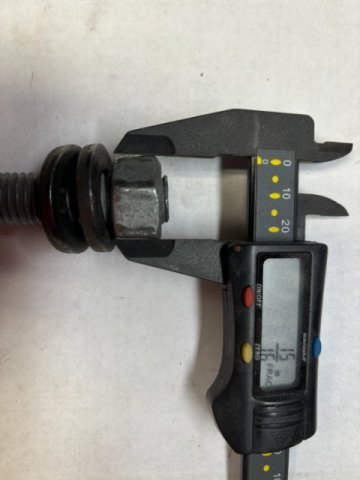
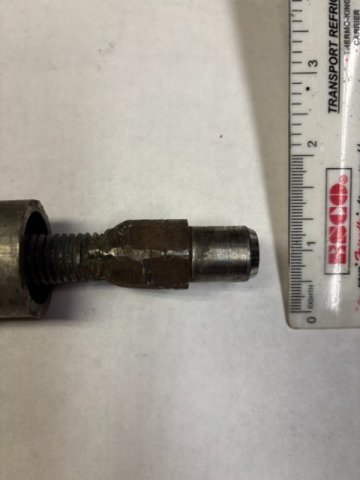
Ford 8.8 Super Duty 8.8 Differential Installation- First of all, I want to apologize for taking so long to finish this posting. I had to paint my house and had some other people's projects to help them with. The first thing that I had to do was to find a method of jacking the front end of my 240z high enough to use high jack stands. Because of the low ground clearance of my Rocket Bunny Front Air Dam and Low Vehicle Height, even my 3 1/2" Low Clearance Floor Jack would not fit. I solve this problem by purchasing a pair of 3 1/2" Car Ramps. They cost about $36 on Amazon. raises vehicle by 3" These ramps were about 28" long and would work on low riding vehicles. Short steep ramps would not work. They are very light weight and can be sacked together (taking a small storage space). jacking cross member The Ramps worked perfectly as my floor jack fit under the Front Cross Member easily. With the Car raised on Four Jack Stands about 6" off the ground, disassembly of the rear suspension can now take place. I designed my exhaust system for easy accessiblty. It consists of Three Sections-One -Front Motor Exhaust Pipes, 2-Middle Section with "X" Pipe after the transmission and Third- Rear 90 degree Exhaust Pipes with Two Turbo Mufflers. The pipes were also, connected together with V Clamps for fast disassembly. Next, the Two Rear Control Arms must be removed from the Strut Spindles. First, the Threaded Cross Shaft must be removed. The Tapered Shaft retaining Pins must be removed. With the Locking Nut removed, the Pins are removed by tapping them cafefully upwards. now, the Threaded Cross Shafts must be taken out. Because of Corrosion and lack of Lubrication, these shafts usually are difficult to remove. You can not hammer them out as both ends has threaded ends and hammering will damage the threads. ZDEPOT sells the Removal Tool but I made mine own. The tool consists of an Internal Threaded Rod which screws to the Threaded End of the Cross Shaft. The Larger External Tube( 1"OD" acts like a spacer of the Threaded Rod. A Large Nut on the opposite side of end of the Threaded Rod operates like a Forcing Screw to pull the Cross Shaft outward. I welded a proper size Lug Nut to the other end of the Threaded Rod. See Posted Pics for Size and Dimensions of this tool. Metric Lug Nut welded to one end of the Threaded Rod 15/16" Nut( pulling nut) placed on the opposite end of the Threaded Rod Removal Tool installed on Cross Shaft Rear Suspension removed With the Rear Suspension and Differential Removed, install the Differential Support Bracket on the two Long 17mm Mounting Bolts for Trial Fit. This test fit checks if any Fuel and Brake Lies and Hand Brake Cable are in the way. In my case, the Fuel Lines had to be extended and Hand Brake Cable modified. Differential Mounting Bracket Trial Fit- Next-Differential Installation
2 points
-
yeah, Bad Dogs I hear are good, and that you can put them over the factory ones, but if the factory ones are rusty, then they need to be repaired/patched first or removed and replaced with these. I I think they way blok did his with thick heavy steel is probably the ultimate (the youtube link I posted earlier).2 points
-
I don't know if you have ridden in modified Z cars, but 240Z's are LIGHT. 320 to the wheels it's basically a widow maker. Overkill on power is overkill on power. You reach a point where more power is useless, as you can't put it down, and the car is already dangerous as-is. It's a street car. With the power level you are talking about, additional bracing is necessary in the subframe and rails. Do you like reliability? Stock=reliability, modifying it for 40-50 horsepower could take away the reliability. stock 370Z engine is fine power wise bone stock for a 240Z. A lot of the modern cars with all the horsepwoer....that's in a car that weights OVER 4000 pounds. 2 tons. Completely different deal. Your weight is about half of those. Be sensible. Live Longer. And this setup....stock brakes are NOT good enough, nor is a stock suspension.2 points
-
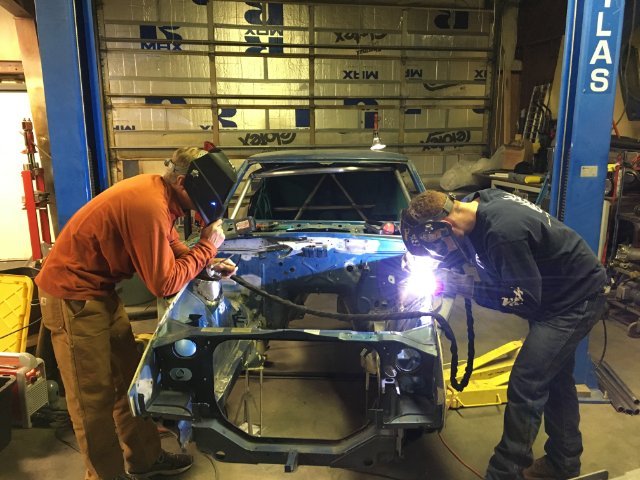
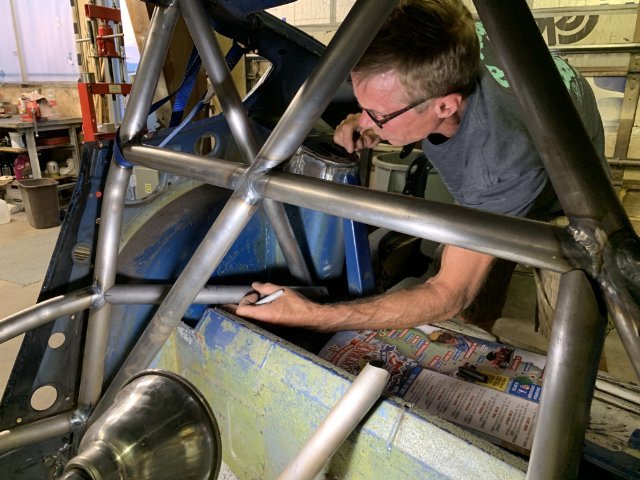
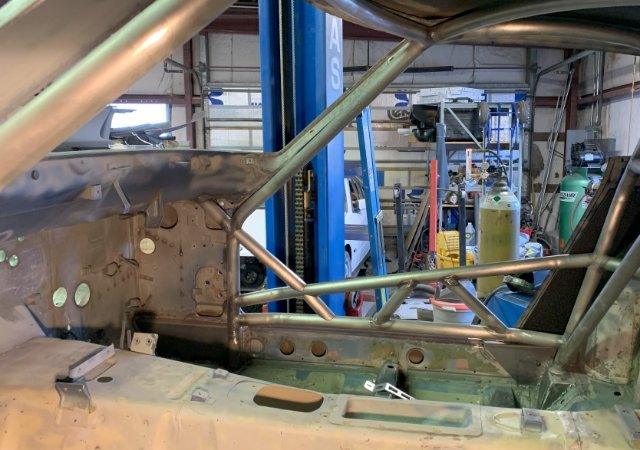
We finished the cage in early 2019. Hand mitered every tube. Hours and hours and hours...
2 points
-
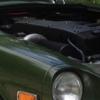
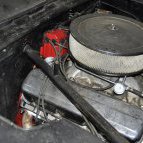
Reviving an old thread... I have a '77 318 Z. It's actually for sale right now but I'm not posting to sell it, just to show it to you folks.
2 points
-
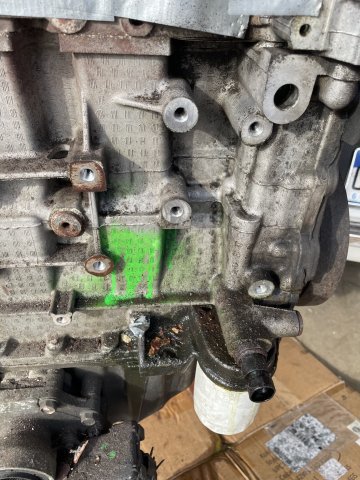
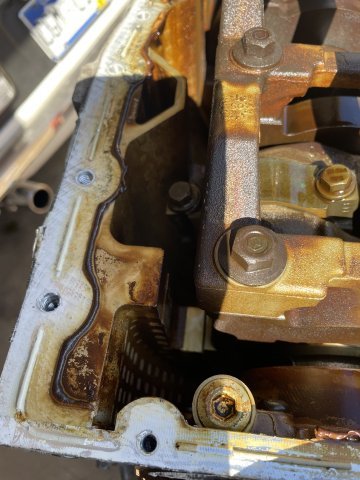
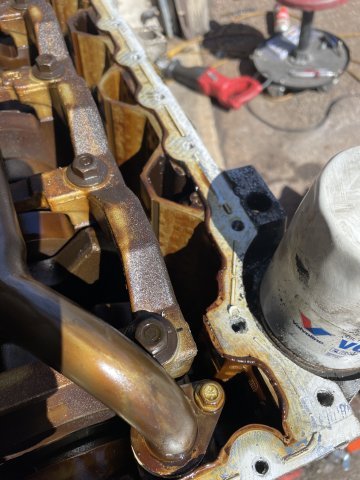
Take a really close look at those side seals as well. I did a rear main once on an L then got to do the job all over again along with the pan when I got the car back together realized the side seals were also leaking, masked by all the oil and years of grime on the rear of the block.2 points
-
Good update! This right here ^ is why I committed to keeping mine fully a street car and I'm glad I did, but part of me also wishes I could go race occasionally without being scared I'll ruin it haha2 points
-
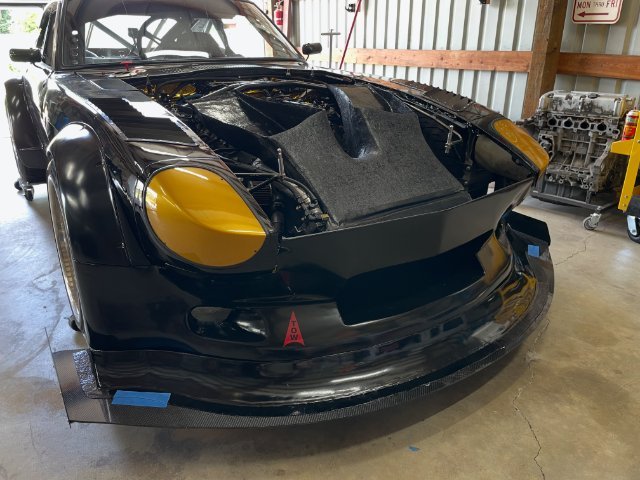
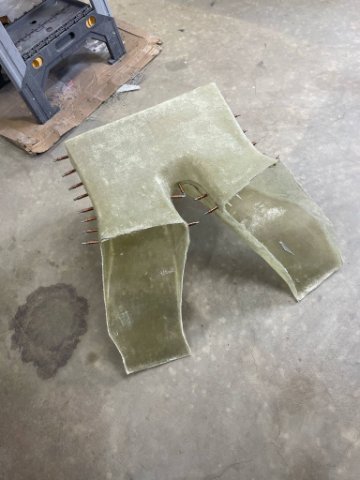
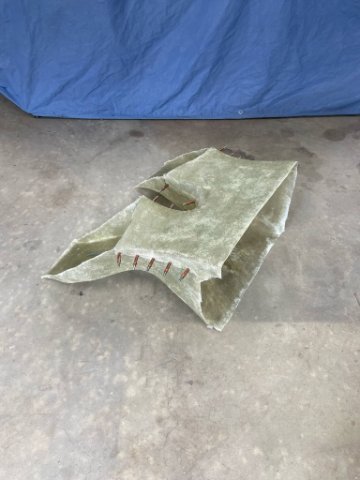
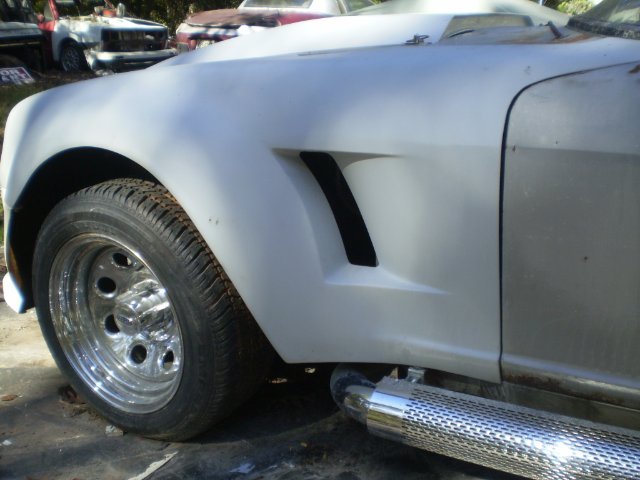
Howdy HybridZ! Seems like the trend, y'all get an update at the beginning of the year and at the end of the year! Might need to reframe my temporal perspective and do every 6 months. This was a slow year for the car and myself. First year since I've owned the car that it hasn't gone to any events! Wish I could say it was because I was doing a bunch of sweet mods and we're hitting the track hard next year, but that's not how it went. Overall, since 2020, the "smiles per $" has been way down, and I think I probably burnt myself out doing the V8 swap as quickly as I did it. Combined with the wreck, I felt like I really needed to step back, re-evaluate and take the year off to figure out how I want race cars to fit into my life! A big thing I've found is that since this just isn't a street car, and has no ability to be a street car, it's tough to get that "just gonna go drive the dang thing" and get excited about the project. Starting to find motivation again, which is nice, and I'm aiming for an event or two next year. That's not to say I didn't get ANY mods done this year! I got the Haltech 2500 into the car, and got it tuned. That was a fun small project, with a bigger price tag, but I'm hoping that it solves a lot of problems moving forward. It did reveal that some of the problems with this current engine are just that. The current motor is a L33 aluminum 5.3, but it's just not making great power. Compression and all that looks fine, but it's only putting down 330hp, when we'd expect closer to 400. Putting that out of my mind for now, and going to run it like this. A new engine is just not in the budget right now. I also did quite a bit of work on the front suspension. I've been running the Apex Engineered arms up front, and have been happy with them. Full disclosure, Ohm is a supporter of the build, you may have seen the car on his page! After running a handful of events, I felt like I had 2 problems to resolve. 1) I needed more track width. I have a 1" spacer in the front, and it's just another thing to check on the car, also while making scrub radius work. 2) I needed a beefier ball joint. The Apex arms use a factory sized ball joint, that is a better material, but after running a few track events, getting up on curbs and getting pretty spicy, they were just not up to the task. Bigger is better, so I went and upgraded to a Howe Racing TA2 front control arm, with their thread in ball joint. The arm is 2" longer than factory, and allows the use of an improved ball joint, the design of which is derived from a 3/4 ton truck. I feel pretty good about this mod! I got some work done on managing airflow on the front of the car. With the freshly chopped fenders, I needed a way to get air out of the wheel well, and made up some Kevlar pieces to help with that. I also made a plug for a radiator extractor vent that will help direct air out the hood, rather than spilling around inside the engine bay. I'll need to snag one more fitting for the dry sump, but otherwise, things are looking in good shape. I'm excited to let the car be "done" for a little bit this year.2 points