Search the Community
Showing results for tags '280zx'.
-
Hey Zers! Well its come time to turn my stroker 280zx into a stroker turbo..right now i have 10:1 CR. I plan to install forged J.E Dished pistons and a 2.5mm HG. this should bring my comp down to a low enough leval to turbo charge.my biggest concern is going with an aftermarket EFI..im running tripple 44 mikunis right now.im thinking of using the N42 non-EGR intake manifold and a 70mm TB.greedy boost controller.Megasquirt 2,MSD 6-2.t3/t4 turbo,720cc injectors.blow off valve/waste gate etc..im wondering what sensors are needed to use megasquirt for my fuel control only.am i able to use MS for fuel only and use MSD 6 for my spark control? if this works,can someone please give me a short write up as to how to go about setting this up.im pretty new to EFI as i grew up with carbs (and im 21). Please,any insight on this would be great. P.S- I plan to run 17-20lb boost MAX! thanks~ Randall
-
Hi guys, So right now I'm looking to buy a 280zx, and I found a 1983 280zx turbo that I would like to buy. However, the car was originally bought in a Colorado dealership in 83 and hasn't been registered in California, where I live. So I'll have to get the car to pass California smog. What I'm wondering is what differences there are between California and non-California 280zx's, and whether or not you think I stand a chance at passing smog without going through lots of modifications. Any help would be great, thanks.
-
I am in need of a clean 280zx exhaust manifold for the P79 head. A stud broke and I have clamped down that side just to be able to drive it short distances but it may have a small leak causing excessive noise that makes it hard to listen for any unwanted sounds during my engine break-in period. Needs to be leak free and broken stud free. I am open to headers if you can cut a good deal on them as long as they relatively new, come with adapter, and are from MSA's newer batches of headers, since I know a few Z guys in my area who bought them when they first came out and found them to be less than satisfactory (apparently MSA did some work and updated their product). I will pay shipping as well on any purchases.
-
Hey Zers, My Dad passed a little over a year ago and in doing so, told me to take care of his old Z. its an 82 280zx n/a. well,i didn't no to much about cars at the time but i know he said to keep the engine that was in it (didn't have to be stock). so after much reading and tons of "old Mechanic" advice,iv since rebuilt the entire engine. here is what i have done "surprisingly my self" so far.... Head (work done by Rebello) - N42 head, bigger valves,port,polished,some work done to the galleys for coolant and oil. Valve Train - Custom cam 512 Lift, 300 Duration, Stiff springs, new Rocker Arms/Lash pads.new timing sprocket/chain. Block- 0.60 over,JE Flat Top Pistons,Lightened and balanced crankshaft,new Barrings. CR- just at or slightly under 11:1 on 93 Octane, Timing *19 Int and *38 Full at WOT. (No Ping!) 220-240 psi Ignition- Modified Distributor (New Dizzy and Dizzy shaft), Full MSD 6AL-2 Ignition with Blaster-2 Coil Intake- Triple 44 Mikuni Carburetors Exhaust- MSA 3-2-1 Headers into a 2.75 inch,no Cat,Dynojet Ultra flow muffler. Drive Train- Auto to N/A 1983 5 speed,Aluminum flywheel/Drive-shaft, R200 4.11 Differential from 200sx Other- Turbo oil pump,new alternator, new battery,New *Champion 4 core Aluminum Radiator, Tires- Rear : 245-60-14 fronts are 205-60-14 -- Well that's pretty much it.i gutted the dash,all A/C HVAC stuff,no spare tire,12lb race seats,11lb CF hood, Custom Aluminum bumpers (look stock),all digital oil,fuel.air ratio,volts gauges.Steel pillar louvers from 81' ZX as well as the 130mph speedo. I havent had it on a dyno yet for max tuning or ran the track but it takes my buddies mildly modified 86' FoxBody Stang all day until i hit 135-140 mph,then wind resistance goes to s**t..but i can max out my speed around 6,800 in 5th gear,7,000 with some tuning im sure. 0-60 times are crazy,1st hits 38mph like intantly and 2nd hits 58mph not much slower,3rd hits around 80 pretty fast,4th is like my OLD 3rd but tops around 110-115 (speedo isnt to accurate around 100 so) 5th pulls nice all the way to redline. Post comments and let me know what you think. Estamated HP? P.S- Going from my auto gear of 3.54 to the 200sx diffy of 4.11 was an incredibly large difference in acceleration,car sounds like a F*****g Indie car lol! also vary streetable with the big cam and lower geared diff. wasn't to fun on the street with the 3.54 and that cam profile.
-
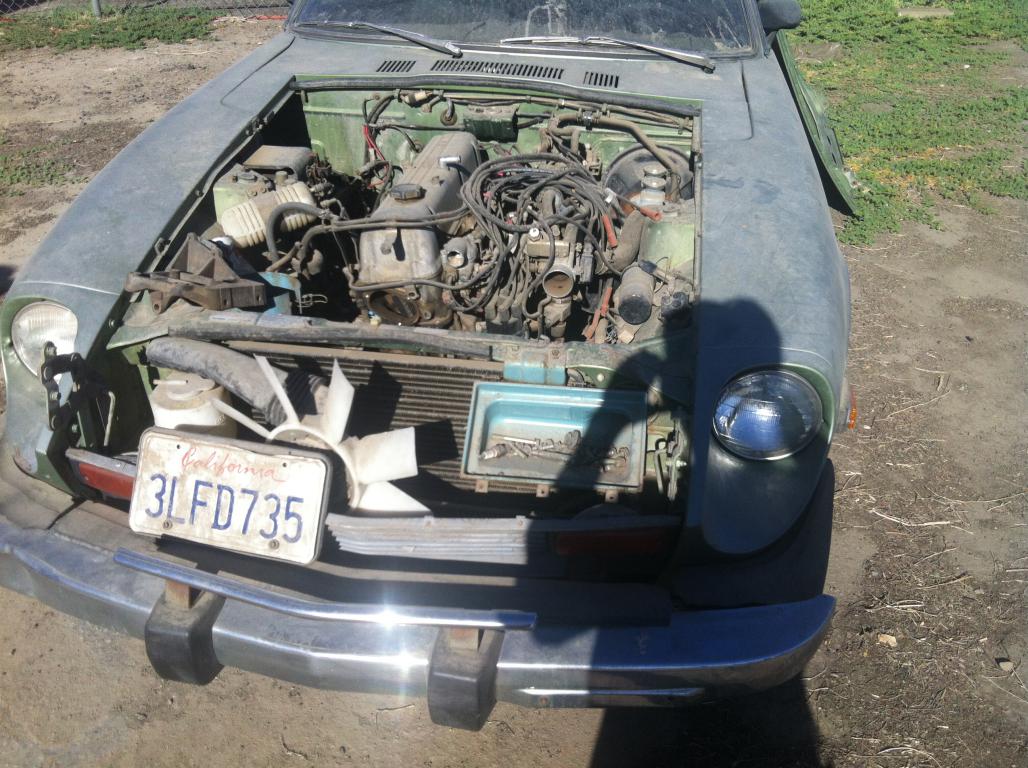
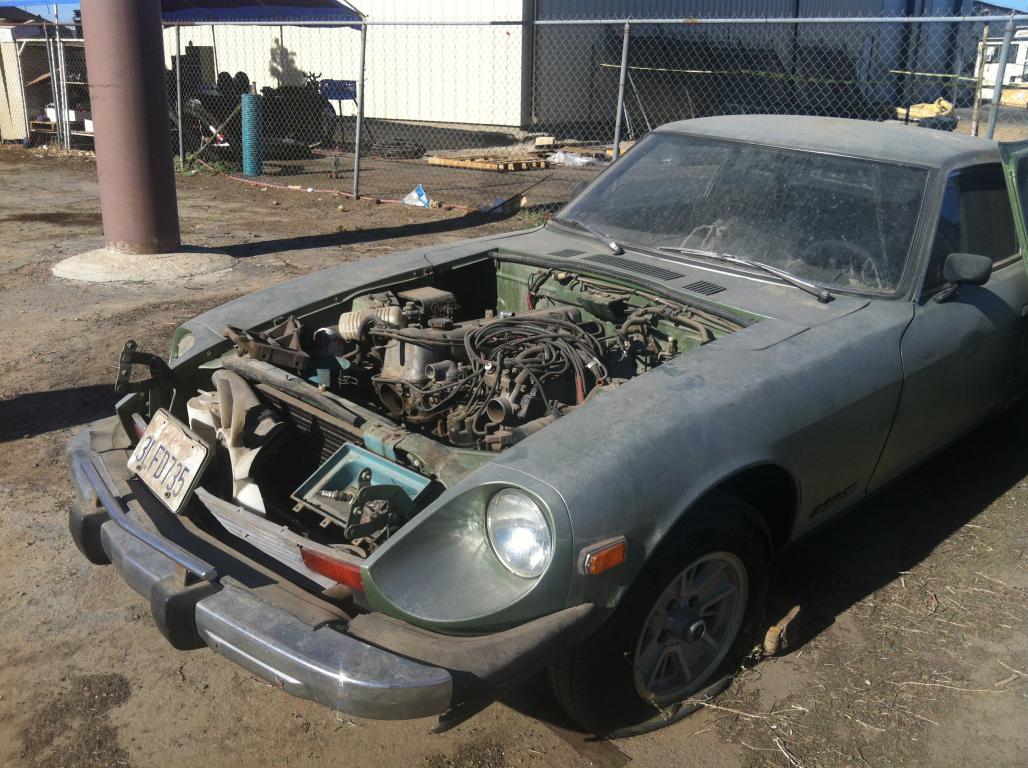
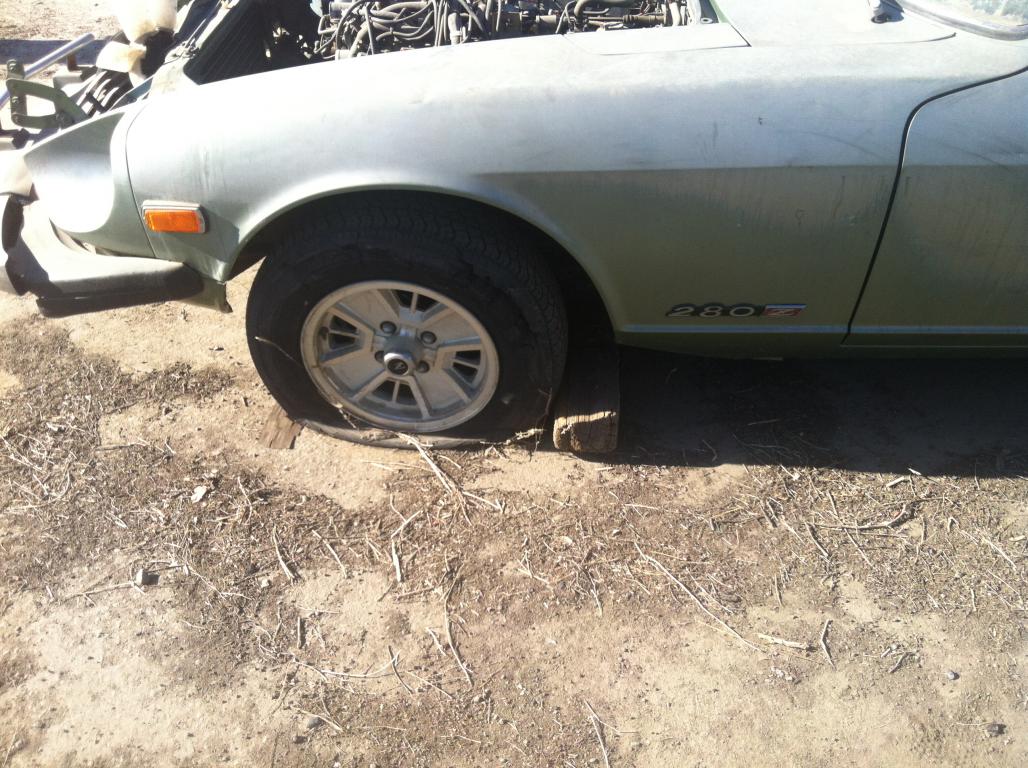
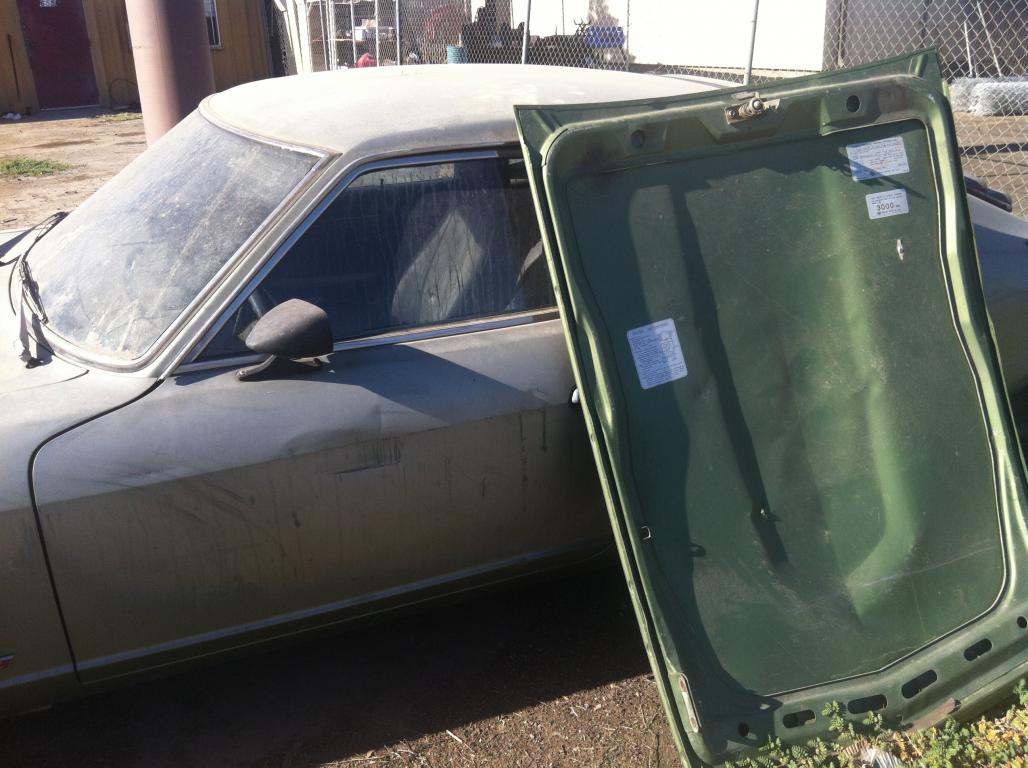
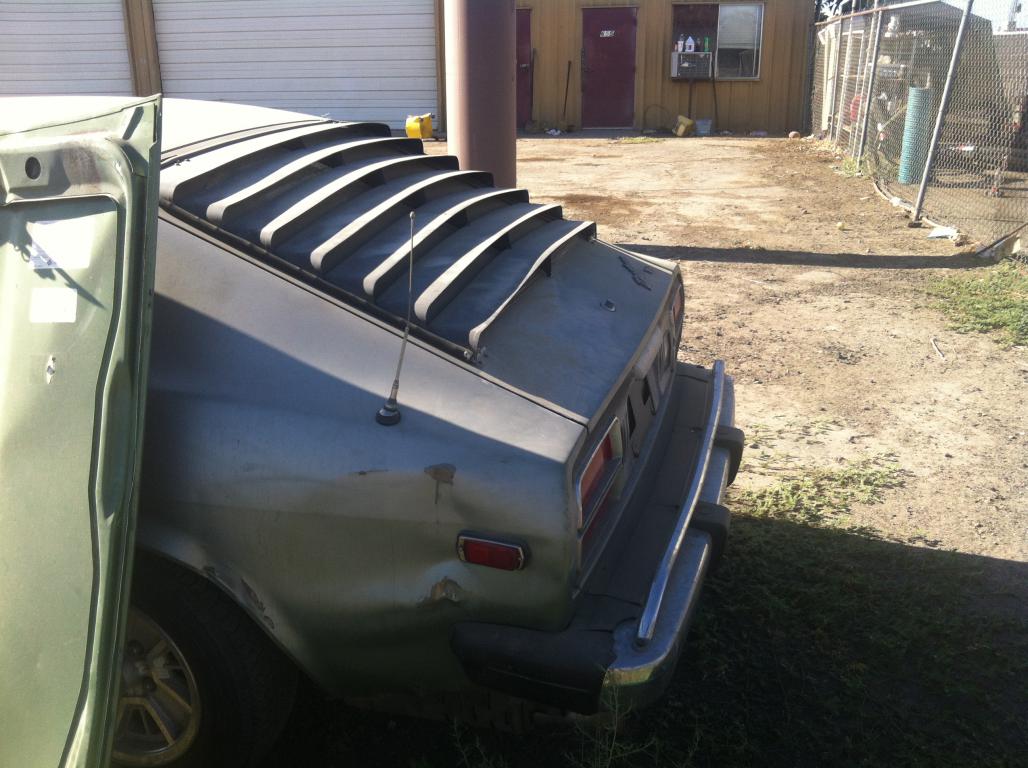
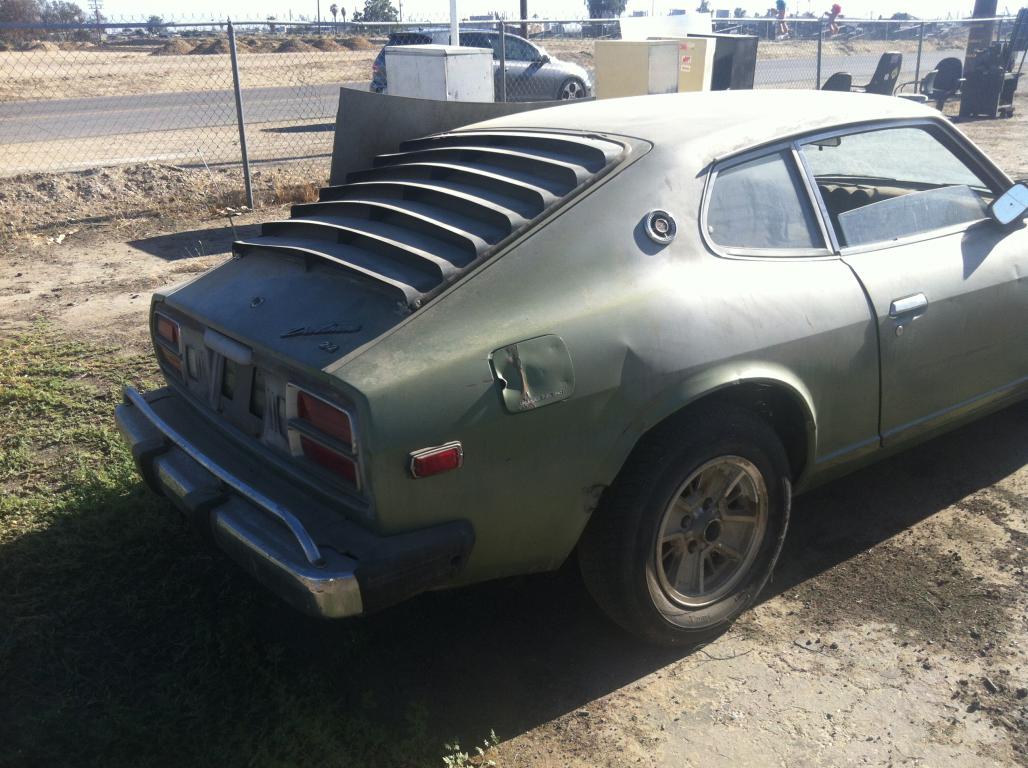
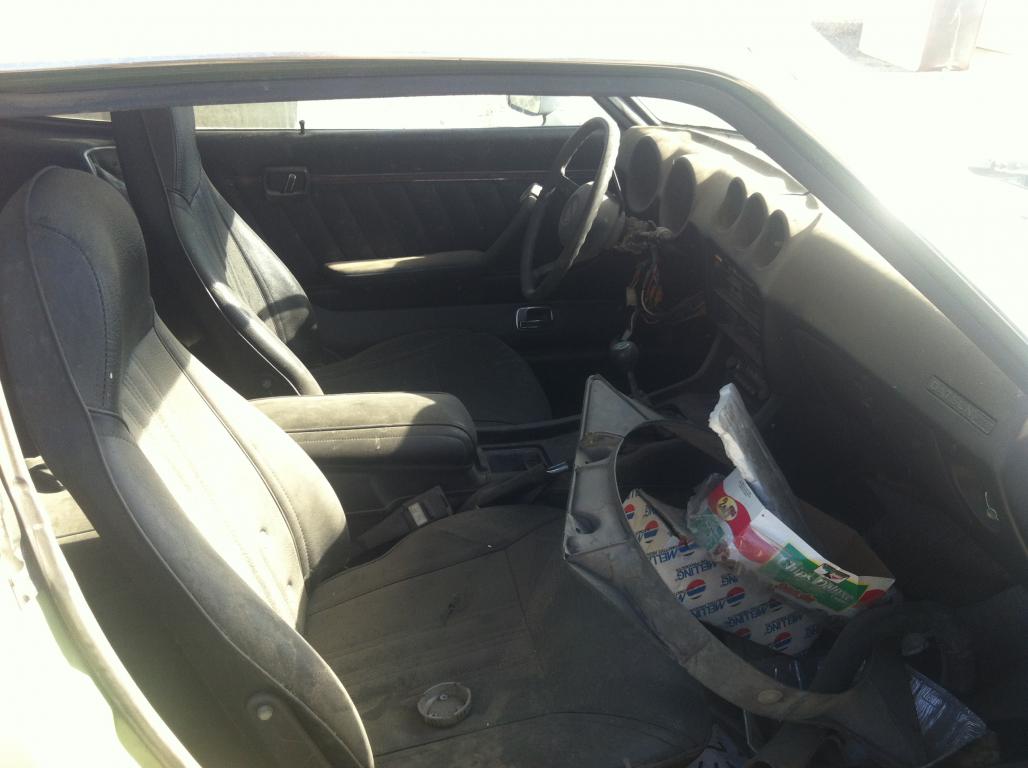
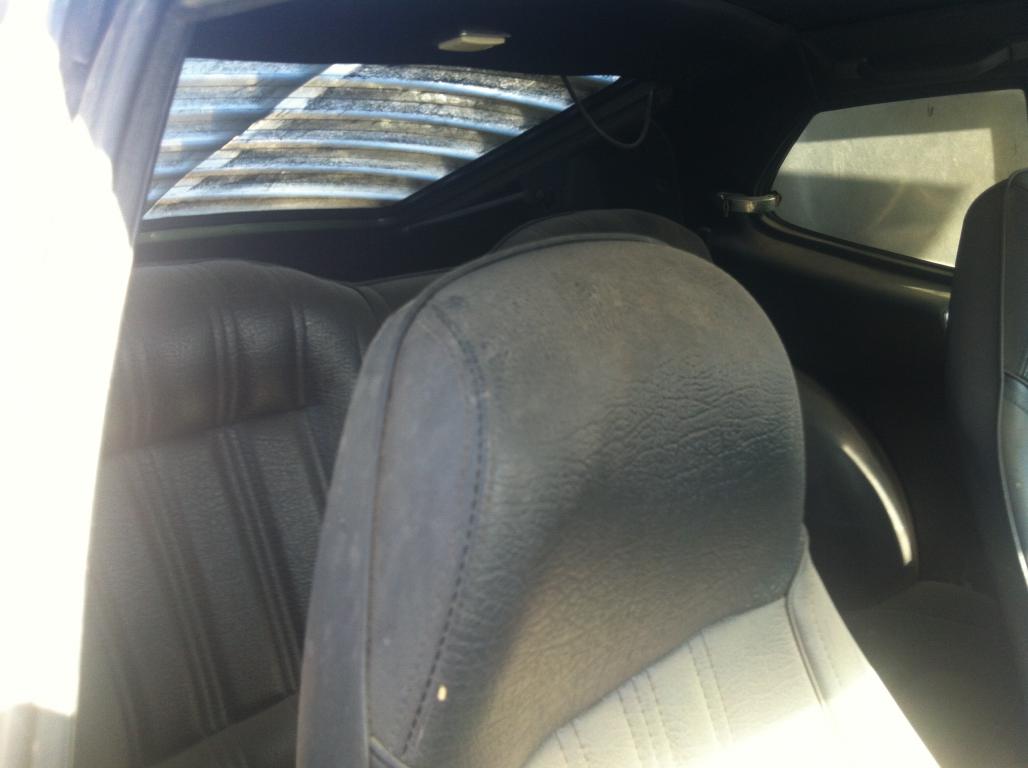
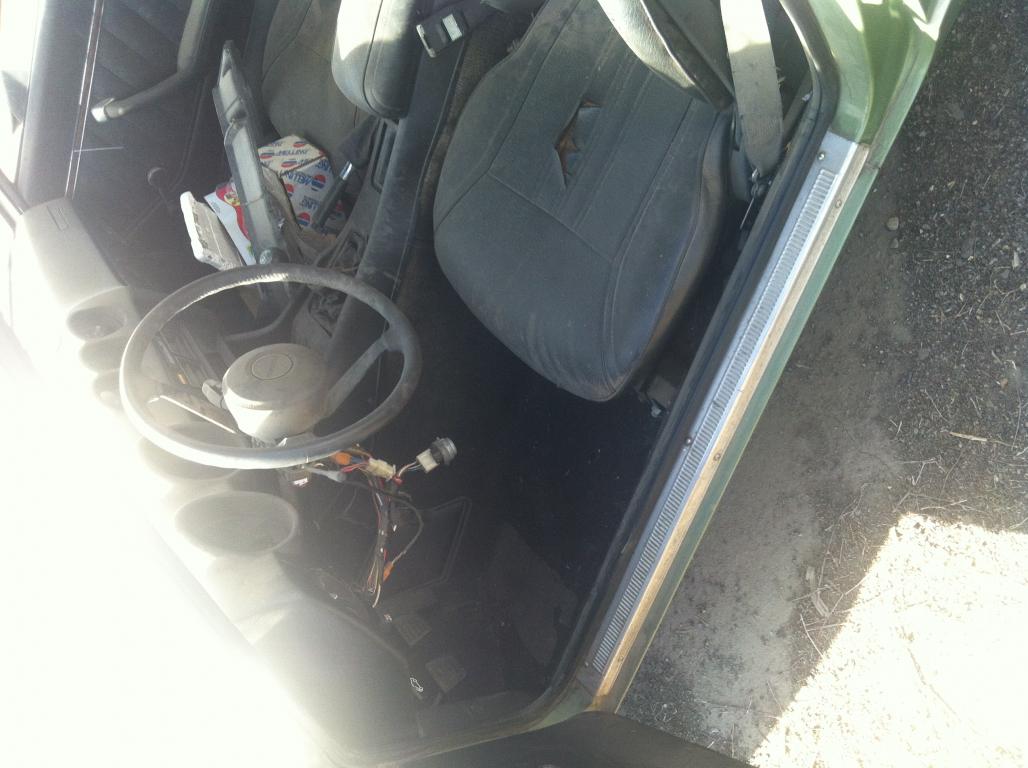
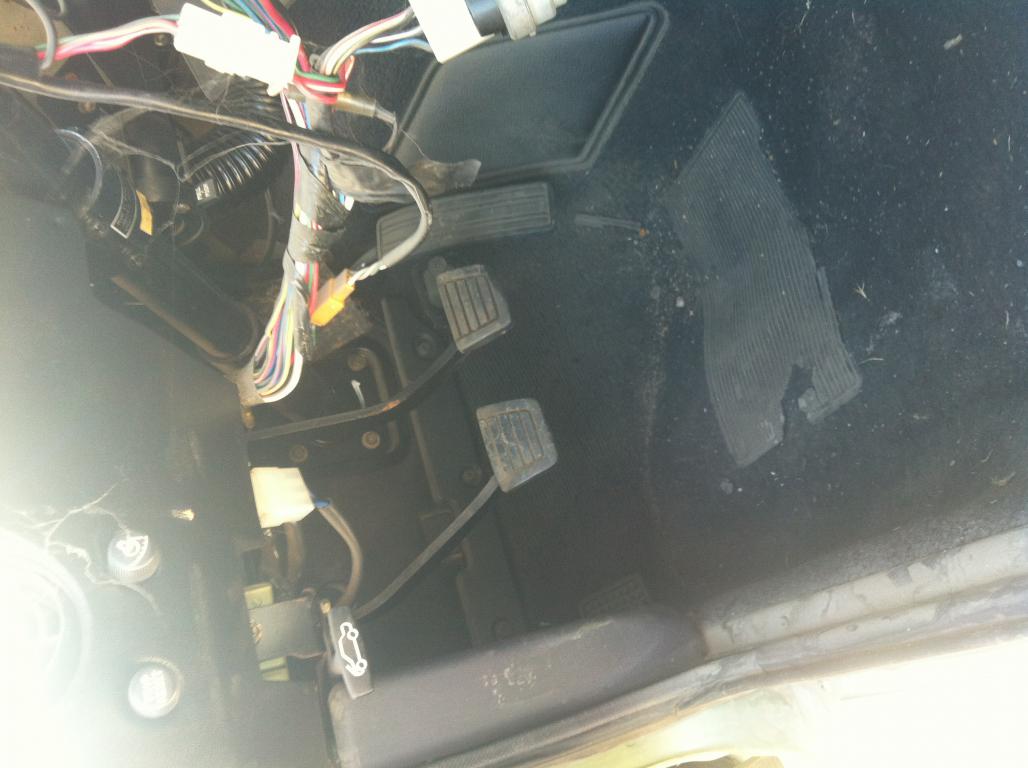
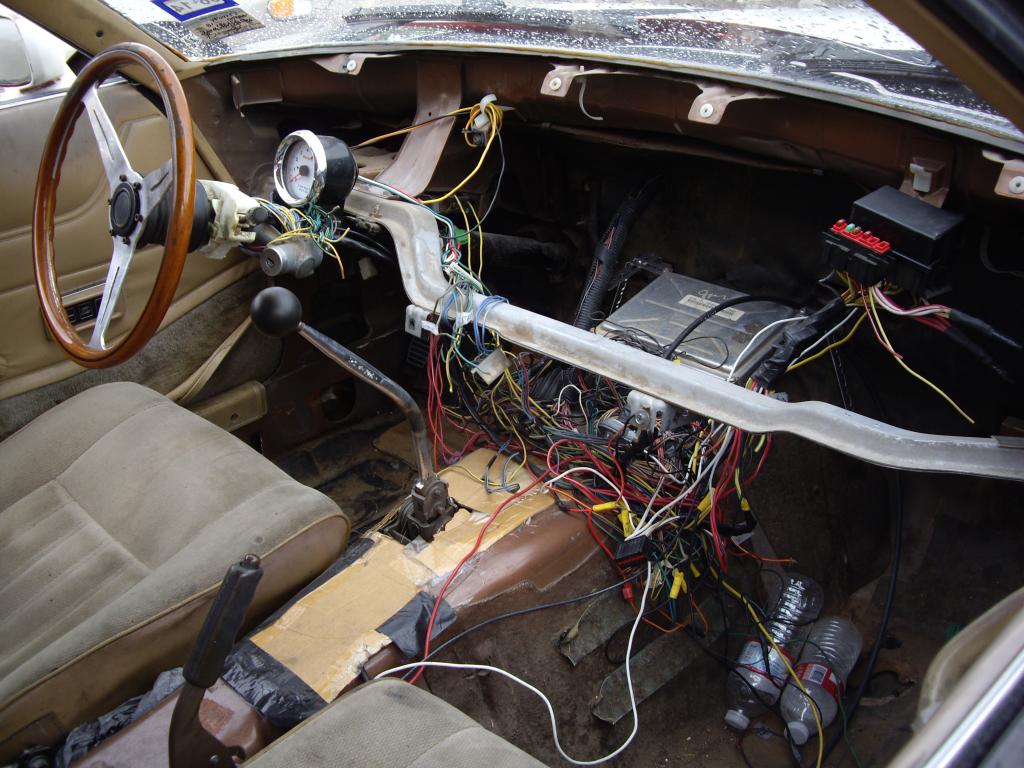
 Hey, new to this forum, so sorry if i do not post this in the correct place. I just purchased a 280zx 2+2 that is in pretty poor condition. No rust or anything, but the whole interior was shot, and no keys to the vehicle. I also believe that all the wiring was shot on it. So I started ripping out all the interior upholstery, which is now finished. I don't have a whole lot of money so now I"m posed with the question: Rebuild the stock L28ET or buy an engine to swap into it. + So that's what I am wondering. I'm not that good with engines but I'm willing to learn, and I'm very excited to see what you guys have to say on this. Also, this 280 is going to be a drift car, so there is no intention on putting it on the street, or having things that are street legal on it. I'm hoping to get a running turbo charged engine in it soon, but for now I'm working on interior safety and cosmetics until i get some help on the engine plan. Please help! It will be much appreciated. Update 7/5/2014 : full car is gutted and I've been engine shopping. I don't have tons of money but everyone who doesn't say drop a 350 in it says that the rb26det is the way to go, so its looking like that. Although, i think my engine is salvage able i just don't know how to build it back up! so here are 10 photos from when i first bought the car, ill try to put all of 'em in there. Still, no replies and I'm struggling here guys. Please help.
-
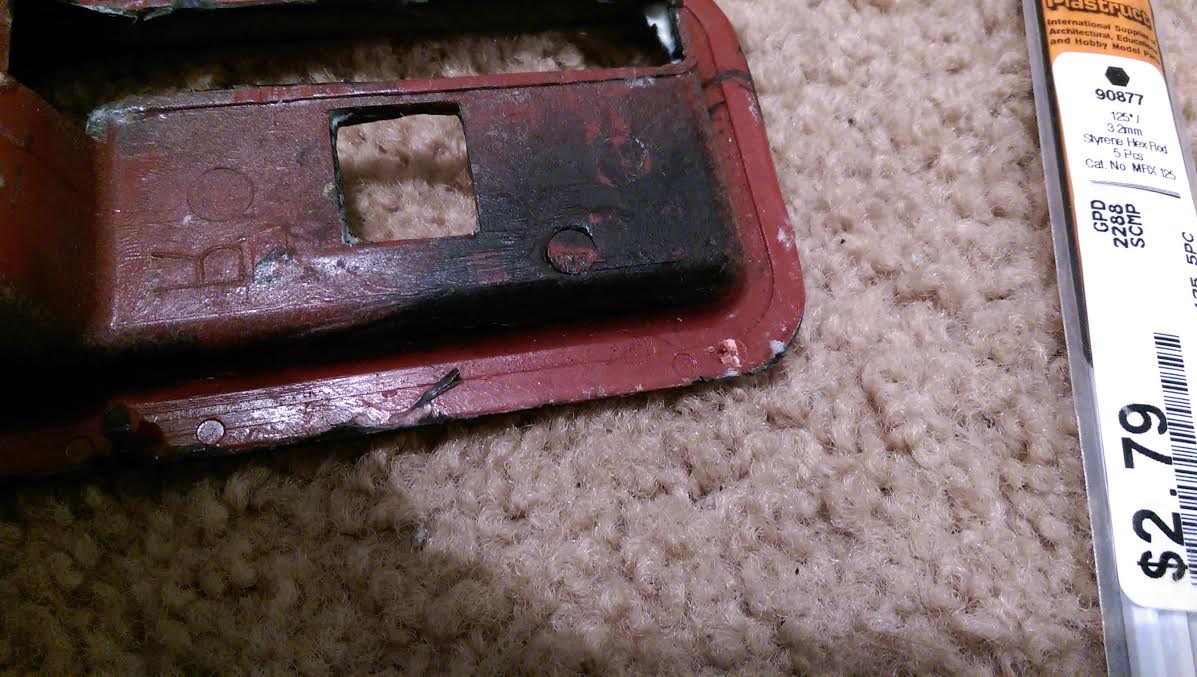
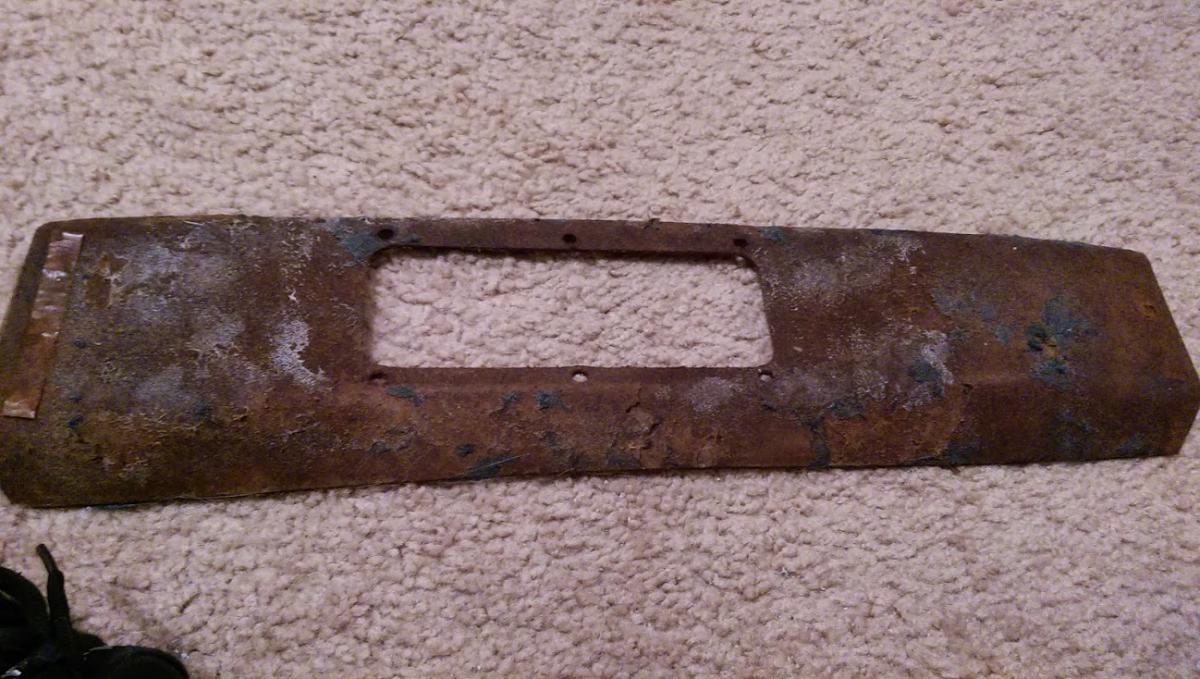
I am trying to restore a 1979 280ZX coupe. I am looking for the apron and grill pieces that that go below the front bumper on the 280zx. The people who owned it before me put an aftermarket piece on it and I want to make it original. I am also looking for a The part numbers are below new oem master cylinder or a rebuild kit. The part numbers are listed below: Master Cylinder: 46010-P6500 Grill: 62300-P7101 Apron: 62652-P7100 Apron Sides: LH 62613-P7100 RH 62612-P7100
-
Hey all, I was reading a post from G.I.Jonas from 2007 about a vg30dett swap into a 280 and I was reading through it trying to gather as much info about the swap before I started posting asking about this. So I have a 79 280zx and an 86 300zx, the 300 is wrecked frame damage wont be fixed ever again but I'm lucky cause the engine didn't take any damage aside from the radiator. blocks fine everything's golden on it. I have a real tight budget but a lot of willing people to help me with this build with a lot of skills, really skilled welders that are close friends and do good work for ridiculously cheap. But anyhow I wanted to originally boost on my l28 but I found out I have the n42 block and n47 head and that not the build I wanted, I wanted the f54 and p90a build but didn't have the stuff. Now I came up with crazy idea that everyone agreed they wanted to help me with, taking everything I can from my wrecked 300 and throwing it into the 280. So on that note the post from gi was on a vg30dett I have the vg30et in my 300 low miles strong engine and trans, I haven't done a swap like this before so I wanted to ask everyone on here what they think I need to do, G.Is post didn't have much info just picture and explanations not what he needed to change etc. I read that the stock steering needed to be changed cause it wont work but that's about it. I got someone who can do the custom mounts but what I'm trying to figure out is what all I need to do. This is what I'm assuming. Custom Mounts Wiring harness Steering Differential Axels? Transmission mounts? Ecu from 300 Custom driveshaft? or can I use the one off the 300? I'm just shooting to complete the swap on what motor, trans, parts I have off my 300 not shooting for performance build yet just getting the swap done. What else should I look into? Where should I start? What should I keep in mind when planning this out. Like I said I got the people to help and I have the tools. I'm also thinking I need to figure the measurements for creating the mounts. Any other ideas on what I should do. If someone could reply with something to help me out that would be awesome. Thank you all!
-
Earlier this week at work someone showed me this 280zx police car transformer: http://www.amazon.com/Takara-Transformers-Masterpiece-Nissan-Fairlady/dp/B00FFXBJ66/ref=pd_bxgy_t_img_z I don't know why I never knew about them before. (I work at a toy company) Upon further investigation they also have a couple variations including a bob sharp racing livery. There are 3 in total and I may have to acquire them all at some point. The price is a bit steep but after holding them they are noticeably top notch. Here are the other two: http://www.amazon.com/Master-Piece-MP-Streak-Completed/dp/B00BQRKX76/ref=pd_bxgy_t_img_y http://www.amazon.com/Takara-Transformers-Masterpieces-MP-19-Smokescreen/dp/B00DDE09AQ/ref=pd_bxgy_t_img_y Complete with fender mirrors!
-
Hello all, My name is Allen, I am in need of a transmission for my 78 280z, and I am located in NC.I would like to find a '80 280zx 5 speed, but anything (other than a 4 speed) that will fit in the car and maybe have a bit better gearing would be lovely. Any help would be appreciated! Allen G.
-
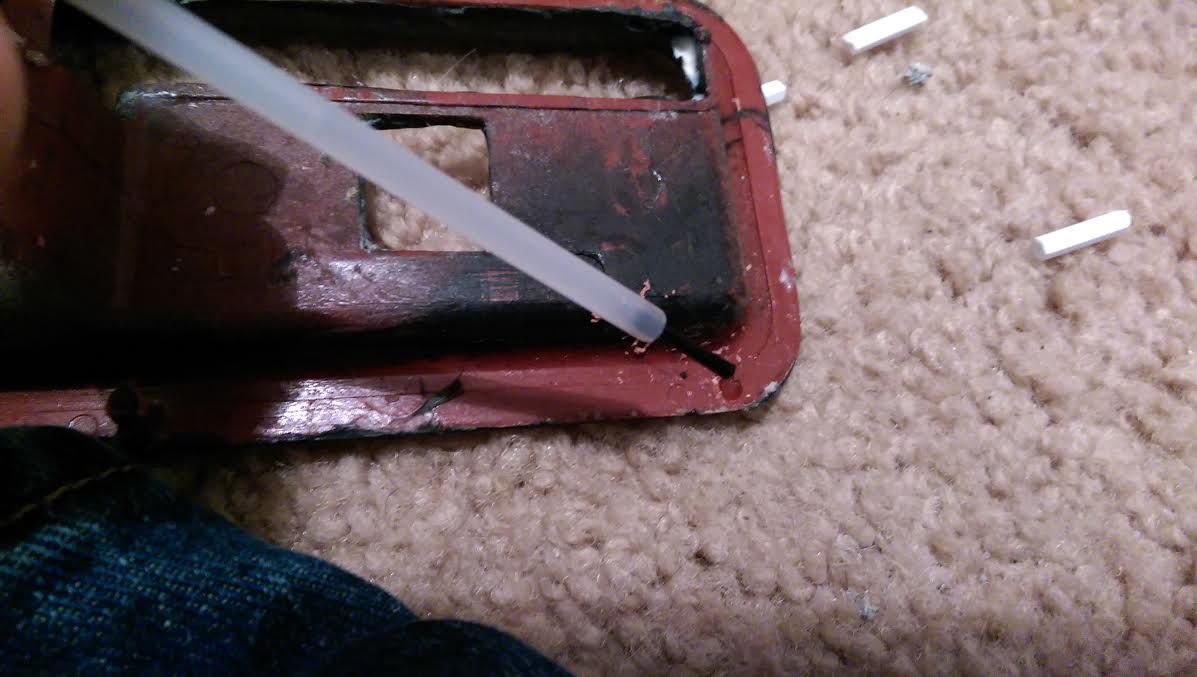
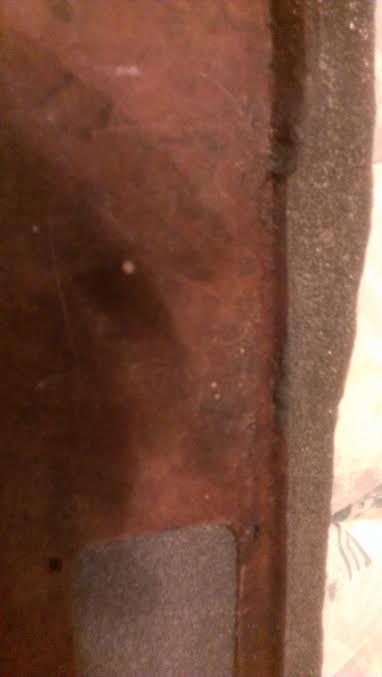
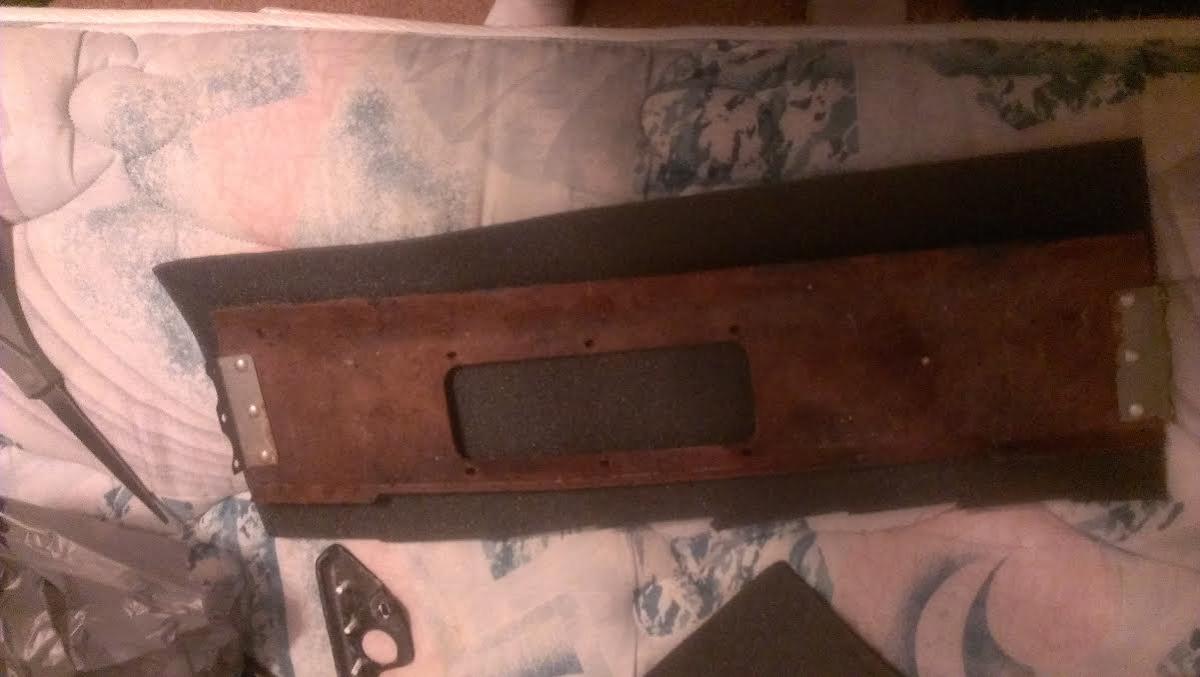
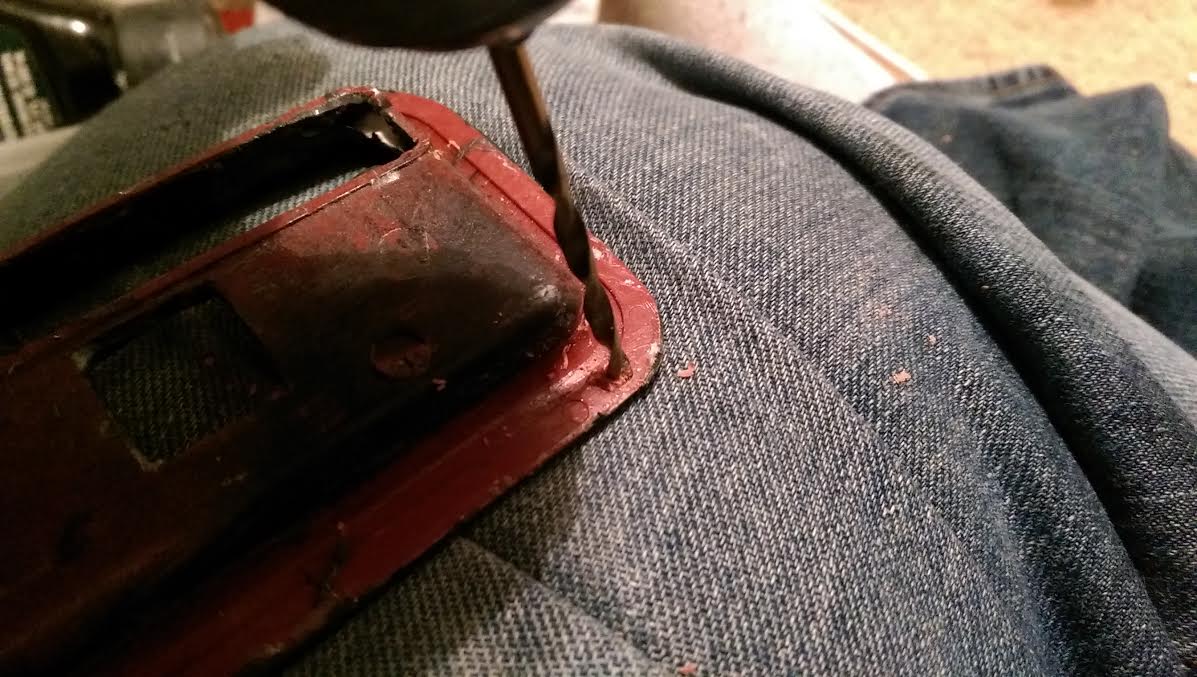
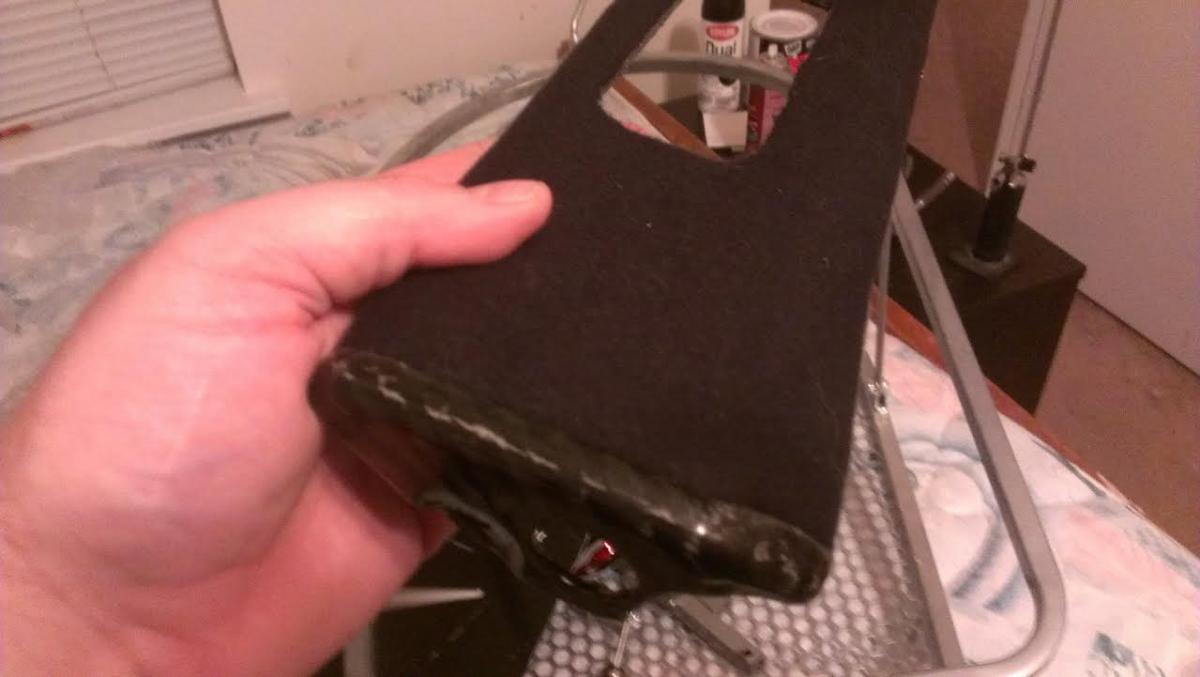
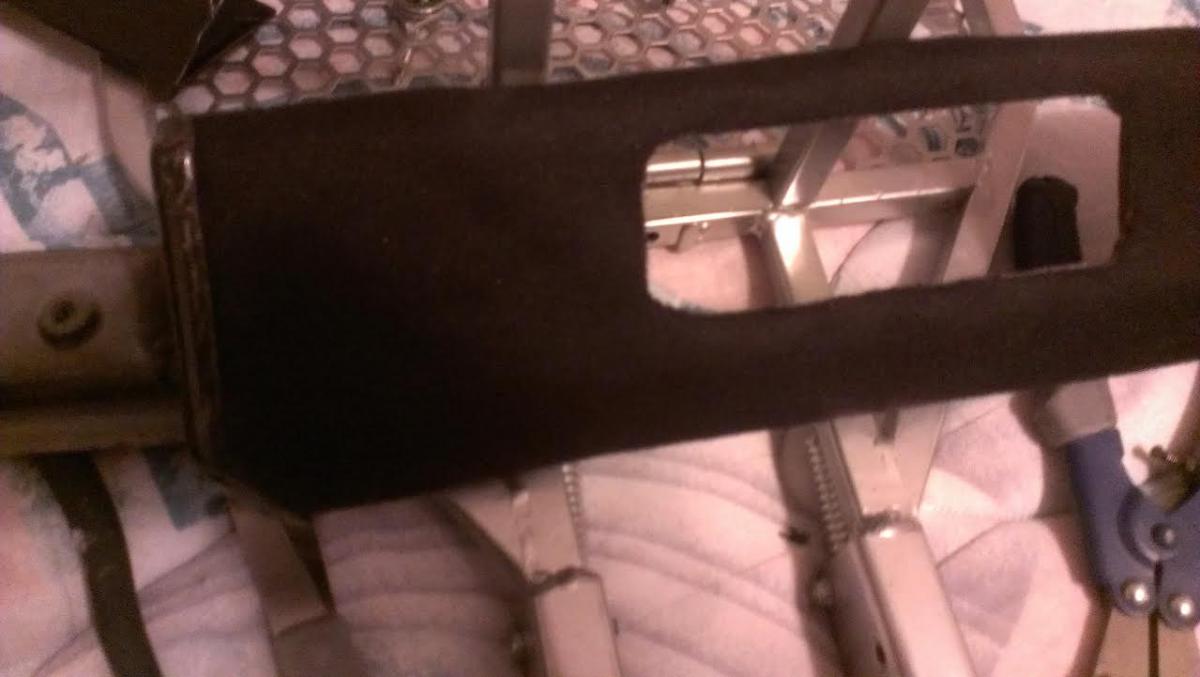
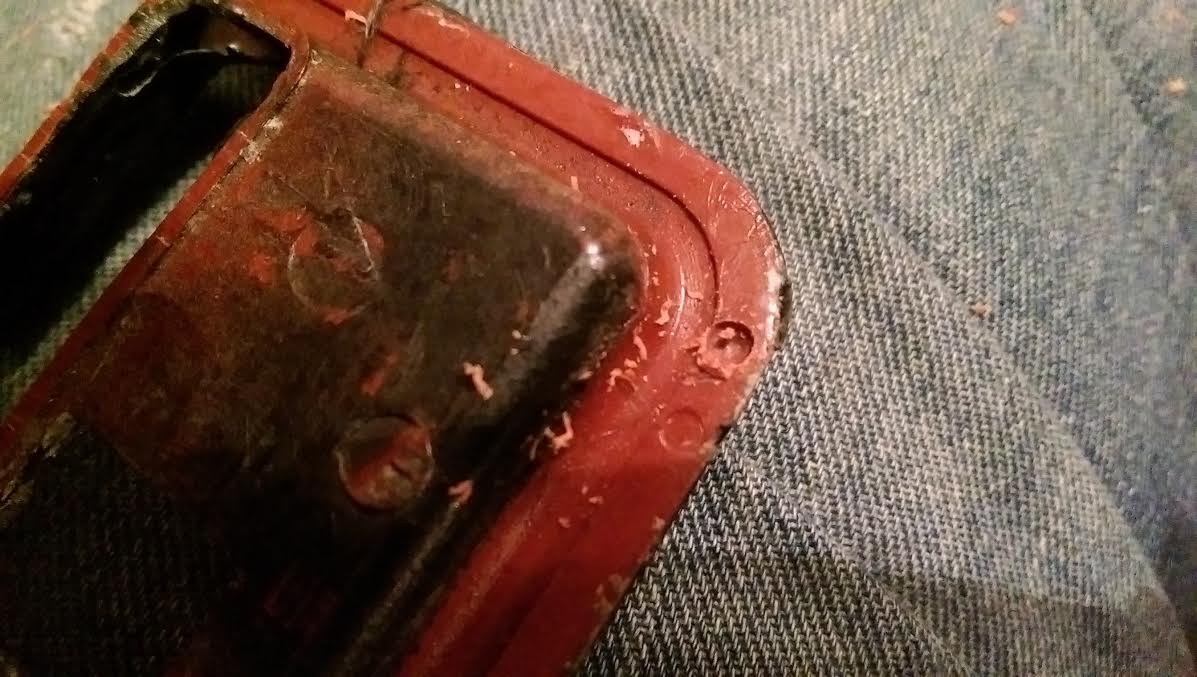
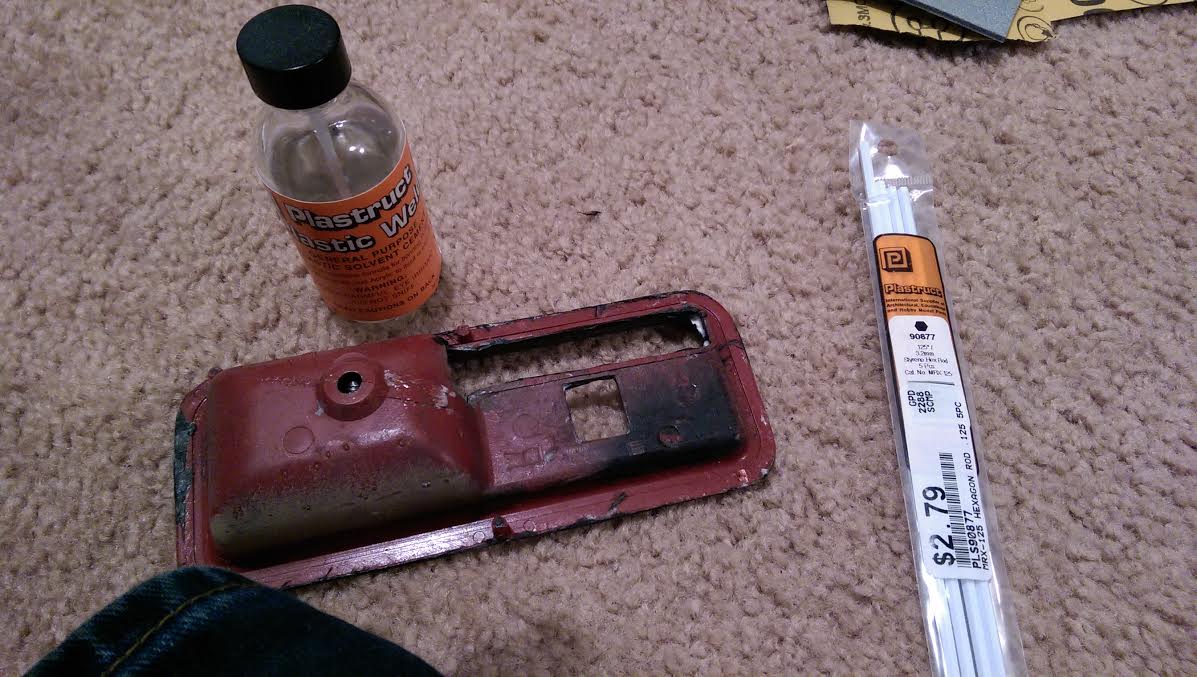
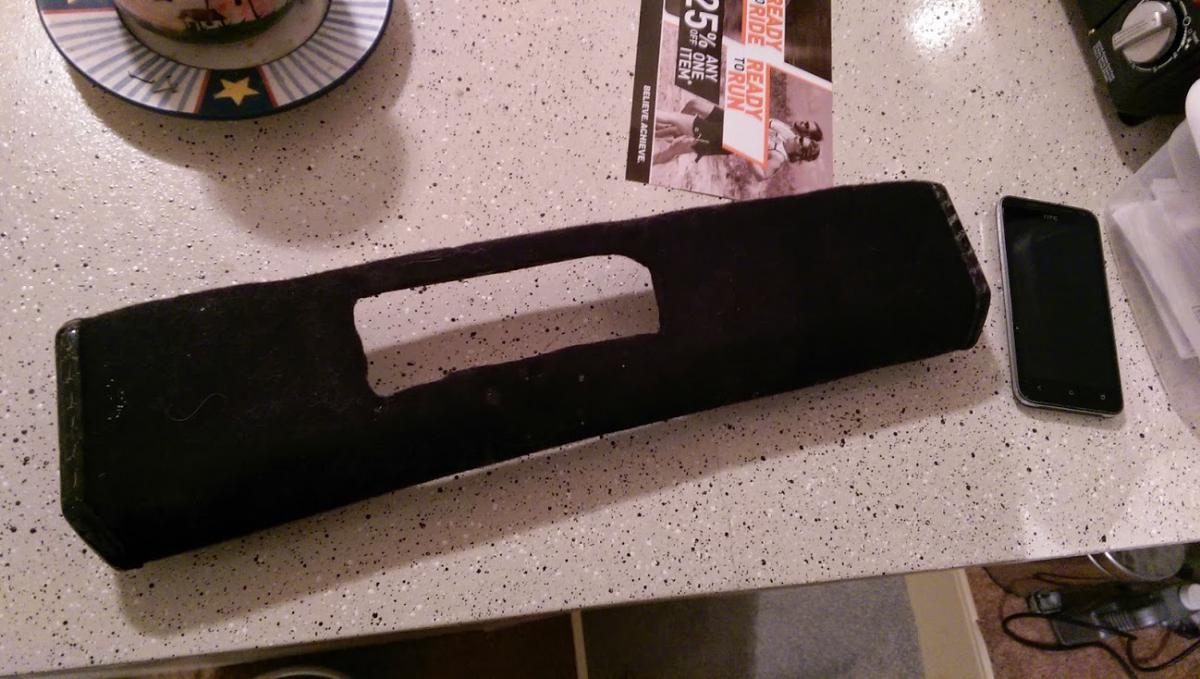
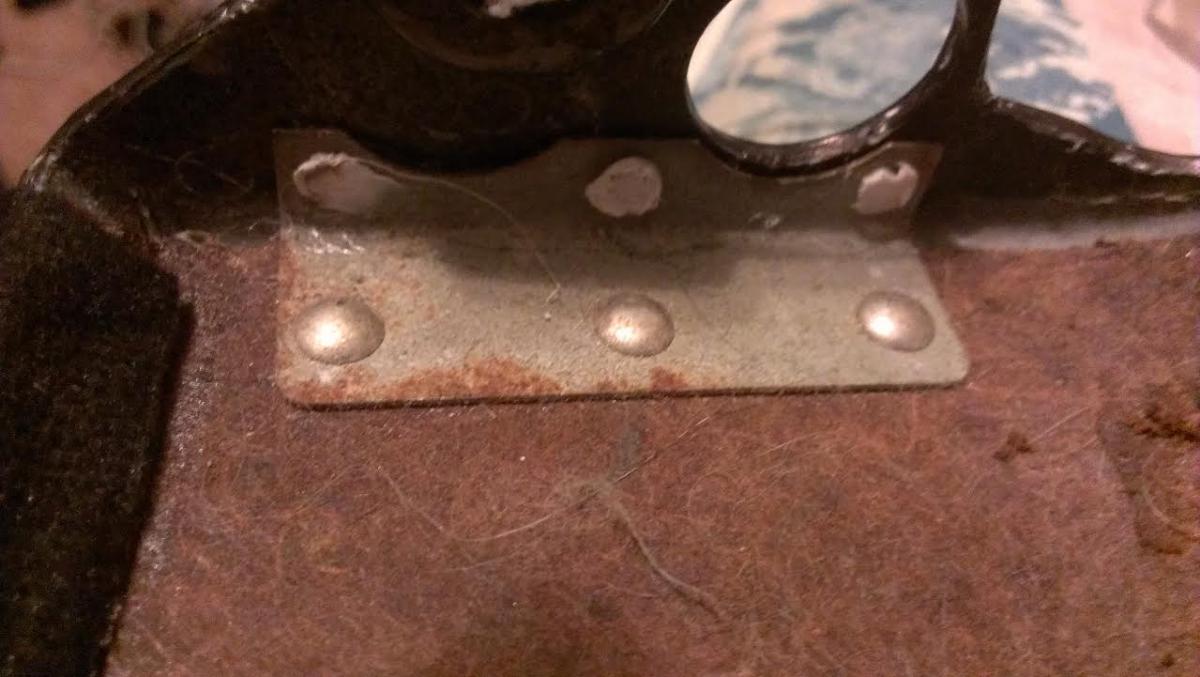
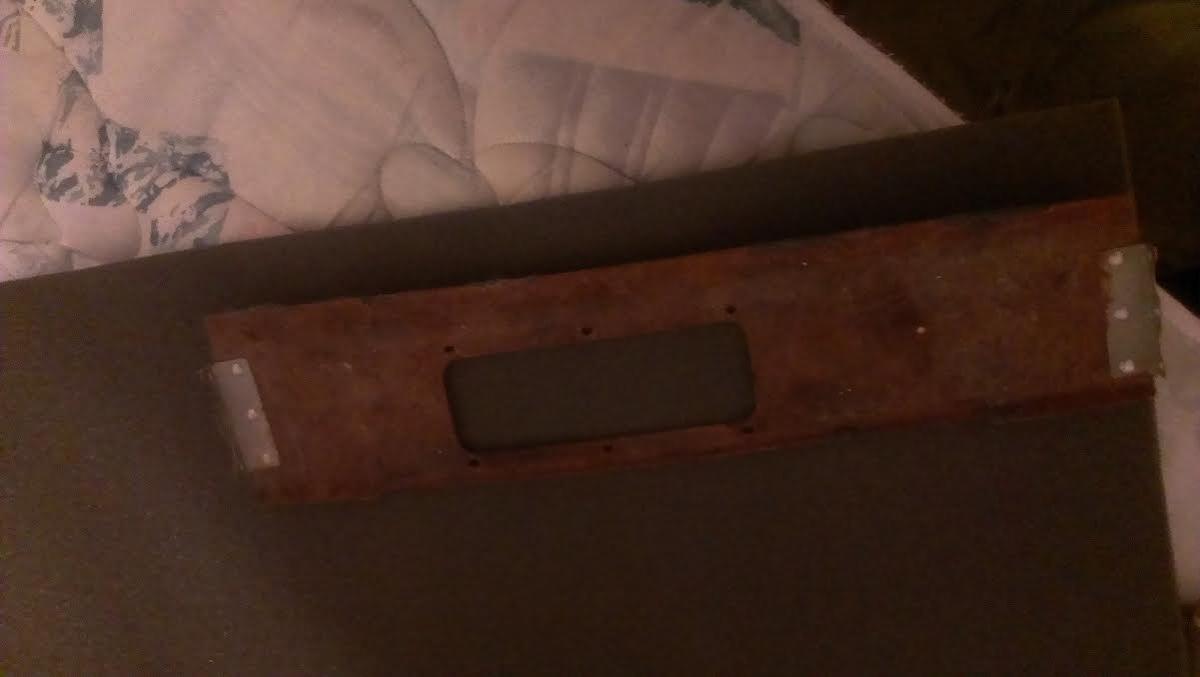
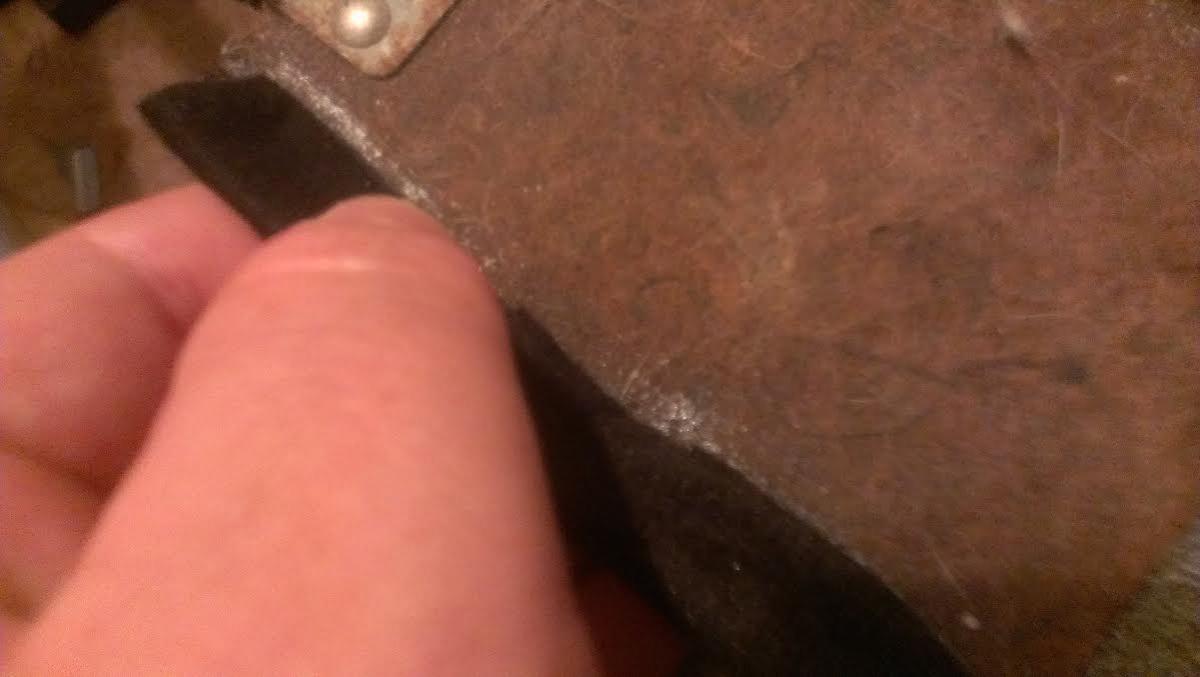
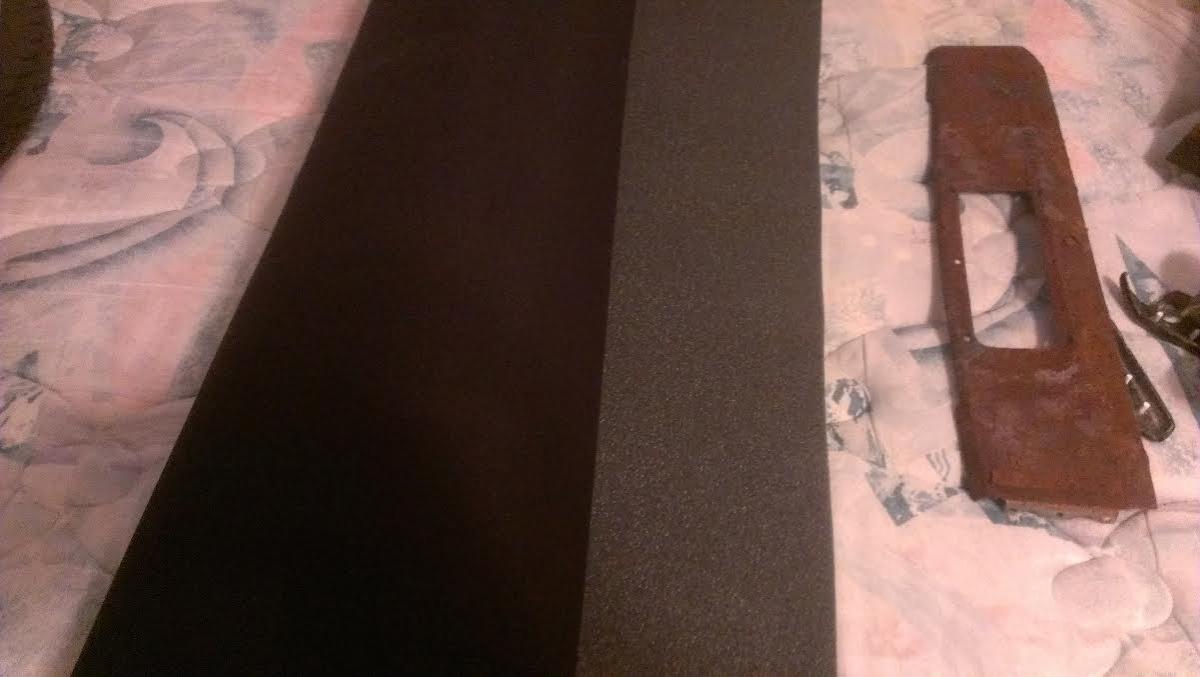
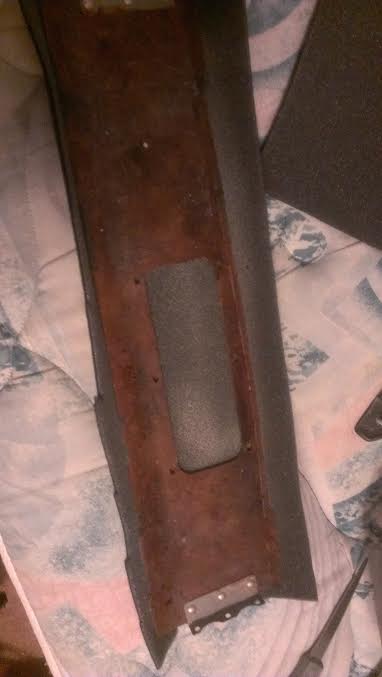
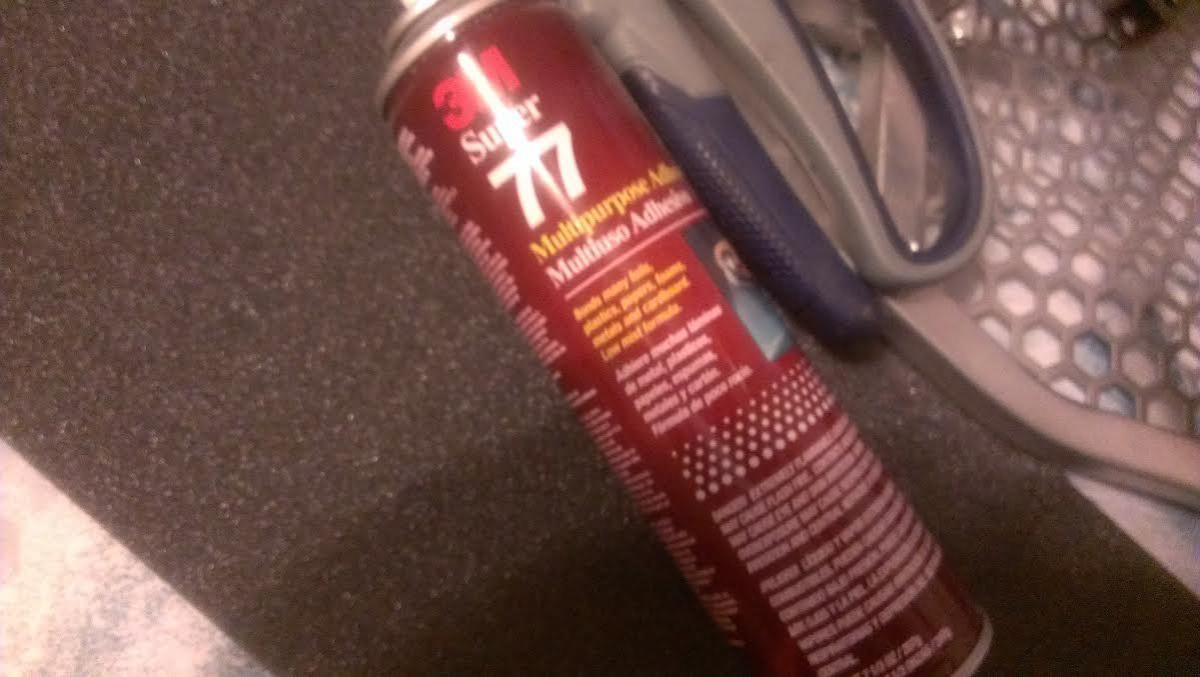
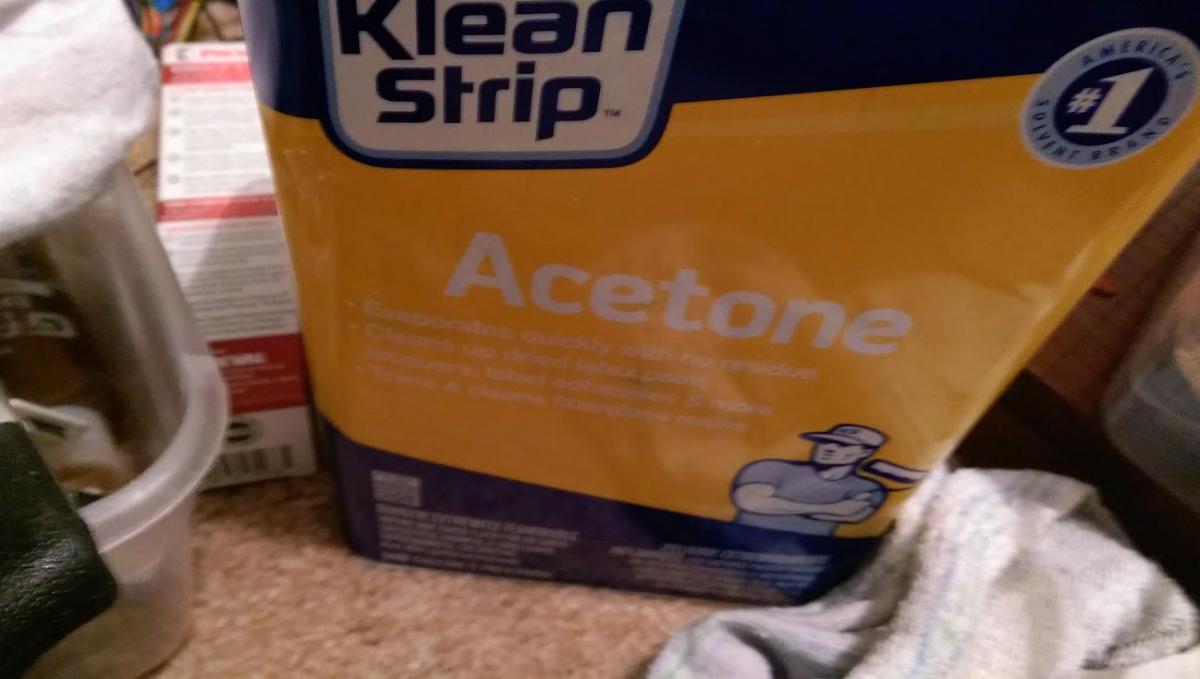
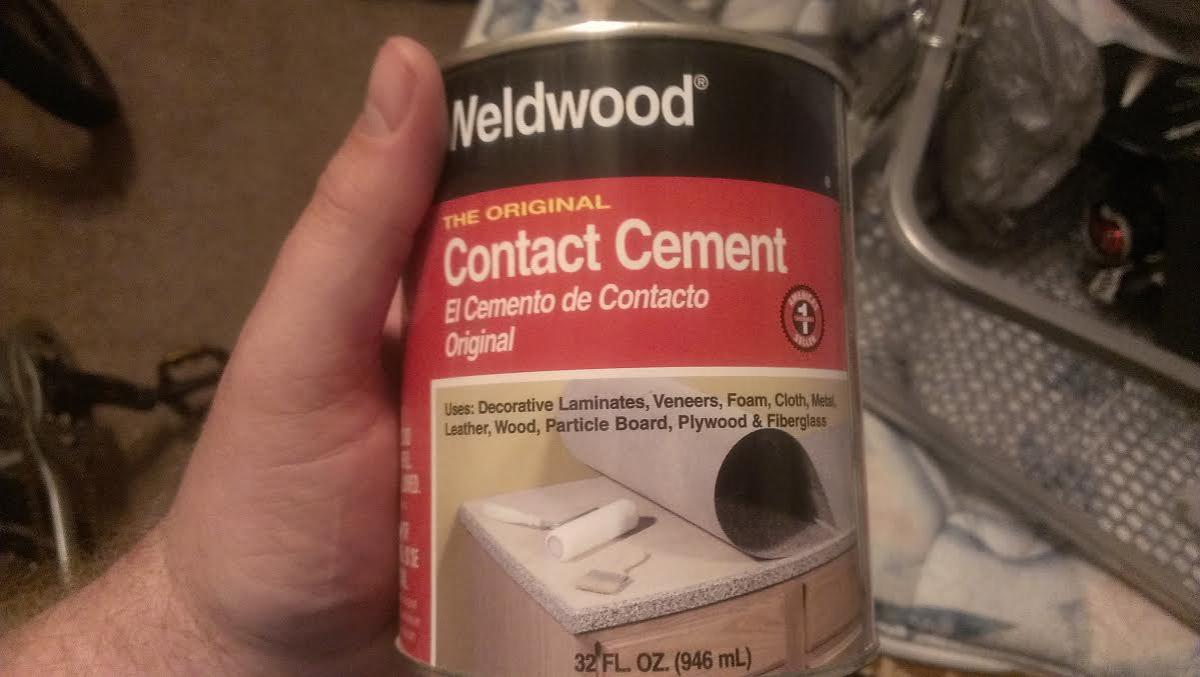
Hi everyone, I wanted to make a little "how to" for how I reupholstered the T-top inserts (dont know the actual name) on my 280zx. I had already completed the part once, but thanks to a sick cat, I had the pleasure of doing it again. Since I was going to do it all over again, I figured I could at least document it, with a few little tips I figured out myself (that apply to other interior pieces as well). I know when I first started messing around with interiors, I had trouble finding information, so I am hoping someone may find this useful. I will be doing my sun visors soon, if anyone wants a write up, let me know. First off, the part has to be removed, FSM or just looking at it should explain how it comes off, mine was already off and not installed (and covered in cat hair and snot): The first thing you want to do is remove the existing fabric, the plastic pieces are attached with pegs that fit through holes then are melted: take a knife and you can snap them pretty easily to get the parts off (I'll discuss putting them back on later): Most of these pieces on our cars is just chip board with a vinyl attached using adhesive, rivets, and staples, the staples in this case need to be removed: Now remove the material: Vinyl usually comes off relatively easy, be careful not to destroy the chipboard piece, since I used headliner material on mine....it tore apart and was a little more difficult, to make it easier you can use acetone and a knife to scrap the stuff off (works really well for headliner pieces). Once done you should have a "clean" part: If you are recovering with vinyl, you may want to run coarse sand paper over the piece to make sure and get everything even and all original fabric off. Any little piece left can be seen or felt through vinyl. I purchased some headliner fabric at Joannes, it's really easy to work with and relatively inexpensive. Lay the part on the fabric and cut to size...well, close to size: I prefer Super 77 for attaching light fabrics, it is somewhat forgiving and, if used correctly, makes a pretty strong bond. I coat both the fabric and the part in glue and let set for about ten minutes until they are both tacky then stick them together: Check to make sure that there are no large bumps in the surface and that it looks nice and even: If it looks good, trim off the excess on the parts where the fabric sits flush and the other edges keep about half an inch to a quarter of fabric hanging over so that it can be securely fastened to the bottom. The Super 77 and other spray adhesives I have used are all really good at clinging to surfaces, as long as there are not too many bends or complex curves, but if there are they seem to want to release over time. My solution to this is Weldwood contact cement, my personal choice, there are others that work just as well I am sure. You can attach the excess to the back of the part using staples if you wish, but I could not find any more really shallow staples, so I went ahead with my contact cement. I added the cement to the excess fabric on either side and to the back of the part itself. (not very noticeable) Then I waited about thirty minutes for it to become quite tacky and rolled the excess onto the part as tightly as I could. Normally you would want to start from the middle and work your way out, since this was a smaller piece it really didn't make that big a difference. Let this set while you go and tend to your plastic pieces. . . . . . . .. . This feels like one long run on sentence, sorry for that, . Now to the plastic pieces, I had cut the little pegs off of the parts, now I need to fix that so that I can reattach them. First you need materials: I could not find ABS rods, but I was able to find 1/8th inch styrene rods, a plastic "glue" a power drill with ~1/8th inch bit..some flexibility here and the part. The glue is actually a solvent, Instead of sticking the pieces together it actually "welds" them. It dissolves the plastic into a paste, when it evaporates out you are left with a rigid plastic once again. If you have a crack in a plastic, or a chip, you can dissolve some shavings with the solvent and use it as a filler, just do not go on too thick or the solvent cannot dissipate and it will look horrible. I use to use acetone for attaching a lot of plastics, it works extremely well for acrylic, but doesn't seem to hold as well on abs and other automotive plastics (for me). This particular solvent is mostly MEK based, which you could buy at most home improvement stores, MEKP is used as a catalyst for lower end fiber glass resins and I have heard that it works to weld plastics, but I have never tried it myself. Take the piece and locate where the peg was, then drill this area out Spot found Be very careful to not go completely through the piece, we are just trying to increase the surface area that is being contacted as well as aid in holding the peg in place long enough to stick. You should end up with a shallow divot Now add a large drop of solvent into this hole and let set for a few seconds While the solvent is setting, go ahead and cut a piece of the rod off, longer is better than shorter, usually I start with a little under a 1/4" Now shove the peg into the divot, twist it so that it will conform to the shape of the divot then hold it in place a good twenty or so seconds, until you can let go and it does not move: Now add some more solvent around the base of the peg, I like to push shavings around the base to build it up a little and hopefully make it a little stronger: That's one down, now go ahead and do the rest. I sometimes take my chances with the original pegs if they were not broken completely off, but it is probably best to go ahead and replace them all. I let the solvent do it's magic for a little bit then I do a test fit to make sure that the pegs line up with the holes on the part, as long as you do not wait too long (time varies with conditions), you can still move them around a little. Then I let them set overnight..because that's what the bottle says to do. . . . . . Next day: The best part, putting it all back together. Take the pieces you have added pegs to and put them in their appropriate places and trim the pegs down a little (if needed): ] Now take a soldering iron, wood burning tool, hot piece of metal, whatever works and melt the pegs to the part. I use a small butane torch and spoon....which is probably not the most innocent looking way of doing this....I heat the spoon up then press it to the peg until it melts flat. Be careful when melting the pegs, they can catch fire, the fabric is flammable as well. Once done it should look like this (or hopefully better): Continue for all the pieces you removed, also give a little strength check to make sure everything is holding firm. As long as everything is holding well and it looks good, you are done, now all that's left is installing it back into your car. I hope this helps some one. In the mean time I'm going to continue with my interior and slowly customizing everything.
-
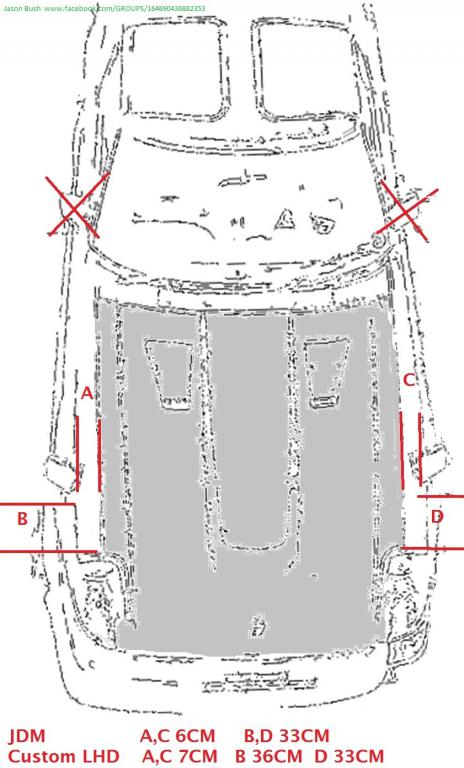
Greetings. With the lack of a Fender Mirror template for S130 on Google Image search, thought I'd make one, submit it, and let the Interwebz do its thing. These are two sources of Mirror locations I've gotten. Anyone really disagree? Thanks for any input.
-
I have an '82 280ZX Turbo with a strange intermittent power window issue. The driver's side power window rolls down consistently and smoothly all the time. However, when I try to roll it up, it intermittently fails. I do not hear the motor even attempting to roll up (it will continue to roll down just fine). I see a couple wires (green and green w/black stripe) coming out of the switch, leading to the window motor. I tested voltage when I attempt to roll up and am indeed getting power through these wires that lead to the motor, so the issue doesn't seem to be the switch. But as I said, the fhis failure to roll up is intermittent. It'll just randomly be able to roll up again, as strong as the day it was made. So does anyone have any suggestions or ideas of what the issue might be, or how to further diagnose it? Are there other wires I'm missing? Thanks!
-
Deleted for inaccuracy / insufficient information.
-
 I need the wiring, including connectors, for the output from a late 280zx. Turbo electronic distributor. This is the dizzy with the single circular 360deg plate with 6 x output marks at 60deg intervals which connects to the 280zx ECU and is driven by a splined driveshaft not a straight tongue. I need the 4 pin (female) connector for the dizzy end with it along with a length of the wiring. The other end is not important but preferable if you can split it out from the loom. Alternatively I would be happy to purchase a complete "engine section" wiring loom as I can use this in stead of adding bits to my 260z loom. Can pay by PayPal or EFT. Thanks Andy
 -
 Greetings, Looking for a Turbo Exhaust Manifold for an L28 Engine. I am located in Los Angeles County and willing to pick up from Orange County, San Fernando Valley and San Gabriel Valley. Thanks for your help. JD
 -
my pass side window broke so i nedd another one hmu if you got one thanks, Allen
-
my pass side window broke so i nedd another one hmu if you got one thanks, Allen
-
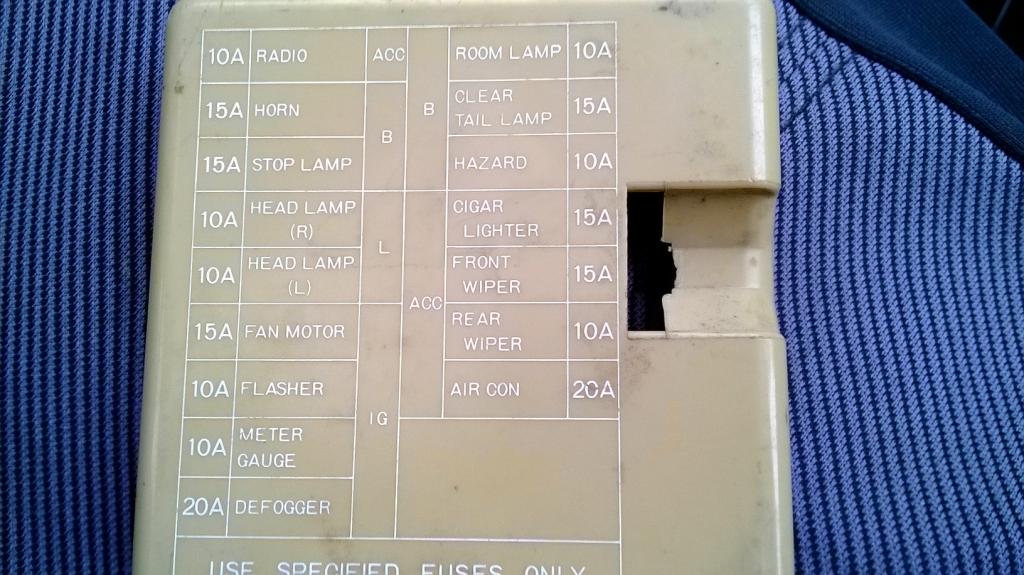
The fan motor (Blower motor?) wasn't working when I bought this 1982 280ZX a week ago. So, i went tot the fuse box to find it didnt have a fuse... not only did it not have a fuse, there is nothing for the fuse too go into. I'm not exactly sure where to go from here, but any help, helps. Thanks!
-
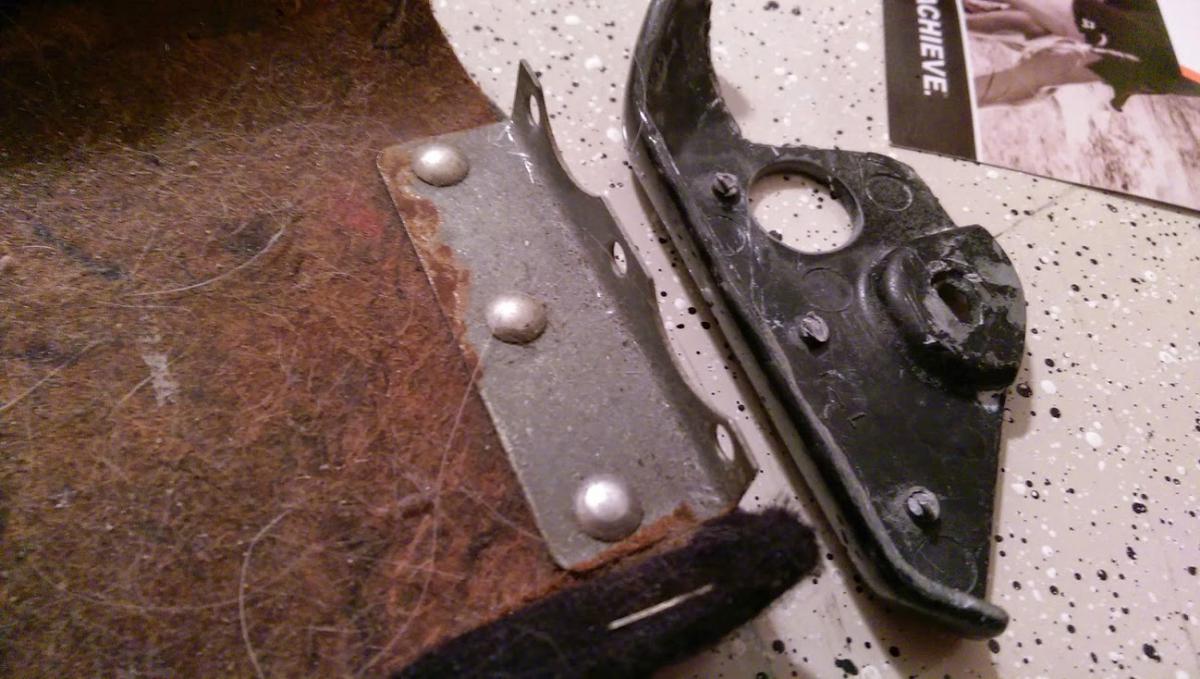
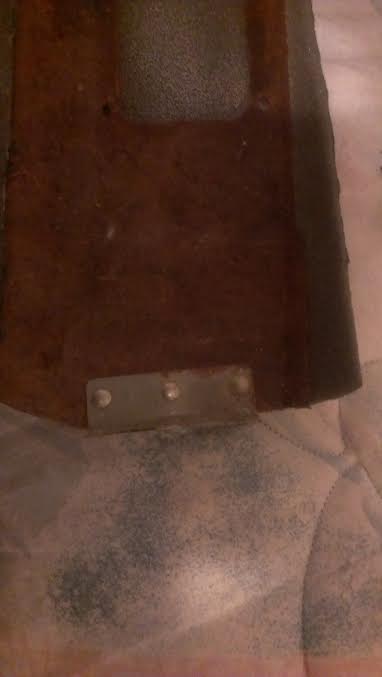
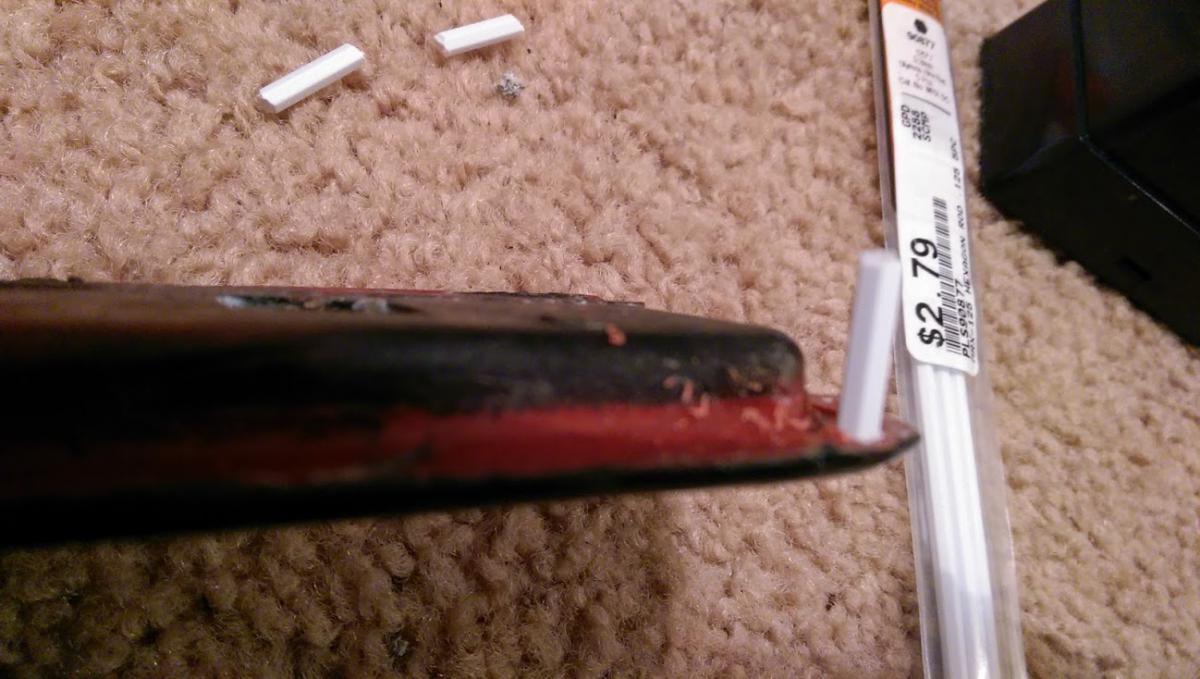
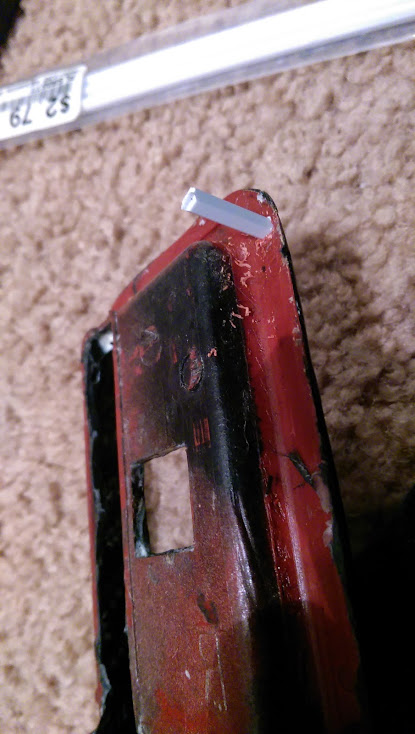
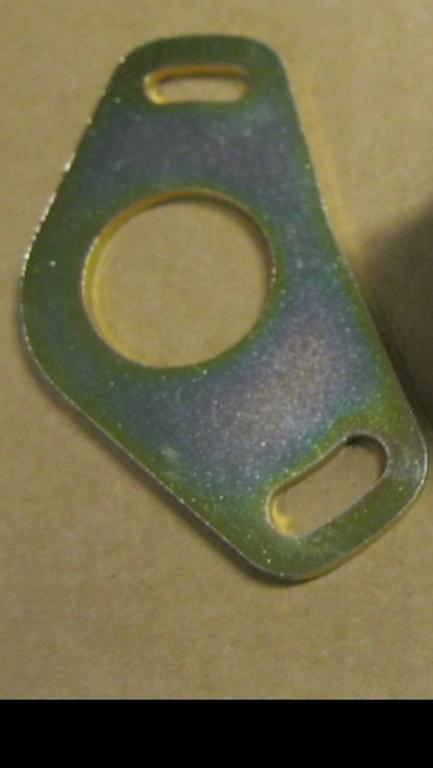
I'm looking for the flat metal plate that bolts to the distributor and the aluminum spacer. I think thats the best way to describe it. I'm attaching a picture. I live in the Tulsa, OK area. If you are close I'll come pick it up. Chris
-
Sorry thought I was in parts wanted. I'll re post there.
-
 hey guys i'v been looking on line for answers to solve my sloppy rear suspension, i have the tokico lowering kit 'springs and blue shocks.' i have a 5.3 lm7 with a saginaw 4 speed trans. stripped interior ' no dash' and new 195/70r14 tires, and new poly bushings all around. the set up feels alright when im cruising around and in straight lines but when i start going 65ish mph through a long fast turn i feel the rear wanting to spin. 1) I wonder if my car is unbalanced since i have the v8 up front and only the fuel tank in the back?i did position the engine as close to the fire wall as possible when i made my motor mounts. 2) And if its not because of weight distribution is it because i dont have the correct spring rates for my set up? what would you recommend on the springs F and R ?
-
 Hello all, I have searched low and high to no avail. I am upgrading to a 280zx alternator in my 75 280. I was following the diagram below and carried out with the white to yellow but had noticed that my volage regulator did not have the specified green and red. It appears that the pin hole of the voltage regulator for the G/R was capped from the factory. So I am hoping that there are some guys here that have figured something out for the 75s that could help me finish this up? Thank you in advance... Connect 1-5 (lamp to windings common) green&red to white&black Connect 2-3 (+12V to Sense) white to yellow
 -
I was hoping to get help from some knowledgeable forum members I'm currently restoring my 78 z I did a L28et swap with a T5 Transmission I've been looking for a T5 driveshaft to shorten it to fit my Z I recently found one for sale but the picture he has of the driveshaft looks tinner from what I've seen from other T5's. This is where I need some help recognizing the driveshaft from the one i want to buy and from the one I've seen classified as a T5 driveshaft. Thanks guys in advance. The driveshaft I want to buy. The T5 driveshaft I've seen for sale. Notice the difference one looks thicker.
-
Hello Hybridz. I am back with another 1983 280zx turbo 5speed. You may remember me from http://forums.hybridz.org/topic/109641-1982-280zxt-log/ . I have been distant from the topic because after getting it fully back to stock, it got totaled Luckily no one was hurt and I was fully covered under my insurance. The insurance company was able to get me this I been working on getting this thing running smooth stock. Then after that Ill start adding more power. Overall this was a great start. Some things needed to be worked on asap. The clutch was getting pretty old when I first got the car and it recently gave. I am modernizing the engine as I replace and refresh the car. So far these have been added: Exhaust 3in SS Mandrel Bend Walker Exhaust 15034 MagnaFlow Performance Mufflers 14419 LC1 Wideband and Autotimer Gauge (soon) Brakes Centric Slotted Rotors Centric Calipers New Brake Master Cylinder New Brake Booster Stainless Steel Brake Lines Porterfield R4 AP229 AP230 pads Ignition NGK 4291 Spark Plugs NGK 8mm Wires Transmission Exedy Stage 1 Organic Racing Clutch Kit Fidanza 10.5lb Flywheel Felpro Rear Main Bearing Set New Clutch Master/Slave Cylinder New O2 Sensor New PCV Valve New Fuel Filter (Soon) I am have issues smogging the car (Like every other Z out there). Even with all this stuff, the smog is off by a little. Idle speed and High Speed CO is about 3.5%, and it has to less than 1.29% Hydro Carbons are at 408, and they have to be less than 220. I put the timing at 24degrees. I'm going to push to back to 20. I have an old ECCS analyzer and it showed injector 3 not firing. I can hear it ticking, but its off. So I plan to change all the injectors out. With these the fuel rail will be swapped for a Pallnet rail, the fuel pump for a Walbro255lph, new connectors will be put in, and a new fpr. Now have two questions for injector sizing. I want to use o-ring style injectors for the new rail, but I am still using the stock ecu. Can the stock ecu run around 300cc? I have looked online and got mixed answers. What o-ring injectors would run with stock ecu? What kind of fuel pressure regulator would I run with those injectors? I plan to log more often and with more pictures. Upcoming New injectors Pallnet Fuel Rail 11mm Walboro 255 Fuel Pump Inline fuel filter Fram G3
-
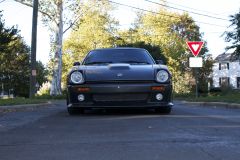
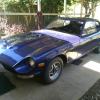
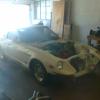
From the album: 1979 280ZX - LS2 Conversion
LS2 Converted 1979 280ZX, OS Gliken Diff, Arizona Z Car 5 Lug Conversion, Arizona Z Car Brake Conversion, GM LS2 engine V8 engine, Motorsports 30th Anniversary Body Kit, HID headlights, Forgeline wheels, 4 Speed GM Automatic transmission (460LE), Paint color Aston Martin Quantum Silver, D2 Coilover's