Leaderboard


Popular Content
Showing content with the highest reputation since 07/28/25 in Posts
-
Been a while since I posted any updates. Been moving along. For the Turbo car I decided to build my own wheels. Ill CNC machine the center sections myself and have the lips and barrels spun for me. I really like the old SSR RS8 wheels but finding them in the correct bolt pattern, offset, and caliper clearance is impossible. I fould a set close, from Japan and had them shipped over. Since this car uses Z31 hubs and such, the spacing is out much more than a standard Z so I need a bit more positive offset. I dissasembled the wheels and scanned the center section into my computer and reverse engineered the shape. Next I re-assembled them and had the 245-45-16 tires Im going to use mounted. I test fitted them to the car, and close, but not good enough. This is the fist time this chassis has been rolling on its own wheels in 27 years. Its been on a cart or a lift. Felt good to see some progress now that the suspension, brakes, and cross-memeber are finally complete Scanned this complete assembly and put it in CAD. Now I have the exact shape of the tire on the rim. Cool cross section of it. Finally I scanned the side of the car, put it into CAD. Now I can adjust my wheel center offset for caliper clearance, and adjust it to work with new Lips and Barrels I will order for the proper offset and fit to the car. Having it in CAD alowed me to look at it from every angle and check all clearances, for calipers, springs wheels lip, ect. Even compressing the suspension to make sure I have fender clearance at full travel Final wheel spec is: Rear - 5 lug = 245-45-16 on 8.5" width rim- 27mm positive offset, 2.25" outer lip on the rim Front - 5 lug = 245-45-16 on 8.5" width rim - 31mm positive offset 1.75" outer lip on the rim Next I need to find some time to program the CNC and start cutting chips. But I got distracted on the NA car, so that update is next.
 5 points
 -
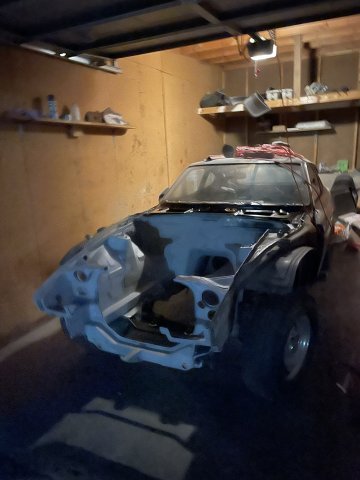
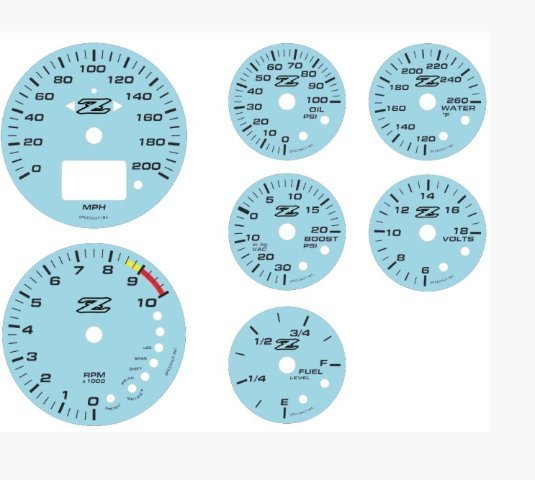
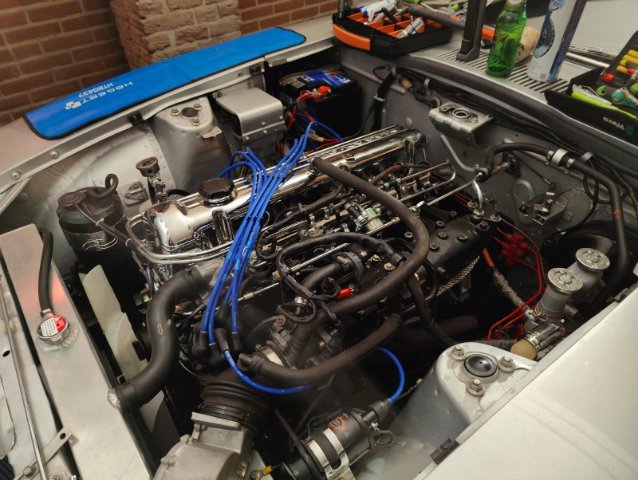
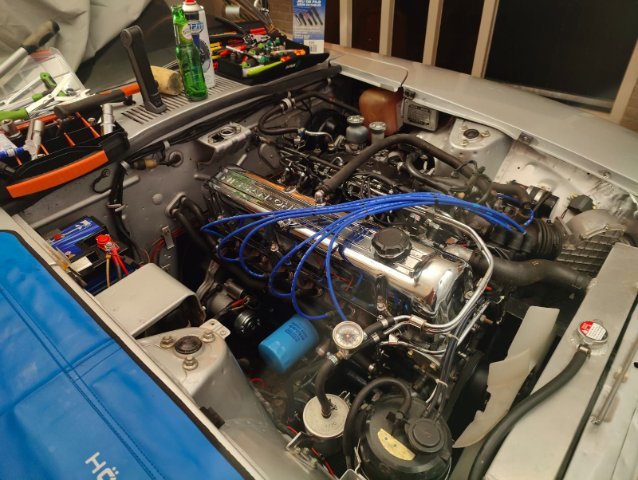
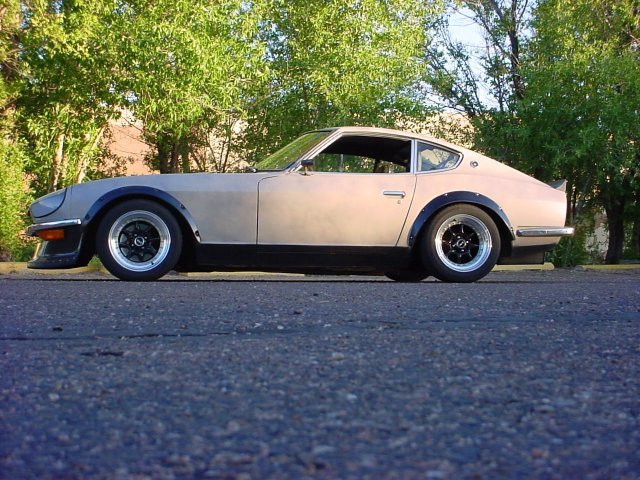
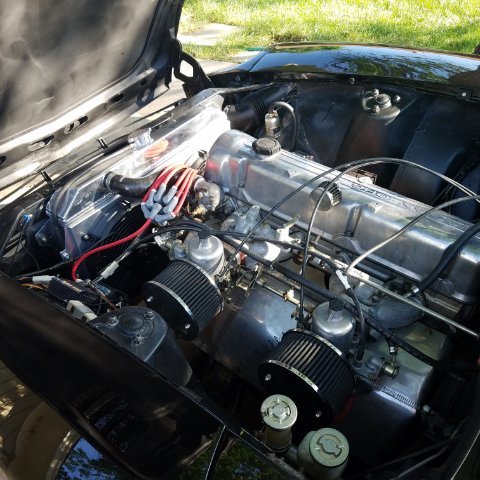
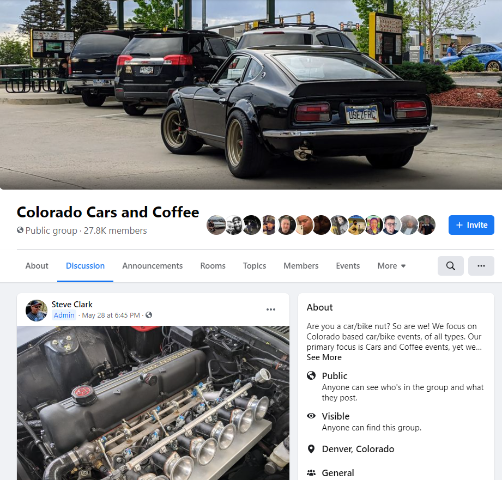
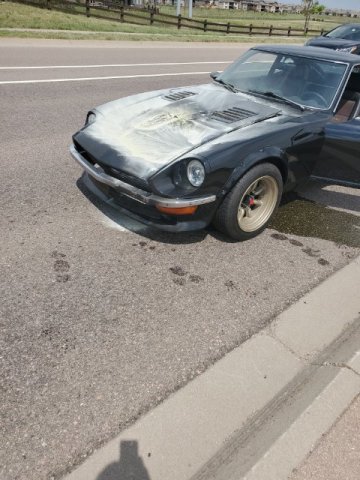
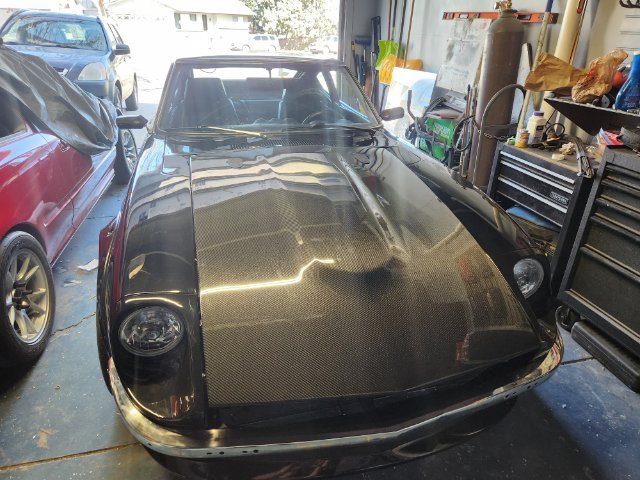
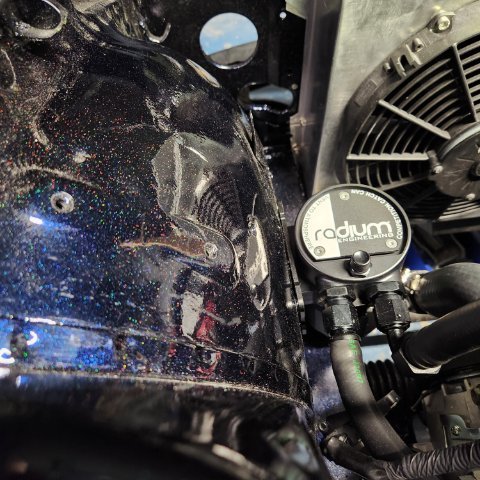
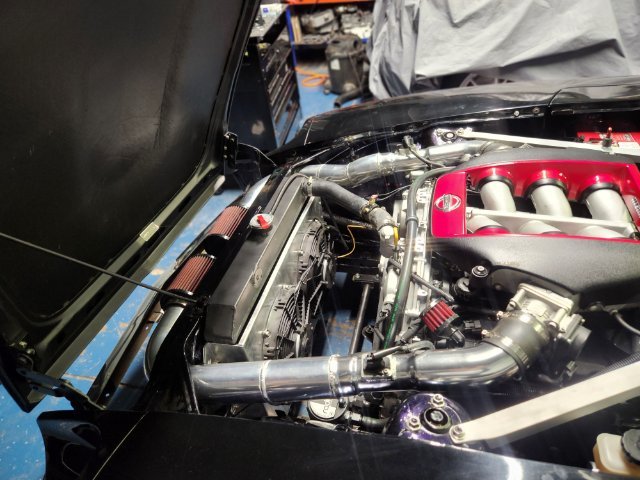
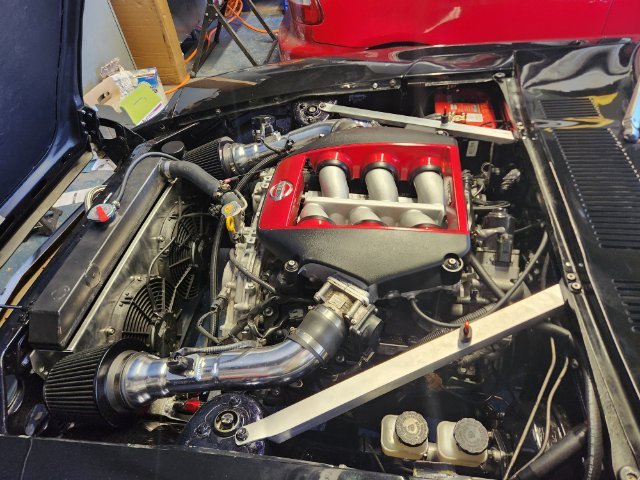
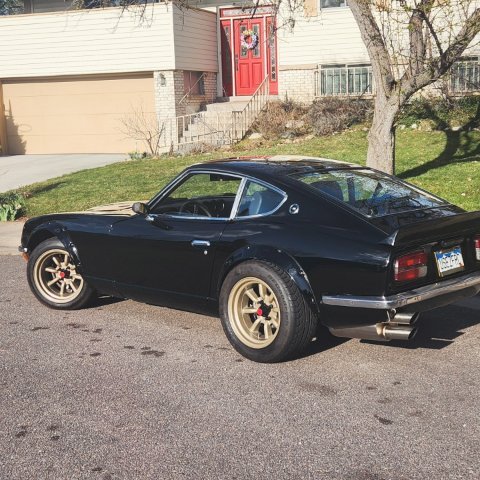
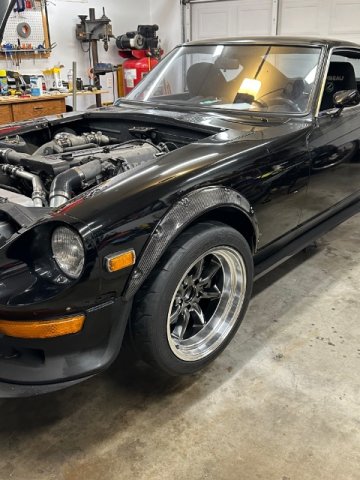
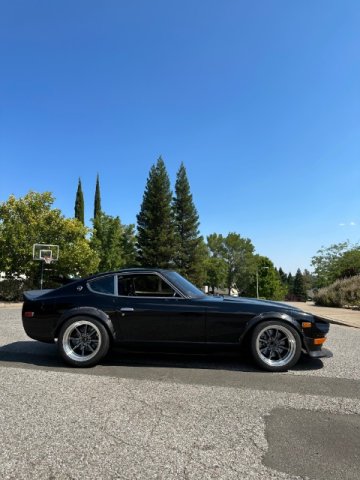
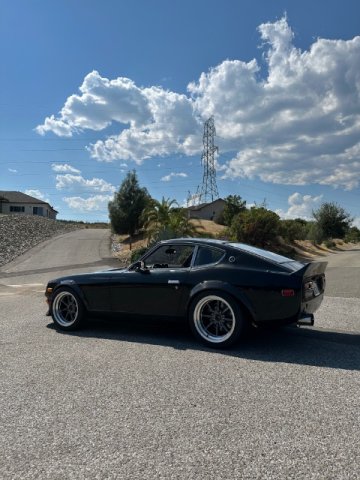
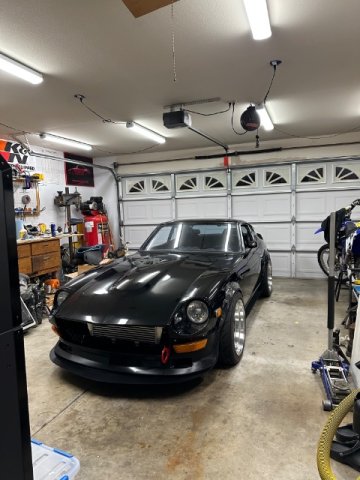
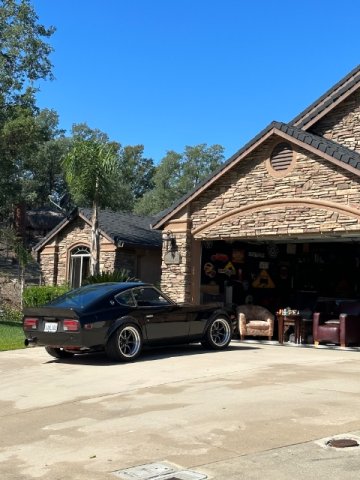
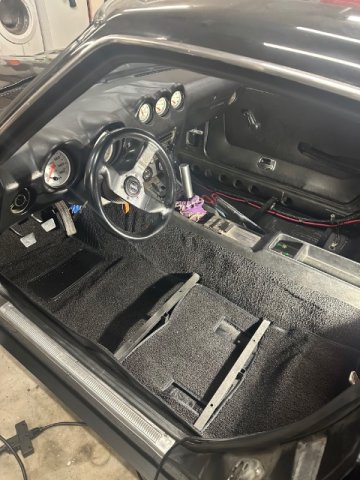
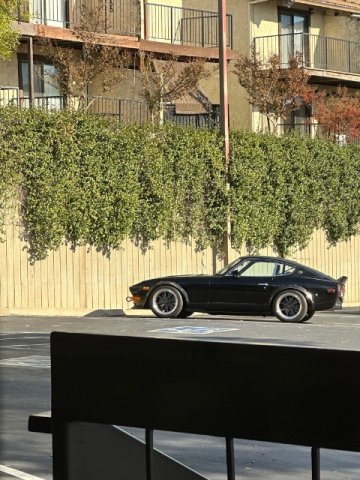
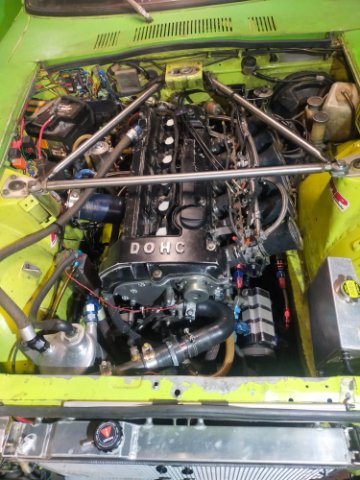
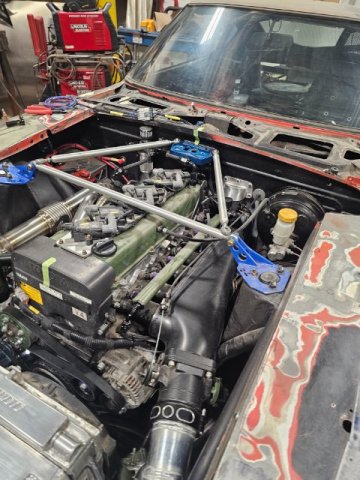
Hi everyone, I am at a good point with my build and wanted to share its history since its one of the few running and driving VQ37 swapped Zs in the country. I am going on over a decade of ownership. I originally bought the car from New Mexico and brought it over to Colorado. Come to find out, it was once a Colorado car also. I picked it up in primer with a rebuilt engine but not really knowing too much about it since all I had were photos and the owners word. The previous owner used it for autocross. The entire interior was missing and it had a rats nest for wiring. I remember it had a switch to manually turn on the fans. It also had a full radiator support and driver side frame rail replacement from a donor Z. I got lucky that this was done really well, I have had no problems getting the car aligned over the years and it drives straight! I saved some money and got the car painted in black, the car was originally a yellow car. The painter actually welded in floor boards and frame rails and closed up the wheel wells from where they were cut for the ZG flares. The rear hatch had to get replaced since it had an inch of bondo over the key hole. Luckily, I was able to track a hatch from a 240Z in the junk yard (when is the last time you have seen that haha). I added sound deadner to the interior and then took the car to an upholstery shop to get the interior put it. I also added some nice gauges. I was able to source some cheap Watanabe 16 inch wheels from yahoo auction Japan. They were different colors but I ended up paying around 900 usd after air shipping them spent another 300 getting them powder coated. I also picked up my Recaro seats from Japan. To this day I have no idea what car they came from but they are one of my favorite parts of the car. The SUs where swapped out for a triple Mikuni 44s. I drove with those and even had them tuned but they were too finnicky at altitude. During this time I got into flipping carbs for resale. I didn't want to deal with the Mikunis and decided to swap to fuel injection. I ended going Jenvey ITBs on Haltech. This setup actually worked great for about a year and even made it to the main page of my local Cars and Coffee. Around that summer I started to develop some running problems where I was running too rich. On my way to the tuner the worst thing happened. The car caught fire. From what I could tell, the itbs backfired and caught the fuel line on fire. If anyone is running itbs on an L Series, I highly recommend an airbox. I got really lucky since a guy like 2 cars back behind me had a fire extinguisher and that the radiator hose blew and stopped the fire. I sent the car over to my tuner/builder and waited on my insurance adjuster to visit the car. I was able to get a full payout through Hagerty and that kickstarted the funds to get my Z back on the road again. I knew I was done with L series. I never really wanted to build something that close to race car since I mostly drive my Z on the streets and occasional canyons. I wanted to stick something Nissan that could remain relatively stock. Something I could start up and just drive. In the past I almost swapped VQ35HR motor and have always had that build in the back on my mind but I noticed that the engines were almost the same price as the bigger brother VQ37. So I went with a VQ37 out of an automatic AWD G37. The reason I chose that engine was to avoid 370z's had been driven hard and the auto engines were cheaper with less mileage. The only change to the block that I needed was a lower oil pan from a RWD VQ and its bolts. I sourced a transmission directly from Nissan since at that time it was actually only about 500 dollars more compared to a used transmission. I looked recently and it seems like the transmission have doubled in price since 2021 when I bought mine. Here are the photos of when I got her back. We ended up putting some flake in the engine bay since I grew up loving lowriders. I also installed a GTR intake conversion. It ended up being a bit of a hassle since the custom fuel rail didn't clear the injectors. We had to extend the fuel ports on the fuel rail to make them taller so that it could clear. I added a catch can since the car is set to vent to atmosphere. I pulled the headers and stripped them and cerakoted them also. The custom hood didn't make it out of the fire so I went carbon fiber. Next I ended up getting the intakes extended to the front of the car to make it a true cold air intake. I recently took the Z engine harness apart and reloomed it and fixed one of my turn signals. Come to find out one of the wires was cut off. With the help of Dave Irwin, I was able to track down all of my missing grounds and also why both lights would blink at the same time (bad switch). I had an extra parts turn signal switch which I harvested and was able to get everything to work out. I recently tackled getting my horn to work. I have never got it to work since my entire ownership. The guys at classiczcar forum really helped me trouble shoot it. Come to find out, my only horn didn't work and for some reason my steering rack wasn't grounded. This is pretty much where the car is now. I took her to a local car meet today and I am hoping to just get more seat time with her. If anyone has any questions about the car or the swap feel free to message me.
4 points
-
Thanks for the replies and comments. Time is always an issue, however Im at the age now where my daughter is 26 years old and working full time. Been married 30 years so the wife is obviously understanding of my hobbies. Hopefully continuing to make progress regularily. Hoping more people come back to the forum and participate in the community. Here is a picture of me and my daughter when she was probably 2ish years old, same car Im working on now. I need to get her back in the shop for a new photo - Time flies
4 points
-
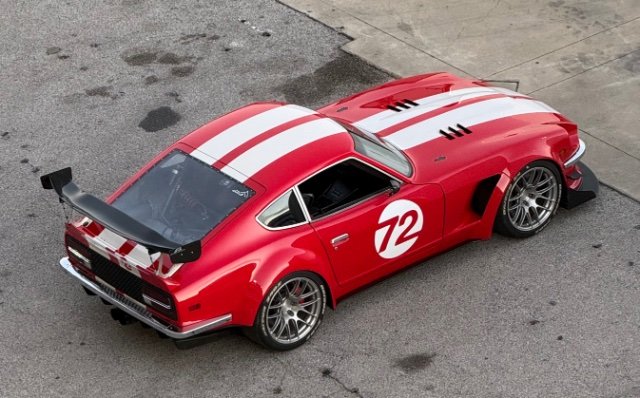
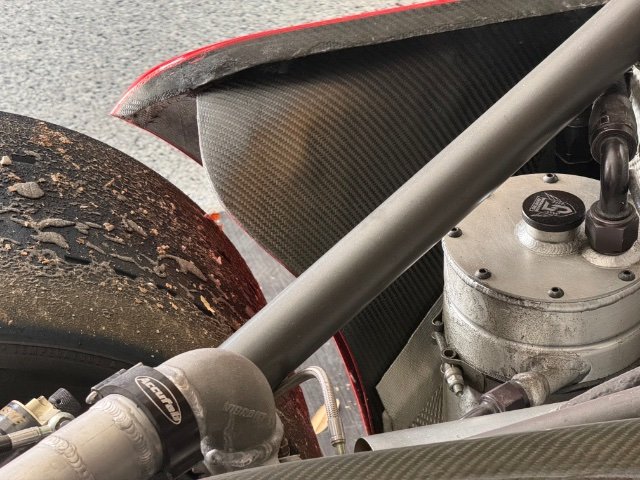
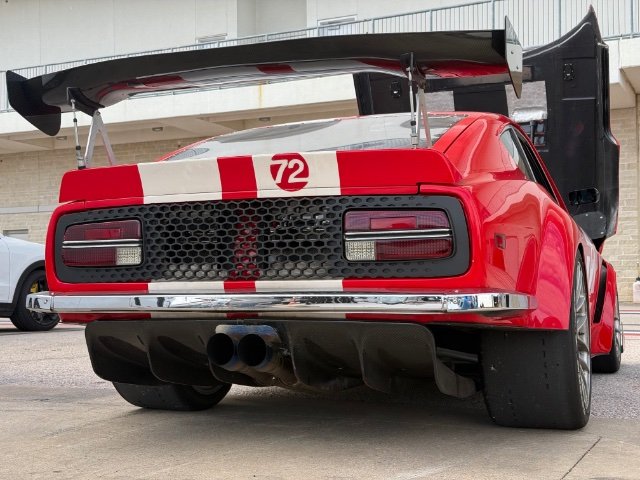
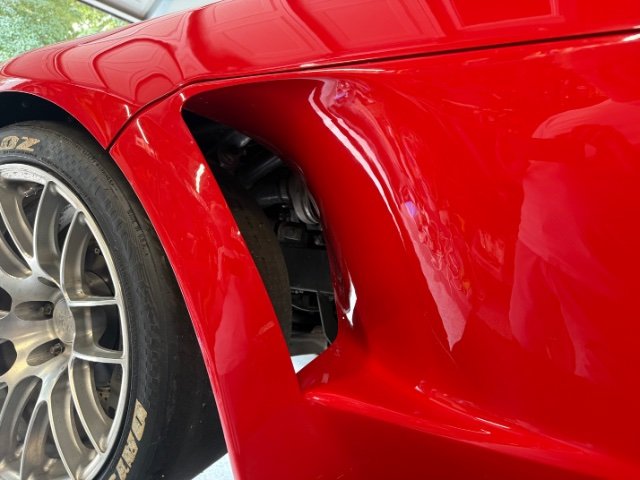
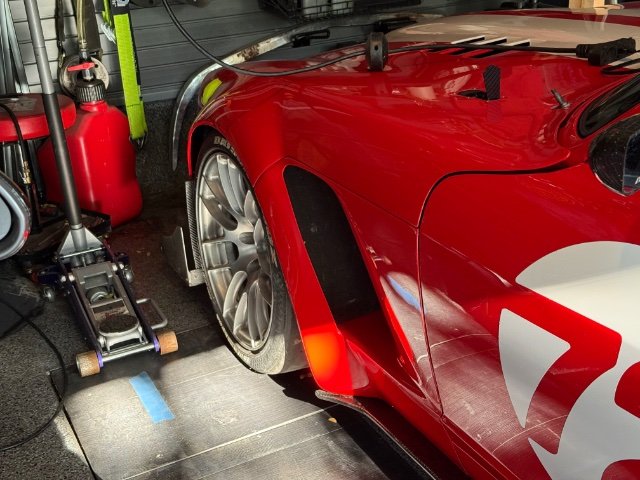
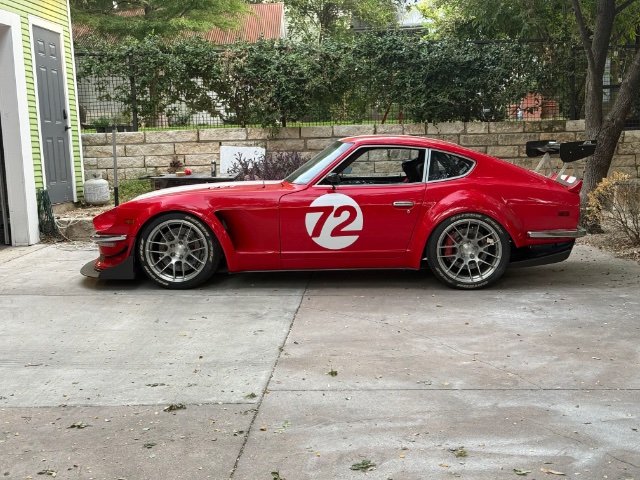
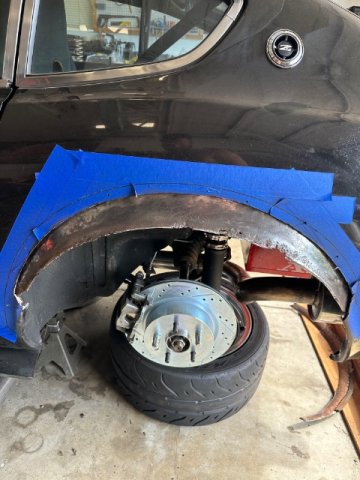
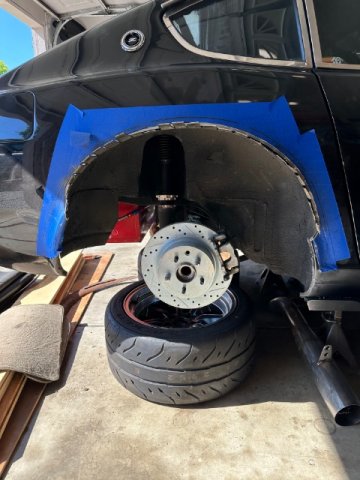
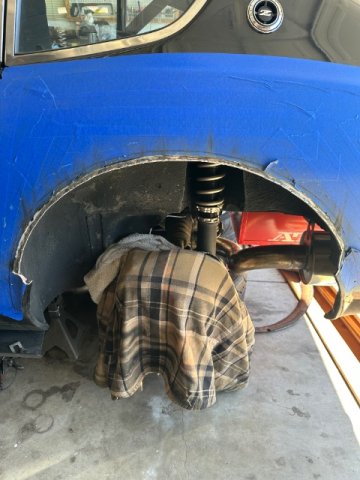
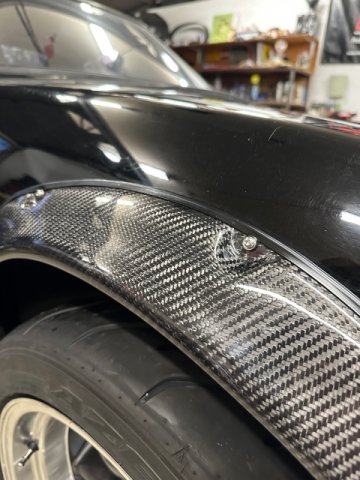
if anyone's still tracking this build I have what might be a last update since the car is mostly done (lol is it ever done?). I finally cad-designed the front fenders and then had a local shop 3D print the parts, then took that to a bodyshop to integrate into the existing fender part and paint it. After that I overlayed the inside walls of it with carbon fiber for added stiffness and protection. I also cut the lower part of the rear fenders and put in a horizontal cf winglet to better extract air. Overall I think it looks great and the resulting new parts helps downforce a ton by extracting air from the wheel wells.
4 points
-
Since that broken rear differential a lot has happened.
4 points
-
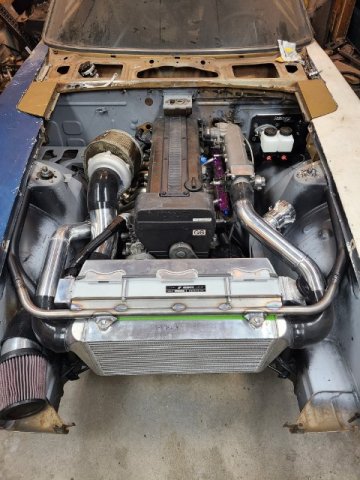
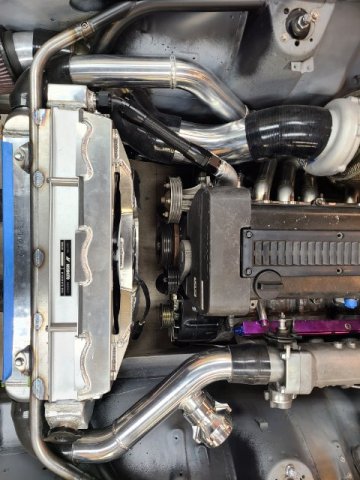
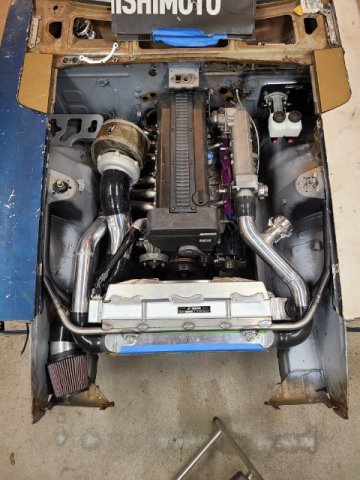
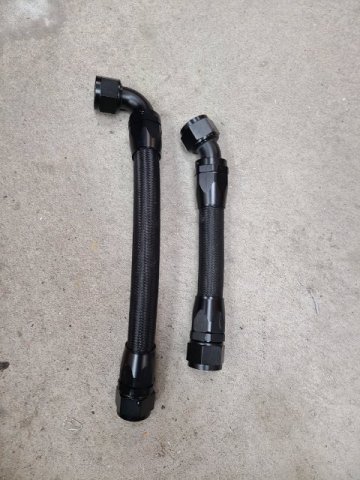
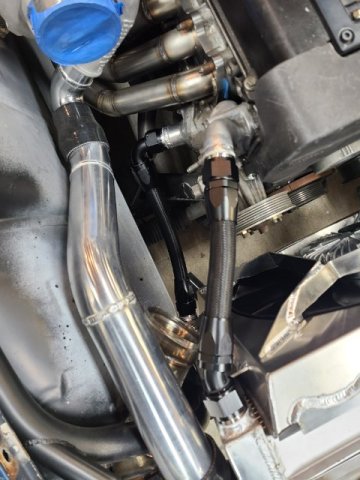
Next order of business was electric fan and shroud, and radiator hoses. I chose the 2016-2019 Camaro single SPAL 18" fan. it will be PWM controlled and is a very popular choice according to the internet as it can flow 5000CFM. Although I cut up the factory shroud to "work" I felt like I needed something fancier. modeled up a base to start working from and had my friends at laserbros in NC laser cut and bend it up. Should have gone one or two AWG thicker so added some bracing as well as some mounts and very happy with the final product. Cut down the radiator and inlets and outlets on the engine and welded on some -16an bungs, made up a couple hoses. in the last photo of the "hose installed" you can see the end of the pipe for the intake I welded into the chassis I mentioned in the previous post. Also decided to move the alternator to the other side of the engine to get it away from the heat. When i pull the engine to paint the bay i'll design and make a bracket to permanently mount it over there.
4 points
-
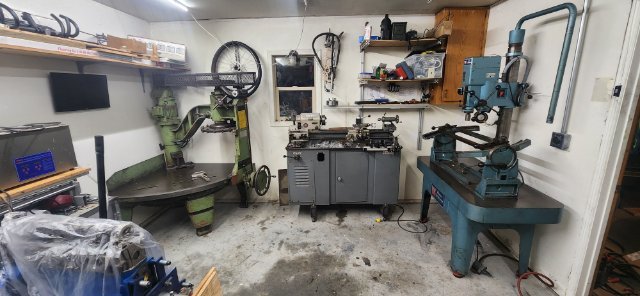
I just wanted to share something pretty exciting in my world. 5 weeks ago I overheard a friend talking about how hard it was to get any machine work done. And it hit me..... I know how to rebuild heads I just need equipment. Did some research and found that 4 of the main shops in the area have sold out or retired. Told the idea to my father in law. And was just spit balling with him. I dont have the cash to start anything and it was just an idea.. well he gave me and my wife a rather large gift and I have now bought a storm vulcan 85b blockmaster and a winona van norman Ph-2000L valve ane seat machine. Still need a valve grinder and obviously tons of tooling. But im excited to see where God takes this. Been 25 years since ive done and work but am excited to get back into it. Plan to get the surfacer going and try to drum up some buisness to make some income to buy more tooling. I onoe they are not the best machines bit they are functional. Just wanted to share
4 points
-
Hi,guys, after one year off with other work, i put back the engine with reground camshafts, and ready for new start !😅 Wait and see ,and Happy new year
4 points
-
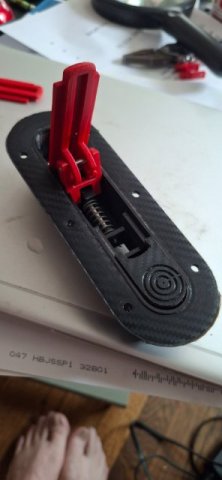
My custom made 3d printed aero hood latches are mounted.
4 points
-
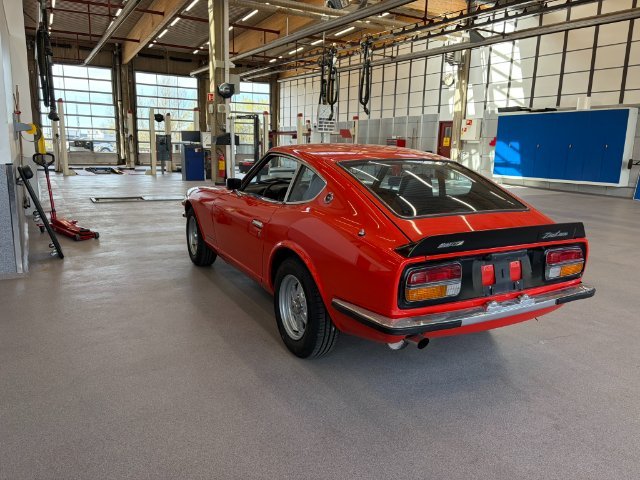
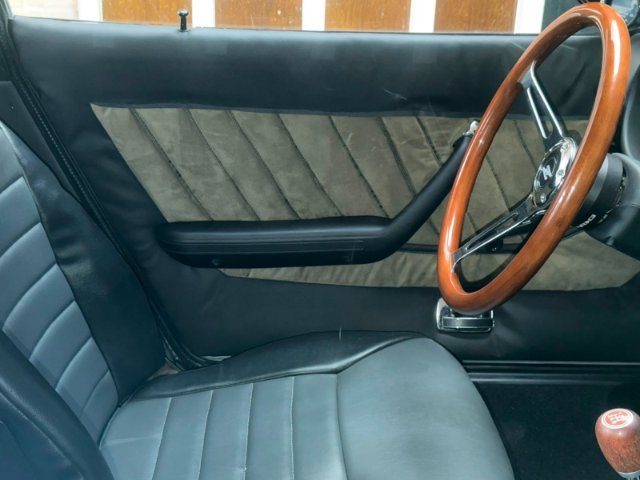
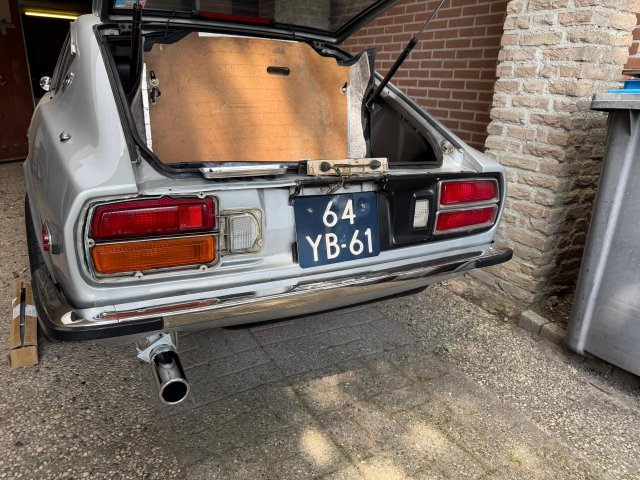
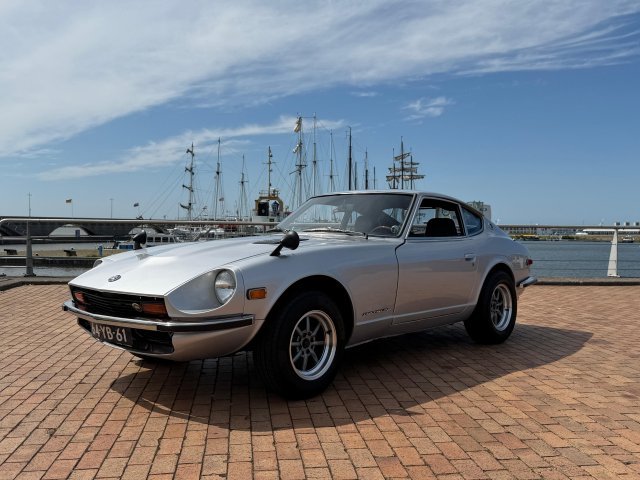
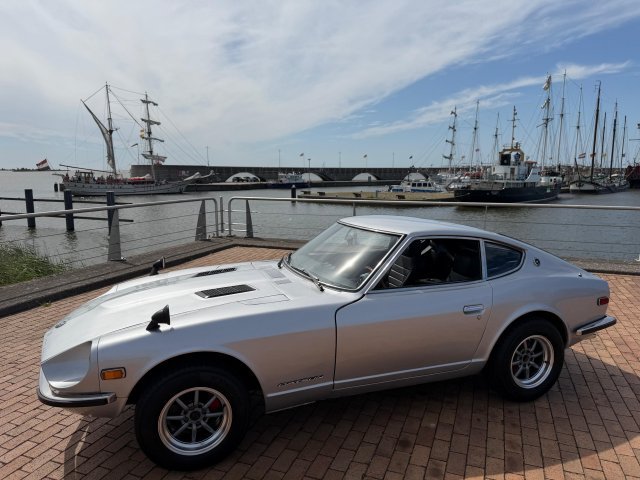
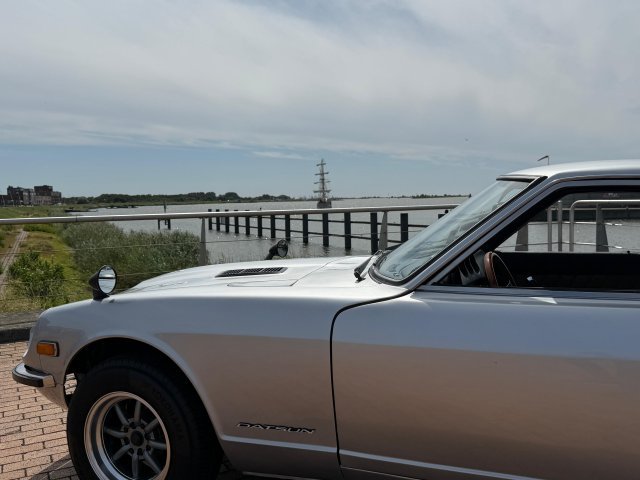
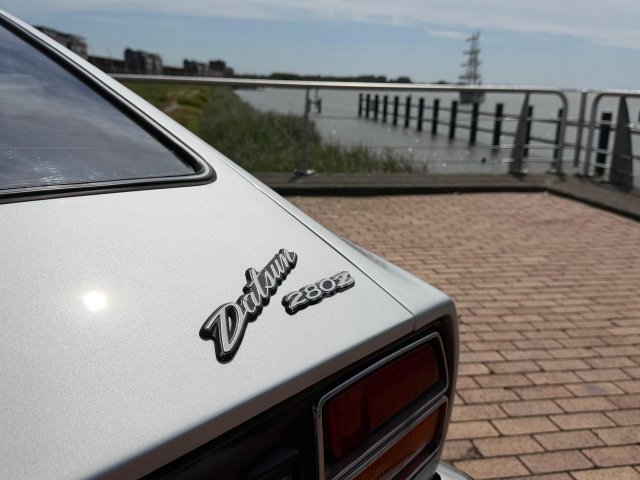
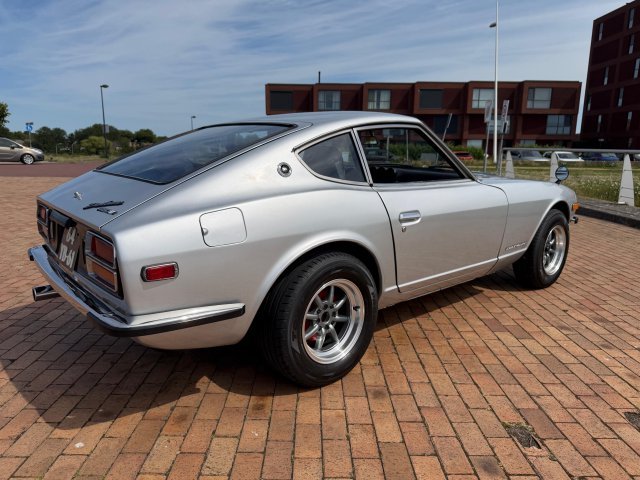
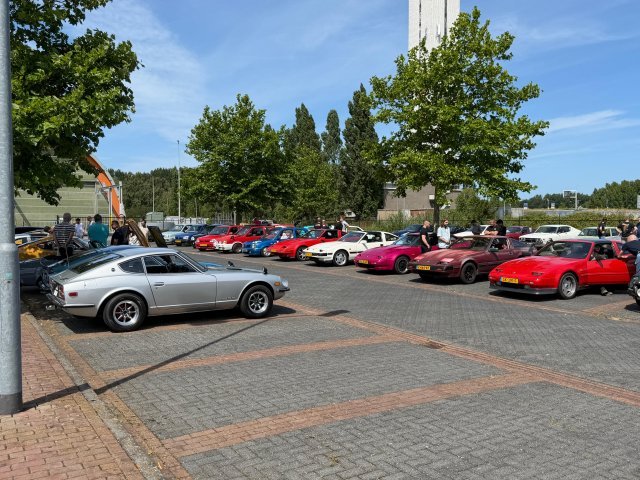
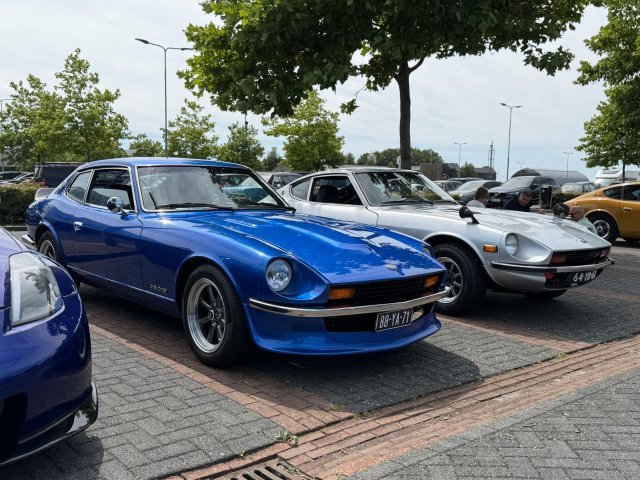
I finally had some time this weekend to work on the Z again and finish off some of the little things that where nagging me. I finished my DIY door card project and got them installed in the car. I must say that they turned out pretty good. The only finishing piece would be to add the wood trim back in but I would have to make one myself. A few weeks ago I managed to pic up a set of Euro taillights from an original Dutch 260z that where in excellent condition. So with the remaining time I had that day I quickly switched them out. Yesterday there was a small all Nissan/Datsun meet I attended which gave me the opportunity to compare my Z with others and do up some inspiration for future modifications. Afterwards I finally had the time to take some proper pictures of the car (with the car not half apart) and cruise along the dikes. WhatsApp Video 2026-07-13 at 09.15.40.mp4
3 points
-
Love the way this is coming out. its been a challenging balance to thread between making everything neat and tidy and making sure I remember its a race car and needs to be functional. decided to polish the intake manifold and turbo, which looks great but upkeep is gonna be a challenge. exhaust is mostly done and welded. need to make a fancy tip for the back. wrapped the downpipe and mid pipe. need to pull the manifold and wrap that too. originally made a open dump wastegate but then changed it up to recirc it because we have a couple tracks with some noise restrictions. I'll order another v band and wastegate outlet so i can cap the exhaust and run it open if the track doesn't have a dB restriction. Fuel system is done. bulkheaded thru the floor. 3d printed some mounts and have it mounted along the floor. injectors are in. got most of the turbo lines made up. opted for the turbosmart oil pressure regulator for the turbo. i've never dealt with a turbo this small and man its a challenge to fit everything. drain is really tight. hits v band and clamp but think i may have the puzzle solved to make it work. fuel fill is welded up. went with stainless to mitigate the risk of corrosion with ethanol.
3 points
-
Was not implying that the only way to get work done on a project is to not have a wife and daughter!!! I can see how that could have come across. Mine is 14 and will be a freshman this year. Ive got 4 years..... Then who knows. As she has gotten older I've been telling the stories of her helping me in the shop when she was little. Her stepping into a drain pan full of oil in ugg boots that I promptly threw away with out telling mom, Me hearing a pppsshhhh noise and I turn around to see her with a my blow torch pointed at her face, Praise the Lord she didnt click the igniter She would have been around 2 also at those times.3 points
-
Been spending alot of time getting the chassis on the NA car cleaned up and ready for paint. Its a super clean almost a no rust car, so I want to strip it completly bare, metal prep it, straighten the floor pans which are really clean just slightly dented from wrong jack points. I started out by stripping everthing off and making digitized and CAD files of all the tar flooring. You can still buy it from Nissan. I have a laser cuttter so I will use it to cut all the replacements. It is an original paint car, so it was hard going in on it. Next I put it on my rotissary I built for the Turbo car and got to work on stripping all the factory undercoating. Using a heat gun, scraper and some mineral spirits did the trick but it took a long time. All super clean original metal under the car This is what it looked like under the front fenders BEFORE cleaning, so super happy and even under the cowl all original paint
3 points
-
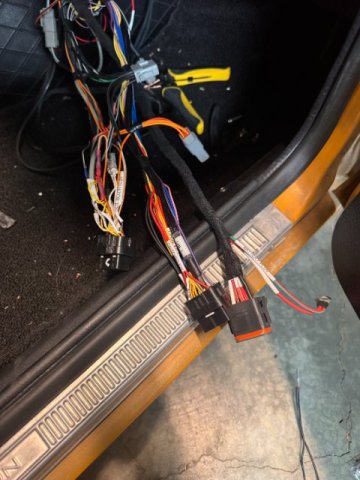
Almost got it done. Such a pain in the as* I probably should have started over, from my old ecu to this ecu wiring.
3 points
-
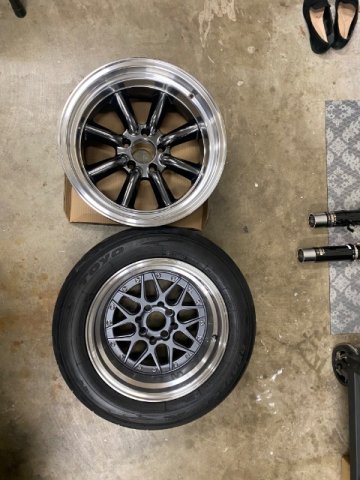
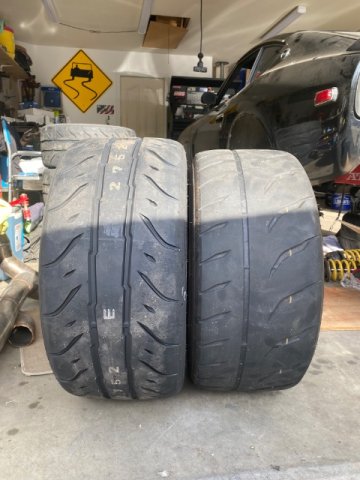
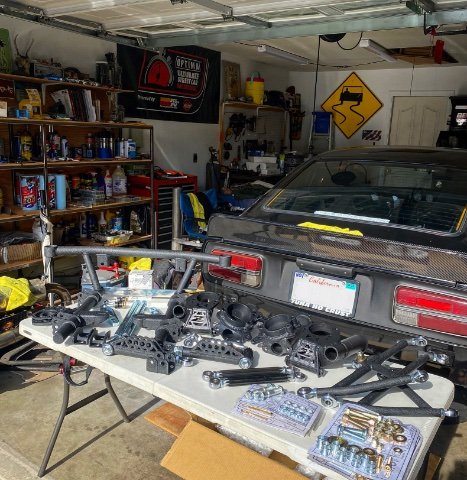
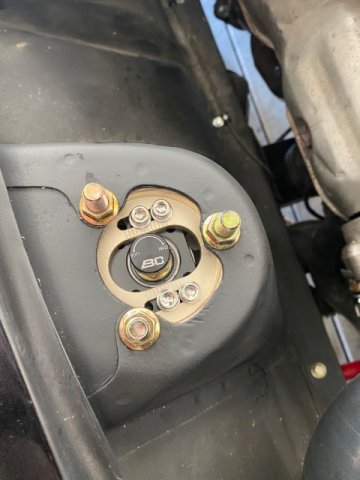
They did send me another set of control arms which was nice of them but they are also a bit short. I did make some modifications to make them work. the kit is supposed to use 8 washers per side but i needed more to align the toe adjuster up, I do have T3 spindles so that may be part of the variation I was seeing. So I machined some spacers because stacking 15 washers was not my favorite design. The spacers tightly fits over the spindle and then takes up about an inch of space and allows 5 washers for "adjustment" The guy from apex did called me and we chatted for a bit about some other design concerns I have. Which was great and he took it well. Apparently they just aren't good at measuring things. They said they are going to try and make me a shorter set of front control arms aswell because the front setup at its absolute max shortest setting is still .375" wider than the stock assembly which doesn't allow me to use any of the roll center or control arm adjustments with my wheel and tire combo. I was hoping to correct geometry with everything being adjustable but that's not the case since the crossmember mounting points are wider than the factory one so I had to max everything out to its shortest point to even fit. With that said I have been plugging away at stuff, brake lines are ran, rear suspension is in, engine is assembled. adapter kit for the trans is machined, body panels are getting put on. started on the interior, everything takes so long. painting brackets and hardware and aligning everything but i am very happy with how its coming out. I was told the car came with a 240sx diff, its actually a j30 diff so it has a 3.91 gear ratio. That may be a slight advantage so not to mad. Anyway, after all this reading. enjoy some photos.
3 points
-
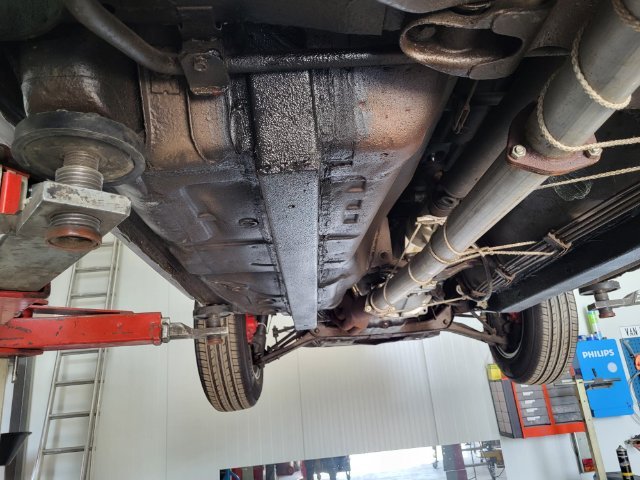
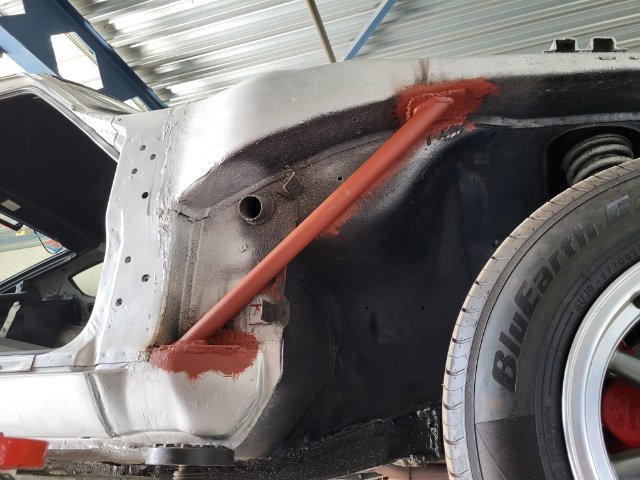
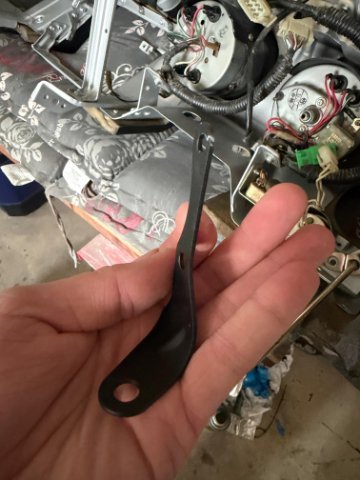
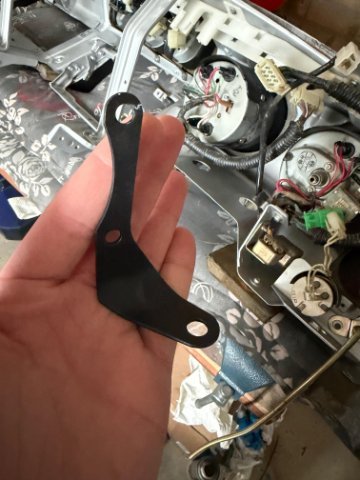
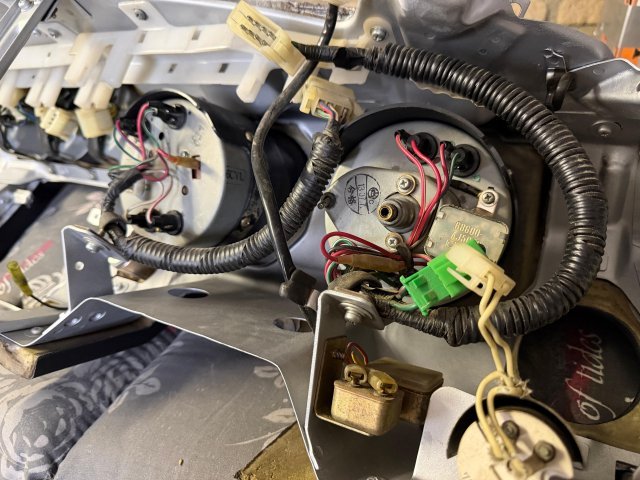
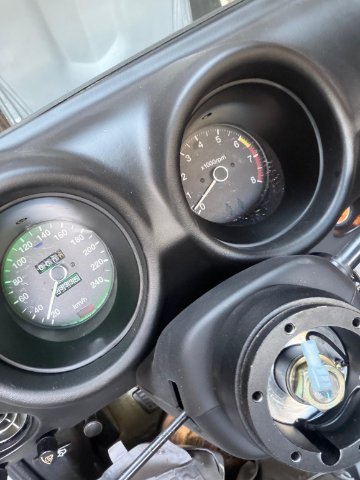
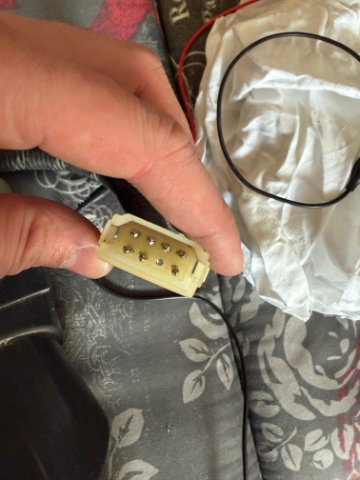
It’s been a long week where in a lot happened, including me getting engaged to my beautiful girlfriend last week! But personal stuff aside we are here for the Z. The body shop couldn’t wait any longer and with my permission they ended up modifying the passenger side frame rail to fit. All in all they did a great job and the end product looked great and above all was very strong. As an added bonus they even gave the frame rails a new coat of underbody spray and drilled two holes in each rail to coat the inside with wax and prevent condensation buildup. This meant I could finally pick the car up last Friday after being over 4 weeks stuck in the shop. By coincidence I was free from work that day so I even got to start the reassembly of the interior starting with the dashboard. And I also quickly strayed the Apex fender braces silver to match the rest of the car. I finished reassembling the dashboard during which I had a little bracket left over. I have studied every possible parts diagram and video but I can’t seen to find where this bracket came from. It was stashed together with all the dashboard parts and bolts but unfortunately I wasn’t smart enough to take pictures of the disassembly. Does anybody know where this little bracket belongs? Anyway I decided to continue the reassembly of the dashboard and reinstall the dashboard into the car. This went rather smoothly even though installing the dashboard all by yourself is a bit of a pain. I immediately tested all the electrical components to see if all the light (which I replaced with LED’s) and gauges still worked. Everything fortunately worked except the tachometer backlight which turned out to just be a reversed polarity, which isn’t an issue for halogen bulbs but is for LED’s. This was easy enough to fix by switching two pins inside the tachometer connector. I’m now at a point where the dashboard is complete and the carpet is mainly in. Because of a national holiday I will have a four day weekend starting this Thursday. This means I can finish the interior of the car and start installing the Apex front and rear control arms, steering knuckles and front crossmember. I really hope these don’t contain manufacturing faults or else they own me a really big apology.
3 points
-
Long week number like 200 but happy with the my progress. Made a tweak to a color based off a cadillac cts5 v blackwing. Its a bit more "copper" tone of orange than I was picturing with the modifications but I am very happy with it. As soon as I started pulling the masked off areas and was seeing the contrast with the grey I loved it. Did get some fisheye on one door so I'll have to fix and respray that at some point and a couple sags/runs in the clear to sand out, but I can make some serious progress on the build now. did get the engine stripped down as well. Bearings, rings, valve springs and a gasket kit have been ordered to freshen it up. but otherwise everything measured out good and seems like a good starting point.
3 points
-
Hi everybody, long time for updates. Been quite busy with kids and a very nasty divorce going on. The good news is my garage and cars are still intact and I am still making progress, although very slowly. Car is very close to track testing. I decided to have a new pair of steering arms machined to match the front geometry. I will post more when they are finished. In the interim, I took the time to catch up on some side projects I wanted to do. With the advancement of AI, some of the projects I considered impossible a couple years ago have turned out to be quite easy now and very inexpensive. Based on Arduino technology, I have integrated a motion sensor into my data acquisition system. I use a Race Technology DL1 Club box which is limited to 8 analog sensor inputs, but can decode an almost unlimited amount of CAN signals. So I built a circuit that decodes the motion sensor and outputs a CAN signal. I now have 3-axis roll, pitch, and yaw angles along with speeds and acceleration live data. It will all be packaged in a small box that mounts in the car. Next is a infrared tire temperature monitor. A 16x4 temperature array sensor once again combined with Arduino and CAN output board. I am trying to package this as small as possible so it can be mounted on brackets roughly 4" above the tire. Again real time data of inner, middle, and outer tire temps while driving. Hopefully saves a lot of time when dialing in the camber and pressures. More to come...........3 points
-
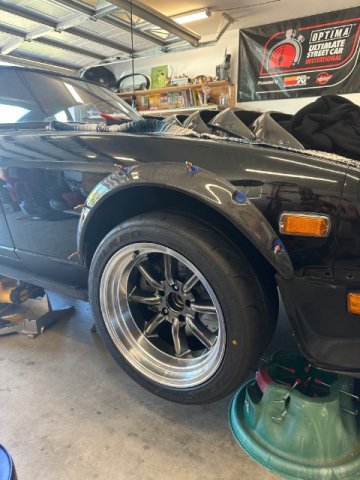
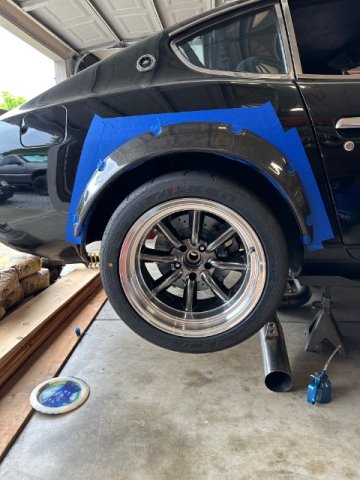
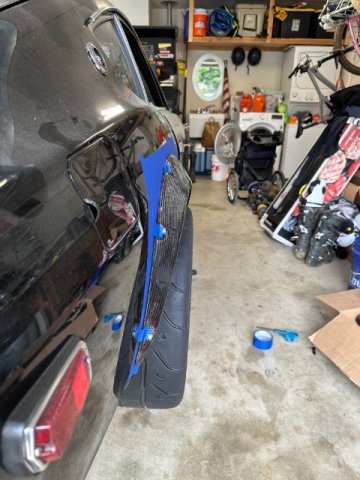
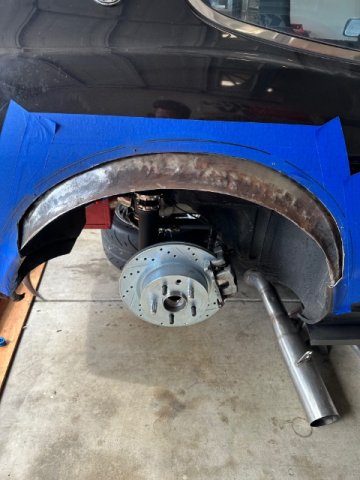
Been a long week but got everything completely stripped and got some epoxy primer layed down on all the metal surfaces. have plenty of body work to do but atleast its sealed and protected now. Hopefully in the next week or two i can get the bodywork done and get some color on it. I did talk to john and his comment is "I don’t claim to be an expert on bonding. But in my experience cracking at a bond line is often due to inadequate surface prep both the underside of the fiberglass and the underlying metal), poor bonding agent, not enough bonding agent, cheap body filler, and/or excessive flexing of the unibody. On the other hand, I know a lot of guys who do the bolt-on installation. For performance applications, it can be an advantage for working inside the wheel well". With that said I think I will spend the time to make the fitment as good as possible and make a last minute decision based on how well it fits/looks.
3 points
-
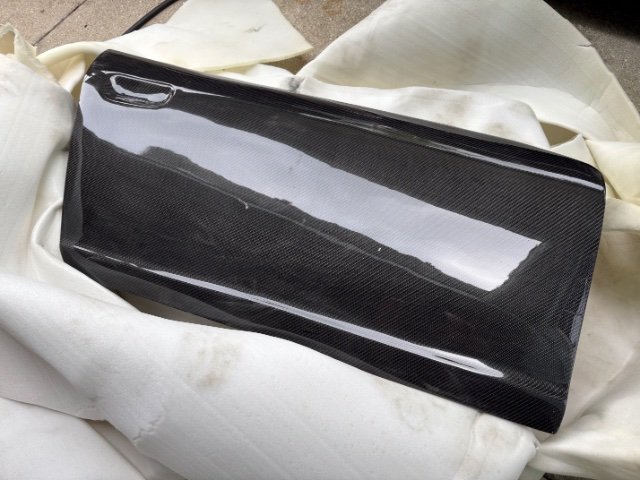
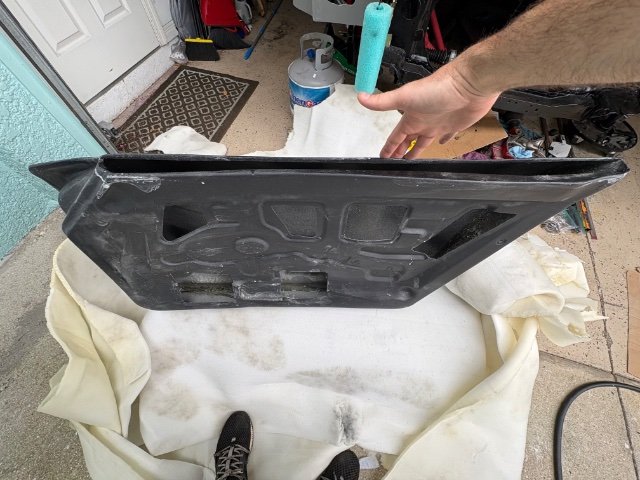
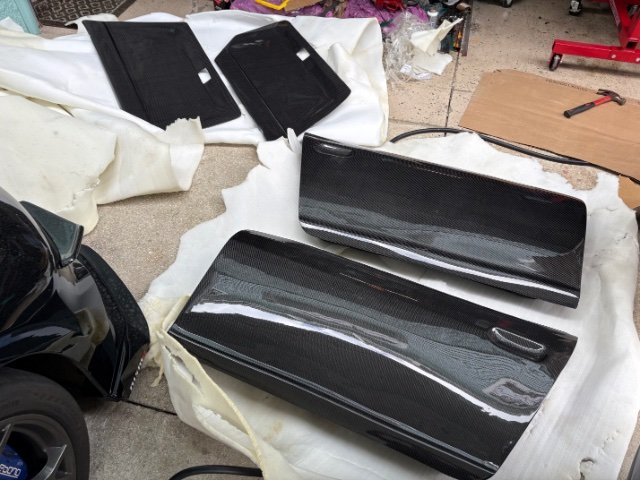
Carbon fiber door and door cards came in, these things are super sexy 🥰
3 points
-
Without the oil cooler, my water temps were never an issue. Never over 200 on track. When I put the Aviaid Mangusta pan on the car it had a provision for an oil temperature sender. Even though my water temps never got too hot on track, once I installed an oil temp gauge, I discovered that my oil temps were getting near 300F. I added the Setrab 34 row cooler, and my oil temps stay below 250F.3 points
-
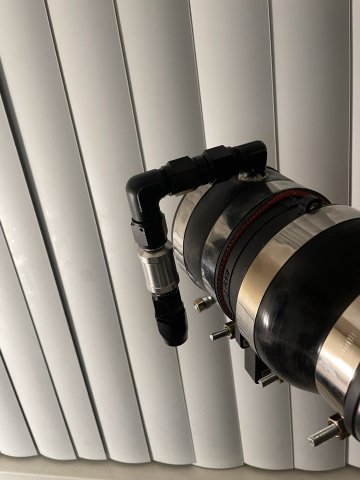
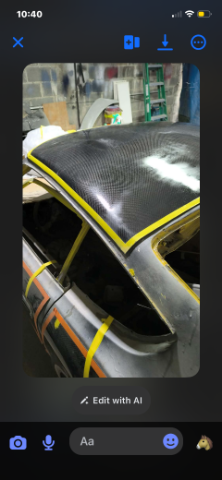
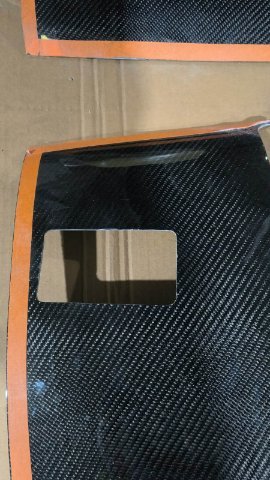
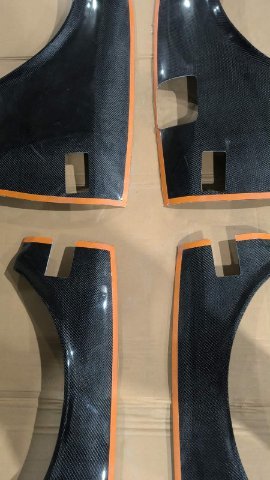
03-25-2026 ATLAS Z UPDATE: I got some of the fittings in I need for my crankcase pressure to catch can to intake setup. Also tall of my carbon fiber panels have been cut, final polishing on roof section then ready to ship to me and bond them on! Then make the borders shiny!
3 points
-
3 points
-
That has got to be the best balance of Form and Function of a Datsun that i have EVER Seen!! Absolutely amazing!!3 points
-
Unrelated update but reasons as to why there's been a lack of updates to this thread: Got a new job that demands a lot more of my time so unfortunately less time to optimize the SLA conversion. Upside however is that I'm learning NX which seems to be some next level software. I think this design is going to take one more fundamental change to really get the dynamic geometries perfect but the work I have so far has been a pretty excellent starting point. The car is also back from the rust repair shop and the cage shop, needless to say my wallet is in a lot of pain at the moment (especially with the S54 being built) but we do these things not because they are easy but because they are hard and we hate money. Anyway, enjoy some photos of the cage in the meantime.
3 points
-
Got it off Amazon: https://amzn.to/4aS32Br And picked up a male pigtail off eBay: https://www.ebay.com/itm/134129914749 I actually replaced the wiper arms too. I used 93 miata arms which bolt up to the stock datsun wipers mechanism. Passenger arm is a little long so I may shorten it. For wiring, I followed this guide: https://www.electronixandmore.com/resources/automobiles/datsun/index.html Note this is very specific to the later wiring for 1978(maybe 1977 too) and would not be applicable to earlier years.3 points
-
Hi All! I've owned a few s30's in the past and finally decided to build one. My car background is a lot of JDM cars including Supra's, AE86s, S13s, Skylines, a Stagea 260rs, etc. I have always loved the style of the s30 (don't we all), the aftermarket support for it and the random people who would stop me and tell me about their "Z" story. The story of this build started over a year ago when I purchased this 1978 Datsun 280z. The story behind the car (that I know of) was it is an American car that was brought to Washington and held at a speed shop awaiting restoration. Then was bought and stored in a heated warehouse for years in BC before i bought it. A little side story, I originally purchased a 1971 240z from the same person and they also had the 280z for sale but was well out of my price range. I would have loved to restore the 240z but unfortunately the amount of work it needed was well beyond my budget and experience just to get it to a useable condition. If you looked at it funny, rust would fall off the car. Mistakes we made. I was sold on what it could be but not what it will take to get there. almost a year later the 280z was still for sale, and the price was a little better. With some luck, i was able to convince the owner to trade back the 240z and cash for the 280z. Success!...Now, it seems the 280z was re-sprayed a British racing green but wasn't done the best and was flaking so i believe that's why it originally underwent the restoration in Washington. The car was just a rolling chassis, the front end had been primer epoxy'd and luckily had everything in boxes and labeled like "driver door guts", or "Rear hatch slam", which was nice to see. Now the goal of this project was to be a fun drivers, resto-mod car. It will be getting an RB26 from an r33 GTR, an RB25 transmission, DBW for the factory ITB's, Techno Toy Tuning full suspension, brakes, differential swap kit, running a Haltech S3 ECU and Wiring Specialties Harness, Poly fuel tank with an r32 skyline Radium hanger and Hellcat fuel pump. The bigger ticket items like turbo/manifold, radiator/fans, and then some smaller things are missing but most of the project is there now. I do plan of re-wiring the whole car considering I'm spending money in every other area. Now, just like anyone, I did set out with budget but considering since I last built a car, prices have gone up for parts which I stupidly didn't account for. Also a lot of, "well if i'm already doing this, then i might as well do that", and "since i have this off, i might as well get that." So the budget has been blown....but at least I'm happy! (maybe). BUT as it stands, the suspension and diff swap kit is in and the car is currently at the body shop getting the sunroof hole patched as well as some of the smaller trim holes plugged and a few small rust spots taken care of. Here are some pics throughout the build and as it stands. Any questions, advice or help for some "gotchas" will be welcome!3 points
-
Great work so far! I’m sure this will be an awesome build. I suspect you will be running fender flares or a wide body kit seeing as your wheels are poking out a bit?3 points
-
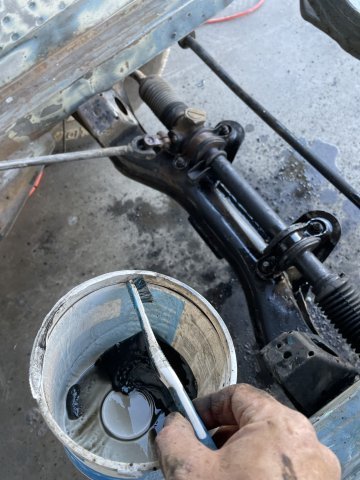
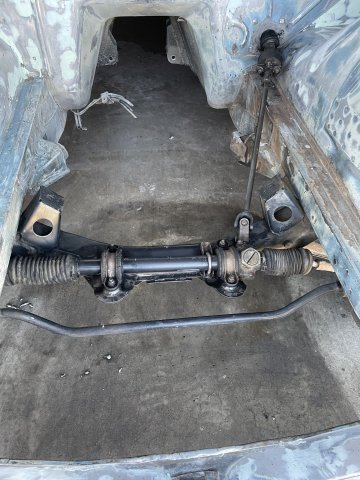
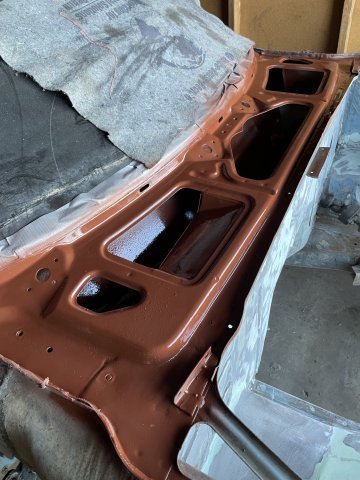
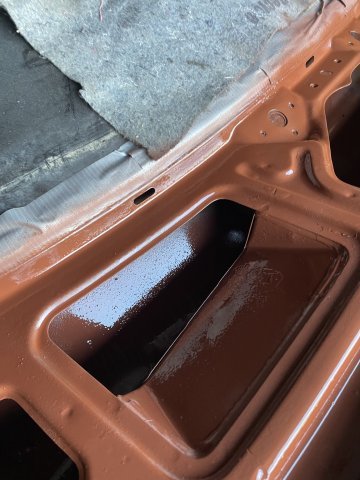
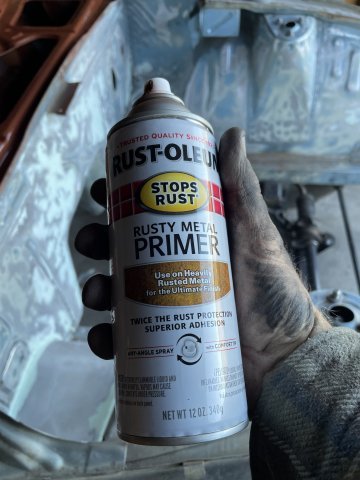
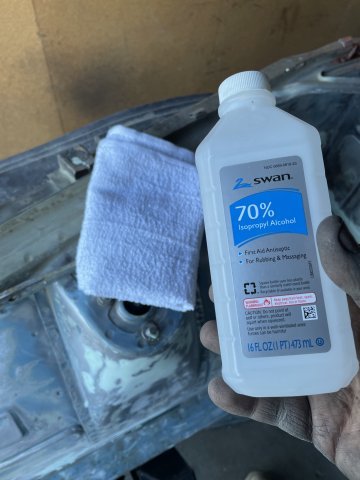
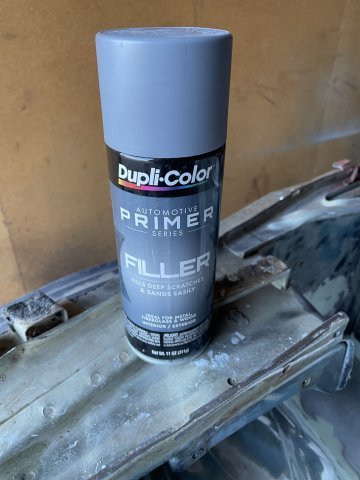
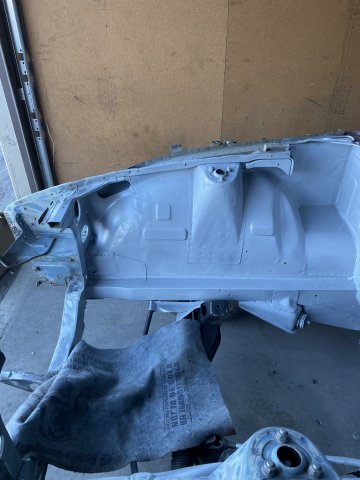
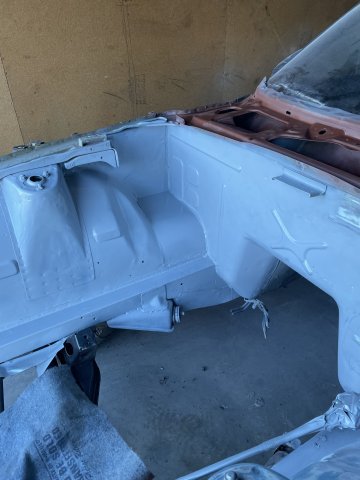
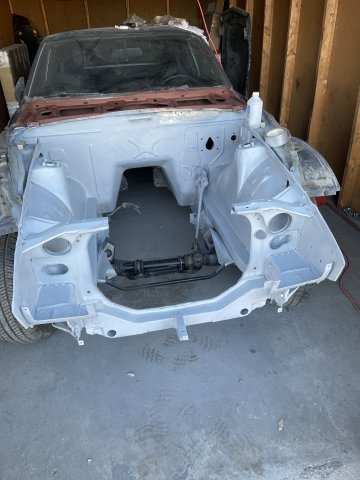
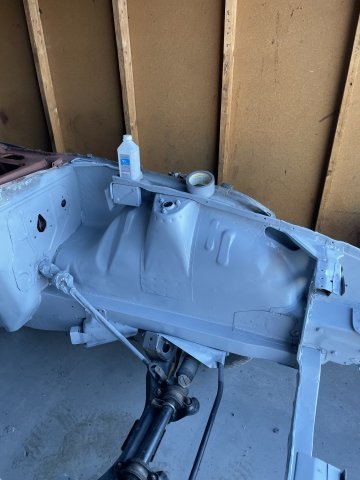
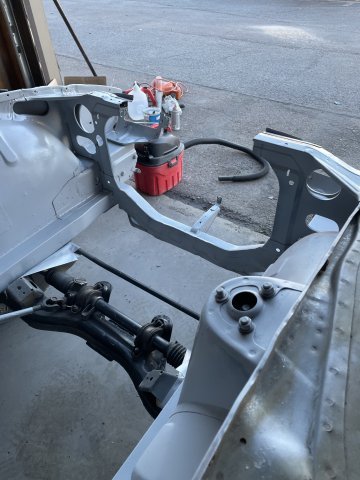
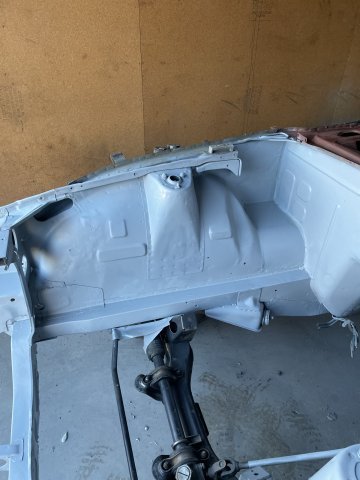
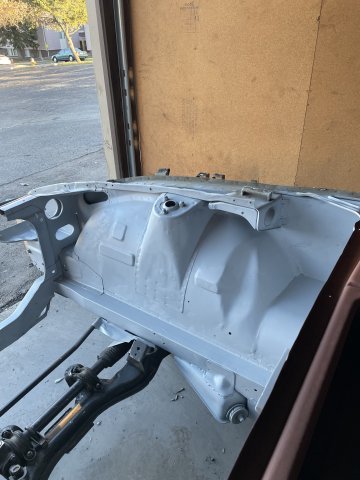
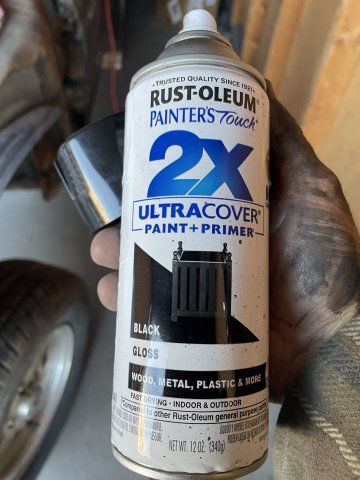
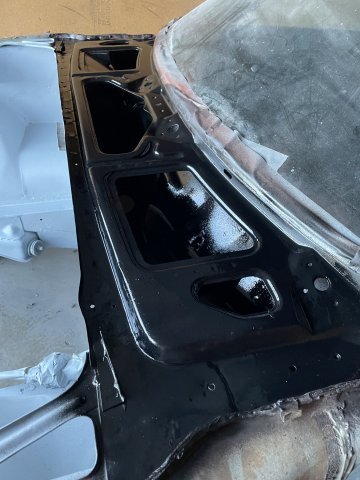
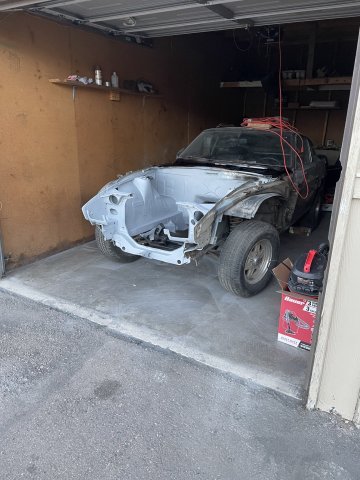
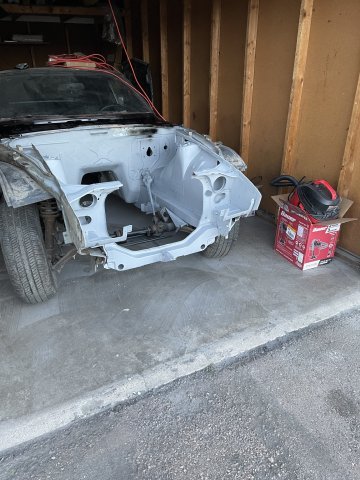
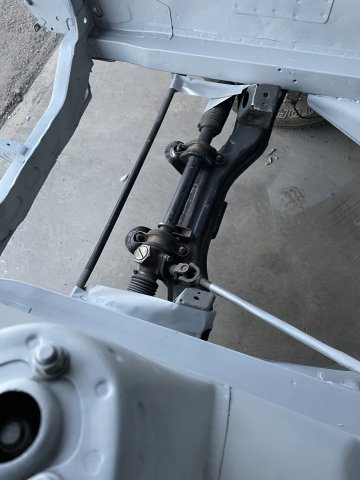
11-01-2025. 260Z work. I got the engine compartment sanded down after the glaze and then cleaned up the crossmember and rack with cleaning solution "g@s" and a toothbrush, and then steel wool, etc. Then I vacuumed out the cowl and primed it with rustoleum rust primerand top coated it with gloss black paint, then painted the engine bay with filler primer. Once dry I will use some spot putty I picked up on the areas that need it, hand sand it smooth and filler primer over that. Once it is good, then I will progress to color and then clear. Busy day! Pics:
3 points
-
Yes, still working on then, just have not posted anything. Bought some expensive components that take time to recover from. A blank PAMS head, that I then designed and has DelWest make me titanium intake valves, Inconel mnemonic stainless steel exhaust valves, also MoldStar 90 seats and guides. Had it assembled, and ports cleaned up for some nice flow numbers. Also purchased a Nismo 6 Speed Trans that was also strengthened and modified by HPI in Japan. I take some progress pics soon.3 points
-
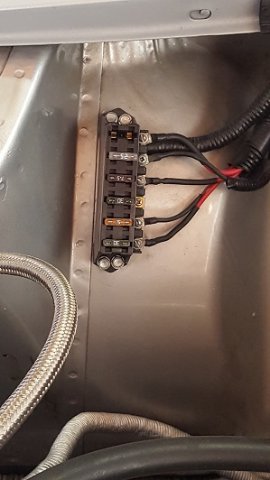
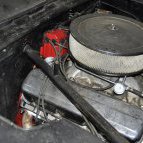
Picked this up from local hot rod shop for my 240z SBC 350 project about 13 years ago. Circuits: Electric fan relay Fuel pump Radio and amplifier Power windows Summit Racing/parts store etc probably have this fuse box.
3 points
-
Got the sensor figured out. It is idling around 130-140 F. Should be OK. I have to post a video. Sorry but I think this thing sounds bad ass. I have an insert in the exhaust so I dont need earplugs.3 points
-
Update: after speaking to Cortex and getting some spindle dimensions from them for CAD mockup, looks like I’ll be using their Radial X spindles. Very exciting stuff, I am a bit weary about using aluminum spindles but the car is a track car and last weighed at ~600# over each front wheel so I think I’ll be alright. Thanks! Excited to share my progress with you guys. I’d eventually like to make my work/design open source and see what more talented suspension engineers can do with it. If I didn’t just buy one of these yesterday I’d offer to trade you a complete kit for one of them KN20 heads XD. A bummer indeed, just another bump in the road! Funny you mention Stock Car blade-swaybars. It’s basically all I’ve been looking at for switching over to that design. Plus the parts are pretty cheap & standardized. Thanks everyone.
3 points
-
This is awesome. We haven't had a good engineering project on here in a while, so this is a good to see.3 points
-
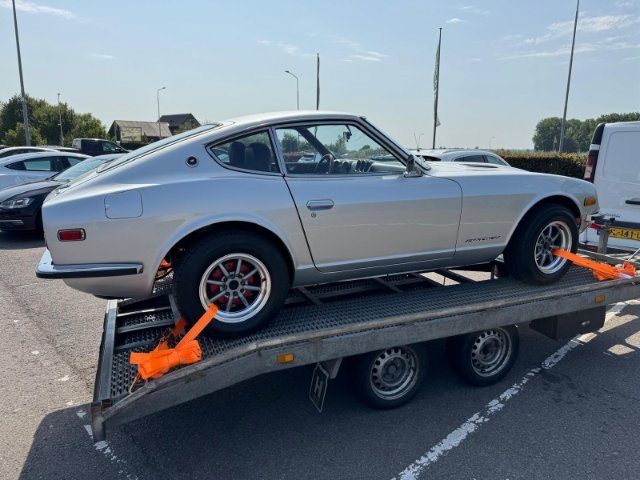
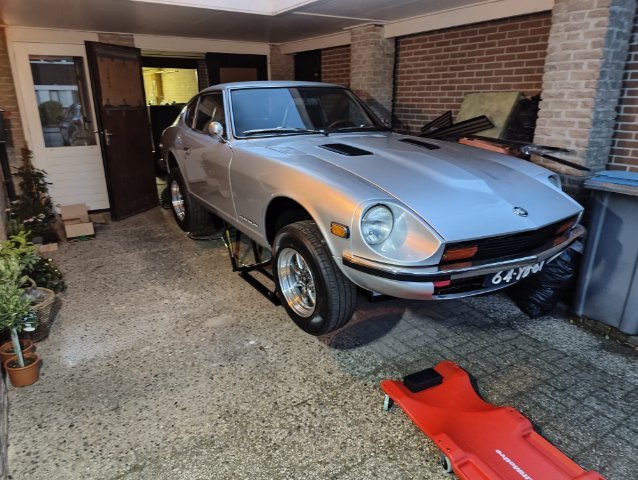
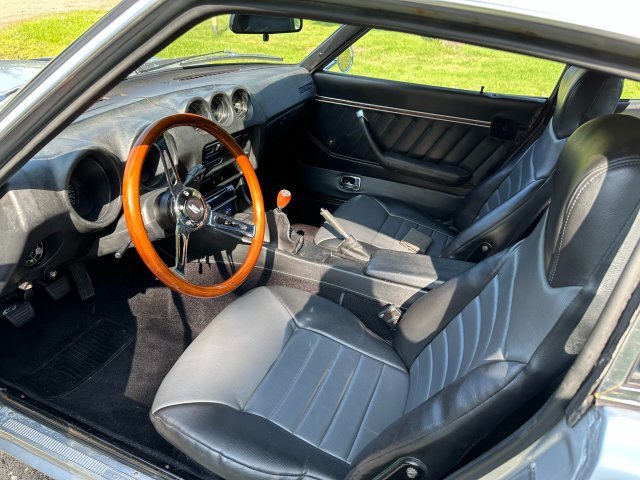
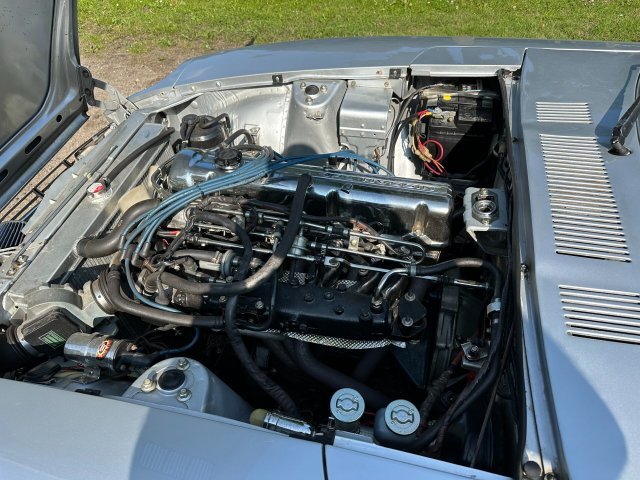
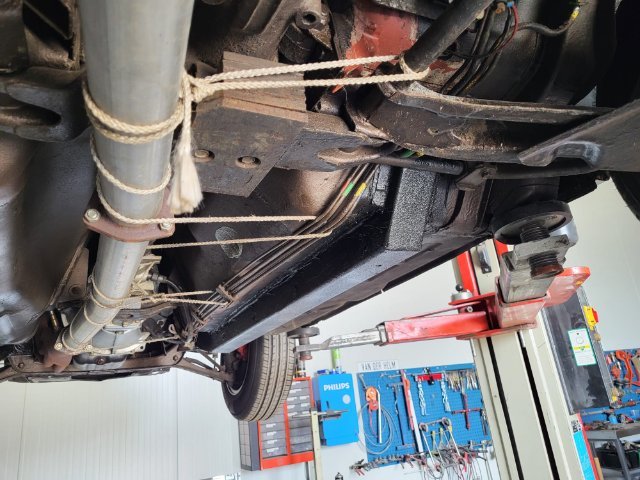
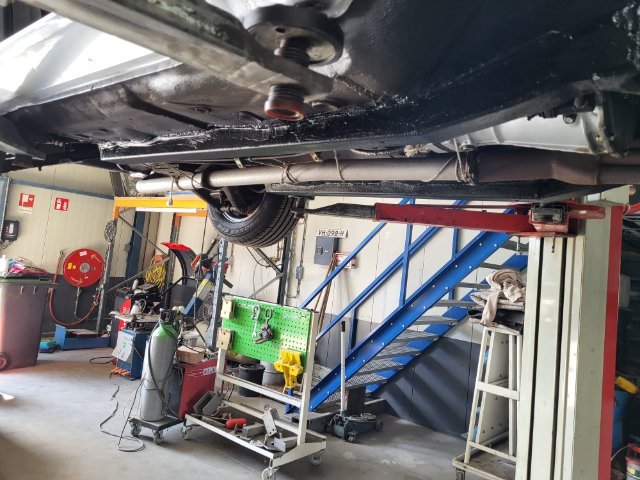
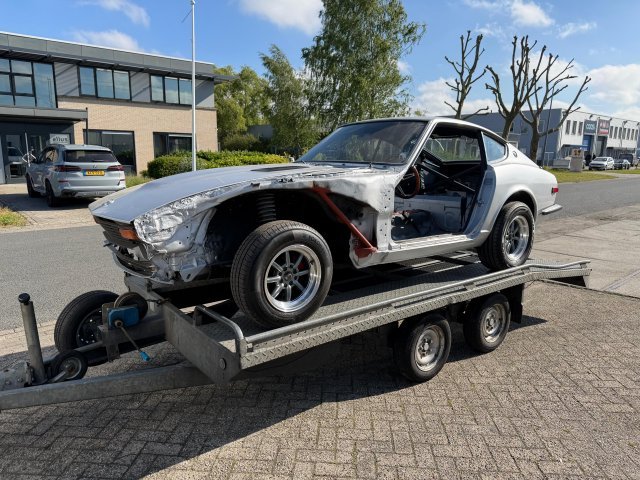
Hello everyone and welcome to my 1977 280z project! I will be using this thread to document my journey with this car and all the little thing that will be done to it to ultimately restore and modify it to be my dream car. I bought the car last week at auction for the decent price of €20.500,- kind of on a whim as this has been my dream car ever since I first learned of there existence (thanks Wangan Midnight and the Devil Z, I know its cliché). Yes €20k is a lot of money but a mid-condition one sells for over €32k here in Europe nowadays. (You can see which side I tied up and which side my dad tied up 😂) What drew me to this car was the paint (absolutely not perfect and needs a repaint at some point but looks good enough for now), the goodies like new wheels and tires, new wooden steering wheel, factory 5 speed gearbox, R200 diff and the claim that the engine was rebuild 10 years ago. Although when picking up the car it turned out there was no documentation what so ever. The car runs and drives and is in fairly decent condition but currently has no valid inspection (called APK in the Netherlands) as the previous owner stats it’s because of the car running rich. Of course it has a cracked dashboard, some small surface rust forming and is missing bolts all over the car but these are all thing that can be fixed over time. For now my main goal is the fix some little stuff and get her on the road so I can start to enjoy the car. So naturally I placed the car on my Quick Jack lift and ordered a bunch of parts from Z-Services EU in France. There are a few thing I like to address before taking it in for inspection. The hood doesn’t open as the cable brackets are missing, the door hinges need rebuilding as the doors won’t close properly, some general maintenance and fixing some sweating oil seals around the car.
2 points
-
07-01-2026 ATLAS Z UPDATE: Well in between working on my other Z, I am still working on this Z car. I went ahead and started working on getting the blue painted portions of the body ready for clear coating, and caulking the border of the carbon fiber pieces. Initially I had planned to paint on a fresh coat of factory blue before clear, but I think I may go with the patina finish that is left after smoothing out the paint and getting it ready for the next step. Using "Poppy's Patina" in a high gloss finish....2 coats.....apply and then the next day apply again for 2 coats is the plan for now. This car is meant to just have fun with. It's the project car while I have the other Z anyway. my 240Z is giving me some timing issues to contend with so I have plenty to do. Also put my water meth pump on some steel to start getting the ideas flowing. PICS:
2 points
-
No sir. The ZPS prototype was fitted in 2011. That EZ setup is similar, but it doesn't use torque sensors or an ECU. It's also substantially more expensive. There IS a company that "copied" our design, but they use an inferior motor that isn't for automotive use. Found it odd that they ordered two of our units back in 2014. We've also developed an electrohydraulic system for those wanting to retain a hydraulically-powered rack, but don't want a traditional PS pump hanging off their engine. Ours uses an electric PS pump with remote reservoir (not as popular as the original ZPS kit, but a number of V8 swap S30 guys have bought one. Hope that's all helpful!2 points
-
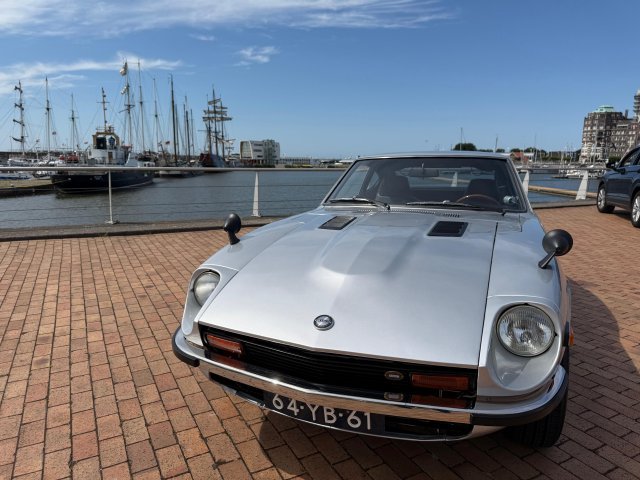
Hello fellow enthusiasts! A family man from Norway here. I got into full-size cars late in life and have been part of the vintage Porsche scene here in Oslo, Norway for around a decade. A project I recently completed is a 5-year nuts-and-bolts bare metal restomod of a 1985 Porsche 944. But now I got myself a 1973 Datsun 240Z. For a long time, I've been Japan curious. Dreaming of visiting the country. Enjoying Japanese cuisine, Studio Ghibli films, various Asian art, the Initial D anime, and following Larry Chen and other Asian car culture YouTube channels. But being in my fifties I am not identifying with huge turbos, vivid car liveries or oversized exhausts. Eventually landing on an older icon. The 240Z. I am a self-taught car restorer and mechanic. And everything I know I've learned from online web forums and old static web pages. I am establishing this thread on Hybridz as I feel a desire to give back and contribute to the continued hub of knowledge and insight in car culture in general, and to the Z-car community in particular. I want to share a full journey, that is readable as a full story. I find that the continuity is harder to do properly on Instagram, FB or similar. But I am planning on sharing updates both here and on Instagram. The car I am now the owner of was first registered in Switzerland in June 1974 and has all the features of what is described as a "Final European Spec". I do not have any written documentation on the Swiss registration. But I -do- have what looks like an original dealer sticker in the rear windshield. And the letters "SWI" written with a crayon on the glovebox mount bracket. The car has lived in the Netherlands since 2001. And now it has moved to Norway. I have little written documentation on the cars life, but the dealer told me it has been sitting for several years, before it now was put on the market. Tires were like hockey-pucks, hoses are dry, bushings are worn, shocks are shot, seatbelts are missing, and there are some rust issues. The car is now red, and the original color is orange 918. But the car is what I describe as "complete". Most the original components are there, apart from the front lip. And it has not been "wrenched to death". I am really looking forward to a long journey with this car. Here are a few images of the car when it was delivered to me. And from today's visit to have the car approved and registered into the Norwegian vehicle registry systems.
2 points
-
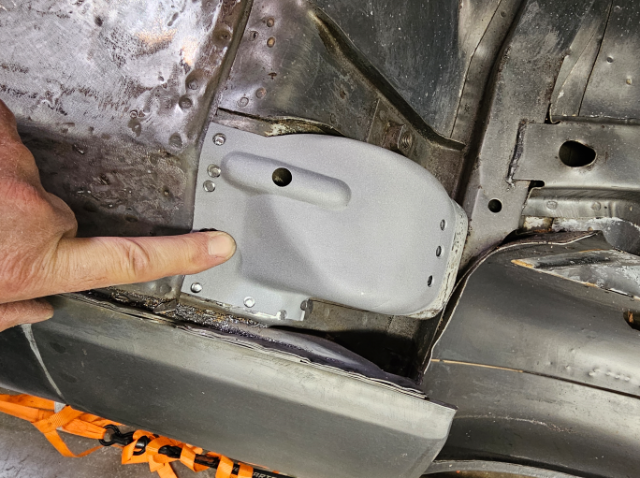
Another productive weekend. Unlike my Turbo chassis that has a late 71 build date, this car having a mid year build date has protection plates over the seat belt pockets. But of course they were used by the PO to jack the car and dented them up. I drilled out the spot welds and removed them, allowing me to straighten the dents and blast underneath them. Before: After: All sprayed with weld thru primer and ready for plug welding back on.
2 points
-
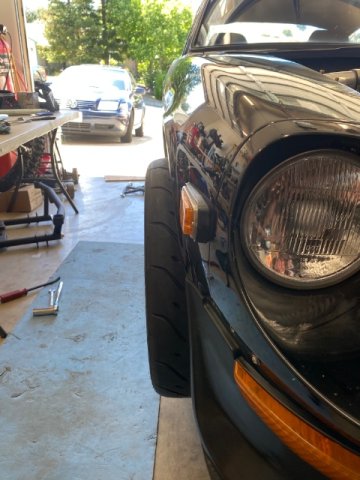
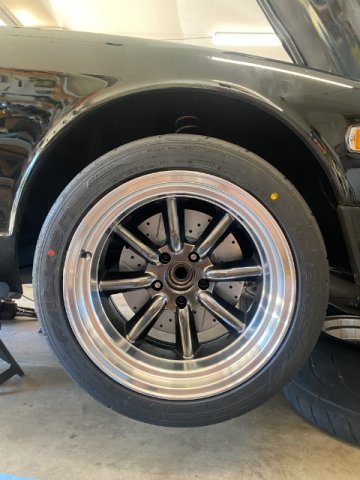
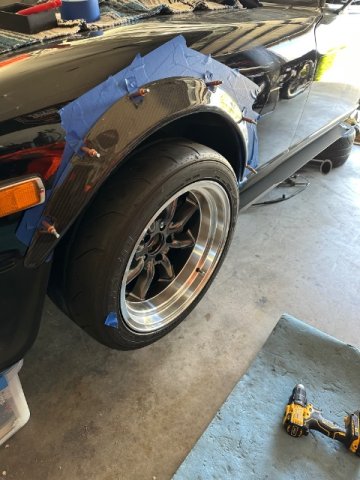
My photo album for the build is located here: https://photos.app.goo.gl/FEXaWgYEMedA2FJv9 My first project car is a 1973 Datsun 240Z. Like many cars, it was mostly stock with a lot of rust when I bought it around 5 years ago. I taught myself to weld and did all the rust repair. I replaced floorboards, frame rails, and many small patches in the fender wells. Then, I rebuilt the braking system and replaced numerous broken or rusted-out parts. Next, I re-gasketed the engine, drained the fuel tank, and cleaned the fuel system. I took the car down to bare metal and tried a DIY paint job. After that, I drove the car for about 3,000 miles around town and on a couple of road trips. I had my fair share of trouble. I had to replace a fuel pump, the alternator only puts out about 12.5 volts, and the wiring harness is starting to show its age, and the previous owners that created a rat's nest. Recently, I purchased another project car that came with a lot of parts and swapped them on. I added TTT coilovers all the way around, Arizona Z Car lower control arms front and rear, Arizona Z Car tie rods, upgraded front sway bar, new front valance, fender flares, and trimmed fenders for clearance, Watanabe wheels, and Toyo R888s (215 front and 235 rear.) I also cleaned up the interior a lot with new door cards and interior trim pieces. Recently, I replaced the billet diff mount with a new polyurethane one, fixed a lot of my early welding, did a full engine service, got the door handles working promptly, and modified the exhaust because it hung about four inches too low. After this, I put about another 2,000 miles on the car. All this work has the car in pretty good condition, but there are still a few things left to have a true daily driver quality car: 1.) Fix the exhaust. I got it tucked up nicely, but between my poor welding and previous owners, there are several leaks, and it sounds terrible. 2.) Rewire the car. I have the brake, reverse, and running lights working. However, I have never been able to get the turn signals to work, and the gauges work very seldomly. I have purchased a 21-circuit harness from EZ Wiring and will rewire the whole car in the next month or two. https://www.ezwiring.com/product-page/ez-wiring-21-standard-wiring-harness 3.) New gauges. EZ Wiring sells new gauage kits. I'm not sure if the 50-year-old gauges are broken or if the wiring harness is bad. So, I think I'm just going to replace the gauges with a set I know will work with the new harness. https://www.ezwiring.com/product-page/shark-mechanical-gauges 4.) Re-attach the skid plate. I had cut the plate off because the bolts were rusted and stuck in the car. I fixed the plate by welding some washers on the bolt holes, but I need to drill out all the old bolts and tap for new ones. I don't have the car lowered that much, so I'm not too concerned about it, but it would be a nice piece of mind. 5.) Alternator. Ever since I have owned the car, the alternator has not worked properly. Recently, I had the alternator rebuilt with quality parts and bench tested. I know it works, but the car is only putting out 12.5 volts when running. I have played with the wiring and got the alternator to put out 14 volts, but then you can smell the wires burning from too much juice. Like I said, there is a rat's nest from the previous owners. I am at least the fourth owner, but I don't have a full history of the car. I have an FSM, but the wiring guide no longer matches because of all the other owner's work. This is why I plan to replace the whole harness. I'm hoping the new harness with better relays with fix my charging issue. 6.) Alignment. After I put the new suspension on, I did a garage alignment, and it is pretty good, but I would like a professional to take a look. I have that scheduled for next week. 7.) New Dashboard. My current dashboard is pretty rough. It has several cracks and looks pretty bad. I have a newer, crackless dashboard. When I rewire the car, I'm hoping to swap the new one in and put some sound deadening behind the dash while I'm at it. I'll post my progress if anyone is interested, and I'm sure I will have a couple of questions. I know the last finishing touches take the most amount of time. I'll also answer any questions anyone has, but I'll warn you that I'm a hobbyist. My full-time job is as a lawyer, and I'm by no means the best mechanic in the world. My welding has also gotten a lot better, but it surely isn't that good. Thanks!2 points
-
I'll echo a couple good points in this thread. I came to this board in 2013 after a good run over on Ratsun, but getting deep enough into the Z specific stuff that I was getting more interested in here. Back the, Hybrid Z was already a place of "SEARCH" and "BAD GRAMMAR MEANS YOUR POST IS INVALID". Some very loud voices kept the general discourse to a minimum, even back then. I think generally, as the cars have gotten rarer and more expensive, a lot of the old guard who liked them for the chassis "cool and cheap" moved on. Facebook rose, and HybridZ has been relegated to a reference item. Lots of other thoughts, COVID, the death of Photobucket etc, but on and on and on. I will say, the forum as a model is not dead. I recently joined a Lotus board, and wow are they busy over there! My Tundra too has quite a bit of forum activity. I've said this in other threads of a similar ilk. Be the change you want to see. If you want more content here, post the content! Make it happen. And tell the youth about the resource that is here. There's quite a bit going on out there in the big wild world still.2 points
-
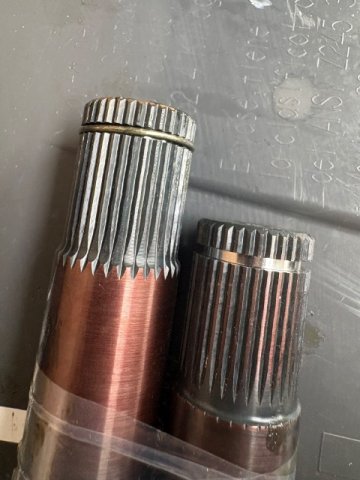
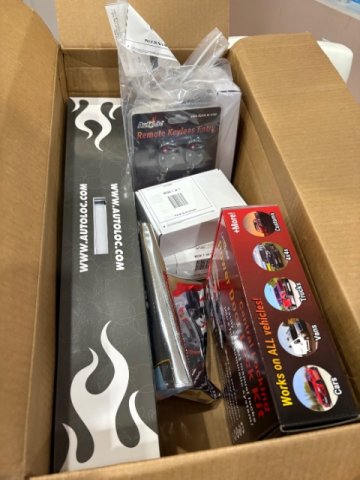
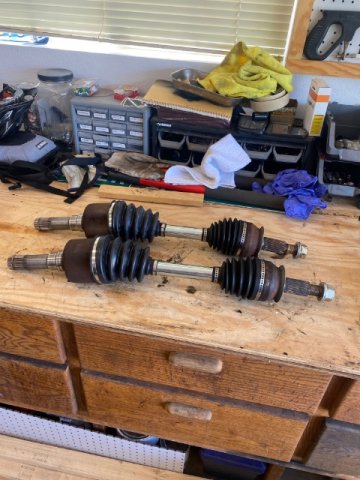
New axle shafts came in today, woohoo. Now that’s how the snap ring is supposed to sit. Hopefully I can put them together this weekend. Also got some other goodies, push to start electronic locks and window kit.
2 points
-
looks like a great starting platform for whatever direction you decide to go with it.2 points
-
Trickflows are a great choice. I have a turbo 351 so not a direct comparison but when I switched from GT40s to 11r 190s it made a massive difference. Unrelated to the engine. I weighed my stock 280z door today. Its gutted so I can paint them. so no glass, regulator, handle, lock, hardware, window frame ext. just a empty door shell. 34lbs.2 points
-
HybridZ is now 26! It's too old to remain on its parents' health insurance plan, and now needs a real-job, with benefits and maybe even a 401K plan. Anyone left here, who started working on their V8 Z project back in the 20th century, and is still wrenching on it? Anyone?2 points
-
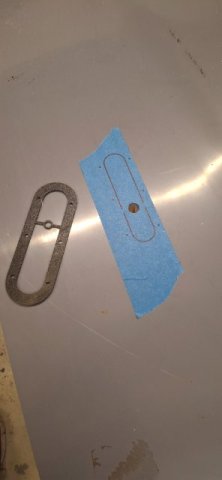
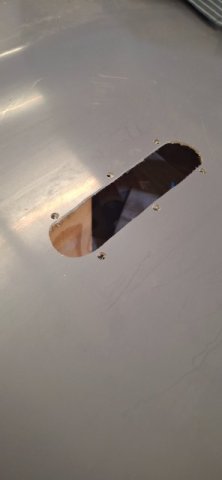
The access panel is to get to the fuel filler neck. I think I got the panel from Allstar Performance. I wish the panel was just a little bigger so that I could remove the filler plate though the opening. The one I have is just a little too small...
2 points
-
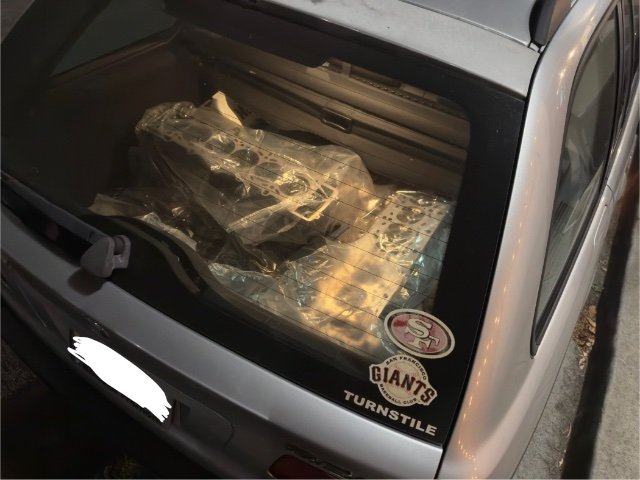
I have the ATL 12 gallon cell in mine. I also use the ATL Black Box sump with pump. The fuel return dumps into the top of the Black Box. I can use pretty much every drop of fuel in the cell without fear of starvation. My cell is below the rear deck and offset to the right for weight distribution reasons. You can just see the bottom of the cell in this picture:
2 points
-
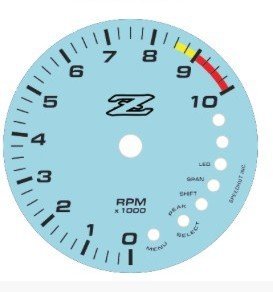
Got my proofs back from speedhut with the Z in there.
2 points
-
Time to update the build threat again. Things are moving slow at the moment but none the less progress is being made. I have contact with two local body shops in the area for the frame rail repair and to measure the body to see if it’s twisted in any way. One of the body shops is specialized is classic car repair and restauration but will probably be quite expensive but none the less a representative will come by to look at the car this week. The other body shop is a more generic one that also does a lot of classic BMW’s and has done some paint work for me in the past. There hourly rate is a lot cheaper, I know they deliver great work and I know they sometimes are willing to do cash work. To save money on the body shop hours I decided to bite the bullet and order a bunch of parts from Apex Engineered which should arrive somewhere next week. Deciding what to buy was quite difficult as the shipping rate varied a lot but in the End I got the shipping down to $284. I all I bought the frame rails, front fender braces, front and rear control arms, steering knuckles, front crossmember and the rear strut brace. As importing stuff from the US is pretty expensive I decided to place a bigger order then what I strictly needed to maximize the value for my money. As the car needed to get welded anyway I ordered the front fender braces as well to reinforce the front of the car as they weren’t that expensive and seemed to me as a worth wile upgrade. As for the control arms my main reasons for buying those was to delay any major body repairs. If my body turns out to be twisted repairing it would turn into a full on restauration project. I do plan on restoring and repainting the car some day but not now, so as a temporary solution the adjustable control arms allow me to tune the effects of a twisted body out a bit. At some point I would like to get the full Apex Engineered Retro Mod suspension so this will give me a great starting point to work from anyway. To save some more money at the body shop I will strip down the interior and remove the fuel lines myself before sending the car of for welding. But before doing that I still have a chance to fix some small stuff surrounding the engine. My backorder from Zservices in France finally came in together with a used Bosch AAR from a Porsche 944 as my original AAR turned out to be broken. So last week I took the valve cover off to adjust the valves and replace the gasket as it was leaking a lot of oil. Good thing I did as the valves where very out of spec. The adjusters where a pain to get loose but after that adjusting them was very easy. I put everything back together with some new NGK spark plug wires and started her back up. Even with near freezing conditions the car started right up and idled better then ever before. The engine still runs very rich at idle and I suspect it might be an injector issue but other then that the engine runs great and the emissions are within the limits so I will place that issue on hold for now. My plans for the coming weeks are to strip down the interior, remove the fuel lines, front fenders and doors. This will also give me the opportunity to clean and inspect those parts of the car for more hidden surprises. I will also repaint the fuel lines as they are full of undercoating and try to restore the dashboard as with any Z mine is cracked. As for the doors I want to rebuild the door hinges and maybe try and reupholster the door cards as mine are actually of a 2+2 and have a giant hole instead of a second door latch. I’m hoping to get the car back on the road after this so I can finally start to enjoy my 280z this spring. Video van WhatsApp op 2025-11-24 om 10.58.36_fab92d46.mp4
2 points
-
I don't know how you have the engine placed, but I would offset the engine about 1 inch toward the passenger side. The drive shaft angle is easier to minimize with the engine shifted in-line with the pinion. This also makes the weight distribution a little better when you are in the car.2 points


.JPG.610ed984fe518681d3e91e1e9db2c217.JPG)
.JPG.e329303b2289e41a95dd4a5e6b9b2bf6.JPG)
.JPG.9c7a1ba75f1d864dfbf8d25cacd45f1e.JPG)
.jpg.9a495c827ef23eaabc1d5953ebb2a222.jpg)
.jpg.a28119b0a846d3cc307ea2f488edf719.jpg)
.jpg.9342f7c8ede52da0e23921e7d8cf589c.jpg)


.jpg.b34f27553f5960421801c8ab2cbf5db3.thumb.jpg.7889e8073010b6a0d8d6aae0626e768b.jpg)