1969honda
-
Posts
445 -
Joined
-
Last visited
-
Days Won
2
Content Type
Profiles
Forums
Blogs
Events
Gallery
Downloads
Store
Everything posted by 1969honda
-
Building a race car.. looking for advice!
1969honda replied to jsausley's topic in S30 Series - 240z, 260z, 280z
Thread is almost 7 years old.... -
The other thing you may look into (I'm still researching and learning chassis and suspension design) is something like the modular ball joint rings? Possibly hook the stock tension rods in to one side and make a new lower control arm off of the threaded stud? Use a something like below but have one side go to the stock control arm mount and then run the clevis side back to the tension rod? https://www.summitracing.com/parts/sps-94000 The link below also has something similar that the miata guys use? http://www.kineticvehicles.com/ControlArms.html
-
6l80e fit in a 75 280z?
1969honda replied to tyranie909's topic in Gen III & IV Chevy V8Z Tech Board
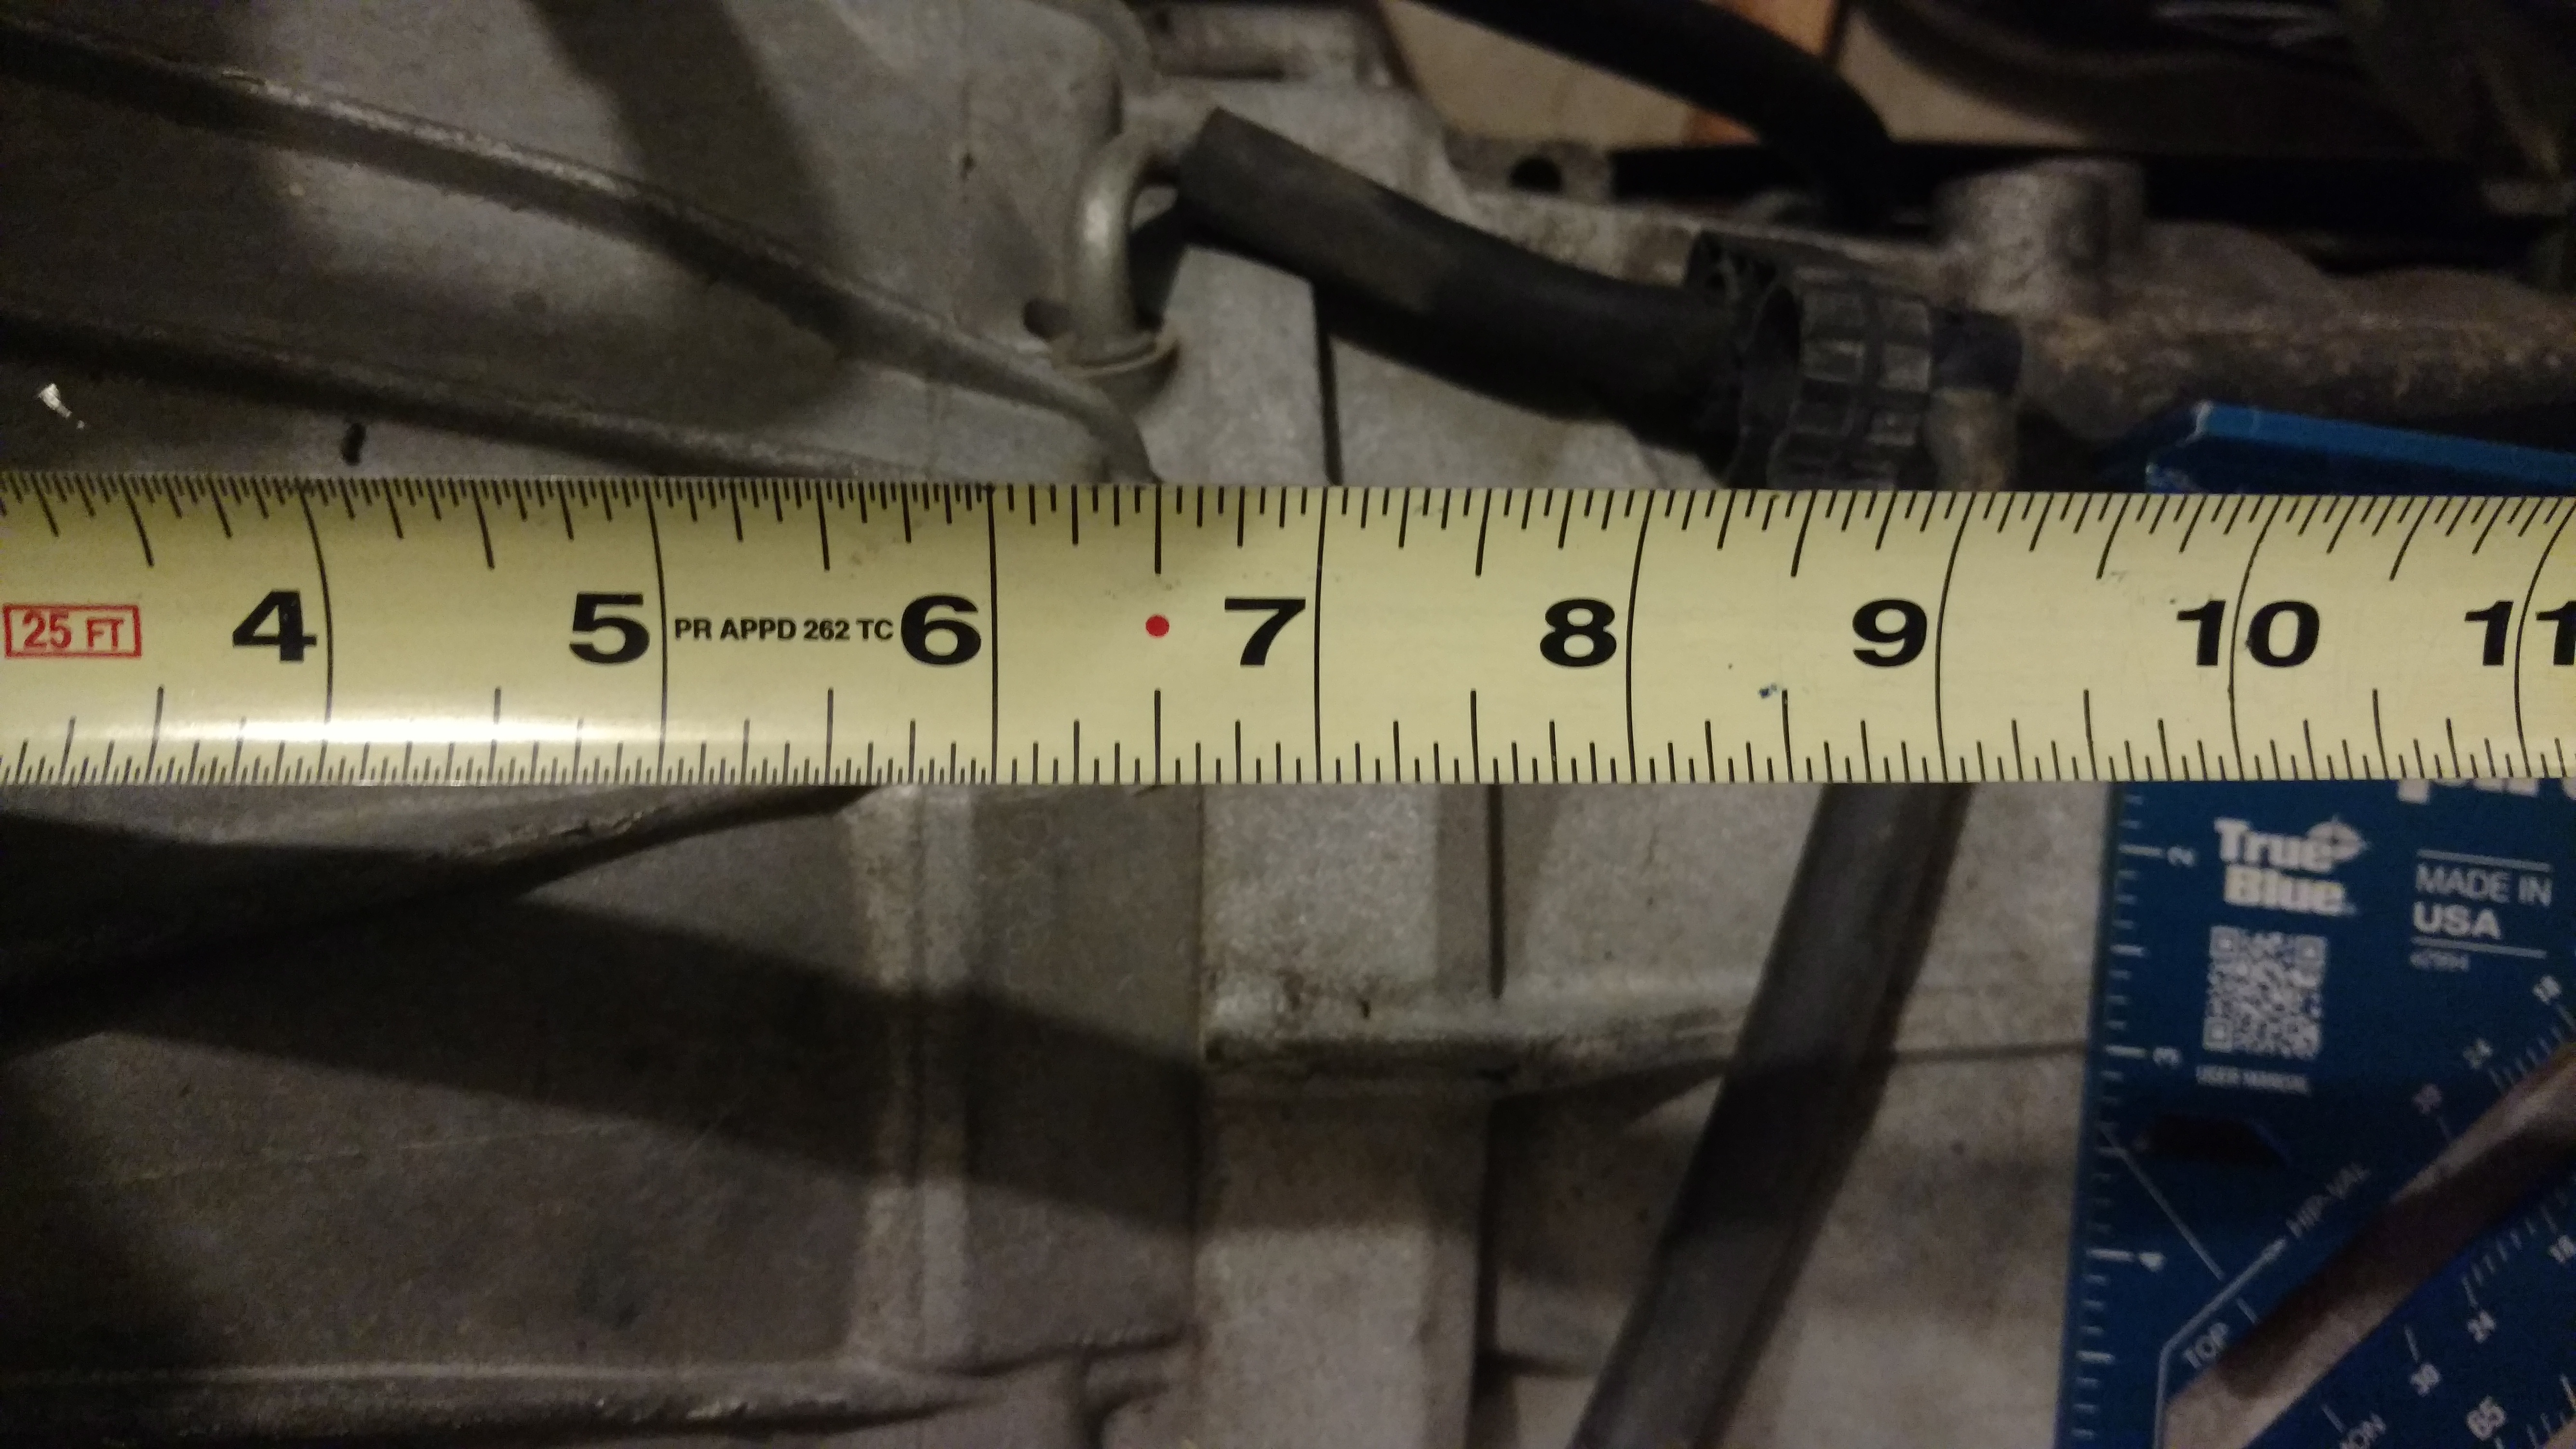
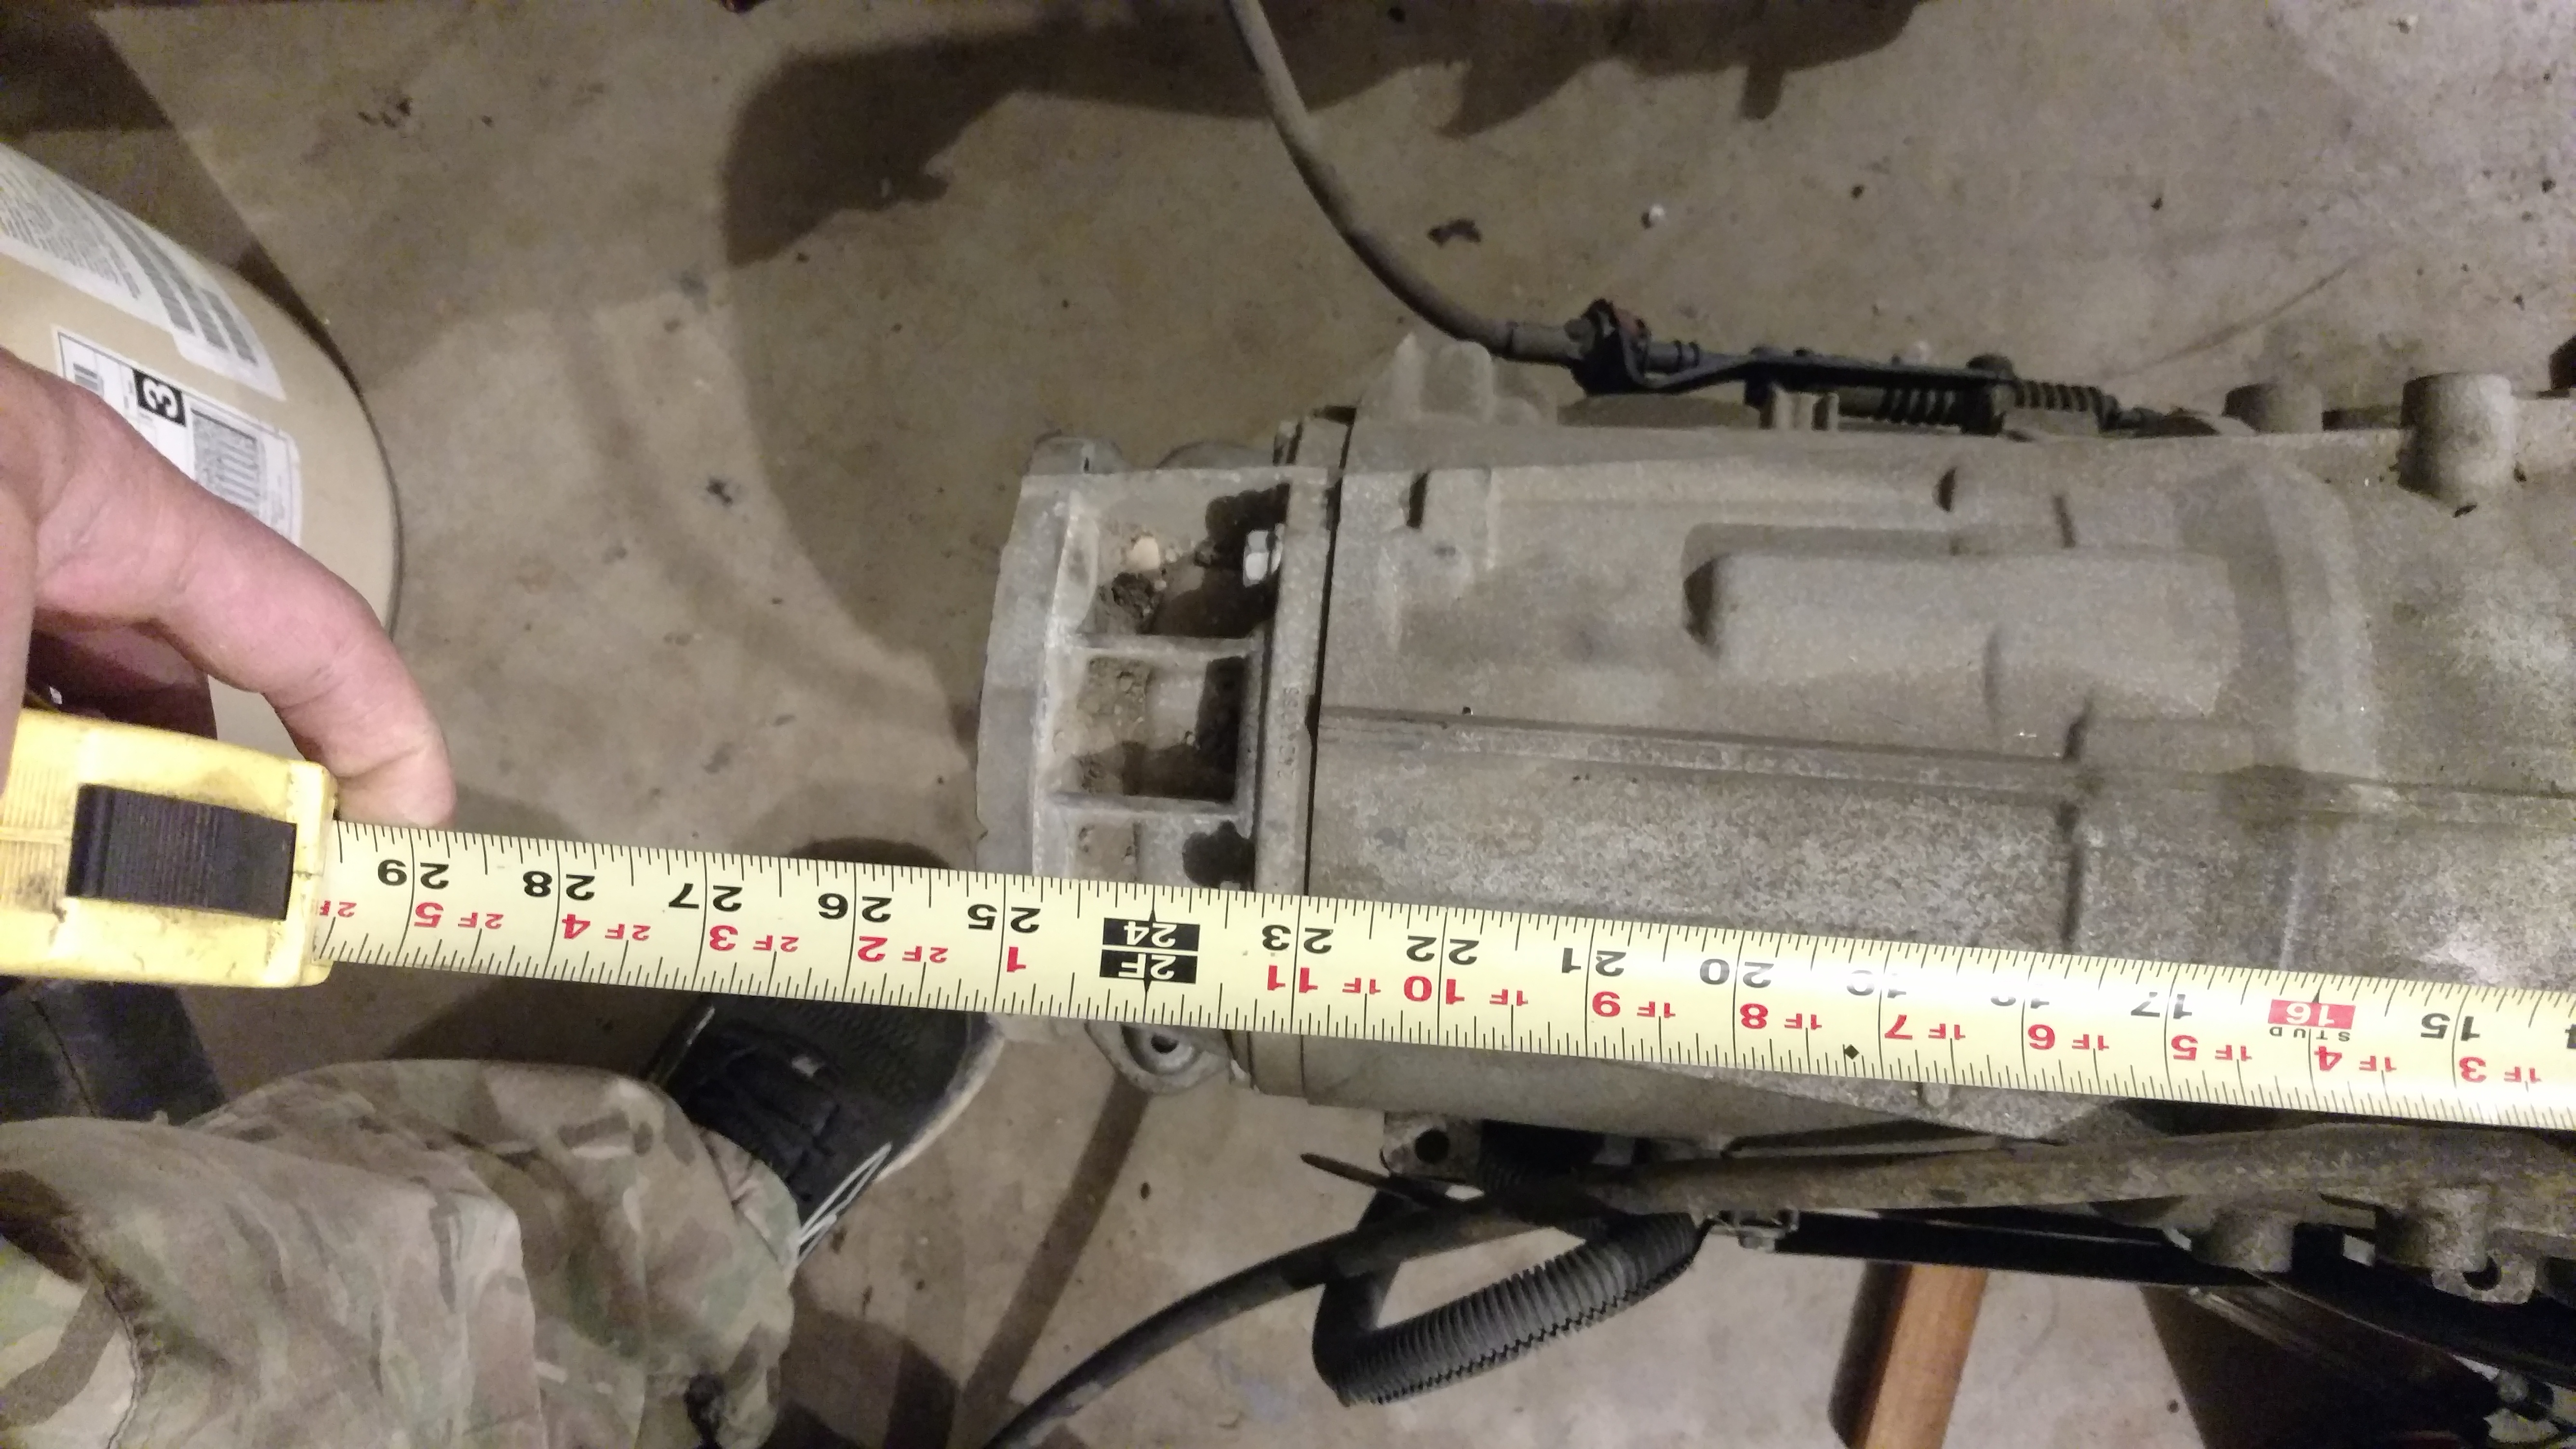
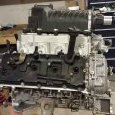
Alright, it's cold out in my garage so I used a couple straight edges and found the length of the trans, depth of the bell housing. I then snapped the photos so camera angle has the tape measure markings matched to the measurement points as best as possible. One picture shows the entire transmission length, mine is 4wd so where the 2wd has a tail cone mounted on I have a transfer case adapter, this parting line for the adapter and the transmission body is 23" from the engine block mountings surface. The other picture shows the bellhousing parting line is about 6 5/8" from the block mounting surface to the bell housing to transmission parting line. At that bellhousing parting line, the transmission is about 12" wide to the outside edges of the different case webs and tabs. From the bottom of the deepest part of my transmission pan to the tallest center rib on top at the bellhousing to transmission parting line it is 15" vertically. Hopefully that all makes sense. If you pm me an e-mail address I can also get you the 2005 GM 6L80 service manual and a repair parts breakdown.
-
It's just one that I recall Ron Sutton has mentioned in several of his suspension design threads on pro-touring due to the joint strength and size.
-
Just spit balling here but, if you are set on using the front Z control arms and tie rods, (and provided pushing the lower ball joint out farther doesn't totally screw up the suspension geometry) would it be possible to machine a steel adapter plate to mount on the stock Z lower control arm in place of the ball joint? Have one end machined with the stick four bolt pattern and the outboard end machined to accept screw in type ball joint? That would allow a really beefy, early 2" Chrysler ball joint (K727 IIRC) like a lot of domestic road course and circle track guys use? They can be found in almost every parts store for a decent price. Howe/Coleman/AFCO and several others all have offerings of that joint in different racing materials and configurations.
-
6l80e fit in a 75 280z?
1969honda replied to tyranie909's topic in Gen III & IV Chevy V8Z Tech Board
Sorry I got busy Wednesday night and didn't get a chance to take pictures. I'll try and get out there once kids are in bed tonight. JPNDave is intimately familiar with the various modern GM automatics, especially the 4L and 6L series transmissions. He's rebuilt more 4l series than he can count and a few 6l80/90s. He also installed and tuned his entire stroked 6.2L/6L80/242AMC drive train in a jk unlimited jeep he owns The computer is in the transmission pan itself on the 6L80/90 and the harness is part of the engine harness. TU/TD can be achieved with the proper resistors and a couple switches after flashing the computer to a Corvette tune. There are some good resources on LS1tech and a few other forums about how to achieve that function without the body control module most believe is required. Also tow/haul mode from what I've read can be used to store a totally different custom transmission tune as it is used to changed the shift points and line pressures from the factory anyways. Think street tune when normal and in tow/haul a revised race or drag. 08 Corvette Engine TCM Conns to do tap shifting.pdf -
6l80e fit in a 75 280z?
1969honda replied to tyranie909's topic in Gen III & IV Chevy V8Z Tech Board
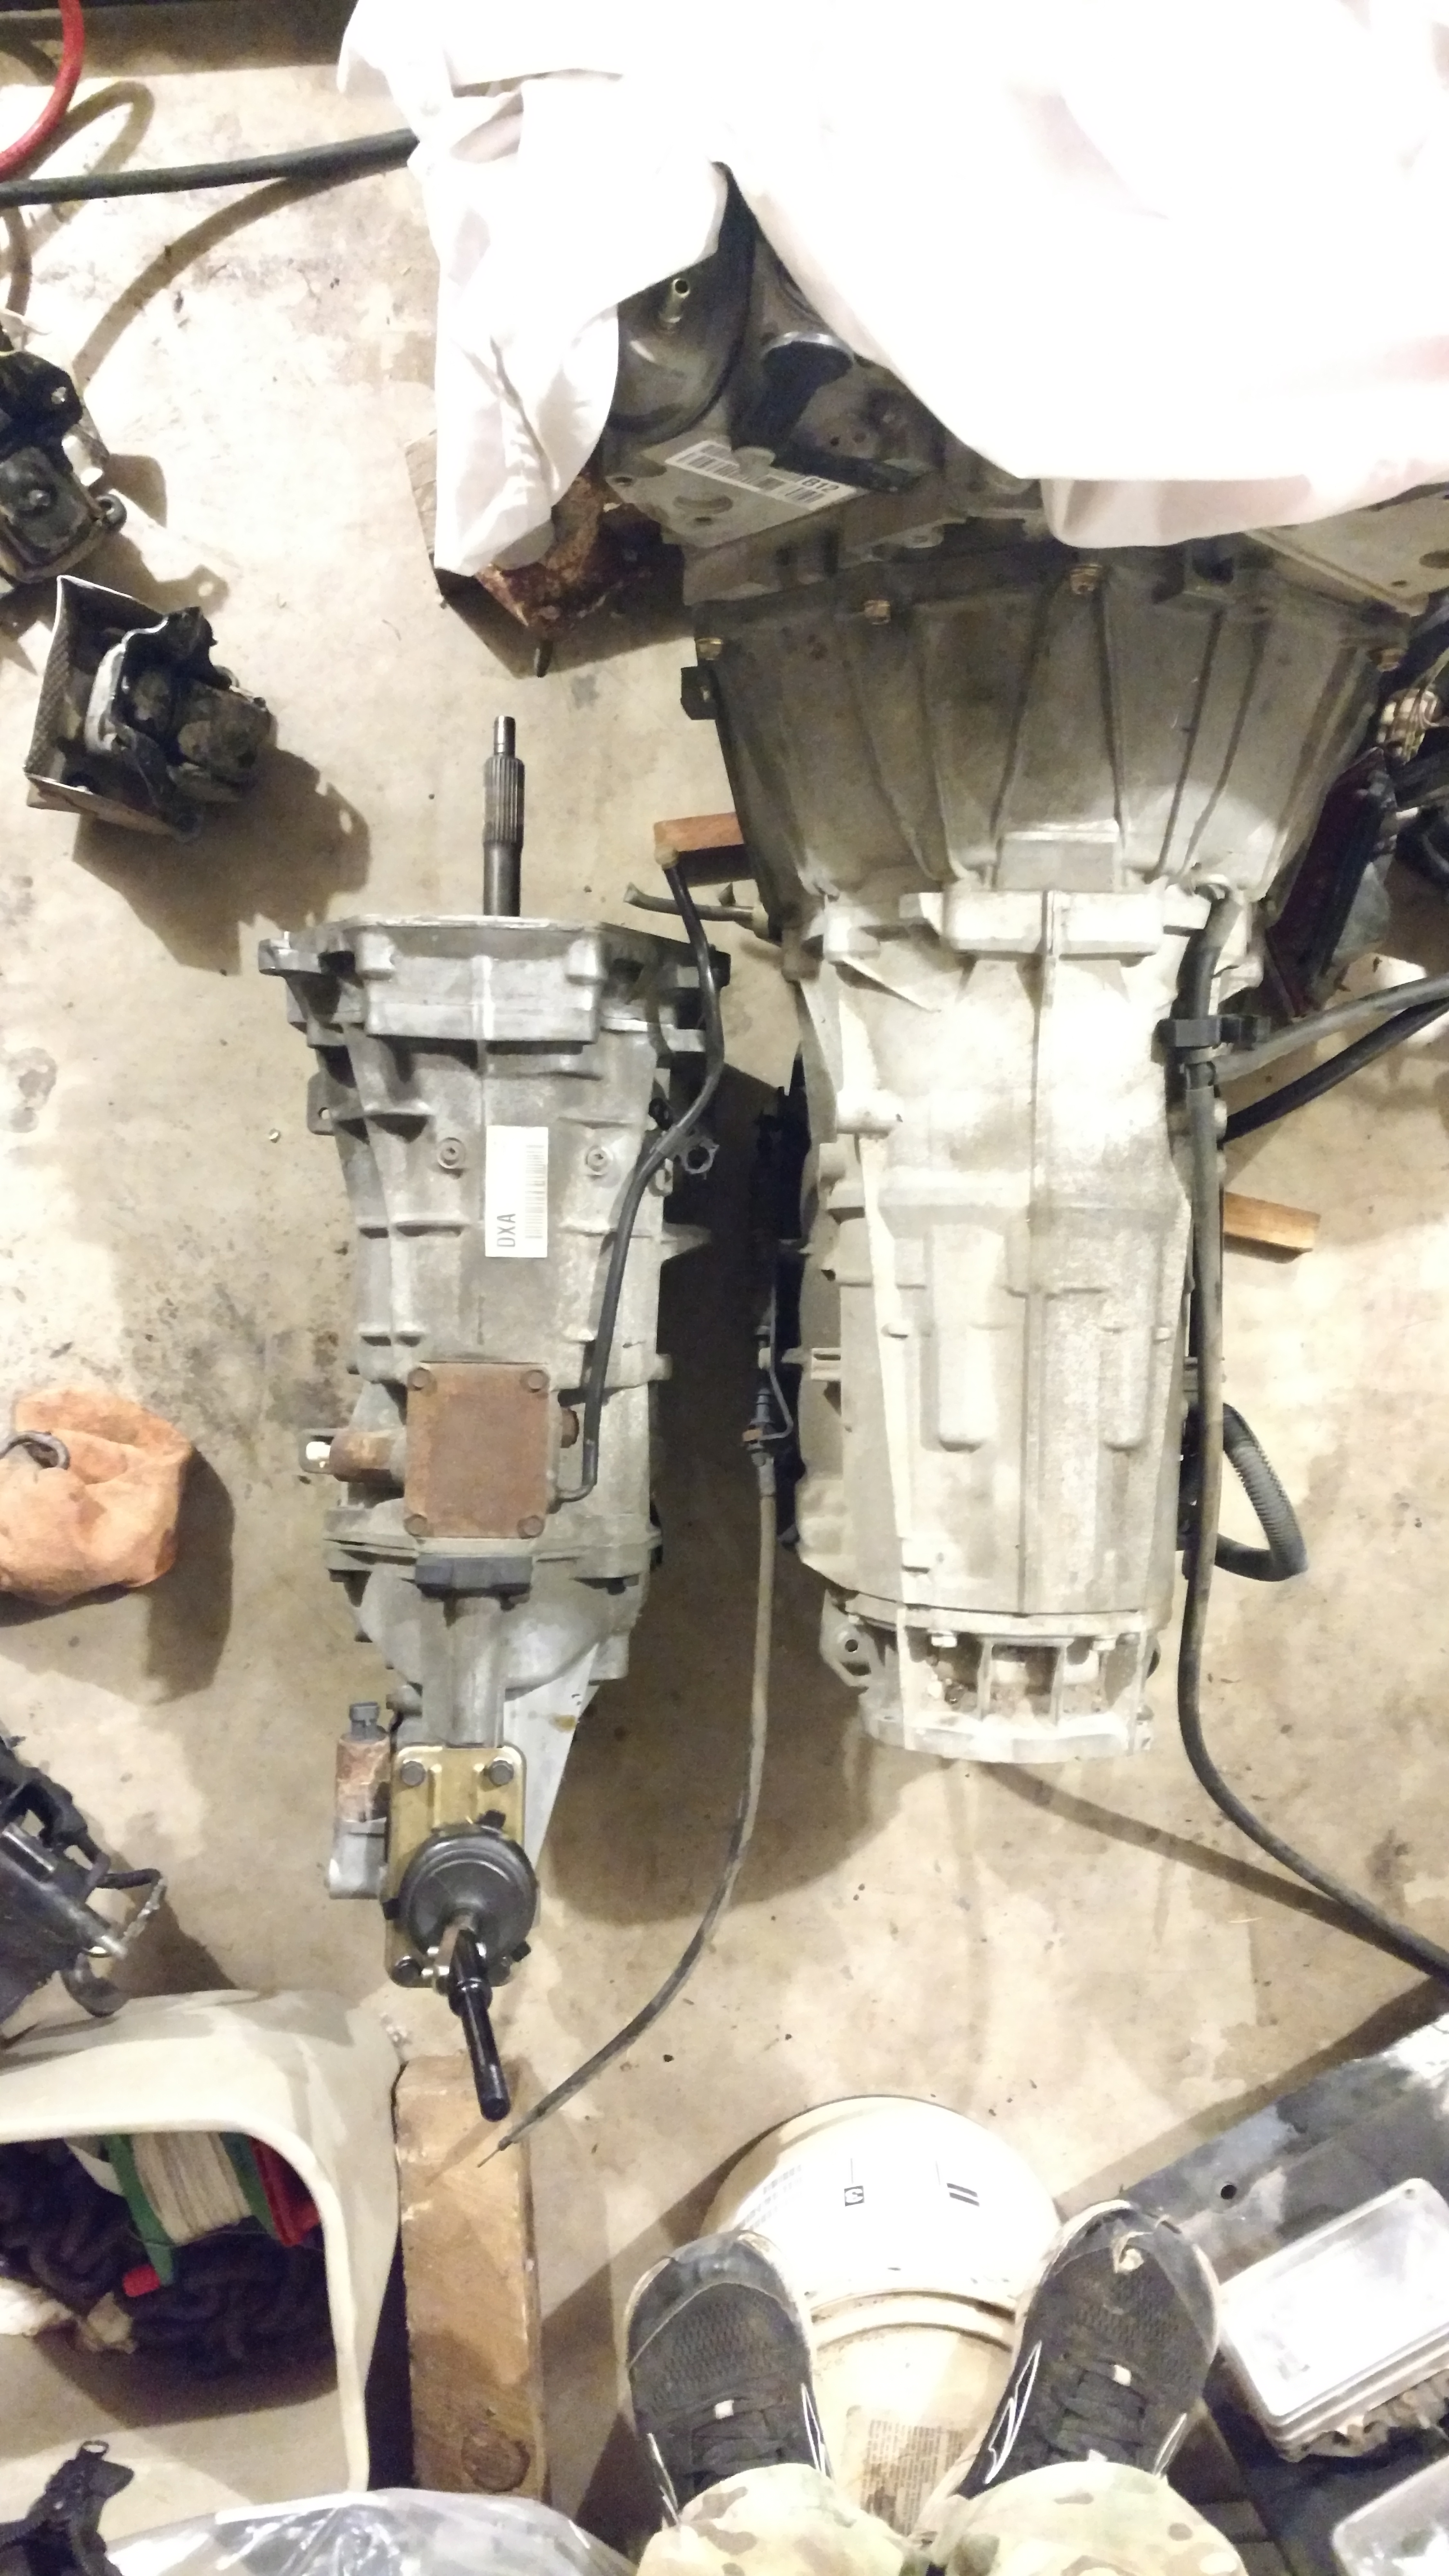
I have a complete 4wd 6L80 and an F-body T-56 minus the bellhousing currently in my garage, the 6l80 is significantly heavier and bigger. I'll see if I can get some photos tonight for you. Keep in mind the gear ratios and what rear gear you are running as well, first is 4.xxx on the 6l80. -
Glad to see your still plugging away at this! I got sidetracked for the time being building up an ls1 swapped k5 Blazer for some family fun next spring.
-
Very nice execution on that intake!
-
Competition vent looks nice! Care to share your thoughts on the vendor you purchased it from and the quality? I think my build will require one down the road for venting and an extra inch or so of hood clearence.
-
Would this work for you? It's spendy at almost $50 http://www.intakehoses.com/mm5/merchant.mvc?Screen=PROD&Product_Code=R90B-400-425SR You could also check out https://www.siliconeintakes.com
-
Unusually loud injector tick
1969honda replied to seattlejester's topic in Trouble Shooting / General Engine
I'd replace it. If finances are a concern but you want the best performance see if RC Engineering or another vendor can provide a new injector, then clean and flow match the whole lot to the same specs. -
Saturn Electric Power Steering In A Datsun 280Z
1969honda replied to socorob's topic in Fabrication / Welding
Thank you! -
Saturn Electric Power Steering In A Datsun 280Z
1969honda replied to socorob's topic in Fabrication / Welding
Do you have a link to the bruno controller you used? I'll thinking it's probably something similar to this but not 100% sure. http://m.ebay.com/itm/12V-24V-48V-2000W-MAX-10-50V-40A-DC-Motor-Speed-Control-PWM-HHO-RC-Controller-/111851538617?hash=item1a0adf08b9%3Ag%3AIVcAAOSwXeJXfNDa&_trkparms=pageci%253Afcedf5c5-87ab-11e7-94c8-74dbd1802351%257Cparentrq%253A0cf38af515e0ab450ef6aa29ffee57dc%257Ciid%253A4 -
Progress on my insane VQ35HR 240Z project
1969honda replied to markrolston@mac.com's topic in Nissan V6 Forum
I like your thought process and vision of "it's just an old 1970s Z car, albeit shiny paint with flares" and all the surprise and magic under the deceivingly normal skin, it will definitely be a sleeper until messed with! I'm really toying with the idea of leaving the exterior of mine just the way it is, faded stock butterscotch colored paint and white accents along the rockers with 240z script and then making sure the engine bay and interior is all new and glossy with an updated interior. Why? sleeper, race car, camaro killer, etc... -
Wow....
-
1 Large Hoodie - Royal Blue Zipcode 84325
-
If the LD28 is not readily listed by ARP, you can send them a single LD28 stud or bolt and they will measure it and compare it to all of their currently made studs to find a match. I had a friend recently do this and they figured out the VK56 in the Nissan Titan uses the same rod bolts as a BMW street bike. The Nissan vk56 isn't listed as having an off the shelf bolts, so he was expecting to pay a lot for custom bolts but instead he saved several hundred dollars and bought two packs of the BMW bolts. *Edited to fix grammar
-
Figured I'd share this here in case anyone had missed it. It looks like the site administrators are struggling with this issue of site traffic and keeping the server current and funded. http://forums.hybridz.org/topic/127731-hybridz-may-be-shutting-down/page-2?do=findComment&comment=1193898
-
That rotisserie and frame reach is ingenious! They definitely thought that design thru thuroughly with all the different ways to elevate, level and rotate the frame and chassis.
-
I just watched the last episode this morning (15). Now to get my funk on and start building my rotisserie...
-
You might be able to suspend the insurance while the vehicle is not in use however and save some money that way.
-
seattlejester's 1971 240Z
1969honda replied to seattlejester's topic in S30 Series - 240z, 260z, 280z
That's actually pretty cool, ultimate budget racepak dash! -
I've now watched 4 episodes while cooking dinner for the kids....
-
Getting rid of that rat smell
1969honda replied to theczechone's topic in S30 Series - 240z, 260z, 280z
You might try some of the pet urine treatment sprays as well.