Search the Community
Showing results for tags 'datsun'.
-
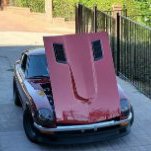
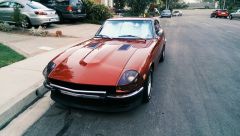
From the album: 71 240z
I picked up my new 1971 Datsun 240z this weekend 06/17/2017 and getting ready to bring her to her new home. -
Version V1
48 downloads
Simple roll center calculator for the Z car based on measuring the angle of the control arm. I tried to list all the definitions and assumptions. Please drop me a comment if you see any errors or improvements. I checked it against my professional software and got the same values when using the same inputs so I think the math is correct. -
 We have been speaking with BC Racing to create a coilover system for the 280ZX We already have a 1980 ZX to use as template but we wanted to know what are things that customers would be interested in like extreme kit, camber plates and other. We also wanted to know if there's any difference between years or models on the 280ZX. Please let us know if there's any interest so we can make this happen.
-
Hello, My name is Joey, and I am looking to start a dream project. Thing's I care about: -Little to NO rust -Title/Paperwork Thing's I don't care about: -Engine Please contact my gmail @joepez56 or via text @773-719-9133 (Please do not abuse my info, I only am giving it because I will resond faster to those)
-
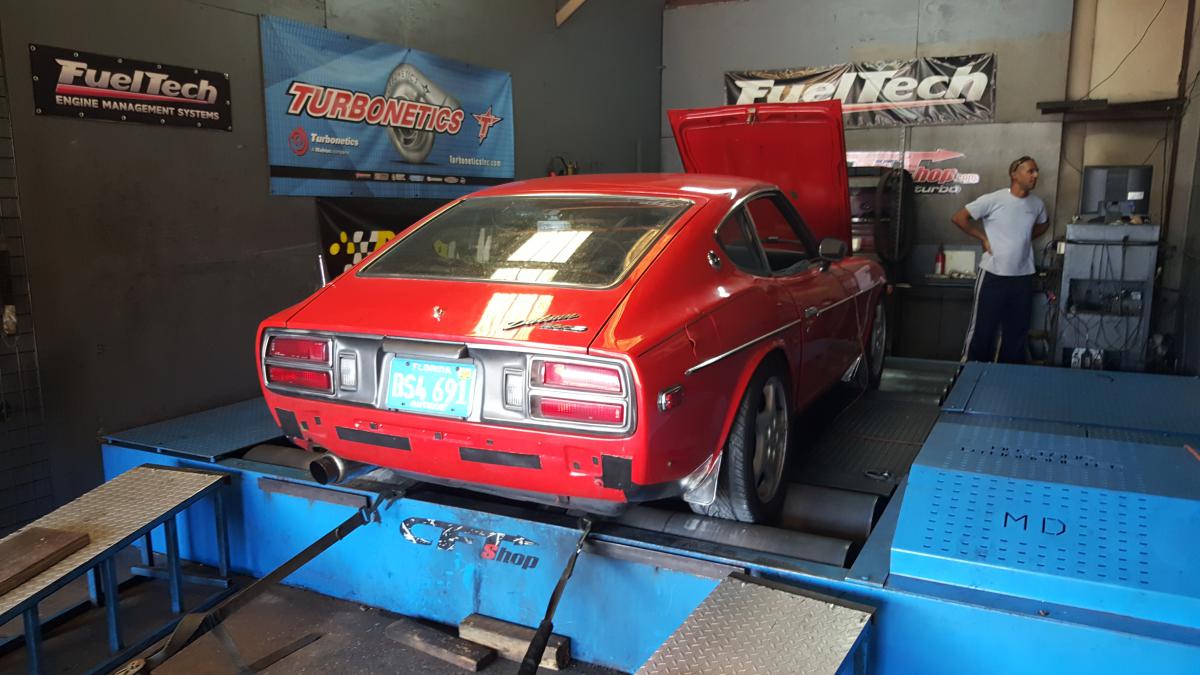
Here is the last dyno run we did to tune the car. It is a blast to drive. There are 29 pulls on this zip drive. You can just look at the last 3-4 pulls as they are the final tune. 225hp with 255 tq on the dyno. Think I am conservative enough on tune for longevity. Still need to work on decel, and initial tip in. Had multiple issues to deal with at the dyno. Kept losing power to the TPS(was the connection being loose on the spade to fuse panel). Blew coupler off did not know it for first 10 pulls. Pulled the power to 3 injectors by accident while closing the gaps on spark plugs. Had the vacuum lines to the boost controller wrong, hence could not build boost. Thats how it is when you don't finish things you start, or finish things others don't. Have to look over everything. Data Log Zip File.zip
-
 I've never seen a thread where someone documented how hawks mounts actually mount up and are installed. So I took a bunch of pics when I did mine for all to enjoy. Chassis Mounts Here's how the mounts look in your hand. I'll explain what each location really does as we move along. And here is the back of the plate that you must weld onto the frame. As you can see, you must clearance the frame in order for the plate to site flush again your frame rails. But before we get into that, lets see how we locate the bracket (front to back). So here is the mount just resting on the frame rail, without the backing plate, You can see now that the lower location of the bracket lines up perfectly with the lower control arm bolt. Now all you have to do is loosen the LCA bolt, remove the nut, and thread the bolt into the bracket (yeah its threaded down there). Once you have it threaded in and snugged (not tight), you've got it located front to back. So then I attached the backing plate to the bracket and swung it back into place on the frame rail. Obviously the backing plate wont sit flush until you clearance the frame. So now, mark the front and back of the backing plate on the frame like so. Now remove the backing plate from the main bracket, also remove the main bracket from the LCA bolt. Place the backing plate on the frame and mark the hole locations. Note that they will be off because you still cant set the bracket flush. So here are my marks. Let me save you some time and suggest that you cut the frame like the pic below. I tried counterboring the holes to make room for the tacked on nuts, but its harder to get the position correct. Notching the frame is easier and much faster. Now you can check to see if the bracket will sit flush. It might not sit perfectly flush, but pretty close. Heres how mine looked. If its good enough for your taste, put the main bracket on the LCA bolt and bolt it back to the backing plate. This will ensure that when you weld it, it is in fact correctly positioned. You probably want to go ahead and grind off the paint on the frame as well, I dont have a pic of that but you get the idea. Now your ready to weld. Just for reference, the side of the frame rail is twice as thick as the top. So you can get a little more heat into that side. Here's my ugly flux core madness, but it will get the job done. The second one turned out much prettier after I found a rhythm. And here is the finished product. Engine Mounts The mounts on the motor are fairly straightforward but I figured I'd show them for documentation purposes. Here is where the original mount goes. And here is the backing plate for the new Hawks mount. Dont put that lower right bolt in though, that comes later with the actual mount. And here is it all bolted together. At this point, I dropped the motor in to position the trans mount. I'll write more on that in the Trans Mount section. Here, its just to show you how the motor sits in the bay.
 -
From the album: New Parts
-
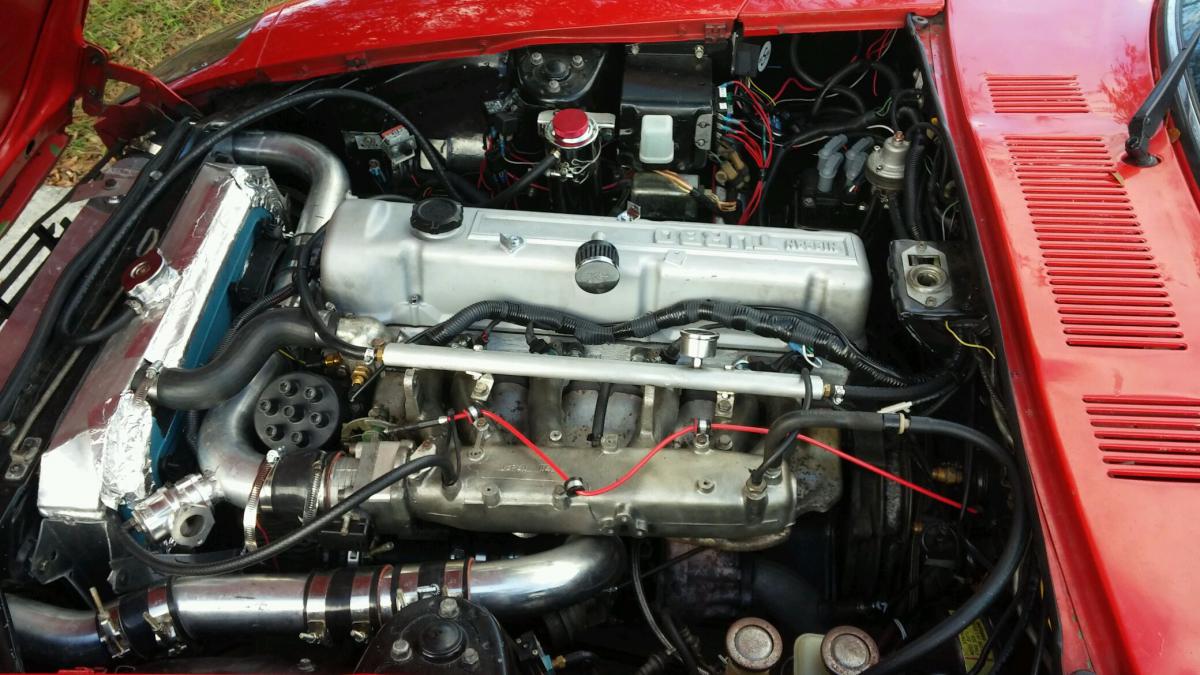
1971 240z "Kirin" Hi there! This is going to be my little Z build. Picked her up as a gift to myself after coming back from Japan. Today she sits eagerly awaiting to be fixed up and driven. After months of sitting I decided it was about time to get a move on it, so here we go! Last Updated: Dec 1st, 2016 - added a couple notes to self May 21st, 2016: Got it running after sitting for 9 months! Now it's sitting again -- Crank Keyway worn-out Note to Readers: I've linked most of the things I've purchased with their part number and a website. If you see something that isn't linked, or want to know where I purchased something, let me know! Exterior -Chassis: rusted -Body: dented steel panels, cracked fiberglass head buckets -Bumper: deleted rear bumper, ugly stock front still installed -Spoiler: Fairlady 432R Reproduction -Grill: Fairlady Z432 Reproduction (1 tuff z) -Paint : 918 Orange (original) -Misc: (order weatherstripping you lazy fool!) / (research rust prevention) / (research body work & paint) Interior Everything was stripped! Lend me your dry ice... Electrical -Battery: New Battery - Optima Red Top 25 / Autozone Universal Battery Mount / (correct size battery cables) -Alternator: upgraded alternator - 140Amp -Wiring Harness: stock (order pretty rainbow colored one - EZ) -Audio: no stereo -Lights: Headlights: Dapper Lighting 7" Classic V2 + White LED Halo (Halogen) / Tail lights: Dapper Lighting Sequential LED -Gauges: stock -Switches: stock -Sensors: Crank Pulley Flying-Magnets system -Ignition System: Distributor-less Simple Digital System Coil Pack Ignition -Spark Plugs: NGK Iridium IX Spark Plugs (PN 739-BPR6EIX) -Spark Plug Wires: 8mm Street Thunder; Spark Plug Wire; Custom Fit 6 cyl.; Black (PN 895-51090) (soon to be removed) -Misc: deleted external voltage regulator / (research windshield wiper motor) Engine & Exhaust - Acc. Belt: Napa (PN _____ ) -Intake Manifold: Mangoletsi -Carburetor(s): Triple Dellorto DHLA 45M -Jets: -Air Filter: K&N re-usable air filter (x3) -Cam: stock? not sure -Block: P30 L24 (Matching #'s) -Head: E31 - Ported (size) -Distributor: stock (delete & plug) -PCV Valve: Valve Cover Breather PCV K&N (PN 800-613) / Crankcase Vent Breather Filter PCV K&N (PN 800-406) (re-route to exhaust) -Exhaust: (research heat shield) -Misc: deleted random wires and screws in engine bay Cooling / Fuel / Oil -Radiator & Plumbing: Mishimoto radiator (PN MMRAD-DATS-70) / Upper & Lower Mishimoto radiator hoses (PN MMHOSE-DATS-70) / 1.75" Mishimoto radiator Tension Clamps / (install custom overflow tank) / (research fan shroud) -Thermostat: 160 degree thermostat & new gasket / 1/4" BSPT Alloy Steel Hex Plug w/ Plumbing tape (x1) -Fan: stock (order electric fan(s) x2) -Water Pump: stock (order gasket) -Misc: deleted manifold / carb coolant line & plugged thermostat housing hole / rotated 90 Deg elbow towards water pump - new 5/8" rubber hose [on order] hose brackets --- -Fuel Tank: stock (research fuel cell) -Fuel Pump: stock (research electrical/mech) -Fuel Regulator: none (research bypass 4+ PSI w/ gauge adapter) -Fuel Filter: Autozone (generic) -Fuel Rail: (removed) -Choke: stock (need to tuck) -Misc: new fuel sending unit, o-ring & lock ring --- -Oil Filter: Fram (size) -Oil Pan: stock -Misc: n/a Suspension / Tires & Brakes -Axels: -Suspension & Steering: clunk. clunk. clunk. -Braking System: I'll eventually stop..(all stock) -Rims: -Tires: cheap Goodyears (insert size) -Misc: n/a Drivetrain -Clutch: custom clutch hardline (3/8-24NPT to M10/1.0) -Master Cylinder: Tilton-76 7/8" Master cylinder (PN 76-875) / adapter (3/8-24NPT double flare to 3/8-24NPT bubble flare) / Girling reservoir, offset 7/16-20 outlet, 5oz -Slave Cylinder: Beck Arnley slave cylinder (PN 072-1258) w/ adjustable rod & return spring / SS clutch hose (PN 21-2170) (order mounting shims) -Throttle System: -Transmission: '77-80 "wide ratio" 5-speed -Differential: not sure yet -Misc: n/a Miscellaneous -AC: none -Heating System: deleted -Bolts: Replacing all bolts with ZCarDepot SS Bolt Kit (PN 650-000) -Hoses: Replaced most fuel vent hoses Going to have to backtrack a little, I hope you don't mind...
-
Howdy! anyone know where i can buy a new or secondhand L28ET motor for my 240z? Ive heard this is an easy swap that is very beneficial. Thanks!
-
Does Anyone Know Of A Webise Where I Can Order A Carbon Fiber Air Dam For My 1978 Datsun 280z 2+2? All Of The Ones That I Have found Mount On To The OEM Air Dam.
-
Hey guys, This is the journey of my 1974 Datsun 260z to where it currently stands and where it is headed. I hope you enjoy! This was the car when I first got it... It was a good running car that was fairly "clean" with the exception of some hidden rust. I drove the car like this for a couple of years before I really got the itch to modify it. To start things off, my carbs started leaking so I rebuilt the round top already on the car. The outcome: Nice new carbs and a sad looking engine bay. (Ignore the wheel in the background, we will get to those later...) With the production of the BC Racing coilovers, I decided it was time to pull the car apart for a few updates in the winter of 2014/2015. It would share a space with an old Austin Healey Mini for the winter. With it up on Jack stands, the intentions were to go through the bushings, suspension and address the rear brakes. Along the Way I also picked up a set of Wilwoods for the front which are still having brackets fabricated. I acquired a Silvermine rear disc brake conversion, BC Racing coilovers, & some Prothane Bushings and work began. With all of the parts acquired that I wanted/needed for the winter ahead, I came across a pretty rair set of wheels that I would snatch up: 15x9 3-Piece Revolution RFX's that the previous owner had painted the faces of a House of Kolors Green. At first, I hated the color of the wheels but they have since grown on me a bit. With everything ready for the winter project, I started tearing the car apart... [/url With all of the suspension pulled off and the struts sectioned, I started assembling the front coilovers. The shop I had weld them had some pretty ugly welds that I ended up having to grind down. I also wire-wheeled the knuckle assembly and painted it for a nice finished look. I also went on ahead and wire-wheeled and painted the brake dust shields while I was at it... Finished Products:
-

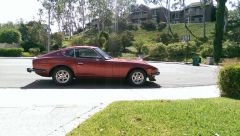
From the album: ls swap
-
From the album: ls swap
-
So there is this ball buster on craigslist correcting my post. In my post i have my car listed as a 1975 260 Z built 12/74. My car is a 260 it came with the L-26 came with 260 badges and it had the big bumpers. When I began to register it in the car came out as a 1975 Datsun 260. I was confused at the moment and ask them why if it's a 1974, dMV's response was that that late 260s were registered as early 1975 cars. Took it and was researched it and was done with it until this guy Mr. Datsun engineer. He kept in insisting on that there is no such thing as a 1975 260z. But I have a 260z 1974.5 registered as 75', technicly its 1975 z260.
-
Hey guys, I'm looking to buy a 280zx with a L28et turbo engine. Would like to buy as complete as possible, Post or PM what you have w/ details, price etc. Trying to find a donor car that runs but isn't very nice for the outside, really just need the engine. I'm swapping it over to my '78 280z. Preferably manual, unless its possible to bolt my current stock 5 speed transmission to the other engine w/o problems. Thanks.
-
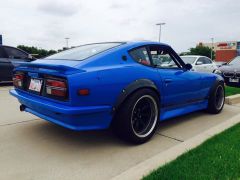
From the album: 1974 260Z
-
From the album: 1974 260Z
-
Hello, So I'm new to HybridZ and somewhat to Z's as well. Got mine back in May of 2014, I've been restoring a 1978 280z and so far I haven't had too many problems. As of now it runs good, sometime it's has problems on a cold start, and it'll idle high but then settles down to around 700-800 rpm. Well anyways right now my issue is with the amount of heat in the cockpit. It gets hot in there, and I feel like it's coming in from the engine bay, but I've also been told it might be coming from the tranny. I wanted to know if anyone else has had this issue and how you solved it? Any information would be helpful. Thank you
-
So my 1983 280ZX 2+2 is having cold start issues. when i turn it on it idles up real high like 900-1000rpm and if i touch nothing after a few seconds the rpms drop and it stalls out. If i crank it and pump the gas it will stay on and not stall out but if i just floor the pedal instead of pumping it it will stall out also the is a quiet backfire that sounds like it comes from the engine area. The reason im calling this a cold star issue is because if i pump the gas long enough for the motor to warm up to running temp i can let go of the gas and it will idle fine at 800-900rpms it revs smooths and sounds good.
-
Hey guys, I figured I may as well start a build thread for my late model 260Z. I am currently in the process of installing the new BC racing coilovers as well as working on a few areas of the brakes while I'm in there. I will also be installing flares this winter after my new 3-piece Revolution RFX wheels in 16x9. Below are a few pictures to get you up to date: Pictures of the coilovers right out of the box: Car on Jack Stands preparing to be disassembled for coilover install: Dirty Front Assembly Removed: Disassembling: Sectioned a bit (Not all the way. Correct cut is 45mm up from the bottom.): Rear Assembly Removed: Sectioned down a bit: Test Fit on front assemble before cutting to the correct height: My 3 Piece Revolution RFX's (Soon to be refinished to Matte Black Faces with Gloss Bronze Lips):
-
Hello fellow Z Enthusiasts, I'm at my whits end here from this Darn Datsun. I've got a 1983 Datsun Maxima, and I can't for the life of me figure out how to get this thing running properly. A-little backstory on the car; The car used to belong to my grandfather, and when he passed away my father inherited it and drove this old girl everyday for 5 years to work, All the way up until the point the engine slipped its timing gear, then it sat for another 7 years until I was old enough to understand cars and not hurt myself while working in the garage. After purchasing a new timing chain and replacing the old one, the car ran fine. Well, my brother was using the car while his was in the shop during this last summer, but the dummy doesn't know a THING about cars and never checked the oil, water/coolant level, etc.; pretty much everything that you need to check on old cars to make sure they dont explode while driving them. Well, this time he didn't check the water level, called my father asking "why it was overheating all the time". And as he was driving it back to our house, the poor car blew the head gasket. Months of work down the drain (and wallet, mind you). It sat for another 2 months, until we managed to get the money to buy a new gasket. (Now THAT was one heck of a time, trying to figure out how to take the head off) We eventually got it replaced, but and hooked everything back up, but upon starting the engine we realized it wouldn't drive correctly. Let me explain; When you started the engine, it would idle great. It revved in idle like a dream as well. Then you'd try driving it; Ohhh boy, was there a problem. The thing would lurch and pop forward worse then a dang blender paired with a v8 engine runnin on 3 cylinders. Back to the garage I suppose. Everything looked fine, but we read in the manual that the oil pump timing gear needs to be 5 degrees past the time marks at 8degrees past TDC. Well, we were off, so we tried setting it how the book looked. Tried again. Cranked and backfired, and eventually got it started that way, but even then it ran so bad that it would die when you gave it just a tiny bit of gas. Back to the garage... We noticed that when we turned the distributer clockwise, it would run better, so we decided that instead of setting the Oil Pump Timing Gear at 5 degrees PAST the timing marks, we'd set it 5 degrees BEFORE the timing mark, still at 8 degrees TDC. Started it up, and amazingly it ran. It ran actually pretty good, which was surprising because it was the complete opposite of what the book called for. Our engine, a L24E non-Cali engine runs OUT of time, not IN time. But it was still out of time and not "drive able" (still lurched) and after hooking up a timing light to the engine, we discovered that the car would idle at 20 degrees, then drop down to 0 when you gave it gas, which would explain the lurching and backfiring. We thought we'd messed up on timing chain, so we checked that but it looks just like its supposed to. After a month of trying to time the car with the Oil Pump Timing Gear, we called 9 to 9 and Tom said that we needed to reset the computer. He said no matter what we did, the engine was fighting to put the engine back in time, so after a quick reset, we'd need to retime the engine again and it should be good. Well after resetting the computer and retiming the engine, the engine wouldn't even start this time. After fiddling with the Distributer and Timing Gear again, we got it running, and the engine now advances correctly when you give it gas. It no longer drops to 0, it goes up with the RPMs. We then tried driving it... Same thing again, only this time worse. It lurches so bad it could give you whiplash if you weren't careful. We think it may be a vacuum line, but they look hooked up correctly and we can't find any leaks, so we are literally going insane trying to figure out this engine. If anyone's been through the same problem or has an idea on what the problem might be, let me know what I could do to try and fix this. Thanks!
-
So here's the problem. My 280 runs good for a while. But after a couple minutes of running it it just starts to slow down. I try giving it more gas but it won't let me it just wont go above 40mph and it just starts getting worse I have to stop the car and turn it off and back on
-

From the album: The 5.3 Project
$984.85 shipped to my door. Wheels of Time -
Hey Zers, My Dad passed a little over a year ago and in doing so, told me to take care of his old Z. its an 82 280zx n/a. well,i didn't no to much about cars at the time but i know he said to keep the engine that was in it (didn't have to be stock). so after much reading and tons of "old Mechanic" advice,iv since rebuilt the entire engine. here is what i have done "surprisingly my self" so far.... Head (work done by Rebello) - N42 head, bigger valves,port,polished,some work done to the galleys for coolant and oil. Valve Train - Custom cam 512 Lift, 300 Duration, Stiff springs, new Rocker Arms/Lash pads.new timing sprocket/chain. Block- 0.60 over,JE Flat Top Pistons,Lightened and balanced crankshaft,new Barrings. CR- just at or slightly under 11:1 on 93 Octane, Timing *19 Int and *38 Full at WOT. (No Ping!) 220-240 psi Ignition- Modified Distributor (New Dizzy and Dizzy shaft), Full MSD 6AL-2 Ignition with Blaster-2 Coil Intake- Triple 44 Mikuni Carburetors Exhaust- MSA 3-2-1 Headers into a 2.75 inch,no Cat,Dynojet Ultra flow muffler. Drive Train- Auto to N/A 1983 5 speed,Aluminum flywheel/Drive-shaft, R200 4.11 Differential from 200sx Other- Turbo oil pump,new alternator, new battery,New *Champion 4 core Aluminum Radiator, Tires- Rear : 245-60-14 fronts are 205-60-14 -- Well that's pretty much it.i gutted the dash,all A/C HVAC stuff,no spare tire,12lb race seats,11lb CF hood, Custom Aluminum bumpers (look stock),all digital oil,fuel.air ratio,volts gauges.Steel pillar louvers from 81' ZX as well as the 130mph speedo. I havent had it on a dyno yet for max tuning or ran the track but it takes my buddies mildly modified 86' FoxBody Stang all day until i hit 135-140 mph,then wind resistance goes to s**t..but i can max out my speed around 6,800 in 5th gear,7,000 with some tuning im sure. 0-60 times are crazy,1st hits 38mph like intantly and 2nd hits 58mph not much slower,3rd hits around 80 pretty fast,4th is like my OLD 3rd but tops around 110-115 (speedo isnt to accurate around 100 so) 5th pulls nice all the way to redline. Post comments and let me know what you think. Estamated HP? P.S- Going from my auto gear of 3.54 to the 200sx diffy of 4.11 was an incredibly large difference in acceleration,car sounds like a F*****g Indie car lol! also vary streetable with the big cam and lower geared diff. wasn't to fun on the street with the 3.54 and that cam profile.
-
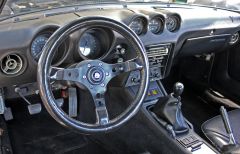
From the album: 73 240z